(Topic ID: 33446)

Vid's Guide to Ultimate Playfield Restoration

By vid1900

11 years ago


Topic Heartbeat

Topic Stats

  • 8,789 posts
  • 803 Pinsiders participating
  • Latest reply 8 days ago by Jagrmaister
  • Topic is favorited by 1,975 Pinsiders
  • Topic is sticky in its sub-forum

You

Linked Games

Topic Gallery

View topic image gallery

20240419_165132 (resized).jpg
20240415_125716 (resized).jpg
PXL_20240404_002101962 (resized).jpg
PXL_20240404_002010342 (resized).jpg
THUMP BUMP HOLE ENLARGE1 (resized).JPG
THUMP BUMP HOLE ENLARGE2 (resized).JPG
IMG_3225 (resized).JPG
IMG_3141 2 (resized).JPG
image (resized).jpg
Pinside_forum_1762038_386370 (resized).jpg
IMG_3141 (resized).JPG
PXL_20240304_203555066 (resized).jpg
20240301_160448 (resized).jpg
20240301_131123 (resized).jpg
IMG_2646 (resized).jpeg
IMG_3299 (resized).jpeg

Topic index (key posts)

143 key posts have been marked in this topic, showing the first 10 items.

Display key post list sorted by: Post date | Keypost summary | User name

Post #7 Playfield damage assessment. Posted by vid1900 (11 years ago)

Post #8 Insert damage assessment. Posted by vid1900 (11 years ago)

Post #34 How to sand your new inserts flat. Posted by vid1900 (11 years ago)

Post #35 Cleaning old glue out of the insert holes. Posted by vid1900 (11 years ago)


Topic indices are generated from key posts and maintained by Pinside Editors. For more information, or to become an editor yourself read this post!

You're currently viewing posts by Pinsider vid1900.
Click here to go back to viewing the entire thread.

2,406 posts in this topic match your search for posts by vid1900. You are on page 1 of 10.
179
#1 11 years ago

So lately we have all been seeing these terrible "restored" playfields. Decals lifting under the clear coat, dirt sealed into the shooter lane, too thick coats of clear, water based clear coats with clouding starting to appear, inserts bucking under the clear, no restoration under ramps or slingshots, faded decals under the clear; simply awful work done by some so-called experts that seem to be spamming the forums constantly.

When I mentioned that I was going to publish a "real" guide to playfield restoration, a few of the playfield restorers that I respect asked me not to do it. They worried about the income loss if people start doing their own work, and they worried that some of the hacks that spam the forums would step their game up.

My logic is that the little information out there is more dangerous than if people were fully informed. All these game owners who get a bit of info here and a bit there, are ruining a bunch of playfields because they are following too many leads, rather than having a single resource.

Also, I would be happy if the spammy "pro restorers" DID step up their game. They are going to continue to get orders because nobody checks up on their work and they price their work cheap, so they might as well learn to do it right.

(Asay made a hotlink TOC for you guys):

REMOVING MYLAR (p1)
DAMAGE ASSESSMENT (p1)
REMOVING INSERTS (p1)
INSTALLING INSERTS (p1)
FIXING INSERT GHOSTING (p2)
PAINTING FOR PLAYFIELD RESTORATION (p2)
AIRBRUSH DISCUSSION (p2)
FRISKET, MASKING, AND SPRAYING COLOR (p2)
FIXING LINE ART, TEXT, SCANNING FOR WATER SLIDE DECALS (p3)
FILLING GOUGES AND CHIPS (p3)
RAISING INSERTS (p3)
PAINTING WHITE AREAS (p3)
THE SHOOTER LANE (p3)
PAINTING VERY FINE LINES (p4)
PLANKING REPAIR EXAMPLE (p5)
AIR COMPRESSOR DISCUSSION (p5)
APPLYING INSERT DECALS (p6)
CLEARCOATING PLAYFIELDS (p16)
THE PROPER CHOICE FOR CLEAR COATING (p16)
STUFF YOU ARE GOING TO NEED TO CLEAR A PLAYFIELD (p16)
MORE SAFETY EQUIPMENT YOU NEED (p16)
MORE STUFF YOU ARE GOING TO NEED TO CLEAR A PLAYFIELD (p17)
CUPPED INSERT REPAIR (p17)
SHOOTER LANE REPAINTING (p18)
OUTGASSING AND INSERT BLOOMING (p18)
STAR ROLLOVERS (p19)
MAGIC ERASER (p19)
FLATTENING THE PLAYFIELD BETWEEN CLEAR COATS (p19)
WORKING EFFICIENTLY WHILE CLEARCOATING (p20)
SANDING THE CLEARCOAT (p20)
FEAR OF MYLAR (p22)
SANDING AND BUFFING A PLAYFIELD (p27)
REPAIRING HALF-TONE DOTS (p29)
PREVENTING THE CLEARCOAT FROM CRACKING WHEN REPOPULATING PLAYFIELDS (p45)
NEVER USE POLY TO 'CLEARCOAT' A PLAYFIELD (p68)

28
#4 11 years ago

First, not all playfields "need" to be restored.

If the game is a player's machine, if the game has a single small wear spot, if you are simply not artistically inclined.....just leave it. No shame at all having games that show their age.

You can practice the examples on some plywood and see if you have what it takes, without jeopardizing a genuine playfield.

25
#6 11 years ago

You want to start by removing the Mylar.

At least once a month somebody asks if they can clear coat over the Mylar. Usually the clear lifts off after a year, so lets just say no to that idea.

There are about 100 internet guides to removing Mylar, but the system that works best for 1990's playfields is to freeze it with canned air (just turn a can of Dust Buster or Maxell upside down). The propellent will freeze the adhesive causing it to separate from the Mylar film. Carefully peel the film back a section at a time.

With really old SS playfields it is often better to use a hair dryer or a household iron and remove the Mylar with heat.

If the film lifts off the playfield paint, or even the top layer of wood, the playfield is not a good restoration candidate. Sometimes a game was stored in an unheated garage and went through a freeze/thaw cycle.

There is some risk, and there is often no way to know until you start. Take a deep breath and remind yourself, not every game needs to be restored.

Always try lifting the Mylar far from the player's view. That way if you start lifting paint, you will not have ruined the entire playfield front and center.

=
EDIT:

After you get the Mylar off, pat down the residue glue with white baking flour. Really press it into the glue, and let it sit a few minutes.

Next, wet the flour with 91% or higher isopropyl alcohol, and allow it to sit until most of the alcohol has evaporated.

Starting at the edge rub all the glue into little crumbs with your thumb.

Even the inserts clean up easily with this method.

I've given up on Goo Gone. The flour/alcohol method works 10x faster with no scraping, or obnoxious smell.

Even really stubborn Sys9 and Sys11 Mylar adhesives are no match for the flour/alcohol method.

rubbingalcohol.jpgrubbingalcohol.jpg flour2.jpegflour2.jpeg

17
#7 11 years ago

Now with the adhesive gone, you will see your playfield in the harsh light of day.

You will need to assess its needs but usually you will have:

PAINT LIFTED FROM INSERTS - the paint has a harder time sticking to the plastic than to the wood, so often the Mylar lifts off the paint too.

GHOSTED INSERTS - the paint AND clear coat have partially lifted from the insert leaving an air gap between the insert face and the clearcoat.

RAISED/SUNKEN INSERTS - the plastic has expanded at a different rate than the wood and is now proud or below the playfield surface.

CUPPED INSERT - especially on old Ballys, the thin face of the insert has become cupped from age and heat from the bulbs. Inserts without the reinforcing facets on the backside seem much more susceptible to cupping.

FADED INSERTS - UV from the bulb and other light sources like sunlight, have removed the color from the inserts.

CRACKED INSERTS - Damage to plastic from air balls or trying to level raised inserts with a hammer and wood.

WORN PAINT - The paint on the playfield or inserts have worn off.

PLANKING - The paint has checked along the surface of the wood. This can happen to any game, but you see it especially when a game is stored in an unheated garage.

1.jpg1.jpg

14
#8 11 years ago

Light up inserts from the front with a flashlight and check each one for damage. You want to look from the back because there will be less to distract your eye.

You can sometimes reinforce a broken insert with epoxy and chopped glass fibers, but if you are putting a lot of work into a machine, you probably want to order new inserts from Gene at Illinois Pinball.

2.jpg2.jpg

20
#15 11 years ago

Before we pull an insert out from the playfield, we want to be sure it does not lift any of the surrounding artwork.

Most Williams games have no, or almost no clear coat (whenever someone talks about wanting Stern to have "Williams quality", all the ops laugh).

Just to be safe, run a brand new Xacto blade around the parameter.

If it's a new Stern game, or if it has been clear coated, REALLY make sure you have cut the insert free of the surrounding clear coat.

3.jpg3.jpg

#21 11 years ago
Quoted from ChadTower:

Illinois Pinball doesn't have inserts on their website...?

I think 99% of what Gene sells is not on his website.

10
#23 11 years ago

(DO NOT remove any inserts from the playfield, unless you have it's replacement "on hand". DO NOT assume you will be able to find replacements, as many have been unavailable for decades. Even if you see that a certain size (especially arrow inserts) is available online, make sure that it fits BEFORE you start. You have been warned )

Next after cutting through any clear coat, it is time to remove the damaged/faded insert. (remember we only remove inserts that are damaged, don't remove inserts for no reason).

1. Find a wrench socket that just fits into the insert hole on the bottom of the playfield. On strange inserts like the chevron arrowhead insert pictured, I use a small nut driver.

2. Take a hair dryer, set it on high and warm both sides of the insert. (I use a heat gun, but I don't want any beginners thinking that this is a good way to learn - too risky until you have a feel for this stuff).

3. While keeping your hand on the face of insert to control its release, push the insert out from the bottom of the playfield. It does not take much pressure at all. On Williams games, you might get the feeling that the insert "wants" to come out - its that easy.

Look how faded this insert is. Note that the playfield itself, nor the cab art had any fading. All this fading can only be attributed to crappy plastic and UV light from the bulb for 20 years.

4.jpg4.jpg

#25 11 years ago

Keep in mind that you can use a LED to help make a faded insert look better, but it will still look terrible when the game is off - and if you are going through this much work to restore a playfield, you might as well do the job right.

15
#26 11 years ago

Many people don't know how playfields are manufactured, so they don't understand that you can't just put a new insert in the holes without working them first.

The sheet of plywood is CNC routed with all the holes.

Then the inserts are glued in by a Pick N Place machine.

Then the entire playfield gets run through a drum sander. The drum sander sands the wood and the inserts all down to one level.

Finally the wood is coated with sealer and it goes to the silk screen to print the graphics.

-

So, brand new inserts are not flat. They don't have to be, because they get SANDED flat after installation in the playfield.

We don't have the luxury of sanding the entire playfield (unless we are installing a printed overlay over the entire surface), so we have to flatten the inserts first.

5.jpg5.jpg

#34 11 years ago

To get the inserts flat, you start with 100 grit sandpaper.

Place the sandpaper face up on your table saw (or any other really flat surface), and move the insert around in a circular motion. Apply even pressure, checking your work often.

You don't want to take too much off, because thin inserts are more likely to crack.

Next sand with 220 grit.

And finally 300 or 400 grit. Do not polish further. You will see why in the clear coating section of this guide (if the insert is opaque or prismed, you can even leave it at 220 it will give the clear coat some extra tooth).

http://www.youtube.com/watch?feature=player_embedded&v=DP5ss7B46cA

Video of Whitewater inserts being installed.

12
#35 11 years ago

The old playfield glue can be epoxy or a sticky mastic of some sort.

You want to clean it all out so the wood can accept the new glue.

The sticky mastic stuff does not readily take to other glues, so be extra careful if you encounter it.

6.jpg6.jpg

#36 11 years ago

If the soft mastic is hard to remove, use the Burr tool with your Dremel.

Don't enlarge the hole by removing wood, just spin out the mastic.

7.jpg7.jpg

#37 11 years ago

As you have probably noticed, even brand new playfields have problems with inserts lifting up.

Wood contracts and expands at different rates than does the plastic insert.

We sure don't want to spend all this time restoring a playfield and have the inserts rise up again and ruin our clear coat.

We want to glue in the new insert (or reseat an old one) and never have to do it again. That means we have to do a better job than the manufacturer did.

If you have ever put a glob of epoxy on an insert, you have noticed that you can chip it off after it has dried. Obviously, this is not an acceptable bond for something we never want to do again.

We need to give the epoxy some "tooth", so we sand the edge of the insert with 100 grit sandpaper.

8.jpg8.jpg

13
#38 11 years ago

This is where you start to separate the boys from the men in playfield restoration.

Even sanding the edge of the insert is not enough.

The final step is to prime the plastic with 3M Plastic Primer.

It goes on thin like water and dries in a few seconds.

Now when you apply the epoxy, you can't chip it off.

9.jpg9.jpg

12
#40 11 years ago

Clear two-part epoxy is the glue of choice here.

We know it sticks to our primed plastic, we know it sticks to wood.

Any glue you can easily chip off of an old sacrifice insert like wood glue, Gorilla Glue or silicone is obviously not going to give us the permanent bond we require.

I use Two Heads epoxy, but you can use just about any brand. One of my favorite restorers has been using the Harbor Freight $1.50 stuff (http://www.harborfreight.com/super-strong-quick-drying-epoxy-92665.html ) for years with perfect results.

Pick a brand with honey-like consistency, you don't want a big mess dripping out the bottom of the playfield.

Always apply the glue from the bottom of the playfield. This way you won't drip on the painted surface and the "squeeze out" will head towards the underside.

Never apply glue to the insert itself, or the squeeze out will all be on top of the playfield.

If you do somehow get glue on the playfield surface, wipe quickly with a rag lightly dampened with Acetone.

Use an "acid brush" to apply the glue. Epoxy dries quickly, so you will throw a bunch away as you work. Don't bother trying to clean or save them.

If you are a beginner, glue up maybe 2 inserts at a time. Don't get too far ahead of yourself, once the glue hits its "work time" it starts to set up fast!

10.jpg10.jpg

10
#41 11 years ago

Acid Brushes are disposable brushes used to apply flux on copper plumbing.

You get a big bag of them for $5 at any plumbing or tool store like Harbor Freight.

acid_brushes.jpgacid_brushes.jpg

16
#46 11 years ago

Sometimes you find that an insert has "a mind of its own" and won't stay down for the epoxy to set.

There could be some tension in the wood (maybe the reason the insert popped out in the first place).

To fix this, we use a 12" C-clamp ($9 at Harbor Freight) to hold it from rising above the playfield surface.

Knock the edges off of 2 blocks of good quality (flat) plywood, and clamp with 2 pieces of wax paper (in case any glue squeezes out). Don't forget the wax paper, you won't be happy if you glue a piece of wood to the playfield....

#49 11 years ago

Sometimes you hear someone tell you to just use a piece of wood with a hammer and bash the inserts back down level with the playfiield. Often they say "go ahead, you won't hurt them".

The problem is that although they will stay down for awhile, whatever forces that were in the wood that ejected them in the first place are still there, and they tend to pop up again.

You can heat inserts with a heat gun and press them down with the 12" C-clamp - this tends to last longer than just hitting them, but still they tend to pop back up.

Once you have a nice clear coat on the playfield, you don't want to ever mess with the inserts again, so just reglue them the correct way.

10
#50 11 years ago

There of course will be inserts that you will not need to replace or reseat.

After 20 or so years, you would think that if they were going to move, they would have already moved. And certainly there is some truth to this.

But a new clear coat is going to put new tension on the playfield that was never there before, so usually you will want to apply some glue to the back lip of those inserts.

I know, it's not as good as roughing them up and using plastic primer, but it is better than a surprise 6 months down the road.

#55 11 years ago

I was going to save this for the advanced section, but this next part will describe how to fix insert ghosting.

10
#58 11 years ago

Insert Ghosting is where the clear coat has pulled away from the plastic and now you see the air gap between the back of the clear coat and the face of the insert.

(LED Ghosting is where small amounts of current that would never illuminate an incandescent bulb, actually causes a LED to become lit when it should be dark. So the "Special when Lit" always appears lit, or dimly lit.

LED Strobbing is where the GI LEDs rapidly flash and make the bulb look like its moving through a disco. )

G1.jpgG1.jpg

14
#59 11 years ago

The theory of fixing Insert Ghosting is that we need to "glue" the flap of clear coat back down to the insert face. There is going to be no place for a lot of solvent evaporation, so we need a "glue" that will cure without direct exposure to air. We also want this glue to have some flexibility to it so something brittle like epoxy is out. Pro restorers have found that Isocynate Clear coat is the perfect solution.

Lately, I've been using Diamond Plate for my top coats (I restored a game for a Dupont engineer who brought me a rather generous 5 gallons of the stuff), but it seems to be too "hot" for this kind of repair.

What does work nicely is PPG Shop Line JC661 clear. You mix it in 2 ratio with a fast topcoat hardener and it cures before it eats the old clear coat. Still, you should make a scan of that area of the playfield in case disaster strikes. You can then use the scan to make a decal (directions for this process are coming up later in this guide).

You need to neatly apply the clear under the flap, and for this you will need a syringe. The JC661 can be drawn up into an Insulin syringe, or for larger jobs, get a big horse syringe.

Using an absolutely brand new Xacto blade, cut a slit around the damage, following the edge of the insert itself.

g2.jpgg2.jpg

#60 11 years ago

Be extra careful because the clear contains Cyanide, so you don't want to go injecting yourself with that.

Fill the gap under the flap with the clear.

Have a rag moistened with Acetone ready to clean up any spills. Use less than you think you need, it takes very little.

Press down the flap to push out any extra clear or air bubbles into the rag. Cover area with waxed paper.

g3.jpgg3.jpg

#61 11 years ago

On top of the wax paper, place a hard rubber block.

Under the playfield hold a piece of plywood.

Clamp together tightly overnight with a 12" C-clamp.

13
#62 11 years ago

The next day, unclamp the rubber block.

CAREFULLY remove the wax paper in the same direction as the flap you cut.

If any bubbles got trapped under the flap, just open them with your Xacto and fill with a drop of clear when you spray your clear coat over the entire playfield.

G5.jpgG5.jpg

#63 11 years ago
Quoted from practicalsteve:

but can you give a little more detail on how to glue the inserts you are not removing? Just apply with a brush under playfield?

Yes, brush on epoxy from the side of the insert onto the wood.

It's not an exact science, and even if you are a little sloppy, no one is going to see it.

You really want to stand the playfield up on its edge on your rotisserie for this. Do the left side of all the inserts, then turn the playfield 180* and do the right sides.

#70 11 years ago
Quoted from stangbat:

vid1900, any experience/comments about using water thin super glue (cyanoacrylate) for ghosting repair? I've used it on my RFM that is on location and it seems to be holding up after several weeks.

Take an old insert, put a dot of glue on the face and see if you can chip it off.

http://www.amazon.com/SureHold-Plastic-Surgery-Super-Glue/dp/B004M599ME

The above Plastic Surgery glue has solvents that let it glue Nylon and other plastics that Cyanos normally don't bond to.

Might be a good experiment.

#73 11 years ago

Some inserts rise up on brand new playfields even before the playfields are ever installed. Just some internal stress in the wood, or stress between the wood and clear coat.

I'd be curious if inserts would ever rise on a playfield made of MDF. That stuff is very stable, very dense.

1 month later
31
#83 11 years ago

I'm going to break up the logical order of things because I got a few emails about paint and Frisket over the weekend. Rather than email everyone separately, I'll cover them here....

Let's start with paint for playfield restoration.

We NEVER use Sharpie pen, Paint Pen, or those little bottles of Testors enamel that you have left over from your Dungeons & Dragons days - EVER.

All of the above will run into the final Clear Coat, making a smeary mess (for you or the poor sucker that buys the game after you and tries to have it restored).

We don't want to use those cheap $1 acrylics from the craft store, because they fade so quickly, making our repairs more apparent over the years.

We don't want to use cheap paints because they don't contain enough pigment to cover in a single coat (especially expensive pigments like Red). Add a little thinner so you can run it through the airbrush, and you find there is almost nothing there.

We don't want paints that dry substantially darker than they look when wet.

We don't want paints that become darker when they are clear coated.

We don't want a paint that permanently sets until heated. This gives us an "out" if we spill, mix the wrong color, or simply make a mistake.

So what paint can we use? Createx air brush colors.

http://www.createxcolors.com/products.html

1. It's already good to go in your airbrush, no thinning is necessary (unless you are doing shading)

2. It covers in a single coat.

3. No waiting for it to dry. If you like your work, you hit it with a heat gun (use a hair dryer if this is your first time - safer), and go on to the next color. Tape will not lift it. This saves you hours of time.

4. It does not react with auto clear coat.

5. It dries the color you mixed it.

6. It is almost the exact same shade when clearcoated.

7. The colors mix properly. Many cheap paints just turn brown when mixed (blue + yellow = brown).

8. It's fade resistant.

9. It sets so fast with heat that even when using white, old colors do not telegraph through the new paint.

Yes, it's $4 a bottle, not .99 cents, but once you try it, you won't ever go back to cheap paint again.

Createx_Opaque-Set_5803-00.jpgCreatex_Opaque-Set_5803-00.jpg

15
#84 11 years ago

Now I just said the word that scares the beginners - Air Brush.

Don't worry, you can get a perfectly serviceable brush for $12 at Harbor Freight.

You could try to thin out paint and manually brush it on, then try to sand it flat to remove the brush strokes, then touch it up again - but you are not going to do that. Your time and your playfield is more valuable than that.

You have spent $200 on LED lights for your game, you can certainly buy yourself an airbrush.

Now if you "get good" at this airbrush stuff, you can certainly buy a $200 Iwata brush, but I'm telling you that there is no playfield I could not restore with the HF one. I sometimes have 4 HF brushes filled with different colors at once, so I can keep my pace up. Spray, heat set, and on to the next color - that is how he pros do it.

You can use a regular shop air compressor (like a Pancake or 120 gallon garage monster), a dedicated "air brush" compressor, or even just canned airbrush air.

If you use a regular shop air compressor, put a simple water separator on the front of the air line to catch the moisture.

Don't ever drip oil into the hose you are going to use for painting. If you have already done this for your other air tools, buy a dedicated painting air hose.

http://www.harborfreight.com/deluxe-airbrush-kit-95810.html On sale all the time for $12.

image_11957.jpgimage_11957.jpg

15
#85 11 years ago

PAINT-1.jpgPAINT-1.jpgYou always read somebody asking "What color paint matches the blue on XXXXX game?".

And the real answer is "The one you mix yourself".

Even if you had a can of the actual Williams paint, your playfield has faded in the last 30 years.

Even if you knew what the color mix was at the time, those colors were mixed by eye at the silkscreener, and thus varied from batch to batch.

Even if someone found a match "Blood Moon #666" for their XXXXX game, it would not match yours, because different games have seen different amounts of UV light.

Now many people have tried to mix their own paint and found it did not create the color they thought it would, or it just turned brown. That is because cheap paints don't have the pure pigments and binders that mix well with others.

Good quality paints mix beautifully, creating the results you expect.

Mix paint in a clear container that you can set on the playfield to match it up. Try to use natural light, not a yellow incandescent lamp. Use a flat container, so you are not looking down the neck of a bottle.

Women have much better color vision than men. Don't be afraid to ask your wife to match colors for you. It will involve her in your hobby and make her feel important that she has a skill you don't. Let her do the actual mixing, don't just ask if a sample is a match.

13
#86 11 years ago

Mix up a little more paint than you think you need.

You will lose some in the air brush or you may have an unexpected touch up latter.

Store small amounts in contact lens cases (5 for $1 at the dollar store), or little "artists" jars.

Step by step matching:

1. Take a drop of your mixed paint and put it on the playfield and see where you are at. Adjust lighter, darker, greener, whatever and place another drop.

2. If drop looks good, spread it out a little and let it air dry. Still the right color? Excellent. No good? Wash off with damp cloth (remember, it's not permanent until you heat set it).

3. Once you have a good dry match, take some Naphtha on a rag and wipe it over the playfield and the paint sample. Does the color still match while wet with Naphtha? If yes, you are ready to paint! If not, adjust slightly until you get it right. The Naphtha give us a temporary "clear coat" to check our work.

PAINT-2.jpgPAINT-2.jpg

14
#88 11 years ago

The two hardest colors to match are Bright Orange and Gray.

On many Bally games, use standard orange and add a few drops of florescent orange. It's amazing how a tiny amount of the florescent fixes it.

On Williams game with hard to match Gray, a drop of yellow or purple will usually make a frustrating match suddenly lock on.

Practice while seated. If you get frustrated, wrap it up for the evening. "Fresh eyes" tomorrow will often get it on the first try.

If you were out in bright sunlight, give your eyes 20 minutes to adapt to the color tone indoors.

19
#89 11 years ago

What the hell is a Frisket?

If you are not from an art or auto background, it probably sounds like something you should have tried before you got married. But nothing is more important in restoring playfields than your roll of Frisket.

Frisket is a roll of masking plastic:

1. It cuts super cleanly, so you don't get raggity paint lines.

2. It is clear, so you can see what you are cutting (It is available in opaque, for what reason, I don't know).

3. It is self adhesive yet does not leave any glue behind.

4. Although it is "low tack" and normally does not lift paint, it totally keeps paint from seeping under the edge. Much better than blue painter's tape or green "frog" tape in that regard.

5. It withstands heat well enough to not shrink when we are setting a layer of paint.

If you can use tracing paper, you can use Frisket.

IMG_6491.jpgIMG_6491.jpg

#90 11 years ago

Cut a section of Frisket and lay it over the area to be airbrushed.

Run you finger along the outline where you will be cutting. You don't have to really press the rest of the frisket down.

Using a BRAND NEW Xacto blade, trace the outline of your soon to be painted areas. Don't press too hard, you should not be feeling the surface of the playfield as you work.

Use a metal straightedge to guide you along straight lines - giant time saver.

If you are cutting a circle for Keylining, you can use a circle template to again save time.

Cut exactly on your line. You don't have to worry about bleed.

Lift the Frisket film from any place you want to get painted. See how cleanly it lifts? Press any air bubbles out that forms as you remove the pieces.

I used "oil paper" here for masking, but you can use Kraft paper or whatever you have.

Make up a bunch of masking papers with one leading edge with masking tape applied.

You will be reusing them as you move to the next area of the playfield, so make them large enough for the biggest section.

FRISK-2.jpgFRISK-2.jpg circle-template.jpgcircle-template.jpg

#92 11 years ago
Quoted from CaptainNeo:

that circle template is all well and good, but it sucks. I have that exact same one, and most of the time, the circles are a goofy size and are in between 2 of the sizes on the stencil. I think once out of about the 200 playfields i've done, has that stencil actually matched up.

I've got a set of 10 circle templates, so if the regular sizes don't fit, the metric sizes usually do.

If you do a lot of work, get a stainless steel set made in the UK.

#94 11 years ago

Now lay down your color.

Practice by shooting a little on the masking paper. If you set the gun down without the cap over the nozzle for more than a few minutes, it may throw a glob out, known as a "booger".

Don't wait for the booger to dry and then sand it out, just wipe the area clean with a rag and spray the entire area again. You are going to like using Createx paint, believe me.

Shooting on the paper lets you be sure that if any boogers are going to fly, it won't be into your work.

Catch the light on the wet paint and make sure your coat is even. If it all looks good, hit it with the heat gun and set the paint.

Now you can change colors, or even put another layer of the same color without waiting around.

Note in this picture how the Frisket that was pressed down onto the playfield has stayed perfectly attached without shrinking from the heat gun- while the area not pressed down has wrinkled. It's good stuff!

FRISK-3.jpgFRISK-3.jpg

#95 11 years ago

Although there are times when you are blending different colors at once, normally it only makes sense to do all the same color at the same time.

Cut out all your Frisket at the same time.

Then move your masking papers around in an orderly fashion, from zone to zone.

Don't waste time masking off the whole playfield with little windows and miles of tape. Just move your masking scraps around. Once the paint is heat set, you don't have to worry about the tape or Frisket lifting the paint.

Do all your colors from light to dark, but save white until the end so it does not get dirty. The Createx paint is flat finish, so the white can soil easily.

Often, once you think you are done, you will find black areas that still need touch up. Be careful you don't get the black on the new white paint!

#97 11 years ago
Quoted from rancegt:

A pinhead named Butch Peel recommended this book on paint matching. I haven't received my copy yet but I've seen his touch-ups and they're very good.
http://www.amazon.com/Blue-Yellow-Dont-Make-Green/dp/0967962870/ref=sr_1_1

Interesting looking book.

Please post your opinion on it once you have a chance to read it.

#107 11 years ago

Sometimes you have a area of the playfield that can't be cleaned up with the Magic Eraser.

Normally, the ME and 99% alcohol cleans off the topcoat, leaving just the paint behind.

If you have to clean too much with the ME, the actual paint will wear away. Or sometimes there is too much printing to clean around. Or sometimes the cracked area is close to the flippers and draws the eye to the cracks, where higher on the playfield it would go completely noticed.

First scan the area with one of those HP 4670 scanners.

Sand any keylining off of the insert, and leave it roughed up to 500 grit. We want that rough area so the clear coat has some "tooth" to hold on to.

Shoot a thin coat of clear over the playfield to lock down any loose pant and seal the surface.

Lightly sand it back to flatten out the cracks that telegraph through the clear.

In this example: Note the planked surface, note that the ME could not get it clean without removing the black printing, note the poor "kiss" of where the red meets the other paints.

cracked.jpgcracked.jpg

10
#108 11 years ago

While your clear coat is hardening, open your favorite photo program and examine your scan.

Using the "Channels" function, kill off any color other than the black and white and make a .jpg of the font.

Go to http://www.myfonts.com/WhatTheFont/ and upload the .jpg of the font.

"What The Font" will tell you what font is it. If your .jpg is crappy, it may ask you to clarify a few characters.

Download the font and open it in your photo program.

#109 11 years ago

Overlay the new font letters on top of the playfield scan in a new layer.

If the letters are arched like this example, you can Rotate each letter or use the "Warp Text" function.

Remember that font size can be fractional, so your font might be 28.6 size rather than just plain old 28. Take your time a get it exactly right.

This font was identified as: Omnibus.

Next, draw the Keyline that goes around the lighted insert. Hold the SHIFT key down as you use the circle tool and overlap the outside of the original circle (this makes a "perfect" circle). Then hit the Subtract button and draw the inner circle. This "cuts out" the center of the first circle.

Unview the background image and check your work.

If it's your first time, the above will take you 20 minutes. If you've used photo programs in the past, it will be less than 5 minutes of work.

5000-WLIT.jpg5000-WLIT.jpg

#110 11 years ago

Next, you have to print your art.

You need Clear Water Slide film, and a Laser Printer. Get the thinnest film they have, if offered a choice.

Ink Jet printer inks quickly fade, don't even think of using them.

Most high end hobby shops have really good decal printers that can print opaque white, and gold / silver metallic. If you need those kind of decals, don't be afraid to use their services.

Trim off the excess film around the printing, leaving clear tabs to connect the keyline to the letters.

#112 11 years ago

Using Frisket film, lay it over the sanded clear coat area to be repainted.

Cut out the Frisket any place that will be painted white (in this example).

Clean up anywhere that the colors don't "kiss" correctly.

FRISKET-OVER.jpgFRISKET-OVER.jpg

#113 11 years ago

Pull the Frisket off and clear over the paint (maybe the whole playfield if you are efficient).

Remember, we never want to apply a waterslide decal to the bare paint, or directly to a plastic insert.

The reason is that you don't want the tension of the clear coat to be different on the topside of the decal than it is underneath.

You run the risk of ghosting if you just stick the decal to the insert plastic.

I've never had an insert decal ghost that has been applied on top of clear coat, then coated over.

Don't take a shortcut here - do it right.

5000-wlit.jpg5000-wlit.jpg

Here is the waterslide decal applied .

#116 11 years ago

Latter in this series, I'll show some better examples of filling gouges. These pictures were not intended to focus on that part of the repair.

=

You can use Epoxy, 2part Auto Clear, or Bondo.

Here, I'm replacing the crappy System 6 flipper mechs and coils with the much superior Williams 1990s style.

The Sys6 flippers connect through 3 fin screws that run through the top of the playfield.

After removing the screws, the holes and chips must be repaired.

hole-repair.jpghole-repair.jpg

#117 11 years ago

The screws left not only a hole, but a depression around the holes and lifted some paint too.

I taped over the back of the holes and filled them almost to the top with 5 minute Epoxy.

I dewaxed the surrounding area with Acetone, then I topped the depression off with Bondo.

Why not just use Epoxy all the way? Because Epoxy is harder than the playfield, so you won't get a nice feathering around the fill. You will sand off lots of paint before you ever get the edge even with the playfield.

Bondo sands and feathers easily.

I gave the Bondo a half hour to dry and then feathered it into the surrounding playfield.

You can color blend the area in with an airbrush, or mask off and spray to the edges - depending on the complexity of the surrounding graphics.

BONDO.jpgBONDO.jpg

#118 11 years ago

If you have smaller chips, and you are going to clear coat anyway, drip the clear coat into the chips with an eyedropper and level them off. Sand lightly, repair any paint loss and proceed with clear coating the entire table.

#125 11 years ago
Quoted from cichlid:

I've read that post before, but my system 6 flippers have three separate mounting plates, not a single plate like a system 11.

And the coils look shorter than a modern coil.

I can still change these over?

Let's not hijack this thread, but yes like Neo said, you scrap out all the other mechs and change over to the single plate, and larger coil.

I'll add some step by step directions to the Flipper Rebuilding Guide in the coming weeks.

#126 11 years ago
Quoted from cichlid:

Are they selling Diamond Plate now to the public, or was this some kind of special treatment you got?

I don't know, you would have to call and see.

I restored a Dupont guy's machine who wanted EVERYTHING stock.

I mentioned Diamond Plate and it's secret formula and he just laughed and said there are no secrets at Dupont. A week or so later, I've got 5 gallons of the stuff on my doorstep. It dries really hard, you can tell when you are sanding.

It's pretty "hot" stuff, so I still prefer JC661 with fast JH6670 hardener for many repairs.

#129 11 years ago
Quoted from BigBird0000:

Is this playfield guide available as a single page, or file?

It's not done yet, so at the moment, it is a living, growing, organism.

But Terry from Pinball Rehab has been distilling it down to its essence, and putting it into sections on his site. This will make it easier to search for a certain topic, and provide backup should Pinside go down.

#130 11 years ago
Quoted from Methos:

can you address how to raise inserts that have sunk a little on 90s WPC games?

RAISING INSERTS:

Sometimes you find that inserts have sunk below the playfield surface. Not cupped, but actually fallen in.

Cupped inserts can simply be filled with clear coat, but if you can see the wood beneath the playfield around the edges, you need to raise it up.

Heat the insert from above and below with a hair dryer.

Keep one hand on the face of the playfield to control the insert, as you push the insert from behind with the largest socket from a wrench set that will fit in the hole.

You may have to reheat while you work.

If the insert is really loose, and you can easily remove it, do so (rough up the side edges with coarse sandpaper, prime with plastic primer and re-glue with epoxy).

If the insert is really tight, then just level it with the face of the playfield and re-glue the entire insert perimeter from the back of the playfield with epoxy.

Don't spare the epoxy, better to have a heavy coat that no ones sees from the back, than to have the insert move around in the future.

#133 11 years ago
Quoted from Patofnaud:

Although I've always been more of a heatgun person for mylar removal.

Last year I had a Space Shuttle playfield that was so fragile and flaky that I used a heat gun.

When you use a heat gun, more glue gets lifted with the Mylar instead of it all being left behind.

But 95% of the time I freeze Mylar.

#137 11 years ago
Quoted from Pafasa:

Do you feel that DP holds up against ball divots as well as your other clears?

Any new playfield is going to get millions of divots until there are so many that you can't tell.

A steel ball is going to be harder than wood, no matter what we coat it with.

http://pinside.com/pinball/forum/topic/playfield-dimple-reality-check

#139 11 years ago
Quoted from terryb:

I'm working on a TAF playfield that I will eventually send out to be cleared. What do you think about the 1K auto clear for doing spot touch-up like under insert decals before I send it out?

Sometimes, I clear the whole playfield before I even start painting to lock in loose fibers and see if it fills in planking.

That can save a lot of work when it turns out you don't have to paint a section.

Try to use the same clear over the inserts that will end up being the topcoat. That way the tensions are the same over and under the insert decals.

#142 11 years ago

Some of the wireforms have wings or blades near the ends that are presssed/formed, to retain them in the playfield, so they are not 100% round. These wings will sometimes pull up bits of the playfield when you remove the guides.

Yeah, that can be nerve wracking.

Usually I pull the first wireform the farthest up the playfield (or hidden from player) to see what I'm in store for.

Warm the area with a heat gun to make sure the paint is soft and not brittle, so it is less likely to chip.

The trick whether you are tapping or pulling out, is to make sure you are moving both ends of the arch equally. Pry a little on one side, then move to the other side.

Once you have the wire out a little, gently rock the wireform side to side. This will slightly enlarge the holes, making for a clean exit. This is especially important for the wires with wings.

Keep on the lookout for wings, or a sharp burr on the very end of the wire - that is what usually gets ya.

I lay down a thin piece of plastic cutting board to protect the playfield and usually use a 5 inch "mini prybar" from Harbor Freight. I've tapered the ends of the prybar on a grinding wheel. I'll never use it for real prying, so I'm not worried about loosing strength on the bar.

I bought a set of nylon prys too, but I always forget to try them out.

nylon_pry.jpgnylon_pry.jpg pry_bar.jpgpry_bar.jpg

#145 11 years ago
Quoted from RudeDogg1:

untill it gets wet then its like a disintigrating sponge lol

Nowadays they have waterproof MDF that is used outdoors (usually ripped into lengths for house trim), and MDF that has color all the way through it.

mdf.jpgmdf.jpg

#148 11 years ago

Most playfields have lots of reflective white areas that are lit by the General Illumination circuits.

Even though you often don't directly see these areas, it's important to repaint them bright white.

My light meter says that by repainting these sections, you are gaining 30-40% reflectance - that's a lot.

Not only are you getting a brighter reflection, you are getting a pure reflection, rather than one tinted beige or yellow.

The old paint has yellowed, the old Lacquer on top of it has yellowed, but at some point these areas were indeed a nice white.

These areas are mostly out of sight of the player, so you can do them without a bunch of leveling and patching. Because you can do them so quickly, there is no reason not to do them.

Sometimes these areas are just clear wood on one version of the playfield and screened white on another, latter production run. It's a judgement call if you want the extra light reflection (and color purity) by painting the clear wood white. Some purists frown upon it, many customers insist on it.

Don't get paint in the light sockets, or try to put balls of foam or tape in them. Just put some old bulbs in the sockets and paint around them.

BULB-SOCKETS.jpgBULB-SOCKETS.jpg

#149 11 years ago

The Shooter Lane:

The Shooter Lane is a special case in restoration.

Because each layer of plywood changes direction, each layer wears in a different way. Dirt gets pounded in and end grain wear in the wood can leave soft fibers exposed.

Get a dowel or a piece of pipe of suitable circumference. If you do a lot of playfields, you will have a few sizes around the shop.

Cushion the sandpaper with an old rag so that your pipe has some "give" like a sanding block has.

If the lane looks bad, you might start with 120 grit sandpaper and see if you can clean it up.

Don't remove too much material or the groove can become too wide.

Step down to 220 grit and see what it looks like.

SHOOT-1.jpgSHOOT-1.jpg

#150 11 years ago

After the 220 grit, run you finger along and see if you have it smooth. See if you have a bunch of spongy wood fibers.

#151 11 years ago

There is a little bit of sanding skill and a little bit of fudge factor involved. Take your time, it either will be nice, or a pile of crap.

If you think you got it nice, take some Naphtha on a rag and wipe down your work.

This gives you a preview of what the clear coat will look like.

Sometimes it looks great dry, but looks terrible when Naphtha-ed.

Other times it looks dicey and grey, but comes out perfect when wet.

If the damage is too bad to sand out, don't despair.

Patch any soft wood fibers with wood filler, sand smooth, mask with tape and simply paint in the "layers" of plywood.

I know this sounds flaky, but I've done it 100s of times and 95% of the time the customer never notices - but if I did not paint it, they'd notice for sure.

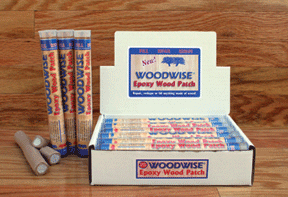
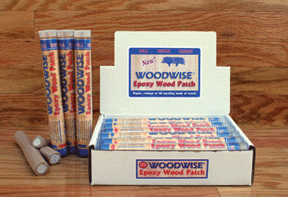
shoot-4.jpgshoot-4.jpg Epoxy-for_wood_patch.gifEpoxy-for_wood_patch.gif

#153 11 years ago
Quoted from Mroadster:

Is it possible to use an airbrush to apply the clearcoat?

Maybe for a "spot" repair, but really you want a HVLP gun to clearcoat a playfield.

Quoted from Mroadster:

Where can I buy the JC661 and Hardener?

Any PPG auto paint dealer will have it.

http://www.ppg.com/coatings/refinish/en/locator/Pages/default.aspx

I'll have a bunch of safety info coming up in the clear coating section of this guide, so if you are totally new to auto paints/clearcoating, don't start spraying until you read it.

#155 11 years ago

If the balls not touching it, you are probably OK.

Post a pic and let's see what you've got.

#158 11 years ago
Quoted from Phetishboy:

Can I mask everything off and clear just the exposed area before making touch ups?

Yes. You want to lock those wood fibers in place before painting.

Quoted from Phetishboy:

I also have the HB decal (it doesn't quite cover the damaged area), would I be able to clear over the decal as well?

If the decal is safe to be coated, then yes. The manufacturer of the decal should be able to tell you that.

If info is not available, use some scrap of the sticker (like the model number or color bars), stick it to a piece of metal and clear it to see what happens.

Make a scan of the decal before you start. That way if hell breaks loose, you can print another on more suitable stock.

Auto clear coat is "hot", so make your first pass over a decal a fine, almost dry mist. Wait 10 minutes (assuming you are using a fast hardener), make a second slightly heavier coat. Again wait 10 minutes and then make a normal light coat.

#159 11 years ago
Quoted from Phetishboy:

The gouge looks very prominent, but you can barely even feel it with your finger, so it's only thru the ink and not into the wood.

Use a flashlight and a straightedge to see how much you need to bring it up.

#161 11 years ago
Quoted from Jam_Burglar:

vid1900, I may have missed this, but do you have your own shop or work for a restorer?

I rent space from a CNC wood working shop in Detroit that has a nice downdraft spray booth. I maintain their CNC (and pinball) machines, they give me a corner of the shop.

I also have my own pole barn shop in OH.

Quoted from Jam_Burglar:

Do you have a website?

No, honestly I've got so much work, I have no need to solicit more.

If you ever see me put up a website, you will know I've become desperate for work, lol.

1 week later
10
#164 11 years ago

Usually I remove Mylar, Magic Eraser, and scrape paint off worn inserts .

Then I put down a light coat of clear.

This:

1. Locks down worn wood fibers, letting the paint adhere cleanly, without fuzz or texture.
2. Locks down existing paint - so masking tape and frisket don't lift paint and make more work for me.
3. Fills in planking and swirl. Sometimes the tiny cracks simply fill in and do not need further painting.
4. A new coat of clear highlights low spots that need to be brought up so the playfield is dead flat. A quick run of 220 grit sandpaper over the field will show much work needed. If you see shine, that spot is low!

#166 11 years ago

Very sucky, people who arbitrarily use any screw in their box.....

Since the ball does not hit it, you could leave it alone. But because I know you don't want to leave it:

I'd use a ball nose punch and knock it down below the playfield. Paint it black, and fill with a drop of 2 part auto clear.

Carefully sand it down before it gets too hard to sand.

=

Or just knock it down and paint it without any clear. If you every do a clearcoat, you could fill it then. (this is what I recommend you do)

#168 11 years ago
Quoted from Miguel351:

My only other concerns with the playfield(that I've seen so far, anyway) are the wear lines from the ramp flaps. There seems to be a lot of crap that has accumulated there over the years and I'm certain some of it has ground into the artwork.

Yes, I'm sure there is a wear line right under the flap edge. No big deal really.

If you are reinstalling ramps over new clear coat, you can put Mylar on the back of the flaps to keep the edge from scratching up the surface.

#170 11 years ago
Quoted from Methos:

How do you decide when to take the mylar off? Obiviously if you have raised inserts -but if the inserts are flat and it is not bubbling or flaking - can/should you just leave it on?

If you are clear coating the playfield, the Mylar should come off.

Otherwise, if it's flat and not bubbling, then leave it alone; it's doing its job of protecting the playfield.

#171 11 years ago

PAINTING VERY FINE LINES:

Sometimes you have a fine line to repair. If you have a bunch of fine lines, make a water slide decal; but for just one line here is a big time saver.

Don't make this kind of fix over rough wood. Be sure you have a solid foundation, or your first clear coat down.

Here is where the ball has worn through the line.

It is in a very noticeable place from the player's point of view. It needs to be repaired.

WEAR.jpgWEAR.jpg

#172 11 years ago

The line is thinner than a 000 brush, so how can you paint it without making a mess?

First we gently cut a path with a Xacto knife. Use a fresh blade, of course.

CUT-PATH.jpgCUT-PATH.jpg

#173 11 years ago

Now load the tip of the Xacto with your paint.

Use a little less than you think you need.

LOAD-TIP.jpgLOAD-TIP.jpg

16
#174 11 years ago

Make a pass in the guide you cut. Notice how the pre-cut guide perfectly takes the paint.

Make as many passes as you need to match the thickness of the original line. Most thin lines need 2 passes.

You could not do this freehand with a brush.

Once you have mastered this technique, you will be quickly fixing playfield details you never though were possible.

APPLY.jpgAPPLY.jpg

#176 11 years ago
Quoted from Dawson:

Are you using createx paint on the knife ?

Indeed, Opaque Black

21
#185 11 years ago

As some of you know, I got in some hot water a few years back when some online pincunts decided to try and get me fired from my place of employment (a very non-pinball industry).

Although I took care of them (you'll never see them at shows again), who needs all that BS over pinball? Not me, that's for sure.

As a big guy with a big build, I've bullied my way through life. I've got to admit, my first instinct in any confrontation is to instantly pop the other person in the jaw. I don't want to have to do that anymore; I'm getting too old, and hopefully too wise.

So if I don't use my name online and tunnel my IP address, it's not that I'm hiding; I'm just keeping my life simple.

Thanks guys!

#188 11 years ago
Quoted from Pafasa:

Hey Vid! I could care less if your name was RosePetal and your mom and dad were Sunshine and Rain.

Aggggggh, you've outed me!

#191 11 years ago
Quoted from albummydavis:

Now, share how you tunnel your IP address.

Sheesh, next you'll want the keys to the Batcave.

Rather than tunneling, non computer geeks should probably use Tor (much easier to set up) :

https://www.torproject.org/projects/torbrowser.html.en

#199 11 years ago
Quoted from Tmezel:

Vid,
Can you fix this insert by sanding it down? It's pretty beat.

Like Neo said, I'd replace it as a first choice.

If it were the last insert on earth:

I'd pull it out and make the cracked part the top - so the swordsman would better hide the repair.

Fill with 2 part clear until level.

Print swordsman on the thicker water slide decal paper to give it a more defused appearance.

-

I see the Magic Carpet is also missing, did you already clear off these inserts?

#200 11 years ago
Quoted from Tmezel:

The art does not cover it all. The insert is flaking. I can't seem to find TOTAN inserts so I think I am hosed.

Kev at CPR says he has found the tooling for all the TOTAN inserts.

Beg him nicely to sell you the ones you need.

#202 11 years ago

PLANKING REPAIR EXAMPLE:

Using Magic Eraser dampened with 99% isopropyl , I cleaned out all the planking (those little cracks in the clear/paint that run parallel to the length of the playfield). Under magnification the cracks looked clean, so I shot my first coat of clear to fill in the cracks and lock down the existing paint.

Many times, the planking fills with clear and no further painting is necessary. This was not one of those times.

The light color of the area (yellow) and the fact that this section is right under the player's nose meant that the planking stood out like a sore thumb.

Sorry about the blurry pic, I took a few shots for safety, but they all were out of focus...

PLANKING.jpgPLANKING.jpg

#203 11 years ago

I color matched the paint by eye, put a drop down on the original yellow paint, dried it with a heat gun and then wiped over the area with Naphtha. My second try matched the color exactly; so I was ready to mask the area off.

Using Frisket, I masked over all the surrounding yellow. Don't try to "spot" repair, it will stand out if the two paints fade at a different rates in the future. Paint all the way to the edge of the art.

I used a Xacto knife and a metal straightedge to quickly cut out the masked areas.

There was no worry about the Frisket lifting the playfield paint upon removal because the playfield already had a layer of clear on it.

LIFTING.jpgLIFTING.jpg

#204 11 years ago

Here I shot my first coat of yellow.

Because this is Createx opaque yellow, note how much coverage I got from a single coat. You would not see results like that with the cheap, $1 acrylic paint from the craft store, especially on a light color like yellow.

I set the paint with a heat gun and laid down a second, final coat.

Don't sit around waiting for cheap paint to dry. Always use paint that you can heat set. Your time is certainly worth more than a $1 bottle of paint.

THINCOATS.jpgTHINCOATS.jpg

#205 11 years ago

After heat setting, I pulled the Frisket off.

I, of course, noted that there is an edge you can feel between the playfield and the new paint.

Using some 500 grit sandpaper, I gently knocked down the painted edges so the threshold was much smoother. This will make the next coat of clear "flow" over the edges rather than causing them to stand proud.

Because I used paint I could heat set, I had no worries about sanding 5 minute old paint. Again, you can't do that with the cheap stuff....

KNOCK-DOWN.jpgKNOCK-DOWN.jpg

3 weeks later
#212 11 years ago

I've been out of town, but the clear coating part of this is coming - sorry about the wait.

Water Based clear is nowhere near as clear as the auto stuff, nor is it as durable, nor are the colors as bright, nor can it be brought to as high of a shine.

Everyone (who does not have an auto refinishing background) starts by using the water based stuff, thinks that they have done amazing work, then one day *graduates* to 2 part iso clear and NEVER looks back.

There are a couple of places you will be using spot repairs with regular oil based polyurethane, as you will see soon in this guide.

#213 11 years ago
Quoted from Dewey68:

Great guide Vid! I know that the water-based clear will yellow over time, but will it yellow if it's covered with automotive clear? Are they even compatible?

I have covered other people's Water Based spot repairs with auto clear, and they are chemically compatible.

Who knows what those repairs will look like when they start to yellow over the years, though.

#214 11 years ago
Quoted from Dewey68:

If someone didn't want to invest in the equipment needed to spray automotive clear

The investment is quite small, as long as you can borrow someone's compressor. Way under $75.

You spend $150 on a plastic ramp, so by comparison, this stuff is cheap!

You'll need an air compressor with a bigger size tank, 30 gallons or larger (nobody ever complained they bought too large of a compressor). That's the High Volume part of High Volume Low Pressure (HVLP). If you are going to get a really big air compressor to use with air tools and the like (60-80-100 gallon), don't get a crappy aluminum head Husky or Craftsman. Get a real iron headed compressor (like a Saylor-Beall) used on Craigslist. It will outlast you and cost less than the Husky. The iron headed compressors can be completely rebuilt, unlike the aluminum.

You'll need a water separator:

http://www.harborfreight.com/air-tools/air-tool-accessories/12-standard-air-filter-68279.html

You'll need a moisture filter that installs at the gun:

http://www.harborfreight.com/disposable-inline-moisture-filter-68224.html

You'll need a regulator that installs at the gun (you don't want to keep walking back to the compressor):

http://www.harborfreight.com/air-tools/air-tool-accessories/125-psi-air-flow-regulator-with-gauge-68219.html

You'll need the HVLP gun:

http://widgets.harborfreight.com/wswidgets/common/displayCoupon.do?week=0813&campaign=b&page=coupon18.html&single=true&cust=77933728034&keycode=1012

-

Of course once you have a nice sized air compressor, you can wet sand pneumatically and get the playfield really flat.

#216 11 years ago

Sorry Joe, that compressor only puts out 3.8 CFM (maybe) and you are going to need more.

The problem is that compressors overrate their output, and sprayguns underrate their air consumption.

If you were refinishing chairs, you would do a lot of start-stop spraying as you rotate the piece, so the compressor might have a little time to charge back up.

But a playfield requires you to do long, even shots as you flood and overlap the surface. You don't want to be caught waiting for the compressor to charge back up as your last pass starts to catalyze.

An experienced shooter can eek out a little more performance from a small compressor and an expensive gun, but that is not you (yet), so hit Craigslist and get a real compressor.

Just for a worst case scenario: figure that a HF cheap gun needs to run @ 6 CFM and 47 PSI to smoothly shoot Shopline JC 661 clear.

#218 11 years ago

Also, because this will now become an air compressor thread for the next page or so:

An Oil Less compressor sounds like a good thing ,but its not. They just don't last long and tend to be really noisy.

A regular compressor will need an oil change after so many hours, but will last 10x as long before a rebuild is necessary.

#220 11 years ago

When buying a used air compressor, first download the manual and find out how long it takes to recharge the tank from zero. Then look online for valve rebuild kits and don't buy a compressor that does not have them commonly available.

Drain the tank, then time how long the recharge takes. If it is within a minute or two of the manual, you are probably in good shape.

=

If you take the head off and run it for 5 minutes (I know what you are thinking, it won't hurt anything), you should not see a puddle of oil forming above the pistons. If you do, it needs new rings.

If it takes forever to recharge, and the rings are good, you probably need new valves. You can order a valve kit (for good compressors, probably not the Husky) or take it to any local compressor shop.

The shop won't want the whole thing, just bring them the head. They will put new valves in it and send you home with a new gasket to use when you put the head back on.

For home use, a real air compressor, rebuilt, with yearly oil changes and a belt every so often, will probably last 15 years before another rebuild is necessary.

#223 11 years ago
Quoted from Kane:

Was looking at the Createx website today. In their technical section under application guides they recommend not using heat to dry. In today's environment I'm guessing this is to cover their butts. Just wondering what your thoughts are.

I always use heat to set the paint.

The video they have for their paints shows a guy using a heat press to set the paint too, LOL.

http://www.youtube.com/watch?feature=player_embedded&v=rJgENdTcSys#!

#224 11 years ago
Quoted from JoeJet:

Thanks Vid. Could you recommend some examples on Amazon or HF? Not sure how to read the specs.. for instance:

The US General branded HF ones are actually made by ABAC/American, all the others are China AFAICT.

It's hard for me to make a recommendation as I don't know what else you are going to use the compressor for. Only HVLP, or air sander too, sand or soda blasting, or .....?

1 week later
#229 11 years ago
Quoted from ArcadiusMaximus:

I'm having a hard time finding the 3m plastic primer for reseating the inserts.

Find the local plastic dealer that sells the bulletproof plastic to all the gas stations and pizza joints.

Many cities have the chain of "AIN" plastic stores.

#232 11 years ago
Quoted from ChadTower:

I recently tried buying an HF compressor.
First tank had a hole in it that whistled like a tea kettle. I returned it the same day.
Second tank popped a hole on a weld spot the first time it was full and shot a piece of shrapnel into my drywall.
There was no third HF compressor.

Yeah, my buddy returned 3 Husky in 3 weeks.

He finally bought a used Speedaire 80 gallon for $200 on CL. 20 years old and it will probably run another 20.

Look for Iron head, not aluminum. Look for USA made. Call for valve replacement part availability BEFORE you buy.

#234 11 years ago
Quoted from tdiddy:

Vid, I saw that you painted areas with old light bulbs in. is it possible to clear coat this way also?

You sure can.

Many times you will have all the light sockets removed because they are corroded beyond repair, but for the times you don't, old lightbulbs are great fillers.

#236 11 years ago

Since wet sanding does not involve the massive amounts of air the HVLP and blow gun delivers, you can just use foam earplugs cut in half, or just foam balls from the craft shop.

If a foam ball escapes during clear coating, that can be a set back, as it leaves trash all over the playfield. If one escapes during wet sanding, no problem, just press it back in.

1 week later
#239 11 years ago

I usually use 400 or 600.

Clean with Naphtha after sanding. Don't get oils from your hand on the clean surface.

Are you using Frisket or green painters tape as masking? If tape, it is old?

#246 11 years ago
Quoted from tdiddy:

Vid, need your input, just cc my hs. And looks like the silk screen has separated from the pf because I put it in the sunlight for a few hrs. theres a couple bubbles. Im thinking if I clap it down and let the cc harded up over the nxt week I will beable to sand and reclear?

I'm not even sure what I am seeing in the picture.

Can you post some other pics from different angles?

Was there a sticker or overlay that lifted?

Thanks.

#247 11 years ago
Quoted from tdiddy:

So my issuse is the second layer of cc separating from the first, I guess I need to sand this area off? And reclear? Our can I cut it out with an xacto knife, sand , reclear

Cut with Xacto, carefully clean out hole (try to find what kept clear from adhering), scuff up bottom of hole with 400 grit - to give the clear some tooth, drip clear into hole to fill it.

#248 11 years ago
Quoted from ArcadiusMaximus:

Hey anyone looking for the 3M Plastic adhesion promoter I found this: http://www.carid.com/install-marker/adhesion-promoter-36441.html . Its in a nice convenient pen form too .

That does look very convenient!

I'm going to have to buy one.

1 week later
#252 11 years ago

No glue needed to flatten Mylar bubbles.

Poke a hole to let the air out, warm gently with hair dryer, press down till cool.

#255 11 years ago
Quoted from Crash:

Will the small hole fuse back together?

Just make the tiniest of pin holes.

You don't even have to put the whole pin in, just the very tip.

#259 11 years ago

I've used the flour and Goo Gone combo and it works good.

I have not tried isopropyl and flour.

2 weeks later
#261 10 years ago
Quoted from Lowrent:

I guess it will not smear when cleared like Sharpie and oil-based paint markers right ?

I'd have to shoot a test panel and see how it reacts to the clear.

Can you draw a line on window glass so we can see how opaque it is?

(BTW, nice penmanship)

#271 10 years ago
Quoted from Pafasa:

Vid, how would you handle badly cupped inserts on an otherwise great condition C37 playfield? Is there a solution that doesn't change the rest of the playfield too much?

Un-jeweled inserts often cup if they are larger in diameter than 1/2" or so.

Scuff up the insert with 600 grit paper (so the clear can have some "tooth" to grip to).

Perfectly level the playfield on your work bench.

Mix up some 2 part auto clear with the fastest hardener you have*

Using a glass eyedropper, drip into the cupped insert until it is leveled off.

If you over fill, sand before the clear gets too hard.

Wipe up drips QUICKLY with lac thinner. Don't let the thinner melt the existing clear or ink.

=

* if you use slow setting catalyst/ hardener, you run the risk of it attacking the the old varnish and creating little whitish spots.

#273 10 years ago

You have A LOT of work on that playfield.

Every so often CPR runs new Firepower playfields for $599, I'd highly suggest you just buy one. Even a playfield swap is a big adventure for a new pinball owner.

If you really want to take a stab at restoration, let me know and I'll walk you through the steps.

#276 10 years ago
Quoted from Lowrent:

Molotow is by far the best.

Yeah, it REALLY looks the best.

Thanks for the test!

#277 10 years ago
Quoted from shutyertrap:

I'll certainly take whatever tutelage you'd pass on though.

OK, let's do it.

This effort is going to give you balls of steel. Once you do it, there will probably be no pinball repair you won't be able to handle. It's going to be a big job, but totally doable for the organized person, so take a deep breath.....

1. remove the glass.

2. pull the playfield up, follow the playfield wires until you find the two big nylon connectors (normally one is black, one white). Usually these are within reach through the "neck" where the backbox of the game connects to the bottom of the cab. Disconnect these connectors. If they are both white, label them with a Sharpie marker.

3. remove the playfield from the game.

4. lay the playfield over 2 sawhorses. (or build this: http://pinside.com/pinball/forum/topic/vids-quick-and-dirty-rotisserie-guide)

5. remove the metal apron at the bottom of the playfield, label the screws and put them in zip loc bag (a month from now, you won't remember what they are).

6. take about 25 pictures with your digital camera of each side of the playfield. Take them from every angle. Especially take pics of the wire colors of the flipper wires. When you think you have full coverage, take a few more.

7. Order your paint kit: http://www.dickblick.com/items/25308-1003/

8. Start taking everything off the playfield, take lots of pictures, buy a box of zip lock bags, label everything.

1 week later
#284 10 years ago
Quoted from Pafasa:

Vid, I asked and you answered about how to handle cupped inserts on my C37. I am too chicken to try it myself. Even if I level the inserts, they are still faded. If you had this playfield, would you be able to replace the inserts? Are there replacements available for this?

About 70% of inserts are available.

If you can get the inserts, then replacing them is a really nice option.

If not, then color match them with LEDs.

Post a picture and give sizes....

#287 10 years ago
Quoted from MrWizzo:

What would you suggest to recreate the artwork and lettering for the new inserts? My apologies if this is a rehashed question.

http://pinside.com/pinball/forum/topic/vids-guide-to-ultimate-playfield-restoration/page/3

The above section deals with how to do it in detail, but basically:

1. Scan
2. Identify Font (http://www.myfonts.com/WhatTheFont/ )
3. Match font size in photoshop overlay
4. Print on waterslide decal paper

#288 10 years ago
Quoted from MrWizzo:

I think PBR should have them since they would all be standard Gottlieb stuff.

From memory, High Hand only needs what, 25 inserts @ .50 cents each? I think they are all simple, round white inserts (can't tell on my phone).

Make sure that if different size white inserts are next to each other, that they are all replaced. Otherwise like Neo says, the old ones will look yellow next to the new white ones.

#289 10 years ago

APPLYING INSERT DECALS:
=
=
This section we will discuss applying Water Slide Decals (WSD).

To recap some earlier info:

1. Laser print or silkscreen WSDs. Regular ink jet printer's inks fade quickly.

2. Use clear WSDs on most inserts. If the insert has white printing on it, use white WSDs or print with an ALPS printer on clear decals (the only printer I know of that prints with white ink is the ALPS. It can even print metallic gold and silver .).

3. Most hobby shops have great printers and will gladly charge you to print your decals.

4. Turn the toner darkness up all the way on your laser printer to get a nice dark image. Turn off any "toner saver" or "economy" modes. There is no room for economy when restoring playfields.

5. Make sure you have your first coat of clear on the playfield before installing WSDs. You don't want a different tension above the decal than below it; or you might get ghosting (decal ghosting is where the decal lifts from the insert).

6. Since you need to clear coat over the decals, sand the whole playfield down to 1000 grit so the next layer of clear has some "tooth" to adhere to. Since you can't sand the decals, you need to do this BEFORE you install them.

7. Refer to this part of this thread to see how we scan and acquire the art and type font:

http://pinside.com/pinball/forum/topic/vids-guide-to-ultimate-playfield-restoration/page/3

#290 10 years ago

Supplies you are going to need:

1. Shallow dish of clean water. Use just regular tap water. Neither cold nor warm water is required.

2. Decal Setting solution. I know someone is going to chime in and say they don't use Decal Set, but we are going to restore a playfield worth $$$$, so a $3 bottle of solution is not going to kill the budget. If you are going to start restoring playfields, get in the habit of doing things right. Decal Set smells like Acetic acid, but I don't know anyone who has ever figured out what it is exactly. It softens the decal so wrinkles come right out and helps with adhesion.

3. Decals. Although you would instinctual reach for your Xacto knife, cut decals out with SHARP scissors. Razors tend to leave an edge that sticks up and makes it harder to release the decal from the backing paper.

4. Small Acid Brush. Any small brush can be used to apply the Decal Set on the playfield.

5. Soft, lint free cloth. Use this to apply the decals.

1.jpg1.jpg

#291 10 years ago

Soak the decal for about 45 seconds in the water. The time does not have to be exactly 45 seconds. You will know the decal is ready when it easily slides off the backing paper between your thumb and forefinger.

2.jpg2.jpg

#292 10 years ago

Long or large decals tend to curl as the water saturates the paper backing quicker than the decal itself.

Soak these decals face down to prevent this curling.

3.jpg3.jpg

#293 10 years ago

Assuming you already blew all the dust off of the playfield before you started, brush some Decal Setting Solution over the target area.

Start with the inserts in the center of the playfield and work your way out the edge. This way you won't mess up the decals you already set.

Now start sliding the decal from the backing paper.

Don't touch the back of the decal where the adhesive is! You could leave a fingerprint or introduce dust.

Hold one side of the decal against the playfield with your finger, then slide away the backing paper.

4.jpg4.jpg

#295 10 years ago

A good trick is use a playfield rotisserie and lay a 4 foot long florescent lamp on the floor, directing it's light upwards to illuminate the inserts. (If you need plans for a super easy rotisserie : http://pinside.com/pinball/forum/topic/vids-quick-and-dirty-rotisserie-guide)

Rotisserie or not, you will probably need a small flashlight to perfectly align the decal.

Often, the black key-lining of the playfield is poorly aligned with the inserts. Do the best you can, but be prepared to fudge a little bit to make it look right.

5.jpg5.jpg

#297 10 years ago

Once you get the alignment correct, it's time to "set" the decal.

Anchor the decal at one edge with your thumb to keep it from moving around.

Using your lint free cloth soaked in Decal Setting Solution, press out the excess water and air from under the decal.

Once you have 95% of the decal pressed out, move your thumb to the pressed side, and wipe down where your thumb was originally.

6.jpg6.jpg

#299 10 years ago

If you have ever tinted the windows in your auto, you will instantly know what to do on the playfield.

Push bubbles and wrinkles out to the edges until the entire decal is set.

If you went to fast and have a "permanent" wrinkle or notice a miss-alignment, flood the decal with Decal Set, and carefully work it out by pressing and wiping.

7.jpg7.jpg

#300 10 years ago

Let your decals dry overnight and you are ready for clear coat.

Two-part auto clear is "hot", meaning that it has very active solvents that will melt your fragile decals if you are not careful.

If this is your first time spraying clear, practice on some decal scrap stuck to a beer can or piece of sheet metal. Get the feel for how much clear melts the decals on some scrap rather than your precious playfield. When I say melt, I mean destroyed; the effect is not subtle.

Spray your first coat as dry as you can. Almost dust over the decals.

Ten minutes latter, give another very, very light coat.

Ten minutes after that, you can finally give a normal, light coat of clear.

Now your decals are protected. You can make any other last minute painting touchups you found, or go ahead and finish clear coating the playfield.

8.jpg8.jpg

#301 10 years ago
Quoted from MrWizzo:

There are a couple red inserts, but mostly white and yellow. Sure to be available at PBR. I would plan on changing them all if I did any. The artwork on all the vintage inserts is almost perfect, but I would bet that some Gottlieb guys out there have the lettering and graphics already scanned, but it would a good project for me as I have yet to change inserts.

Yes, PBR has very fair prices on inserts (.50 cents can't be beat).

I see some of the inserts have red letters on them, so you need a color laser for those decals.

Quoted from MrWizzo:

Trying to level them with clear seems more daunting than changing inserts, never having done either.

You go either way with a little less effort on filling the cupped inserts, but if the keylining is worn, I'd probably just change the inserts at the same time.

#303 10 years ago
Quoted from o-din:

Vid, maybe you'd like to tackle my Fireball playfield. You do such nice work and I'm in no hurry.
o-din

I'm swamped with work right now, but keep in touch.

How worn is the big digital "planet" above the flippers?

#305 10 years ago

Lots of work to fix that one, but honestly it looks pretty typical for that title.

I'm trying to get a guy who has a NOS Fireball EM playfield to let me rent it from him so I can get it scanned for CPR. He has the only one I've ever heard of and paid big money to buy it.

If you can't wait, Ron Kruzman did one of those a few months ago and it turned out great. You might hit him up while he still has the florescent orange paint on his workbench.

#307 10 years ago
Quoted from o-din:

I was almost embarrassed to post that pic,

Nothing to be embarrassed about. Probably 70% of those tables look just like yours does.

#314 10 years ago
Quoted from Shapeshifter:

So, I can see how doing the outside of an insert is possible - a circular one. Put the circle template that matches the outside.

But how do you get a perfect circle on the inside of the circle??

Any ideas??

Those metal circle templates have the inside circle sizes too, so you cut the frisket for the outside circle, don't peel it off, then select and cut the inner circle.

Now, only remove the "ring" of frisket and you have both the inner and outer circles.

#315 10 years ago

One more question, vid. Is that planking terminal?

Not at all.

All of this planking and paint loss was completely repaired on this playfield.

The playfield came out way better than new.

I'll show how it's done in an upcoming installment.

1.jpg1.jpg // Error: Image 102573 not found //

#318 10 years ago
Quoted from angus:

For the decals that go on the ball release cover over the instruction cards on TAF, would you put clear coat on those decals? Or leave them bare?

It depends.

Some decals already have a laminate on them, and others are meant to be cleared.

Ask the vendor you bought them from as to what you need to do.

#323 10 years ago
Quoted from Pafasa:

How do you go about cleaning clear out of the holes? Specifically, the rollover switch slots, lamp holes, and especially the star cutouts for star rollovers?

Usually the clear "wants" to stay out of the holes all by itself. It kind of bunches away from them, rather than roll down the sides.

To keep the clear out of the insides of the lamp sockets you can use old burned out lightbulbs or foam plugs.

Good guide to star rollover here:

http://www.classicplayfields.com/guides.html

Quoted from Pafasa:

Is there a timeframe where the clear is soft enough to use an exacto?

Depends on the brand of clear.

Usually there is a day or so when it's easily sanded, then it gets progressively harder.

#324 10 years ago
Quoted from Dewey68:

If they do hold up to clear coating, they will be the cat's pajamas!

Try it over white paint and keep us posted!

#327 10 years ago

Mylar is pretty tough stuff, so I don't see the "smaller than a pin hole" hole enlarging over time (especially with home use).

The heat will probably not actually seal the hole, it just makes the adhesive grab again.

3 weeks later
#329 10 years ago

You probably have a real plastics store that sells the bulletproof plastic to the pizza joints and banks in any larger city.

Look under "Plastics - Sheet Goods".

#332 10 years ago

Pretty much all FTs look something like that (and many are much worse).

If you are uncertain about your abilities, then you should get the CPR.

Then you can sell the old playfield, or keep it to work on another day, as your skills increase. That would not be the most difficult repair, but probably not the one you want for your first shot at it.

#335 10 years ago

Put a straightedge across them and see if they are raised or sunken.

#337 10 years ago

Also, are you sure there are decals installed, or just paint chipping because the inserts are raised?

#341 10 years ago

Replicating the half tone is easy.

Scan the area.

In Photoshop (or whatever) remove the background color leaving the dots. Print the dots on water slide decal paper.

On the actual playfield, repaint the affected area the solid background color.

Now simply apply the decal of dots on top of the solid background.

I'll post some pics latter.

#344 10 years ago
Quoted from Pafasa:

Do you ever travel through nebraska near Omaha?

I've been there a few times.

I'll let you know the next.

#345 10 years ago

When cutting the frisket is the aim to cut along the true boundary line

Yes, cut the true boundary line.

Frisket gives that perfect edge, take advantage of it.

Use one of those lighted magnifiers to get it right:

image_11371.jpgimage_11371.jpg

#346 10 years ago
Quoted from Hatska1:

Also, where text is painted on the playfield, do you cut around each letter like any other boundary line? Or is it best to recreate a decal and apply that just like you would over an insert?

Use "What the Font" and just print a decal.

You can waste a lot of time and still get 1/2 assed results trying to cut around a bunch of fine text.

#348 10 years ago

Scan it, and post the pic here.

#351 10 years ago

Im not really sure how crazy the gameplay will be though.

Have you played Dragon? It has a plexi playfield.

dragon_pinball.jpgdragon_pinball.jpg

#356 10 years ago
Quoted from Soapman:

If I read right you "one coat" clear the playfield before you touch-up. of course you clean and sand out all the grime.

Yes, lock down all that flaky paint.

Quoted from Soapman:

I have laminated decals should I have got the water slide?

Waterslide would be better. Much thinner and the clear coat has no problems sticking to the matte surface.

Take your laminated ones to the copy store and have them Xeroxed onto water slide decals. Tell them to turn up the "darkness" all the way up.

1 week later
#360 10 years ago
Quoted from pinballlizard:

do most copy stores have suitable water slide paper?

http://www.decalpaper.com/category-s/3.htm

I'd get it here where you know it's fresh.

Who knows how long the stuff has been sitting at the copy store.

#362 10 years ago

I've got one of those cheap HP 4600 scanners.

They stopped making them 10 years ago, but you still see them used for $25 all the time.

#363 10 years ago

HP4670

HP-ScanJet-4670VP-Chicklets.jpgHP-ScanJet-4670VP-Chicklets.jpg

#368 10 years ago

I've use the Wicked Fluorescent Sunburst.

#372 10 years ago
Quoted from selmo:

Did you find any significant difference to the wicked colors?

No, not really.

The opaque colors obviously cover better than the translucent ones. But the translucent ones are easier to shade into another color.

The metallic ones look great, but not a lot of pinball uses for those, lol.

#375 10 years ago
Quoted from erichill:

Hey Vid, can you recommend a source for the clear trays you use for mixing colors?

Often I just use whatever blister pack waste that is sitting around the shop

You can get clear artist's pallets at Dick Blick if you want something official looking.

#382 10 years ago
Quoted from jyfly:

Does this wear look possible to repair? The blue and purple look to be very challenging.

Yeah, that's a fun one.

You need a clean scan from someone to make a decal.

First seal the wood and paint the damage white.

Then match the light blue and spray the blue field back on. I'd probably paint over all the lettering and all the half tone dots in that section. It would be too difficult for a beginner to get the new dots to match the old dots.

Then in photoshop, remove the light blue background from the scanned image. Remove the white areas from the scanned image.

On a color laser printer, print the repair on clear waterslide decal. This will restore the black lettering and the tiny purple dot halftone.

Test how the purple dots look on the light blue background. They might need a little more red added to them. If they do, remove the decal before it dries and print another test patch.

It may take you a few tries, but once you complete this repair, you will be ready for just about anything a playfield can throw at you.

1 week later
#389 10 years ago
Quoted from SJJ:

Vid, After applying a water slide decal I sprayed it with a clear gloss acrylic to protect it from melting from the final clear coat. Seemed to work ok. Is this technique ok!

Satin finish might be better so the clear coat can adhere to it.

And of course, we always worry that the acrylic spray will yellow over the years.

#392 10 years ago
Quoted from SJJ:

Can you elaborate on your technique and what equipment you use for wet sanding pneumatically.
Thanks Vid

I've got that coming up soon in the clear coating section of this guide.

I'm on the road for work, but it's coming....

#395 10 years ago
Quoted from pzy:

Tiny little speck under the (new) clearcoat.

I'd leave it, but if it bugs you; dig it out with Xacto, black, fill with drop of 2 part clear on a toothpick.

#397 10 years ago
Quoted from sed6:

Can I do any or all of this work without completely disassembling the underside of the PF? I know drop targets will need to come out, same with regular targets and pretty much everything that sticks up above the PF surface.

You have to remove everything from the topside.

Then you need some way to mask paint and clear from getting through to the other side.

Do not underestimate the volume of air that blasts out of a HVLP sprayer. You don't want your masking material blowing across your perfect clear coat...

1 week later
#406 10 years ago

Even the white decal paper needs a white painted playfield, or the playfield wood color might show through and be too dark.

I usually make the decals exactly the same size, so no overlap.

#408 10 years ago
Quoted from BillinIndiana:

Should I use the plastic primer on a used insert? Or do you just use it on new ones?

Use it on used inserts too.

We really want to avoid any further insert movement under the clear coat.

#410 10 years ago

Since you are going to clear over it anyways, red or blue solution might not matter.

2 weeks later
#413 10 years ago

Try letting the acrylics dry 2 more weeks and see if they then can be sanded.

I don't like the idea of putting clear on gummy paint, it may haze or blush in the clear.

1 week later
#416 10 years ago
Quoted from Nuclear_Waste:

What is the best way to restore a switch slot where a ball drop happens? (Hate that in a playfield design!)

Fill it with Wood Epoxy, gently round it's edges (sharp edges chip), paint a matching wood color.

Might want a Cliffy in there for sure.

#417 10 years ago
Quoted from Shredso:

What would you do here? I have the paint you suggested, an airbrush and frisket. I'm just not sure what to do about the fine black lines. Hand paint them after the red is done?

Prime worn spot.

Repaint whole section red (a tiny spot of red may fade at a different rate than the field).

Use Xacto fine line technique from this page:

http://pinside.com/pinball/forum/topic/vids-guide-to-ultimate-playfield-restoration/page/4

#419 10 years ago
Quoted from Shredso:

Should I prime it with the airbrush, same paint or brush on actual primer?

Prime with white primer, from an airbrush. This way the color will be even.

Quoted from Shredso:

I wonder if I score the lines before painting will the airbrush fill them in, or will I still be able to find it.

You will still be able to find it. Thin, even coats do the trick.

Quoted from Shredso:

Thanks again for the awesome guide.

You are very welcome.

#420 10 years ago
Quoted from Shredso:

Would you just free hand the lines in the guitar with the exacto technique?

You could also scan the area and make a water slide decal of just the black lines.....might be more trouble, but could be good practice.

1 week later
#424 10 years ago
Quoted from Endorx:

Out of curiosity. How would you tackle cracked areas.. Seems like most my bolts have been overtightened at some point on the playfield which has caused minor cracking around what ever has been tightened.. Is it a case of repair the whole area?

Minor cracking is often seen.

You can help hide it with some stainless steel washers at the base of the wire guides.

But any actual fixing would involve tearing down the playfield and clearing it.

#425 10 years ago
Quoted from Pickle:

Question: I have a repro Kiss playfied from IPB. This was THE last one that Gene had. Other than an issue on one insert is it is fine. The damage is only on the insert. Is there a good way to fix this without having to re-clear the entire playfield? What is the best option to fix this?

Obviously there was a problem with adheasion on that insert.

Either the insert was not sanded, so the clear had no tooth to grip to, or there was contamination of some sort.

Is the insert slightly below the playfield surface? That would explain it not getting sanded.

I'd sand it with some 400 grit, mask off the playfield to the OUTSIDE of the black keyline around the insert, and do a spot repair with some 2 part auto clear.

If the insert is low, I'd level it with 2 part clear, before the spot repair.

#428 10 years ago
Quoted from Pickle:

3. Level pf perfectly, and fill damaged insert with Minwax Gloss polyurethane.

Don't do that.

Use 2 part auto clear.

Poly turns yellow, does not adhere to plastic well, and in nowhere near as hard. That is a REALLY high traffic area, it has to be done right.

#431 10 years ago

You don't have to replace the insert, but you do need to make it flush with the rest of the table, and fix the worn clear.

It is slightly higher on the right hand side?

#433 10 years ago
Quoted from andypuk:

What would I need to use to 'fill' it to be flush with the playfield before applying a new decal?

Level the entire playfield and fill the hole with 2 part auto clear.

#435 10 years ago

Pull the playfield out of the machine and shim up the 4 corners so that the table is dead level.

Mix up some 2 part auto clear in a glass container, and using a tiny glass eyedropper, or a veterinary syringe (not a 29 gauge insulin syringe - the needle is too small to draw up the clear), carefully fill the hole.

2 part clear shrinks very little, so you don't need a giant mound of overfill.

If you are careful with the removal of the loose material, you probably won't even need a new decal.

#436 10 years ago

Before you start any "surgical" playfield repairs, get one of these (always on sale for $29 at Harbor Freight) :

mag_lamp.jpgmag_lamp.jpg

#438 10 years ago

Yes, gloss is what you want.

2 part clear is very thin like water. Depending on your skill, you may not have to do anything once leveled.

Even though you are not going to be spraying it, have lots of ventilation and wear a disposable carbon respirator (they have them wherever you buy 2 part clear). Just like spray paint or primer, wear gloves and safety glasses, even a $12 Tyvek "bunny suit" .

#440 10 years ago

Take a SHARP 1/4" wood chisel, and holding it VERTICALLY (that means straight up, not at an angle like you would normally use a chisel), scrape off the clear coat and any printing.

Your first stroke will be hair raising, but once you "get" it, it goes really fast.

#443 10 years ago
Quoted from Aurich:

Respectfully, you're doing this for free because you want to after all, do you still plan to do it?

Don't worry.

I've been living out of a hotel room for months.

Not a bad place for repairing circuit boards, but not really ideal for spraying toxic clear.

My boss keeps promising me a vacation, so as soon as that happens, I'll take a bunch of pics, finish a bunch of insanely late projects, and write up the clear coat part of the guide.

Had I known this job would go this crazy, I would have quit before they threw all this money at me....

#446 10 years ago

You pretty much have to clear coat over it.

I guess you could put a piece of Mylar over the decal, but the Mylar might lift it over the years.

-1
#448 10 years ago
Quoted from LEE:

The water slide decal might lift over the years as well. Especially if it is large. Doesn't matter what is on top of it.

I've never had that happen (use fresh decals, and Decal Set to glue it down), but I guess anything is possible.

Remember that you need a coat of clear UNDER and ON TOP OF the decal.

You need the tension to be the same on both sides of the decal, or it may be pulled away from the insert.

Also remember not to stick decals to shiny inserts, always sand the clearcoat on the inserts with 600 to give the decal adhesive some tooth.

#454 10 years ago

My question is what is the best material for the wood repair? I have "quikwood" or plastic body filler

That "epoxy wood" stuff that comes in a dough-like stick is good.

Really rough up the area that it needs to adhere to, it will chip off if you try to patch over clear coat or wood filled with wax.

Sand a nice, smooth radius over the edges when it dries, a sharp edge will chip.

Paint it to match the surrounding wood. If you a lighting a saucer hole with an odd color like Red or Violet, check how your paint matches using that color. You don't want to find out after you have assembled your playfield that the repair stands out under Red illumination.

Epoxy-for_wood_patch.gifEpoxy-for_wood_patch.gif

#456 10 years ago

You have to sand after each coat of clear, or the clear will build up around holes and openings.

So, part of the sanding is to knock down the build up, and part is to leave a surface that the paint can grip to.

400-600 is fine. You can match colors just by wiping with Naphtha to simulate a clear coat.

#460 10 years ago
Quoted from KloggMonkey:

Is it possible to still get nice results from hand brushing automotive-clear and using an airbrush for the color touch-ups?

No.

Don't even try it.

You can rent a big air compressor for $15 a day, if you can't just borrow one.

3 weeks later
#463 10 years ago
Quoted from pinwillie:

definitely a challenge I tried to make all the dots line up, not easy at all. then just tried to blend them out.

Once the playfield is populated no one will ever notice.

Great job!

#482 10 years ago
Quoted from Aurich:

Hey vid, what's your personal take on how long to wait after buffing out the final clear coat before repopulating the upper playfield and/or actually playing on it? I see people's numbers all over the place.

Really depends on what brand clear you use.

Some softer clears, like the ones CPR uses takes months to completely cure.

The Diamondplate or JC660 that I usually use is hard in less than 30 minutes, but the highest shine takes about 3 weeks of cure before it will totally buff out. So I usually just shelve the playfield for a month and then buff.

In a pinch, I've used an IR lamp to speed curing up, but I'm always worried that the IR might one day raise an insert or something (you know how unpredictable wood is).

#485 10 years ago
Quoted from Pafasa:

Hey Vid, you started this thread out on an F-14. I assume you are finished with it. Do you have more pics and instructions for the rest of the process?

I've been working out of town, so I'm only home for 40 hours and then it's back on the road.

I promise, the moment I get my vacation, I'll finish up with the clear coating section of the guide.

#488 10 years ago
Quoted from Matt_Rasmussen:

I'm reading the createx stuff comes out pretty thick.

Not in my experience.

It seems exactly the correct consistency to spray, right out of the bottle.

#491 10 years ago
Quoted from Matt_Rasmussen:

Does that kit seem like a good place to begin anyway?

Sorry, I don't have any experience with that kit.

#494 10 years ago
Quoted from shimoda:

Vid, I'm beginning to worry that the Avatar you use might actually look like you after a while.

That's an old photo.

#500 10 years ago
Quoted from NickRocco:

I need to repair some lifting/separation over several playfield inserts.

From the pics, it looks like you have some insert edge wear, and some actual ghosting.

The ghosting is repaired using this technique (5 posts down) :

http://pinside.com/pinball/forum/topic/vids-guide-to-ultimate-playfield-restoration/page/2

-

The edge wear is fixed by leveling the inserts (if they are popped) and then filling the chipped area with 2 part clear. Level the playfield with some shims so the chips fill evenly. Use some frisket and fix the chipped keylining around the edges of the inserts with black paint, then fill with clear.

Quoted from NickRocco:

Also, I was planning to clean/polish the playfield with a 3-step system that I purchased from Treasure Cove years ago. Is this worth using? If so, should I clean/polish before repairing the inserts or after?

First fix all the problems, before you worry about how shiny your playfield is. If you polished the ghosted inserts, the whole chip can break free and fly loose.

Let your repairs dry a month and then polish it up.

Don't overuse the polish, as it is abrasive and is wearing your playfield surface down the the level of the deepest scratch.

#507 10 years ago
Quoted from MinnPin:

1) Does anybody recommend mixing something in with these paints? I know Createx sells a reducer, but the Blick near me didn't carry it. I can order it online, but is it necessary or should I just use the stuff straight?

99% of the time I use Createx straight from the bottle.

Quoted from MinnPin:

2) Does anybody have a clue how to get to the purple color shown in this picture? The orange and yellow will be easy, but this purple is plaguing me. I get that generally red and blue make purple, and according to a little color wheel that I bought, a sort violet/red looks like it is on the right track - which means more red than blue..

I would probably start with maroon or purple and add more red, rather than try to make a purple from scratch.

You could also take the empty head to the hardware store and have them mix you a quart of semi-gloss maroon paint with their computer.

#517 10 years ago
Quoted from RyanClaytor:

I'm guessing they would not mix Createx airbrush paints for you, correct? If not, what kind of paint should you request for use with airbrush?

The cab can be painted with semi-gloss latex (you still need to sand before you paint, so it sticks).

Exterior house paint has UV inhibitors so it will resist fading just like Createx does.

Usually the bottom or insides of the head has an unfaded section to get a good color sample from (the hardware store needs about a dime sized (10mm) section to get a reading from. Under the coin door or under the legs is good too, if you have the balls to wheel in the whole lower cab, lol.

Thin the paint so it runs through your airbrush.

I've got a whole cab restoration guide coming up in the future.

#519 10 years ago
Quoted from RyanClaytor:

Any recommended thinners?

Follow the can label as far as thinning.

Many times it's just plain water.

1 week later
#522 10 years ago
Quoted from 2RustyBalls:

Vid how about some photo's of before and afters of your PF restorations? I'm surprised 11 pages and no before and afters of your work.

I wanted this to be more of a "how to" guide, rather than just me waving my dick around .

At the bottom of page 6 there is a completed F14:

http://pinside.com/pinball/forum/topic/vids-guide-to-ultimate-playfield-restoration/page/6

I've got a whole pile of playfields completed and awaiting clear coat. I'll try and get some good completed pics for you guys.

3 weeks later
#536 10 years ago
Quoted from flashinstinct:

How long do you have to leave the clamp on? I have a few to glue and only one c-clamp. I don't really want this to take 3 days but if I have to.. I will

If you are using 5 minute epoxy, then 6 minutes.

#542 10 years ago
Quoted from revmex:

Vid,
would you say that any playfield is restorable?

You would hate to put $1500 of work into a playfield, if you could just buy a reproduction.

Sometimes the inserts are so faded, and replacements are not available, that you just want to find a better specimen.

#544 10 years ago
Quoted from R4840:

Vid,
Was wondering how long do you wait for the Createx paint to cure before it is safe to shoot clear? Can you shoot after you heat set it?

Good question.

I usually shoot the following day.

It's probably dry enough once heat set....Maybe I'll shoot a test panel one day and see if I can make it screw up 10 minutes later...

#546 10 years ago
Quoted from R4840:

Thanks, was already to clear and on the final wipe down with Prep sol notice a small spot that needs touch up.

I have filled in tiny holes and cracks and cleared the same day.

You ALWAYS find some little spot you overlooked.

#549 10 years ago

Are you sure it's too thick?

Normally Createx shoots fine straight from the bottle.

Try raising your PSI.

Try shooting just water and see if you have a blockage somewhere.

#551 10 years ago

I'm assuming you are using Createx paint.

Bump your PSI to 45.

If it still won't go, add 10% water or Windex and try again.

=

#555 10 years ago
Quoted from Whridlsoncestood:

Have you ever tried invisible glass instead of windex to thin the paint?

I've only used Windex in a pinch with off brand paint. Createx shoots straight from the bottle for me every time.

#559 10 years ago
Quoted from flashinstinct:

Yeah, I guess the airbrush I got from harbor freight is not up to par....maybe I'll get a better one next year . It did the job at 45PSI but I had to be careful and shot the paint from further away.

It's a $12 air brush, you can buy 26 of them for the price of a nice Iwata.

Remember that you can vary the depth of the button press along with the pull back of the button (dual action). You'll get the hang of it.

If you are used to junky rattle cans, you will be shocked at how well Createx white covers - they don't spare the pigment.

Congrats on getting it working!

#563 10 years ago
Quoted from flashinstinct:

wondering if I can sand the touch up a bit with 1000-1500 grit paper just to smooth out the finish a bit?

Sure you can.

You can knock down masked edges and of course, some sanding gives the clear coat something to "bite" into.

#566 10 years ago
Quoted from SKILL_SHOT:

would a wagner power painter work for spraying a cabinet?

It might. How smoothly does it lay out paint on a wall?

Quoted from SKILL_SHOT:

Is there an alternatve to clearing the PF like brush on clear then sand?

You REALLY don't want to do that.

If you try to brush 2 part clear over decals, it melts them in a few seconds. The solvents are too "hot" when applied that thick.

Once you have seen how flat and mirror finish 2 part clear lays out when sprayed, you will never even dream about messing with a brush and sanding.

If no junk falls into the clear while drying (you clear playfields flat on their backs) many times you don't even have to buff.

#569 10 years ago
Quoted from SKILL_SHOT:

So I knocked down all the flakey paint and its smooth to the touch now i need to seal it right?

You will need to seal it so the frisket does not lift any of the paint.

Quoted from SKILL_SHOT:

should I wipe it down with naptha first?

Yes, that will help clean everything off - don't put your greasy fingerprints on the game once you've cleaned it.

Also get down inside the slots and holes - make sure no wax is hiding along the edges to mess up your work.

Quoted from SKILL_SHOT:

as you can se there are areas of bare wood how would you go about isolating those spots to sand and bring back the color frisket and a mini sand blaster?

That is a real skill matching bare wood with the darker old stuff.

If there is just a slight difference, sometimes polyurethane will add enough yellow.

Other times, you have to work with stains or pigments to blend in fresh sanded wood.

Finally, you have to seal the raw wood before you do the 2 part clear, otherwise you often see how porous the fresh wood is.

#573 10 years ago
Quoted from 2RustyBalls:

Lots of talk but why no photo's Vid?

I'm working on the road right now.

Kinda hard to spray Isocyanate clear in my hotel room, lol.

#578 10 years ago
Quoted from flashinstinct:

I had a bottle of fluorescent pink. I added a Smidge of red to it and still no pink.

Did you add regular red or fluorescent red?

#581 10 years ago
Quoted from sc204:

Quick question, after removing all of the items from the top of the payfield, there are raised mounds of wood where the wood screws were. I assume you try to push those back in before sanding?

A domed punch makes quick work of all the mounds.

You could also use the handle end of a nut driver, if it is not all chewed up.

doaming punch set.jpgdoaming punch set.jpg
#582 10 years ago
Quoted from flashinstinct:

Yeah I used the opaque red but when I mean a smidge, I mean like the tip of a tooth pick just to get a bit of red in the paint. When I shoot it on paper it still looked pink.....when I shoot it on the red, it blurs in....

Florescent paints are translucent, so it looks like in your case you are going to need to prime with white first, then paint over with your fluorescent.

#587 10 years ago
Quoted from sc204:

Couldn't find it under ball head, punch, round head punch etc
Unfortunately just went to the local well stocked tool and hardware store and they didn't have it. Guess I will have to find it on line.

If you want a really big set of them, Harbor Freight has them for $29 after coupon :

http://www.harborfreight.com/25-piece-doming-block-and-punch-set-93539.html

Sears stores have them.

Mechanic stores might have them as "Pilot Punch", used to drive pins.....

#591 10 years ago
Quoted from Spraynard:

I had to sand it down quite a bit to be smooth again, but now it sits below the surface of the playfield. In the picture, it's not glued down, just sitting there.

How much did you sand off the face?

You want to be careful, because if you sand it thin, it will crack when a ball strikes it.

You can rough up the sides and glue it flush with epoxy, but if it is too thin, just replace it.

#592 10 years ago
Quoted from Drano:

I apologize if this has been covered somewhere before, but how do you deal with the ground in ball track on many older EM games at the top arch? I've never been able to satisfactorily remove or repair them due to the bare wood.
Can't really just fill and paint it.

There are a couple of ways to approach it.

If there is enough wood left to sand out the rut without sanding through the next layer of plywood, then you can work it out to the slightest slope.

The hardest part is getting the freshly sanded wood to match the old dark wood. You can experiment on the back of the playfield to find the right stains or even varnish to match the old wood's tone.

-

If there is deep wear through the next layer of ply then you can fill it with Bondo or auto clear.

Then you will have to mask off the surround area and paint all the way to some feature or border (spot painting will be too hard for most people to match).

Using a "dry" brush technique, grain the painted wood to match the rest of the playfield. If you are on the fence about how much graining to do, do less.

You can also get fancy and scan a section of good wood, then print water slide decals and place them over the Bondo-ed wood. Do this with a laser printer, because ink jet fades pretty fast. Again, make your wood decals go all the way to the borders or some feature like the pops. Little patches draw attention to themselves.

#600 10 years ago
Quoted from MinnPin:

The reason you can't lay frisket (right off the roll) onto your surface, trace the design, pull up the frisket, cut it and lay it back down is because it is too flimsy and it's hard to get it into the right design shape again. So, I followed the advice given by Master-Vid1900, which is to adhere the frisket and cut the pattern directly with a sharp X-acto knife. When I do this, I either press so lightly I leave frisket attached, which leads to a mistake in the pattern. When I press heavier, I cut lightly into the cabinet and the other paint, which is noticeable. Am I missing something? I have re-read these posts over and over again.

To do an entire cab side, you may go through 4-5 blades.

As you gain skill, you will soon be able to cut just the frisket, without cutting into the cab.

Work while seated with a magnifier light.

#601 10 years ago
Quoted from 2RustyBalls:

Come on Vid post some pictures. We need some meat!!

shuttle.jpgshuttle.jpg
#604 10 years ago
Quoted from MinnPin:

do you have any tips on the overspray effect?

Look at all your cabs and get an idea of how overspray looks.

"roughly" mask off an area and then just spray yourself some overspray.

If you over did it (as most people do), wipe off before it dries and try again.

3 weeks later
#606 10 years ago

Small hole like that can just be filled with Bondo.

Larger holes you can use a piece of wood dowel, then Bondo.

Bondo is great because it feathers out much smoother than most wood filler.

#608 10 years ago
Quoted from mof:

What's the best way to remove a broken post down in a hole?

What kind of post?

Pics?

#611 10 years ago
Quoted from mof:

What's the best way to remove a broken post down in a hole?

If it is a regular "wood screw post" you can drill it out from the rear with a "hollow screw extractor".

http://www.highlandwoodworking.com/set3hollowscrewextractors.aspx

Don't drill all the way through to the face of the playfield. Just drill about 1/2 way through and then twist the screw tip out the rest of the way with a pair of needle nose Vise-grips.

You can backfill the hole with epoxy so it is strong enough to take the new post.

185112.jpg185112.jpg

#613 10 years ago
Quoted from mof:

What's the best way to "line it up" from the back side?

From the front you can hit the broken shaft with a nail set and it will telegraph through the back side.

#614 10 years ago

If a screw breaks off in a T-nut rather than in wood, you can drive the shaft and the T-nut out with a nail set.

Always check the backside and make sure nothing is blocking the T-nut (like another nut, washer or assembly).

#620 10 years ago
Quoted from mwiz:

Is there another plastic primer that you can recommend? Something I can get at a big box store? I can't find the 3M Plastic Primer for sale anywhere.
Thanks.

Big box stores are probably not going to have anything.

Find the local shop that sells the bullet resistant plastic for party stores and gas stations.

If you have Granger local, someone told me they found the primer there too.

#624 10 years ago
Quoted from RudeDogg1:

What do you do about inserts that are quite loose in the hole is it just a case of more glue?

Glue them down with epoxy.

Fill any remaining gap with auto clear when you go about leveling the cupped inserts.

#630 10 years ago
Quoted from ArcadiusMaximus:

I am about to start work on my playfield. I have quite a bit of decals that will need to be applied. A few are on the larger side with the largest being roughly 8"x10"

An 8x10 water slide decal might be hard to work with.

Try to find places to cut it into workable sections; your sanity will thank you.

Quoted from ArcadiusMaximus:

I plan on sealing the playfield in the next few days since mine had significant planking that I could not clean out. On top of that I will do my decal/ touch ups then seal that off with another few coats of clear.

Good, your decals need a smooth place to lay. They don't do too well on rough, planked surfaces.

Quoted from ArcadiusMaximus:

However a lot of the areas I will be scuff sanding will wind up being covered with a decal. Is this going to be a problem once I go to seal everything? Will the top layer of clear still adhere properly?

When water slide decals lift, it's usually because the substrate is different than the top coat.

By sealing your playfield with the same auto clear you are going to top coat it with, you minimize any tension differences.

#633 10 years ago
Quoted from ArcadiusMaximus:

Any tips for squeegeeing water out of larger decals?

No squeegee, the decal will tear or distort .

Slide the decal off and blot with a lint free rag dipped in Decal Setting Solution.

#636 10 years ago

It does look like ghosting.

I'd probably leave it for now.

If it get worse and all the bubbles connect to each other, then fix it with the directions earlier in this thread.

#639 10 years ago
Quoted from BJM-Maxx:

I guess I need a fairly big decal across the balls. Should I cut it into smaller pieces to make them manageable?

Yes.

Scan the entire area first (or see if someone here can give you a clean scan.

Quoted from BJM-Maxx:

Do I sand everything off in that area and level the inserts with clear (all the inserts are nice and even with the playfield but are cupped)?

Using a SHARP vertical chisel (not at an angle like a chisel is normally used), the old paint will scrape right off the insert faces.

Quoted from BJM-Maxx:

How do I do the sanding across the racked balls area to stop precisely on the narrow bare wood strip around the balls?

Don't sand down the inserts, glue them back level with the playfield. Then fill them with auto clear to un-cup them.

You will do just a minimal amount of sanding with 400 grit to give the new paint some tooth. Do not sand back down to bare wood.

#641 10 years ago

I always clear the whole playfield to protect it from any further wear.

If you are good at feathering in, then I guess you could stop the clear under some feature like the plastics.

I like how smoothly Bondo feathers when filling a divot.

#644 10 years ago
Quoted from Chet:

if the ghosted spots eventually connect with each other, they still would have to come to the edge of the insert in order to inject some kind of clear into the lifted areas from the perimeter of the insert, correct?

It's easier if they come to the edge, but you could make an incision anywhere, really.

Quoted from Chet:

The PF otherwise is near perfect, so i did not think re-clearcoating the entire PF would be necessary, but is re-clearing pretty much a given for this kind of thing?

You don't have to reclear, but clearing will protect the game into the future.

#645 10 years ago
Quoted from ArcadiusMaximus:

I'm prepping my playfield for an initial clear coat and Ive noticed a few inserts that I removed and reset with epoxy have raised slightly.
.

Did you rough up and prime the plastic first?

Quoted from ArcadiusMaximus:

Like barely catches your finger nail. Should I worry about lowering them again or just clear over it and be done with it.

If you are sure they are done moving, then just clear over them.

By the time you spray and sand a few coats, you will never see the edge.

Quoted from ArcadiusMaximus:

. I'm assuming reattaching all the playfield pieces will help bring it back to shape once I begin to reassemble.

Yes, as soon as the rails are reattached, everything should be flat again.

#647 10 years ago
Quoted from BJM-Maxx:

Maybe I missed it but let's say I strip a playfield down with the intention of clearing it. What do I have to do to decontaminate it so the clear is not messed up.

Naphtha cleans off all that old wax and fingerprints nicely, without dissolving the old finish.

Make sure you clean the slots and holes; you want the clear to stick to the edges.

Quoted from BJM-Maxx:

Assuming I now have a clean surface, I should rough up everything with 220 grit then lay clear on that?

Use 500 grit to give the clear some tooth.

220 is WAY too abrasive - you'll lose art!

Quoted from BJM-Maxx:

I have to say that I will have a lump in my throat the first time I try it.

That's good actually.

When you are cautious, you will probably do a better job and not take shortcuts.

You can always practice on a piece of plywood - paint a section, put a decal on it and clear over it all.

#657 10 years ago
Quoted from jasonbar:

However, I do wonder if anything can be done about a little bit of "ghosting" over the "G" & "R" arrow inserts. They look great when lit. They appear a little cloudy when unlit. If I rub my fingernail on them, they go crinkle-crinkle & the Mylar is clearly a little "blistered" & raised up at those points. Is there a quick fix? The ol' barely-poke-it-with-a-brand-new-X-acto-knife-pointy-point-and-shoot-it-with-the-hair-dryer trick?

Try poking a pin in the bubble and see if gently warming the Mylar with a few layers of cotton cloth and a household iron will stick it back down.

If it's been too long, it may not have any stickiness left and there is nothing you can do without removing the Mylar (and the risks associated with that).

Unless you are prepared for a possibly much larger project, it's probably best to try the pinhole, and then just let it be.

#665 10 years ago

Sharpen a chisel and hold it completely vertical (not at an angle like you normally use a chisel), the old clear and silkscreen will come right off.

Only do this on inserts you want to remove the printing, glue and clear coat from.

1 week later
#672 10 years ago

The JC line has 3 different speeds of catalyst at my supplier.

I use the fastest cure when misting over fresh decals, or 1st coat over old Bally Playfields (where the "heat" from the longer curing catalysts can create little spots on the inserts).

I have some genuine Diamondplate clear that was mixed up for me, but it is so hot, I never use it over new decals - it tends to wrinkle them.

#676 10 years ago

Poly is yellow and dewaxed shellac is amber, so often they make good sealers that you can match the sanded section into the old wood.

Shellac is totally non toxic, a pleasure to use compared to most of the stuff we use in playfield restoration.

#678 10 years ago
Quoted from flugs:

Could I fill the inserts with clearcoat until they are levelled again, or should I remove, sand and glue them in again?

If the EDGES of the inserts are below the face of the playfield, I'd remove, sand the sides for "tooth" and reglue them.

If the inserts are loose, I'd remove, sand the sides for "tooth" and reglue them.

Once the inserts are flush and stable, then I would fill the cupped inserts with clear coat.

#680 10 years ago
Quoted from Mudflaps:

Any recommendations for a 'clean look' on the shooter lane other than what's recommended by Treasure Cove?

Yeah, don't do any of that nonsense. It looks SO hacked.

If you have a notch like that, fill it with Wood Epoxy.

Then paint it a matching wood color (you can practice your paint matching skills on the back of the playfield).

With a very dry stiff brush, paint on a little bit of wood grain (less grain is better than more).

Then just follow the directions at the bottom of this page:

http://pinside.com/pinball/forum/topic/vids-guide-to-ultimate-playfield-restoration/page/3

1 week later
#683 10 years ago
Quoted from o-din:

Hi vid.
Earlier in this thread I showed you pics of my Fireball playfield that was planking and in bad need of repair.
How do you like my final resolve?

Nice work!

#689 10 years ago

Hard to say,

Try to dry a patch of straight color and see if it does anything weird when it drys.

I assume you did not "overcook" it when drying?

1 week later
#697 10 years ago
Quoted from MinnPin:

Is there a good technique for getting these black, curved and straight lines going around the illumination white areas back in place without it looking sloppy?

You can scan the Keylining before you paint, then print some water slide decals you apply after you do the white paint.

Thin lines you can "paint" with an Xacto blade.

OR, if you use a really sharp, new Xacto blade while cutting the frisket, you will probably not need to fix the keylining. This is a skill you will develop. Use a big, illuminated magnifying work light.

#698 10 years ago
Quoted from desertT1:

Search didn't come up with any results, but can you use alcohol to thin paints for airbrush? I found a thread in an RC airplane forum that uses the exact brand of paints that I have and one person liked alcohol the best for thinning. Just want to make sure it won't do damage when used as a thinner.

On something as expensive as a playfield, you probably should use the Createx thinner.

BUT note that Createx sprays straight from the bottle, no thinning necessary.

I'll admit that in a pinch I used ammonia to thin some Createx where I needed the lightest of shadings....but I'm not going to recommend it to anyone.

#699 10 years ago
Quoted from altan:

I've gone through this and haven't seen a solution to my specific issue. Some of the insert around the Terminator robot's mouth has cracked off --- but only the black part. See pic.

What's the best approach to fix? Frisket the area and use black createx? Could careful brushing be used or is airbrush needed?

Like Minpin said, you want to air brush it, because you WILL see brush strokes when backlit (especially with LED lighting).

#702 10 years ago
Quoted from altan:

Does one coat tend to make it level with the other art or should multiple coats be applied to make it level?

Once you spray the clear coat over the paint, the clear will self-level the insert wear.

#705 10 years ago
Quoted from BJM-Maxx:

What kind of safety equipment are people using for spraying clear? The local body supply shop sold me a dual cartridge mask but the clear definitely says to use a positive pressure supplied air system.

Isocyanate does not have a smell, so the clear manufacturer puts that hideous smell into the formula so you CAN'T miss a leak in your mask.

If you start doing clear all the time, a pressure air system would be a worthwhile investment in your longevity.

Quoted from BJM-Maxx:

I watched some YouTube videos where a guy was spraying with just a dust mask which seemed crazy.

Yeah, I've emailed that guy to take down those dangerous videos, but he keeps them around.

Don't even think of using a dust mask for spraying, or sanding the lead based cabinet paint.

#706 10 years ago
Quoted from altan:

Thank again! I'm using my phone so my search may have missed this, but is there a post in this thread that has advise regarding spraying clear over a small area? And perhaps recommended brand?

Spraying clear over a small area is much harder to do than just clearing the whole playfield.

You need to spray all the way to an edge where the transition will not be noticed.

Rottenstone can be used to knock down the high gloss of the new clear to better match the old clear.

PPG JC660 is a very forgiving clear for the beginner to get totally pro results. Sand it before it too long, because after a few weeks, it becomes very hard.

#715 10 years ago
Quoted from MinnPin:

So, even if I am completely outside, in my driveway performing this task, I need a mask and a bunch of cartridges to the tune of $100 or more? Seriously?

You can't clear in your driveway because airborn trash will stick to your clear coat.

A cartridge mask is ~$27 that will cover you both for isocyanines and lead paint dust from sanding cabs.

Don't sand cabs inside your garage, you will never get the lead out.

#720 10 years ago
Quoted from KloggMonkey:

I have a poll barn that I plan to use for my clear coating area. Its weatherproof, but has a gravel floor, should I make a makeshift paint booth with some plastic to control any potential dust?

Yes, put some plastic up (make it way bigger than you think you need, or the mist might fill the space).

Spray the floor with water to temporarily keep the dust down, just before you start.

#721 10 years ago
Quoted from NYP:

what cabinets have lead in the paint? Are we talking old EM's before a certain era or are we talking WPC games?

Lead paint was banned after 1978 for home use but was commonly used in commercial applications into the 2000s, and can still be found today.

You will never get the lead dust out of a basement or garage, so BE CAREFUL.

Wash any lead dust clothing separately from other clothes. Better yet, wear a Tyvek suit ($9).

Wear a real respirator that is rated for lead exposure.

#735 10 years ago

You can cut right up to the line.

I was making a 3D effect for a special client.

#738 10 years ago

Because that is the most noticeable area of the playfield, you are going to have to sand all the varnish off in the whole area.

Any patching will stand out like a sore thumb.

Tape off the black keylining and use an electric detail sander to expose the fresh wood.

Using Blond Shellac, then spray a few layers until the color matches the rest of the playfield.

1 week later
#750 10 years ago
Quoted from cheezywhiz:

What's the best way to fill in the little recessed grooves between inserts and the playfield? I would think they need to be leveled out before applying clearcoat or else the clearcoat would sink into the crack, no?

You mix up a little 2 part auto clear coat and fill in the valleys.

Same way you fill up cupped inserts.

Polyurethane will shrink over time and the valleys usually return. 2 part clear is very stable, and of course, completely compatible with itself when you clear the entire playfield.

#751 10 years ago
Quoted from Bangagong85:

That is a bummer. I went ahead and ordered it probably an hour before your post. Oh well, I'll see what it can do for me, after all, I have no experience and not really any kind of detailed work to do with it. Thanks for the tip anyway, I'll let you know how it works out.

I would not worry too much about that air brush.

If it does not work, you can get a completely serviceable one on sale at HF for $12 and just throw the TCP one away.

http://www.harborfreight.com/deluxe-airbrush-kit-95810.html

#756 10 years ago
Quoted from MinnPin:

Can anyone give me a run down of the process for applying these, starting with how the playfield should be prepared?

http://pinside.com/pinball/forum/topic/vids-guide-to-ultimate-playfield-restoration/page/3

Quoted from MinnPin:

But how should the surface be?

Put the decals over a thin layer of clear coat. The clear should be finely sanded, and not glossy.

Quoted from MinnPin:

How see through (or translucent) are these decals going to be?

If you bought clear waterslides, very translucent. If you bought White waterslides, not so much.

#757 10 years ago
Quoted from shimoda:

What kind of compressor do you use for airbrushing, all I have is a 20 gallon husky, I imagine that is a bit of overkill and not properly suited to airbrushing...

I use a 200 gallon Saylor-Beall for both airbrushing and clearcoating.

No such thing as overkill when it comes to compressors. The larger the tank, the less it cycles on and off.

Promoted items from Pinside Marketplace and Pinside Shops!
$ 12.95
$ 54.99
Cabinet - Shooter Rods
Lighted Pinball Mods
 
$ 18.95
Eproms
Pinballrom
 
From: $ 170.00
3,000 (OBO)
Machine - For Sale
Walnut Creek, CA
$ 54.99
Cabinet - Shooter Rods
Lighted Pinball Mods
 
$ 109.95
Electronics
PinSound
 
$ 179.00
$ 18.95
Eproms
Pinballrom
 
$ 22.00
Cabinet - Shooter Rods
arcade-cabinets.com
 
$ 36.95
Eproms
Pinballrom
 
From: $ 2.99
$ 10.00
$ 54.99
Cabinet - Shooter Rods
Lighted Pinball Mods
 
$ 54.99
Cabinet - Shooter Rods
Lighted Pinball Mods
 
From: $ 209.00
$ 8.00
Electronics
Third Coast Pinball
 
2,200
Machine - For Sale
Boise, ID
$ 9.99
Eproms
Matt's Basement Arcade
 
$ 40.00
Cabinet - Other
Rocket City Pinball
 
$ 54.99
Cabinet - Shooter Rods
Lighted Pinball Mods
 
From: $ 3.50
Playfield - Other
Rocket City Pinball
 
From: $ 9.99
Eproms
Matt's Basement Arcade
 
$ 27.95
Eproms
Pinballrom
 
2,406 posts in this topic match your search for posts by vid1900. You are on page 1 of 10.

You're currently viewing posts by Pinsider vid1900.
Click here to go back to viewing the entire thread.

Reply

Wanna join the discussion? Please sign in to reply to this topic.

Hey there! Welcome to Pinside!

Donate to Pinside

Great to see you're enjoying Pinside! Did you know Pinside is able to run without any 3rd-party banners or ads, thanks to the support from our visitors? Please consider a donation to Pinside and get anext to your username to show for it! Or better yet, subscribe to Pinside+!


This page was printed from https://pinside.com/pinball/forum/topic/vids-guide-to-ultimate-playfield-restoration?tu=vid1900 and we tried optimising it for printing. Some page elements may have been deliberately hidden.

Scan the QR code on the left to jump to the URL this document was printed from.