(Topic ID: 29731)

Vid's GUIDE To Rebuilding Pop Bumpers

By vid1900

11 years ago


Topic Heartbeat

Topic Stats

  • 657 posts
  • 171 Pinsiders participating
  • Latest reply 28 days ago by vid1900
  • Topic is favorited by 789 Pinsiders

You

Linked Games

No games have been linked to this topic.

    Topic Gallery

    View topic image gallery

    Pop 1 (resized).jpg
    Pop2 (resized).jpg
    T1QRoyXmtXXXXxQCI4_054151__26593_std.jpg
    20220509_162529 (resized).jpg
    C114_8color1080lbl (resized).jpg
    IMG-20211207-WA0003 (resized).jpeg
    DE newest (resized).jpg
    DE older (resized).jpg
    picture (resized).png
    20210127_002841.jpg
    20210126_212921.jpg
    20210126_212901.jpg
    20210114_145356 (resized).jpg
    giphy.gif
    20210107_075154 (Large) (resized).jpg
    20210107_075144 (Large) (resized).jpg

    Topic index (key posts)

    3 key posts have been marked in this topic (Show topic index)

    There are 657 posts in this topic. You are on page 10 of 14.
    #451 6 years ago
    Quoted from spinal:

    Sky Jump, Gottlieb '74:
    Rebuilding middle pop which had a coil without square end and noticed upon reinstall that coil rotates around (but has no slack horizontally). Not sure if it did this before I took apart but it was sticking on after activated hence the rebuild. My left and right pops don't rotate so something is not right here. At the very least this will cause strain in coil solder points and rotations will lose energy (a least a bit) that would otherwise be directed to ball (or this was reason it was originally sticking on).
    What do I have wrong here or is this wrong coil?
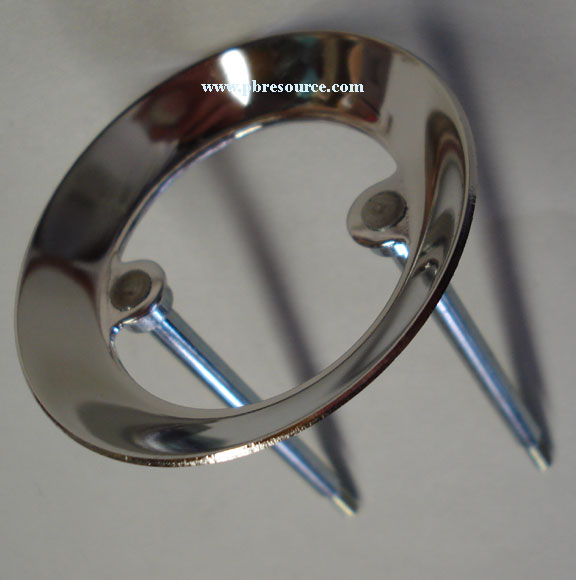
    (Last pic is of right pop)

    On that first picture it looks like you've got a pretty big gap between the coil top and the bracket

    #452 6 years ago
    Quoted from spinal:

    What do I have wrong here or is this wrong coil?

    I'm rebuilding a Sky Jump at the moment. All 3 coils I have for the pops are identical A-4893 and look factory. The manual also only has a single entry for pop bumper coils. The coils do not rotate.
    20171017_095335 (resized).jpg20171017_095335 (resized).jpg

    #453 6 years ago

    OK thanks. Yes, I've confirmed that my center coil is not factory so I ordered the correct one.

    1 week later
    #454 6 years ago

    I got a question rebuilding one of the three pop bumpers in my WCS94.

    Once I got the new ring assembly shafts thru the metal and fiber yokes and secured both nuts, it appears shorter than the other two pop bumper shafts in the pin. (see pics)

    I read somewhere they make this same ring w/ 1/16" shorter shafts and I think I got one of those rings.

    Question is what happens if I try to use pin w/ shorter ring shafts?

    I'm not planning to, I'm getting the correct longer shaft ring, but was curious why there are two rings with such a miniscule length difference? Is one for Data East or Gottlieb?

    shortshaft (resized).jpgshortshaft (resized).jpg

    longshaft (resized).jpglongshaft (resized).jpg

    #455 6 years ago

    Thanks for the polishing tip. I would have never thought of it, but it makes them so much smoother.

    IMG_0467 (resized).JPGIMG_0467 (resized).JPG

    #456 6 years ago
    Quoted from CUJO:

    I got a question rebuilding one of the three pop bumpers in my WCS94.
    Once I got the new ring assembly shafts thru the metal and fiber yokes and secured both nuts, it appears shorter than the other two pop bumper shafts in the pin. (see pics)
    I read somewhere they make this same ring w/ 1/16" shorter shafts and I think I got one of those rings.
    Question is what happens if I try to use pin w/ shorter ring shafts?
    I'm not planning to, I'm getting the correct longer shaft ring, but was curious why there are two rings with such a miniscule length difference? Is one for Data East or Gottlieb?

    Get a ruler out and measure those rings.

    Is it just that one set has more thread, or it is actually longer?

    #457 6 years ago
    Quoted from bflagg:

    Thanks for the polishing tip. I would have never thought of it, but it makes them so much smoother.

    Your balls thank you!

    #458 6 years ago
    Quoted from vid1900:

    Get a ruler out and measure those rings.
    Is it just that one set has more thread, or it is actually longer?

    Here's a pic of the broken ring that came out of WCS94.It measures 2-1/2 inches from the top of the ferrule to the start of the threads.
    Add 1/8" for the ferrule height to where it attaches to the ring, so 2-5/8" to the beginning of the threads.

    Not sure how long the threads were on the one I put in the pin already. I don't have another ring out of the game or a spare.

    Could you measure one and let me know if this length matches what a Bally/Williams should be?

    BTW, never did find the two lock nuts in the cabinet with the threaded rod portions in them but I did find the two washers.
    Might have been like this for years and the only way I noticed any issue was the switch error (credit dot) I got and found the broken metal yoke.
    Those threads are smoothed out and gone on the broken shafts.

    pbrbroke (resized).jpgpbrbroke (resized).jpg

    #459 6 years ago

    Could someone please measure the length from the bottom of the threads to the ring and/or ferrule for me?
    Thanks.

    #460 6 years ago
    Quoted from CUJO:

    Could someone please measure the length from the bottom of the threads to the ring and/or ferrule for me?
    Thanks.

    Williams A-4754 I have here is just under 1/2" of thread. 2 1/2" from the threads to the shoulder. 1/8" shoulder to the ring.

    #461 6 years ago
    Quoted from ajfclark:

    Williams A-4754 I have here is just under 1/2" of thread. 2 1/2" from the threads to the shoulder. 1/8" shoulder to the ring.

    Thank you for confirming...I couldn't find dimensions for this part online.
    BTW, how long is the threaded portion? Mine had snapped off.

    #462 6 years ago
    Quoted from CUJO:

    Thank you for confirming...I couldn't find dimensions for this part online.
    BTW, how long is the threaded portion? Mine had snapped off.

    Quoted from ajfclark:

    Williams A-4754 I have here is just under 1/2" of thread

    Of that 1/2", 29/64" is threaded (ie there's 3/64" where the yokes will sit).

    #463 6 years ago

    So what about those plastic pop bumper rings on classic Sterns? Note this comment:

    https://pinside.com/pinball/forum/topic/quicksilver-club-all-welcome#post-3027805

    What are the pros and cons of these? I'd think they'd be easier on a ball than even polished metal rings, and probably lighter too. But if they're so great there must be a good reason I don't see them everywhere, right?

    #464 6 years ago
    Quoted from RoyGBev:

    So what about those plastic pop bumper rings on classic Sterns? Note this comment:
    https://pinside.com/pinball/forum/topic/quicksilver-club-all-welcome#post-3027805
    What are the pros and cons of these? I'd think they'd be easier on a ball than even polished metal rings, and probably lighter too

    Plastic bumper rings are the ultimate.

    Quoted from RoyGBev:

    But if they're so great there must be a good reason I don't see them everywhere, right?

    Stern Electronics went out of biz 35 years ago

    2 weeks later
    #465 6 years ago

    Just as I looked over your guide, here’s what I found when pulling apart my first pop for playfield swap. Good thing I had extras!

    F029A054-4545-4326-8936-60237331C274 (resized).jpegF029A054-4545-4326-8936-60237331C274 (resized).jpeg

    73E77E2F-BACD-40D7-AF8A-893D54496350 (resized).jpeg73E77E2F-BACD-40D7-AF8A-893D54496350 (resized).jpeg

    #466 6 years ago
    Quoted from La_Porta:

    Just as I looked over your guide, here’s what I found when pulling apart my first pop for playfield swap. Good thing I had extras!

    Hey! That looks somewhat familar...

    #467 6 years ago

    I’ve got a question: I rebuilt and placed my first pop last night, and it looks slightly off-kilter, as far as height. With the cap installed, there looks to be a little more of a gap than the old ones in the accompanying picture. Is that ok? The height of the ring itself appears to be the same...just the distance from the ring to the cap. Is it possible that the bodies I got are a bit taller?

    89294AA6-DB19-4533-A211-6DFDC930D3F6 (resized).jpeg89294AA6-DB19-4533-A211-6DFDC930D3F6 (resized).jpeg

    6884DF78-1258-4B24-9859-C5259A73CC52 (resized).jpeg6884DF78-1258-4B24-9859-C5259A73CC52 (resized).jpeg

    #468 6 years ago

    Well I answered my own question: the bodies are slightly taller, maybe 1/4 inch. Does this really matter? The bumper looks like
    It will work just fine...is there any concern other than cosmetic?

    #469 6 years ago
    Quoted from La_Porta:

    Well I answered my own question: the bodies are slightly taller, maybe 1/4 inch. Does this really matter? The bumper looks like
    It will work just fine...is there any concern other than cosmetic?

    As long as the ring is the same distance from the playfield it should function the same...

    #470 6 years ago

    Thanks Vid for this thread. Gave me the courage to take off the pops on my Raven. I think this pin is a collector!

    F468C501-368D-47B1-AA86-87D5ECFDC5DD (resized).jpegF468C501-368D-47B1-AA86-87D5ECFDC5DD (resized).jpeg

    1 week later
    #471 6 years ago

    Vid, I used your guide here to rebuild my firepower pops while doing the playfield restore. Good grief are they sensitive and fast! Thanks for all of your work on here.

    #472 6 years ago

    Just removing the grime from the plastic spoons and polishing the rings made a HUGE difference on my Raven. Pretty simple task. Another reason for the buffer. Here’s the grime

    44CD94CD-687D-489D-B32C-5D3B2006FC39 (resized).png44CD94CD-687D-489D-B32C-5D3B2006FC39 (resized).png

    #473 6 years ago
    Quoted from vid1900:

    Plastic bumper rings are the ultimate.

    Stern Electronics went out of biz 35 years ago

    Does anyone know why those rings are not getting reproduced? I know there needs to be a large order for injection molded plastic like this.. but I have to imagine there is enough demand now.

    -Jay

    #474 6 years ago
    Quoted from jrobinso99:

    Does anyone know why those rings are not getting reproduced? I know there needs to be a large order for injection molded plastic like this.. but I have to imagine there is enough demand now.
    -Jay

    Stern flipper bats weren't even being made till this year, and these rings don't break much. I figure it's not a priority to remake them when metal are available

    #475 6 years ago
    Quoted from zacaj:

    Stern flipper bats weren't even being made till this year, and these rings don't break much. I figure it's not a priority to remake them when metal are available

    Except that everyone constantly talks about how great they are. Better action, less wear on Vid's balls, etc.

    Personally, I would be in for 50 if they were as sturdy as the originals and the price was reasonable. I would use them on all my early SS restores going forward...

    -Jay

    #476 6 years ago

    High end auto brake lines are dipped in melted Nylon to keep them from collecting crap, maybe someone in that field could dip some pop-rings.

    3 weeks later
    #477 6 years ago

    I just finished restoring a 1964 Williams San Francisco. I was doing a first "road test" today to make sure all the switches were adjusted optimally when....oops. Something happened. On the very first activation of one of the pop bumpers, the machine went into "game over" mode with an awful buzzing sound from the (locked on) game over relay. At first I thought there must be a short in the pop bumper circuit. After about an hour of scratching my head, reading and rereading the schematic diagram I just started looking REALLY SLOWLY and CAREFULLY at any and all components in the game over relay circuit. It was hard to see with my nearly 50 year-old eyes (and at first I thought it was an unusual wire connection) but I finally found the nut and the threaded end of rod from a pop bumper ring sitting on top of the ends of the switch blades for the "special" relay. I always tighten these nuts well because I don't want them working their way loose, but is it possible that I overdid it with this one? Or do you think that the ring rod was faulty? I am looking for opinions as to why the rod sheared off so that if it was a case of operator error I can adjust my approach and avoid something similar in the future.

    20180109_141206 (resized).jpg20180109_141206 (resized).jpg

    20180109_141130 (resized).jpg20180109_141130 (resized).jpg

    20180109_141056 (resized).jpg20180109_141056 (resized).jpg

    #478 6 years ago

    Took the offending ring out tonight. It was brand new.

    20180109_213956 (resized).jpg20180109_213956 (resized).jpg

    #479 6 years ago

    Could be crappy/weakened metal as well. One of mine had the same thing happen to it.

    #480 6 years ago

    Aaaaand then this: about a year ago I ordered a bunch of parts for three restoration projects including this one. Pictured here are 5 out of six ring/rod assemblies that are no good straight out of the box. They were all nested together and it never occurred to me that there could be anything wrong with a brand new ring/rod until I unpacked them last night. Five of the six had crappy attachments. The three on the left are really bad. See how much the rods can easily move out of parallel? The two on the right might not look bad but if you give the rods a gentle wiggle they move. In retrospect, it was probably play like that which caused the pops on a prior project to wear through the bumper bodies gradually over a period of six months, eventually causing a full pop lockup/blown transistor.

    20180110_092030 (resized).jpg20180110_092030 (resized).jpg

    20180110_092110 (resized).jpg20180110_092110 (resized).jpg

    #481 6 years ago

    For comparison I dug an old ring/rod out of my spare parts bin. The rod attachment on this is rock solid steady. The end of the rod that is flattened onto the ring looks WAY better formed compared to the one pictured in my post.

    20180110_093330 (resized).jpg20180110_093330 (resized).jpg

    #482 6 years ago

    Drop them ring side up into your vise. Close the jaws until they almost grip the rods.

    Re-peen the heads with one or two taps, install.

    (remember, these are made from super soft steel so they don't chew up your balls. Handle with care, don't over-tighten, just snug them. )

    #483 6 years ago
    Quoted from vid1900:

    Drop them ring side up into your vise. Close the jaws until they almost grip the rods.
    Re-peen the heads with one or two taps, install.
    (remember, these are made from super soft steel so they don't chew up your balls. Handle with care, don't over-tighten, just snug them. )

    Thanks Vid. That was an easy fix. They all seem snug now, but I must admit that I am concerned about their long term durability. It looks to me like the factory peen on my funky rods barely rolled over the hole in the ring. Time will tell, I suppose. Thanks as always for your help!

    #484 6 years ago
    Quoted from pinheadpierre:

    Aaaaand then this: about a year ago I ordered a bunch of parts for three restoration projects including this one.

    Who did you order those from? They look like somebody's bad attempt at refurbishing old ones.

    #485 6 years ago

    Interesting theory. Until now I had not questioned whether they were truly new. For the price it seems unlikely that they are refurbished (unless someone likes working basically for free). They came from Marco about a year ago.

    3 weeks later
    #486 6 years ago

    Vid,

    Here is a picture of some screws placed in the playfield. I'm guessing someone did it because of a malfunctioning pop bumper?IMG_3815 (resized).JPGIMG_3815 (resized).JPG

    #487 6 years ago
    Quoted from A2Woodz:

    Vid,
    Here is a picture of some screws placed in the playfield. I'm guessing someone did it because of a malfunctioning pop bumper?

    Yeah, probably the ball was hanging up there if the pop was not firing.

    Of course the heads of those screws were just tearing up the balls (especially in the pop pit!), so make sure you remove those screws, tap a bamboo skewer into the holes (cut flush with wire cutters) , and cover with a small piece of mylar.

    Install new balls, of course.

    #488 6 years ago

    Question for you Vid:

    I had a fuse blow on my right lower Firepower pop bumper circuit (I installed the mod that fuses the solenoids on the J12 connector). This has not happened before I installed my restored play field, and rebuilt the pops per your guide here. I made them extra sensitive: the game rocks, those things are firing constantly and bouncing the ball all over the place! However, I wonder if, because of Firepower's configuration of the four pops in a square, when the ball repeatedly bounces back and forth between two of them very quickly, that it almost causes the circuit to be closed for too long, resulting in the blown fuse. Could this be the case? I have looked over everything else, and cannot find any other issue.

    The installed fuses from the kit are 1.25 A.

    #489 6 years ago
    Quoted from vid1900:

    Yeah, probably the ball was hanging up there if the pop was not firing.
    Of course the heads of those screws were just tearing up the balls

    What is it with, not to be unkind - or actually to really be unkind- these idiots putting screw holes in perfectly good play fields? Would they do that to their cars? Ok, I know, yes some of them would. Have bought two games ina row where this was done. If the game is too hard, stop playing it!!!!!!

    #490 6 years ago
    Quoted from DCRand:

    What is it with, not to be unkind - or actually to really be unkind- these idiots putting screw holes in perfectly good play fields?

    It's like my neighbor the sheriff always says, "Stupid people do stupid things".

    #491 6 years ago
    Quoted from La_Porta:

    Question for you Vid:
    I had a fuse blow on my right lower Firepower pop bumper circuit (I installed the mod that fuses the solenoids on the J12 connector). This has not happened before I installed my restored play field, and rebuilt the pops per your guide here. I made them extra sensitive: the game rocks, those things are firing constantly and bouncing the ball all over the place! However, I wonder if, because of Firepower's configuration of the four pops in a square, when the ball repeatedly bounces back and forth between two of them very quickly, that it almost causes the circuit to be closed for too long, resulting in the blown fuse. Could this be the case? I have looked over everything else, and cannot find any other issue.
    The installed fuses from the kit are 1.25 A.

    Sometimes, it is "just the fuse".

    Replace the fuse and see if it happens again.

    1 month later
    #492 6 years ago

    All right so I just finished my first restore, and I am having a hell of a time getting the pops to fire when the ball hits the skirt.

    The skirt has movement and I can see the pin, but it is not hitting the spoon. This is a WPC95 game, so it’s all fairly standard stuff. Do I need to check the alignment, or should I try bending the switch ? Not sure what I’m doing wrong here. I used the light trick for alignment and it looks like it’s on there ok

    #493 6 years ago
    Quoted from Rdoyle1978:

    All right so I just finished my first restore, and I am having a hell of a time getting the pops to fire when the ball hits the skirt.
    The skirt has movement and I can see the pin, but it is not hitting the spoon. This is a WPC95 game, so it’s all fairly standard stuff. Do I need to check the alignment, or should I try bending the switch ? Not sure what I’m doing wrong here. I used the light trick for alignment and it looks like it’s on there ok

    Does it fire with your finger?

    Is it a new skirt and spoon, or are some the parts old?

    Did you clean the switch contacts with a $100 bill?

    #494 6 years ago
    Quoted from vid1900:

    Does it fire with your finger?
    Is it a new skirt and spoon, or are some the parts old?
    Did you clean the switch contacts with a $100 bill?

    Yes it fires with my finger, but less so when i just tap the edge, like a ball would - i have to press down a bit more in the middle.

    New skirt and spoon

    yes switches were cleaned. All parts new except the very base part of the body. And it really has to be a $100 bill? lol

    #495 6 years ago

    ^ Then make the switch gap smaller and you should be all set.

    $100 bills are crisp and perfectly abrasive with just enough flair for a well heeled pintech.

    #496 6 years ago
    Quoted from vid1900:

    ^ Then make the switch gap smaller and you should be all set.
    $100 bills are crisp and perfectly abrasive with just enough flair for a well heeled pintech.

    Thanks, I’ll add one to my tool belt

    Will see what I can do about bending that gap. Thanks

    #497 6 years ago

    Anyone ever have a problem where the rod and ring retriggers the bumper by pushing down the skirt?

    The replacement part from PBR flares out at the top to a cylinder about the diameter of the hole in the skirt. Sometimes it pushes the skirt down and then the bumper re-triggers and stays energized:

    http://www.pbresource.com/caps/wll-a4754.jpg

    I also had it jam in the skirt and I had to pull it out.

    I removed these replacement rod and ring parts and putting the originals back after cleaning them up. However I am still having a problem where one bumper retriggers when the ring hits the skirt. Is there some adjustment I need to do so that the ring doesn't plunge so far down and hit the skirt? This is on a 1954 Williams Spitfire by the way. The body and skirt are new.

    #498 6 years ago
    Quoted from dr_nybble:

    Anyone ever have a problem where the rod and ring retriggers the bumper by pushing down the skirt?
    The replacement part from PBR flares out at the top to a cylinder about the diameter of the hole in the skirt. Sometimes it pushes the skirt down and then the bumper re-triggers and stays energized:
    http://www.pbresource.com/caps/wll-a4754.jpg
    I removed these replacement rod and ring parts and putting the originals back after cleaning them up. However I am still having a problem where one bumper retriggers when the ring hits the skirt. Is there some adjustment I need to do so that the ring doesn't plunge so far down and hit the skirt? The body and skirt are new.

    Make sure you have washers in between the nut and the yokes; maybe you can add another to have a bit more height on the ring

    #499 6 years ago
    Quoted from Rdoyle1978:

    Make sure you have washers in between the nut and the yokes; maybe you can add another to have a bit more height on the ring

    I didn't have the washers -- thanks ! ! Still happening so maybe I will add a few washers to the one bumper. Other one seems okay.

    #500 6 years ago
    Quoted from dr_nybble:

    I didn't have the washers -- thanks ! ! Still happening so maybe I will add a few washers to the one bumper. Other one seems okay.

    Seems like the only way to go - you don’t want to loosen those nuts, as they will definitely fall off

    There are 657 posts in this topic. You are on page 10 of 14.

    Reply

    Wanna join the discussion? Please sign in to reply to this topic.

    Hey there! Welcome to Pinside!

    Donate to Pinside

    Great to see you're enjoying Pinside! Did you know Pinside is able to run without any 3rd-party banners or ads, thanks to the support from our visitors? Please consider a donation to Pinside and get anext to your username to show for it! Or better yet, subscribe to Pinside+!


    This page was printed from https://pinside.com/pinball/forum/topic/vids-guide-to-rebuilding-pop-bumpers/page/10?hl=ajfclark and we tried optimising it for printing. Some page elements may have been deliberately hidden.

    Scan the QR code on the left to jump to the URL this document was printed from.