(Topic ID: 173269)

1956 Gottlieb Score-Board Pick-Up

By RyanClaytor

7 years ago


Topic Heartbeat

Topic Stats

You

Linked Games

Topic Gallery

View topic image gallery

16105539_1569300173096782_2219186164431302399_n (resized).jpg
photo 1.JPG
photo 3.JPG
photo 2.JPG
photo 2 (resized).JPG
photo 3 (resized).JPG
photo 1 (resized).JPG
AwesomeStarWars-1 (resized).jpg
jazz-1.gif
RightLadyCompIlluminated (resized).jpg
RightLadyComp (resized).jpg
RightDecorativeCompIlluminated (resized).jpg
RightDecorativeComp (resized).jpg
LeftLadyCompIlluminated (resized).jpg
LeftLadyComp (resized).jpg
LeftDecorativeCompIllustrated (resized).jpg
There are 69 posts in this topic. You are on page 1 of 2.
#1 7 years ago

This is the story of a father/son trip to pick-up a pinball machine.

I wasn't going to document this, but a few folks who read through the pick-up story of my 1964 Bally "Hay-Ride" voiced an interest in having me documenting my next acquisition. I doubt anything will compare to that 4-day family road trip, but here goes anyway.

This all started about a month or so ago during my first trip to the White Rose Gameroom Show in York, PA. I was excited to play a lot of the EM games, woodrails specifically. I've never owned a woodrail before, but my interest in older games is growing. Anyhow, I systematically made my way down woodrail row, playing each one of those beautiful restores. (Thanks to everyone who brought one!) However, one of them in particular captured my attention:

scoreboard.jpgscoreboard.jpg

I was really taken by the Roy Parker artwork (not just the fifties filly, but also the smart use of geometric shapes, color, and typography), the unconventional layout (no Italian bottom here), the middle pop-bumper (for those occasional and exciting back-from-the-dead moments), the short ball times (with busy lives, my wife and I rarely have time to camp-out on games anymore), and the uncommon 4-player woodrail (there are 3 of us in our family and it's nice to be able to all hop on a single machine, should the interest arise). As the lady says:

IMG_7734a.jpgIMG_7734a.jpg

Anyhow, as I mentioned, I was pretty smitten with this game. Every person I met at the show was another excuse to play it.

"Hey, have you tried that woodrail over there? Wanna grab a two player game? Here's how it works."

I even met the owner, Pat, and shared a game with him. He was a very nice fellow who reminded me of the fact that it was for sale. I thanked him for his gentle suggestion, but told him that I didn't think it would fit in the overhead compartment, as I flew to York. I did, however, find out that Pat lived just outside of Pittburgh, PA, about half-again as close to my home in Michigan as York. *Note to self*

My York weekend continued with periodic stops to visit Score-Board. Sometimes without, but mostly with a partner in tow. By the end of the few days, I told myself, "If it doesn't sell by the end of the show, I'll contact Pat and see if we can make a deal." I got busy moving bingos in the final hours and by the time I came back to woodrail row to investigate the status of the Score-Board, 90% of the games were gone. I didn't know the status of the game (packed-up, sold, other) but I had Pat's contact info, so I made a point to get in touch with him a couple days after the show.

Once I got in contact with Pat, he told me the good news; Score-Board was still in his possession and still for sale. The only problem was that I was maxed-out on space. Something had to go. Since my wife never really warmed up to our 80's-tastic John Trudeau masterpiece, a Gottlieb/Premier "Monte Carlo":

IMG_6826.jpgIMG_6826.jpgIMG_6827.jpgIMG_6827.jpg

...that went on the chopping block.

I told Pat that my purchase of the Score-Board would be contingent upon me selling my Monte Carlo. He said that was fine and to let him know when I made the sale. It was gone in under 72 hours:

byebyeMonty.jpgbyebyeMonty.jpg

I immediately called Pat and let him know that I had cash-in-hand and we started working out a pick-up date.

Quick addendum to the purchase deal; Pat received a couple calls on Score-Board the morning after I called him with news of my Monte Carlo sale. *phew* Just in time! ...and to Pat's credit, he did not act on the other interested buyers. Thank you, Pat!

ANY-how, fast-forward to last weekend and my son and I embarked on our trip to Butler, PA:

Untitled-4.jpgUntitled-4.jpg

...by way of a healthy number of stops for my 3-year-old son.

Just before we got onto the highway, we spotted an exciting sight:

IMG_7627.jpgIMG_7627.jpg

If you have a son, you know the allure of big machinery. So that started our trip on the right foot. Off we went.

IMG_7631.jpgIMG_7631.jpg

In short order I started singing, "On the Road Again," and I asked my son if he'd ever heard that song before. He hadn't, so I pulled it up on my phone and piped it through the car speakers:

New Willie Nelson fan. "On the Road Again," was an often repeated request throughout our journey.

Our first stop was about an hour down the road at Big Boy's Restaurant:

IMG_7654.jpgIMG_7654.jpg

...where we built our all-you-can-gorge breakfast of champions:

IMG_7662.jpgIMG_7662.jpg

Nom!

IMG_7658.jpgIMG_7658.jpg

We got ourselves back on the road after our customary departing "pee-pee in the toilet." Mommy bought us a new book before we left:

IMG_7635.jpgIMG_7635.jpg

Which came in handy, both as reading material to pass the time and a sun visor:

IMG_7645.jpgIMG_7645.jpg

It wasn't long before we crossed state lines:

IMG_7669.jpgIMG_7669.jpg

...and arrived at our next destination another hour from our breakfast stop, the hands-on science museum in Toledo, OH:

IMG_7675.jpgIMG_7675.jpg

It's called the Imagination Station:

IMG_7683.jpgIMG_7683.jpg

...and it had more exhibits and activities than we could see in our 2 hours there, like this bowling ball pulley that, when dropped, launched a tennis ball multiple stories into the air:

IMG_7685.jpgIMG_7685.jpg

...or the optical illusion room:

IMG_7691.jpgIMG_7691.jpg

...or a gigantic piano:

IMG_7693.jpgIMG_7693.jpg

...or the tilted room:

IMG_7701.jpgIMG_7701.jpg

We even constructed this little "house" together:

IMG_7716.jpgIMG_7716.jpg

I swear I'm only showing you, like, a tenth of the activities we did, too. It was a great stop.

By design, my little dude was exhausted at the end of our science museum excursion, and I deliberately timed our departure with his nap-time:

IMG_7721.jpgIMG_7721.jpg

He had a monster 2.5 hour rest, which brought us into:

IMG_7724.jpgIMG_7724.jpg

Right after he woke-up, I found a rest stop, so we could go...

Quoted from RyanClaytor:

...pee-pee in the toilet...

...and run around. Thankfully this rest area had a wide open grassy knoll...

IMG_7726.jpgIMG_7726.jpg

...where we raced from tree to tree until he told me,

"Phew! I think I'm ready to sit down!"

yas.gifyas.gif

giphy.gifgiphy.gif

So that made the final half-an-hour really easy. We made our way through bridges and wooded hills and areas that just seemed quintessentially Pennsylvanian to me.

IMG_7730.jpgIMG_7730.jpg

We arrived at Pat's place to a warm greeting and he showed us to that gorgeous machine:

IMG_7734.jpgIMG_7734.jpgIMG_7735.jpgIMG_7735.jpg

My son got to play it for his first time and approved of our new purchase:

IMG_7731.jpgIMG_7731.jpg

Even the wires on it looked shiny and new:

IMG_7739.jpgIMG_7739.jpg

Pat was just the coolest. I can't over-emphasize what a smooth transaction this was from start to finish. He even showed my son a few of his other toys and brought out a milk crate so he could play with them:

IMG_7741.jpgIMG_7741.jpg

I wish we could have stayed longer. Pat was such a gracious host, but eventually we packed-up "Score-Board" and secured it for the ride back home:

IMG_7749.jpgIMG_7749.jpg

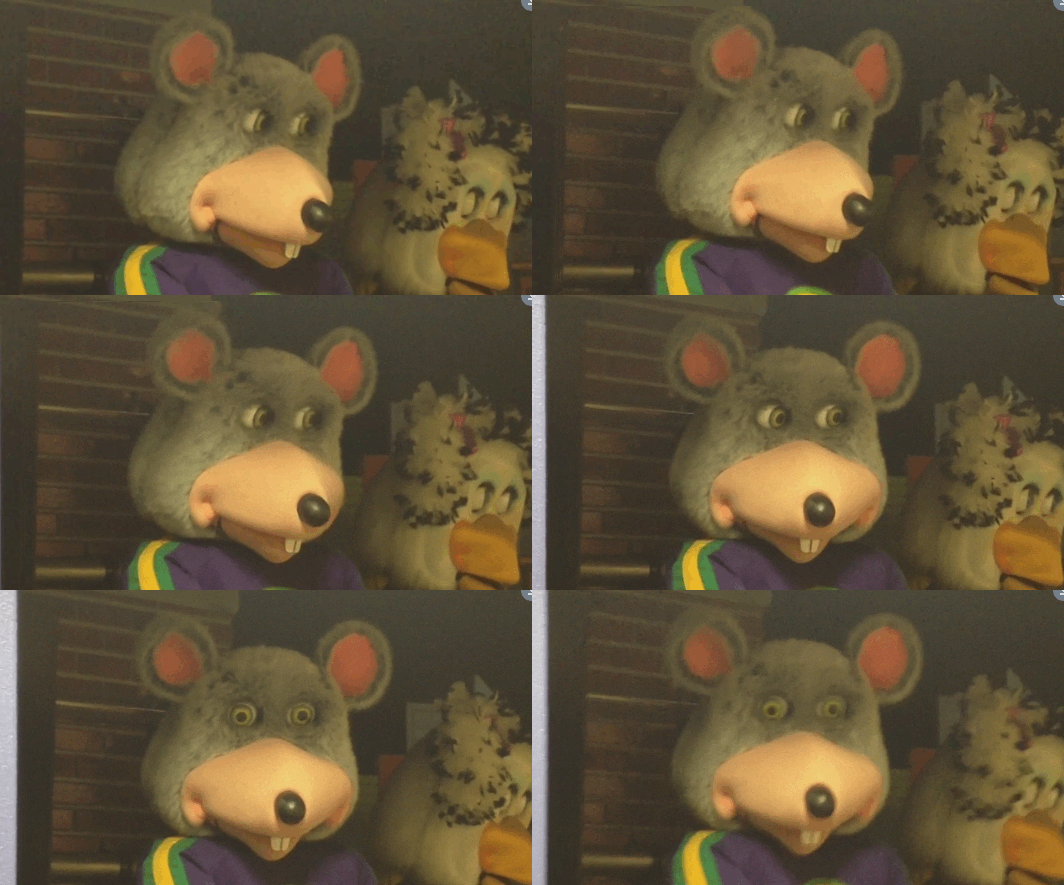
We pushed on for another hour, which got us back into Ohio around dinnertime. Before we left I found a Chuck E. Cheese in Youngstown, OH with a hotel less than a mile away.

IMG_7755.jpgIMG_7755.jpg

It was the perfect reward for my little dude being such a tremendous travel companion.

IMG_7751.jpgIMG_7751.jpg

We woke up the following morning and grabbed some breakfast at the hotel before experiencing more highway vistas:

IMG_7757.jpgIMG_7757.jpg

...and rest stops:

IMG_7760.jpgIMG_7760.jpg

...with nary a pinball machine.

tony-tears-o.giftony-tears-o.gif

I'd planned on going back to the Imagination Station as we double-backed through Toledo on our way home. There was still so much stuff we hadn't seen! However, after having some conversations in the car I was told that we should go back to Chuck E. Cheese, not the science museum.

chuck.gifchuck.gif

*shrugs* His decision, not mine.

Finally, we crossed our home-state line:

IMG_7769.jpgIMG_7769.jpg

...and delivered Score-Board to it's new resting spot.

#2 7 years ago

Excellent! Great addition to your EM collection!

#3 7 years ago

Story: 10/10

Machine 10/10

That pop bumper below the flippers???? I haven't seen that before. Looks like fun.

ClintNodding.gifClintNodding.gif

#4 7 years ago

Very nice game! congrats.

#5 7 years ago

Nice story, you traded up in my opinion.

#6 7 years ago

Nice machine, love your roadtrip stories! Can you tell me what is that paper apron made of? Kind of paper and is it white ink on black or black on white? I need to create one for my Williams Spitfire.

#7 7 years ago
Quoted from bingopodcast:

Excellent! Great addition to your EM collection!

Thanks, BingoPodcast! ...and I agree.

Quoted from xsvtoys:

Story: 10/10
Machine 10/10

You sound like an awfully generous judge. Ha-ha! But I'll take it. Thank you, XSVToys.

Quoted from xsvtoys:

That pop bumper below the flippers???? I haven't seen that before. Looks like fun.

It's a hoot! Sometimes it saves it when you least expect it, sometimes you can nudge it to coax it back into play, and there are just enough holes and space around that pop where it's certainly not a sure fire save.

Quoted from Dr_of_Style:

Very nice game! congrats.

Thanks, Doc. We're lovin' it. Been havin' some family fun on it since setting it up last weekend.

Quoted from poppapin:

Nice story, you traded up in my opinion.

Ha-ha! Much appreciated. Hard to argue with my wife's opinion (and yours).

Quoted from dr_nybble:

Nice machine, love your roadtrip stories!

ohstopitb.gifohstopitb.gif

goOn.gifgoOn.gif

Quoted from dr_nybble:

Can you tell me what is that paper apron made of?

It's sort of like a chip-board material. Pretty sure the seller told me (at York, which was a month ago) that he bought it from Pinball Resource. Maybe Steve has what you're looking for!

Good luck with your Spitfire, Nybble!

#8 7 years ago

wow what an awesome story!!

so envious..been chasing a score-board for about 30 years, have given up one turning up in australia

#9 7 years ago

What a fun dad. Congrats on a great looking machine.

#10 7 years ago
Quoted from illawarra92:

wow what an awesome story!!
so envious..been chasing a score-board for about 30 years, have given up one turning up in australia

Huh! Interesting! I'd never even heard of the title until I went to the York Show. How did you come to know about score board? It's not a title I see on peoples' wish lists very often, but after playing it myself I'm awfully happy I was able to pick it up. Good luck with your search, illawara92!

Quoted from AlexF:

What a fun dad. Congrats on a great looking machine.

Thanks for all your kind words, AlexF. Beat of luck with the sale of your Spanish Eyes! Wish I could take it off your hands.

Quoted from dr_nybble:

Can you tell me what is that paper apron made of?

Looks like it was hand-cut:

image (resized).jpgimage (resized).jpg

This next shot is kind of up-side down. Just trying to show you that it is printed on white paper.

image (resized).jpgimage (resized).jpg

Hope this helps!

#11 7 years ago
Quoted from RyanClaytor:

Huh! Interesting! I'd never even heard of the title until I went to the York Show. How did you come to know about score board? It's not a title I see on peoples' wish lists very often, but after playing it myself I'm awfully happy I was able to pick it up. Good luck with your search, illawara92!

when i first saw a photo of the game in michael colmers pinball book that i bought around 1978..had started collecting pinballs the year before..

think the only way would be to import one from america to australia.

#13 7 years ago

Another home run, in my humble opinion. Enjoy it!

#14 7 years ago

Great! Very glad I left this one for you as I was very close to pulling the trigger, it couldn't have gone to a better home and I know we were both fascinated with it while also grabbing some multiplayer games on it together. Hopefully you hold onto it for quite a while! (Because if I'm ever in Michigan, I want to play again! On, your invitation, of course... )

A photo featuring not only our scores but also my red shirt AND the game I scored on behind it. Awesome.What a fun show to be at, glad you made the flight and came down!

Enjoy it man! It was in truly beautiful shape!

IMG_8754 (resized).JPGIMG_8754 (resized).JPGIMG_8880 (resized).JPGIMG_8880 (resized).JPG

#15 7 years ago

If anyone is interested, I'm selling a nice, working Score Board in So. Cal. Will ship worldwide. Contact me for pics.

#16 7 years ago
Quoted from mikeincali:

If anyone is interested, I'm selling a nice, working Score Board in So. Cal. Will ship worldwide. Contact me for pics.

IMG_20161114_202614 (resized).jpgIMG_20161114_202614 (resized).jpg

#17 7 years ago

and after waiting 38 years for one to surface in australia..this one is coming to live in australia

thanks mike, you have been a legend regarding this (now find me a surfside )

#18 7 years ago
Quoted from illawarra92:

been chasing a score-board for about 30 years, have given up one turning up in australia

Quoted from mikeincali:

If anyone is interested, I'm selling a nice, working Score Board in So. Cal. Will ship worldwide.

Quoted from illawarra92:

after waiting 38 years for one to surface in australia..this one is coming to live in australia

This is just...the coolest. I've been taking care of an illustration job over the past couple weeks and not posting much, but when I read this I was so happy this thread could be the catalyst for an exchange like this. I love Pinside.

*GOOD FEELS!!!*

Although, I just noticed this right now:

forSale (resized).jpgforSale (resized).jpg

Here's hoping the deal is still on and mikeincali just forgot to pull the ad.

Quoted from Mk1Mod0:

Another home run, in my humble opinion.

Many thanks.

THAT...is happening. Did I mention I rolled it the other day:

IMG_7953 (resized).jpgIMG_7953 (resized).jpg

highestfive.gifhighestfive.gif

Was starting to wonder if rolling this game was possible. (It is NOT easy.) The game times are SUPER short! Timed myself a couple of times and...

IMG_8030 (resized).pngIMG_8030 (resized).png

...each game was under a minute. These are GAME times, not BALL times. (Get ready for some fast action, illawarra92 ! Ha-ha!)

Anyhow, now I gotta work on a 2,000 point achievement.

Quoted from Otaku:

Very glad I left this one for you as I was very close to pulling the trigger

Thanks, man! I was so worried someone was gonna snatch it up before I could make something happen.

Quoted from Otaku:

it couldn't have gone to a better home

Veronica-Mars-Stop-it-gif.gifVeronica-Mars-Stop-it-gif.gif

----------------
NEWS:
----------------

So I've been doing some things to some stuff. In an effort to give this ole machine the treatment it deserves, I recreating the plastics artwork. Mine were in pretty crispy condition. If you recall, they were all flipped upside-down...

IMG_8027 (resized).jpgIMG_8027 (resized).jpg

...so as not to catch the switches with their curled-under edges:

IMG_8029 (resized).jpgIMG_8029 (resized).jpg

Here are the comparisons of the top decorative plastics:

rightDecorative.jpgrightDecorative.jpg

leftDecorative.jpgleftDecorative.jpg

...which I chose to recreate in Adobe Illustrator (a vector art program) due to the mechanical appearance of the artwork (with its straight and precise lines):

illustrator.jpgillustrator.jpg

However, for the lady plastics:

rightLady.jpgrightLady.jpg

leftLady.jpgleftLady.jpg

...I decided to hand-ink (completely re-draw by hand) each of them since the character of the line-art seemed much more organic with it's flowing appearance and slightly tapering lines.

This process started by searching for any Score Board owners on Pinside. Thankfully there were two, besides me. I wrote them and asked if they still owned their Score Board and if they'd be willing to send me some pictures of those plastics (since mine were so beat-up it was hard to make out where many of the lines were or what direction they went). To my surprise, both responded within 24 hours with really fantastic, high-resolution, straight-on, in-focus images:

Girls.jpgGirls.jpg

Girls2.jpgGirls2.jpg

I'd thank them publicly here, but I don't have their permission (yet) to mention them by name. ...but thank you so much to each of you for your help. Both of you made my results a lot more faithful to the original than I ever could have hoped for from my plastics alone.

Have I mentioned that I love Pinside?

Once I had these images, I digitally overlayed them on top of my own plastics (since I knew for certain the hole placement was exactly where it needed to be and I could measure the exact dimensions in real life) and proceeded to un-warp the plastics in Photoshop:

warp.jpgwarp.jpg

From here, I converted the image to greyscale, bumped-up the contrast (to deepen the value of the inked lines and lighten the colors), and finally turned everything into a non-reproductive blue:

ladiesToRestore.jpgladiesToRestore.jpg

I printed these out on bristol (a thick, archival drawing paper) at about 170% scale. (That's a secret trick of cartoonists. If you draw larger and then shrink your drawing for reproduction, all the slight wobbles in your lines will be far less apparent and just sort of reduce-away, giving you a much cleaner, professional-looking end product.):

sizecomp.jpgsizecomp.jpg

From there, I proceeded to hand-ink each of these plastics:

handink.jpghandink.jpg

Periodically throughout this process I'd have some help:

IMG_7968.jpgIMG_7968.jpg

When the inking was finished, it looked something like this:

inkedAnalog.jpginkedAnalog.jpg

...and when it was scanned and thresholded (made everything either black or white, no shades of grey), it looked something like this:

ladiesInked.jpgladiesInked.jpg

From here, I made a file that composited the hand-drawn inks with a more accurately produced black triangle outline with rounded corners (produced in vector art) and crop marks (also produced in illustrator):

rightLadyInkAndCrop.jpgrightLadyInkAndCrop.jpg

I then digitally colored the line-art:

digiColor.jpgdigiColor.jpg

...replicating the original as accurately as possible (for the most part...keep reading):

rightLadySolo.jpgrightLadySolo.jpg

The entire time I was inking and coloring, I was constantly referencing and zooming into the photographed originals that I was sent from the fellow pinsiders mentioned above. I really wanted to get these right. Save for a few parts.

During my time playing Score Board, whenever I looked down at these plastics the anal-retentive artist in me saw that "10 Points When Lit" sign...

10ptStraight.jpg10ptStraight.jpg

...and just cringed at the fact that the bottom of this page had a curvalinear edge, but the typography above (supposedly set on the page itself) was plunked-down on a completely straight baseline.

11850.gif11850.gif

So, when I was re-inking everything, I just re-drew the baselines and lettering:

10PTcurved.jpg10PTcurved.jpg

...before inking it:

10PTcurvedInks.jpg10PTcurvedInks.jpg

Another element I changed, were those stubby little index fingers:

fanger.jpgfanger.jpg

oh-cringe.gifoh-cringe.gif

I mean, I don't know if Roy Parker was using Megan Fox as a hand model or what...but, ew.

SO:

finger.jpgfinger.jpg

...there's that.

Finally, I love me some Roy Parker artwork as much as the rest of our obsessive community, but...*sigh*...cross-eyed?

cross-eyed.jpgcross-eyed.jpg

...mascara not only on the eye lashes, but on the eye balls?

mascaraMadness.jpgmascaraMadness.jpg

...and generally stoic?

So, I tried to brighten (and straighten) those eyes a bit and make 'em a little more jolly about displaying that 10 point signage:

newFaces.jpgnewFaces.jpg

One more look:

rightLady.jpgrightLady.jpg

leftLady.jpgleftLady.jpg

Haven't got 'em printed yet, but I'll update with those results when I get 'em back from the printer.

#19 7 years ago

Ryan, I've told you this before, but your art skills are something that I can never hope to emulate.

I'm such a linear thinker, that those flowy sign changes would've never occurred to me either.

Excellent work!!!

#20 7 years ago

Whooooaaaaa - very very very cool sir!!!
Fantastic work and thanks for posting yr process!!!

Cheers Ron

#21 7 years ago
Quoted from bingopodcast:

Ryan, I've told you this before, but your art skills are something that I can never hope to emulate.

Thanks, Nick. My collection wouldn't be as functional without you. Maybe we'll have to collaborate on something.

Quoted from manitouguy:

Whooooaaaaa - very very very cool sir!!!

Ron, this means A LOT coming from you. I think we both share a similar fastidious approach to the aesthetics of our game. Thank you for chiming-in.

#22 7 years ago
Quoted from RyanClaytor:

Maybe we'll have to collaborate on something.

Dying to do so.

#23 7 years ago

yeah man, i love pinside too! the electro mechanical section just inspires me so much, even after collecting since 1977.

you guys in america don't know how good you have it!

have contacted peter and he is making reproduction cards for score-board at the moment..will let you know when there are done

http://www.pinballrebel.com/pinball/cards/

#24 7 years ago

That. Is. Amazing. Seriously, fantastic work!

arwen crying (resized).pngarwen crying (resized).png
(http://imgur.com/I4UnlY2.gif)

That is seriously going the extra mile. I guess it being your job doesn't hurt either!

I wonder what's up with those woodrail plastics. My woodrail plastics were so bad that nearly every single one fell to pieces in my hands when I took them off before ordering reproduction ones with that same brown tinge. Must be something in the mixture - it NEVER happens on later metal rail games.

Ryan-Santa, I'd like a quick drawing of my poofy-haired self next to my Jive Time for Christmas. I'll pay you in Christmas cookies. (Although I was going to post that jokingly, I think you CAN ship cookies! Hmm...)

wGJ7y_s-200x150 (resized).pngwGJ7y_s-200x150 (resized).png
(http://imgur.com/YEkD6UM.gif)

(There's a bad word in here, careful of your son's ears)

#25 7 years ago

My GIFs don't work. Is that a donator thing now too? All of the nerve! I uploaded them to Imgur and edited in the direct links.

Oh, and in-case you wanted the original infinite loop of the FedEx thing in glorious full browser screen quality (you know you do): http://thebest404pageever.com/swf/Fed_Ex.swf

#26 7 years ago
Quoted from RyanClaytor:

So I've been doing some things to some stuff. In an effort to give this ole machine the treatment it deserves, I recreating the plastics artwork. Mine were in pretty crispy condition. If you recall, they were all flipped upside-down...

This is so cool. After all of the work you have been doing to learn how to restore Project Pins, you finally get the opportunity to use your artistic talents. And well used they were! Your attention to detail and to the original art is appreciated by those of us who try to bring these magnificent works or art back to life.

Thank you for describing in detail how you performed each step and thanks to the two mystery Pinsiders who helped you out. It will take me a couple of reads to take it all in. Could you let us in on the special hardware and software you used to touch-up the red lipstick. Not all of us have magic pens that can do this!

Quoted from RyanClaytor:

Haven't got 'em printed yet, but I'll update with those results when I get 'em back from the printer.

How will the art be transferred to the actual plastic pieces? Will the printer do that for you directly onto the plastics or will you be using waterslide decal transparencies? Have you already cut the plastic slings and if so, what type and thickness of plastic did you use. Will you be drilling the post holes? Sorry for all of the questions but I have a large plastic piece in the middle of my Spanish Eyes that I might be trying to reproduce and I would like to learn as much from the master as possible before tackling this type of project. The only problem is that I don't have a color printer.

Bottom line: Your repros look totally awesome.

#27 7 years ago
Quoted from illawarra92:

you guys in america don't know how good you have it!

It's good to be reminded of this. I never really think about what it would be like to search for pins a continent away.

Quoted from illawarra92:

have contacted peter and he is making reproduction cards for score-board at the moment..will let you know when there are done

Would love to see those! Please post back here publicly. You never know when it might help someone. Your first post in this thread is already evidence of that!

Quoted from Otaku:

That. Is. Amazing. Seriously, fantastic work!

Thanks, man. Much appreciated.

Quoted from Otaku:

I wonder what's up with those woodrail plastics. My woodrail plastics were so bad that nearly every single one fell to pieces in my hands when I took them off

fans.giffans.gif

Quoted from Otaku:

Ryan-Santa, I'd like a quick drawing of my poofy-haired self next to my Jive Time for Christmas.

diddy.gifdiddy.gif

Quoted from Otaku:

My GIFs don't work.

Sure they do. Just select "ORIGINAL SIZE" from the drop-down menu before uploading:

aniGif.jpganiGif.jpg

See?

tear.giftear.gif

Also, congrats on your new...

Quoted from Otaku:

...donator thing.

...proud o' you, Otaku.

Quoted from Pecos:

This is so cool.

Thanks, Pecos! Nice to see you around here. I owe you a lot of thanks for spotting my bumbling technical oversights and for finding me a project pin to tackle (once I tackle another project or two). Ha-ha!

Quoted from Pecos:

After all of the work you have been doing to learn how to restore Project Pins, you finally get the opportunity to use your artistic talents.

moment2.gifmoment2.gif

(Nobody ask me why Kristen Bell is my spirit animal this week. I don't know either.)

Quoted from Pecos:

Thank you for describing in detail how you performed each step...

You got it, man. Tryin' to pay it back a little after all the help I've received on the Pinside message boards.

Quoted from Pecos:

...and thanks to the two mystery Pinsiders who helped you out.

YAS!!! ...although I just heard back from one of them, who would prefer to remain anonymous. We'll see if I can publicly shame...er, I mean...NAME the other contributor to these plastics.

Quoted from Pecos:

Could you let us in on the special hardware and software you used to touch-up the red lipstick. Not all of us have magic pens that can do this!

Ha-ha! Like everything else, the magic pen is just a tool. It allows you to do things more efficiently, but not necessarily better. You've still gotta move your meat hooks in a way that looks like a lady-face. But let me try to answer your questions...

Hardware: As you saw and mentioned, for part of the coloring and correcting process I was using my Microsoft Surface Pro 4:

digiColor.jpgdigiColor.jpg

This is not a necessity. As a matter of fact, part of the time I was doing this on my desktop compy with a plain ole' mouse and sometimes I'm at the dining room table scratchin' it out with my son. I guess after drawing for so long I sort of forget how interchangeable these processes are to me and I just switch around to whatever "makes the most sense" to me at the moment. At the risk of boring the crowd, I guess I'll leave it at that for hardware. If you have more specific questions, I'm happy to answer them.

Software: I used Adobe Photoshop to composite, resize, and convert to non-reproductive blue before printing them out on bristol. When I scanned the inks back into the computer I used Photoshop, again, to threshold out all the greys and then digitally color. At least, that was true for the lady-plastics. The decorative plastics were created entirely in Adobe Illustrator, a vector art program.

As mentioned above, if I'm glossing over any part of your question, lemme know.

Quoted from Pecos:

How will the art be transferred to the actual plastic pieces?

I found a printer who is willing to give it a go.

Quoted from Pecos:

Will the printer do that for you directly onto the plastics or will you be using waterslide decal transparencies?

Direct to plastics.

Quoted from Pecos:

Have you already cut the plastic slings and if so, what type and thickness of plastic did you use.

Nope. I'm including vector cut marks that the printer will then use to, like...CNC (or something) the plastics out based on those coordinates. Will have to get back to you on thickness of plastic.

Quoted from Pecos:

Will you be drilling the post holes?

Not if I can help it. Also vector cut lines.

Quoted from Pecos:

Bottom line: Your repros look totally awesome.

Thank you muchly. I can't wait to see them printed!!! Speaking of which:

crops.jpgcrops.jpg

I just finalized the file and pushed the go button on the electronic mail machine. This and Pinball Magazine #4 have been my two Black Friday purchases.

I actually waited around a couple/few days before sending them off through the intertubes because my eye will usually spot something horrible about my drawing after that amount of time. Thankfully I gave myself some space for this to happen, because I ended up changing a few things about the right gal:

comp.jpgcomp.jpg

From the moment I posted her a few days back, something was bothering me about her. I finally came to the realization that her forehead was really kinda jutting out a lot more than I'd like it to. So, I revised that, as well as made her a little more smiley, gave her some lashes, and made her left eye a little less bulgy.

I'll be sure to report back when plastics arrive.

#28 7 years ago

Yes the shape of the red-head's head did not look right to me either (everything else looked perfect). But I didn't want to say anything, didn't want to be all critical and also was afraid you had sent it out already and it would be too late to change. Glad you changed it.

I read a number of different threads about making new plastics and as far as I can recall no one has printed directly to the plastic, it has been all decals. That will be great if it works!

I can't tell for sure but it looks like you are going to get all the printing done on full sheets and then doing the cutting and drilling?

#29 7 years ago

Looks great - one small thing I noticed is that for some reason her head extends with her hair, like a bump, sorry if it's too late. Looks like that how it was originally and doesn't look so bad at "normal" pinball-plastic viewing distance.

Screenshot_3743 (resized).pngScreenshot_3743 (resized).png

#30 7 years ago

http://www.pinballrebel.com/pinball/cards/

Gottlieb_Score-Board_instruction_cards.pdfGottlieb_Score-Board_instruction_cards.pdf

#31 7 years ago

Will the printer do that for you directly onto the plastics or will you be using waterslide decal transparencies?

Quoted from RyanClaytor:

Direct to plastics.

I'm looking forward to seeing the results. Be sure to tell your printer that there is a layer of white ink covering the artwork - at least there has been on every plastic piece that I remember handling.

Quoted from RyanClaytor:

At the risk of boring the crowd, I guess I'll leave it at that for hardware. If you have more specific questions, I'm happy to answer them.

Found this about the Microsoft Surface and Pro Pen:

https://www.microsoft.com/surface/en-us/support/hardware-and-drivers/the-surface-touchscreen?os=windows-10&=undefined#UseW10

"Use a pen with the touchscreen
The Pro Pen that’s included with Surface Pro and Surface Pro 2 is a digital pen that you can use to draw, sketch, and write notes by hand. For more info, see Using the Pro Pen.

Two Bluetooth®-enabled pens are designed to work with Surface 3, Surface Pro 3, Surface Pro 4, and Surface Book. Both of these pens are integrated with OneNote.

Surface Pen (Surface Pro 3 version) is included with Surface Pro 3, and you can buy it as an accessory for Surface 3, Surface Pro 4, or Surface Book. For more info, see Using Surface Pen.
Surface Pen (Surface Pro 4 version) is included with Surface Pro 4 and Surface Book, and you can buy it as an accessory for Surface Pro 3 or Surface 3. This pen has more features than the Pro 3 version. For more info, see Using Surface Pen (Surface Pro 4 version).
If you have a Surface 3, Surface Pro 3, Surface Pro 4, or Surface Book and want to use pressure sensitivity with graphics apps like Corel Draw and earlier versions of Photoshop, install the WinTab driver for Surface Pro 3 from Surface software, firmware, and drivers."

So, the Microsoft Surface has a touch-screen and a digital pen that allows you to make the pen 'magic.' Sorry for the technical interlude, it's the IT guy left in me that has to understand exactly how it works.

color_blocks (resized).pngcolor_blocks (resized).png

Is this necessary so the printer can get the correct color registration?

I will be needing a plastic for Spanish Eyes reproduced. Is your printer open for more work?

Thanks again for educating us art-illiterate plebians!

#32 7 years ago

So, there's another thing I've been working on in the background for the past couple weeks. Not sure I mentioned it, but this "Score Board" is my first woodrail purchase. Consequently, I was sort of at a loss when I went to turn this machine on. There was no toggle-switch under the cab beneath the right flipper (like every other pinball machine I own). So the seller showed me how I simply needed to plug it in and push the start button. However, with a 3-year-old son running around the house...

IMG_8097.jpgIMG_8097.jpg

...this will not do.

This machine also has a kick-off switch:

IMG_7820.jpgIMG_7820.jpg

...which, evidently is meant to be beaten from the bottom of the cab to turn off the machine.

uh.gifuh.gif

After 60 years of looking this good, I didn't want to be the owner that bashed it to pieces. So I set about making a toggle switch. I knew I wanted it recessed so that if the machine was set on the ground it wouldn't be mashed up into the cabinet. So I took a look at some of my other pins and based on some measurements I managed to make a 3D mock-up in Google Sketch-Up:

IMG_7879.pngIMG_7879.png

IMG_7877.pngIMG_7877.png

My thought was that I would take the piece of MDF I cut out from the bottom of the cab and simply glue/clamp it to the top of a piece of plywood. The former would have the smaller hole to receive the toggle switch and the latter would have the larger hole that you would see from the bottom of the cab.

I am not a wood-worker, but thankfully my department at the university where I teach has a tremendous shop guy who was willing to hold my hand through this portion.

IMG_7881.jpgIMG_7881.jpg

I'm really glad I had these 3D plans ready to show him, as it allowed us to get on the same page pretty quickly and understand what this weird thing was I wanted to make. He even suggested a slight modification of my design. Instead of gluing the MDF to the top of a piece of plywood, we could simply drill the larger hole part-way on one side, then flip the plywood over and drill the smaller hole through the other side. Then the upper, thinner, portion that receives the toggle switch would be made from the same wood as the rest of the unit and be stronger when all was said and done. Sounded great to me.

We couldn't find a piece of scrap plywood around the shop that was thick enough, so we decided I would simply glue together two thinner pieces:

IMG_7888.jpgIMG_7888.jpg

I grabbed a couple pieces of scrap matte board at home so I wouldn't mar the surface that we just cut. Here's what it looked like when finished.

Bottom:

IMG_7883.jpgIMG_7883.jpg

...and Top:

IMG_7882.jpgIMG_7882.jpg

In the above shot, you can see our in-house wood-worker even added a little bevel around the edges.

fancy.giffancy.gif

I did a quick test fitting with the toggle switch:

IMG_7889.jpgIMG_7889.jpg

...and it fit like a glove:

IMG_7890.jpgIMG_7890.jpg

SO PRETTY!!!

IMG_7891.jpgIMG_7891.jpg

Alright, alright, it's pretty. But was I able to make it work? Well...I got it installed in the bottom of the cab:

IMG_7899.jpgIMG_7899.jpg

...and wired the kick-off switch wires:

IMG_7895.jpgIMG_7895.jpg

...directly to the toggle switch:

IMG_8055.jpgIMG_8055.jpg

...thinking that it would perform the same function as an on/off switch.

Weeelll...it kinda did this:

weellll.gifweellll.gif

Enter my buddy, BingoPodcast. Thankfully he was around to talk me through this. To make a long story short, I had the switch wired to the wrong location. Instead of intercepting the kick-off switch, I needed to put the switch between the hot side of the outlet plug and the fuse:

IMG_8100.jpgIMG_8100.jpg

Same thing different angle (below you can see the wires tucked-back under the bottom board as they're routed up to the front of the cabinet to the toggle switch):

IMG_8099.jpgIMG_8099.jpg

Here's the lay of the cabinet now, with toggle switch in the front-right with wires running back to the back-right. You can also see the kick-off switch is wired back were it was originally:

IMG_8098.jpgIMG_8098.jpg

...and now I have a toggle switch, a consistent way to turn on my machines, and most importantly a safer game (without a dangling plug):

IMG_8070.jpgIMG_8070.jpg

Woo-hoo!!

#33 7 years ago
Quoted from RyanClaytor:

There was no toggle-switch under the cab beneath the right flipper (like every other pinball machine I own).

Well, you are just a wealth of information today Mr. Claytor. Bravo!!

Both of my 1964 Williams Moulin Rouge and Stop 'N' Go will be needing this mod. The Stop 'N' Go had a thumb wheel/switch added in-line to the power cord but your solution is so much more elegant. Another item to add to my to-do list!

Thanks for documenting and sharing this. You've even include the plans and dimensions. How professional!

#34 7 years ago
Quoted from xsvtoys:

Yes the shape of the red-head's head did not look right to me either (everything else looked perfect). But I didn't want to say anything, didn't want to be all critical and also was afraid you had sent it out already and it would be too late to change. Glad you changed it.

Heh. Thanks, XSV. I understand the resistance to mentioning something like this. It's hard to know someone's interest in feedback in a public forum. I should have stated this more clearly in my first re-art-ing post, but part of the reason I posted these images was to get some critical feedback before sending it to print. Anyhow, next time feel free to chime-in.

Quoted from xsvtoys:

I read a number of different threads about making new plastics and as far as I can recall no one has printed directly to the plastic, it has been all decals. That will be great if it works!

crossed.gifcrossed.gif

Quoted from xsvtoys:

I can't tell for sure but it looks like you are going to get all the printing done on full sheets and then doing the cutting and drilling?

Yes. The printer/cutter machine will be doing the cutting for me. It should cut the outer edges and the interior holes for the screws.

Neato! Thanks for posting here.

Quoted from Pecos:

Be sure to tell your printer that there is a layer of white ink covering the artwork

Done!

Quoted from Pecos:

So, the Microsoft Surface has a touch-screen and a digital pen that allows you to make the pen 'magic.'

Uhm...yes. If by "magic" you mean "pressure sensitive." Pressure sensitivity basically means that the harder you press with the stylus (or the "magic pen"), the larger or darker the mark it will make.

Quoted from Pecos:

color_blocks (resized).png

Is this necessary so the printer can get the correct color registration?

Nope. There are things called registration marks that allows the printer to more accurately line-up each of the separate colors of the printing process...

registration.pngregistration.png

...but mine are not registration marks. My boxes are simply me printing a number of different color swatches so that if I decide to print again in the future, I'll have an idea of how the mixed colors will look when printed. (Most of the time, colors print differently that a screen displays them.)

Quoted from Pecos:

Is your printer open for more work?

I'm honestly not sure yet, but I'll see how things turn out with the plastics and then have a conversation with said printer.

Quoted from Pecos:

Thanks again for educating us art-illiterate plebians!

pleasure.gifpleasure.gif

It's the least I can do.

#35 7 years ago

I feel your pain! I once had a Williams Big Chief from 1965 that turned on by hitting the flippers and turned off by kicking the bottom. I really could not wrap my mind around that so I attempted to fix it by installing a regular switch as you did. I was not so smart at that point in my pinball life and never got it working. I sold the machine before I ever got it resolved. On the other hand, I can do this!

IMG_5864 (resized).JPGIMG_5864 (resized).JPG

#36 7 years ago

The talk about the registration marks has me confused now. Is the artwork going on as digital printing or process printing? I would have to think it must be some form of digital printing for a one-off project like this. Maybe done on a fancy high-end inkjet machine, not sure if laser would work on plastic.

#37 7 years ago

Nice job on the mod, I was reluctantly waiting for you to cut a hole in the bottom of the cabinet and was pleasantly surprised when we got to your mounting method.

I still would recommend using power strips to cut all power to your games, but that's just me. This one looks safe, but who knows about those other "factory" switches - and on some machines, even with the switch off power, flows through a large portion of the game surprisingly - it needs the service outlet powered, which requires it to go through the line filter... then the fuse block... then some more wiring...

I don't know if I could sleep peacefully at night leaving them "HOT" like that especially with a kid in the house, but maybe that's just me!

At my place everything is on a power strips - no matter how new, 1955 to 1985 - and they of course all get switched off by the power strip when finished (and usually the game power switches are left on for when I turn them back on, my personal preference). Even then, during long vacations or leaves from my house, the power strips (4) all get unplugged from the wall. Perhaps a bit much, but that little effort goes a long way and can save everything (including people!) you love at your house (seriously) in the extra 5 minutes it takes to unplug everything, or when staying at home and just heading out for the day (or when you're done playing), just the extra one or two minutes (or less!) to cut all power with the switch on the power strip.

Up to you, but I would recommend it! (Your power switch would not be in vain, still great and very helpful to have the individual switches too on a game-to-game basis)

Great job my friend!

#38 7 years ago

Ryan beautiful work and super tutorial and topic.

The plastics; '10 points when lit' signs the girls have were borrowed on the Slick Chick PF by the bunny girls. If you have not made them yet take another look at the S. Both ends are cropped at an angle not straight. Your upper end was still straight. Hope this makes sense.

Minor anal observation hope you don't mind.

#39 7 years ago
Quoted from Mk1Mod0:

I can do this!

drool.gifdrool.gif

Quoted from xsvtoys:

Is the artwork going on as digital printing or process printing?

Digital.

Quoted from xsvtoys:

The talk about the registration marks has me confused now.

Quoted from RyanClaytor:

mine are not registration marks.

Then...

Quoted from Otaku:

Nice job on the mod

Gracias.

Quoted from Otaku:

I was reluctantly waiting for you to cut a hole in the bottom of the cabinet...

Oh, that definitely happened. ...with my trusty Swiss Army knife:

IMG_7876 (resized).jpgIMG_7876 (resized).jpg

Now it looks like this after some filing:

IMG_8070 (resized).jpgIMG_8070 (resized).jpg

I wasn't too busted up about it because the bottom piece of MDF already had some holes kicked in it (someone trying to turn off the machine? ) :

IMG_7899 (resized).jpgIMG_7899 (resized).jpg

Quoted from Otaku:

I still would recommend using power strips

That option was recommended to me. I'm a slave to consistency and dug my heals in about it. I also chat about it with my wife and ultimately we decided that it would be nice to turn on just one game at a time if we wanted to.

Quoted from SteveinTexas:

Ryan beautiful work and super tutorial and topic.

Thanks, Steve.

Quoted from SteveinTexas:

The plastics; '10 points when lit' signs the girls have were borrowed on the Slick Chick PF by the bunny girls.

Huh! Interesting tid-bit. Both Parker artwork, if I remember correctly. (Too lazy to IPDB-it right now.)

vaycaydays.gifvaycaydays.gif

Quoted from SteveinTexas:

take another look at the S. Both ends are cropped at an angle not straight. Your upper end was still straight.

Huh...now you have me interested.

WARNING TO ALL REASONABLE-MINDED FOLKS!!! Minutia alert!!!

Alright, Steve, let's take a look at this.

My left "S":

LeftS (resized).jpgLeftS (resized).jpg

Original left S #1:

LeftS01 (resized).jpgLeftS01 (resized).jpg

Original left S #2:

LeftS02 (resized).jpgLeftS02 (resized).jpg

My right "S":

RightS (resized).jpgRightS (resized).jpg

Original right S #1:

RightS01 (resized).jpgRightS01 (resized).jpg

Original right S #2:

RightS02 (resized).jpgRightS02 (resized).jpg

Alright. I've come to the conclusion that you're a bunch of correct. That upper angle of my "S"s could use some honing. When I printed this in blueline, though (based off of plastic #1), it looked like this:

blueS.jpgblueS.jpg

Much more straight, but quite likely due to my...

Quoted from RyanClaytor:

un-warp[ing] the plastics in Photoshop

However, as you suspected, I have already...

I promised my printer I'd send them the files by this week...so Black Friday was the last day to do that. However, this is another reminder (TO ME) to be more explicit with the type of feedback I'm interested in. Had I received this observation before today, I certainly would have made the change. (My fault, not yours.) As it stands, I'll try to make peace with my perfectionism. Really appreciate you taking such a close look at my work, Steve!

Sincerely,
Ryan

#40 7 years ago

Ryan,

Here are the bunny girls with the same signs, not the prettiest picture but original (before i fixed them up a bit).

DSC05141 (resized).JPGDSC05141 (resized).JPG

#41 7 years ago
Quoted from RyanClaytor:

WARNING TO ALL REASONABLE-MINDED FOLKS!!! Minutia alert!!!

snoring (resized).pngsnoring (resized).png

Oh fer cryin' out... now you've got me doing it!

#42 7 years ago

Its OK panic is over. We fixed it in Acrylic its all good now!

#43 7 years ago

Once you go into the world of typography you fall deep into the arena of obsessive attention to minutia in text shape, kerning, etc. So as long as you are going to obsess about the shapes of the end points of the S, I'll throw out something I also noticed before. This may have been intentional like the incorporation of the wave shape of the banner int the text, which was a great mod.

"10" looks great as a match.

"POINTS" looks great.

"WHEN LIT" however is a bit off. The letters are taller than the original. It should be easy to see if you look for it. Possibly intentional to make it more visible?

BD156FFB-25F1-495D-AED7-0FD78C806EC2-435-000000375815D3F7_tmp (resized).pngBD156FFB-25F1-495D-AED7-0FD78C806EC2-435-000000375815D3F7_tmp (resized).png

#44 7 years ago
Quoted from Pecos:

Be sure to tell your printer that there is a layer of white ink covering the artwork - at least there has been on every plastic piece that I remember handling.

Ryan, I've been thinking about this and since neither I nor probably the printer has any idea what type of white ink was used on the plastics during that period so please proceed with caution!

I can't tell from the pics, but do your original plastics have a coating of white ink over the artwork? I don't know what 'standard procedure' was in the age of the dinosaurs; I was born in that era so I guess that makes me a dinosaur too! Anyway, best to go with what was commonplace for the time if only for authenticity's sake.

If you want to go with the white ink it might be a really good idea to experiment with some scrap plastic first to see what kind of opacity/transparency you get before inking up the artwork. You certainly don't want to block all or most of the light getting to that beautiful artwork or yours! You are blazing new trails and that is never as easy as it seems at first glance but I'm rooting for you!

#45 7 years ago
Quoted from SteveinTexas:

Ryan,
Here are the bunny girls with the same signs

Thank you for taking the time to do my research for me, SteveInTexas. Much appreciated.

Wait...SteveInTexas? Slick Chick? It's all coming together now! I just found your thread on your Slick Chick playfield restore a few days ago! Really great work! I'm probably about 3 days behind on your updates, but really great work from what I saw. Just popped over there real quick and it looks like you may have finished(!??!). Can't wait to take my time with the rest of your updates.

Quoted from Mk1Mod0:

Oh fer cryin' out... now you've got me doing it!

batman.gifbatman.gif

Quoted from xsvtoys:

"WHEN LIT" however is a bit off. The letters are taller than the original.

Agreed, and as you suspected, it was...

Quoted from xsvtoys:

...intentional [due to] the incorporation of the wave shape of the banner into the text.

On the original plastic, there was just this huge gap of white space under the word "lit." Now, to my eye anyway, it looks more like the text is curving with the undulations of the big sheet of paper the gal is holding.

Anyhow, here's the image of the bluelines with new curvilinear baselines and cap lines. Maybe that will better illustrate my intention (the blue-line pencils) on top of the original (solid blue printed shapes):

blueline.jpgblueline.jpg

I did my best to make those curved lines get progressively more and more curved the closer they got to the bottom of the sign (transitioning from the straight top of the page/sign to the curved bottom edge).

Quoted from Pecos:

I can't tell from the pics, but do your original plastics have a coating of white ink over the artwork?

Yup. It's all crackly and bacon-ized, but there's some white back there. Also, there would have to be to make that white sign that she's holding.

Quoted from Pecos:

I'm rooting for you!

thankyou.gifthankyou.gif

#46 7 years ago

All of the text looks great as you did it!

It will be interesting to see how this all plays out with the printing. It takes some specialized equipment and possibly a bit of expertise and/or artistic talent to be able to get white down when using digital printing.

#47 7 years ago
Quoted from xsvtoys:

All of the text looks great as you did it!

Thanks, XSV.

Quoted from xsvtoys:

It will be interesting to see how this all plays out with the printing.

Me too! Ha-ha!

Also...

Quoted from Pecos:

I can't tell from the pics, but do your original plastics have a coating of white ink over the artwork?

Quoted from RyanClaytor:

Yup. It's all crackly and bacon-ized, but there's some white back there. Also, there would have to be to make that white sign that she's holding.

IMG_8186 (resized).jpgIMG_8186 (resized).jpgIMG_8183 (resized).jpgIMG_8183 (resized).jpgIMG_8185 (resized).jpgIMG_8185 (resized).jpg

At least, I'm pretty sure that's white. Ha-ha! (Finally got a chance to shoot these close-up for ya.) I'm definitely including the white on the back of my print, anyway.

layers (resized).jpglayers (resized).jpg

#48 7 years ago

A quick aside as I'm waiting for plastics from the printer; I've been workin' on a little sumpthin' in the background:

https://pinside.com/pinball/forum/topic/the-pinball-podcast-100th-episode-anniversary-commemorative-artwork

2 weeks later
#49 7 years ago

Things arrived:

AllPlasticsComp (resized).jpgAllPlasticsComp (resized).jpg

I am VERY happy:

RightDecorativeComp (resized).jpgRightDecorativeComp (resized).jpgLeftDecorativeComp (resized).jpgLeftDecorativeComp (resized).jpgLeftLadyComp (resized).jpgLeftLadyComp (resized).jpgRightLadyComp (resized).jpgRightLadyComp (resized).jpg

Illuminated comparisons:

LeftDecorativeCompIllustrated (resized).jpgLeftDecorativeCompIllustrated (resized).jpgRightDecorativeCompIlluminated (resized).jpgRightDecorativeCompIlluminated (resized).jpgLeftLadyCompIlluminated (resized).jpgLeftLadyCompIlluminated (resized).jpgRightLadyCompIlluminated (resized).jpgRightLadyCompIlluminated (resized).jpg

They're not screen-printed, but they're about a million times better than what I had.

Here's one final crispy comparison:

CrispyCompIlluminated (resized).jpgCrispyCompIlluminated (resized).jpg

Woo!

jazz-1.gifjazz-1.gif

#50 7 years ago

Wow, I got nothin' I can even say to that. I mean, seriously, that is as awesome as...well, this:

AwesomeStarWars-1 (resized).jpgAwesomeStarWars-1 (resized).jpg

There are 69 posts in this topic. You are on page 1 of 2.

Reply

Wanna join the discussion? Please sign in to reply to this topic.

Hey there! Welcome to Pinside!

Donate to Pinside

Great to see you're enjoying Pinside! Did you know Pinside is able to run without any 3rd-party banners or ads, thanks to the support from our visitors? Please consider a donation to Pinside and get anext to your username to show for it! Or better yet, subscribe to Pinside+!


This page was printed from https://pinside.com/pinball/forum/topic/1956-gottlieb-score-board-pick-up and we tried optimising it for printing. Some page elements may have been deliberately hidden.

Scan the QR code on the left to jump to the URL this document was printed from.