(Topic ID: 336664)

White Water / WH2O - Scratch Build

By MiniPinHead

11 months ago


Topic Heartbeat

Topic Stats

You

Linked Games

Topic Gallery

View topic image gallery

IMG_7232 (resized).jpeg
IMG_7228 (resized).jpeg
IMG_7224 (resized).jpeg
IMG_7220 (resized).jpeg
IMG_7222 (resized).jpeg
White Water 12-7043 Wire.pdf (PDF preview)
IMG_6682-ezgif.com-optimize.gif
IMG_6681 (resized).jpeg
IMG_6458 (resized).jpeg
IMG_6456 (resized).jpeg
IMG_6453 (resized).jpeg
IMG_6443-ezgif.com-optimize.gif
IMG_6437 (resized).jpeg
IMG_6436 (resized).jpeg
IMG_6438 (resized).jpeg
IMG_6376-ezgif.com-video-to-gif-converter.gif
There are 448 posts in this topic. You are on page 9 of 9.
#401 67 days ago
Quoted from bballfan:

Mezel mods has a 3d target splint for shifting targets.
https://mezelmods.com/products/williams-target-splint
You could also:
1)Try to tighten the rivets with a press or hammer and punch.
2)Rig it with a zip tie
3)Remove 1 or both rivets and use a 5-40 screw and nut so you can tighten it easily.

Thank you!

I don't think #1 would work, as the rivets are very snug already, and then already tried #2 (no bueno). #3 is where I'm leaning, but just need to take the time to do that. A nut with teeth could help, and increase the surface area being tightened

Thanks again

#402 67 days ago

What does the call out say @the 14 second mark???

#403 67 days ago
Quoted from mollyspub:

What does the call out say @the 14 second mark???

Multi millions

#404 67 days ago
Quoted from mollyspub:

What does the call out say @the 14 second mark???

Multi-MillionsMulti-Millions

Quoted from Iamthelaw:

Multi millions

Thank you

Added Mylar to the out lane sections of the apron because totally forgot to do that.

Prepped

PreppedPrepped

Right side

RightRight

Left side

LeftLeft

The ball hadn’t left any marks in the clear coat at all, yet, but don’t want that to possibly eventually happen.

#405 67 days ago

That baby is protected. Unless you're putting her on location, I feel pretty confident she's going to look like a gem for lifetimes to come.

#406 67 days ago
Quoted from MiniPinHead:

[quoted image]

Thank you
Added Mylar to the out lane sections of the apron because totally forgot to do that.
Prepped
[quoted image]
Right side
[quoted image]
Left side
[quoted image]
The ball hadn’t left any marks in the clear coat at all, yet, but don’t want that to possibly eventually happen.

Thank you . I don’t own this title ( it’s on my wishlist) so I’m not too familiar with it. I have however played it on location a handful of times.
Love this thread and look forward to your updates!

#407 67 days ago
Quoted from Kneissl:

That baby is protected. Unless you're putting her on location, I feel pretty confident she's going to look like a gem for lifetimes to come.

Thank you! Wouldn’t know the first thing about putting anything on location, but sounds like a job for Stern Pros

Quoted from mollyspub:

Thank you . I don’t own this title ( it’s on my wishlist) so I’m not too familiar with it. I have however played it on location a handful of times.
Love this tread and look forward to your updates!

It’s definitely a great game and a lot of fun. You have good taste

I have a hard time remembering gameplay rules, so figured the pic would be useful to reference the call out.

#408 66 days ago
Quoted from MiniPinHead:

Still looking forward to finishing off this build with your PCBs that are in progress

They are in the pending board fabrication list.

#409 61 days ago
Quoted from DumbAss:

They are in the pending board fabrication list.

This is great news! Thank you

The AE-26-1200 coil on the Whirlpool / Lost Mine popper was sending balls down the middle, despite flippers being held or not. Funny how perfectly consistent it did it. Nudging was necessary, which I'm not a fan of requiring. Decided to lower the coil power even more and went with an AE-26-1500.

AE-26-1500AE-26-1500

Now the ball gets sent out consistently hitting the left flipper, if held, or sometimes the right flipper if not held. Pretty sure an AE-27-1200 would also work, but already not concerned about playfield wear with the lower powered AE-26-1500 and no sense in seeing if the 27-1200 would end up hitting the left sling or not. The mechanism is completely new, so maybe over the years a 27-1200 could become too weak regardless.

First test with AE-26-1500

Test 1 AE-26-1500Test 1 AE-26-1500

Second test with AE-26-1500

Test 2 AE-26-1500Test 2 AE-26-1500

Did several games always purposely hitting the Whirlpool, and the popper consistently serves up the left flipper with an AE-26-1500. Might not be the most intense, but the popper can still send the ball down the middle if not paying attention, so the Whirlpool risk is there. The playfield definitely won't be getting worn in that typical spot

Earlier post mentioning the popper mechanism edited with what coil actually worked. See https://pinside.com/pinball/forum/topic/white-water-wh2o-scratch-build/page/3#post-7692705

#410 61 days ago

Can you angle the mech towards the right flipper more? my game will hit the right flipper, quickly. If you hold it up, it'll shoot up the inlane, even rarely it'll hit extra ball.. You must drop catch to maintain control.
Also, my coil for the mine kickout is an 800

#411 61 days ago
Quoted from Kneissl:

Can you angle the mech towards the right flipper more? my game will hit the right flipper, quickly. If you hold it up, it'll shoot up the inlane, even rarely it'll hit extra ball.. You must drop catch to maintain control.
Also, my coil for the mine kickout is an 800

The popper is snug in place and was perfectly squared away inside the cutout hole. I suppose it's possible the hole wasn't oriented correctly when cut, but zero reason to doubt that as everything else has lined up so well. There might have been some wiggle room, or play, in the assembly, but not much at all when installed Utilized the dimples and didn't look back

Purposely avoided the stock AE-23-800 because haven't seen a used WH2O playfield where outside the popper wasn't worn, so prioritized lowering the coil power. An AE-23-800 would hit the right flipper no problem, but very happy with the 26-1500 used.

#412 61 days ago

Cool cool.
Just noticed the blue flasher over the mine.. I like the changeup.

#414 58 days ago

So.. what’s the next project?

#415 58 days ago

Quoted from Kneissl:

So.. what’s the next project?

IJ3IJ3

But seriously, I need a full day to take off the mini playfield in WH2O and get at the coil stop for the Bigfoot diverter log and sand it down 1/4”. Probably only takes a couple hours, but don’t want the game out of commission if don’t finish in one stretch. It gets a healthy amount of use. As a temporary fix put some foam on the diverter and have the game playing 100% consistently right now.

Enjoying the game immensely, but feel like posting a video of it right now would be cheating

There’s also some metal that needs to be put into it and some PCBs in the works. Will get that solid gameplay video up after the diverter is corrected

As a side project, getting together a backbox insert panel for someone who had a No Fear panel in their WH2O

LicensedLicensed

PanelPanel

This seller is legit!

ebay.com link: itm

Jealous my WH2O won’t have the game logo, haha

#416 58 days ago

Hey that is going to be a really great light panel!

#417 58 days ago
Quoted from MiniPinHead:

Purposely avoided the stock AE-23-800 because haven't seen a used WH2O playfield where outside the popper wasn't worn, so prioritized lowering the coil power. An AE-23-800 would hit the right flipper no problem, but very happy with the 26-1500 used.

That is why you would put a piece of mylar down. The problem I see with your kickout is that it's probably going to send balls SDTM if that left flipper isn't raised.

Rob

#418 58 days ago
Quoted from MiniPinHead:

[quoted image]
As a side project, getting together a backbox insert panel for someone who had a No Fear panel in their WH2O

Jealous my WH2O won’t have the game logo, haha

Dang that's nice, going by that i'm sure mine is from another game as well. Anyone know what it is?

IMG_5539 (resized).jpegIMG_5539 (resized).jpeg
#419 58 days ago
Quoted from Rob_G:

That is why you would put a piece of mylar down. The problem I see with your kickout is that it's probably going to send balls SDTM if that left flipper isn't raised.
Rob

You are correct. It’s slow enough that you see it coming, though. I’m sure you can live catch it, but if you just hold the left flipper the ball will bounce to the right flipper. Sometimes it goes right directly from the popper. Honestly, now am curious about trying to bat it and live catch it…

First impressions with 26-1500 are am loving the intricacies. The risk of it going SDTM seem to be outweighed by how nicely it’s dished out, and how the playfield doesn’t take a beating (mylar also laid down).

Quoted from Kneissl:

Dang that's nice, going by that i'm sure mine is from another game as well. Anyone know what it is?
[quoted image]

Well, it’s not a No Fear

#420 58 days ago

I don’t understand how there are multiple WH20’s with wrong light boards? What’s going on?

#421 57 days ago

Brought back from the grave. Sometimes you get a little Frankenstein. If your Frank doesn’t have a left arm you dig one up.

#422 57 days ago
Quoted from Kneissl:

Brought back from the grave. Sometimes you get a little Frankenstein. If your Frank doesn’t have a left arm you dig one up.

You have an Indy 500 in your WH2O. That's like getting the left arm from the pet cemetery

ebay.com link: itm

#423 57 days ago

hah good eye,

Quoted from MiniPinHead:

You have an Indy 500 in your WH2O. That's like getting the left arm from the pet cemetery
ebay.com link: itm

Same designer, same decade.. not that far off

1 week later
#424 48 days ago

Removed the upper playfield assembly to get at the Bigfoot diverter coil stop

RemovedRemoved

UpperUpper

This is the part that all the fuss was about

Coil StopCoil Stop

From here

CoilCoil

Leaving the 1/2” coil stop wasn’t a good idea, as it needed to be 1/4” but had wanted to avoid grinding down the coil stop because was worried about rusting.

Taped off what was to remain

MeasuredMeasured

Grinding away

GrindingGrinding

Realized marking what needed to be ground away was easier than leaving tape in place. The tape helped create a great guideline, though.

MarkerMarker

Things kept getting hot, so used a wrench and electrical tape to get it done

Tape and WrenchTape and Wrench

Done

DoneDone

and Doneand Done

Again, this is using a # B-13488 to make a # 01-10892.

End result looks good, length is correct, and diverter log moves much farther out than before. The stop’s metal core was solid at least through where was ground, so actually have no rusting concerns

Taking the opportunity of the game semi-disassembled to wax, correct mylar, and adjust some switches.

#425 43 days ago

Changed the flipper bats to stock with the Williams logo. Like the white and blue complementing the playfield. Still using the lesser coil power and Precision bushings.

FlippersFlippers

Mini PF reinstalled. Awaiting some Mantis parts to use stock switches for the Bigfoot ramp (double gate at entrance and overhanging switch bracket). The ball likes to ride the sides of the Bigfoot ramp, so need the stock setup to capture 100% of the ball movement 100% of the time.

MiniMini

Grabbed this piece from Pinball Decals to protect the topside switch on the Bigfoot ramp: https://www.pinballdecals.com/PartsByGamePages/WhiteWater_Page.html

ProtectorProtector

Had a couple balls get hung up in the whirlpool eject when entered from the Lost Mine. Cut the 384. # 02-4672 armature & extension to be a little shorter: 3-1/4”

Prior to the additional shortening

PriorPrior

After

AfterAfter

Installed

InstalledInstalled

Oriented the coil a different direction. The teeth of the cup don’t have a chance of interfering with the opto switch anymore, which had been a concern prior. This was just due to how the coil rested between the brackets.

CupCup

The alignment of the armature and cup are important in the mech, so the cup doesn’t catch on the side of the housing.

Realized that the spring that was used in the 1292. # B-9362-R-3 coil & bracket assembly AE-26-1200 was not strong enough for what it was doing. Sometimes balls would take two hits to enter the shooter lane. One of the 1534. # 10-128 kicker springs (3) was supposed to go here, but might have had a bad one. This worked well: https://www.pinballlife.com/10-128

Mirco dimples worked just fine. Install always looked correct.

InstalledInstalled

10-128 Spring

SpringSpring

Compressed. Much more powerful than the spring I had there prior.

CompressedCompressed

That fixed the issue, but also cheated and used just a tick of 3-in-1 oil just to make sure the mech was moving smooth.

Due to the 10-128 spring in the coil bracket assembly being weak, will check the slings.

#426 37 days ago

As part of the continued troubleshooting and correcting, fixed the Bigfoot diverter via the grinding of the 1/2” coil stop down to the stock 1/4”

Worked perfectly and makes you love that grin even more

IMG_6374-ezgif.com-optimize.gifIMG_6374-ezgif.com-optimize.gif
#427 37 days ago

Awesome Dude! Love the Grin, the movement and the White and Blue Flippers.

#428 36 days ago
Quoted from Tophervette:

Awesome Dude! Love the Grin, the movement and the White and Blue Flippers.

Thank you! The white, stock bats just made too much sense with the white of the water splashing against the raft and the white of the upper playfield river. The blue rubbers go well with the blue of the playfield and theme.

Received the Mantis metal switch-mounting brackets. Two will get installed and two will be stored. The double gate will only be half-used, as the MRS for the Insanity Falls ramp reads the ball 100% since the neck of the ramp is narrow after the entrance.

MantisMantis

MetalMetal

Mounting holes look good. Screws went in at a slight angle but then rested flat after straightening out during install.

MountingMounting

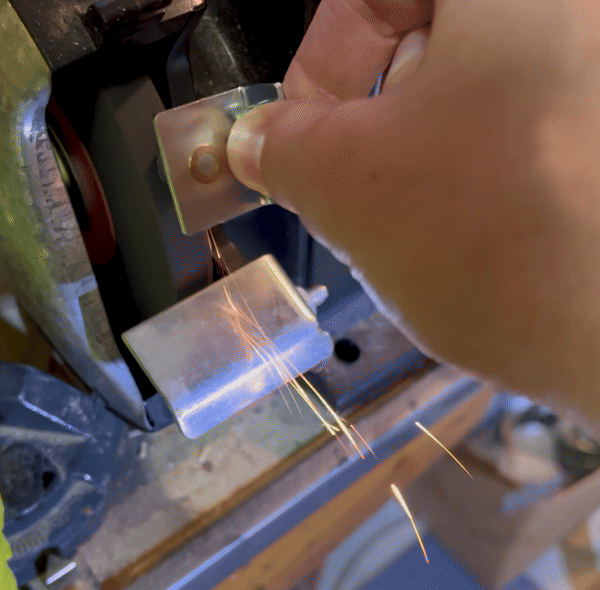
Switched out the Bluffs / Canyon Ramp "Main" MRS and added in the 842. # 01-9476-2 Switch Bracket, 843. # 5647-12693-21 mini sub-micro switch, and subsequent parts to have the stock, physical switch so the ball movement will be read 100% of the time there. This is seen in the previous Bigfoot diverter GIF triggering the log movement. Also, added in the Pinball Decals plastic protector to keep the ball down and protect the new switch.

Plastic 1Plastic 1

This piece needed some minor adjusting on the position of the screw holes

Plastic 2Plastic 2

Mounted the protector above the stock plastic (no sense in deterring the ball from getting a little air at the turn in the ramp)

PlasticPlastic

Switch moves freely and tested with a ball before finalizing the install

SwitchSwitch

MRS was nice, but this is how it has to be for this switch

DoneDone

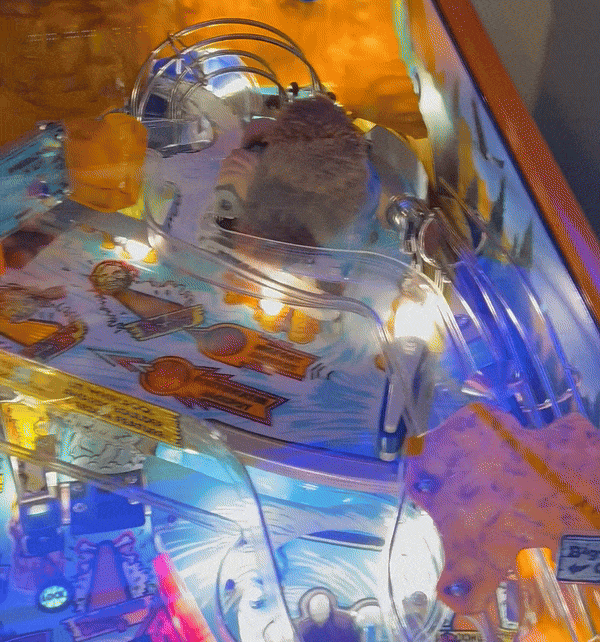
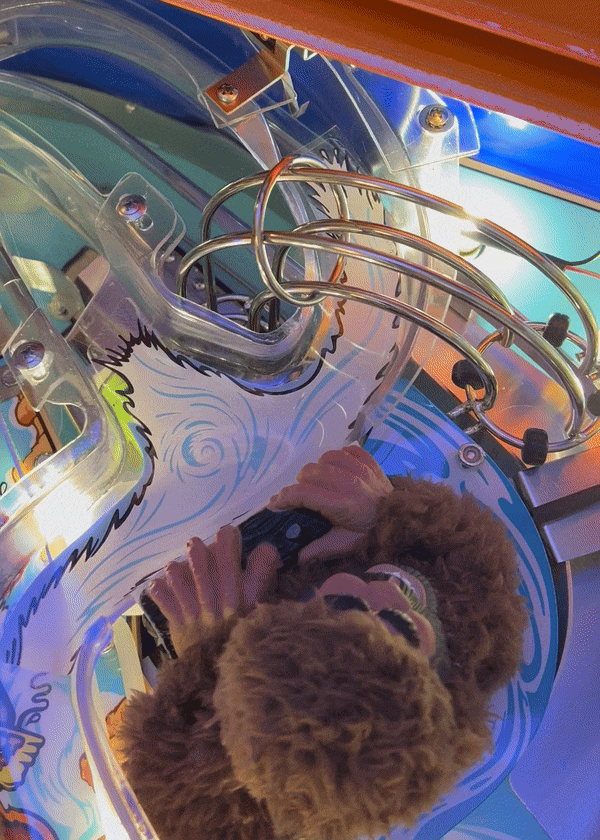
Insanity Falls / Rapids "Entrance" with the double gate installed on the mini playfield, but still using the MRS

EntranceEntrance

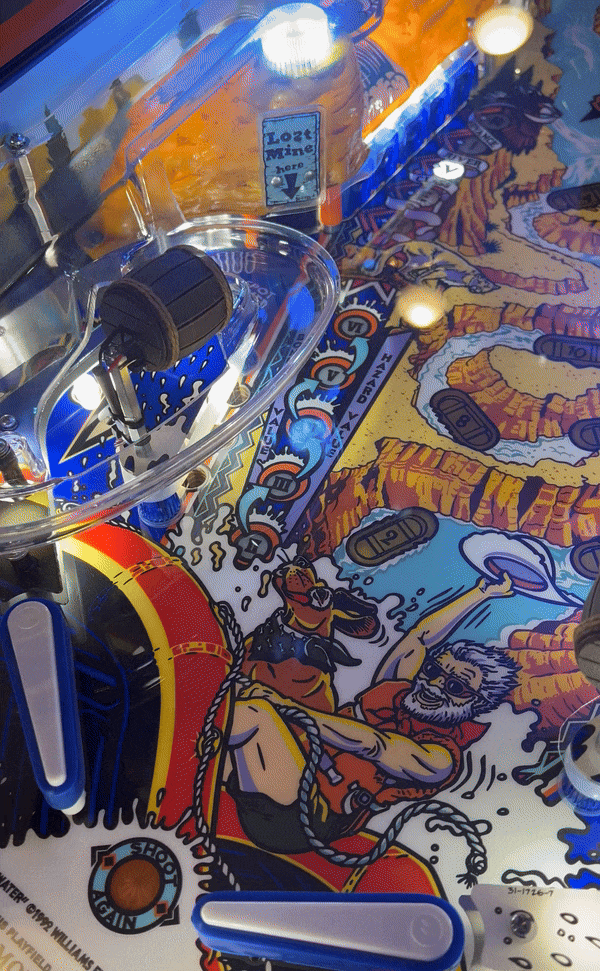
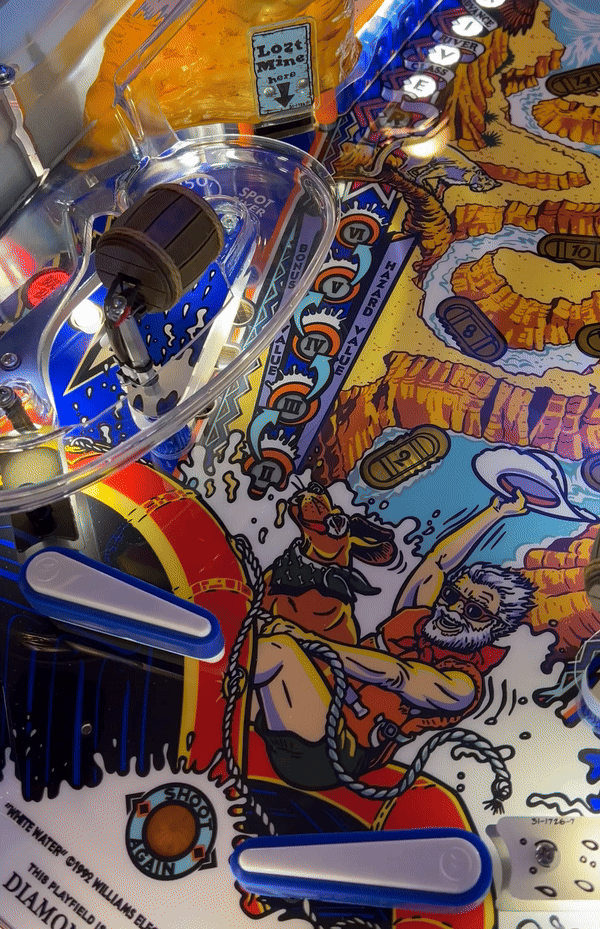
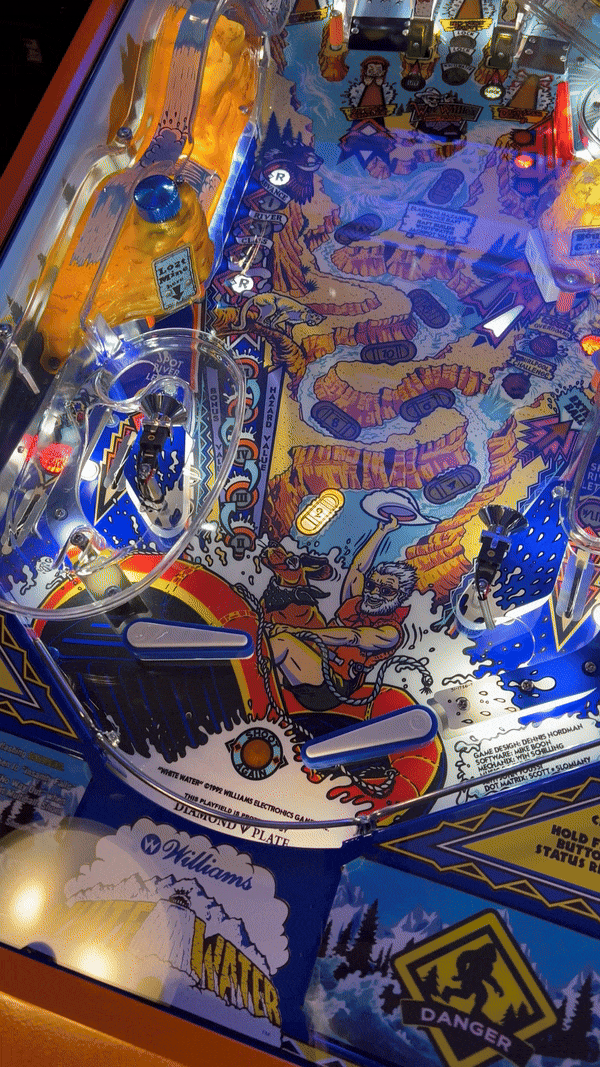
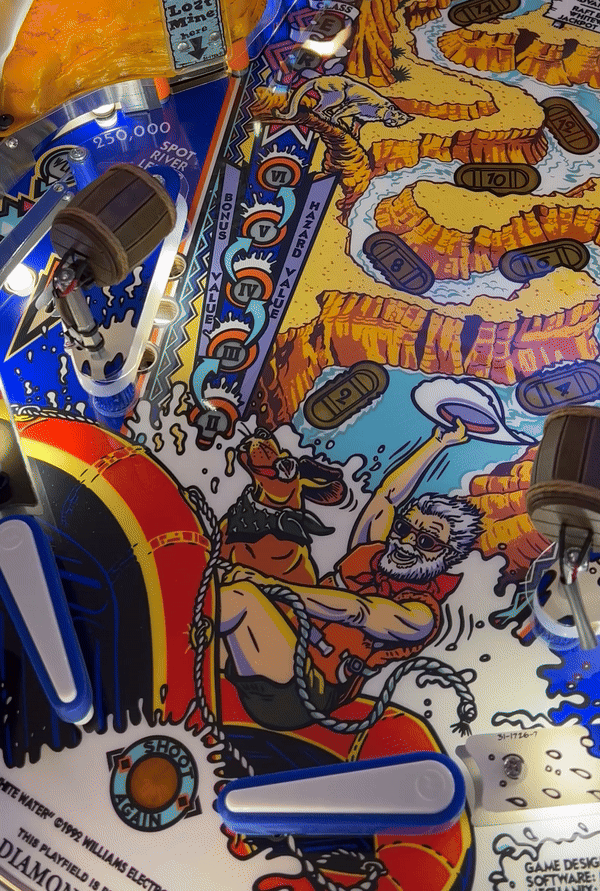
The Bluffs / Canyon Ramp "Entrance" switch just needs the gate wire form (in transit) for it to be finished, and then the switches are all done. The switch is necessary to trigger the Bigfoot diverter, as the ball can whiz under the Canyon Main switch and beat Bigfoot moving the log. Both switches on the Canyon ramp trigger the diverter movement, which is needed for the ball to be properly guided.

Here is another good lesson learned - the sunlight-colored light strips from Comet match their frosted sunlight bulbs only if the light strip is clear and not frosted.

Frosted Sunlight

Frosted SunlightFrosted Sunlight

Clear Sunlight

Clear SunlightClear Sunlight

Comet, with their great customer service, helped make this correction

#429 36 days ago

Still can’t nail down the right whirlpool eject coil, so amassed some backup coils for testing

CoilsCoils

Realized am missing a 24-900 that could be useful:
https://www.pinballlife.com/williamsbally-ae-24-900-coil.html

The issue is sometimes the ball backspins and sometimes it doesn’t. Also, sometimes fresh wax changes how the ball rolls. Am fearful stock is correct, and need to get the ball shooting out to the right flipper, because these next two scenarios happen with the same coil:

IMG_6371-ezgif.com-video-to-gif-converter.gifIMG_6371-ezgif.com-video-to-gif-converter.gifIMG_6376-ezgif.com-video-to-gif-converter.gifIMG_6376-ezgif.com-video-to-gif-converter.gif
#430 36 days ago

Man this is looking awesome! I look forward to when I can start mine. I’ll definitely be returning to all of this amazing info when it’s time. But for now, I’m up to my ears in TOTAN.

#431 36 days ago
Quoted from jazc4:

Man this is looking awesome! I look forward to when I can start mine. I’ll definitely be returning to all of this amazing info when it’s time. But for now, I’m up to my ears in TOTAN.

He needs to change the Mini to Mega in his handle. MegaPinHead.. would a mini pinhead keep the full range of coil winds on hand?

#432 35 days ago
Quoted from jazc4:

Man this is looking awesome! I look forward to when I can start mine. I’ll definitely be returning to all of this amazing info when it’s time. But for now, I’m up to my ears in TOTAN.

I’ll be closely following your build, too

Quoted from Kneissl:

He needs to change the Mini to Mega in his handle. MegaPinHead.. would a mini pinhead keep the full range of coil winds on hand?

Haha! You’re too kind

AE-25-1000 hits the bottom of the boulder by the Lost Mine sign, which is protected in this build. Still didn’t like the ball always hitting the protector, so that coil is out. Safe to assume AE-23-800 is the same. And AE-26-1200 was actually doing the same, but didn’t realize it until today.

Durability is a goal in this build, so these coils are out. Can’t have them hitting the edge of the boulder/mountain plastic.

Coils 1Coils 1

AE-26-1500 could work, but it’s the one that was giving trouble with the ball going to both flippers

Coils 2Coils 2

Went with an AE1-27-1200 and the ball actually hits the right flipper without fail

Coils 3Coils 3

Full disclosure, the coil brackets of the whirlpool eject really need to grip the coil so the cup on the armature doesn’t catch the edge of the popper (i.e., everything needs to be straight and stay straight). Also, discovered that the top of the armature wasn’t flat, or level, enough so it was possibly part of the reason for the ball spin, or the ball not always acting the same every eject. Corrected that via a light sanding and the ball didn’t vary during testing.

Played a few rounds, even got to Wet Willy’s, and had the ball do this 100% of the time after the AE1-27-1200 was installed and the armature sanded more flat

Right Flipper Every TimeRight Flipper Every Time

For going with one of the weakest coils and still always getting to the right flipper, just about couldn’t believe it. Will test it after a fresh wax (will be wax #4, ha) and test again.

Also, installed a red plunger spring, which is one power above standard, to make the skill shot a little more challenging and to have the plunger easier to use. Used a little 3-in-1 oil on the shooter shaft and wiped it clean. The oil definitely made a huge difference, and was also used on the diverter and shooter lane feed in this build. Definitely helps break in new mechs and smooths out their motions.

#433 35 days ago
Quoted from MiniPinHead:

I’ll be closely following your build, too

Haha! You’re too kind
AE-25-1000 hits the bottom of the boulder by the Lost Mine sign, which is protected in this build. Didn’t like that anyway so that coil is out. Safe to assume AE-23-800 is the same. And AE-26-1200 was actually doing the same, but didn’t realize it until today.
Durability is a goal in this build, so these coils are out.
[quoted image]
AE-26-1500 could work, but it’s the one that was giving trouble with the ball going to both flippers
[quoted image]
Went with an AE1-27-1200 and the ball actually hits the right flipper without fail
[quoted image]
Now, full disclosure, the coil brackets of the whirlpool eject really need to grip the coil so the cup on the armature doesn’t bash edge of the popper (i.e., everything needs to be straight and stay straight). Also, discovered that the top of the armature wasn’t flat enough so it was possibly part of the reason for the ball spin, or the ball not always acting the same ever eject. Corrected that via a light sanding and the ball didn’t vary during testing.
Played a few rounds, even got to Wet Willy’s, and had the ball do this 100% of the time after the AE1-27-1200 was installed and the armature sanded more flat
[quoted image]
For going with one of the weakest coils and still always getting to the right flipper, just about couldn’t believe it. Will test it after a fresh wax (will be wax #4) and test again.
Also, installed a red plunger spring, which is one power above standard, to make the skill shot a little more challenging and to have the plunger easier to use (it’s a very kid-friendly game). Used a little oil 3-in-1 oil on the shooter shaft and wiped it clean. The oil definitely made a huge difference, and was also used on the diverter and shooter lane feed (just those three spots) in this build. Definitely helps break in new mechs and smooths out their motions.

A little lube does go a long way !

#434 34 days ago
Quoted from mollyspub:

A little lube does go a long way !

Have seen an uptick in bawdy jokes lately. Must be spring time

With all the talk about not using lube in pinball the oil wasn’t a consideration at first. It turned out to be a must for those three assemblies/mechs and made a huge difference in their movement. Most of the oil was wiped away, but even the smallest amount made a big difference.

#435 34 days ago
Quoted from MiniPinHead:

Have seen an uptick in bawdy jokes lately. Must be spring time
With all the talk about not using lube in pinball the oil wasn’t a consideration at first. It turned out to be a must for those three assemblies/mechs and made a huge difference in their movement. Most of the oil was wiped away, but even the smallest amount made a big difference.

Basically no need to use any oil/grease in pinball, except metal to metal applications (like motor gearbox).
Oil helps in short term, but then it will collect fine dust particles.

#436 34 days ago
Quoted from Davi:

Basically no need to use any oil/grease in pinball, except metal to metal applications (like motor gearbox).
Oil helps in short term, but then it will collect fine dust particles.

Definitely noted, thank you

Cleaned the plunger assembly and tried it again without the oil, but the movement wasn’t smooth. Could be the springs, washers, or the rod, but I imagine over time the roughness could smooth out. Wiped the rod with a dab of oil on a paper towel and that did the trick, at least temporarily. Because all the parts are new, chalking the oil use up as part of the break-in period of the build.

The shooter lane feeder has an all-metal spot that really needed it, earlier, too:

Shooter LaneShooter Lane

Feeder AssemblyFeeder Assembly

This is what I used, but wipe away after applied

OilOil

Are you supposed to remove the paint on shooter rod springs, or just vacuum it up?

#437 34 days ago
Quoted from MiniPinHead:

Are you supposed to remove the paint on shooter rod springs, or just vacuum it up?

I removed with white spirit.

1 week later
#438 25 days ago

Installed the 934. ..3 # 12-7043 Switch Wire (1/2) onto the # A-16099 Dual Gate Assembly on the Bigfoot Bluff / Canyon side. Previously installed the switch and wired it.

12-7043 Switch Wire Installed 112-7043 Switch Wire Installed 1

The switch triggers the Bigfoot diverter to toggle, as does the second switch on the ramp, which makes sure no balls can sneak past Bigfoot if you hit them spot on. It's easy to forget that the second switch is back there, as the first switch toggles the diverter and the second one keeps it toggled. I don't imagine you ever see the diverter go back at all only to be toggled again by the second switch, since the ball should be moving too fast. Just an observation from the build (i.e., don't forget about switch # 57 Canyon Main way back there).

12-7043 Switch Wire Installed 212-7043 Switch Wire Installed 2

Game now plays 100% and is dialed in, so ends the gameplay troubleshooting stage! The game is a ton of fun, and a very vibrant and upbeat game.

Wire is printable via attached PDF on 8.5 x 11 paper. It's 1mm thick (diameter) wire. It's tricky installing it, because you need to thread the whole thing through the switch side to the non-switch side in order to avoid threading the tighter bends of the wire. Not exactly intuitive.

12-7043 Switch Wire12-7043 Switch Wire

Still doing some metal parts and then once those are done will do a gameplay video.

#439 25 days ago

Wish you lived closer. I'd love to play that minty fresh WH2O! Excellent work!

2 weeks later
#440 8 days ago

Gameplay video with an embarrassing White Water multiball, but shows the Gold Rush happening:

Gameplay is dialed in and done.

#441 8 days ago

Awesome. I really liked the color DMD and the blue flippers that were so bouncy.

#442 3 days ago

Thanks to the skills of radium was able to install the last piece on WH2O - # 01-10889 Waterfall Lights Shield (1)

Used # 4008-01093-12B tr #8-32 x 3/4” ph (3) security screws to secure the cover to the light shield.

4008-01093-12B4008-01093-12B

Used # 4106-01033-08B sms #6 x 1/2” p-tr-hd-a to secure the light shield to the backbox

4106-01033-08B4106-01033-08B

Could have used # 4108-01092-10B txt #8 x 5/8” ph (9) for additional security for the topper cover, but opted for more 4106-01033-08B screws as the topper is secure with three security screws and they’re a pain for anyone to remove to service anything up there.

TopperTopper

WH2O scratch build #1 is done (and sold!)

DoneDone

And DoneAnd Done

And #2 will get its own thread in due time

#443 3 days ago

Sad to see you sold such a labor of love, but see you're planning on another. Following!

#444 3 days ago
Quoted from MiniPinHead:

Thanks to the skills of radium was able to install the last piece on WH2O - # 01-10889 Waterfall Lights Shield (1)
Used # 4008-01093-12B tr #8-32 x 3/4” ph (3) security screws to secure the cover to the light shield.
[quoted image]
Used # 4106-01033-08B sms #6 x 1/2” p-tr-hd-a to secure the light shield to the backbox
[quoted image]
Could have used # 4108-01092-10B txt #8 x 5/8” ph (9) for additional security for the topper cover, but opted for more 4106-01033-08B screws as the topper is secure with three security screws and they’re a pain for anyone to remove to service anything up there.
[quoted image]
WH2O scratch build #1 is done (and sold!)
[quoted image]
[quoted image]
And #2 will get its own thread in due time

Didn’t know this would be for sale? How much did it go for?

#445 3 days ago
Quoted from MiniPinHead:

Thanks to the skills of radium was able to install the last piece on WH2O - # 01-10889 Waterfall Lights Shield (1)
Used # 4008-01093-12B tr #8-32 x 3/4” ph (3) security screws to secure the cover to the light shield.
[quoted image]
Used # 4106-01033-08B sms #6 x 1/2” p-tr-hd-a to secure the light shield to the backbox
[quoted image]
Could have used # 4108-01092-10B txt #8 x 5/8” ph (9) for additional security for the topper cover, but opted for more 4106-01033-08B screws as the topper is secure with three security screws and they’re a pain for anyone to remove to service anything up there.
[quoted image]
WH2O scratch build #1 is done (and sold!)
[quoted image]
[quoted image]
And #2 will get its own thread in due time

It had tobe tough to sell it. Then again, it will make room and funds for the next build

#446 3 days ago
Quoted from poppapin:

Sad to see you sold such a labor of love, but see you're planning on another. Following!

Thank you! Will try and make the thread useful and interesting. This was a labor of love, but also paved the way to do it again and to do a more efficient job. Lots of learning and helpful Pinsiders along the way made it possible, and will make the next one possible again

Quoted from mollyspub:

Didn’t know this would be for sale? How much did it go for?

It covered the cost of the build Didn't occur through Pinside. Don't actually know if the buyer saw the thread, but they saw many photos that were on here.

Quoted from jazc4:

It had tobe tough to sell it. Then again, it will make room and funds for the next build

Yeah, looking forward to getting the next one going, but not looking forward to collecting certain parts again. Several more than last time are now readily available, though

#447 3 days ago

Can’t believe you sold it. Looking forward to the next build. Plan to do anything different?

#448 2 days ago

You did well on this assignment. Looking forward to seeing your next project. I wish I could have played it at least one time. I bet it was awesome and super fast.

Promoted items from Pinside Marketplace and Pinside Shops!
From: $ 110.00
Lighting - Interactive
Pinball Z
 
$ 10.95
Eproms
Pinballrom
 
$ 9.95
Eproms
Pinballrom
 
$ 5.95
Lighting - Led
Mitchell Lighting
 
$ 225.00
Lighting - Interactive
Professor Pinball
 
$ 225.00
Cabinet - (Alt) Translites
FlyLand Designs
 
$ 12.95
Playfield - Decals
Pinball Pimp
 
$ 69.50
Boards
Pinball Haus
 
$ 60.00
Cabinet - Decals
Pinball Haus
 
$ 1,059.00
Flipper Parts
Mircoplayfields
 
$ 119.99
Cabinet - (Alt) Translites
FlyLand Designs
 
$ 329.99
Lighting - Other
Lighted Pinball Mods
 
$ 79.99
Cabinet - Armor And Blades
PinGraffix Pinside Shop
 
7,400
Machine - For Sale
Castle Rock, CO
7,699 (OBO)
Machine - For Sale
Evansville, IN
$ 84.99
Cabinet - Armor And Blades
FlyLand Designs
 
15,000
Machine - For Sale
Ontario, CA
$ 27.95
Eproms
Pinballrom
 
From: $ 9.99
Eproms
Matt's Basement Arcade
 
$ 34.99
Rubber/Silicone
NO GOUGE PINBALL™
 
$ 189.00
Playfield - Plastics
Starcade Amusement
 
$ 9.95
Lighting - Led
Mitchell Lighting
 
$ 15.00
Playfield - Other
Nezzy's Pinball Prints
 
$ 12.95
7,800 (OBO)
Machine - For Sale
Cincinnati, OH
$ 30.00
Playfield - Other
YouBentMyWookie
 
$ 399.00
Cabinet - Decals
Mircoplayfields
 
Great pinball charity
Pinball Edu
There are 448 posts in this topic. You are on page 9 of 9.

Reply

Wanna join the discussion? Please sign in to reply to this topic.

Hey there! Welcome to Pinside!

Donate to Pinside

Great to see you're enjoying Pinside! Did you know Pinside is able to run without any 3rd-party banners or ads, thanks to the support from our visitors? Please consider a donation to Pinside and get anext to your username to show for it! Or better yet, subscribe to Pinside+!


This page was printed from https://pinside.com/pinball/forum/topic/white-water-wh2o-scratch-build/page/9 and we tried optimising it for printing. Some page elements may have been deliberately hidden.

Scan the QR code on the left to jump to the URL this document was printed from.