
 Roanoke, VA
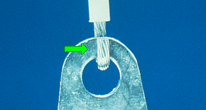
So, does anyone have any tips on how to hold everthing your trying to solder in place? I'm doing a flipper rebuild and I had to quit b/c I was doing a terrible job trying to chase the wires with solder in one hand and the iron in the other lol. Been trying to look up vidoes but no luck yet. Thanks all.
(Topic ID: 28249)

