(Topic ID: 21326)

X-Men ramp posts mod

By Tekman

11 years ago


Topic Heartbeat

Topic Stats

  • 131 posts
  • 37 Pinsiders participating
  • Latest reply 2 years ago by king_pin
  • Topic is favorited by 40 Pinsiders

You

Linked Games

Topic Gallery

View topic image gallery

IMG-20180326-WA0028 (resized).jpeg
DSC_8295.JPG
DSC_8268.JPG
DSC_8267.JPG
DSC_8206.JPG
DSC_8205.JPG
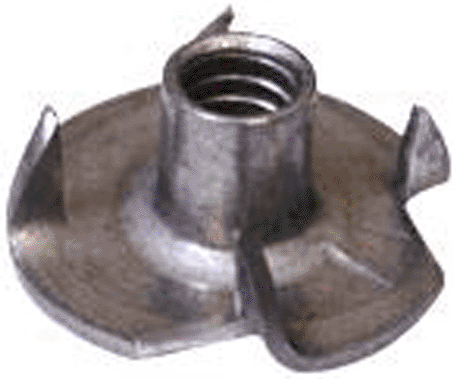
t-nut.gif
x-men_playfields.jpg
IMG_0019.JPG
IMG_0018.JPG
IMG_0007.JPG
IMG_0015.JPG
IMG_0012.JPG
IMG_0009.JPG
530-5332-00.jpg
posts2.jpg
There are 131 posts in this topic. You are on page 1 of 3.
#1 11 years ago

I noticed my PF was quickly starting to look like the surface of the moon because I was constantly getting massive air balls off the ramp posts and beating the heck out of the PF. With a little modding, I'm happy to say the air balls from the ramp posts are gone and match the style used in TRON. I chose to use real metal posts with tapered hard black post rubbers to replace the unusual post combination Stern decide to use on this machine. Now the ramp area feels more controlled and no air balls! I just wish I did this sooner before I got so many unnecessary deep dimples.

Parts ordered from Pinball Life:
2-1/8" Tall Metal Post With Threaded Base and (Female) Threaded Top - Qty. 4
http://www.pinballlife.com/index.php?p=product&id=323
1-1/16" Stern/Sega SlightlyTapered Black Hard Rubber Post Sleeve - Qty. 4
http://www.pinballlife.com/index.php?p=product&id=69
#6-32 x 3/8" Pan Screw With Locking Washer $0.10 - Qty. 4
http://www.pinballlife.com/index.php?p=product&id=235
#10-32 Nylon Insert Lock Nut $0.10 - Qty. 4 (I had to use one thinner/standard #10-32 nut near the left NC for clearance because the nylon lock nut is too tall and will hit the NC bracket)
http://www.pinballlife.com/index.php?p=product&id=749
small washers already had on hand - Qty. 6 (4 #8 size for top of the posts and 2 #10 size for under the PF where you have to remove the t-nuts)
IMAG0546.jpgIMAG0546.jpg IMAG0547.jpgIMAG0547.jpg

#2 11 years ago

I think that's a good idea, nice job!

I didn't get airballs much at all at first, but get them a lot now for some reason. May try this.

#3 11 years ago
Quoted from muttonboy:

I think that's a good idea, nice job!
I didn't get airballs much at all at first, but get them a lot now for some reason. May try this.

The original left side plastic posts are only #6-32 screws and start to bend back a little over time from being hit by the ball and the new angle may be causing more air balls for you. Just a thought.

#4 11 years ago

Why not replace the one back by the rogue too?
I was thinking about doing this myself.
Hotlinks would be great too that want to do this.

#5 11 years ago
Quoted from jackal2001:

Why not replace the one back by the rogue too?
I was thinking about doing this myself.
Hotlinks would be great too that want to do this.

Added links.

Rogue isn't a problem with air balls for me and is recessed in pretty far. A post with screw on top would be too high and rub the plastic anyway. I suppose if someone was having an issue with it could drill a hole in the plastic above for the screw and it would look factory fresh.

#6 11 years ago

why use the tapered post sleeves? I'm assuming the bigger side you put on the top side of the post.

#7 11 years ago
Quoted from jackal2001:

why use the tapered post sleeves? I'm assuming the bigger side you put on the top side of the post.

They're thinner because the area has some pretty tight shots and shape angled down really keeps the air balls away. Yes, you're correct that the bigger side goes towards the top.

#8 11 years ago

One note of caution. You must feel comfortable with completely removing the left NC assembly and loosening the pop bumper assembly half way to remove the #6-32 t-nut and add the #10-32 post. You will need a thinner #10-32 nut for clearance when putting the NC assembly back in. All the other posts are a piece of cake.

#9 11 years ago

Thanks. Order placed.
I don't know why they used those other posts/rubbers. That was one of the first thing I noticed and wanted to change.

#10 11 years ago
Quoted from Tekman:

One note of caution. You must feel comfortable with completely removing the left NC assembly and loosening the pop bumper assembly half way to remove the #6-32 t-nut and add the #10-32 post. You will need a thinner #10-32 nut for clearance when putting the NC assembly back in. All the other posts are a piece of cake.

No issues. Hell I'm not going to try and find one of those thin 10-32 nuts. I'll just dremel out the corner edge of the NC bracket.

#11 11 years ago

Speaking of the left NC, do you guys ever get ball hang ups on NC and the left post of the left ramp? Got a few last night, haven't looked into it yet

#12 11 years ago
Quoted from Eskaybee:

Speaking of the left NC, do you guys ever get ball hang ups on NC and the left post of the left ramp? Got a few last night, haven't looked into it yet

Are you talking with the NC is up or down (stuck on the crack)? I assume you're talking down and will need to adjust the height screw at the bottom of the NC assembly. I had to adjust both of mine to make them perfectly flush.

#13 11 years ago
Quoted from Tekman:

Are you talking with the NC is up or down (stuck on the crack)? I assume you're talking down and will need to adjust the height screw at the bottom of the NC assembly. I had to adjust both of mine to make them perfectly flush.

Yea, when he's down. I'll have a look at that screw, i think thats it - thanks.

#14 11 years ago

What about using that stronger post that Pinballife made for LOTR?

#15 11 years ago
Quoted from playernumber4:

What about using that stronger post that Pinballife made for LOTR?

These are #10-32 posts of the highest quality and are the maximum size that will fit in the existing holes anyway. I don't think it would ever be possible for these posts to bend or break. Of course, you're welcome to try anything you want.

#16 11 years ago

Mine is complete with dark blue cliffy post rubber. I just need the washers for the top along with the screws.
This helps to slow the return shot directly into a post. Before if you shot directly into the factory post it would shoot strait down the middle with such speed. This really helps to get rid of that. Not to mention if a ball got a little bit of air and hit the top side of those factory rubber rings the ball would launch. This also helps solve that issue. I don't know why they tried to do something different here. This works perfect. posts2.jpgposts2.jpg

#17 11 years ago
Quoted from jackal2001:

Mine is complete with dark blue cliffy post rubber. I just need the washers for the top along with the screws.
This helps to slow the return shot directly into a post. Before if you shot directly into the factory post it would shoot strait down the middle with such speed. This really helps to get rid of that. Not to mention if a ball got a little bit of air and hit the top side of those factory rubber rings the ball would launch. This also helps solve that issue. I don't know why they tried to do something different here. This works perfect.

Looks nice. Especially with the Cliffy's in place. I'm sure I would still bang the heck out of the 2 posts in front of the Iceman ramp. You would think it's my favorite shot.

#18 11 years ago
Quoted from Tekman:

One note of caution. You must feel comfortable with completely removing the left NC assembly and loosening the pop bumper assembly half way to remove the #6-32 t-nut and add the #10-32 post. You will need a thinner #10-32 nut for clearance when putting the NC assembly back in. All the other posts are a piece of cake.

I'm a little lost here....is the "thinner #10-32 nut" you mentioned linked to above? If not...where would you find one and what would you call it when asking for it?

So basically the 2 post that use the t nuts originally....you take the t-nuts out from the bottom of the play field and they all 4 just connect with a nut on the bottom? Are the t nuts hard to remove?

#19 11 years ago
Quoted from DugFreez:

I'm a little lost here....is the "thinner #10-32 nut" you mentioned linked to above? If not...where would you find one and what would you call it when asking for it?
So basically the 2 post that use the t nuts originally....you take the t-nuts out from the bottom of the play field and they all 4 just connect with a nut on the bottom? Are the t nuts hard to remove?

Not sure if the OP is referring to low profile nuts. If he is, those can be found in the hardware section of pinrestore.com
They are not as thick and are great when installing plastic protectors. Sometimes the taller nuts don't get enough bite so I use the low profile ones.
If he was referring to nuts that are not as wide... then I'm lost too

#20 11 years ago
Quoted from DugFreez:

I'm a little lost here....is the "thinner #10-32 nut" you mentioned linked to above? If not...where would you find one and what would you call it when asking for it?
So basically the 2 post that use the t nuts originally....you take the t-nuts out from the bottom of the play field and they all 4 just connect with a nut on the bottom? Are the t nuts hard to remove?

It's a standard 10-32 nut you would get from Home Depot in the plastic bags. The t-nuts are very easy to remove with a flat-head screwdriver with almost no force. All four new post are fastened by 10-32 nuts on the bottom of the PF.

#21 11 years ago
Quoted from Drano:

Not sure if the OP is referring to low profile nuts. If he is, those can be found in the hardware section of pinrestore.com
They are not as thick and are great when installing plastic protectors. Sometimes the taller nuts don't get enough bite so I use the low profile ones.
If he was referring to nuts that are not as wide... then I'm lost too

I referred to them as 'thinner' because the standard nylon lock nuts are too tall and will hit the left NC mounting bracket.

#22 11 years ago
Quoted from Tekman:

It's a standard 10-32 nut you would get from Home Depot in the plastic bags. The t-nuts are very easy to remove with a flat-head screwdriver with almost no force. All four new post are fastened by 10-32 nuts on the bottom of the PF.

So it would be completely reversible if you put the t-nuts back in under the playfield? I'm thinking I might go ahead and do this (whenever I place my next PBL order), but I wanted to make sure it wasn't anything I couldn't easily undo.

#23 11 years ago
Quoted from Tekman:

I referred to them as 'thinner' because the standard nylon lock nuts are too tall and will hit the left NC mounting bracket.

Aha, so just a plain old nut. Got it.
The ones I mentioned from pinrestore are also thinner and low profile, but they are still locknuts.

#24 11 years ago
Quoted from DugFreez:

So it would be completely reversible if you put the t-nuts back in under the playfield? I'm thinking I might go ahead and do this (whenever I place my next PBL order), but I wanted to make sure it wasn't anything I couldn't easily undo.

Nothing is permanent and can be easily undone. I put all the parts I removed in a bag so I could always have the option to undo it. I know I will never undo it but I want the option if I ever sell the machine down the road.

#25 11 years ago
Quoted from Drano:

Aha, so just a plain old nut. Got it.
The ones I mentioned from pinrestore are also thinner and low profile, but they are still locknuts.

They are called jam nuts. Meant to jam against another nut for the most secure lock. For our purpose a single jam nut helps because they are thin profile.

1 week later
#26 11 years ago
Quoted from Tekman:

Nothing is permanent and can be easily undone. I put all the parts I removed in a bag so I could always have the option to undo it. I know I will never undo it but I want the option if I ever sell the machine down the road.

That is what the coin box is for. Put all the factory parts in once you replace them with something else.

#27 11 years ago
Quoted from jackal2001:

That is what the coin box is for. Put all the factory parts in once you replace them with something else.

+1 lol. I do the same thing.... at least until I get a place where I can have a change machine and all my coin mechs work.

#28 11 years ago

Anyone try star posts on the outlanes? Still getting lots of Outlane drains even with them tight.. And we're not good nudgers. Comparing it to my IJ, the posts are no where near as tight as you can make them... Mostly since they are star posts on IJ and thin posts with the bouncy black rubbers that this thread is deleting from the ramps.

#29 11 years ago
Quoted from sd_tom:

And we're not good nudgers.

Hey practice makes perfect sometimes a well timed small bump can prevent a drain. I think putting star posts on the outlanes to make them tighter is going a bit too far.

#30 11 years ago
Quoted from Tekman:

I chose to use real metal posts with tapered hard black post rubbers to replace the unusual post combination Stern decide to use on this machine.

This is a great idea! Looks better, too... in my opinion. I just placed an order for the metal posts and dark blue Cliffy sleeves. Will go on my pro before the first play.

#31 11 years ago
Quoted from sd_tom:

Anyone try star posts on the outlanes? Still getting lots of Outlane drains even with them tight.. And we're not good nudgers. Comparing it to my IJ, the posts are no where near as tight as you can make them... Mostly since they are star posts on IJ and thin posts with the bouncy black rubbers that this thread is deleting from the ramps.

How steep is yours set? Do you have a level that checks degrees? Steeper may help with outlane drains, mine doesn't seem all that bad.

I thought I had mine set steep, bubble on the machine was on the top line instead of centered. Checked it with the torpedo level yesterday and it reads 6.5~6.6 degrees...

#32 11 years ago
Quoted from muttonboy:

How steep is yours set? Do you have a level that checks degrees? Steeper may help with outlane drains, mine doesn't seem all that bad.
I thought I had mine set steep, bubble on the machine was on the top line instead of centered. Checked it with the torpedo level yesterday and it reads 6.5~6.6 degrees...

My bubble is more near the top line as well vs centered.. prob much like yours. It might be the multiple kinds of drains that are out of our control (given our suck nudging).. that has us a bit frustrated.

- Wolverine figure... his right hand side belt .. if a ball dribbles off of it, SDTM
- Wolverine figure throwing the ball into an outlane OR just dropping it SDTM instead of throwing
- Magneto drops SDTM sometimes; at least that's far enough away that if we learn to nudge might be able to anticipate
- Side to Side slingshot action seems to head right towards the upper outlane posts and sends it down the outlane at high speed. lower outlane posts don't even get touched

It's just the last one that the star posts might help with... only cause when compared to IJ, the lanes aren't very tight at all even in the tightest position.. there's a full ball width between top and bottom outlane posts that seems to channel anything coming side to side right down there with no interference / chance to do anything.

and yeah, practice makes perfect. i do markmon's wolverine remount.. that might help the belt SDTM and reduce the number of times we're left standing there with a "cheap shot" to a understandable level

1 week later
#33 11 years ago

I installed this mod yesterday and immediately noticed a difference on the play.Thanks Tekman!No more out of control flying balls!

#34 11 years ago

I just got my post goods in and was wondering: Is there a reason you went with the threaded top posts? I can't help but feel the washers and screws look a bit out of place, but didn't know if they were to serve a purpose.

I think I'm going to hold off on my install a bit and possibly order these:

http://www.pinballlife.com/index.php?p=product&id=1044

#35 11 years ago

If anyone is interested in all of the parts needed for this mod and wants to save a few bucks on shipping, check out my FS thread.

http://pinside.com/pinball/forum/topic/fs-x-men-ramp-post-mod-kit-15-shipped?replies=1#post-376985

Update: SOLD!

#36 11 years ago

So what are you doing differently?
The top threaded posts are the norm. They are used on all other pins. Washer and screw probably helps prevent the post sleeve from moving up and out.

#37 11 years ago

So what are you doing differently?
The top threaded posts are the norm. They are used on all other pins. Washer and screw probably helps prevent the post sleeve from moving up and out.

He is referring to the post without a threaded top. If you use Cliffy's they will stay put and if they move up over time it will be slightly and you can just push them down. There is no right or wrong way, it's just a matter of personal preference.

530-5332-00.jpg530-5332-00.jpg

#38 11 years ago
Quoted from DugFreez:

I just got my post goods in and was wondering: Is there a reason you went with the threaded top posts? I can't help but feel the washers and screws look a bit out of place, but didn't know if they were to serve a purpose.
I think I'm going to hold off on my install a bit and possibly order these:
http://www.pinballlife.com/index.php?p=product&id=1044

I went with the exact same style on Tron for consistency in my lineup and I suppose they also prevent the post rubber from creeping up.

#39 11 years ago
Quoted from bballfan:

I installed this mod yesterday and immediately noticed a difference on the play.Thanks Tekman!No more out of control flying balls!

Awesome!

#40 11 years ago

I had just never noticed a post that had nothing mounted to the top of it with the threaded top. I hadn't even thought about it until my order came in.

I have 2 other Stern's on hand to compare to. Spider-Man has no lone post like this and Playboy has a couple and they all have tapless tops and the post just slide on. The part number I decided to go with above is a normal Stern part number post (it's even listed in the X-Men manual, but not used). I'm sure either will be fine and if the post sliding up is an issue....I will reorder and get the tapped tops again.

#41 11 years ago

I placed order last night and am gong the dugfreez route. Ordered 5 posts though and hope to swap the post separating Xavier and Rouge. I think the post is short enough to fit under the plastic there but not sure 100%.

#42 11 years ago
Quoted from turbo20lbs:

I placed order last night and am gong the dugfreez route. Ordered 5 posts though and hope to swap the post separating Xavier and Rouge. I think the post is short enough to fit under the plastic there but not sure 100%.

Let us know how the Rogue post goes....I was thinking about it, but I didn't think it would fit under the plastic without bowing it up or having to notch it out.

#43 11 years ago

I ordered an extra post but never looked into talking everything apart myself to replace the rogue post.

#44 11 years ago

in the dugfreez version, what's the shortened list of accessory hardware?

#45 11 years ago
Quoted from sd_tom:

in the dugfreez version, what's the shortened list of accessory hardware?

4 - 530-5332-00 posts
4 - post sleeves of your choice
4 - #10 flat wasters
3 - #10-32 nylon insert lock nuts
1 - #10-32 jam nut or nylon insert jam nut (low profile to go under Nightcrawler mech)

That is a list for a complete swap and not using any of the original parts. I haven't done my install yet so I'm not certain if the #10 washer has room to be installed under the Nightcrawler mech with the low profile nut or not.

It's the same parts that are listed at the top with different posts and minus the 4 #8 washers and the 4 pan screws for the top.

Edit: If you would want to replace the 5th Rogue / Xavier post in that area (which matches very nicely) you would just add another post, another sleeve, another nut and another washer.

#46 11 years ago

Dugfreez style complete! I am not sure how you guys are getting away with the NC re-mount, but the new post threads on my game were kinda interfering with the NC assembly. I could have bolted the NC back on as is with the new post, but it wouldn't have been perfectly lined up with the holes. I ended up trimming the post threads to provide clearance for the NC assembly as well. The jam nut clears perfectly, the new post is what was still giving me a slight issue. See pic below.

Also the Rouge\Xavier post looks/works great IMO. I also put clear washers in place of metal ones on the slings, and a purple acron nut on top of the post at the end of the Iceman ramp.

White rubber on this thing is a must, I put white on all my games but this particular game had the most dramatic change as far as "brightening up".

IMG_0009.JPGIMG_0009.JPG IMG_0012.JPGIMG_0012.JPG IMG_0015.JPGIMG_0015.JPG IMG_0007.JPGIMG_0007.JPG IMG_0018.JPGIMG_0018.JPG IMG_0019.JPGIMG_0019.JPG

#47 11 years ago
Quoted from DugFreez:

4 - 530-5332-00 posts
so I'm not certain if the #10 washer has room to be installed under the Nightcrawler mech with the low profile nut or not.
It's the same parts that are listed at the top with different posts and minus the 4 #8 washers and the 4 pan screws for the top.

I got a #10 washer on mine, as I felt a washer is needed here. I did smash it down with a hammer though to get it as flat as possible. If you are at a hardware store you should be able to find a thin washer of some sort though.

#48 11 years ago
Quoted from turbo20lbs:

Dugfreez style complete! I am not sure how you guys are getting away with the NC re-mount, but the new post threads on my game were kinda interfering with the NC assembly. I could have bolted the NC back on as is with the new post, but it wouldn't have been perfectly lined up with the holes. I ended up trimming the post threads to provide clearance for the NC assembly as well. The jam nut clears perfectly, the new post is what was still giving me a slight issue. See pic below.
Also the Rouge\Xavier post looks/works great IMO. I also put clear washers in place of metal ones on the slings, and a purple acron nut on top of the post at the end of the Iceman ramp.
White rubber on this thing is a must, I put white on all my games but this particular game had the most dramatic change as far as "brightening up".

So, no issues on the Rogue / Xavier post? It fit right in there? It looks really good. I honestly didn't think a post would fit without getting in the plastic. Did you just raise the plastic up to get the post in or did you have to take some things loose?

I heard from someone else that the Nightcrawler bracket got into the post threads a bit, but a little bit of filing would take care of it.

I had the same kind of idea for the post on the right sling. I went with a small black rubber ring instead of the original nut and then a black acorn nut on top. Anything looks more finished than just bare threads sticking up there.

I have been waiting for someone to come up with an X-Men plastic protector set (at least for the slings if nothing else) so I can get rid of the fender washers.

#49 11 years ago
Quoted from turbo20lbs:

Dugfreez style complete! I am not sure how you guys are getting away with the NC re-mount, but the new post threads on my game were kinda interfering with the NC assembly. I could have bolted the NC back on as is with the new post, but it wouldn't have been perfectly lined up with the holes. I ended up trimming the post threads to provide clearance for the NC assembly as well. The jam nut clears perfectly, the new post is what was still giving me a slight issue. See pic below.
Also the Rouge\Xavier post looks/works great IMO. I also put clear washers in place of metal ones on the slings, and a purple acron nut on top of the post at the end of the Iceman ramp.
White rubber on this thing is a must, I put white on all my games but this particular game had the most dramatic change as far as "brightening up".

Looks good! I guess the non-threaded posts are a little longer and need to be cut. Thanks for being the first person to take on the Rogue/Xavier post and sharing detailed pictures.

#50 11 years ago

Finally got around to doing mine. I did it "old school" with the threaded top posts. Haven't done the Rogue/Xavier post, will probably get around to it some day. Looks much better than the original posts. I did light blue cliffy's on Iceman posts and the dark blue on storm posts.

While at it I also installed the Cliffy scoop protector, shooter lane eject protector and a switch slot protector.

Should be good to go now

Promoted items from Pinside Marketplace and Pinside Shops!
From: $ 40.00
Lighting - Interactive
Professor Pinball
 
$ 35.00
Cabinet - Decals
Pinball Haus
 
From: $ 44.00
Playfield - Other
Pin Monk
 
$ 79.99
Cabinet - Armor And Blades
PinGraffix Pinside Shop
 
From: $ 218.00
Lighting - Backbox
Lermods
 
$ 29.99
Cabinet - Sound/Speakers
PR Mods
 
Trade
Machine - For Trade
Phoenix, AZ
6,500 (OBO)
Machine - For Sale
Clinton, OH
Trade
Machine - For Trade
Coos Bay, OR
$ 225.00
Lighting - Interactive
Professor Pinball
 
$ 6.00
Playfield - Protection
Apron Envy
 
From: $ 10.00
Cabinet - Sound/Speakers
arcade-cabinets.com
 
6,000 (OBO)
Machine - For Sale
Bay Shore, NY
$ 25.00
Playfield - Toys/Add-ons
3D Tech. Pinball Parts
 
From: $ 99.99
Cabinet - Other
Lighted Pinball Mods
 
From: $ 52.00
Playfield - Other
Pin Monk
 
Hey modders!
Your shop name here
There are 131 posts in this topic. You are on page 1 of 3.

Reply

Wanna join the discussion? Please sign in to reply to this topic.

Hey there! Welcome to Pinside!

Donate to Pinside

Great to see you're enjoying Pinside! Did you know Pinside is able to run without any 3rd-party banners or ads, thanks to the support from our visitors? Please consider a donation to Pinside and get anext to your username to show for it! Or better yet, subscribe to Pinside+!


This page was printed from https://pinside.com/pinball/forum/topic/x-men-ramp-posts-mod?hl=kenm and we tried optimising it for printing. Some page elements may have been deliberately hidden.

Scan the QR code on the left to jump to the URL this document was printed from.