(Topic ID: 124004)
Linked Games
 Swinger
Williams, 1972
Swinger
Williams, 1972
Topic Gallery

 Toronto, ON
 Salem, OR
Absolutely correct. Any silvered or darkened bulbs will fail soon and run really hot until they do.
I usually relamp with 47s while I'm killing dead bulbs.
Quoted from dmbjunky:Here's a metal polishing thread.
Oooo...thanks for the suggested read. Just went through it (and followed all the links down their respective rabbit holes). It's making me ponder that polisher suggested by Hilton (whysnow). With the current sale price (Labor Day? ...or usually on sale, not sure), plus 20% off, it's hard to beat for 30-ish dollars.
For anyone wondering, here's the 6in. Buffing Tool (Reg. $54.99, Sale $39.99)
http://www.harborfreight.com/6-inch-buffer-94393.html
Minus the Harbor Freight Coupon:
http://images.harborfreight.com/hftweb/home-page2015/images090415/labor-day-coupon-bw.jpg
...ends up coming to $31.99.
![]() Tempting.
Tempting.
Quoted from jwilson:Just a note that the bulb on the right might work right now but it's going to burn out very soon. I try not to recycle bulbs unless the glass is clear.
Quoted from dasvis:They might work when they are black like that, but run extra hot. Always replace these to avoid melting plastics.
Quoted from bingopodcast:Absolutely correct. Any silvered or darkened bulbs will fail soon and run really hot until they do.
Advice taken:
New bulb (above right) now installed in previous location:
Thanks for the continued education, guys!
Before starting tonight, I've gotta credit Yancy...
Quoted from yancy:Metal refinishing is one of the more satisfying steps of pin restoration. Especially lockdown bar receivers, which usually look like the inside bottom of a dumpster. I know you can't see 'em when you play, but they bug me all the same.
...for gettin' my dander up about the lock-down bar polishing. ![]()
So, I took another look at mine:
...and decided it needed to come out.
I know many of you guys have dealt with creatures and "leavings" and other unspeakable things, but...c'mon, this is pretty rank, right?
...or does it get a lot worse?
Regardless, here are some more flattering angles:
All that rust seems to have left some more mold/mildew on the inside of the cab:
...which I'm guessing I'll have to sand or clean out somehow. (As usual, I'm open to suggestions on strategies for remediation.)
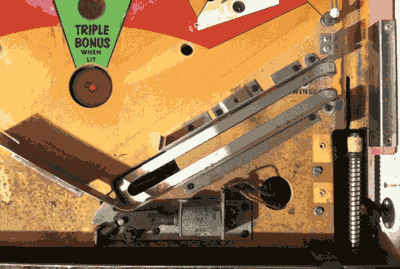
The other side of the lockdown receiver wasn't as bad:
...but still needs some cleaning, which got me wondering how I take this thing apart!
So, I tried figuring out how these locking components might separate from one another...
...but was having a difficult time wrapping my head around its disassembly. I understood that there were a couple of screws that could be removed (next to my hand in the above shot), but even if that portion was removed, the moving bar still seemed to be locked in place at either end.
So I started investigating the bar holders (nomenclature???) and only found these odd sunken screw things:
...without a screw head on either side:
I was baffled and just sort of resigned myself to an unproductive evening, at which point I came here to my support group and started uploading my customary gaggle of photos. Which is when I saw THIS(!!!):
There's an OPENING in one of the bar holders!!!
![]()
![]()
![]()
So of course, as soon as I unscrew those two screws (which I should have just attempted in the first place) everything came falling apart as it should:
So...NEVERMIND! No questions here. ![]()
Well, maybe one...
...about those "bar holders" I mentioned before. They're still firmly in place on the main unit and I still don't understand how those might come apart.
Without their removal, I'm not sure how I would clean them to my usual fastidious standards. ![]()
Before I completely sign-off for the evening, I have another question relating to...
Quoted from RyanClaytor:the 6in. Buffing Tool
...mentioned above.
So, here's something weird...I think I might have one?
We moved into our current house about a year ago, and this was left behind in our garage. It works, but I have no instructional manual, so I'm not really sure if that wire wheel and sander are replaceable. Do I just unscrew that nut on the end...
...in order to replace that particular component (wire wheel, sander, whatevs) with a polishing unit of some sort? ...and if so, are all wheeled tool shafts (again...nomenclature???) interchangeable? Do I need to need to know a shaft size when I go to purchase one?
Thanks, as usual, for taking pity on this Luddite.
Quoted from RyanClaytor:Before I completely sign-off for the evening, I have another question relating to...
...mentioned above.
So, here's something weird...I think I might have one?
IMG_8090.jpg
We moved into our current house about a year ago, and this was left behind in our garage. It works, but I have no instructional manual, so I'm not really sure if that wire wheel and sander are replaceable. Do I just unscrew that nut on the end...
IMG_8091.jpg
...in order to replace that particular component (wire wheel, sander, whatevs) with a polishing unit of some sort? ...and if so, are all wheeled tool shafts (again...nomenclature???) interchangeable? Do I need to need to know a shaft size when I go to purchase one?
Thanks, as usual, for taking pity on this Luddite.
Can you take a close up picture of the red sticker in the middle? If it's at all legible we can probably find you an owner's manual online. I can also run it past my dad, I know he has had one like that bolted to his work bench for as long as I have been alive. Usually the wheels are replaceable, but I don't know if the parts are universal or not.
-Andy
Quoted from OuterDork:Can you take a close up picture of the red sticker in the middle? If it's at all legible we can probably find you an owner's manual online. I can also run it past my dad, I know he has had one like that bolted to his work bench for as long as I have been alive. Usually the wheels are replaceable, but I don't know if the parts are universal or not.
-Andy
Oh, right, the internet! ![]()
Thanks, OuterDork! Good to see you're still around here. ![]()
My polishing machine is just that. A re-purposed bench grinder. Once you get the shaft size you can find an appropriate replacement wheels for buffing and polishing. I have a cotton wheel for plastics on one side and a leather wheel for metal on the other. Your results may vary.
I used that hand-me-down grinder today:
...and started cleaning up some of that lock-down bar receiver. If you recall, it looked like this before:
...but after some wire wheel action:
Admittedly, a bit patchy, but a far cry from the petri dish of yesterday.
The rusty part of the lockdown bar receiver:
...cleaned up mostly:
...save for a REALLY rough a pitted spot that had some heavy-heavy rust:
I could not for the life of me abrade that out of there. As usual, I'm all ears for suggestions.
Finally, I got the major schmutz off the next couple of parts.
Before:
After:
Quoted from Mk1Mod0:My polishing machine is just that. A re-purposed bench grinder.
Quoted from dmbjunky:You probably won't buy a better grinder than that one. You just have to find the right wheel combination and you are set.
This is great news! ![]() Thanks for the reassurance, DMBJ and Mk1Mod0!
Thanks for the reassurance, DMBJ and Mk1Mod0!
Quoted from RyanClaytor:Oh, right, the internet!
image.jpg
Thanks, OuterDork! Good to see you're still around here.
Yep, not going anywhere, following with interest. ![]() OK the down side is that model appears to be old enough I can't find a manual online. The upside is we should have all the info we need on that sticker. Wheels are sold based on diameter, RPM rating, and arbor size. You can snag the diameter just by measuring. You want wheels rated 3600 RPM's or higher, and the arbor size is... too blurry for me to see, but hopefully you can read it. Sounds like some others have recommended wheels to try. It looks like Dayton is still around, but only sold through http://www.grainger.com/ In theory, any wheels with the right specs should work.
OK the down side is that model appears to be old enough I can't find a manual online. The upside is we should have all the info we need on that sticker. Wheels are sold based on diameter, RPM rating, and arbor size. You can snag the diameter just by measuring. You want wheels rated 3600 RPM's or higher, and the arbor size is... too blurry for me to see, but hopefully you can read it. Sounds like some others have recommended wheels to try. It looks like Dayton is still around, but only sold through http://www.grainger.com/ In theory, any wheels with the right specs should work.
I imagine you may have figured this out already, but I figured i would toss my 2 cents in. Hope it helps.
-Andy
Quoted from OuterDork:Yep, not going anywhere, following with interest.
![]() I mean...
I mean... ![]()
Quoted from OuterDork:OK the down side is that model appears to be old enough I can't find a manual online.
Bah well. Thanks for doin' my dirty work for me, though, OuterDork. I really just need to take some time and get in there with a couple of wrenches and see if I can pop those wheels out of there.
Quoted from OuterDork:It looks like Dayton is still around, but only sold through http://www.grainger.com/
Funny you should mention this, I have a physical Grainger location about a 5 minute drive from my house. Woo-hoo!
Quoted from futurepinhead:The metal work is looking amazing.
Thanks a lot. I guess I have more of a perfectionist streak in me than I'd like to admit, because I still see a lot of flaws, even in the clean pieces. But comments like this help me move forward with more important aspects, like functionality! ![]()
Quoted from futurepinhead:I am jealous of your tools there.
Ha-ha! First of all, in an effort to not dismiss a compliment, thank you. But to be completely transparent, I am *such* a dunce when it comes to working with my hands...in a traditionally practical way. I can art my way around what I need to, but I'm pretty ignorant when it comes to tinkering with or fixing mechanical things. Many of the tools I've mentioned in this post I've only purchased (cheaply!) for the sake of working on this project (with the hopes there may be more in my future). Or in the case of the bench grinder, it fell out of the clear blue sky and onto my garage wall when we purchased our house...and I forgot about it...until I had a need. Regardless, these things can be had for really reasonable prices...
Quoted from RyanClaytor:For anyone wondering, here's the 6in. Buffing Tool (Reg. $54.99, Sale $39.99)
http://www.harborfreight.com/6-inch-buffer-94393.html
Minus the Harbor Freight Coupon:
http://images.harborfreight.com/hftweb/home-page2015/images090415/labor-day-coupon-bw.jpg
...ends up coming to $31.99.
Tempting.
...if you're interested in them and poke around enough.
So I did a couple more minutes of wire wheel on the lock-down bar receiver before putting it back together:
Did I mention it was hot in the garage? *phew*

I almost forgot about the sludge caked on my cab underneath the lock-down bar receiver:
So I did my best to clean that up. I didn't know what to do exactly, but started with a little hand cleaner to remove the majority of it and ended with a little alcohol to remove any hand-cleaner residue and get it nice and dry.
*shrugs*
By the end of the night the receiver was reattached:
As I mentioned before, there's still a lot more I'd like to do to it, but several sources are telling me to move on and get to more important things, so I'm going to listen to them.
...and make "a further cleaning of my receiver" a list item of things to do once this project is complete. ![]()
Dasvis is right. Steve Fury uses Minwax to protect them and I've seen posts here recommending Evaporust for removing the rust from metals.
Bruce
I got my poster in from Ryan's giveaway. Here is my shout out thread for him.
https://pinside.com/pinball/forum/topic/shout-out-for-ryanclaytor#post-2669575
Thanks again Ryan!
Quoted from dasvis:Unless you give that a coating of clear or maybe wax it heavily, it's going to rust in the future. The plating is mostly gone now.
Quoted from PinballFever:Dasvis is right. Steve Fury uses Minwax to protect them
Thanks, Dasvis and Bruce. I've got that on my "to do after everything is done" list. ![]() ...it's all coming apart again for the re-theme anyway. But thanks for the reminder. I'm sure many metal parts will be getting the wax treatment at that time.
...it's all coming apart again for the re-theme anyway. But thanks for the reminder. I'm sure many metal parts will be getting the wax treatment at that time.
Quoted from futurepinhead:I got my poster in from Ryan's giveaway. Here is my shout out thread for him.
Wha-- ![]()

This is pretty-much the coolest. Thanks, Jared. I truly appreciate the kind words and dedicated thread.
So this...
...now looks like this...
...except, I couldn't figure out where this piece went:
...but, boy was it ever shiny.

I scanned that whole apron area...
...and couldn't even find a set of holes to screw it into. I was about to come whine to you guys and see if you could solve all my problems (again), but then I decided to comb this thread, which lead me here:
...more precisely, to this dumb gif I made:
While that gif didn't answer my question, it at least gave me a date to search for in my copious mounds of documented photos:
Thankfully, my 25-day-younger self had a sinking suspicion my mind would fail nary a month later. Here are the couple of month-old shots that solved it:

Do yourself a favor and print out some score cards. They have Swinger. I just looked.
Photo paper or thick card stock will do just fine.
Quoted from Pahuffman:...print out some score cards.
I dunno, I think they look...

Actually, I'm waiting to deal with those later, as I'll eventually make them re-theme specific. Didn't see any reason to make 'em twice. But thanks for the linkage, Pahuffman. Downloaded 'em for later.
-----------------------
Today I polished more stuff. Ball arch looked like this at the start of the day:
...with a bunch of calcified stuff on the other side:
At the end of the day, it looked like this:

This morning, my son and I went down to investigate our new parts.
Naturally, being a man of exquisite taste, he wanted to play with the $10 pop bumper cap first.
We grabbed a few parts and did our best to reverse engineer the new parts into the old pop bumper configuration:
From there, things became pretty astounding:
He grabbed a pop bumper, and without education or prompting, he started putting it into the playfield...right where it was supposed to go(!!!!):
Then after a few short tries, he proclaimed, "I DID it!!!"
Indeed he had! (He's only 2, BTW.)
#ProudDadStuff
#FeelingLuckyToHaveHadACameraHandyAtThisMoment
THEN(!!!) we were looking at the old pop-bumpers in an attempt to extract the existing lamp sockets and leads, when we ran into this delay:
...a ball of solder preventing the lead from being extracted and put into the new bumper. I showed him why we couldn't pull it out, and he said,
"Solder-Sucker."
To which I responded, "

"
Then he said again, clear as day,
"Solder-Sucker, Dada."
I swear I've showed him a solder-sucker, like...maybe, once. And that was probably a month ago when I bought it for another project.
![]()
Until next update...still astounded.
Quoted from RyanClaytor:He grabbed a pop bumper, and without education or prompting, he started putting it into the playfield...right where it was supposed to go(!!!!):
Two years old and he's already a Pinball Wizard! Pinball Genius! Thanks for posting this Ryan. It is great to see the young'uns enjoying the pinball hobby.
Started to piece together the new pop bumper parts. In doing so, I found myself continually confusing the part names of the pop bumper assembly, until I found this image:
...found on this page from the PAPA website:
http://papa.org/learning-center/collector-resources/rebuilding-pop-bumpers/
Thanks, P.A.P.A.!
So here's a quick comparison of my new and old bodies (Bottom: New body from PBR. Top: Old, cracked and yellowed body from Swingy.):
I ended-up getting new bodies, skirts, bases, and rod/ring assemblies for all my bumpers. Decided to keep the same springs and lamp socket/leads, as those seemed like functional parts of the top-side assembly. Here's a comparison of an old assembly and a new one (well, mostly new):
The more I think about it, the more I wonder why I didn't just SPRING for the couple of other new parts. Despite me being a skinflint, they probably wouldn't have been that much money. Now, (after receiving my order) I'm looking back at the powered-up image of Swinger and noticing that 6 of the 7 bumpers seem to be dark:
I'm sure this could very well have just been due to a bum lamp rather than a faulty lamp socket/lead, but just in case anyone has some feedback about them, I thought I'd include some visuals of the socket/leads.
Socket:
Leads:
I managed to piece together all top-side bumper assemblies (both pops and passives) by the end of the night (but none of them are attached/resoldered yet):
...maybe tomorrow night, unless I get some bad news about those sockets.
In the meantime, boy-howdy, this game keeps looking better and better!

I think I mentioned this previously or privately to you, but I would have replaced those sockets. Despite being a real cheapskate myself, I believe I said that they were pretty gross.
Sorry Ryan!
Now, that said, it's possible you can make these work... but why? You will have to polish those to get good electrical contact, and that is tough to do due to the construction of the socket. You won't have to worry about flickery sockets if you replace them. At least, flickery due to a crummy socket.
The legs/leads don't look that bad, if that helps.
Quoted from RyanClaytor:Started to piece together the new pop bumper parts. In doing so, I found myself continually confusing the part names of the pop bumper assembly, until I found this image:
7.jpg
...found on this page from the PAPA website:
http://papa.org/learning-center/collector-resources/rebuilding-pop-bumpers/
Thanks, P.A.P.A.!
So here's a quick comparison of my new and old bodies (Bottom: New body from PBR. Top: Old, cracked and yellowed body from Swingy.):
photo 1.JPG
I ended-up getting new bodies, skirts, bases, and rod/ring assemblies for all my bumpers. Decided to keep the same springs and lamp socket/leads, as those seemed like functional parts of the top-side assembly. Here's a comparison of an old assembly and a new one (well, mostly new):
photo 2.JPG
The more I think about it, the more I wonder why I didn't just SPRING for the couple of other new parts. Despite me being a skinflint, they probably wouldn't have been that much money. Now, (after receiving my order) I'm looking back at the powered-up image of Swinger and noticing that 6 of the 7 bumpers seem to be dark:
387592.jpg
I'm sure this could very well have just been due to a bum lamp rather than a faulty lamp socket/lead, but just in case anyone has some feedback about them, I thought I'd include some visuals of the socket/leads.
Socket:
photo 3.JPG
Leads:
photo 4.JPG
I managed to piece together all top-side bumper assemblies (both pops and passives) by the end of the night (but none of them are attached/resoldered yet):
photo (1).JPG
...maybe tomorrow night, unless I get some bad news about those sockets.
In the meantime, boy-howdy, this game keeps looking better and better!
woohoo-o.gif
Those old bumper parts would be great to test the peroxide / UV light yellowing removal on.
And I'd also replace the old sockets.
Quoted from girloveswaffles:Those old bumper parts would be great to test the peroxide / UV light yellowing removal on.
Good call! Thanks for the suggestion, Gir. ![]()
For those curious: https://pinside.com/pinball/forum/topic/say-goodbye-to-old-yellowed-plastics
Quoted from bingopodcast:I would have replaced those sockets.
Quoted from girloveswaffles:And I'd also replace the old sockets.

I'm curious about the effect that the peroxide treatment would have on the insulator built into the socket. I would assume that it would dry it out, possibly allowing a short?
Quoted from bingopodcast:I'm curious about the effect that the peroxide treatment would have on the insulator built into the socket. I would assume that it would dry it out, possibly allowing a short?
It would only be for the plastic parts. Most peroxide solutions contain some water, and would deteriorate the sockets.
So Ryan, unless I missed it in the several pages of posts, do you have a theme for the game yet?
Since you've already done some posters for Pinball at the Zoo, maybe you need to do something animal themed.
Maybe something with an anthropomorphic feline type character. A large one with a mane perhaps?
I'm going to quit now before a moderator says something.
Quoted from girloveswaffles:do you have a theme for the game yet?
Hey, Gir, no problem. This thread is likely getting a bit unwieldy to process from the beginning to end, so it's probably time I mention this again for any new-comers:
Quoted from RyanClaytor:...this thread is going to be tech-heavy at first. I want to make sure this machine can and will run 100% before I spend a bunch of time on aesthetics. So, my re-theme reveal may take a little while.
Thanks for asking, though.
My goal is to get this puppy working 100%, I'll play-test for a while (so I can make more informed decisions about naming/re-theming various play-mechanics) and then start on art. Once I finish the first piece of artwork, this thread will be the first place I post and announce my re-theme. But again, that'll be...
Quoted from RyanClaytor:...a little while.
![]()
The sockets are fine and they are controlled by the game so they won't come on with the rest of the GI. Once you have the game starting up you can hit the "On Bumpers" switches at the top to double check that the lights in the bumpers are all good.
Quoted from davideokills:The sockets are fine and they are controlled by the game so they won't come on with the rest of the GI. Once you have the game starting up you can hit the "On Bumpers" switches at the top to double check that the lights in the bumpers are all good.
I've been giving this a lot of thought, actually. On first thought, this...
Quoted from davideokills:...they are controlled by the game so they won't come on with the rest of the GI...
...would seem to be a logical conclusion. However, this...
Quoted from davideokills:Once you have the game starting up you can hit the "On Bumpers" switches at the top to double check that the lights in the bumpers are all good.
...would require that I repopulate and solder into place a bunch of potentially bum sockets and leads with the chance of them not working.
Also, the more I look at this picture (the last time the game was powered on):
davideokills' statement could be correct: the pops are not lit because they haven't been turned on yet.
~or~
They could be off because the sockets are bad
~or~
They could be off because bulbs were bad
~but~
The TOP passive bumpers should be on, but with only one lit that tells me I've got a 50/50 chance of the socket being the culprit (the other chance is a bad bulb).
Finally, the CENTER POP bumper is not lit by a roll-over (to my knowledge, correct me if I'm wrong), it's simply a 100 point pop all the time.
So, with this knowledge, I think I'm going to do something unexpected, which is to use the old sockets/leads. The reason for this is several-fold:
1. I'll be pulling everything off the playfield again after I'm done play-testing, in order to sand-down and retheme the game. If the sockets are truly bad, I can replace them at that time.
2. I suck at soldering. ...and if I used shiny new sockets/leads, and I had to solder them in two times over, I'd fear my sub-par soldering work wouldn't live up to the pristine nature of those new leads.
3. After this minor debate, I'm really curious to see if they work or not.
4. I'm really cheap.
Anyhow, in the coming nights I'll plan on doing that. Thanks to everyone for giving me some food for thought.
Quoted from PinballFever:Will this work with old white flippers, posts, ball guides?
Well...I've got a couple cracked flippers I could throw in the mix. ![]() ...not sure when exactly that will happen, but I'd be curious to find out, too.
...not sure when exactly that will happen, but I'd be curious to find out, too.
Promoted items from Pinside Marketplace and Pinside Shops!
Reply
Wanna join the discussion? Please sign in to reply to this topic.

Hey there! Welcome to Pinside!
Donate to PinsideGreat to see you're enjoying Pinside! Did you know Pinside is able to run without any 3rd-party banners or ads, thanks to the support from our visitors? Please consider a donation to Pinside and get anext to your username to show for it! Or better yet, subscribe to Pinside+!
