(Topic ID: 270361)
 Oviedo, FL
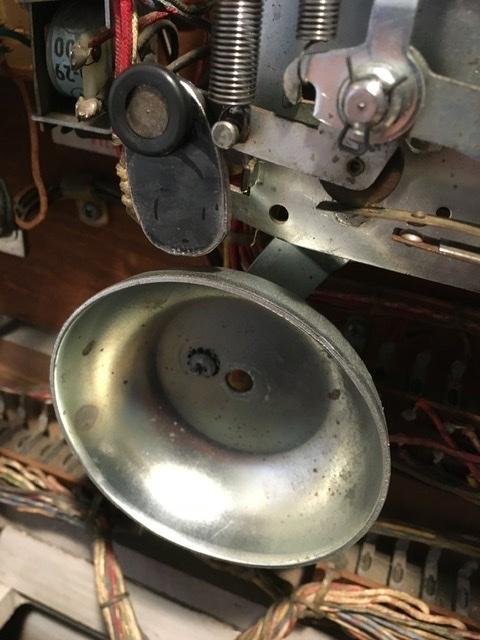
I think you are missing a piece. Looks like a thick, loose fitting metal "clapper" hangs there to ding the bell. Maybe it fell off and rolled under the cab floor - worth a check. Looks like you could make one similar from some round stock (complete with what looks like a chamfered hole). Or perhaps you could just find some fender washers of appropriate size and glue them in a stack to make it work?
 Match Units (resized).jpg
Guess I’m taking up the cab floor- never done that before. Hopefully, the part it floats on comes off. Feeling behind it, it feels like it’s riveted on. That unit has to be cleaned anyway, but I was hoping to get away without doing it.
Didn’t see the washer part in the Williams part book as a separate part.
i wouldn't bother taking up the floor. I meant looking under it with a mirror and flashlight or fishing under it with a magnetic wand. If it's under there, it would probably dislodge itself if you put the cabinet on end, too. Also, don't think you need to disassemble the end of that actuating arm. I think whatever hung on it, just had a hole diameter slightly larger than the "button" head on that arm (that's probably why it fell off in the first place maybe during transport). You could just secure it on there with an E-clip or Hair Pin Clip.
I’ll give it a try.
I’m guessing it has been missing for a long time, which would explain the second hole drilled in the bell- someone was trying to move the bell closer to the button head hoping it would clang the bell.
Your Williams # A-5505 Clapper Arm is indeed missing the "loose fitting" roller washer that actually strikes the bell. These were originally riveted on the clapper arm. Perhaps a couple of nylon washers could be pressed over the head of the rivet to work?
Nylon washers or metal ones held on with a clip. I’ll see what works and report back.
Sure seems like a bell clapper would be a common part that Marcos would have, but the pic they have of the arm doesn’t show the roller washer.
Your game has A-5505 clapper arm attached to B-5492-3 drive arm. Those parts were discontinued around 1966. They were replaced by 1A-3610 (or 01-3610) clapper arm attached to A-6488 drive arm. Both the old unit like yours and newer units use the same bell: 1A-1179A (or 01-1179A).
If I can’t fashion a solution, how complicated would it be to change the bells out for chimes?
Could I route the same power from the switches to trigger the chimes?
(Because, really I was holding out for a chime machine, but this one looked like fun so I, um, forgot I wanted chimes and got Heat Wave instead. Wasn’t expecting it to be this big a project, but guy needs a hobby, anyway.)
Fishing under the board with a magnet landed me a.... vintage thumbtack. Can’t imagine what someone would be doing with a thumbtack near a pinball, but there you go.
I found a thick neoprene washer to hold it in place. Also, a c ring. Still need to get a washer... bought the wrong size.
1 week later
1 month later
Reply
Wanna join the discussion? Please sign in to reply to this topic.

Hey there! Welcome to Pinside!
Donate to PinsideGreat to see you're enjoying Pinside! Did you know Pinside is able to run without any 3rd-party banners or ads, thanks to the support from our visitors? Please consider a donation to Pinside and get anext to your username to show for it! Or better yet, subscribe to Pinside+!
