(Topic ID: 57710)

WHITEWATER CLUB= Lifejackets not required

By Skypilot

10 years ago


Topic Heartbeat

Topic Stats

  • 7,815 posts
  • 630 Pinsiders participating
  • Latest reply 11 days ago by MiniPinHead
  • Topic is favorited by 298 Pinsiders

You

Linked Games

Topic Gallery

View topic image gallery

pasted_image (resized).png
White Water 12-7043 Wire.pdf (PDF preview)
IMG_7687 (resized).jpeg
IMG_7686 (resized).jpeg
IMG_7692 (resized).jpeg
IMG_7693 (resized).jpeg
IMG_7694 (resized).jpeg
IMG_7678 (resized).jpeg
IMG_0736 (resized).jpeg
IMG_0732 (resized).jpeg
IMG_0737 (resized).jpeg
IMG_6165 (resized).png
IMG_1689 (resized).jpeg
IMG_0518 (resized).jpeg
Pic (resized).jpg
IMG_2208 (resized).jpeg

You're currently viewing posts by Pinsider davi.
Click here to go back to viewing the entire thread.

#2718 6 years ago
Quoted from Tjohejsan:

Finished my game, so now i am in the club
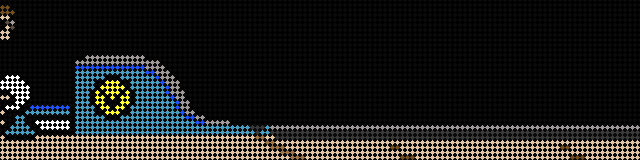
It was very dirty when i bought it.
Lots of new parts and lots of cleaning
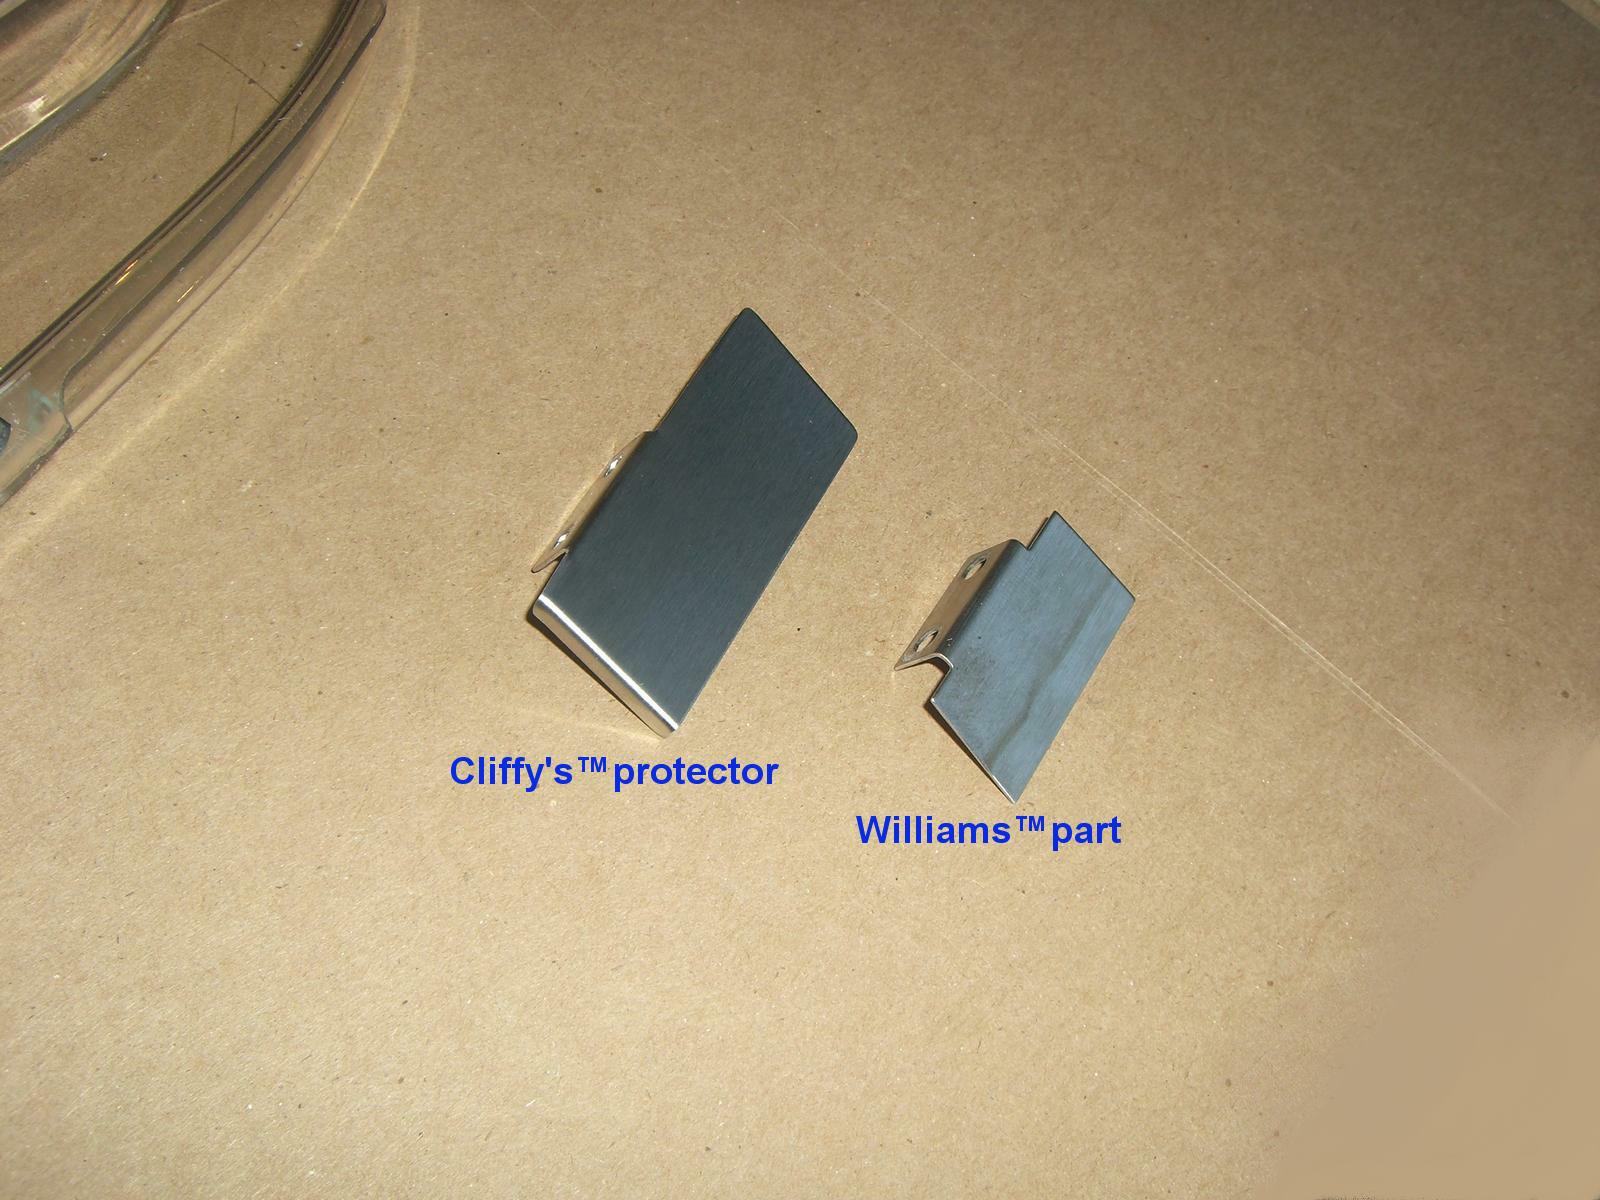
Whats left now is to changed all the 3 flipper parts.

Very nice! I like the overall look, and seems you have a good taste: no dominant blue, no purple... Good job! This is the real White Water.
And yes, extra points for Road Show

#2720 6 years ago
Quoted from Tjohejsan:

:DThank you
I like clean White bulbs. It looks fresh.
Especially when you polish the playfield.
And clean and flame polish the ramps.
Only some blue att the left targets, and the Whirlpool.

Where did you buy the left inlane plastic?
Seems you need the upper playfield mountain as well.

3 weeks later
#2742 6 years ago
Quoted from Playdium:

I need to find replacement inserts for these pictured. What's the Williams part number?

A good source:
http://www.pinballlife.com/index.php?p=catalog&parent=402&pg=1

Please doublecheck the size.

#2745 6 years ago
Quoted from Playdium:

So is there a clear lens that goes over the insert?
Also need a few pics of the jet bumper lamp lead connections.

In case you see no damage on inserts, you still need decal on it, like this:
http://littleshopofgames.com/product/whitewater-insert-decal-set/

As the decal set doesn't contains pink/black colors related to this insert, you have to paint this as well.

1 week later
#2780 6 years ago
Quoted from Tjohejsan:

Looks reaylly nice.
How much did you pay for that resturation?

Whatever is the answer, you can't say it is good or bad deal without knowing the before status of pf.

3 months later
#2911 6 years ago
Quoted from DefDumBlindKid:

Look at the gleam on that Mirco Playfield, woot! So happy with the way this H20 turned out

Nice! Has minor color issue, but overall looks good. Nice restore!

#2922 6 years ago
Quoted from DefDumBlindKid:

Ahh. I can see it now! But, yes, it wasn’t anything I would notice by playing the game.
I bought a Theater of Magic playfield that I had to send back because it was Very different from the original.

Most probably you have a TAG playfield, and you've got Sun Process version.
In Europe, Sun Process is more common.

http://www.hsapinball.com/HSA_PINBALL/hsa072914tomdiff.html

#2925 6 years ago
Quoted from DefDumBlindKid:

This information is blowing my mind right now. I had no idea! Nobody has ever mentioned that to me before, and I’ve never seen a European SUN playfield. I wouldn’t have sent it back! Whew. I can kiss that restocking fee goodbye.
Hindsight is a cruel accountant in this hobby. Now I really feel dum

Never mind. That repro was not perfect. That's why he would like to create TAG version too.

#2928 6 years ago

One of the best White Water I have seen.
Seems you have a good taste.

1 month later
#2946 6 years ago
Quoted from PinDeLaPin:

Thought i would include a photo of the bush repair job on my broken upkicker bracket done by previous owner. You can see the jb weld used to reattach the 2 pieces. Surprised it didn't have duct tape around it also, however I could find that as i get deeper into the machine. Lol!

20180311_152330 (resized).jpg20180311_152330 (resized).jpg

3 months later
#3011 5 years ago
Quoted from Vino:

Hey fellow rafters, considering a micro pf for my WH20 which is currently has original pf with some planking but doesn’t effect play.
I know ultimately it’s preference, but is it better to just keep the og DP pf intact on this title or consider a swap?
The game isn’t going anywhere.
Looks like a challenging, fun yet frustrating project but gathering some opinions before I go down this part of the river.
Thanks for any input guys

How is your pf look like? Please share some photos.

2 weeks later
#3020 5 years ago
Quoted from PinDeLaPin:

Hey guys been working on wh20 fixing a bunch of little odds and ends. So i'm down to my last error and am completely stumped on it. I have rebuilt the damn pop bumpers completely and am still getting this error at startup. Just to be clear I had this issue also b4 idid the rebuild. It works completely fine after I reset the error in test mode and scores properly. Anyone have any insight into this issue to help me keep my sanity.

20180727_101014 (resized).jpg20180727_101014 (resized).jpg
#3029 5 years ago
Quoted from PinDeLaPin:

Ok Marvin u a bad dude! Got home and checked it out and u sir called it spot on. I didn't realize there were switches under that mountain plastic was thinking it was referring switch 55 to the right pop bumper. Sure enough i took that plastic off and that switch was definitely closed.Thk u!
[quoted image]

As zene10 predicted.

#3033 5 years ago
Quoted from flipordie:

Scrolling thru eBay saw this Topper chrome??
ebay.com link » Whitewater Pinball Machine Topper Chrome Decal Licensed
Where is this stuff suppose to go? Or is it a mod?

There is a reflective sheet on the top of backbox, below topper lamps. However, this ebay stuff looks too short.

DSC_2310 (resized).JPGDSC_2310 (resized).JPG
#3039 5 years ago
Quoted from PinDeLaPin:

So all of a sudden I got the infamous bigfoot error last night. Looked at my bi-directional board and the led would light intermittently. After I looked at the board I determined the cap had started to leak. Question is can I replace the 35v 100uf cap with a 50v 100uf one? I only have the 50v ones on hand and wasnt sure it would make matters worse if i installed it. Any feedback would be great on this thx.

Sure you can replace. Higher voltage rating is not an issue.
http://www.learningaboutelectronics.com/Articles/What-does-the-voltage-rating-on-a-capacitor-mean

2 weeks later
#3050 5 years ago
Quoted from Blitzburgh99:

I have a couple of burned out bulbs in the topper. Thinking I read a post about those bulbs being special ones. Anyone have a link to where I can get spares?

https://www.marcospecialties.com/pinball-parts/04-0194

#3059 5 years ago
Quoted from Blitzburgh99:

The WH2O I picked up is claimed to be a two-owner HUO game. Condition of things as I look closely at it leads me to believe it’s true.
Can anyone provide a definitive answer as to why this rubber ring is here...and should/shouldn’t it be in place? Someone said earlier in this thread that it was placed there on the production line to prevent quick drains. So would this be how they came from the factory? Any info is appreciated.[quoted image][quoted image]

Read this section:
https://pinside.com/pinball/forum/topic/whitewater-club-lifejackets-not-required/page/54#post-3979956

#3068 5 years ago
Quoted from Cserold:

Bumping this. Have a HEP restored WH2O with a Pinsound 1 board. The Pinsound board has not worked correctly since day one. Now the latest firmware update for the board causes the game to produce NO audio after starting a game. Can't get a reply from the Pinsound guys over the last few days on this recent development (they are typically pretty good at replying). Just frustrating to have an unplayable game. Is anybody else successfully running the Pinsound 1 board (not the new Pinsound Plus Board) with the latest Pinsound firmware on their White Water?

I have seen your videos. Can you post a picture about the board, showing us the status LED's? Is the Running LED lit?
After the firmware upgrade, what is your volume level (at service buttons)?

You can try this:
Pick up another USB. Copy a small sound package file into this drive. Any package is OK, no need to be White Water. Let the board unpack it, then start a game. Activate switches and modes as much as you can, you have to hear some sound/callouts. If not, then seems you have a hardware issue.

#3069 5 years ago
Quoted from FlippyD:

Are you 100% sure you have the correct data on your USB stick? What other problems have you had with PinSound? I have PinSound in three games and the only issues I've ever had were with bad or incompatible USB sticks or with setting up the data on the stick incorrectly. These are all original PinSounds running older firmware.
It's summer vacation season for Europeans so the Pinsound guys might be slower in replying.

Correct, in 99% the USB drive is the faulty item. And yes, vacation season in Europe until end of August, especially in France, Italy and Netherlands.

#3077 5 years ago
Quoted from Cserold:

Thanks for the reply. Appreciate it. I’ve already tried multiple usb drives. My main volume is at around 12 or so. Ive posted some pics of the board and the leds on the board[quoted image][quoted image][quoted image]

Seems OK at first sight.
I have only 2 idea, simple crosscheck:
1. Can you move the USB from Fish Tales to White Water or from other pin?
2. Can you swap Pinsound board between games?

#3079 5 years ago
Quoted from Cserold:

Yes. I can try to swap usb. Could also try to swap the boards if necessary. So, the FT sound package will work in WH2O? Also here is the Pinsound debug data if this helps at all.
31/12/1969 18:00:18.357 INFO Log file enabled : /tmp/pinsound///pinsound-debug.log
31/12/1969 18:00:18.362 INFO Init sound buffers
31/12/1969 18:00:18.365 ERROR OpenSerial: Unable to open /dev/ttySP0
31/12/1969 18:00:18.368 INFO OpenSerial: Opening /dev/ttySP1
31/12/1969 18:00:18.412 INFO hardwareDecode found #FIRMWARE (Version)
31/12/1969 18:00:18.413 INFO Version firmware : 0057
31/12/1969 18:00:18.414 INFO Version software : 18.8.1
31/12/1969 18:00:18.415 INFO hardwareDecode found #HARDWARE (PCB release)
31/12/1969 18:00:18.416 INFO PCB hardware release : 1.4
31/12/1969 18:00:18.417 INFO hardwareDecode found #VOL (Volume)
31/12/1969 18:00:18.418 INFO Hard volume: 79
31/12/1969 18:00:18.419 INFO Decoder not set, ignoring volume
31/12/1969 18:00:18.471 INFO FIRMWARE VERSION : 0057
31/12/1969 18:00:18.474 INFO Custom boot sound
31/12/1969 18:00:18.476 INFO Send STATUS to PSoC
31/12/1969 18:00:20.092 INFO PSengine init
31/12/1969 18:00:20.093 INFO Init starting...
31/12/1969 18:00:20.638 INFO Audio groups initialized
31/12/1969 18:00:20.649 INFO Groups initialized
31/12/1969 18:00:20.650 INFO Init done
31/12/1969 18:00:20.651 INFO Launching initpinsound
31/12/1969 18:00:20.654 INFO Listing mix set : White_Water_Original
31/12/1969 18:00:20.658 INFO Load mix directory : White_Water_Original
31/12/1969 18:00:20.659 INFO Opening mix : /tmp/pinsound///audio/White_Water_Original
31/12/1969 18:00:20.661 INFO Loading : config.pinsound
31/12/1969 18:00:20.670 INFO Loading : jingle
31/12/1969 18:00:20.743 INFO Loading : licence.txt
31/12/1969 18:00:20.745 INFO Loading : music
31/12/1969 18:00:21.381 INFO Loading : sfx
31/12/1969 18:00:23.232 INFO Loading : single
31/12/1969 18:00:23.253 INFO Loading : voice
31/12/1969 18:00:24.342 INFO Loaded V2 sound package
31/12/1969 18:00:24.344 ERROR Cannot find or open file : /tmp/pinsound///.mix
31/12/1969 18:00:24.345 INFO Init mix bufferizing sequence
31/12/1969 18:00:24.346 INFO Init sound buffers
31/12/1969 18:00:24.348 INFO Current ducking values: jingle: 0.05 sfx: 0.9 voice: 0.85
31/12/1969 18:00:24.349 INFO Play boot jingle
31/12/1969 18:00:24.351 INFO Jingle default volume: 10%
31/12/1969 18:00:24.353 INFO Opening music file : /tmp/pinsound///audio/boot.wav
31/12/1969 18:00:24.370 INFO send READY
31/12/1969 18:00:24.371 INFO run Engine
31/12/1969 18:00:24.374 INFO Bufferizing started

You can hear some FT jingle/sfx/voice in other games. I have tested T2 sound quality in TZ with this way.

#3082 5 years ago

What about fuses F106 to F110?

#3093 5 years ago
Quoted from Cserold:

Final post here on Pinsound issues. I put the FT pinsound package on the thumb drive that was in WH2O. Worked flawlessly in FT...so the thumb drive was not the issue (as expected since I already tried multiple in WH2O). I also put the WH2O files on the drive that was in FT and nothing changed in WH2O...no sound at all when you start a game. From the errors showing in the debug log posted above and with all this testing, my conclusion that this is a a software issue with the latest firmware and the "White_Water_Original" sound package posted on pinsound.org. I haven't found anybody successfully running latest firmware with a Pinsound 1 board on WH2O. Others are successfully using the Pinsound PLUS board on WH2O.
Got an email back from Nic and Tim from pinsound. Confirmed they are both on vacation and can't help right now.

Have you ever tried to copy the files by yourself? Sometimes I had issues, the board was unable unpack the zip properly. Copy the content of zip file using computer, the entire White_Water_Original folder under the "audio" folder on the USB.
Last hint: contact Endprodukt, I am sure he has a working package/firmware combination (he is working on WH2O reorchestration).

#3103 5 years ago
Quoted from delt31:

is there anyway to control the speed of the flicker of the bottom lights that illuminate the topper?

Yes, there is a way, with upgraded PCB by GLM.
http://www.greatlakesmodular.com/index.html?http://www.greatlakesmodular.com/products/pinball/wh2o_clb.html

1 week later
#3138 5 years ago
Quoted from Nightmare:

Does anyone have an extra boulder garden plastic mountain that they aren’t using? My plastic piece broke and I’d hate to have to buy a whole set just for one.

Here:
http://www.pinball.center/en/shop/pinball-parts-by-game/white-water/3880/-boulder-garden-mountain-for-white-water

#3149 5 years ago
WH2O mountain (resized).JPGWH2O mountain (resized).JPG
3 weeks later
#3232 5 years ago
Quoted from Soulrider911:

Can someone be so kind to post s pic for me. Thankyou

DSC_1955 (resized).JPGDSC_1955 (resized).JPG
1 week later
#3251 5 years ago
Quoted from Soulrider911:

thelaw yes the lights just stay on pretty sure it’s the sequencer board do u k ow delts username or a link to the post? Cheers

https://pinside.com/pinball/forum/topic/wh20-topper-chase-lights-work-but-then-slow-downthoughts

3 weeks later
#3310 5 years ago
Quoted from bobmorlock:

Hi WH2O fellas!
I want to change my rusty playfield hangers for new ones, and I have been wondering whether the ones I have right now are the real originals for the game. Mine measure 3"1/8 long on the hook side. Looking at Mantis I have the choice between a short or a long: https://mantispinball.com/product-category/misc/
Which ones have you got on your game ?
[quoted image]

This one:

20181023_155933 (resized).jpg20181023_155933 (resized).jpg
#3316 5 years ago
Quoted from Mikonos:

They look perfet! I ordered to print it at 20 inkjet slices in backlite. Result is a piece with a very solid colours because this amount of ink. Black colour is almost opaque. There is no grain, of course!
I spent/spend a lot of time restoring artworks doing my best and they are printed with the best quality.
Do you need a copy?
Regards

As we are talking about a translite, a picture is worth a thousand words.

1 week later
#3335 5 years ago
Quoted from algrande:

WHITE WATER RAD CALS CABINET ART from Highclasspinball!

Pics?

1 week later
#3361 5 years ago
Quoted from Soulrider911:

Hey fellow Rafters, I need your help. Would one of you mind looking at your female 15 pin connector (harness side) that connects to the transformer?
I just put a new connector on and i may have swapped two wires by accident .
If you look you should have 2 blue wires of the 15, one is a blue/greyish strip, and one blue/violet stripe. see my pic below for reference is mine correct? thanks
[quoted image]

I see 2x blue/grey on the female connector, and also on male side at transformer.
Same at other end (power driver board).
20181110_070127 (resized).jpg20181110_070127 (resized).jpg20181110_070440 (resized).jpg20181110_070440 (resized).jpg20181110_071002 (resized).jpg20181110_071002 (resized).jpg20181110_071217 (resized).jpg20181110_071217 (resized).jpg

#3362 5 years ago
Quoted from Davi:

I see 2x blue/grey on the female connector, and also on male side at transformer.
Same at other end (power driver board).
[quoted image][quoted image][quoted image][quoted image]

The greyish strip is actually white (was white in 1993).
According to manual, the power driver board end is blue/white.

WH2O_7 pin (resized).JPGWH2O_7 pin (resized).JPG
#3364 5 years ago
Quoted from Soulrider911:

Got thanks so much guys.actually looks like it wouldn't even matter of I did swap them? They both do the same thing?

Exactly the same.

1 week later
#3418 5 years ago
Quoted from bigd1979:

Its crazy but i guess it was old school tech and it cant be recreated correctly bc of the missing die....

Here is a good summary:

creditdotpinball.com/2014/05/22/mods-foiled-again-the-white-water-topper-reproduction/amp/

2 weeks later
#3511 5 years ago

End of 1992, Enterprise, Nevada.
John Youssi to Dennis Nordman:
JY: Dennis, we have to finish the artwork, production is scheduled in January.
DN: I know, I know... the only thing left is how to cover those lamps at Whirlpool.
JY: pick up the cheapest bulb condoms, I think we have tons of red in the warehouse.

2016, at Pinball Show
Question by pinhead:
"Mr. Nordman, what was your intention with red bulb condoms?"
DN: (thinking for few seconds) you know, design is very important. You have to use the right colors in order to highlight or hide certain areas. Red was a good choice, because of.....

4 weeks later
#3551 5 years ago
Quoted from dmacy:

Another picture. Note pics are from tear down...[quoted image]

Let me measure.

Capture (resized).JPGCapture (resized).JPG
#3552 5 years ago
Quoted from Davi:

Let me measure.[quoted image]

Diameter: 0.35 inch
Height: 0.25 inch

https://www.marcospecialties.com/pinball-parts/03-6047-1

#3565 5 years ago

What is the correct metal post/spacer part number here?
Mine is a welded repaired crap.

Thanks

20190107_225443 (resized).jpg20190107_225443 (resized).jpg
#3569 5 years ago
Quoted from dmacy:

Correction it should be part number 02-4250-21 and 1 5/16” long. Apparently I didn’t measure well. We need to get with the metric system!
[quoted image]

Thank you!

#3588 5 years ago
Quoted from Soulrider911:

restoration noun
res·to·ra·tion | \ˌre-stə-ˈrā-shən \
Definition of restoration
1 : an act of restoring or the condition of being restored: such as
a : a bringing back to a former position or condition : REINSTATEMENT
the restoration of peace
b : RESTITUTION
c : a restoring to an unimpaired or improved condition
the restoration of a painting
d : the replacing of missing teeth or crowns
2 : something that is restored
especially : a representation or reconstruction of the original form (as of a fossil or a building)
See 1c.. anyway, be the negative/pessimistic critical person all you want, and it's your god give right. Just know i kinda chuckle every time I see someone post a blatant negative comment -like marvin - when they had the opportunity to say something supportive or maybe even positive... takes more muscles to frown than smile, just saying.
FYI... NEVER did I claim I RESTORED the chrome or the cabinet, maybe you should read through some of HEP's "RESTORATION" threads that use new cabinets Marvin.

Don't worry, at least you are doing something useful for this community (like your hints and ideas in your threads).
And we have to inform HEP asap, that his company is not anymore "full service pinball restoration company".

#3603 5 years ago

What is the best sideblade/pinblade/sideart for WH2O?

#3612 5 years ago
Quoted from OTRChief:

I have https://www.pingraffix.com/product-page/whitewater-pinblades which I like. I have side art or mirror blades on all of my games. Whitewater is the tightest fit and the art is easy to damage because of this.

Looks good!

#3613 5 years ago

Oh, I see... Black painted wood is the perfect design for every pin, except Funhouse, Earthshaker, etc...
Original =//= nicest, the best

1 week later
#3674 5 years ago
Quoted from Blitzburgh99:

I need some help...I just got another Vacation Jackpot today...that’s 2 in two days. I’m pretty sure I’m not that good.
I am running ROM LH-5. Is there a bug or something in that ROM set? I ran the River Level up to 6 on first ball by focusing exclusively on doing just that, using multiballs to move rafts and river letters. I had an extra ball. When I drained, the Extra Ball was served and River was still at 6. When I drained the extra ball and ball 2 was served, I expected river to be back to 1. The inserts on the playfield showed back to start of river. But the DMD Vacation Planner had River 6 still completed. I think I had a Bonus Hold somewhere between ball 1, extra ball, and ball 2.
Does anyone know how river 6 can be held over or kept?

http://www.actionpinball.com/tech/ww.php

#3685 5 years ago
Quoted from webdiddy:

Could someone please tell me where I can find the switch for the "right jet arena"?

Number 55.

Screenshot_20190127-161745_Drive (resized).jpgScreenshot_20190127-161745_Drive (resized).jpg
1 week later
#3731 5 years ago
Quoted from DANGERTERROR:

I think warm is the way to go. Plenty of white and light blue in the art, no need to bleach it. Warm at least works best under the rocks. One issue I’ve run into is that the yellow river inserts, even with warm leds, look too light, almost greenish. Sickly. Not gold enough. Anyone have a trick color or idea for warming up yellow inserts. I need ULTRA WARM. Or something.

Try pink. Not kidding.

#3737 5 years ago
Quoted from Soulrider911:

Hey guys have a major problem. Just put the playfield in my new cabinet and the shooter is roughly 1/2” too low?!
[quoted image]
First thought was the shooter was maybe mounted too low?
[quoted image]
Second was the wrong playfield hangers as I had to replace the old ones , I cross referenced with my creature assuming they use the same size.
[quoted image]
The playfield clearly looks to high at this end
[quoted image]
I’m totally lost love any help please

As I remember, we need longer hangers:

https://pinside.com/pinball/forum/topic/whitewater-club-lifejackets-not-required/page/67#post-4649433

#3752 5 years ago
Quoted from guido:

I cannot see the waterfall effect on my topper. Could the lights not be working the way they are supposed to do?

Sequence is completely wrong.
This is the right operation:

#3761 5 years ago
Quoted from guido:

I'm using 194 bulbs. So the bulbs shouldn't be the problem since the manual says that those bulbs are the correct ones.[quoted image]

Bulbs are OK.
Check your chase light board, resolder suspicious connections.
If all else fails, you can buy aftermarket boards, like this:
https://rocklandpinball.com/product/white-water-chase-lightboard-15761-2/

#3773 5 years ago
Quoted from Ericpinballfan:

There was a white water topper for sale for 2 hours earlier today.
Anyone know what it went for?

Actually 2... 2nd was $275.
https://pinside.com/pinball/forum/topic/whitewater-topper-and-light-assembly

2 months later
#4003 4 years ago
Quoted from arcadenerd925:

Thanks! I figured I would email Larry@starship, he responded just now 6 - 8 weeks. I'm just glad he is making more, I wont be tearing this thing down for a rebuild for at least a few months or so. Just going to enjoy it as is for now.

I do it every 3 months since February, 2018 (I guess I am not the only one). Answer is always the same: 2-3 months.
I hope they will make it this year.

1 month later
#4068 4 years ago

Restoration is in progress

Screenshot_20190524-174008_Gallery (resized).jpgScreenshot_20190524-174008_Gallery (resized).jpg20190524_174115 (resized).jpg20190524_174115 (resized).jpg
#4071 4 years ago
Quoted from PinDeLaPin:

That looks good Peter is that a whole new transformer or has it been rebuilt?

Thanks. It's the original, 26 years old transformer. Cleaned, painted and polished by me.

2 months later
#4154 4 years ago

What is the correct flipper coil setup?

According to manual:
Left: 15411, orange
Lower right: 11629, blue
Upper right: 11629, blue

According to parts list:
Left: 15411, orange
Lower right: 11629, blue
Upper right: 11630, red

#4159 4 years ago
Quoted from PinDeLaPin:

Hey Peter the parts list is technically correct. However, I personally do not like that coil on the left flipper and I changed mine to a 11629. Feels much better imo and seems to make disaster drop ramp more fluid. I have had zero issues with it, no plastics cracking or anything negative at all.

Thanks for this info.

#4181 4 years ago
Quoted from Kawydud:

My bad, thought I seen him post that they were ready.

Almost, waiting for paint process.

2 weeks later
#4245 4 years ago
Quoted from MikeSinMD:

$227 with tax and shipping! Ouch!!!

$370 with shipping and tax. No comment.

#4247 4 years ago
Quoted from PinDeLaPin:

Ok Peter I was bitching about $227 but you definitely have something to bitch about. $370 Ouch!!

I have to wait for European stock. Hopefully price won't that crazy.

#4288 4 years ago
Quoted from PinDeLaPin:

I am in real need of this bigfoot opto bracket. Does anyone have a spare or maybe have one on a parts machine that they could let go of? If you have this part please send me a pm. Thanks[quoted image]

What about 3D print? This part holds optos only, no ball contact normally.

#4291 4 years ago
Quoted from PinDeLaPin:

Hey Peter I would go that route except i'm missing the part completely so have no way to replicate it.

If all else fails, let me know, I can do the design quickly.

11
#4298 4 years ago
Quoted from PinDeLaPin:

Well damn that sucks. Does anyone else have one of these brackets they would be willing to get rid of?

Mission completed! The factory bracket is not ideal (need to bend the legs), this version is improved.
Tested on a spare mini playfield with ball guides and optos.

20190823_233647 (resized).jpg20190823_233647 (resized).jpg20190823_233659 (resized).jpg20190823_233659 (resized).jpg20190823_233712 (resized).jpg20190823_233712 (resized).jpg20190823_233728 (resized).jpg20190823_233728 (resized).jpg
2 weeks later
#4355 4 years ago
Quoted from PinDeLaPin:

It's a perfect fit Peter![quoted image]

It was not easy at first, the original bracket doesn't fit as it is, it has a bent leg, otherwise doesn't match with playfield holes. So if I copy the metal bracket, a bent plastic is required. Yours is perfect, with right angle.
I am glad it works

3 weeks later
#4407 4 years ago

Boulder set has been arrived. While I appreciate the effort, primary color is far away from original color, secondary color is way far away, looks like a chocolate mountain... Am I the only one who expect a nice colors for this money? And no, I don't believe that the reference set was soooooo dark at Starship Fantasy, I have never seen an original dark set like this.

20191004_180721 (resized).jpg20191004_180721 (resized).jpg20191004_181052 (resized).jpg20191004_181052 (resized).jpg
3 weeks later
#4437 4 years ago
Quoted from Pesmerga:

I mean the topper! posted some pics from the web for reference, which screws are used from factory on these ? Thanks[quoted image][quoted image]

As it goes on top of backbox, you have to use wooden screw, like #6 x 3/8" Unslotted Hex Head Wood Screws.

1 month later
11
#4504 4 years ago

In case you don't like the reproduction boulder set (too shiny, too dark), here is my process to be closer to factory appearance:

Tools:
Red Scotch-brite pad (quarter sheet is enough for full set)
Toothbrush
Isopropyl Alcohol

Step 1: Remove shiny surface
Cut small pieces from Scotch-Brite. Remove the coat with circular movements.

Step 2: rinse the mountain with water (to remove dry coat particles)

Step 3: Remove excess paint
Use toothbrush and Isopropyl Alcohol. Of course the more you apply/brush, the more paint you remove. Factory mountain has very few brown paint on it.
I kept a bit more to reach a realistic look.

Wh2o_before (resized).JPGWh2o_before (resized).JPGwh2o_scotch2 (resized).JPGwh2o_scotch2 (resized).JPGwh2o_scotch3 (resized).JPGwh2o_scotch3 (resized).JPGwh2o_IPA (resized).JPGwh2o_IPA (resized).JPGWh2o_after (resized).JPGWh2o_after (resized).JPG
#4506 4 years ago

Help... What is the correct rubber ring type for this post?

02-4677 post (resized).jpg02-4677 post (resized).jpg02-4677 post2 (resized).jpg02-4677 post2 (resized).jpg
#4509 4 years ago
Quoted from mjthompson:

I've had my WH2O apart for over a year and in the mean time my phone crapped out so I lost my pictures. I think these brackets go on the back of the backboard as in the picture but what the hell are they for?[quoted image]

This is part of slide assembly, called rear guide leg.

Screenshot_20191222-080341_Drive (resized).jpgScreenshot_20191222-080341_Drive (resized).jpg
#4511 4 years ago
Quoted from mjthompson:

Ok, thanks. So as shown in my picture, they are installed backward, the hooks should be toward the front of the playfield not toward the back as I have them. The manual isn't very clear to me, are the brackets just used as a pivot point before the slides engage?

Screenshot_20191222-082551_Gallery (resized).jpgScreenshot_20191222-082551_Gallery (resized).jpg
#4520 4 years ago
Quoted from MikeSinMD:

My whitewater Playfield is a little rough, and I am considering a new one. I am thinking of going with Mirco play fields. What is the opinion on these? Any problems with them? Should they be clearcoated also? Is mirco the only option? Also, where do you buy them? Thanks

Bought a Mirco pf in 2018. The playfield assembly is almost ready, so far no issue about holes, dimples, looks like an exact copy. The artwork is very nice, vibrant colors.

#4525 4 years ago
Quoted from zene10:

I haven't installed the WH2O Mirco playfield yet. However, I did install a new Mirco Whirlwind playfield. I was happy with the clear coat and colors. It's held up well with about 500 plays so far.
Issues with Whirlwind playfield (I traded my original to be used as the template for a new Mirco field):
1. "NE" decal missing from an insert. This affected multiple people who purchased from the original run. The company was indifferent and I don't know if anybody received a replacement or partial refund due to this omission.
2. The shooter lane/trough kickout area. Something was off by a few mm. Stock WW Cliffy's did not fit properly. Cliff was kind enough to create a Mirco version of the kick-out area proector based on the template I sent him.
3. The dimples were off on multiple mechanisms (pops, flippers, lift ramp area, etc). This was both irritating and disappointing, since my field was supposed to be the template, I expected a plug and play repopulation.

It's really sad in year 2019 that this can happen. Is it really hard to compare the original and the repro based on scans? Switching back and forth the pictures immediately highlight any difference.
Btw, the actual WH2O Mirco pf also has artwork issue: one orange line is missing... Not a big deal, but sounds stupid after the 1st run, which had that line.

#4544 4 years ago
Quoted from Osvivalt:

I did do some basic paint restoration and the front cabinet looks way better than before. However the eagle is still an issue. I know the best option would be new decal installation, but I don't have the skills, tools or room to do it. I'd still highly appreciate it if someone could take a high quality picture of their eagle and send it here for me to use. I'm still considering producing a custom eagle sticker for a few dollars and just putting it there. I know it sounds terrible, but a decal change is currently not an option for me. And if I were to change the decal in the future, a small sticker doesn't make any difference as as it would be removed alongside with the old decal.
Before and after:[quoted image][quoted image]

Picture has been sent.

2 weeks later
#4575 4 years ago
Quoted from Osvivalt:

For some reason I can't adjust the game volume any lower than 8. It's possible to make the game louder, but 8 is the lowest. I have LH6. Any idea what's the case?

ADJUSTMENTS -> STANDARD ADJ. -> MIN. VOL. OVERRIDE
Change to "YES".

#4578 4 years ago
Quoted from mbeardsley:

I wonder what the logic was to preventing an operator from turning the volume down to lower than 8. Kind of strange that they will let the volume go up so loud as to blow out the speakers, but not let it go lower than "just a bit too loud".
I always need to set mine down to 7, but can't do that unless I change this other setting first...kind of annoying.

With this way, the owner/employee of location can't set the volume below 8. If the volume is too low, the earning is lower.

1 week later
#4595 4 years ago
Quoted from PinDeLaPin:

Ahh I see it now that I looked closer at it. Good to know i'm not actually missing it. Thx for the help to all who commented

https://pinside.com/pinball/forum/topic/white-water-missing-plastic-coming-soon/page/10#post-4691793

#4597 4 years ago
Quoted from PinDeLaPin:

Thats an interesting fix. Did you put one of these on your machine?

No - but lowered the curved clear plastic at the end.

#4607 4 years ago
Quoted from J67ab:

Other than the metal portion of the decal everything else is available on the topper. I revitalized mine for about $150,

That 'metal portion' is the heart of the topper - otherwise the topper is dead, and the chase light is pointless.

1 month later
#4723 4 years ago
Quoted from Mrstern:

Hey guys I am doing a restoration and are looking for some NOS parts any help would be appreciated I need nos ramps nos topper decal and a nos playfield set

Your chance for biggest lottery prize ever is higher.

#4731 4 years ago
Quoted from mbeardsley:

I would check to see if Chris Hibler can repair it.
http://chrishiblerpinball.com/contact/

Whirlpool light board is very simple...
Order some new socket, and replace the wrong ones with a help of solder sucker.

https://www.marcospecialties.com/pinball-parts/24-8804

1 week later
#4749 4 years ago
Quoted from Davedigger:

Hi everyone, joined the club yesterday!! My topper is lit with LEDs and wanted to change them back to the incandescent light bulbs. Are they just the regular 555 wedge bulbs or is there another version that works the best? Thanks

#194 wedge

#4752 4 years ago
Quoted from Davedigger:

Thanks everyone for the tips on the topper bulbs. Ive got one more question. The large left ramp where it attaches at the bottom, mine wiggles a lot when the ball goes down it. I just have a bare screw attaching the ramp that goes through the left ball guide that feeds the flipper. Im sure the screw should have a spacer or something around it that would make it more snug through the ball guide holes. It is just the bare really long screw going from ramp through the guide into the play field. Any help in what parts im missing would be great. Thanks[quoted image][quoted image]

This one:

https://www.pinballlife.com/mm5/merchant.mvc?Screen=PROD&Product_Code=PBL-300-0052-00

#4754 4 years ago
Quoted from Davedigger:

thanks Davi, does it just take one?

Yes, one piece.

20200331_014340 (resized).jpg20200331_014340 (resized).jpg
1 week later
#4774 4 years ago
Quoted from transprtr4u:

Could use a pic of the assembly holding the bracket, under the whirlpool ... this supports the metal bracket holding the optos to the subway
Mine looks lines it's been doctored with, causing the optos to be be too low ...
Regards and thanks in advance for your time
Rob[quoted image]

https://pinside.com/pinball/forum/topic/restoration-rough-water-to-white-water-/page/2#post-4617481

1 week later
#4811 3 years ago
Quoted from woody76:

Does anyone have a really good picture of the lower playfield? specifically wet willy area, I want to print a overlay to cover a touch of flipper bat wear.

I hope it's good enough, Cruze scan
wh2o lower pf.jpgwh2o lower pf.jpg

#4816 3 years ago
Quoted from woody76:

this will work,but can you do another to include the entire hat?

Wh2o_cut (resized).jpgWh2o_cut (resized).jpg
#4844 3 years ago
Quoted from mbaumle:

Can confirm. My white water is a HUO example with the goodie bag still in the game that included 2 lightning flippers.

My explanation:
Fish Tales production was at end of 1992.
Based on ipdb.org: "Designer Mark Ritchie stated that the European distributors had wanted a shorter flipper."
Fish Tales manufacturing was followed by Creature from the Black Lagoon, then White Water. I guess the stock level of shorter flippers was pretty high at that time.

1 week later
#4891 3 years ago
Quoted from Lhyrgoif:

Could anyone post a picture of their ball through and specifically the position of the ball feeder mechanism and coil? My game works (balls are fed to shooter lane) but the coil assembly mounting screws are actually going through the playfield and I can see two screw ends down in the recess where the ball wire-form starts, is this normal?
I really want to see how this is mounted on other Whitewaters.
The strange thing is I can't see any old vacant holes on the underside either, so I'm not sure it has been moved, but if feels wrong where it is now too.
And yes, its dirty, I just bought it and are going through the game so haven't really cleaned it properly yet
[quoted image]

That's normal - you can use shorter screws.
http://christopherhutchins.com/gallery/album362/22_G

1 week later
#4907 3 years ago
Quoted from arcadenerd925:

How was the fit on the ramps? did you have to grind anything down or adjust anything to get them in?
Going to be headed this way myself next month.

Perfect fit, no need to hack/modify them.

#4923 3 years ago
Quoted from Lhyrgoif:

Sure, It could be to get less flipper action (more "resistance" with the spring) but wouldn't it be easier to just mount a weaker coil instead? I'm really curious about the cause fore this.

The flipper return extension spring bracket hits the ball guide on the main playfield (right loop, inner one).

3 weeks later
#5014 3 years ago
Quoted from djreddog:

Factory does not have that rubber installed. With that rubber in, the game plays much easier. Pull it out and be prepared for some massive right outlane drains!

According to statistics, the lack of post/rubber doesn't generate more right outlane drains.
https://pinside.com/pinball/forum/topic/whitewater-club-lifejackets-not-required/page/81#post-4979269

#5023 3 years ago
Quoted from Johncare07:

I’m doing a restore and during tear down of the playfield I only see one pop bumper plastic top. Is that right? I know the boulders cover then pops, but looking for clarity. Thanks.
[quoted image]

That's a Data East bumper cap.
https://pu-parts.com/data-east-sega-stern-pop-bumper-caps_5
(The rubber setup is also not correct.)

1 month later
#5131 3 years ago
Quoted from RusticatedBelt:

Anyone happen to have their Bigfoot assembly detached and could take a few photos of the Opto interrupter piece attached to the bottom of the motor shaft (between the opto board and motor casing? The part in the manual is 03-8698 Actuator Opto Switch. Don’t see a replacement part anywhere so I need to recreate this from scratch. A few photos by a tape measure or with calipers would be welcomed. Seems like it would be easy enough to 3D print.

This is a simple disc. I can't tell you the exact diameter, but you can easily measure the distance between the opto and the center of the shaft.
Wall thickness is about 2 mm, height is ~ 10 mm.
DSC_2602 (resized).JPGDSC_2602 (resized).JPGDSC_2603 (resized).JPGDSC_2603 (resized).JPG

#5133 3 years ago

Another view, this is how the cut look like.

20200718_171507 (resized).jpg20200718_171507 (resized).jpg

When Bigfoot looks to player's direction:
20200718_171532 (resized).jpg20200718_171532 (resized).jpg

#5139 3 years ago
Quoted from RusticatedBelt:

What’s the verdict on replacement ramps and boulders from Starship Fantasy or Marco? They are essentially priced the same considering shipping from both. Are they the same quality? Seems like most posters were saying Starship, but I saw some pretty badly painted boulders on this thread that may have come from Starship that needed some help, and looking to avoid that.

The ramp maker is Starship - great quality. Also true for boulders (paint color is too dark). I don't know who is the maker of the ugly white boulders.

1 week later
#5159 3 years ago
Quoted from tdiddy:

My wh20 has the a wrinkle in to foil topper which seems kinda common, how do ppl address this? I was thinking about a heat gun and going slow?

Risk and reward...

3 weeks later
#5204 3 years ago
Quoted from woody76:

Yes, but looks way better than glitter solution. I have had friends play mine and they can't tell its a reproduction. You have to angle it forward and the effect is pretty darn close to original. I can't remember what I paid.

I agree, it's better than nothing. But to call it pretty close to original? Based on feedbacks and videos it's far away. The waterfall effect is missing.

https://www.google.com/amp/s/creditdotpinball.com/2014/05/22/mods-foiled-again-the-white-water-topper-reproduction/amp/

#5207 3 years ago
Quoted from woody76:

Can you read? You have to mount it differently. It has to be mounted with spacers so the entire thing leans forward. It is not perfect but way better than glitter and so far no one has even noticed it was a repro

Don't be upset. I know what you mean. The link I posted contains a video comparison between original and tilted repro. Day and night.

1 month later
#5236 3 years ago
Quoted from mystman12:

Actually I'm not talking about the switch, I've already protected that. I'm talking about the cracking at beginning of the first turn on the ramp. You can see in my pic that it's cracked so bad there's now a hole on the side. The metal piece over that spot in your photo is what I'm looking for.

Looks like that metal piece is from Disaster Drop ramp entrance.
Buy a Disaster Drop ramp protector from Cliffy, and move the original metal piece to Big Foot ramp.
http://www.passionforpinball.com/WH20/wh20cliffy_vs_oem.jpg
http://www.passionforpinball.com/wh20.htm

2 weeks later
#5257 3 years ago
Quoted from eb94114:

That makes sense. I might post a picture later, as I do think I have the rubber blocking the ball access. If I do, is there anything I should do to fix that? Isn't this the post that can be moved? Thanks again.

This is the area. You can see a hole - I also removed the post.

20201013_184207 (resized).jpg20201013_184207 (resized).jpg20201013_184727 (resized).jpg20201013_184727 (resized).jpg
2 weeks later
#5267 3 years ago

Looking for some advice...
Is this zero clearance normal?

20201029_121031 (resized).jpg20201029_121031 (resized).jpg20201029_121252 (resized).jpg20201029_121252 (resized).jpg
#5270 3 years ago
Quoted from Bryan_Kelly:

Did you install new ramps and/or mountains and boulders? Ramps are thicker and also the boulders.
If so, you may have to shave off some of the mountains on top. Grind, file...what ever it takes.
Big Foot is no issue if his fur touches the glass.

Thanks.
Yes, new Starship ramps and boulders/mountains. At the back ramp, the situation is worse, about 1/3 inch higher, touching the wood. Should I lower the L brackets?

1 week later
21
#5280 3 years ago

My first restoration is done
20201107_141220 (resized).jpg20201107_141220 (resized).jpg20201107_141227 (resized).jpg20201107_141227 (resized).jpg20201107_141237 (resized).jpg20201107_141237 (resized).jpg20201107_141537 (resized).jpg20201107_141537 (resized).jpg20201107_142313 (resized).jpg20201107_142313 (resized).jpg20201107_142337 (resized).jpg20201107_142337 (resized).jpg20201107_143321 (resized).jpg20201107_143321 (resized).jpg20201107_143323 (resized).jpg20201107_143323 (resized).jpg20201107_143328 (resized).jpg20201107_143328 (resized).jpg

20201107_143407 (resized).jpg20201107_143407 (resized).jpg20201107_143424 (resized).jpg20201107_143424 (resized).jpg
#5292 3 years ago
Quoted from djreddog:

Ok a couple of updates before I mess something up.
First photo shows a yellow arrow to the trace that goes to the bad socket. To be clear, all I need to do is heat up the soldering iron and then retrace that line?
[quoted image]
Next 2 photos show a closer shot of the pins. The pin on the far right is the one that goes to the bad socket. It looks different than the other pins. Is that the problem? Looks like it’s lacking solder?[quoted image][quoted image]

Don't touch the trace. Resolder (reflow) the far right joint. The solder is there, but cracked. Most probably due to vibration caused by lost mine kickout.

#5297 3 years ago
Quoted from Pinterest:

That's awesome - do you produce the light boards also?

Lamp board is available at many European store:
Ministry of pinball
Best of pinball
Pinball Center

2 weeks later
#5313 3 years ago
Quoted from mystman12:

Anyone have any pictures of the underside of the upper flipper? Mine has a strange issue where the end-of-stroke just barely reaches the flipper pawl, and as a result gets caught on the corner of it after it's played enough and worn down a little bit. I just replaced the end-of-stroke, plunger assembly, coil stop, and put new shrink tubing on the pawl, but it's still the same as before. At this point I'm just trying to figure out what's different about my flipper compared to others'. Pics with the flipper fully extended would be most helpful.
[quoted image]

Originally, this flipper is equipped with spring around the plunger.
Your picture is with spring retainer bracket - this bracket is for external spring. The bracket hits the ball guide, this is a limitation.
You have to remove the bracket, or if you want to use external spring, need to modify a bit.

20201123_201329 (resized).jpg20201123_201329 (resized).jpg20201123_201352 (resized).jpg20201123_201352 (resized).jpg
#5315 3 years ago
Quoted from mystman12:

Yeah, I noticed that when I was putting the flipper back together, but I was able to adjust it so the bracket doesn't hit the ball guide. Interestingly, it looks like your EOS also just barely reaches far enough, albeit a bit further than mine.

The main reason of why I removed the inner spring: sometimes I feel it "sticky", when it's fully compressed (and acts as a limiter in this case).

#5320 3 years ago
Quoted from DwightEisenhower:

I'm having an issue with my White Water going into factory reset after powering down. I'll turn the machine off per normal. Next time I turn it on, it resets to factory settings (unable to take volume below 10, 3 balls/game, not set on free play, and deletes all my high scores). I can deal with the first 3 issues but deleting my high scores hurts.
In searching through pinside for a solution, I came across this:
https://pinside.com/pinball/forum/topic/white-water-power-down-resets#post-3437982
Would this be a potential solution?
Any guidance is appreciated. Thanks.

Here, search for factory reset:

http://techniek.flipperwinkel.nl/wpc/index3.htm

#5326 3 years ago
Quoted from mbeardsley:

Yes, I believe you are correct. LH-5 was pretty bad, in that it would crash as soon as you had a pretty good game. Something about hitting the standup targets too many times in a game would cause it. The LH-6 rom fixed that issue. I have been running LH-6 for a long time with no problems.

And the light show (flashers, GI dimming) in LH6 is pretty cool - and compatible with recently released pin2dmd colorisation.

wh2o pin2dmd.gifwh2o pin2dmd.gif
#5329 3 years ago
Quoted from yaksplat:

Is that the Endprodukt colorization?

Yes, this was a teaser.

#5362 3 years ago
Quoted from Lhyrgoif:

Oh, the chick finally got a life jacket too
Really nice art, I do want it but not sure for that price.

Creature at 9 o'clock.
I like the sideart. The other art is also pretty cool, but for me, it's too crowded as translite.
The artist is a pure talent.

#5365 3 years ago
Quoted from RCSP:

I didn't look through 108 pages of this thread, so maybe this has been answered. I want to grease the bigfoot motor gears. I have most everything taken apart, but can't see how bigfoot's head is removed. Help! Thanks.

At the back, there is a hidden machine screw. Unscrew, then you can remove the head.
Then, there is a grub screw.

DSC_2596 (resized).JPGDSC_2596 (resized).JPGDSC_2598 (resized).JPGDSC_2598 (resized).JPGDSC_2599 (resized).JPGDSC_2599 (resized).JPG
#5383 3 years ago
Quoted from PinDeLaPin:

Well damn that's pretty sweet. How bout the story of where you scored it and how many kidneys you had to give up to get it?

Most probably here:
https://pinside.com/pinball/forum/topic/nos-parts-for-sale-cftbl-addams-whitewater#post-5902424

#5392 3 years ago

Someone please explain me:
An item goes to Pinside Market. One hour later, the ad is closed: The seller marked this ad as "not sold".
What's the point? Is this the way to avoid fee?

#5397 3 years ago
Quoted from brian-allen:

Hi everyone!!! I wanted to share these new White Water Side Art Blade decals I created. Thanks for all the support on these so far!
All of the artwork was hand-drawn by me, ships from us directly.
• Officially licensed from Williams/Bally, and comes with a genuine Hologram sticker to prove authenticity.
• Printed on thick Matte White Opaque Air Egress/Perm, high-quality vinyl.
• The Air-Egress vinyl adhesive we use makes for easy and forgiving installation. (10-15 minute installation)
• Printed with vibrant, fade-resistant colors.
• Laminated with a scratch-resistant protective coating that will keep them looking like new for many years.
• The textured, matte laminate will also minimize the number of reflections from the Playfield lights.
• Fits ALL White Water pinball machines.
• Die-Cut hole in each blade to accommodate backbox hinge bolt for easy installation.
• Set of two pre-cut decals (one for each side).

You can check them out here:
https://www.flylanddesigns.com/product-category/pinball-and-arcade-artwork
THANK YOU!!!
[quoted image][quoted image][quoted image][quoted image][quoted image][quoted image][quoted image][quoted image][quoted image]

Cool!
Is it possible to extend the artwork next to shooter lane/apron (to fully cover the side of cabinet)?

WW_SB (resized).JPGWW_SB (resized).JPG
1 month later
#5471 3 years ago
Quoted from crazy79:

Hello, purist hide your eyes! I'll add a layer.
Custom topper finished.
I'm still looking for a downloadable HD image of the topper, if you've got that under your belt, I'll put my hand up.
Thank you in advance.
[quoted image][quoted image][quoted image]

Hey, wrong thread, this is the correct one:
https://pinside.com/pinball/forum/topic/congo-club-owners-only

1 month later
#5609 3 years ago
Quoted from acidburn:

Anyone know where you can buy this silver thing from for the topper? Assume it’s there to help disperse the light from the bulbs? (Circled in red)
[quoted image]

Normally in print/decal shops. Look for chrome/mirror vinyl.
Like this:
https://www.amazon.com/12x78Chrome-Mirror-Silver-Sticker-Self-adhesive/dp/B00LY81CAY

#5612 3 years ago
Quoted from mystman12:

Is that factory? Mine doesn't have that.

Yes, it's factory.

1 month later
#5722 2 years ago
Quoted from Crash:

I personally can't justify the price. I'm ok with buying a monochrome LED display, as amber is what I grew up with and I spend 90% of the time watching the ball. Or I could get white with colored gel filters. Either way LED is miles ahead of the old problematic plasma systems.

An option is pin2dmd. 50% cheaper than ColorDMD. Colorization is available for White Water. It's 99% done, but I don't really care the remaining 1%.

#5727 2 years ago
Quoted from Crash:

I went down the PIN2DMD route. I encountered multiple design and QA issues (as did others) and it doesn't meet my location reliability needs.

I received a display from Canada, and this was a pure plug&play experience. No issue at all.
QA issue is most probably related to multiple manufacturing source (open source project).

1 week later
#5765 2 years ago
Quoted from loneacer:

Anybody know the part number(s) for the topper screws? Looks like there's 3 for the topper and 6 for the dome (3 in the back that go in wood, 3 in the front that go in metal). I'm guessing they are all Torx screws, probably 2 or 3 different ones.

These are in the parts list (for backbox lock and for topper dome):

4008-01093-16B
4008-01093-12B

And most probably this is for the topper (wood):
https://www.marcospecialties.com/pinball-parts/4110-01093-12B

1 week later
#5814 2 years ago
Quoted from mbaumle:

I have a repro set from starship (I think, bought from Marco, but I think Starship supplies them). They’re so close to the original, I actually only replaced the broken ones from the set and you wouldn’t notice the difference.
There’s some replacements out there that are glossy looking and much darker brown. I don’t have experience with them, but they definitely aren’t close to looking like the originals.

The latest run by Starship is waaay darker than the original.
Here is my method:

https://pinside.com/pinball/forum/topic/whitewater-club-lifejackets-not-required/page/91#post-5367007

#5819 2 years ago
Quoted from BrewNinja:

Pinball.center is good to go.

Be careful about plastics and translites, stickers.

#5820 2 years ago
Quoted from nerdygrrl:

Oh wow, that came out great

Thanks. It's an easy process.

#5829 2 years ago
Quoted from rvermeire:

Anything else that can be done ?

Try it without the spring.

1 week later
#5840 2 years ago
Quoted from yzfguy:

Thanks, I don't care for that one. Looking for a new original.

Is 3D an option?

#5845 2 years ago
Quoted from yzfguy:

It's new, but it's an alternate art package. I much prefer the original in this case. I get it when alternate art is done for games like the shadow, but wh20 already has great original art. I was hoping someone had replaced a good condition original with that one and might want to sell.

I agree, it's a nice art by Youssi.

#5849 2 years ago
Quoted from yzfguy:

I ordered one from them two weeks ago and they are out of stock, no ETA I'd prefer they mark it out of stock than accept payment only to tell you it's out of stock and ask if you want a refund.

If all else fails, there is a repro source in Europe.
I can help about postage (if direct shipping to USA is not possible).

3 weeks later
#5907 2 years ago
Quoted from The_Pump_House:

Could someone post the part number for the vuk cup that feeds the upper playfield?
I ordered one but received the wrong part.

03-8561

#5914 2 years ago
Quoted from The_Pump_House:

That’s what I ordered but that’s not the correct part. My vuk cup has a base that extends down the coil shaft

03-8561 is the factory setup, according to parts list.

#5915 2 years ago

It's a coil, not a cup.

2 weeks later
#5924 2 years ago
Quoted from BrewNinja:

He offered to help re-create the topper, but then PPS got involved and we got the twisted pins version....

cristiano-ronaldo-portugal-airport-statue (resized).jpgcristiano-ronaldo-portugal-airport-statue (resized).jpg

4 weeks later
#5957 2 years ago
Quoted from Jherre6:

How is everyone lighting there playfield more? I would consider pinstadiums, but they might not fit/or might block the view some.

Starpost lights:

009a0080f98d0f52cdc2b87bd5494ff6de81e159 (resized).jpg009a0080f98d0f52cdc2b87bd5494ff6de81e159 (resized).jpg04ccac4935f0071baae062d33b59150f7e61be67 (resized).jpg04ccac4935f0071baae062d33b59150f7e61be67 (resized).jpg83e8932a4f7c15744c3e9ae69513929dec9e4c73 (resized).jpg83e8932a4f7c15744c3e9ae69513929dec9e4c73 (resized).jpgbeac674edee794a8a416acb0a83a72f2b0a9b988 (resized).jpgbeac674edee794a8a416acb0a83a72f2b0a9b988 (resized).jpg
1 month later
#6102 2 years ago
Quoted from nerdygrrl:

Looks great, that backbox lighting is amazing!!!!

I like the playfield part, but the backbox... Why the backbox is amazing?

#6111 2 years ago
Quoted from yzfguy:

Trying to provide arms for my poor bigfoot. No idea why they are missing. Can someone please take a pic with his arms extended so I can see how/where they are connected to him? His body fur looks fine, no holes or anything, so I can't tell how I would attach them even if I find a close match for the fur.
Thanks!

DSC_2596-1 (resized).JPGDSC_2596-1 (resized).JPGDSC_2599-1 (resized).JPGDSC_2599-1 (resized).JPG
2 weeks later
#6127 2 years ago
Quoted from Whitewater:

Hi guys can someone please post a closeup photo of the area just in front of Bigfoot . I’m missing something outta my machine ?[quoted image]

Missing items:
White spacer: 03-8371
Metal post: 02-4426-1
Nut 6-32 nylock

20211018_102102 (resized).jpg20211018_102102 (resized).jpg
1 month later
#6206 2 years ago
Quoted from algrande:

looking for a WATERFALL SUPPORT FOR WHITE WATER (03-8745)[quoted image]

Seems only available in Germany.

3 weeks later
#6240 2 years ago
Quoted from nerdygrrl:

Has anyone installed a Mirco? If so how do you like it?

I have a Mirco playfield. So far so good, no clearcoat issue.

2 weeks later
#6247 2 years ago
Quoted from radium:

Anyone build a whitewater from scratch? Wondering which parts are going to be impossible to find. Seems like big foot mech and lamp boards? What else?

It depends. If you are looking for original parts, the mission is almost impossible: Big Foot, ball guides, lamp boards, playfield harnesses, wireform ramps.
And of course waterfall topper.

If repro is good enough, the project is still hard, but not impossible. I can help with lamp boards and wireforms.

20211118_082749 (resized).jpg20211118_082749 (resized).jpg20211118_083154 (resized).jpg20211118_083154 (resized).jpg
#6249 2 years ago
Quoted from Lhyrgoif:

I think the metal piece for holding the opto sensors at the mini playfield is one of these things. If you are handy and have some tools you could make one yourself, its basically a bent piece of metal with some holes in it.

No problem

https://pinside.com/pinball/forum/topic/whitewater-club-lifejackets-not-required/page/86#post-5164892

#6254 2 years ago
Quoted from mbeardsley:

I'm shopping out my WH20 (replacing a lot of stuff, going to LEDs, etc). I bought a "Whitewater post kit" from Marcos that has a bunch of clear star posts and a bunch of clear "narrow" posts. It also includes one post as shown below.
I haven't been able to find where this post gets used. Did Marcos include this incorrectly? Or maybe one of the posts I currently have is incorrect?
Ideas?
[quoted image]

It's a kind of stopper. It stops the backbox lightboard at 90 degree.

#6274 2 years ago
Quoted from mbeardsley:

My original WH20 dome does not have any top foil or stickers on it and I've owned it since late 1996, and I doubt that it "fell off" before that.
So, I don't believe that they originally came with the foil on it.

It's factory, installed onto the top of the backbox (not on the dome), behind the light deflector (below the bulbs).

#6277 2 years ago
Quoted from mbeardsley:

Well, that's not what he was talking about. He was talking about the foil in the top of the dome like FishTales has.

I don't know Fish Tales topper, but he wrote:

"My WH20 topper does not have the mirrored type adhesive film under topper."

#6285 2 years ago
Quoted from TheOnlyest:

All this will do is light up more of your ceiling... 99 out 100 games dont have this tape anymore.

The tape is in between the lights and the decal, and lower than the bulbs. Due to it's position it reflects the light towards to the waterfall.
I have seen many White Waters, the foil was always there.

20220120_075732 (resized).jpg20220120_075732 (resized).jpg
1 week later
#6302 2 years ago
Quoted from mbeardsley:

Yes, I'm in the middle of replacing my bigfoot motor, so I had the whole bigfoot mechanism removed last night. Not only are the plastic parts sort of tacky, but the fur is pretty matted and grungy too. I wish there was an easy replacement for the fur - ideally with a fur that more closely matches the color of the mountains.

Remove Bigfoot body, then use water and shampoo.

#6305 2 years ago
Quoted from whthrs166:

Ha! Head and Shoulders?

Or this. It's official.

Screenshot_20220127-231739_Chrome (resized).jpgScreenshot_20220127-231739_Chrome (resized).jpg
#6338 2 years ago
Quoted from Lhyrgoif:

Normally I think people add way too much mods (like plastic animals) to their games

It's true for "missing plastic" too
(Why it's missing? Is the upper part not heavily crowded as default?)

#6351 2 years ago
Quoted from yzfguy:

I think you mean missing mountain. The missing plastic goes over the metal ball guide under the left ramp.
To me, the get looks naked without a missing mountain. It just feels like it should have been there.

I mean missing plastic mountain

#6375 2 years ago
Quoted from mbeardsley:

I'm re-assembling my WH20 after a shop (and various other fixes) and now I'm somehow missing a connector!
In the picture below (circled in red) I have this connector that seems to have no place to go. I believe it has something to do with providing input to the bigfoot mech, but I can't find where the other of this connector is.
If someone could check their machine and see where this goes to, I would appreciate it. Thanks.[quoted image]

It goes to Bigfoot Cave flasher.

20220130_210417 (resized).jpg20220130_210417 (resized).jpg
#6384 2 years ago
Quoted from in2kiss:

Is that red flasher cover supposed to be there or did you add it yourself?

Good question. According to parts list, there are 2 pcs mini dome cover in White Water: one above Whirlpool flasher, and one in Waterfall ramp.
On the other hand, I saw the cover at the cave in HEP gallery.

169_G (resized).jpg169_G (resized).jpg217_G (resized).jpg217_G (resized).jpg
#6386 2 years ago
Quoted from Shenanigander:

That is a good price for sure!

Oh interesting. Mine is missing then.

This is the part number: 03-8662-9
And a spacer is also required (~5mm).

3 weeks later
#6500 2 years ago
Quoted from lrosent345:

Hi everyone. I have done quite a bit of investigating the problems. I had a second white Water and put it next to the one I was working on. They are no where near the same. I found in searching that there were at least 3 different companies that made playfields. I can tell you that one of mine was made in 1992 and the other was made in 1993 by a different company. There are suttle differences in them. My bigfoot ramp fits perfectly in one of my games but not the other. It needs to be lowered at the flap entrance. It looks as though the ramps fit most but not all games.. I also know the prototypes are not the same as the production models. I reccomend using washers for the whirlpool ball stuck problem and sanding of the recess for the entrance to the suicide canyon ramp. The canyon ramp fitting is not the easiest but it does ensure the best chance for not ruining the ramp. It appears impossible for me to make ramps that willl drop in on any game. If you ruin the ramp. I might get you a better price on a replacement but I will not send you another free ramp. You always have the option of returning the ramps for a full refund. Again, if you can think of a better way to resolve this, I'm always open for suggestions.

Hi Larry,
I like your ramps. Is it 100% same as the original? No - the shape is the same, the thickness is greater. But it's stronger, and I like it.
If I am ready for a restoration, it means I am ready for minor modifications.
New shiny clear ramp looks 100x better than yellowish, broken and hacked old one. Without new ramps high level restoration is basically impossible for most of the titles.
Thanks for doing this.

wh2o_resto (resized).jpgwh2o_resto (resized).jpg
1 month later
#6576 2 years ago
Quoted from SFBP36:

Hi all, just got my 1st WH20 a few days ago. Can someone tell me how the Bigfoot’s Cave mountain is attached to the shooter lane wire form? My replacement has the 2 screw holes to attach it to the ramp and one more up top. Is there a special bracket for the wire form? The one I got with the game was broken and Velcro taped in place. Thanks!

All you need is: a zip tie.

Screenshot_20220328-214140_Chrome (resized).jpgScreenshot_20220328-214140_Chrome (resized).jpg
1 month later
#6698 1 year ago
Quoted from mbaumle:

Sorry if this has been discussed multiple times already, but how can I adjust the plunge on this game? Currently, a full plunge sends the ball down the spine chiller ramp and straight down the middle nearly 100% of the time.
This really hasn't ever been a huge issue since it's usually me playing and I go for skill shots, but I have young kids in the family who just do full plunges all the time, and the game is literally unplayable for them.

Original shooter spring is 10-148-1: medium tension.
Try the spring assortment kit, it has medium-low, and lowest tension spring too.
https://www.marcospecialties.com/pinball-parts/10-148-XX

3 months later
#6861 1 year ago
Quoted from Frogroar:

I received “next gen” cabinet decals for my White Water a while ago. Now that I’m almost ready to install them, I find them purple-ish instead of blue. The sharpness and colors of the mountains and Bigfoot are great though. Should my new decals match the blue I see on the playfield and old cabinet? I read somewhere that all White Waters were purple-ish when they came out of the factory, is that true?

Original is dark blue. In fact same blue as in Funhouse.
Can you post few pictures (cabinet vs new decals)?

#6867 1 year ago
Quoted from Pinkitten:

It does appear a slightly purple blue, but still looks very good imho.

I agree.

3 weeks later
#6913 1 year ago
Quoted from lanfeust:

Hi, I am a new owner of a WW, according to you, what leds fit the best to this pin... white, cold white, warm white, blue, clear, frosted...? others? thanks!

White Water is in the nature, so warm white or sunlight white.

2 weeks later
#6967 1 year ago
Quoted from PinballGalore:

2 quick questions. How many volts are the backbox flashers meant to be?
Also, how many volts are the topper bulbs supposed to be?
Thnx
[quoted image]

Backbox flasher voltage: 20V, pulse. Bulb type: 906
Topper voltage: 12V, pulse. Bulb type: 194.

#6974 1 year ago
Quoted from PinballGalore:

Thanks.
I saw those too but couldn't see anywhere mention they are 20v or the word "pulse" as Davi listed, so I want to make sure they're not the regular 12v flashers as those blow out in a millisecond.

You need that mbeardsley linked.

#6981 1 year ago
Quoted from TheOnlyest:

Iv'e been watching this convo for a couple days... I have no clue what you guys are talking about with this 20v-24v backbox panel flasher bulb nonsense.... But I think you guys are trippin!! I've been a pinball tech for over 30 years, and I don't know of any 20v wedge flasher bulbs in ANY insert panel! I have had good-ol standard 12v 906 LED flashers in my WH20 for over a year and they work just fine... Coincidentally, same thing in my other 11 pins for about 7 years, I don't thing i've ever even had one fail!

Flasher circuit works at 20V. Or am I wrong?
I said he needs bulb type 906. Nobody talked about 20V bulb type.

#6983 1 year ago
Quoted from bobukcat:

You are not wrong but it caused confusion because then shokel328 thought he needs 20V bulbs but he doesn't, because they are just pulsed the 12V bulbs work perfectly fine, as you and most of us already know.

I thought he is looking for the output voltage of the socket (based on a picture with empty sockets) and the bulb voltage too.
(I have to improve my English.)
Anyway, I am sure he is OK by now, the bulb type 906 and Marco's link defines the type very well.

#6989 1 year ago
Quoted from billsfanmd:

Quick question on the small RIVER pcb under pf. My R bulb sometimes will not stay lit when it should. I swapped other bulbs and sockets and its def something on the board..Don't see the board in the manual. THinking I need to reflow solder on connector or any other ideas. Thx!

Resolder (reflow) the joints at the connector. The solder is there, but most probably cracked, due to vibration caused by lost mine kickout.

#6995 1 year ago
Quoted from EEE:

This is what the bottom of mine looks like
Any suggestions on where to buy the motor and metal stand-off?
[quoted image]

The motor itself is not available. With gearbox:
https://www.marcospecialties.com/pinball-parts/14-7973

4 weeks later
#7040 1 year ago
Quoted from kryss63:

Picture 1: something is missing on right side (and also on left side). Certainly a screw and something else... could you confirm ?

A metal spacer is missing:
https://www.pinballlife.com/williams-metal-lane-guide-spacer.html
You also need a philips head wood screw, 3/4".

For the metal post, usually 6-32 x 1/4 sheet metal screw is required. Buy this kit, it helps a lot:
https://www.pinballshop.nl/playfield-parts/screws-and-nuts/big-bag-of-everything/?sl=en

#7041 1 year ago
Quoted from daveyvandy:

I'm curious if an LED OCD board could smooth those out?

No - topper light is controlled by Chase light board independently from lamp matrix.

#7047 1 year ago
Quoted from Frogroar:

Howdy partners!
I need to ask for a huge favor: can someone scan this area in a high resolution for me please? I can't seem to find adequate images on the internet...
I will try to repaint and airbrush the drawing or make a decal if plan A doesn't work out.
Thanks in advance!
[quoted image]

I have this scan.

c13310f8a6b065c135c608f61b21c514cfaf6f6b.jpgc13310f8a6b065c135c608f61b21c514cfaf6f6b.jpg
#7049 1 year ago
Quoted from woody76:

is this to size? I need as well

It's a jpeg file, so you have to scale it.

#7051 1 year ago
Quoted from woody76:

Yep, I opened in AI and PS and it needs to be sized. Still a solid image so should work. Thank you

Let me know if you need the original scan.

2 months later
#7236 1 year ago
Quoted from PinDeadHead:

Does anyone know if I’d have to remove the upper playfield to access the switch underneath?

No need to remove the playfield. Remove the top mountain, the switch is below the mountain plastic.

DSC_2053 (resized).JPGDSC_2053 (resized).JPG
3 weeks later
#7291 1 year ago
Quoted from radium:

Longshot, but hoping someone might know what part number 01-11020, "brkt dual switch gate" looks like. It's a bracket for a microswitch. Anyone knows where it goes? Maybe it's under the main playfield?
Some hints... 1) it's not part of the upper playfield, 2) I don't think it's part of a ramp because it's listed separately from the ramp assemblies, 3) the cable for it is called "double ramp switch cable" in the bom
This is the switch/actuator for it...
[quoted image]
It is part of assembly A-16099, "dual gate assy"...
[quoted image]

You were so close.
Open the H-15994, then you will find 3 wires:
Green/yellow
White/violet
White/grey
This means 2 switches, switch 47 and 48. The bracket is behind/under the Lights Whirpool/Whirlpool is lit plastic/lamp assy.
Screenshot_20230305_004853_Chrome (resized).jpgScreenshot_20230305_004853_Chrome (resized).jpgScreenshot_20230305_005128_Drive (resized).jpgScreenshot_20230305_005128_Drive (resized).jpgScreenshot_20230305_005243_Drive (resized).jpgScreenshot_20230305_005243_Drive (resized).jpgScreenshot_20230305_005738_Gallery (resized).jpgScreenshot_20230305_005738_Gallery (resized).jpgDSC_2122 (resized).JPGDSC_2122 (resized).JPG

#7302 1 year ago
Quoted from mbaumle:

Red whirlpool lights just follow the lighting schemes in Williams games.
I.e. Yellow to light an award, green for locks, red for jackpots.
Each whirlpool lamp lights for each ball ball shot to it during “ride the whirlpool.” Once they all flash, it scores a jackpot. They’re also the same color as the Boulder awards (and shooting the whirlpool awards a Boulder), so, if I were a betting man, I’d say that’s why they chose red bulb condoms in the whirlpool.
I really don’t think people notice the nuance in the whirpool Lights to count the balls until a jackpot is made, so blue does make sense too.

Here is the "true" story of Whirlpool lights:
https://pinside.com/pinball/forum/topic/whitewater-club-lifejackets-not-required/page/71#post-4720220

2 months later
#7376 11 months ago
Quoted from Arsenal129:

Hi there. I just acquired my WH2O this week and am cleaning up the playfield. The “Boulder Garden” Boulder has been massacred and needs replacement. I found a replacement from a UK site called Pinball Center. I am wondering if anyone has ordered a repro boulder from them and whether the repro is a close match color wise to the originals. Thanks.

It's in Germany, not in the UK. Colors are far from the original.

20230215_171231 (resized).jpg20230215_171231 (resized).jpg
1 month later
#7440 9 months ago
Quoted from radium:

Here is a mystery. Can anyone find the part number in the BOM for the three 8-32 stud plates on the left rail that hold the falls ramp?
[quoted image]
The parts manual has a 6-32 plate listed for other games, but nothing for WH2O.
[quoted image]
I thought the most-likely match is A-12258-2, but this is not in the BOM.
https://www.marcospecialties.com/pinball-parts/A-12258-2
Anyone know?

Maybe this?
https://www.marcospecialties.com/pinball-parts/515-6508-00

1 month later
#7509 8 months ago
Quoted from radium:

Anyone know what part number "A-16385" is in the BOM? It is a metal part, on the upper playfield. Called "runway ball guide w/baffle". Baffle? Yes I am baffled what this is.
[quoted image]
As far as I can tell, it's not listed in the horrifically/ridiculously/exorbitantly expensive batch of metal parts Mantis recently made for this game either.

I think it's the outhole ball guide.
For some reason, this has a unique part number in White Water?
This is the standard part:
https://www.marcospecialties.com/pinball-parts/B-8623

1 month later
#7599 6 months ago
Quoted from radium:

Need some help. Easy stuff!
1) What size/type screw is used to attach the metal light shield to the backbox? (The four screw holes at the top by the translite)
2) What size/type screw is used to attach the plastic topper dome to the metal light shield? (There are FIVE screw holes on the front of the plastic dome that go into the metal shield). I think the five top holes are threaded in the metal shield?
Pictures appreciated!
I am reproducing these and likely placing the order within a month. If you need one (or any other metal parts) shoot me a PM. I will do the bending and paint if you'd like.
[quoted image]
[quoted image]

20230926_072257 (resized).jpg20230926_072257 (resized).jpg20230926_072317 (resized).jpg20230926_072317 (resized).jpg20230926_072339 (resized).jpg20230926_072339 (resized).jpg
https://pinside.com/pinball/forum/topic/whitewater-club-lifejackets-not-required/page/116#post-6275515

#7602 6 months ago

Wood screws at top side, metal screws from bottom.

DSC_1842 (resized).JPGDSC_1842 (resized).JPGDSC_1853-1 (resized).JPGDSC_1853-1 (resized).JPG
#7606 6 months ago
Quoted from radium:

So I need holes for #8 torx screws on the top, screw goes into the wood.
And the bottom holes tapped for machine screws?
I need to go to my storage unit and dig the head out and take a look but it's buried in the back.

I am not sure about bottom. I can't check it now, maybe it's also wood screw - I think I mixed with the lock screw.

#7608 6 months ago
Quoted from MiniPinHead:

I probably just forgot to write it down, but don't have a note as to what the 6 1593. # 4205-01041-14 #5 x 7/8" Philips Flat Head Wood Screws are used for

It's for the pop bumber body.
https://pinside.com/pinball/forum/topic/vids-guide-to-rebuilding-pop-bumpers#post-485876

#7617 6 months ago

It's funny. No question, it's a White Water forum

Screenshot_20230929_190904_Chrome (resized).jpgScreenshot_20230929_190904_Chrome (resized).jpg
2 months later
#7695 3 months ago
Quoted from MiniPinHead:

Do you find the ball goes to the outline a lot, or just sometimes?

Speak with data:

https://pinside.com/pinball/forum/topic/whitewater-club-lifejackets-not-required/page/101#post-5687204

2 weeks later
#7720 3 months ago
Quoted from MiniPinHead:

Interesting missing mountain variant in this for sale thread: https://pinside.com/pinball/market/classifieds/ad/170595
Thought it was worth posting in the club thread. Don’t recall seeing it done this way before.
[quoted image]

Looks like it's modified mountain-jet bumper #1, Part Number: 03-8789. Isn't it?

wh2o-mountain-mop-4_1 (resized).pngwh2o-mountain-mop-4_1 (resized).png
#7725 3 months ago
Quoted from MiniPinHead:

Good eye! I believe you’re right
Not sure if I’d be a bigger fan of it than the traditional missing mountain, but it has potential for sure.
[quoted image][quoted image]
[quoted image][quoted image]

I am not a fan of the missing mountain.
First of all, it's not missing. And anyway, the top third of the playfield is really crowded, ball paths are covered, so I don't see any reason to add this.
(A word "missing" is a great selling method, I know).

Promoted items from Pinside Marketplace and Pinside Shops!
$ 9.95
Lighting - Led
Mitchell Lighting
 
From: $ 110.00
Lighting - Interactive
Pinball Z
 
$ 79.99
Cabinet - Armor And Blades
PinGraffix Pinside Shop
 
7,800
Machine - For Sale
Castle Rock, CO
7,780 (OBO)
Machine - For Sale
Wilsonville, OR
$ 12.95
$ 84.99
Cabinet - Armor And Blades
FlyLand Designs
 
15,000
Machine - For Sale
Ontario, CA
$ 225.00
Lighting - Interactive
Professor Pinball
 
$ 34.99
Rubber/Silicone
NO GOUGE PINBALL™
 
$ 9.95
Eproms
Pinballrom
 
From: $ 9.99
Eproms
Matt's Basement Arcade
 
$ 225.00
Cabinet - (Alt) Translites
FlyLand Designs
 
$ 15.00
Playfield - Other
Nezzy's Pinball Prints
 
6,500
Machine - For Sale
Montpelier, VA
$ 329.99
Lighting - Other
Lighted Pinball Mods
 
$ 5.95
Lighting - Led
Mitchell Lighting
 
$ 12.95
Playfield - Decals
Pinball Pimp
 
$ 27.95
Eproms
Pinballrom
 
$ 69.50
Boards
Pinball Haus
 
$ 399.00
Cabinet - Decals
Mircoplayfields
 
$ 30.00
Playfield - Other
YouBentMyWookie
 
$ 189.00
Playfield - Plastics
Starcade Amusement
 
$ 60.00
Cabinet - Decals
Pinball Haus
 
$ 119.99
Cabinet - (Alt) Translites
FlyLand Designs
 
$ 10.95
Eproms
Pinballrom
 
$ 1,059.00
Flipper Parts
Mircoplayfields
 
Hey modders!
Your shop name here

You're currently viewing posts by Pinsider davi.
Click here to go back to viewing the entire thread.

Reply

Wanna join the discussion? Please sign in to reply to this topic.

Hey there! Welcome to Pinside!

Donate to Pinside

Great to see you're enjoying Pinside! Did you know Pinside is able to run without any 3rd-party banners or ads, thanks to the support from our visitors? Please consider a donation to Pinside and get anext to your username to show for it! Or better yet, subscribe to Pinside+!


This page was printed from https://pinside.com/pinball/forum/topic/whitewater-club-lifejackets-not-required?tu=davi and we tried optimising it for printing. Some page elements may have been deliberately hidden.

Scan the QR code on the left to jump to the URL this document was printed from.