(Topic ID: 33446)
Linked Games
 Bobby Orr's Power Play
Bally, 1978
Bobby Orr's Power Play
Bally, 1978-
Gilligan's Island
Bally, 1991
-
Space Jam
Sega, 1996
Topic Gallery
 Santa Rosa, CA
 Redisham
Quoted from pinwillie:All three kickout holes on my WCS94 are chewed up but this one is the worst as far as wood damage. I plan on repairing , fixing the artwork then a cliffy. My question is what is the best material for the wood repair? I have "quikwood" or plastic body filler
Wow that looks scary. I'd love to see it once you've done it. It might give me a bit more gumption to try it myself.
 Sana'a
My question is what is the best material for the wood repair? I have "quikwood" or plastic body filler
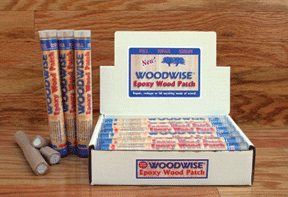
That "epoxy wood" stuff that comes in a dough-like stick is good.
Really rough up the area that it needs to adhere to, it will chip off if you try to patch over clear coat or wood filled with wax.
Sand a nice, smooth radius over the edges when it dries, a sharp edge will chip.
Paint it to match the surrounding wood. If you a lighting a saucer hole with an odd color like Red or Violet, check how your paint matches using that color. You don't want to find out after you have assembled your playfield that the repair stands out under Red illumination.
Hey vid, I went ahead and put down the first round of clear on a project today. Best way to learn is just to jump in sometimes! I'm using the Spray Max 2K 2 part rattle can, we'll see how it works. So far so good (and yes I'm using all the safety gear, respirator, sealed goggles, gloves).
Anyways, I put down a mist coat and then two full coats, and once it hardens up I'm going to start masking off and doing paint touchups. Looks good, just the expected orange peel from a sprayed coat.
I presume you sand before doing paint though right? My understanding is you need a little tooth to the clear to make a second round stick properly later after you take all the time to do touch up painting.
Is that how you do it? And if so, how much are you sanding? Knock it down with 600? How far do you go with moving on to finer grits to get it clear enough to match paint colors through but not so smooth the second round of clear won't take? And I guess it needs to be smooth enough to make the decals stick right too ... This is where it feels like there might be a balancing act. ![]()
You have to sand after each coat of clear, or the clear will build up around holes and openings.
So, part of the sanding is to knock down the build up, and part is to leave a surface that the paint can grip to.
400-600 is fine. You can match colors just by wiping with Naphtha to simulate a clear coat.
Perfect, that's exactly what I figured, but wanted to be sure, so thanks! ![]()
For the color matching I was afraid that the clear might be cloudy enough after 600 grit that it would be hard to see the color accurately through it, but the Naphtha trick would work for that too I'm sure.
I really need to start a thread documenting this, I'm sure people will be able to learn from my mistakes. ![]()
My compressor is more than enough for the small $12 HF color airbrush. However it doesn't have the capacity or CFM output for shooting clear.
Is it possible to still get nice results from hand brushing automotive-clear and using an airbrush for the color touch-ups?
Quoted from KloggMonkey:My compressor is more than enough for the small $12 HF color airbrush. However it doesn't have the capacity or CFM output for shooting clear.
Is it possible to still get nice results from hand brushing automotive-clear and using an airbrush for the color touch-ups?
If you're not going to go the full on route don't hand brush, use this:
http://www.spraymax.com/index.php?id=361&L=1
It's a real 2 part clear in a rattle can. I just put down my first coats with it, so far I'm completely happy with it, very easy to use. I wouldn't imagine a brush will get you results you'll like compared to that.
Quoted from KloggMonkey:Is it possible to still get nice results from hand brushing automotive-clear and using an airbrush for the color touch-ups?
No.
Don't even try it.
You can rent a big air compressor for $15 a day, if you can't just borrow one.
1 week later
I'm so ready to put my game back together. This touch-up stuff sucks. I have done about 90% of the black and have red and blue to do. (F14) I don't know if I want to do the blue, do to the "dot fade" at the bottom. I know I need to do the red, but should I do the blue. (normal dark "none mylar" semi circle between the two pilots.
Just want to put it back together to play (or sell for next one). Don't really need it to be Collector grade, maybe "nice" player.
Sorry for the rant.
2 weeks later
Quoted from CaptainNeo:Yes it's fixable and not it's not going to be easy. That compensator area in the purple is damn hard to do. Each dot has to be done by hand (that's the way I do them anyway). Otherwise you'll either have to go with just solid purple in that section or do a airbrush fade. Detail areas like this get expensive in a hurry when it comes to restoring.
2013-09-17 21.10.59.jpg
2013-09-29 11.27.32.jpg
2013-10-17 21.12.14.jpg
definitely a challenge I tried to make all the dots line up, not easy at all. then just tried to blend them out.
 Melbourne
Quoted from pinwillie:definitely a challenge I tried to make all the dots line up, not easy at all. then just tried to blend them out.
So when you do a repair like this, do you apply a clear over just that area, or is the repair and Createx paint hard enough?
That is if I didn't plan on doing a full clear, just wanted to fix it up just a bit.
Quoted from Matt_Rasmussen:So when you do a repair like this, do you apply a clear over just that area, or is the repair and Createx paint hard enough?
That is if I didn't plan on doing a full clear, just wanted to fix it up just a bit.
In my case i did the whole playfield clear, if you're just doing that spot you would need to either spot clear or cover with mylar.
2013-10-19 12.24.24.jpgQuoted from pinwillie:All three kickout holes on my WCS94 are chewed up but this one is the worst as far as wood damage. I plan on repairing , fixing the artwork then a cliffy. My question is what is the best material for the wood repair? I have "quikwood" or plastic body filler
2013-09-17_21.09.17.jpg 223 KB
these also turned out nice, the black outline isn't perfect cause its just gonna get covered with cliffys.
IMG_20131020_103059.jpg
IMG_20131020_103050.jpg
IMG_20131020_103036.jpgQuoted from pinwillie:these also turned out nice, the black outline isn't perfect cause its just gonna get covered with cliffys.
Did you use the JB weld quickwood stuff?
If anyone could suggest a clear that might work from an airbrush, for just small touch up area (I realize that it's not ideal) I would appreciate it.
Quoted from Matt_Rasmussen:Did you use the JB weld quickwood stuff?
I used this
ebay.com link: itm
Holy $hit Willie, that touch up work and clear looks great! Especially the spot down by the flipper.
Quoted from Soapman:I'm so ready to put my game back together. This touch-up stuff sucks. I have done about 90% of the black and have red and blue to do. (F14) I don't know if I want to do the blue, do to the "dot fade" at the bottom. I know I need to do the red, but should I do the blue. (normal dark "none mylar" semi circle between the two pilots.
Just want to put it back together to play (or sell for next one). Don't really need it to be Collector grade, maybe "nice" player.
Sorry for the rant.blackdone.jpg 302 KB
Looks like you're at the same spot as I am on my F-14. I can't match that blue worth a $h!t. I have been trying at least 2 hrs. I try adding a little white to some blue? Nope too light, so I add some cobalt blue too dark. Little bit of this or that, still wrong. Driving me nuts
Quoted from BillinIndiana:Looks like you're at the same spot as I am on my F-14. I can't match that blue worth a $h!t. I have been trying at least 2 hrs. I try adding a little white to some blue? Nope too light, so I add some cobalt blue too dark. Little bit of this or that, still wrong. Driving me nuts
I just decided that I will never do playfield touchups myself. Thanks Bill.
Quoted from pinwillie:these also turned out nice, the black outline isn't perfect cause its just gonna get covered with cliffys.
WOW!!!!!
That is beautiful - I seen the before pics and it's breathless ![]()
Quoted from Pafasa:I just decided that I will never do playfield touchups myself. Thanks Bill.
I would try it if I were you, never know you may be the next big thing..LOL It's kinda a love/hate for me, I just can't match paint colors very well. I like doing the rest, but will only do it as a hobby. I doubt I'd ever be good enough to make a PF look Brand New, but I'll settle for looking Better any day.
You are right. Better is better than not better. Still, it will be quite a while before I have the balls to try to make my playfield better on my own. There is plenty of established talent out there. I'll leave it to them and focus on improving my repair skills.
I hear that Vid1900 guy is not too shabby!
Hey vid, what's your personal take on how long to wait after buffing out the final clear coat before repopulating the upper playfield and/or actually playing on it? I see people's numbers all over the place.
Quoted from BillinIndiana:Looks like you're at the same spot as I am on my F-14. I can't match that blue worth a $h!t. I have been trying at least 2 hrs. I try adding a little white to some blue? Nope too light, so I add some cobalt blue too dark. Little bit of this or that, still wrong. Driving me nuts
When I started working on my Earthshaker, I took it to Cliffy's so we could scope out making protectors for it and doing some repairs.
We removed the mylar and started fixing the insert lettering...then it went into spot touch ups, etc.
Well, the blue was one of the worst to match.
I came back one day, and Cliffy had repainted all of the blue (for me...thanks I love you for it buddy!), cause he couldn't get a decent match; and he's done a ton of playfield touch ups in his lifetime.
You may have to just repaint...sorry to say.
Good luck.
Robert
Quoted from Aurich:Hey vid, what's your personal take on how long to wait after buffing out the final clear coat before repopulating the upper playfield and/or actually playing on it? I see people's numbers all over the place.
Really depends on what brand clear you use.
Some softer clears, like the ones CPR uses takes months to completely cure.
The Diamondplate or JC660 that I usually use is hard in less than 30 minutes, but the highest shine takes about 3 weeks of cure before it will totally buff out. So I usually just shelve the playfield for a month and then buff.
In a pinch, I've used an IR lamp to speed curing up, but I'm always worried that the IR might one day raise an insert or something (you know how unpredictable wood is).
I shot several coats of that 2K Spraymax, so probably not much data out there on it as far as that goes. I don't really care about giving it a mirror like finish, it's an EATPM and it won't look quite right to me if it's super shiny, but I don't want to screw down posts etc and crack it or mess it up somehow.
Quoted from Pafasa:Hey Vid, you started this thread out on an F-14. I assume you are finished with it. Do you have more pics and instructions for the rest of the process?
I've been working out of town, so I'm only home for 40 hours and then it's back on the road.
I promise, the moment I get my vacation, I'll finish up with the clear coating section of the guide.
I'm looking at an airbrush kit on amazon, what do you guys think of this deal. Do you think that would be just fine for what we're doing here, minor touch ups of playfields and/or cabinets?
http://www.amazon.com/gp/product/B009ZXNPUA/ref=ox_sc_act_title_2
and also, should I get some reducer in addition to the paints? I'm reading the createx stuff comes out pretty thick.
Quoted from vid1900:Not in my experience.
It seems exactly the correct consistency to spray, right out of the bottle.
Does that kit seem like a good place to begin anyway?
I find the Createx paints slightly thick, depending on your tip size and setup you may find you want to reduce a little. Reducer is cheap, just order it at the same time, then you can experiment to see what feels right.
Quoted from shimoda:Vid, I'm beginning to worry that the Avatar you use might actually look like you after a while.
Why, because he's answering my questions? ![]()
Quoted from Matt_Rasmussen:Does that kit seem like a good place to begin anyway?
I got the same airbrush and paints and they work great. That is a good deal if you don't have a air compressor already.
As for Createx paint, I think it is just right out the bottle. Just don't have a heavy finger. Practice, practice, practice, and when you feel like you got it practice a few more times. ![]()
Yeah, I'm in the edge, don't know if I should mess with repairs or just live with the flaws and enjoy the machine.
Vid,
Thanks for all of the great information!
Although I have owned pinball machines for the last 10 years or so, I am going to try some playfield repairs for the first time on a very dirty TFTC that I just purchased. I need to repair some lifting/separation over several playfield inserts. I read the section in this tread that dealt with fixing this problem and I have also read this information...
http://pinballrehab.com/1-articles/pinball-restoration/playfield/247-fixing-insert-problems
Which do you feel is the best way to fix my problems? Also, I was planning to clean/polish the playfield with a 3-step system that I purchased from Treasure Cove years ago. Is this worth using? If so, should I clean/polish before repairing the inserts or after? I also need to repair the scoop hole and I was planning to add a Cliffy protector to prevent future damage.
I actually do airbrush and clear as a hobby and this thread has me wanting to strip down the playfield and clear the whole thing but I am concerned that it might be over my head.
Please let me know what the best repair technique would be and how far I should or need to go beyond the repair.
Thanks.20131019_151250.jpg20131019_151255.jpg20131019_151305.jpg20131028_072320.jpg
Quoted from vid1900:That's an old photo.
That's the Caretaker from Phantasm isn't it?
"BOYYYYYYY!!!!"
That movie scared the crap out of me...
Hey Nick, the article you referenced is an excerpt from the following post (re-printed with Calico's permission). The link may provide some additional information (Vid did have a response in the post, but it was pretty brief).
Quoted from NickRocco:I need to repair some lifting/separation over several playfield inserts.
From the pics, it looks like you have some insert edge wear, and some actual ghosting.
The ghosting is repaired using this technique (5 posts down) :
http://pinside.com/pinball/forum/topic/vids-guide-to-ultimate-playfield-restoration/page/2
-
The edge wear is fixed by leveling the inserts (if they are popped) and then filling the chipped area with 2 part clear. Level the playfield with some shims so the chips fill evenly. Use some frisket and fix the chipped keylining around the edges of the inserts with black paint, then fill with clear.
Quoted from NickRocco:Also, I was planning to clean/polish the playfield with a 3-step system that I purchased from Treasure Cove years ago. Is this worth using? If so, should I clean/polish before repairing the inserts or after?
First fix all the problems, before you worry about how shiny your playfield is. If you polished the ghosted inserts, the whole chip can break free and fly loose.
Let your repairs dry a month and then polish it up.
Don't overuse the polish, as it is abrasive and is wearing your playfield surface down the the level of the deepest scratch.
Promoted items from Pinside Marketplace and Pinside Shops!
Reply
Wanna join the discussion? Please sign in to reply to this topic.

Hey there! Welcome to Pinside!
Donate to PinsideGreat to see you're enjoying Pinside! Did you know Pinside is able to run without any 3rd-party banners or ads, thanks to the support from our visitors? Please consider a donation to Pinside and get anext to your username to show for it! Or better yet, subscribe to Pinside+!
