(Topic ID: 21848)

VID's Guide to Lighted Flipper Buttons for $4.18

By vid1900

11 years ago


Topic Heartbeat

Topic Stats

  • 197 posts
  • 83 Pinsiders participating
  • Latest reply 2 years ago by BorgDog
  • Topic is favorited by 258 Pinsiders

You

Linked Games

No games have been linked to this topic.

    Topic Gallery

    View topic image gallery

    20220108_154212 (resized).jpg
    20220108_151936 (resized).jpg
    20220108_151943 (resized).jpg
    20220108_151822 (resized).jpg
    IMG_2069 (resized).JPG
    20170317_193211 (resized).jpg
    20170317_192936 (resized).jpg
    20170221_135020 (resized).jpg
    20170312_201521 (resized).jpg
    02 (resized).jpeg
    01 (resized).jpg
    image.jpg
    20141102_003613.jpg
    IMG_1256.JPG
    image-739.jpg
    image-182.jpg

    You're currently viewing posts by Pinsider vid1900.
    Click here to go back to viewing the entire thread.

    27
    #1 11 years ago

    So I'm plowing through a pile of Space Shuttles that I'm restoring all at once, and one customer wants lighted flipper buttons. He mails me a kit to install that costs $64.

    Then another customer hears about it and he wants me to wait so he can order the same kit.

    I tell him I've got all the parts laying around the shop, and it sure does not cost $64 if you DIY.

    #2 11 years ago

    Everyone has some #44 sockets in their junk pile (.50 cents) .

    I had some FLEX 44/47 PREMIUM BLUE SUPER from Cointaker already in the shop ($1.59).

    SOCKET-AND-LAMP.jpgSOCKET-AND-LAMP.jpg

    #3 11 years ago

    Screw the Socket under the flipper button and out of the way of the Flipper Button Leaf Switch.

    Run the wires from the socket to the GI for the coin door (the 25 cent lights).

    Position the head of the LED so it is shining slightly up.

    Don't let the LED head touch the Leaf Switch, or it may wear out the LED or break the LED's leads.

    INSTALLED-LED.jpgINSTALLED-LED.jpg

    #5 11 years ago

    Finally, here is what it looks like from the outside. It's brighter than the picture shows in real life, but it is hard to take a picture of an LED.

    Total cost was under $5. Total time was 15 minutes to do both sides.

    If you wanted to go completely insane, you could install 2 LEDs per side, but your total cost would go up to $8.36.

    FLIPPER-BUTTON.jpgFLIPPER-BUTTON.jpg

    #7 11 years ago
    Quoted from Wolfmarsh:

    Great idea, I'll be doing this on f-14 for sure.

    Yeah, blue or red would look great on F-14.

    Or a color changing LED that does red white and blue (take it out of one of those stupidly bright 4th of July buttons). You would need a pair of clear flipper buttons for this, so add $3 to the total price for the pair.

    http://www.pinballlife.com/index.php?p=product&id=1692

    #10 11 years ago

    I get email from people who don't want to post questions on the forum, LOL.

    Q: Vid1900, is that flipper button blue or clear in the picture? and I cant figure how to get my buttons off.

    A:

    That button pictured is transparent blue.

    Use duck bill pliers and turn the metal nut CCW. If the button is still stuck without the nut, use a wood block and rubber mallet to gently tap it out.

    #17 11 years ago
    Quoted from mojozone:

    so these have a head on it where you can position to where u want, and it will not move? interesting for sure.

    Yes.

    Normally they are used to get light into difficult spots, like when you have a narrow arrow insert that needs to be lit through the hole in the drop target bracket.

    #23 11 years ago

    could you also take a picture of where on the coin door you ran the wires to for the GI? thanks

    Most coin doors have 2 or 3 lights that are GI (General Illumination) and are thus always on.

    Tap power from any bulb. The one closest to the coin door hinge is usually the easiest.

    The power at the bulb is 6.3 Volts AC, so you don't have to worry about polarity - either wire can go to either lamp lug.

    Replace the coin door #44 bulbs with LEDs while you are in there - it will save electricity and restore the deep red the 25 cent sign had before it faded over the years.

    Use small zip ties to secure your new wires to the existing wiring harness.

    coin-door.jpgcoin-door.jpg

    #24 11 years ago
    Quoted from pinwillie:

    great idea! I assume you could also use a 555 socket and bulb?

    Yes.

    It is harder to find suitable 555 sockets, so a stiff wired one made for pop bumpers might be an easy solution (and one you already have in the shop).

    http://www.pinballlife.com/index.php?p=product&id=1245

    Don't staple the leads too close to the socket until you find your perfect spot. You can put shrink tubing or aquarium airline tubing over the leads if they are too close to the grounding straps.

    #25 11 years ago
    Quoted from pinwillie:

    You will also need transparent flipper buttons....

    http://www.pinballlife.com/index.php?p=product&id=1692

    Same price as the opaque ones, $1.50 . Transparent Blue, Red and Clear.

    Transparent Green, Purple and Amber buttons are available too, but they are 1/4" longer (made for video games), so you have to shim the leaf switch out with a standoff if you want those colors.

    #29 11 years ago
    Quoted from markmon:

    I do this already but use the 555 flex bulbs. Here are the sockets for those:
    http://www.pinballlife.com/index.php?p=product&id=294

    Yes, those would be good sockets.

    Believe it or not, they don't come up in a search on Pinball life for "lamp socket", LOL.

    #35 11 years ago
    Quoted from Drano:

    The only difference with the store bought ones is that some of them pulse.

    Cointalker sells pulsing bulbs if you want them:

    #36 11 years ago
    Quoted from pinsrus:

    Ok might sound like a dumb question but what about the wire? Any will do?

    Not a dumb question.

    Any wire 24 gage or heavier will be fine. The smaller the gage number, the heavier the wire (don't ask me why).

    Get stranded, not solid wire; as it will be flexing when you open the coin door.

    You can even use speaker wire if that's all you have.

    #37 11 years ago

    Is the pricing on that site for a single button or a pair?

    #39 11 years ago
    Quoted from pinsrus:

    Thanks vid, speaker wire is actually what I was thinking of using. Ha

    Nothing wrong with speaker wire.

    If you were doing some $$$$$ restore, you would probably want something more "pinball looking", that would appear to be factory wire.

    #42 11 years ago
    Quoted from bluevegas:

    Awesome thread vid1900! I actually purchased the purple cointaker kit for my TOTAN, but their purple was not very purple.

    Yeah, I have some Super Flex Purple from them and they look Pink!

    I'll same em for the next time I restore a Dolly Parton.

    ]
    ]

    Pinball Life's frosted Purples are purple.

    #45 11 years ago
    Quoted from bluevegas:

    would those work even though they are not flex?

    Assuming these are the same quality of purple light, I'd try this bulb:

    http://www.pinballlife.com/index.php?p=product&id=2561

    ]

    And this socket so you can aim the light inwards:

    http://www.marcospecialties.com/pinball-parts/077-5009-00

    #46 11 years ago

    Any way to light a saucer?

    As a matter of fact, Space Shuttle has 2 red (or sometimes gold) Saucers that I always add light to.

    Here I've taken voltage from the nearby GI lamp, installed a #44 socket, and installed a flex LED.

    saucer.jpgsaucer.jpg

    #47 11 years ago

    Like always, make sure the LED clears the switch and pawl.

    #51 11 years ago
    Quoted from pinwillie:

    CT frosted work good for the eject hole plastics as well

    Perfect!

    #55 11 years ago
    Quoted from ab3:

    any chance i should use a white light instead of blue (would that appear brighter?). Any other suggestions? Coin taker doesn't seem to make brighter flexes. Thanks!

    Try a different bulb, you may have a dud.

    Measure the voltage AT THE SOCKET and make sure you have at least 6.2 AC volts.

    I did not have any white Flex to try, so I don't know if they are brighter.

    Try aiming the Flex around. It seems that slightly upward gave the brightest glow.

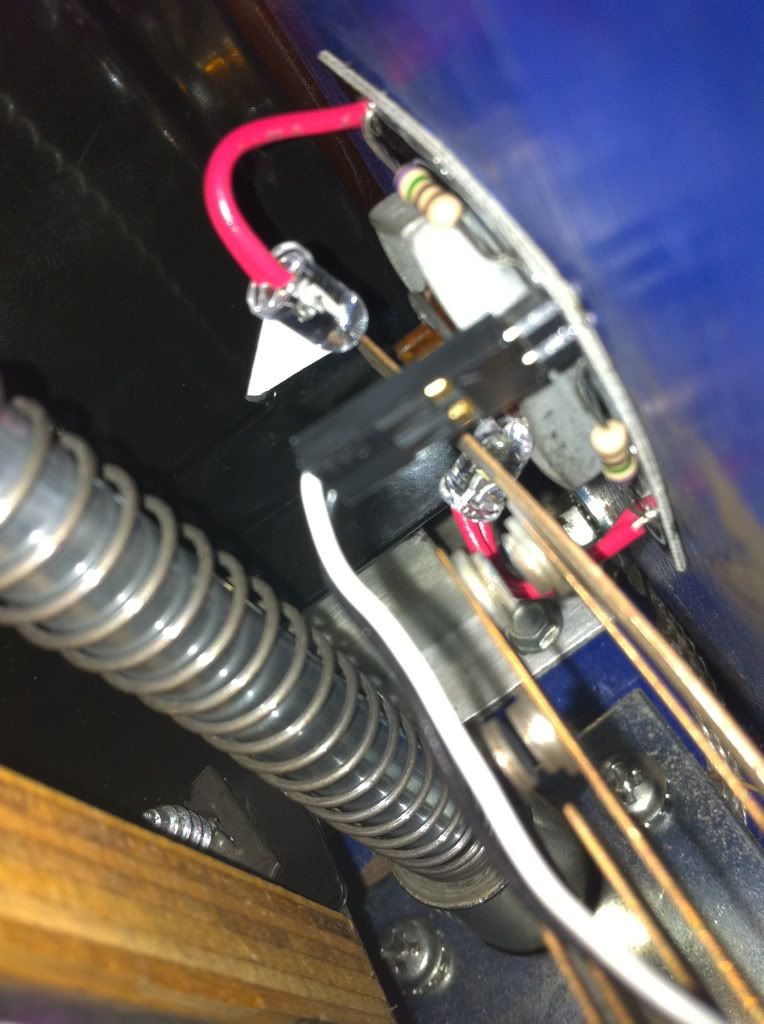
    If there is an "E" clip on the end of your flipper button, don't aim into that (it's metal).

    There could also be a chance that the Flex have changed over the year since I bought them, or maybe batch to batch? Maybe the blue flipper buttons vary batch to batch?

    Try 2 Flex LEDs (steal the one from the other button) and see if it is still dim?

    I got a bunch of emails from others who did it, how is everyone's brightness?

    3 weeks later
    #60 11 years ago

    You can use a 2 or 3 lead socket, but the 2 lead are cheaper.

    1 year later
    #72 10 years ago
    Quoted from MustangPaul:

    Nice. Did you use a red or white led? For the red clear flipper buttons did you use red or white led's. Thanks for the great and easy to do mods.

    Usually I color match the bulb to the plastic.

    So a red saucer gets a red LED bulb.

    Although a blue saucer gets a VERY deep purple color from a purple LED. Worth trying if you want something "spooky" looking and not too bright.

    4 weeks later
    #74 10 years ago

    Also, as a few of your guys have emailed me, the price of Flexi LEDs has fallen to only .99 cents (.89 cents if you buy 10 or more):

    http://www.pinballlife.com/index.php?p=product&id=3108

    Competition is a great thing.

    1 month later
    #83 10 years ago
    Quoted from xfassa:

    Anyone else having F106 randomly blow as a result of this mod? I have performed this modification twice (WH20 and TAF) with little success. My setup is identical to what is discussed in this post (using coindoor GI as the source for 6.3V). Unfortunately, F106 randomly blows (could be mins, hours, or even days). What the heck am I doing wrong on this mod? Thanks!

    With the power off, clip on your meter leads to the circuit in diode mode and then launch some balls, bang on the flippers, see if you can get it to beep.

    Will it blow if you don't have bulbs installed?

    Is there one stray wire strand?

    Is something touching the back of one of the LED heads at some point?

    What if you knee the coin door?

    1 month later
    #88 10 years ago
    Quoted from Pinball_Nate:

    I got me some sockets and LED bulbs now........
    Can you just solder the wires onto the existing wire clamp that is already there on the coin door GI?? In other words, these wires slide onto a flat piece, they aren't simply soldered on - so can I solder onto the metal "clamp" portion once I slide the plastic protective cover off???
    Thanks,
    Nate

    Show me a picture of a "wire clamp" you are considering.

    #92 10 years ago
    Quoted from NPO:

    Here's my question: are you using T-taps to complete the circuit, or are you combining your lead wires for the flipper button lights with the GI lighting wires (basically, taking both wires, stripping the ends, combining their ends together, crimping a female lead on, and then plugging the female end to the male spade of the coin door light socket so both the coin door and the flipper button lights come on at the same time) ?

    There are just so many different models of pins that there is no way to tell someone the "right" way to tap into the power.

    I like clean and reversible, so Spade Splitters are a cheap solution.

    Car audio guys love T-taps, another solution.

    There may also be spare connectors on the coin for for Bill Acceptors or other lighting, so keep your eyes (and meter) open.

    spade-splitter.jpgspade-splitter.jpg T-Tap.jpgT-Tap.jpg
    #96 10 years ago

    First hit on Google:

    http://www.centurytool.net/8019K96_Single_Male_to_Double_Male_Splitter_Pair_p/8019k96.htm

    They are usually just in your crimp on terminal kit.

    #97 10 years ago

    Of course, you can use these too:

    piggy back terminal.JPGpiggy back terminal.JPG
    3 months later
    #105 9 years ago
    Quoted from J_Cutler:

    The Flex bright Slow 16 Color Changing LEDS from Cointaker are awesome.

    How long does it take for the 2 buttons to get out of sync with each other?

    Do they always start their cycle on the same color?

    1 week later
    #112 9 years ago

    If you can't crimp, you can tap into a wire anywhere along it's length with 3M Taps:

    http://www.amazon.com/gp/product/B001JT72F2/ref=pd_lpo_sbs_dp_ss_1

    #127 9 years ago
    Quoted from izzy:

    Anybody else's clear buttons seem to stick. Unless I push straight in then seem to hang up. Tried come clear plastic spray to make them glide better, didn't help. Other than that, they look great.

    There are some crappy buttons on the market.

    Pop them apart by pressing them on a table and sand the leading edge of the button.

    1 year later
    #173 8 years ago
    Quoted from PNorth:

    On an AFM, would it be possible to tap power from J2 or J5 on the Coin Door Interface Board rather than running wire all the way on to the coin door itself?

    You can take GI power from anywhere it's convenient.

    Quoted from PNorth:

    Also, will the LED's shining on the translucent flipper buttons interfere with the flipper optos on AFM?

    LED lighting is very directional, so just don't shine it into the opto gap

    You're currently viewing posts by Pinsider vid1900.
    Click here to go back to viewing the entire thread.

    Reply

    Wanna join the discussion? Please sign in to reply to this topic.

    Hey there! Welcome to Pinside!

    Donate to Pinside

    Great to see you're enjoying Pinside! Did you know Pinside is able to run without any 3rd-party banners or ads, thanks to the support from our visitors? Please consider a donation to Pinside and get anext to your username to show for it! Or better yet, subscribe to Pinside+!


    This page was printed from https://pinside.com/pinball/forum/topic/vids-guide-to-lighted-flipper-buttons-for-418?tu=vid1900 and we tried optimising it for printing. Some page elements may have been deliberately hidden.

    Scan the QR code on the left to jump to the URL this document was printed from.