(Topic ID: 213089)

Up the Irons - Stern Iron Maiden Owners and True Fans Club!

By AlexSMendes

6 years ago


Topic Heartbeat

Topic Stats

  • 15,842 posts
  • 1,050 Pinsiders participating
  • Latest reply 24 hours ago by woodmedic
  • Topic is favorited by 499 Pinsiders

You

Topic Gallery

View topic image gallery

image1 (resized).jpeg
image0 (resized).jpeg
Afbeelding van WhatsApp op 2024-04-22 om 21.13.46_6debbf1e (resized).jpg
Afbeelding van WhatsApp op 2024-04-22 om 21.13.46_dbcfac75 (resized).jpg
Afbeelding van WhatsApp op 2024-04-22 om 21.13.46_b6c829e3 (resized).jpg
pasted_image (resized).png
SYJ_IMDN-2.0-PremLE-ADV_For-ETSY-Stacked_images (resized).jpg
SYJ_IMDN-2.0-PremLE-INTRO_For-ETSY-Stacked_images (resized).jpg
SyJ-IMDN_Intro-Prem-MED (resized).jpg
SyJ-IMDN_ADV-Prem (resized).jpg
Afbeelding van WhatsApp op 2024-04-20 om 18.07.15_834b23a7 (resized).jpg
Afbeelding van WhatsApp op 2024-04-20 om 18.08.28_c85b3c64 (resized).jpg
20240420_170649 (resized).jpg
20240420_170609 (resized).jpg
20240420_171019 (resized).jpg
Screen Shot 2024-04-19 at 6.01.36 PM (resized).png

Topic index (key posts)

17 key posts have been marked in this topic, showing the first 10 items. (Show topic index)

There are 15,842 posts in this topic. You are on page 209 of 317.
#10401 2 years ago

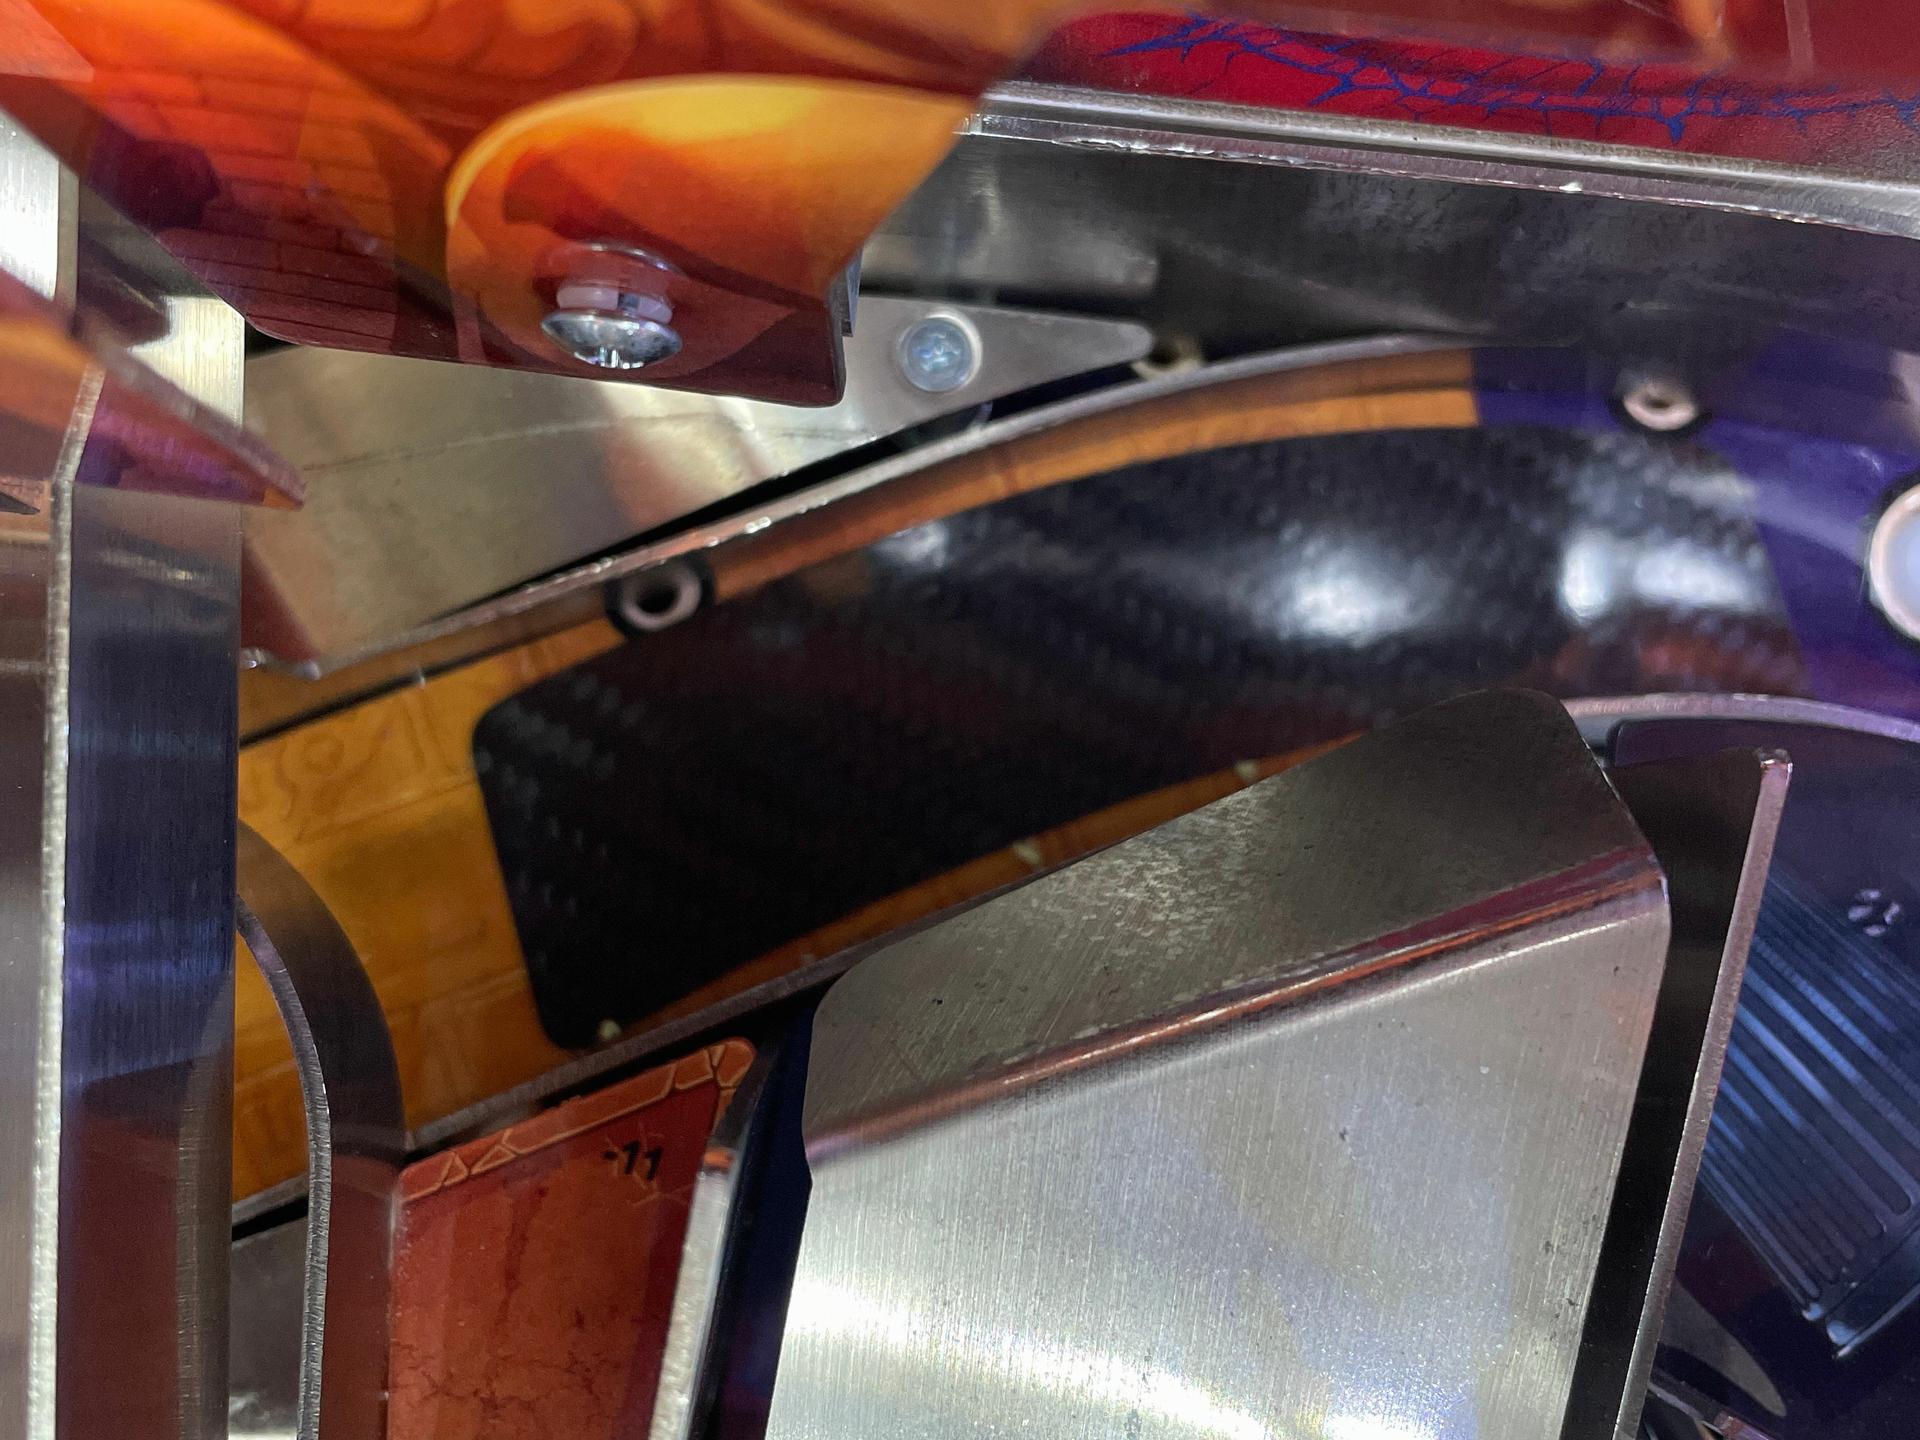
I finally installed the cliffy’s carbon fiber piece for the orbit protector. Huge difference! No more balls getting stuck back there, or slowing down when it goes through there. The old thin metal protector literally just peeled right off. I had to clean off a little bit of adhesive but that was it. Stuck the new one on and done!
I too am having the issues with the orb and the mummy captive balls. The orb one sometimes gets stuck in the forward position, and the mummy one looks like it works OK but doesn’t register the hit half the time. I have had this game now for a couple months and I still don’t feel like it is 100% dialed in. Oh well, I’ll get it a little at a time. Still love the game though!

#10402 2 years ago

Also, I added a shaker to it. What settings does everybody use for their shaker? Thanks Mìke

#10403 2 years ago

Also, next time you have the glass off, check this one way gate. Mine was in the up position screwed to the playfield so it was like this from factory.
I really thought Stern quality was slipping but my GZ was error free.

PXL_20211215_132353532~2 (resized).jpgPXL_20211215_132353532~2 (resized).jpg
#10404 2 years ago
Quoted from MikeSinMD:

Also, I added a shaker to it. What settings does everybody use for their shaker? Thanks Mìke

Medium " middle " setting.

#10405 2 years ago
Quoted from wtatumjr:

I also have IM and GZ and find the two very close as my favorites. IM has had problems with the two ball switches- one I fixed but the orb one I ordered a new seat, ball, and actuator. I'll let you know if that fixes it. There was also a one way gate under the upper playfield installed so it was always open and a loose switch on the crypt. It's a great game once dialed in though, even if you aren't a fan of the music it grows on you.

We played GZ at expo and I never played one machine that many consecutive times .I’ve been on the hunt offering a pretty nice package deal for trade and I’m glad nobody took me up on it .I’ll just wait it out as I have more time than $$.

#10406 2 years ago
Quoted from RobbyIRL5:

IMDN is right with GZ as my favorite game however I’ve been plagued with issues on getting the orb and other ball for the lock (too late to try to spell it right) adjusted right. I’ve changed out to the pencil style vs blunt style part under the playfield, but it seems it can go over center, and outside the spoon on the switch and get stuck until hit hard again. When going to the pencil style, is there a switch with a bigger spoon on it?
If I set the leafs too close, the shaker or flippers cause it to activate, no good either.
Sadly the power stays off on this machine as it’s hard to get though the game without an error on the mummy multiball (and even more surprisingly, the game can’t even count where the balls are and it ruins the rest of the game, can’t imagine why they couldn’t fix that in code).
I’d go as far as saying I like this game better than GZ, but struggling with this issue. Maybe I’m just missing something. I’ve got a leaf spring adjuster, and all the right tools but seems to be such a tight adjustment that even when I do get it right, it’s only for a few games before it goes back to problematic one way or another.

I had similar issues with the premium balls, but you can get them dialed in. You have to tackle the two issues separately, 1) the travel of the activator on the spoon and 2) the spoon activation of the switch.

For number 1, you need to blue loc-tite the pencil to the ball first. Then make sure the center of the pencil tip hits the very center of the spoon by bending the spoon bracket. Finally, tighten the nut under the ball to limit the travel to be within the spoon surface area.

Play some games and bash the hell out of it. Once you have this working and not getting stuck outside the spoon perimeter, get the leaf switch gap dialed in to your satisfaction. It may not register every light tap, but that is true of any leaf switch solution generally speaking.

Hope this helps!

#10407 2 years ago

Count me in
MacFarlene figures and some more extras

IMG-20190331-WA0000 (resized).jpgIMG-20190331-WA0000 (resized).jpgIMG-20190331-WA0001 (resized).jpgIMG-20190331-WA0001 (resized).jpgIMG-20190331-WA0003 (resized).jpgIMG-20190331-WA0003 (resized).jpgIMG-20190331-WA0004 (resized).jpgIMG-20190331-WA0004 (resized).jpgIMG-20190331-WA0005 (resized).jpgIMG-20190331-WA0005 (resized).jpgIMG-20190331-WA0006 (resized).jpgIMG-20190331-WA0006 (resized).jpgIMG-20190331-WA0010_1 (resized).jpgIMG-20190331-WA0010_1 (resized).jpgIMG-20190331-WA0011 (resized).jpgIMG-20190331-WA0011 (resized).jpgIMG-20190331-WA0012 (resized).jpgIMG-20190331-WA0012 (resized).jpgIMG-20190331-WA0013 (resized).jpgIMG-20190331-WA0013 (resized).jpgIMG-20190331-WA0014 (resized).jpgIMG-20190331-WA0014 (resized).jpgIMG-20190331-WA0015 (resized).jpgIMG-20190331-WA0015 (resized).jpgIMG-20190331-WA0016 (resized).jpgIMG-20190331-WA0016 (resized).jpgIMG-20190331-WA0019 (resized).jpgIMG-20190331-WA0019 (resized).jpgIMG-20190331-WA0020 (resized).jpgIMG-20190331-WA0020 (resized).jpg
#10408 2 years ago

After going from 7.2 to 6.8 degrees I'm finding the auto plunge is hitting a lot more consistently. That along with most people saying it hits better after waxing and the stronger coil worked for a few people it seems to me that more speed is better for making it get around consistently.
I ordered the stronger coil just to see so I'll report my findings when it arrives.

I'm getting killed with the left outlane lately though. I'm getting a drain off the upper left slingshot into the triangle rubber below the plunger lane exit directly into the left outlane. It's so fast I have no time to react and it usually goes clean into the outlane. Killed one of my best games today.

#10409 2 years ago
Quoted from Anony:

After going from 7.2 to 6.8 degrees I'm finding the auto plunge is hitting a lot more consistently. That along with most people saying it hits better after waxing and the stronger coil worked for a few people it seems to me that more speed is better for making it get around consistently.
I ordered the stronger coil just to see so I'll report my findings when it arrives.
I'm getting killed with the left outlane lately though. I'm getting a drain off the upper left slingshot into the triangle rubber below the plunger lane exit directly into the left outlane. It's so fast I have no time to react and it usually goes clean into the outlane. Killed one of my best games today.

lol I am the opposite, find 7 degrees makes it more fun and actually perfect for me. 6.8 was too slow for me unless waxed but 100 games later it is slow again.

Also had the best game and beat my own GM today 1.2B and almost made it to the beast again! dammit!

I did notice something cool today, one of the ramps flashed GREEN for a second during a mode and I accidentally made the shot and hit it, this triggered a ball locked completing the 3rd lock for Trooper Multiball. I do not think it is a fluke or bug, but maybe it is and it is highly impossible I will do this again, all that to say, if your ramps ever flash green even for a sec and you get the shot it will give you a virtual BALL LOCK. very cool and strange at the same time.

#10410 2 years ago
Quoted from Pin_Fandango:

lol I am the opposite, find 7 degrees makes it more fun and actually perfect for me. 6.8 was too slow for me unless waxed but 100 games later it is slow again.
Also had the best game and beat my own GM today 1.2B and almost made it to the beast again! dammit!
I did notice something cool today, one of the ramps flashed GREEN for a second during a mode and I accidentally made the shot and hit it, this triggered a ball locked completing the 3rd lock for Trooper Multiball. I do not think it is a fluke or bug, but maybe it is and it is highly impossible I will do this again, all that to say, if your ramps ever flash green even for a sec and you get the shot it will give you a virtual BALL LOCK. very cool and strange at the same time.

I'm pretty new to pinball and still pretty bad so I think that's why I'm finding 6.8 better. My best is still 350 million and I didn't hit 300m once at 7.2.

#10411 2 years ago
Quoted from wtatumjr:

Good advice from Kkoss and will fix 90 percent of the problems.
My orb ball problem though is the ball will not reseat itself to rest position so the switch doesn't know what to do. I'm going to try another ball and seat. This really isn't the greatest of designs. The spring seems to be proper strength, only the ball is hanging on the lip.
[quoted image][quoted image]

I used a small amount of grease on the saucers to stop this.

#10412 2 years ago
Quoted from Tranquilize:

I used a small amount of grease on the saucers to stop this.

I tried this already- good idea but didn't help in this case.

#10413 2 years ago
Quoted from wtatumjr:

I tried this already- good idea but didn't help in this case.

If you lift the playfield you will probably find it hung up outside the spoon edge. This is fixable, see my earlier post.

Cheers!

https://pinside.com/pinball/forum/topic/up-the-irons-the-iron-maiden-pinball-official-owners-club/page/209#post-6656971

#10414 2 years ago
Quoted from PinballHaven:

I had similar issues with the premium balls, but you can get them dialed in. You have to tackle the two issues separately, 1) the travel of the activator on the spoon and 2) the spoon activation of the switch.
For number 1, you need to blue loc-tite the pencil to the ball first. Then make sure the center of the pencil tip hits the very center of the spoon by bending the spoon bracket. Finally, tighten the nut under the ball to limit the travel to be within the spoon surface area.
Play some games and bash the hell out of it. Once you have this working and not getting stuck outside the spoon perimeter, get the leaf switch gap dialed in to your satisfaction. It may not register every light tap, but that is true of any leaf switch solution generally speaking.
Hope this helps!

So this is helpful, breaking it down into a couple of steps. But to be clear, the pencil posts are better than the blunt ones?

-The first step, screw down the ball far enough down (closer to the playfield) so that the pencil post won’t/can’t get outside of the spoon

-second step, adjust the leafs to respond to movement

The issue is that if you do step one properly, the tolerance is so tight on the leafs that a flipper press or shaker will activate it.

So go back to step one, raise the ball up (away from the playfield by backing it out), but now the spoon isn’t big enough to contain it (specifically the pencil shaped post), it goes over the edge and gets stuck.

Seems like the best fix would be a larger/deeper spoon on the switch. I screwed up because the orb was working fine with the blunt post and when I had the playfield up, decided to swap it out, and now it’s as big as a problem as the mummy multiball.

I know it’s tunable, but seems to have such tight tolerance, just not much fun. Easier to turn on another game although IM is likely my favorite.

#10415 2 years ago
Quoted from RobbyIRL5:

So this is helpful, breaking it down into a couple of steps. But to be clear, the pencil posts are better than the blunt ones?
-The first step, screw down the ball far enough down (closer to the playfield) so that the pencil post won’t/can’t get outside of the spoon
-second step, adjust the leafs to respond to movement
The issue is that if you do step one properly, the tolerance is so tight on the leafs that a flipper press or shaker will activate it.
So go back to step one, raise the ball up (away from the playfield by backing it out), but now the spoon isn’t big enough to contain it (specifically the pencil shaped post), it goes over the edge and gets stuck.
Seems like the best fix would be a larger/deeper spoon on the switch. I screwed up because the orb was working fine with the blunt post and when I had the playfield up, decided to swap it out, and now it’s as big as a problem as the mummy multiball.
I know it’s tunable, but seems to have such tight tolerance, just not much fun. Easier to turn on another game although IM is likely my favorite.

I didn’t change the post, just made sure it couldn’t come loose from the ball assembly and then got it centered on the spoon. I did a lot of messing with the spoon position to make it work, but once I got that dialed in I haven’t touched it.

If getting it centered on the spoon and tightened properly as you described makes the leaf switch too sensitive then you need a bigger gap on the leaf switch.

#10416 2 years ago
Quoted from captaindorky:

Following up on an issue that is finally resolved after almost 5 months of waiting. Yes - 5 MONTHS.
Apparently my Spike CPU board amplifiers were shot and the board required repair. I was informed that those parts were currently unavailable - so I'd have to wait until possibly 2022 or go for a board swap...

What was up w/the audio amp? I'm getting ready to swap out the audio chip for the woofer on my Munsters, just curious what you experienced.

#10417 2 years ago

The audio went to sh**. It was all muffled and essentially useless.

The game played fine but the audio was jacked up. I sent video to Stern and a distributor and was told my CPU board was to blame. 5 months later, massive frustration and about $300 later, I hopefully will get a functional board back that works.

Apparently these boards are in short supply. I've already been contacted by somebody asking me to send my bad board to them so they can harvest parts off my bad board to fix other boards. I was told amplifiers for the board are not available. Really? This is the best Stern can do?

I'm done. I can send my Williams/Bally boards in for repair and it is a quick fix (kudos Hibler). These Stern boards? Good luck. It sucks. My machine is going for sale as soon as it is functional again. 5 freaking months. Unacceptable.

#10418 2 years ago
Quoted from captaindorky:

The audio went to sh**. It was all muffled and essentially useless.
The game played fine but the audio was jacked up. I sent video to Stern and a distributor and was told my CPU board was to blame. 5 months later, massive frustration and about $300 later, I hopefully will get a functional board back that works.
Apparently these boards are in short supply. I've already been contacted by somebody asking me to send my bad board to them so they can harvest parts off my bad board to fix other boards. I was told amplifiers for the board are not available. Really? This is the best Stern can do?
I'm done. I can send my Williams/Bally boards in for repair and it is a quick fix (kudos Hibler). These Stern boards? Good luck. It sucks. My machine is going for sale as soon as it is functional again. 5 freaking months. Unacceptable.

Such a shame... I think this is one of the best machines ever made, but I have to say if mine was out of action for 5 months, I'd be p*ssed to the point of getting rid of it too.

All for the sake of a new board - that's incredibly poor service. Unfortunately this seems to be the way its going at the moment - all the emphasis seems to be getting thousands of orders for new machines, never mind when they can actually get made or availability of spare parts etc.

#10419 2 years ago

For those keeping track or making note, I just wanted to comment that my metal loop protector also seems to be demonstrating curling at about 100 games.
As I've been reading about this happening to others, I wasn't exactly sure what kind of curling folks were experiencing. I now see that it is the back edge that curls up, lengthwise...and sure enough, when balls go back there, especially with lighter passes/plunges (or in preparation for trooper multiball), a ball will get hung up back there. That is annoying.
I jumped on Cliffs website and went ahead and purchased his IMDN protector package, which will also include that carbon fiber loop protector. I will look forward to receiving it.

#10420 2 years ago
Quoted from captaindorky:

The audio went to sh**. It was all muffled and essentially useless.
The game played fine but the audio was jacked up. I sent video to Stern and a distributor and was told my CPU board was to blame. 5 months later, massive frustration and about $300 later, I hopefully will get a functional board back that works.
Apparently these boards are in short supply. I've already been contacted by somebody asking me to send my bad board to them so they can harvest parts off my bad board to fix other boards. I was told amplifiers for the board are not available. Really? This is the best Stern can do?
I'm done. I can send my Williams/Bally boards in for repair and it is a quick fix (kudos Hibler). These Stern boards? Good luck. It sucks. My machine is going for sale as soon as it is functional again. 5 freaking months. Unacceptable.

My Munsters audio is fine when first turned on. If once warmed up and I shut the pin off, then on again (after waiting a bit), the woofer chip (TPA3123D2PWP) would get very hot and the bass was pretty much gone. Wait awhile...fine again. So I ordered a replacement chip from digi-key last summer for ~$8. Getting ready to finally install.

Whoever mentioned you can't get parts appears to be correct. No stock at Digi-Key, Arrow, Newark, etc. and looks like it won't be in stock until 2/22. 7 in stock at Mouser. Yikes!

I was even going to hit you up about buying the old board just to have, before you mentioned some already pinged you about that!

#10421 2 years ago
Quoted from ChipScott:

For those keeping track or making note, I just wanted to comment that my metal loop protector also seems to be demonstrating curling at about 100 games.
As I've been reading about this happening to others, I wasn't exactly sure what kind of curling folks were experiencing. I now see that it is the back edge that curls up, lengthwise...and sure enough, when balls go back there, especially with lighter passes/plunges (or in preparation for trooper multiball), a ball will get hung up back there. That is annoying.
I jumped on Cliffs website and went ahead and purchased his IMDN protector package, which will also include that carbon fiber loop protector. I will look forward to receiving it.

i noticed this is happening on my pro delivered Jan 2020. Also ordered cliff set with carbon strip which i expect to get back soon and will report back any issues.

#10422 2 years ago

Mine is still stuck solid with the 3m tape recommended earlier. Quite a few games played too, someone sat on the machine for almost 6 straight hours while me and her boyfriend played golden tee, still no peeling.

#10423 2 years ago
Quoted from Anony:

Mine is still stuck solid with the 3m tape recommended earlier. Quite a few games played too, someone sat on the machine for almost 6 straight hours while me and her boyfriend played golden tee, still no peeling.

I have a playfield protector, is safe ? You have a picture of the exact location?

#10424 2 years ago
Quoted from RGAires:

I have a playfield protector, is safe ? You have a picture of the exact location?

Playfield protectors cover the whole playfield right? I'd think you could install this directly over it, I installed mine over the mylar that was already there.

I'm having trouble finding a good picture of where it goes but it's just behind the center ramp to the left of the nylon pin where the ball typically drops from the ramp shot.

https://www.passionforpinball.com/iron_maiden.htm

Cliffy's site shows it pretty well but the cliffy protector doesn't go quite as far to the right as the official one.

https://www.passionforpinball.com/IronMaiden/IMDN-orbit-CF-inst001.jpg

#10425 2 years ago
Quoted from Anony:

Playfield protectors cover the whole playfield right? I'd think you could install this directly over it, I installed mine over the mylar that was already there.
I'm having trouble finding a good picture of where it goes but it's just behind the center ramp to the left of the nylon pin where the ball typically drops from the ramp shot.
https://www.passionforpinball.com/iron_maiden.htm
Cliffy's site shows it pretty well but the cliffy protector doesn't go quite as far to the right as the official one.
https://www.passionforpinball.com/IronMaiden/IMDN-orbit-CF-inst001.jpg

I will check that Thanks

#10426 2 years ago
Quoted from Anony:

Mine is still stuck solid with the 3m tape recommended earlier. Quite a few games played too, someone sat on the machine for almost 6 straight hours while me and her boyfriend played golden tee, still no peeling.

I've got my 3M double-sided tape coming today because mine is beginning to curl as well (not sure how many games but I'm guessing around 300). Looking forward to getting that fixed.

#10427 2 years ago
Quoted from Biju:

I've got my 3M double-sided tape coming today because mine is beginning to curl as well (not sure how many games but I'm guessing around 300). Looking forward to getting that fixed.

Just be careful lifting the old one off, mine bent to hell and I had to use a new one. Might be worth using some solvent to weaken the existing glue.

#10428 2 years ago
Quoted from Anony:

sat on the machine for almost 6 straight hours while me and her boyfriend played golden tee

Sounds like a keeper-

#10429 2 years ago
Quoted from Anony:

Just be careful lifting the old one off, mine bent to hell and I had to use a new one. Might be worth using some solvent to weaken the existing glue.

Thanks for the advice! I'm sure the metal is exceptionally thin. I think I'll just try some naphtha on a q-tip and slowly work it from there.

#10430 2 years ago
Quoted from Biju:

Thanks for the advice! I'm sure the metal is exceptionally thin. I think I'll just try some naphtha on a q-tip and slowly work it from there.

Yeah just go slow, I did more damage than I needed to because I had a spare one handy.

#10431 2 years ago

Darn - turned on my IM last night to find that the all of the lower/middle playfield lights are out. GI is ok, and everything else seems to work fine. I had a quick look at the manual, and I believe all those leds are controlled by chained extensions from node board 8 CN3 - I had a look, re-seated the CN3 connector as well as the connecter on each led board (8b,8c, 8d, 8e I think). Still no joy - anyone have any ideas?

#10432 2 years ago
Quoted from Ceemunkey:

Darn - turned on my IM last night to find that the all of the lower/middle playfield lights are out. GI is ok, and everything else seems to work fine. I had a quick look at the manual, and I believe all those leds are controlled by chained extensions from node board 8 CN3 - I had a look, re-seated the CN3 connector as well as the connecter on each led board (8b,8c, 8d, 8e I think). Still no joy - anyone have any ideas?

I had that exact thing happen to me on my LZ.
My problem was a plug pin going to the node board. The plugs are designed with a male side one the board side which meets the female part in the plug. The female part backed out of the plug so it didn't make contact. Look at each plug on end to see if a female pin has backed out .

#10433 2 years ago
Quoted from wtatumjr:

I had that exact thing happen to me on my LZ.
My problem was a plug pin going to the node board. The plugs are designed with a male side one the board side which meets the female part in the plug. The female part backed out of the plug so it didn't make contact. Look at each plug on end to see if a female pin has backed out .

Ah yes good point, that actually happened recently on my GB and caused the flippers to die.

My distro has got back to me (they are fantastic), and said to eliminate each led board, as one bad board can cause the whole chain to fail. Go all the way back to the node board then try swapping that. I'll check out that CN3 connector plug too as you suggest - thanks.

#10434 2 years ago
Quoted from Ceemunkey:

Such a shame... I think this is one of the best machines ever made, but I have to say if mine was out of action for 5 months, I'd be p*ssed to the point of getting rid of it too.
All for the sake of a new board - that's incredibly poor service. Unfortunately this seems to be the way its going at the moment - all the emphasis seems to be getting thousands of orders for new machines, never mind when they can actually get made or availability of spare parts etc.

I kind of wish Stern could have some sort refurbish program. Send in your broken board (CPU or Node), get a refurbish board in return at a lower cost. They fix your board and use it for another return. Shame to waste an entire CPU board because of a failed audio amp chip. Node boards are fairly cheap, so those might not be cost effective to do a refurb.

Other option would be to sell the Spike 2 board w/o the CPU daughter card. I guess that could get messy if someone misdiagnoses whether it's the actual CPU board or the main board the CPU sets on.

#10435 2 years ago

<blockquote cite="#665874

Quoted from Anony:

Playfield protectors cover the whole playfield right? I'd think you could install this directly over it, I installed mine over the mylar that was already there.
I'm having trouble finding a good picture of where it goes but it's just behind the center ramp to the left of the nylon pin where the ball typically drops from the ramp shot.
https://www.passionforpinball.com/iron_maiden.htm
Cliffy's site shows it pretty well but the cliffy protector doesn't go quite as far to the right as the official one.
https://www.passionforpinball.com/IronMaiden/IMDN-orbit-CF-inst001.jpg

You mean this?

pasted_image (resized).pngpasted_image (resized).png
#10436 2 years ago
Quoted from RGAires:

<blockquote cite="#665874

You mean this?[quoted image]

Yeah that's the spot the protector goes.

Quoted from mbwalker:

I kind of wish Stern could have some sort refurbish program. Send in your broken board (CPU or Node), get a refurbish board in return at a lower cost. They fix your board and use it for another return. Shame to waste an entire CPU board because of a failed audio amp chip. Node boards are fairly cheap, so those might not be cost effective to do a refurb.
Other option would be to sell the Spike 2 board w/o the CPU daughter card. I guess that could get messy if someone misdiagnoses whether it's the actual CPU board or the main board the CPU sets on.

Someone call Louis Rossmann. But for real repair places like that either rely on donor boards or need to have a bunch of stock of parts on hand. with the shortages I'm not even sure they would be have what is needed to repair stuff right now.

And I installed the larger coil last night and only got to play two games but I was 6/6 for auto plunges. I will give it a longer play tonight and report back.

#10437 2 years ago

I am wondering what the issue really is with these boards....
Are these impossible to fix really? or is it just that the components are too small to solder by hand?

I can do micro soldering, no problem, under a micro scope, I have repaired and stitched pads at around 0.1 mm, that is like a spec of dust....

Not bragging nor trying to show off, I am not an engineer nor have formal training, I am just a guy that likes to do good work....

is it the actual size the problem or is it something else?

#10438 2 years ago
Quoted from Pin_Fandango:

I am wondering what the issue really is with these boards....
Are these impossible to fix really? or is it just that the components are too small to solder by hand?
I can do micro soldering, no problem, under a micro scope, I have repaired and stitched pads at around 0.1 mm, that is like a spec of dust....
Not bragging nor trying to show off, I am not an engineer nor have formal training, I am just a guy that likes to do good work....
is it the actual size the problem or is it something else?

Pretty sure it's just that soldering these micro components is a lot harder than the normal soldering most of us can do. And with a lot of these boards being layered a screwup can kill them way easier than the older PCBs that had through-hole components and you could like re-drill vias and stuff.

I am pretty good at soldering but the one time I tried to solder something small like on these boards I killed it. Seems like a lot of component level repair on boards with tiny parts like this involves some special equipment like the microscope, hot air station etc.

Based on the stuff I see Louis Rossmann do we could all learn how to do it but I don't know if the average person has the patience or equipment to do it compared to macro size soldering. he does courses though, if anyone is in new york go learn from him and start providing the service to the community!

Also diagnosing without schematics can be pretty hard. Do Stern provide schematics for repair?

#10439 2 years ago
Quoted from Anony:

Pretty sure it's just that soldering these micro components is a lot harder than the normal soldering most of us can do. And with a lot of these boards being layered a screwup can kill them way easier than the older PCBs that had through-hole components and you could like re-drill vias and stuff.
I am pretty good at soldering but the one time I tried to solder something small like on these boards I killed it. Seems like a lot of component level repair on boards with tiny parts like this involves some special equipment like the microscope, hot air station etc.
Based on the stuff I see Louis Rossmann do we could all learn how to do it but I don't know if the average person has the patience or equipment to do it compared to macro size soldering. he does courses though, if anyone is in new york go learn from him and start providing the service to the community!
Also diagnosing without schematics can be pretty hard. Do Stern provide schematics for repair?

no I think they kept the schematics to themselves...

As for micro soldering, I have no issues with SMD stuff and testing double layered smd components, yes it is harder but I can do it...

A semi decent microscope (at around $300) can do these no prob, yes there are more expensive - not needed for my application - . I just fixed other boards with components way smaller than the CPU inside a Stern, I just compared them as I have a pinball machine right next to me.

The only issue I would have is that I have no idea what has failed on these. I would not know what to replace or test, but other than that, the soldering is easy - for me- as I have all the tools to micro solder.

#10440 2 years ago
Quoted from Pin_Fandango:

no I think they kept the schematics to themselves...
As for micro soldering, I have no issues with SMD stuff and testing double layered smd components, yes it is harder but I can do it...
A semi decent microscope (at around $300) can do these no prob, yes there are more expensive - not needed for my application - . I just fixed other boards with components way smaller than the CPU inside a Stern, I just compared them as I have a pinball machine right next to me.
The only issue I would have is that I have no idea what has failed on these. I would not know what to replace or test, but other than that, the soldering is easy - for me- as I have all the tools to micro solder.

Yeah the work Louis does on Macs is usually not too bad to diagnose since there is obvious corrosion from water damage. Start by changing out the obviously damaged components and go from there.
If there is no visible indication of what's gone wrong you need to spend a lot of time diagnosing and without schematics that's really hard.

#10441 2 years ago
Quoted from Anony:

Pretty sure it's just that soldering these micro components is a lot harder than the normal soldering most of us can do. And with a lot of these boards being layered a screwup can kill them way easier than the older PCBs that had through-hole components and you could like re-drill vias and stuff.
I am pretty good at soldering but the one time I tried to solder something small like on these boards I killed it. Seems like a lot of component level repair on boards with tiny parts like this involves some special equipment like the microscope, hot air station etc.
Based on the stuff I see Louis Rossmann do we could all learn how to do it but I don't know if the average person has the patience or equipment to do it compared to macro size soldering. he does courses though, if anyone is in new york go learn from him and start providing the service to the community!
Also diagnosing without schematics can be pretty hard. Do Stern provide schematics for repair?

Electrical engineer here (old fart, recently retired, RF not pinball tho!). SMD really isn't that hard, used it for +30 years because of the electrical performance benefits. I prefer it actually for most cases. Super easy for resistors, caps, etc. The IC's that have bent leads on the sides (called 'gull wing') aren't bad either. Two irons help, and it's pretty easy to just glob solder across all the leads until all the solder is melted and lift the part off. Clean up the excess solder with solder wick. Clean up old flux with IPA. Position the new part, tack solder a couple of leads at the corners to hold it in place, then solder the rest. Inspect for excessive solder/shorts (solder wick helps). I'd rather change one of those than a thru hole any day. Thin solder and a small soldering iron tip helps, but I just use a standard pencil tip.

Granted, some parts can be more of a PIA than others. The audio issue that captaindorky mentioned earlier? - Likely the audio amp IC. That part would be an exception since there's a thermal pad on the bottom of the IC that solders to a pad on the board to help dissipate the heat. Since it's hidden, that pretty much requires a hot air gun (and/or heat on the back side of the board). Not insurmountable, but you definitely need to be careful not to unsolder (and blow away) every other part surrounding that audio chip. Some heat on the back of the board helps to 'preheat' things too. What I use to do in my designs (and what Stern should have done) is bring out some of the copper from under the part. That allows a person to place an iron on the thermal pad to safely preheat the thermal pad under the IC, making the chip removal a lot easier.

If anyone is interested, Amazon has some SMD practice boards for less than $10. Easier to muck one of those up rather than a Spike 2 CPU or node board.

If an old man like me can do it, you guys (and gals) can too. A cheap head visor (magnifier) really helps too.
pasted_image (resized).pngpasted_image (resized).png

#10442 2 years ago

Speaking of tiny components, I just found this in my cabinet. Does anyone know what it is? It's very small, looks almost like an LED or something.

I couldn't get a very clear picture but it's a tiny white square with an opaque circle in the middle and a tiny chip looking thing on the opaque part. Flipper linkage for scale in the picture.
PXL_20211217_231054222 (resized).jpgPXL_20211217_231054222 (resized).jpg

Also got some new flipper linkages and they came with a small metal plug to make the hole in the bushing the right size and probably prevent stretching. My current ones don't have this, but it seems like it's key to keeping this part from wearing out.

#10443 2 years ago
Quoted from Anony:

Speaking of tiny components, I just found this in my cabinet. Does anyone know what it is? It's very small, looks almost like an LED or something.
I couldn't get a very clear picture but it's a tiny white square with an opaque circle in the middle and a tiny chip looking thing on the opaque part. Flipper linkage for scale in the picture.
[quoted image]
Also got some new flipper linkages and they came with a small metal plug to make the hole in the bushing the right size and probably prevent stretching. My current ones don't have this, but it seems like it's key to keeping this part from wearing out.

only thing that comes to mind the backing of a stand up target, but I am not sure. Check the orb, extra ball skill shot and the X targets... wild guess.

#10444 2 years ago

for those of you having flickering LED lights....

At first I thought Stern's leds were bad/cheap but I just think they are just like comets (?), anyway, if you have flickering leds here and there, you can prevent it by simply reducing the gap in between the led and the socket.
Pics for reference, sorry, bad zoomed in photos off a phone.

I used non-serrated long nose small pliers to shape it down (I was also experimenting with frosted vs clear leds), clears are brighter.

All that to say, no more flickering anywhere when fixed.

To reshape the socket it is easier to remove from underneath the PF, fyi.

Note: I did not do the upper left corner as those live underneath a board and can't be accessed - they are stapled into the PF like the backboard GI, they can only be removed from the top = removing the small flipper assy, and the left ramp, so that is a fight for another day. Of course, the leds there are now flickering, lol.

The rest work perfectly.
IMG_6956 (resized).jpegIMG_6956 (resized).jpegIMG_6957 (resized).jpegIMG_6957 (resized).jpeg

#10445 2 years ago
Quoted from Anony:

Speaking of tiny components, I just found this in my cabinet. Does anyone know what it is? It's very small, looks almost like an LED or something.
I couldn't get a very clear picture but it's a tiny white square with an opaque circle in the middle and a tiny chip looking thing on the opaque part. Flipper linkage for scale in the picture.
[quoted image]
Also got some new flipper linkages and they came with a small metal plug to make the hole in the bushing the right size and probably prevent stretching. My current ones don't have this, but it seems like it's key to keeping this part from wearing out.

Go into bulb test and see if any don't light. Does look like a LED at first glance...

#10446 2 years ago
Quoted from Pin_Fandango:

for those of you having flickering LED lights....
At first I thought Stern's leds were bad/cheap but I just think they are just like comets (?), anyway, if you have flickering leds here and there, you can prevent it by simply reducing the gap in between the led and the socket.
Pics for reference, sorry, bad zoomed in photos off a phone.
I used non-serrated long nose small pliers to shape it down (I was also experimenting with frosted vs clear leds), clears are brighter.
All that to say, no more flickering anywhere when fixed.
To reshape the socket it is easier to remove from underneath the PF, fyi.
Note: I did not do the upper left corner as those live underneath a board and can't be accessed - they are stapled into the PF like the backboard GI, they can only be removed from the top = removing the small flipper assy, and the left ramp, so that is a fight for another day. Of course, the leds there are now flickering, lol.
The rest work perfectly.
[quoted image][quoted image]

Most of my backpanel GIs and a few others around the machine had flicker issues, even after tweaking the sockets themselves. Yesterday I replaced all the problem ones and most of the others that didn't require a lot of disassembly with comets. Flicker went away on all but one. That was fixed with a drop of solder on the bulb contact as suggested by Anony a few days ago.

Did have to remove quite a bit of stuff including the left ramp almost entirely to access one in the upper left corner you mention.

Side note, I have a pro, but I grabbed the lighting diagram from a premium and installed red bulbs in the sockets where the premium uses them instead of the standard whites on the pro. The programming that turns those sockets on and off appears to be in the pro code and it gives the same lighting effect. I also put red in socket behind the sarcophagus captive ball which is normally white on both.

I got back and forth on whether I like the effect from the places that normally have them, but even if I do eventually go back to white the one behind the sarcophagus is staying.

#10447 2 years ago
Quoted from craif:

Most of my backpanel GIs and a few others around the machine had flicker issues, even after tweaking the sockets themselves. Yesterday I replaced all the problem ones and most of the others that didn't require a lot of disassembly with comets. Flicker went away on all but one. That was fixed with a drop of solder on the bulb contact as suggested by Anony a few days ago.
Did have to remove quite a bit of stuff including the left ramp almost entirely to access one in the upper left corner you mention.
Side note, I have a pro, but I grabbed the lighting diagram from a premium and installed red bulbs in the sockets where the premium uses them standard whites on the pro. The programming that turns those sockets on and off appears to be in the pro code and it gives the same lighting effect. I also put red in socket behind the sarcophagus captive ball which is normally white on both.
I got back and forth on whether I like the effect from the places that normally have them, but even if I do eventually go back to white the one behind the sarcophagus is staying.

yes I did try replacing with comets at first and it seemed to improve but the flickering came back. it has been perfect since adjusting all the sockets to a nice fit around the bulb, no wiggle = no flicker, wiggle inside the socket = flicker.

Adding solder at the bottom, can arguably improve conductivity but ultimately it is making the base thicker, which compresses the spring more and creates more tension, which is good, more tension = less wiggle = less flickering? More than 1 way to skin a cat I guess. Don't like to spend a lot of time soldering under the PF. A splatter can introduce a short turning it into a node board nightmare. Very common when GI shorts happen and finding a GI short is a pain in the A$$.

Adjusting the socket seems to works for me, lol, I am lazy.

If they issues come back, I think I will just replace the bad sockets.

#10448 2 years ago
Quoted from craif:

Most of my backpanel GIs and a few others around the machine had flicker issues, even after tweaking the sockets themselves. Yesterday I replaced all the problem ones and most of the others that didn't require a lot of disassembly with comets. Flicker went away on all but one. That was fixed with a drop of solder on the bulb contact as suggested by Anony a few days ago.
Did have to remove quite a bit of stuff including the left ramp almost entirely to access one in the upper left corner you mention.
Side note, I have a pro, but I grabbed the lighting diagram from a premium and installed red bulbs in the sockets where the premium uses them instead of the standard whites on the pro. The programming that turns those sockets on and off appears to be in the pro code and it gives the same lighting effect. I also put red in socket behind the sarcophagus captive ball which is normally white on both.
I got back and forth on whether I like the effect from the places that normally have them, but even if I do eventually go back to white the one behind the sarcophagus is staying.

I was going to try the red bulbs but decided not to. I guess on pro you just don't notice the light show because it's white? What modes does it show on that you noticed it once going to the red ones?

#10449 2 years ago
Quoted from Anony:

I was going to try the red bulbs but decided not to. I guess on pro you just don't notice the light show because it's white? What modes does it show on that you noticed it once going to the red ones?

I haven't played a premium much recently so I can't say for certain the show is truly identical but i think it is.

On the pro it will dim/power off the sockets independently just like on the premium. When both lights are stock white you only really notice some dimming when one goes down, as the other white bulb is still on. With the reds installed in the appropriate sockets, the effect is noticeably white, red or dark depending on the what each socket is doing in the current show.

#10450 2 years ago
Quoted from Pin_Fandango:

yes I did try replacing with comets at first and it seemed to improve but the flickering came back. it has been perfect since adjusting all the sockets to a nice fit around the bulb, no wiggle = no flicker, wiggle inside the socket = flicker.
Adding solder at the bottom, can arguably improve conductivity but ultimately it is making the base thicker, which compresses the spring more and creates more tension, which is good, more tension = less wiggle = less flickering? More than 1 way to skin a cat I guess. Don't like to spend a lot of time soldering under the PF. A splatter can introduce a short turning it into a node board nightmare. Very common when GI shorts happen and finding a GI short is a pain in the A$$.
Adjusting the socket seems to works for me, lol, I am lazy.
If they issues come back, I think I will just replace the bad sockets.

Perhaps a dab of solder on the side of the bulb might help? Easier to try than replacing a socket?

Promoted items from Pinside Marketplace and Pinside Shops!
$ 39.95
Playfield - Toys/Add-ons
ULEKstore
 
$ 18.95
Playfield - Protection
ULEKstore
 
$ 34.00
Playfield - Other
Pin Monk
 
$ 94.99
Playfield - Toys/Add-ons
Lermods
 
$ 80.00
Gameroom - Decorations
Duke Pinball
 
$ 18.95
Playfield - Toys/Add-ons
ULEKstore
 
From: $ 6,999.99
Pinball Machine
Pinball Pro
 
$ 20.00
Cabinet - Other
Filament Printing
 
6,500 (Firm)
Machine - For Sale
Merrimack, NH
$ 75.00
Cabinet - Shooter Rods
FlipMods
 
From: $ 30.00
Cabinet - Other
Rocket City Pinball
 
From: $ 35.00
Playfield - Toys/Add-ons
Twisted Tokens
 
From: $ 60.00
Playfield - Toys/Add-ons
arcade-cabinets.com
 
$ 100.00
Gameroom - Decorations
Duke Pinball
 
From: $ 30.00
$ 8.99
Cabinet - Other
Inscribed Solutions
 
$ 132.00
Playfield - Toys/Add-ons
Lermods
 
$ 15.00
Playfield - Other
YouBentMyWookie
 
$ 100.00
Playfield - Toys/Add-ons
JuanSolo's modshop
 
$ 55.00
Playfield - Protection
Tucson Pinball
 
Wanted
From: $ 50.00
Playfield - Toys/Add-ons
arcade-cabinets.com
 
$ 55.00
Playfield - Toys/Add-ons
arcade-cabinets.com
 
From: $ 65.00
Playfield - Toys/Add-ons
arcade-cabinets.com
 
$ 29.99
Playfield - Decals
Cento Creations
 
8,600
6,500
Machine - For Sale
Lake Elsinore, CA
Hey modders!
Your shop name here
There are 15,842 posts in this topic. You are on page 209 of 317.

Reply

Wanna join the discussion? Please sign in to reply to this topic.

Hey there! Welcome to Pinside!

Donate to Pinside

Great to see you're enjoying Pinside! Did you know Pinside is able to run without any 3rd-party banners or ads, thanks to the support from our visitors? Please consider a donation to Pinside and get anext to your username to show for it! Or better yet, subscribe to Pinside+!


This page was printed from https://pinside.com/pinball/forum/topic/up-the-irons-the-iron-maiden-pinball-official-owners-club/page/209 and we tried optimising it for printing. Some page elements may have been deliberately hidden.

Scan the QR code on the left to jump to the URL this document was printed from.