(Topic ID: 63352)

Twilight Zone Owner's club

By Caucasian2Step

10 years ago


Topic Heartbeat

Topic Stats

You

Linked Games

Topic Gallery

View topic image gallery

IMG_9141 (resized).jpeg
IMG_0001[1] screwpost detail (00b) (resized).jpg
IMG_0001[1] screwpost detail (00a) (resized).jpg
IMG_0001[1] screwpost detail (00) (resized).jpg
Pinside_forum_8036376_3779623 screw through playfield oops (a) (resized).jpg
IMG_0403 (resized).JPG
IMG_0404 (resized).JPG
IMG_6425 (resized).jpg
PXL_20240406_221516459 (resized).jpg
IMG_0402 (resized).JPG
IMG_0401 (resized).JPG
image (resized).jpg
tz_ball_shooter_lane_feeder (resized).png
IMG_5127 (resized).jpeg
IMG_5125 (resized).jpeg
Screenshot_20240401-094638 (resized).png

Topic index (key posts)

8 key posts have been marked in this topic (Show topic index)

There are 15,209 posts in this topic. You are on page 202 of 305.
#10051 3 years ago
Quoted from Kare9:

I think somehow that coil's power is being affected, I'm guessing BR3 on the solenoid circuit (I see you've had reset issues). Do you notice any other coils becoming weaker?
Assuming you've checked the coil sleeve, and the coil stop/plunger for mushrooming.

thanks for the reply! sorry to sound noob but what exactly and were is located BR3? i really had never heard of it until now...

#10052 3 years ago
Quoted from Manny65:

If you want a quick fix you can throw in a daughter board as parispinballadct mentioned - I'd recommend a Kahr board (https://www.kahr.us/daughterboard.html) who originally designed this fix.

yes - this is the exact daughterboard model I used for both TZ and Indy and really been all good since.

#10053 3 years ago
Quoted from jawjaw:

Have you tried taking the scoop off and inspect? Could be broken weld or something just snapped that is not obvious looking at it assembled. I had this problem on a Congo I used to own. Volcano would throw balls all over. It wasn't until I actually removed the stack that I discovered a mounting tab was broken clean off.

hey, thanks for replying.
well yes, I think i have inspected this whole thing a million times.
doesnt look like anything's broken or snapped.
it's weird but i mean i can live with it since 9 out of 10 it fires perfect... ah Pinball...

#10054 3 years ago
Quoted from ParisPinballAdct:

thanks for the reply! sorry to sound noob but what exactly and were is located BR3? i really had never heard of it until now...

Unfortunately it's impossible to say for sure what problem is. BR3 is located on the driver board. I think it would be well worth the time and money to have a tech come out and take a look. You poking around the boards may cause more harm than good, if you have zero experience this is not the time to make a first foray without doing a bunch of prior research on pinwiki or a similar resource.

#10055 3 years ago

Hi all, just installed the GI and LED OCD boards in TZ. Holy crap, I didn't know what I was missing until I saw this. Looks really good. However, its causing my PinStadiums (which tap off of the back of a GI bulb socket) to flash now. I've sent a note to their support, but I think all I need to do is wire tap into the GI signal before it gets to the GI OCD board. Anybody know which pins those might be on the power driver board (I think that's where they are, I did a lot of cable shuffling in that 119, 120, 121 block area)?

Thanks!

#10056 3 years ago
Quoted from RobbyIRL5:

Hi all, just installed the GI and LED OCD boards in TZ. Holy crap, I didn't know what I was missing until I saw this. Looks really good. However, its causing my PinStadiums (which tap off of the back of a GI bulb socket) to flash now. I've sent a note to their support, but I think all I need to do is wire tap into the GI signal before it gets to the GI OCD board. Anybody know which pins those might be on the power driver board (I think that's where they are, I did a lot of cable shuffling in that 119, 120, 121 block area)?
Thanks!

Answering my own question thank you to Scott / PinStadium, J121, pins 6 and 11.

#10057 3 years ago
Quoted from RobbyIRL5:

Hi all, just installed the GI and LED OCD boards in TZ. Holy crap, I didn't know what I was missing until I saw this. Looks really good. However, its causing my PinStadiums (which tap off of the back of a GI bulb socket) to flash now. I've sent a note to their support, but I think all I need to do is wire tap into the GI signal before it gets to the GI OCD board. Anybody know which pins those might be on the power driver board (I think that's where they are, I did a lot of cable shuffling in that 119, 120, 121 block area)?
Thanks!

Yeah in my experience the GI OCD board especially was a complete game changer as I didn't realize how much dimming and lighting effects I had lost.

#10058 3 years ago

I cleaned my TZ yesterday and while doing that I took the obligatory look at the balls (no, not THOSE). The metal ones look great; shiny, no noticeable dents or scratches. Then I inspected the white ceramic ball and realized that it had lots of small black "streaks" in the white finish that I haven't really seen before (about a year ago since I last gave the game a good cleaning).

I have no idea if it's white "paint" that has been scratched off the surface (is the ceramic ball black/grey-ish inside?) or what those dark streaks/marks are, but it does look kind of bad. The ceramic balls are rather expensive so while I could get a new one, that would probably also be ugly in a year or so if I don't find the reason.

I took a quick look at the playfield to try and find out where those marks could come from and realized that the two screws right behind the upper-right flipper could be the culprit. When I tested to launch a ball from the shooter, the ball would often bounce off one of those two screw heads before reaching the "rocket" kick-out below.

TZscrews (resized).jpgTZscrews (resized).jpg

At first I thought my metal ball guide perhaps was mounted wrong on my game but I had a look at other peoples TZ and saw they had the same position and screws as on mine (the pic above is originally taken from IPDB). The screws are the normal ones used for fastening of the ball guides.

Is this mounted wrong?
Should I try to find a screw with a flatter head, not protruding that much above the playfield surface?
Is the ceramic ball surface so hard that these screws can't really make any difference and the reason is something else?
Any suggestions or ideas?

Thanks

#10059 3 years ago
Quoted from Lhyrgoif:

I cleaned my TZ yesterday and while doing that I took the obligatory look at the balls (no, not THOSE). The metal ones look great; shiny, no noticeable dents or scratches. Then I inspected the white ceramic ball and realized that it had lots of small black "streaks" in the white finish that I haven't really seen before (about a year ago since I last gave the game a good cleaning).
I have no idea if it's white "paint" that has been scratched off the surface (is the ceramic ball black/grey-ish inside?) or what those dark streaks/marks are, but it does look kind of bad. The ceramic balls are rather expensive so while I could get a new one, that would probably also be ugly in a year or so if I don't find the reason.
I took a quick look at the playfield to try and find out where those marks could come from and realized that the two screws right behind the upper-right flipper could be the culprit. When I tested to launch a ball from the shooter, the ball would often bounce off one of those two screw heads before reaching the "rocket" kick-out below.
[quoted image]
At first I thought my metal ball guide perhaps was mounted wrong on my game but I had a look at other peoples TZ and saw they had the same position and screws as on mine (the pic above is originally taken from IPDB). The screws are the normal ones used for fastening of the ball guides.
Is this mounted wrong?
Should I try to find a screw with a flatter head, not protruding that much above the playfield surface?
Is the ceramic ball surface so hard that these screws can't really make any difference and the reason is something else?
Any suggestions or ideas?
Thanks

The powerball is ceramic, and the black marks you see on it is dirt embedded in nicks in the surface. It’s perfectly normal. The nicks come from normal play, highly likely not from the area you identified. The are a result of the ball hitting other exposed metal surfaces around the playfield.

Some people do replace at least one of the screw hears you identified. People put a post (or maybe two) there with a rubber. But they do that to slow the ball down when it’s headed to the rocket launch, to keep it from bouncing out after a skill shot. Attached is a pic from another thread, maybe someone has a better one. My machine is all stock, so I don’t have the mod (and my ball often bounces out of the rocket ship area).

I believe some people have had success cleaning the powerball. I personally haven’t tried to and just accept the slight discoloring.

https://images.pinside.com/0/b9/0b91814d04b73ddc25a2439adeef21477100ba7c/resized/large/0b91814d04b73ddc25a2439adeef21477100ba7c.jpg

pasted_image (resized).jpegpasted_image (resized).jpeg
#10060 3 years ago

You can take a rag,some mother's cleaning wax, and rub it for about five minutes and it will look good as new. Takes a couple hundred plays to look greyish again , so I do this when I'm waxing the playfield every so often.

#10061 3 years ago
Quoted from PinJim:

The powerball is ceramic, and the black marks you see on it is dirt embedded in nicks in the surface. It’s perfectly normal. The nicks come from normal play, highly likely not from the area you identified. The are a result of the ball hitting other exposed metal surfaces around the playfield.
Some people do replace at least one of the screw hears you identified. People put a post (or maybe two) there with a rubber. But they do that to slow the ball down when it’s headed to the rocket launch, to keep it from bouncing out after a skill shot. Attached is a pic from another thread, maybe someone has a better one. My machine is all stock, so I don’t have the mod (and my ball often bounces out of the rocket ship area).
I believe some people have had success cleaning the powerball. I personally haven’t tried to and just accept the slight discoloring.
https://images.pinside.com/0/b9/0b91814d04b73ddc25a2439adeef21477100ba7c/resized/large/0b91814d04b73ddc25a2439adeef21477100ba7c.jpg
[quoted image]

I used Astonish oven and cooktop cleaner on the power ball.

#10062 3 years ago

Novus 3 and 5 min of your time and it will be white again.

#10063 3 years ago

I follow what the manual states, page 2 #4
CLEANING of the POWRBALL is not recommended.

#10064 3 years ago

Curious, has anyone ordered a new clock board from Ingo recently? I want to order one but I have some questions on the color options listed in his ad, but I've gotten zero response from him on either from his website or from his ads on here. Just want to make sure he's still making them.

#10065 3 years ago
Quoted from DDandB-KID:

I follow what the manual states, page 2 #4
CLEANING of the POWRBALL is not recommended.

I bought a new white one.

#10066 3 years ago
Quoted from drummermike:

I bought a new white one.

If you still have your original one recommend holding onto it.

https://pinside.com/pinball/forum/topic/tz-powerball-original

#10067 3 years ago

I used this stuff. No etching and ball smells very pleasant afterwards

441FFD78-FCC8-4917-8A16-2F75D58B2A86 (resized).jpeg441FFD78-FCC8-4917-8A16-2F75D58B2A86 (resized).jpegD394A0C6-6194-4EDB-9D5E-E38F2CDFFEBB (resized).jpegD394A0C6-6194-4EDB-9D5E-E38F2CDFFEBB (resized).jpegD957FDB3-6E28-4CD5-A4DE-534E356BAAE9 (resized).jpegD957FDB3-6E28-4CD5-A4DE-534E356BAAE9 (resized).jpeg
#10068 3 years ago
Quoted from DDandB-KID:

I follow what the manual states, page 2 #4
CLEANING of the POWRBALL is not recommended.

Yeah I used a sand blaster

#10069 3 years ago
Quoted from DDandB-KID:

If you still have your original one recommend holding onto it.
https://pinside.com/pinball/forum/topic/tz-powerball-original

I still have it. I cleaned it but the new one looks better. Got it at PL for $40. I do not notice any difference in play.

#10070 3 years ago
Quoted from atg1469:

Curious, has anyone ordered a new clock board from Ingo recently? I want to order one but I have some questions on the color options listed in his ad, but I've gotten zero response from him on either from his website or from his ads on here. Just want to make sure he's still making them.

They don’t respond to PMs. The order link on their website was working and I ordered a clock board. They refunded me. I emailed and asked why and when I could order again. They never responded.

#10071 3 years ago

Cleaned my PowerBall with novus years ago, it was so dirty it looked like a regular ball. It took some scrubbing but it came back to white.

I wonder if you could tumble or ultrasonic it?

#10072 3 years ago
Quoted from PinJim:

The powerball is ceramic, and the black marks you see on it is dirt embedded in nicks in the surface. It’s perfectly normal. The nicks come from normal play, highly likely not from the area you identified. The are a result of the ball hitting other exposed metal surfaces around the playfield.
Some people do replace at least one of the screw hears you identified. People put a post (or maybe two) there with a rubber. But they do that to slow the ball down when it’s headed to the rocket launch, to keep it from bouncing out after a skill shot. Attached is a pic from another thread, maybe someone has a better one. My machine is all stock, so I don’t have the mod (and my ball often bounces out of the rocket ship area).
I believe some people have had success cleaning the powerball. I personally haven’t tried to and just accept the slight discoloring.
https://images.pinside.com/0/b9/0b91814d04b73ddc25a2439adeef21477100ba7c/resized/large/0b91814d04b73ddc25a2439adeef21477100ba7c.jpg
[quoted image]

Added rubbers for those two screws (can't hurt) and took a picture of my powerball. The ball isn't really that dirty (or grey as other people posted here) but it have nicks with dirt in them.

Not cleaned it yet in any way, thinking of what to do after seeing the manual advising not to clean the powerball (not sure why, any idea?).

20210314_161906 (resized).jpg20210314_161906 (resized).jpg

#10073 3 years ago
Quoted from Lhyrgoif:

Not cleaned it yet in any way, thinking of what to do after seeing the manual advising not to clean the powerball (not sure why, any idea?).

It's a type of hardened ceramic.

I'm sure that some chemicals could soften the hardness, and eventually cause more nicks or cracks in the surface.

#10074 3 years ago

The door area in the center of the playfield was designed to use 4 flashers, using two small circuit boards for flash lamps under the large door panel.
This design is still in the manual, and shown in the red prototype panel.

TZ flashers.jpgTZ flashers.jpg

TZ door (resized).jpgTZ door (resized).jpg
(Pictures from HEP gallery.)

During the conversation with JIMAKOST (he is doing a cool TZ scratch build), he mentioned that he is looking for lamp boards, including a door lamp board. My goal was to create a door panel with the integration of 4 flashers, operated by 4 different playfield flashers.
Aftermarket mods with small PCB only replace the GUM and BALL flashers, that's the only chance for sample/production games, only 2 holes are available for flasher extension.
The LOCK 1-2 flashers cannot be installed into these boards (unless you are ready to hack it) - there is no hole on the PCB for extra flashers.

Few years ago GLM introduced a lamp board with 4 flashers - however the control was based on only 2 playfield flashers (GUM, BALL), not 4.

My door panel contains all feature lamps (original twist-in design for bulb or LED's) and the 4 flasher area, controlled by 4 flashers as per designer's intention. Every insert area contains 4 small LED flashers for even light distribution, and the feature lamp remain in the center. Connection to factory lamp harness via plug&play harness, no soldering required.
20210315_093054.jpg20210315_093054.jpg

20210313_170027.gif20210313_170027.gif

20210312_231553 (resized).jpg20210312_231553 (resized).jpg

Thanks to Coyote for clarification of flasher locations. I can create more lamp boards, if there is a demand.

Added over 3 years ago:

Further info here:

https://pinside.com/pinball/forum/topic/twilight-zone-door-lamp-board-flashers-add-on

#10075 3 years ago
Quoted from Davi:

The door area in the center of the playfield was designed to use 4 flashers, using two small circuit boards for flash lamps under the large door panel.
This design is still in the manual, and shown in the red prototype panel.
[quoted image]
[quoted image]
(Pictures from HEP gallery.)
During the conversation with Jimakost (he is doing a cool TZ scratch build), he mentioned that he is looking for lamp boards, including a door lamp board. My goal was to create a door panel with the integration of 4 flashers, operated by 4 different playfield flashers.
Aftermarket mods with small PCB only replace the GUM and BALL flashers, that's the only chance for sample/production games, only 2 holes are available for flasher extension.
The LOCK 1-2 flashers cannot be installed into these boards (unless you are ready to hack it) - there is no hole on the PCB for extra flashers.
Few years ago GLM introduced a lamp board with 4 flashers - however the control was based on only 2 playfield flashers (GUM, BALL), not 4.
My door panel contains all feature lamps (original twist-in design for bulb or LED's) and the 4 flasher area, controlled by 4 flashers as per designer's intention. Every insert area contains 4 small LED flashers for even light distribution, and the feature lamp remain in the center. Connection to factory lamp harness via plug&play harness, no soldering required.
[quoted image]
[quoted image]
[quoted image]
Thanks to coyote for clarification of flasher locations. I can create more lamp boards, if there is a demand.

Nice work Davi!!

Do you have a rough idea of what the board would cost? And would you need a minimum number to make it viable?

#10076 3 years ago

If it were affordable I'd imagine a ton of us would switch to gain that feature, even if our boards are fully working. I'd switch it out for sure. Very cool to not have to solder or run wires to anything!

#10077 3 years ago
Quoted from yzfguy:

If it were affordable I'd imagine a ton of us would switch to gain that feature, even if our boards are fully working. I'd switch it out for sure. Very cool to not have to solder or run wires to anything!

I'm in! This board would be a must for TZ fans.

#10078 3 years ago

That's really cool. If affordable, I'd be in for one.

#10079 3 years ago
Quoted from Davi:

Obszar drzwi pośrodku boiska został zaprojektowany do użycia 4 migaczy, przy użyciu dwóch małych płytek obwodów do lamp błyskowych pod dużym panelem drzwi.
Ten projekt jest nadal w instrukcji i pokazany na czerwonym panelu prototypu.
[quoted image]
[quoted image]
(Zdjęcia z galerii HEP.)
Podczas rozmowy z Jimakost (robi fajną, podstawową konstrukcję TZ ), wspomniał, że szuka tablic oświetleniowych, w tym tabliczki na drzwi. Moim celem było stworzenie panelu drzwi z integracją 4 kierunkowskazów, obsługiwanych przez 4 różne kierunkowskazy.
Nieoryginalne mody z małą płytką drukowaną zastępują tylko migacze GUM i BALL, to jedyna szansa na gry próbne / produkcyjne, dostępne są tylko 2 otwory na rozszerzenie flashera.
Migacze LOCK 1-2 nie mogą być instalowane na tych płytach (chyba że jesteś gotowy, aby je zhakować) - na PCB nie ma otworu na dodatkowe migacze.
Kilka lat temu GLM wprowadził tablicę lampową z 4 migaczami - jednak sterowanie opierało się tylko na 2 migaczach pola gry (GUM, BALL), a nie 4.
Mój panel drzwi zawiera wszystkie lampy funkcyjne (oryginalny projekt wkręcania żarówek lub diod LED) i obszar 4 migaczy, kontrolowany przez 4 kierunkowskazy zgodnie z intencją projektanta. Każdy obszar wkładki zawiera 4 małe migacze LED zapewniające równomierny rozsył światła, a lampa funkcyjna pozostaje pośrodku. Podłączenie do fabrycznej wiązki lamp za pomocą wiązki plug & play, bez lutowania.
[quoted image]
[quoted image]
[quoted image]
Dzięki kojot do wyjaśnienia lokalizacji flasherów. Mogę stworzyć więcej tablic do lamp, jeśli jest zapotrzebowanie.

Davi, you've made quite a stir in the forum. We are waiting for the opportunity to purchase.

#10080 3 years ago
Quoted from Jecco74:

They don’t respond to PMs. The order link on their website was working and I ordered a clock board. They refunded me. I emailed and asked why and when I could order again. They never responded.

Sucks to hear, I was really hoping to order one. I guess if anyone's looking to sell their Ingo board instead let me know!

#10081 3 years ago
Quoted from Davi:

The door area in the center of the playfield was designed to use 4 flashers, using two small circuit boards for flash lamps under the large door panel.
This design is still in the manual, and shown in the red prototype panel.
[quoted image]
[quoted image]
(Pictures from HEP gallery.)
During the conversation with Jimakost (he is doing a cool TZ scratch build), he mentioned that he is looking for lamp boards, including a door lamp board. My goal was to create a door panel with the integration of 4 flashers, operated by 4 different playfield flashers.
Aftermarket mods with small PCB only replace the GUM and BALL flashers, that's the only chance for sample/production games, only 2 holes are available for flasher extension.
The LOCK 1-2 flashers cannot be installed into these boards (unless you are ready to hack it) - there is no hole on the PCB for extra flashers.
Few years ago GLM introduced a lamp board with 4 flashers - however the control was based on only 2 playfield flashers (GUM, BALL), not 4.
My door panel contains all feature lamps (original twist-in design for bulb or LED's) and the 4 flasher area, controlled by 4 flashers as per designer's intention. Every insert area contains 4 small LED flashers for even light distribution, and the feature lamp remain in the center. Connection to factory lamp harness via plug&play harness, no soldering required.
[quoted image]
[quoted image]
[quoted image]
Thanks to coyote for clarification of flasher locations. I can create more lamp boards, if there is a demand.

Looks good! I would be interested in one, definitely!
What color are the flasher LEDs?

#10082 3 years ago
Quoted from Manny65:

Nice work Davi!!
Do you have a rough idea of what the board would cost? And would you need a minimum number to make it viable?

Thanks. I would wait a bit to check the interest.

Quoted from yzfguy:

If it were affordable I'd imagine a ton of us would switch to gain that feature, even if our boards are fully working. I'd switch it out for sure. Very cool to not have to solder or run wires to anything!

Quoted from Giulio:

I'm in! This board would be a must for TZ fans.

Quoted from damadczar:

That's really cool. If affordable, I'd be in for one.

Quoted from RobertL:

Davi, you've made quite a stir in the forum. We are waiting for the opportunity to purchase.

Thanks guys. Let's see.

Quoted from Coyote:

Looks good! I would be interested in one, definitely!
What color are the flasher LEDs?

Thanks. This test board has cool white LED's. Of course warm white is also possible.

#10083 3 years ago
Quoted from Davi:

Thanks. This test board has cool white LED's. Of course warm white is also possible.

I would swap to warm white or even red, IMHO. (If you leave it cool-white, no worried, they're thru-hole and can be easily swapped.

#10084 3 years ago
Quoted from Coyote:

I would swap to warm white or even red, IMHO. (If you leave it cool-white, no worried, they're thru-hole and can be easily swapped.

I agree. Red would highlight the effect.

#10085 3 years ago

Dang, I need that pcb board in my life!

#10086 3 years ago
Quoted from Lhyrgoif:

Dang, I need that pcb board in my life!

Very cool board, would buy. What occurs when the panel is meant to be on?

#10087 3 years ago
Quoted from Davi:

The door area in the center of the playfield was designed to use 4 flashers, using two small circuit boards for flash lamps under the large door panel.
This design is still in the manual, and shown in the red prototype panel.
[quoted image]
[quoted image]
(Pictures from HEP gallery.)
During the conversation with Jimakost (he is doing a cool TZ scratch build), he mentioned that he is looking for lamp boards, including a door lamp board. My goal was to create a door panel with the integration of 4 flashers, operated by 4 different playfield flashers.
Aftermarket mods with small PCB only replace the GUM and BALL flashers, that's the only chance for sample/production games, only 2 holes are available for flasher extension.
The LOCK 1-2 flashers cannot be installed into these boards (unless you are ready to hack it) - there is no hole on the PCB for extra flashers.
Few years ago GLM introduced a lamp board with 4 flashers - however the control was based on only 2 playfield flashers (GUM, BALL), not 4.
My door panel contains all feature lamps (original twist-in design for bulb or LED's) and the 4 flasher area, controlled by 4 flashers as per designer's intention. Every insert area contains 4 small LED flashers for even light distribution, and the feature lamp remain in the center. Connection to factory lamp harness via plug&play harness, no soldering required.
[quoted image]
[quoted image]
[quoted image]
Thanks to coyote for clarification of flasher locations. I can create more lamp boards, if there is a demand.

I have the add board on for the Gum Ball flashers. This looks interesting.

#10088 3 years ago
Quoted from Kare9:

Very cool board, would buy. What occurs when the panel is meant to be on?

In case of flasher activity*, the door panel flashers are also activated.

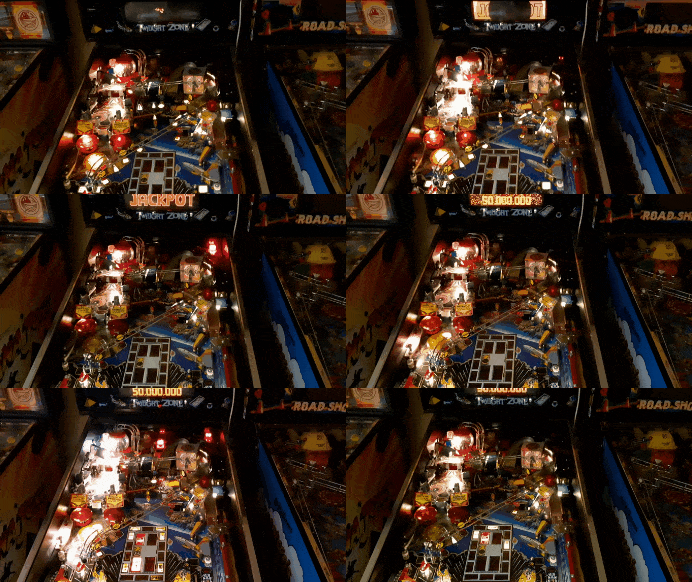
(*These 4 flashers)
Upper left insert, GUM -》upper left ramp flasher
Upper right insert, BALL -》upper right ramp flasher
Lower left insert, LOCK 1 -》pop bumpers flasher
Lower right insert, LOCK 2 -》upper right flipper flasher

20210315_224854.gif20210315_224854.gif
#10089 3 years ago

How much are we talking for this board if it was made again? It is pretty cool!

#10090 3 years ago
Quoted from Davi:

In case of flasher activity*, the door panel flashers are also activated.
(*These 4 flashers)
Upper left insert, GUM -》upper left ramp flasher
Upper right insert, BALL -》upper right ramp flasher
Lower left insert, LOCK 1 -》pop bumpers flasher
Lower right insert, LOCK 2 -》upper right flipper flasher[quoted image]

Nice. Funny part is I can hear the sounds in my head as I watch that clip. One of the best jackpot sounds in pinball, gives me the goose bumps to this day.

#10091 3 years ago
Quoted from Davi:

In case of flasher activity*, the door panel flashers are also activated.
(*These 4 flashers)
Upper left insert, GUM -》upper left ramp flasher
Upper right insert, BALL -》upper right ramp flasher
Lower left insert, LOCK 1 -》pop bumpers flasher
Lower right insert, LOCK 2 -》upper right flipper flasher[quoted image]

Count me in for one as well my man.

#10092 3 years ago
Quoted from Davi:

The door area in the center of the playfield was designed to use 4 flashers, using two small circuit boards for flash lamps under the large door panel.
This design is still in the manual, and shown in the red prototype panel.
[quoted image]
[quoted image]
(Pictures from HEP gallery.)
During the conversation with Jimakost (he is doing a cool TZ scratch build), he mentioned that he is looking for lamp boards, including a door lamp board. My goal was to create a door panel with the integration of 4 flashers, operated by 4 different playfield flashers.
Aftermarket mods with small PCB only replace the GUM and BALL flashers, that's the only chance for sample/production games, only 2 holes are available for flasher extension.
The LOCK 1-2 flashers cannot be installed into these boards (unless you are ready to hack it) - there is no hole on the PCB for extra flashers.
Few years ago GLM introduced a lamp board with 4 flashers - however the control was based on only 2 playfield flashers (GUM, BALL), not 4.
My door panel contains all feature lamps (original twist-in design for bulb or LED's) and the 4 flasher area, controlled by 4 flashers as per designer's intention. Every insert area contains 4 small LED flashers for even light distribution, and the feature lamp remain in the center. Connection to factory lamp harness via plug&play harness, no soldering required.
[quoted image]
[quoted image]
[quoted image]
Thanks to coyote for clarification of flasher locations. I can create more lamp boards, if there is a demand.

Would this still work with my Robby the robot that uses the sockets to run his LEDs?

If so I am in.

#10093 3 years ago
Quoted from PinJim:

Nice. Funny part is I can hear the sounds in my head as I watch that clip. One of the best jackpot sounds in pinball, gives me the goose bumps to this day.

Me too! It was playing in my head as I read your post!

#10094 3 years ago
Quoted from Jecco74:

Would this still work with my Robby the robot that uses the sockets to run his LEDs?
If so I am in.

I have the same mod and never thought about that but I too am interested if the price is right. I have just sent a PM to Peter.

#10095 3 years ago
Quoted from Jecco74:

uses the sockets

Which "sockets"? There are a lot there.

#10096 3 years ago
Quoted from Coyote:

Which "sockets"? There are a lot there.

I think that techically you can tie the robot into any sockets, they might just be aligator clips but I will wait for comfirmation or I will have to open up mine.

#10097 3 years ago
Quoted from Coyote:

Which "sockets"? There are a lot there.

Quoted from dnaman:

I think that techically you can tie the robot into any sockets, they might just be aligator clips but I will wait for comfirmation or I will have to open up mine.

Completely unfamiliar with the mod. Essentially, if it's a LAMP socket, then sure - looking at the board, nothing's changed there. There are still sockets. If it ties into a FLASHER socket though, well, Davi uses built-in LEDS, not sockets. So, if it ties into a flasher, you'll have to look elsewhere.

#10098 3 years ago

Sign me up. Beautiful

#10099 3 years ago

In as well...

#10100 3 years ago

It's been a long time but has there been any progress on having someone provide new voice work for Serling's call outs in TZ to be used on PinSound? I would contribute to having someone do this.

Promoted items from Pinside Marketplace and Pinside Shops!
$ 15.00
Playfield - Other
YouBentMyWookie
 
$ 359.00
Playfield - Other
NO GOUGE PINBALL™
 
From: $ 1.00
Playfield - Other
Rocket City Pinball
 
10,500 (OBO)
Machine - For Sale
Seaside, OR
$ 90.00
Playfield - Toys/Add-ons
pinballmod
 
$ 69.00
Playfield - Toys/Add-ons
Lermods
 
$ 145.00
Cabinet - Other
Pinball Haus
 
$ 125.00
Cabinet - Shooter Rods
Super Skill Shot Shop
 
$ 129.50
Cabinet - Decals
Pinball Haus
 
$ 115.00
Playfield - Toys/Add-ons
pinballmod
 
$ 9.95
$ 45.00
Cabinet - Toppers
Pinball Haus
 
10,000 (OBO)
Machine - For Sale
Mount Pleasant, WI
$ 35.00
Cabinet - Other
Rocket City Pinball
 
$ 399.00
Cabinet - Decals
Mircoplayfields
 
$ 109.95
Playfield - Toys/Add-ons
pinballmod
 
$ 110.00
Playfield - Toys/Add-ons
pinballmod
 
10,950 (Firm)
Machine - For Sale
Grosse Pointe Farms, MI
9,500 (OBO)
Machine - For Sale
Martinez, CA
From: $ 100.00
Lighting - Interactive
Professor Pinball
 
$ 14.95
Playfield - Toys/Add-ons
ULEKstore
 
$ 14.95
$ 45.00
Playfield - Toys/Add-ons
Just 3D Mods
 
€ 75.00
Playfield - Toys/Add-ons
PPmods
 
$ 132.00
$ 63.00
Playfield - Toys/Add-ons
Lermods
 
$ 1,059.00
Pinball Machine
Mircoplayfields
 
Hey modders!
Your shop name here
There are 15,209 posts in this topic. You are on page 202 of 305.

Reply

Wanna join the discussion? Please sign in to reply to this topic.

Hey there! Welcome to Pinside!

Donate to Pinside

Great to see you're enjoying Pinside! Did you know Pinside is able to run without any 3rd-party banners or ads, thanks to the support from our visitors? Please consider a donation to Pinside and get anext to your username to show for it! Or better yet, subscribe to Pinside+!


This page was printed from https://pinside.com/pinball/forum/topic/twilight-zone-owners-club/page/202?hl=bundy and we tried optimising it for printing. Some page elements may have been deliberately hidden.

Scan the QR code on the left to jump to the URL this document was printed from.