(Topic ID: 295170)

I like those odds - The Mandalorian Owners Club

By flynnibus

2 years ago


Topic Heartbeat

Topic Stats

  • 7,808 posts
  • 637 Pinsiders participating
  • Latest reply 4 days ago by Stonehenged
  • Topic is favorited by 306 Pinsiders

You

Linked Games

Topic Gallery

View topic image gallery

IMG_6121 (resized).jpeg
IMG_6895 (resized).jpeg
IMG_5769 (resized).jpeg
IMG_20240221_192612_818 (resized).jpg
IMG_0530 (resized).JPG
IMG_0529 (resized).JPG
IMG_0528 (resized).JPG
IMG_0531 (resized).JPG
Mando mod speaker panels (resized).jpg
Capture (resized).JPG
IMG_5195 (resized).JPG
IMG_5556 (resized).jpeg
IMG_0112 (resized).JPG
IMG_0103 (resized).JPG
IMG_0111 (resized).JPG
IMG_0093 (resized).JPG

Topic index (key posts)

33 key posts have been marked in this topic, showing the first 10 items. (Show topic index)

There are 7,808 posts in this topic. You are on page 52 of 157.
#2551 2 years ago
Quoted from KozMckPinball:

2 screws one on each side to keep the hook bracket in position where the mini playfield rods sit in the U bracket. Remove the nut on the lever underneath the playfield and disconnect the wire connectors, I think there were three? I forget that part without looking at it.

I took the ramps off too, made it much easier to get my hands in there to loosen the hook locks.

#2552 2 years ago
Quoted from KozMckPinball:

Looks like you need the Encounter (left) ramp Cliffys as well.

On order and still waiting. I was excited to get the other mods in there.

#2553 2 years ago
Quoted from Enron64:

Noticed that the exit to the ambush horseshoe doesn’t have a washer and looks like the clear is chipping. This happened to my deadpool on the katana ramp. Has anyone removed this and put a washer there? Was it a pain in the butt?
[quoted image]

I used a fiber washer from Home Depot. Just snipped it with a scissors so it could easily slide on there. I had to loosen the ball guide a little to get that washer under it. It's held up since

3 (resized).jpg3 (resized).jpg
#2554 2 years ago
Quoted from Jesder:

I'm curious how easy it is to remove the mini playfield on the Prem/LE models.
One of the targets on my mini playfield is at an odd angle, so would like to adjust it.
Does anyone know the steps required with removing the mini playfield?
[quoted image]

You can see 2 nut/screw heads on either side of the top side of the playfield on black stand posts. Just loosen them and they have hook claws that hold the metal posts in the u joint, they release. Then go under the playfield and take the screw out of the pivot arm that goes through the playfield. 2 wire cable connections, separate at the connection under the playfield. Lift up the mini playfield and it comes out

#2555 2 years ago
Quoted from Belvedere:

I used a fiber washer from Home Depot. Just snipped it with a scissors so it could easily slide on there. I had to loosen the ball guide a little to get that washer under it. It's held up since
[quoted image]

This is a great idea (over total disassembly, which is something I'd hate to have to deal with on receipt of a NIB machine). Definitely keeping this in mind-- thanks!

#2556 2 years ago
Quoted from Enron64:

Noticed that the exit to the ambush horseshoe doesn’t have a washer and looks like the clear is chipping. This happened to my deadpool on the katana ramp. Has anyone removed this and put a washer there? Was it a pain in the butt?
[quoted image]

I actually got a chip in my PF in this exact same spot. Stern approved sending an unpopulated PF out as a replacement. (not looking forward to the day that I do that swap). Still waiting for them to send it to me.

#2557 2 years ago

So glad I found a pro and didn't wait for a premium, wire forms on the way....just installed the foundry. I've seen mods over $100 and doesn't match the quality of this thing....for $85.00, this mod is a must for a Mando.
The Foundry (resized).jpgThe Foundry (resized).jpg

#2558 2 years ago
Quoted from TheProgrammer:

I actually got a chip in my PF in this exact same spot. Stern approved sending an unpopulated PF out as a replacement. (not looking forward to the day that I do that swap). Still waiting for them to send it to me.

That sucks Sorry to hear. Mine isn’t chipped yet and that picture actually makes it look way worse than it actually is. If I don’t do something though it will happen. Happened to my deadpool. I got an unpopulated playfield for that but sold the game and included the playfield with it. Do you have a pic of the actual chip? Curious how much damage was required for a new playfield.

#2559 2 years ago
Quoted from Belvedere:

I used a fiber washer from Home Depot. Just snipped it with a scissors so it could easily slide on there. I had to loosen the ball guide a little to get that washer under it. It's held up since
[quoted image]

Awesome idea!Thanks. I am gonna do that today.

#2560 2 years ago
Quoted from Enron64:

Awesome idea!Thanks. I am gonna do that today.

Cliffy sells carbon fiber, very thin, washers. They have adhesive on the back though may be tough to slide those in place. Contact Cliff directly if interested. I use them under my sling star posts.

#2561 2 years ago

Placing a washer under the guide is super easy, it’s approx 2 screws, 4 nuts and your done.

I’ll post a step by step guide tomorrow for those wanting to do it.

#2562 2 years ago
Quoted from J85M:

Placing a washer under the guide is super easy, it’s approx 2 screws, 4 nuts and your done.
I’ll post a step by step guide tomorrow for those wanting to do it.

How's the one way gate on the U turn exit coming along? I might try something myself there when I get some time..

#2563 2 years ago

Thanks for all the info and help on this page. I ended up removing the ball guide and putting down Mylar and a washer.

#2564 2 years ago
Quoted from KozMckPinball:

How's the one way gate on the U turn exit coming along? I might try something myself there when I get some time..

I was just about to ask that

#2565 2 years ago
Quoted from KozMckPinball:

How's the one way gate on the U turn exit coming along? I might try something myself there when I get some time..

The one way gate I have in my spares box was a little too wide to fit (think it maybe from an old Bally/Williams) as well as I would want it to.

I plan on taking one of a newer Stern like JP and trying that, will update you, but other than the width being an issue I can’t see a problem with narrower bracket fitting and fixing the issue.

17
#2566 2 years ago

U-Turn guide Washer Fix (approx 10 minutes)

So after getting the ramp back together to trial a one way gate I ended up taking it back off last night to write this up for those that need it. Super easy install should take you 10-20 minutes max depending how much disassembly you decide to do of the right ramp.

First things first locate the washer and nut holding the guide in place, while under the playfield also remove the washer and nut holding down the ramp.
22A0BCA6-031A-40E5-9361-75F1B12019C0 (resized).jpeg22A0BCA6-031A-40E5-9361-75F1B12019C0 (resized).jpeg

Now drop the playfield down and remove the two screws in the top of the right ramp plastic (ignore the missing screws here, I have removed all the horrible plastic shields and spacers weeks ago)
6E5AE76B-F48D-4069-B2B2-D3B2D47062FC (resized).jpeg6E5AE76B-F48D-4069-B2B2-D3B2D47062FC (resized).jpeg

Next unscrew the hex post (it is a single post that runs through the middle plastic, now lift the black bottom plastic up as far as it will go, be careful not to lose the washer.
FB775155-646F-415A-BEA5-0B3006BBEEC6 (resized).jpegFB775155-646F-415A-BEA5-0B3006BBEEC6 (resized).jpeg

This next step might vary person to person but if your game has enough play in it you can just push the guide out from underneath enough to slip the washer under and it will pop right back in. I actually found this easier to do with the playfield back in the upright position, as I could push the guide out with one hand and put the washer in place with my other but do what works best for you.

If you don’t have enough play remove the right ramp from the right slingshot post and it will free up the right ramp completely allowing you more access for a little more disassembly.

Put it all back together and BOOM job done, clear coat protected.
B3ECC563-D475-46F2-87A5-A202E39B155A (resized).jpegB3ECC563-D475-46F2-87A5-A202E39B155A (resized).jpeg
D07ADDEA-08D2-4525-9F32-A1ACEEF043B5 (resized).jpegD07ADDEA-08D2-4525-9F32-A1ACEEF043B5 (resized).jpeg

#2567 2 years ago
Quoted from J85M:

U-Turn guide Washer Fix (approx 10 minutes)
So after getting the ramp back together to trial a one way gate I ended up taking it back off last night to write this up for those that need it. Super easy install should take you 10-20 minutes max depending how much disassembly you decide to do of the right ramp.
First things first locate the washer and nut holding the guide in place, while under the playfield also remove the washer and nut holding down the ramp.
[quoted image]
Now drop the playfield down and remove the two screws in the top of the right ramp plastic (ignore the missing screws here, I have removed all the horrible plastic shields and spacers weeks ago)
[quoted image]
Next unscrew the hex post (it is a single post that runs through the middle plastic, now lift the black bottom plastic up as far as it will go, be careful not to lose the washer.
[quoted image]
This next step might vary person to person but if your game has enough play in it you can just push the guide out from underneath enough to slip the washer under and it will pop right back in. I actually found this easier to do with the playfield back in the upright position, as I could push the guide out with one hand and put the washer in place with my other but do what works best for you.
If you don’t have enough play remove the right ramp from the right slingshot post and it will free up the right ramp completely allowing you more access for a little more disassembly.
Put it all back together and BOOM job done, clear coat protected.
[quoted image]
[quoted image]

Give this man a key post

#2568 2 years ago
Quoted from Xelz:

Give this man a key post

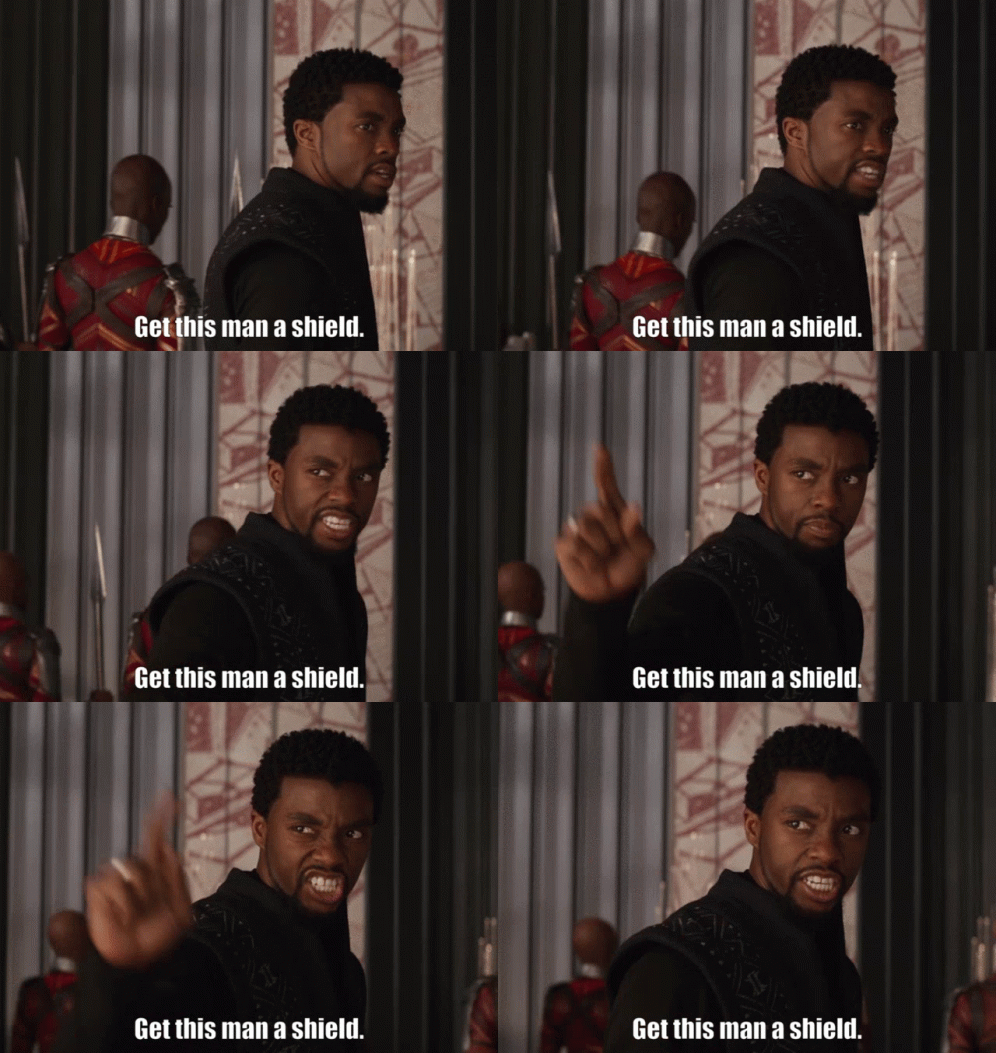
Thanks for the kind words mate, your post reminded me of Avengers
C3F9729A-7E88-4FFF-BDFB-0F41DAB6EA0B.gifC3F9729A-7E88-4FFF-BDFB-0F41DAB6EA0B.gif

#2569 2 years ago

Hi

Quick question, on the premium when using the flippers on the helmet when its tilted, does your helmet move left and right when hitting the flippers when no ball there?

Cheers

#2570 2 years ago
Quoted from Xaqery:

I created button press types to handle the different things we do with a button: short press, long press, held. I needed to do this when I decoupled the flame thrower so that it can happen any time. I needed to change how short presses work. A Short Press now needs you to close the button and then open the button all within 96ms. Which is a really quick tap. The foundry used to use a SHORT PRESS to allow you to select stuff. If you do a really quick complete tap closing and releaseing it should work fine.
In the latest code, to be released soon(tm), I changed short press to 128ms for the equipment. But that doesnt matter for the foundry, I changed the foundry to only use the button close edge. The foundry no longer cares about what type of press you are doing.
I think people think you need to double tap because to double tap you have to do a really quick tap.
Getting the mini-playfield and Encounters to work well is the #1 thing I want to work on before V1.0. But even if we get to V1.0 and its not working really well I will fix it.
- Dwight

Very helpful - Thanks Dwight. Indeed quick complete tap is selecting Foundry items for me now. I never thought that some of us press the action button differently and that it makes a difference.

Looking forward to more code updates and improvements. Thanks for the explanation.

#2571 2 years ago
Quoted from Deafman013:

Hi
Quick question, on the premium when using the flippers on the helmet when its tilted, does your helmet move left and right when hitting the flippers when no ball there?
Cheers

It shakes a little yes, when you say move how much movement are you seeing? Check your mini playfield mounts are tightened and secure as well as the cover if that’s loose you will see what appears to be movement but it’s the clear plastic cover rattling, I saw this once after forgetting to tighten down the cover.

#2572 2 years ago

When I select the start multball perk from the foundry it doesn't work? There seems to be quite a few bugs in current code.

#2573 2 years ago
Quoted from John1210:

When I select the start multball perk from the foundry it doesn't work? There seems to be quite a few bugs in current code.

Pretty sure it lights multiball but doesn't start it. You still need to hit the final Razor Crest shot to start it.

Best time to buy this would be when you need to hit anotehr 8+ shots to light the next multiball mode. Buying this item will take you start to multiball ready.

#2574 2 years ago
Quoted from Jesder:

Pretty sure it lights multiball but doesn't start it. You still need to hit the final Razor Crest shot to start it.
Best time to buy this would be when you need to hit anotehr 8+ shots to light the next multiball mode. Buying this item will take you start to multiball ready.

Yeah it is supposed to qualify it for the final shot to start it im gathering? But I find im still in the middle of qualifying the hurry up. Definitely a bug i think.

#2575 2 years ago
Quoted from John1210:

Yeah it is supposed to qualify it for the final shot to start it im gathering? But I find im still in the middle of qualifying the hurry up. Definitely a bug i think.

I believe it lights the next razorcrest item, which varies: multi, hurry up, multi, hurry, multi, hurry, wizard mode. So if you just had multi and go to foundry and choose lite razorcrest…it’ll light the hurry up

#2576 2 years ago

Is there a way to tap into the razor crest engine lights for a mod? The foundry get its power from a GI bulb. Some modes all of the GI lights go out except for the crest engines. Having the foundry lit as well when that occurs would make it really stand out.

#2577 2 years ago
Quoted from tilt-master:

Is there a way to tap into the razor crest engine lights for a mod? The foundry get its power from a GI bulb. Some modes all of the GI lights go out except for the crest engines. Having the foundry lit as well when that occurs would make it really stand out.

Mezel Mods has a foundry LED mod. I have it installed. I used the supplied alligator clips. I do have it clipped to a GI bulb though. Check out the Whiplash (Ironman) mod thread, he strips a wire in a middle section and wraps his mod wire into that bare exposed wire or I guess you could PM him about it.

https://pinside.com/pinball/forum/topic/whiplash-mod-for-iron-man

#2578 2 years ago

Does anyone know if you can toggle between foundry purchases? Or, do you just have to wait until they're highlighted? Say I have the rifle, flamethrower, and whistling birds. Do I have to wait until the action button turns green to add a ball?

#2579 2 years ago
Quoted from Looprunner:

Does anyone know if you can toggle between foundry purchases? Or, do you just have to wait until they're highlighted? Say I have the rifle, flamethrower, and whistling birds. Do I have to wait until the action button turns green to add a ball?

Good question, I'm curious as well. I try to take a flamerthrower and rifle into a MB and use them both during, flamethrower at beginning of MB and rifle at end of MB to re-start. Both are available during MB but which takes priority?

#2580 2 years ago
Quoted from tilt-master:

Good question, I'm curious as well. I try to take a flamerthrower and rifle into a MB and use them both during, flamethrower at beginning of MB and rifle at end of MB to re-start. Both are available during MB but which takes priority?

You use the flamethrower by holding the action button, and you use the rifle by tapping the action button. Im not really sure what would happen if you throw the whistling birds in the mix. Id guess that the amban rifle would only activate if there was less than 3 balls remaining.

#2581 2 years ago
Quoted from J85M:

U-Turn guide Washer Fix (approx 10 minutes)
So after getting the ramp back together to trial a one way gate I ended up taking it back off last night to write this up for those that need it. Super easy install should take you 10-20 minutes max depending how much disassembly you decide to do of the right ramp.
First things first locate the washer and nut holding the guide in place, while under the playfield also remove the washer and nut holding down the ramp.
[quoted image]
Now drop the playfield down and remove the two screws in the top of the right ramp plastic (ignore the missing screws here, I have removed all the horrible plastic shields and spacers weeks ago)
[quoted image]
Next unscrew the hex post (it is a single post that runs through the middle plastic, now lift the black bottom plastic up as far as it will go, be careful not to lose the washer.
[quoted image]
This next step might vary person to person but if your game has enough play in it you can just push the guide out from underneath enough to slip the washer under and it will pop right back in. I actually found this easier to do with the playfield back in the upright position, as I could push the guide out with one hand and put the washer in place with my other but do what works best for you.
If you don’t have enough play remove the right ramp from the right slingshot post and it will free up the right ramp completely allowing you more access for a little more disassembly.
Put it all back together and BOOM job done, clear coat protected.
[quoted image]
[quoted image]

Just put my washers on today! Thanks for all your help on this pin!

#2582 2 years ago
Quoted from crujones4life:Just put my washers on today! Thanks for all your help on this pin!

Your welcome mate, glad my posts have helped you.

#2583 2 years ago
Quoted from MarklarD:

You use the flamethrower by holding the action button, and you use the rifle by tapping the action button. Im not really sure what would happen if you throw the whistling birds in the mix. Id guess that the amban rifle would only activate if there was less than 3 balls remaining.

That's an excellent question... I'd probably defer to prioritizing the rifle and just wait until the 2nd to last ball drains and save the whistling birds for after that

#2584 2 years ago

Added some razor crest shooters to my shop if anyone is looking, I was able to make some nice ones at a fair price. Working on something cooler for all Stern games hope to share that soon

#2585 2 years ago
Quoted from Riefepeters:

I believe it lights the next razorcrest item, which varies: multi, hurry up, multi, hurry, multi, hurry, wizard mode. So if you just had multi and go to foundry and choose lite razorcrest…it’ll light the hurry up

Ahhh got it. Thanks

#2586 2 years ago
Quoted from MarklarD:

You use the flamethrower by holding the action button, and you use the rifle by tapping the action button. Im not really sure what would happen if you throw the whistling birds in the mix. Id guess that the amban rifle would only activate if there was less than 3 balls remaining.

If you have multiple weapons/perks from the foundry, the selected item cycles on screen from top to bottom.

The action button will also cycle colours in sync with what is highlighted at the time on screen, the game will cycle through depending what is currently happening in the game.

Orange - Flamethrower
Green - Ambam Rifle
Yellow - Whistling Birds
Red - Jet Pack

#2587 2 years ago
Quoted from J85M:

If you have multiple weapons/perks from the foundry, the selected item cycles on screen from top to bottom.
The action button will also cycle colours in sync with what is highlighted at the time on screen, the game will cycle through depending what is currently happening in the game.
Orange - Flamethrower
Green - Ambam Rifle
Yellow - Whistling Birds
Red - Jet Pack

Gotcha, so you just have to wait until your item cycles up. Thanks for the info!

#2588 2 years ago
Quoted from Looprunner:

Gotcha, so you just have to wait until your item cycles up. Thanks for the info!

Yeah just watch the lcd or button colour to know when the one you want is selected, I haven’t timed it but at a guess each item is selected for about 3-5 seconds maybe slightly more before cycling to the next.

#2589 2 years ago

From the latest Readme file:

- Changed how and when the action button works regarding equipment.
- As before, there are two types of presses: HELD and SHORT. HELD is
holding the button down for some time. SHORT is a quick tap of the
button.
- You can now use the Flame Thrower any time you want if it is available.
- The action button will be orange or toggle orange and another color
if you also have other equipment lit that is applicable.
- To use the Flame Thrower press and hold the button down. Soon it will
begin setting shots on fire from right to left across the game. When
you release the button after it begun, it will stop setting shots on
fire.
- If you also had other equipment available and you hold the button
past a very short tap the Flame Thrower will win and your other
equipment will not be used. Likewise, if you have Flame thrower and
something else available and you just tap the button you will use
your other equipment and not the Flame Thrower.
- The action button now flashes a bit differently.
- As before each equipment has its own color:
- ORANGE - FLAME THROWER - Set Shots on fire for 2X each
- GREEN - AMBAN RIFLE - Add-A-Ball in a multiball
- YELLOW - WHISTLING BIRDS - Spot lit shots in a Mission
- RED - JET PACK - Spot a level during an Encounter
- The button will flash of the color that makes sense depending on the
Equipment and where in the game you are. But if you also have the
Flame Thrower and can use it the button will now toggle between two
colors, orange and the other of the 3 colors.

#2590 2 years ago

Is code .98 buggy? I have .97 on my Pro and have seen some folks on Facebook saying they will wait until .99 to update. I'm trying to figure out whether .97 or .98 provides a better game play experience.

#2591 2 years ago
Quoted from medeski7:

Is code .98 buggy? I have .97 on my Pro and have seen some folks on Facebook saying they will wait until .99 to update. I'm trying to figure out whether .97 or .98 provides a better game play experience.

No, at least not in my experience at home. Originally when .98 released people thought there was a bug with the foundry select but it was simply the timing required being changed by Dwight (the games coder) that caused some confusion.

There’s nothing in .98 that will ruin your enjoyment of the game other than the usual bugs in some areas of the game but none that break the game, update your game asap! There is a lot of great content in .98

#2592 2 years ago
Quoted from J85M:

No, at least not in my experience at home. Originally when .98 released people thought there was a bug with the foundry select but it was simply the timing required being changed by Dwight (the games coder) that caused some confusion.
There’s nothing in .98 that will ruin your enjoyment of the game other than the usual bugs in some areas of the game but none that break the game, update your game asap! There is a lot of great content in .98

Personally I think updating now is the way to go! Challenge mode is great and most of the complaints involve the action button and just not understanding the timing in the foundry. Small gameplay tweaks all around. I'd go for it.

#2593 2 years ago

See medeski7 PoopsMagee agrees update now, this is the way!

13
#2594 2 years ago

Thought some of you guys might like seeing this. It's called silver artery and is really a great match if you are thinking of getting powder coating done.

PXL_20211117_000025721 (resized).jpgPXL_20211117_000025721 (resized).jpgPXL_20211117_000033270 (resized).jpgPXL_20211117_000033270 (resized).jpgPXL_20211117_000146233 (resized).jpgPXL_20211117_000146233 (resized).jpgPXL_20211117_000153403 (resized).jpgPXL_20211117_000153403 (resized).jpgPXL_20211117_000218876 (resized).jpgPXL_20211117_000218876 (resized).jpg
#2595 2 years ago
Quoted from Lermods:

Thought some of you guys might like seeing this. It's called silver artery and is really a great match if you are thinking of getting powder coating done.[quoted image][quoted image][quoted image][quoted image][quoted image]

Wow that looks great!

#2596 2 years ago
Quoted from Lermods:

Thought some of you guys might like seeing this. It's called silver artery and is really a great match if you are thinking of getting powder coating done.[quoted image][quoted image][quoted image][quoted image][quoted image]

VERY nice!

#2597 2 years ago

I still have an issue or 2 with this action button conundrum...

I had jetpack and rifle lit, but during a mulutiball the upper pf was clearly defaulting away from encounters. It was still cycling between jet pack (which i assume is useless at this time) and rifle. I waited till I was down to 2 balls, tried to time the rifle press and stuffed it up.

Quite frustrating.... I need to play better obviously but this action button stuff is not very practical or intuitive. Or am I missing something ? Need help here.

#2598 2 years ago
Quoted from John1210:

I still have an issue or 2 with this action button conundrum...
I had jetpack and rifle lit, but during a mulutiball the upper pf was clearly defaulting away from encounters. It was still cycling between jet pack (which i assume is useless at this time) and rifle. I waited till I was down to 2 balls, tried to time the rifle press and stuffed it up.
Quite frustrating.... I need to play better obviously but this action button stuff is not very practical or intuitive. Or am I missing something ? Need help here.

Currently with the action button timing being very small, your best bet when in a multiball is to give the action button a few rapids hits.

Next update Dwight has mentioned he will be making the button timing a little longer so it should fix what appears to be an inconsistency.

I believe it came from the last update where Dwight was trying to make the flamethrower usable at all times without accidental uses of other weapons/equipment.

#2599 2 years ago
Quoted from Enron64:

That sucks Sorry to hear. Mine isn’t chipped yet and that picture actually makes it look way worse than it actually is. If I don’t do something though it will happen. Happened to my deadpool. I got an unpopulated playfield for that but sold the game and included the playfield with it. Do you have a pic of the actual chip? Curious how much damage was required for a new playfield.

I believe they sent a new PF because the chip removed some of the art. That is their requirement I think.

84BF1E7C-E356-42F3-B447-652F37D39044 (resized).jpeg84BF1E7C-E356-42F3-B447-652F37D39044 (resized).jpegC48BDBF9-2926-432B-8D18-C568F31D63C6 (resized).jpegC48BDBF9-2926-432B-8D18-C568F31D63C6 (resized).jpeg
#2600 2 years ago
Quoted from TheProgrammer:

I believe they sent a new PF because the chip removed some of the art. That is their requirement I think.
[quoted image][quoted image]

Man that sucks! The good news is Eddy designed Mando very well so it’s fairly easy to disassemble providing your replacement playfield is dimpled and predrilled it won’t be the hardest playfield swap out there.

I’ve documented removing most of the top side of the playfield so if you need anything drop me a pm!

But I would try and touch that up with a black permanent marker and getting a washer under that rail to avoid anymore future damage and just enjoy the game and keep the spare playfield handy.

Promoted items from Pinside Marketplace and Pinside Shops!
$ 20.00
Playfield - Toys/Add-ons
WilliPinball Mods
 
8,000 (OBO)
Machine - For Sale
Findlay, OH
€ 40.00
Playfield - Toys/Add-ons
Pino Pinball Mods Shop
 
$ 6,999.00
Pinball Machine
The Pinball Place
 
$ 5.00
Cabinet - Decals
Pinball Fuzz
 
€ 110.00
Playfield - Toys/Add-ons
Pino Pinball Mods Shop
 
9,900 (Firm)
$ 70.00
Playfield - Toys/Add-ons
Diddy's Pinball Mods
 
$ 20.00
Playfield - Protection
Pinhead mods
 
$ 69.99
Cabinet - Decals
Inscribed Solutions
 
$ 20.00
Playfield - Plastics
Game Room Info Shop
 
$ 290.00
Playfield - Toys/Add-ons
Beyond Shop
 
$ 60.00
Cabinet - Sound/Speakers
Pin Wiz Mods
 
$ 145.00
Cabinet - Shooter Rods
Hookedonpinball.com
 
$ 110.00
Playfield - Toys/Add-ons
Diddy's Pinball Mods
 
$ 6.00
Playfield - Toys/Add-ons
3D Tech. Pinball Parts
 
€ 65.00
Playfield - Toys/Add-ons
Pino Pinball Mods Shop
 
$ 9,799.00
Pinball Machine
Gameroom Goodies Arizona
 
$ 30.00
Cabinet - Decals
Inscribed Solutions
 
8,050 (Firm)
Machine - For Sale
Las Vegas, NV
$ 20.00
Lighting - Other
Pin Monk
 
$ 22.95
€ 45.00
Playfield - Toys/Add-ons
Pino Pinball Mods Shop
 
From: $ 105.00
Playfield - Toys/Add-ons
Lermods
 
There are 7,808 posts in this topic. You are on page 52 of 157.

Reply

Wanna join the discussion? Please sign in to reply to this topic.

Hey there! Welcome to Pinside!

Donate to Pinside

Great to see you're enjoying Pinside! Did you know Pinside is able to run without any 3rd-party banners or ads, thanks to the support from our visitors? Please consider a donation to Pinside and get anext to your username to show for it! Or better yet, subscribe to Pinside+!


This page was printed from https://pinside.com/pinball/forum/topic/this-is-the-way-the-mandalorian-owners-club/page/52?hl=tippyroad and we tried optimising it for printing. Some page elements may have been deliberately hidden.

Scan the QR code on the left to jump to the URL this document was printed from.