(Topic ID: 100875)

The ruins of Camelot

By Ramakers

9 years ago


Topic Heartbeat

Topic Stats

  • 33 posts
  • 19 Pinsiders participating
  • Latest reply 9 years ago by Pin-it
  • Topic is favorited by 5 Pinsiders

You

Linked Games

Topic Gallery

View topic image gallery

P1110436.JPG
P1090756.JPG
P1110431.JPG
P1100650.JPG
speelveld vlak.jpg
scharnier.jpg
P4290148.JPG
P1110428.jpg
P1090762.jpg
11
#1 9 years ago

I was looking for a challenge, when I came across this Bally Camelot.
The photos were unclear, but the cabinet looked bad on the outside. He was re-dyed in a non-original color. The bright red head and body in dark green?
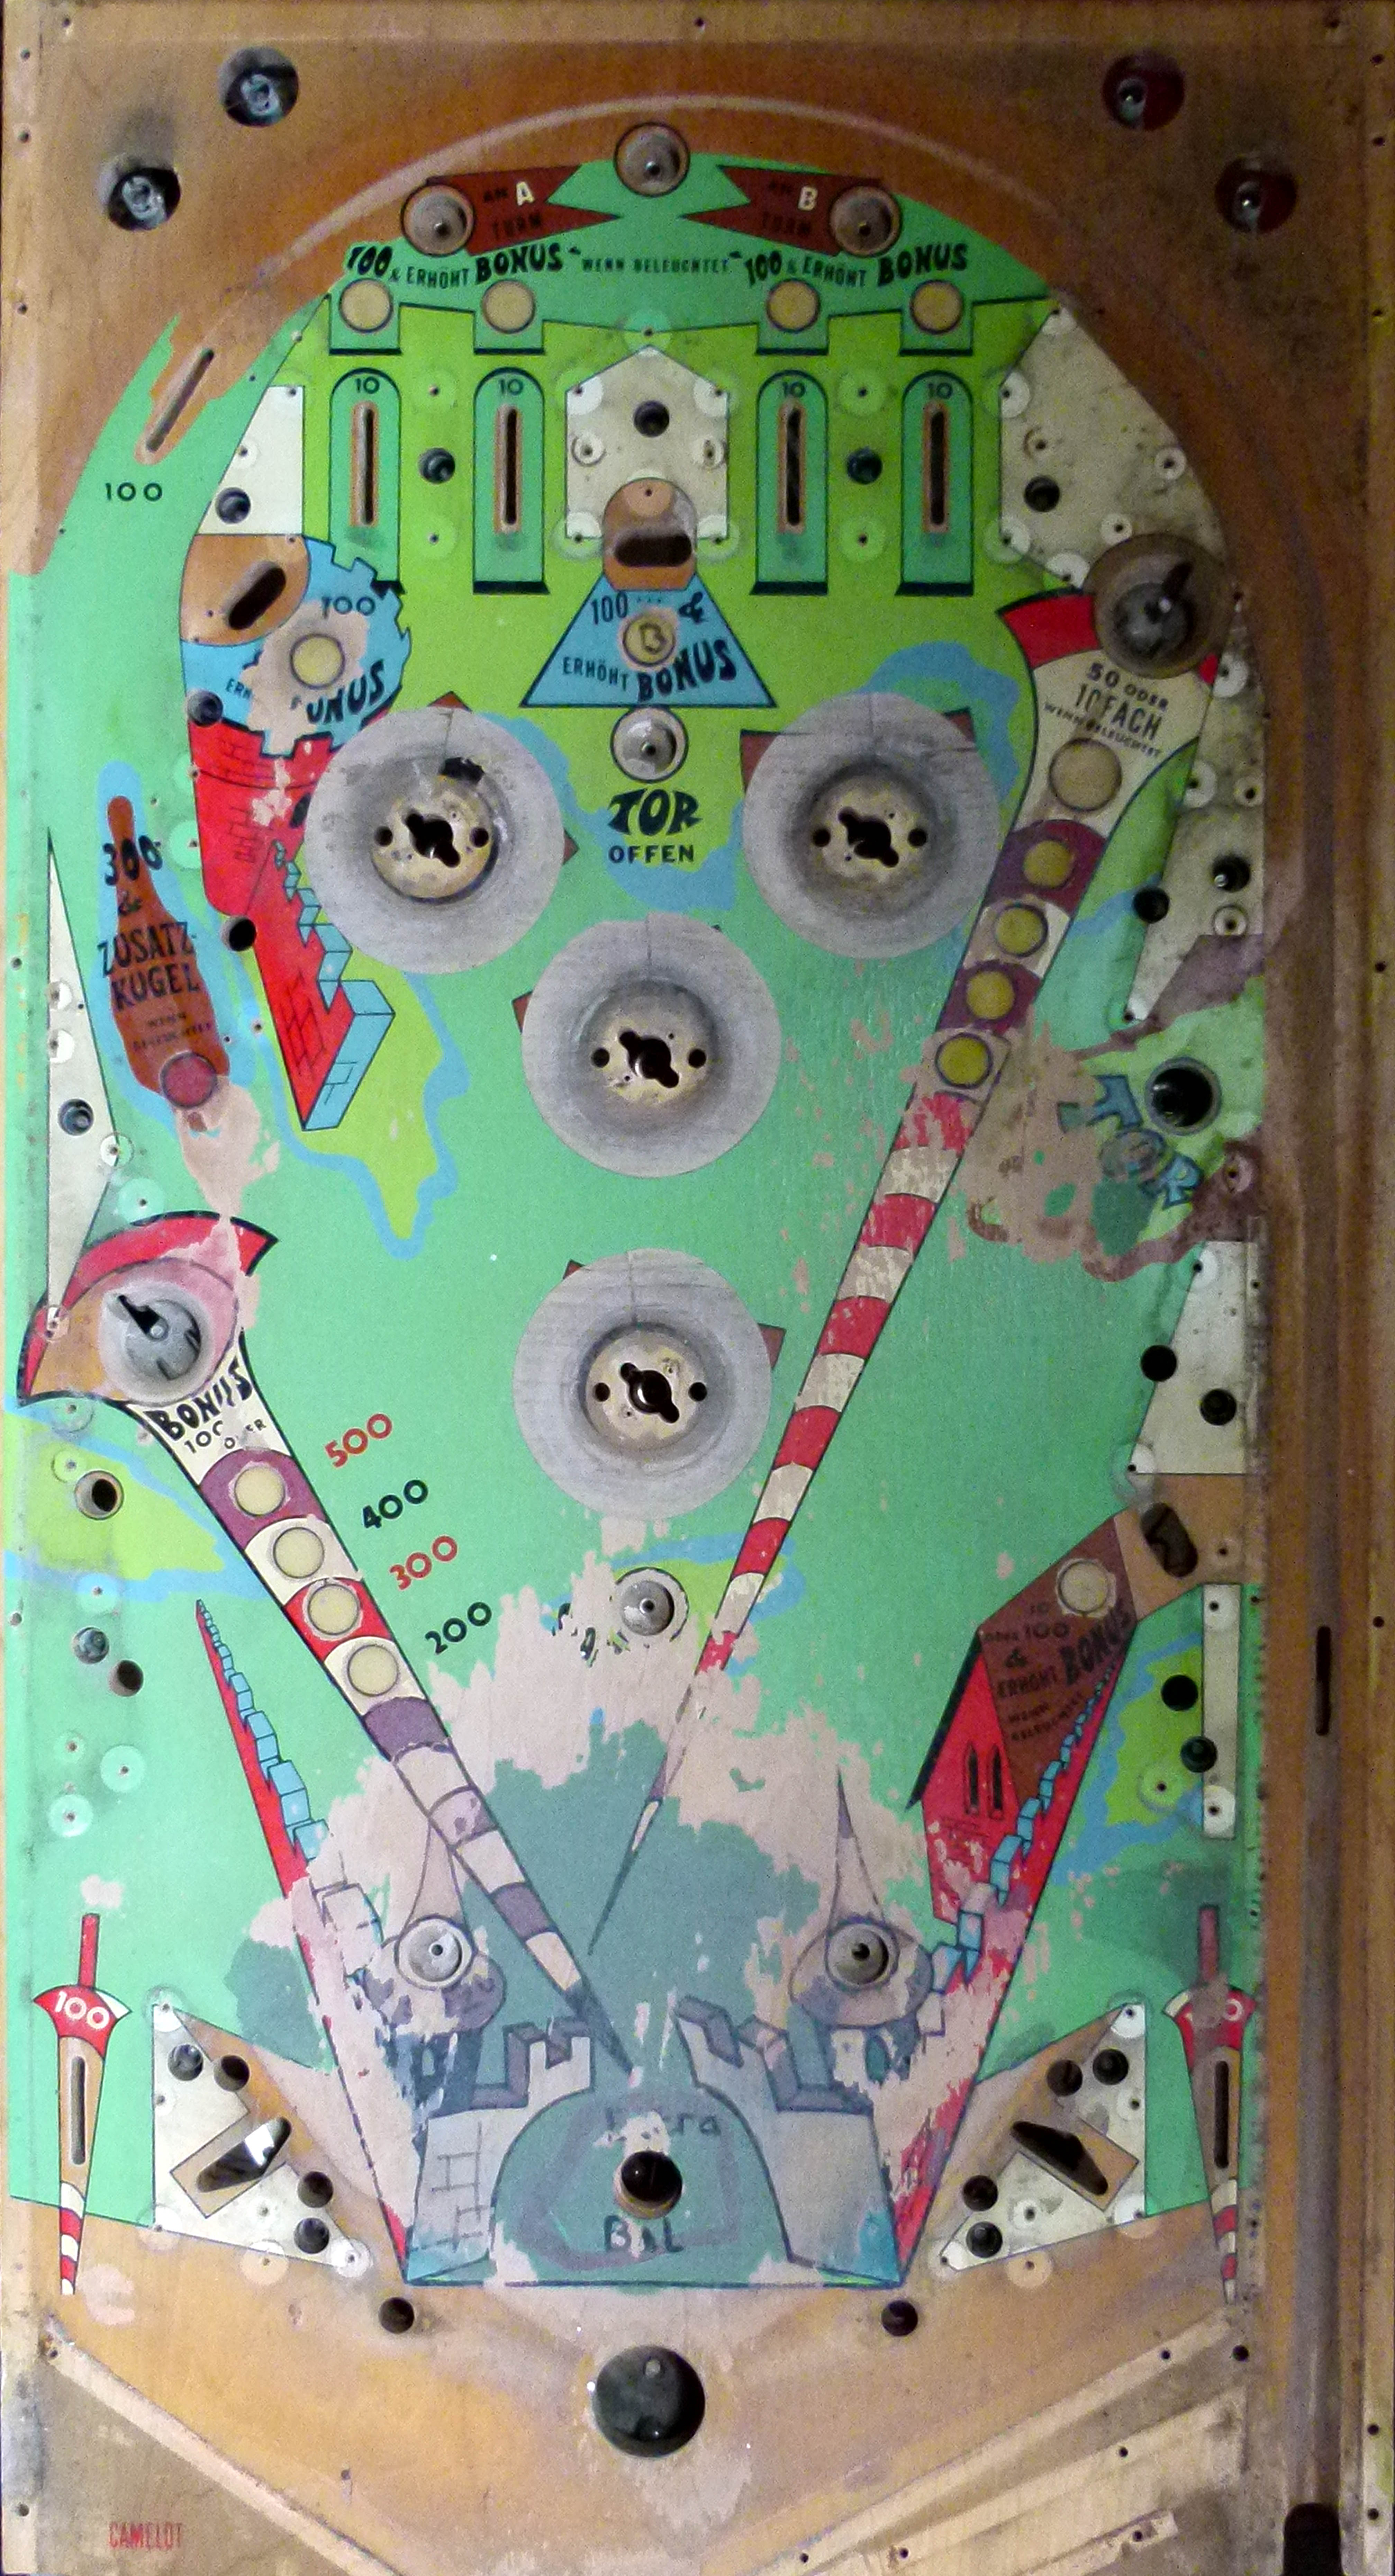
The playfield was not good visible on the pictures due to the reflection of the glass, but the seller said that this looked good for his age.
After a trip of 80 miles, I saw this:

P1090762.jpgP1090762.jpg

scharnier.jpgscharnier.jpg

By the looks of the hinge cover and the overall rim, I suspected the guy didn't even know how to open the playfield glass. So I opened the coin door and flipped the lever. And by magic I could open the glass single handed. The seller was Gobsmacked.

Eventualy I managed to get home to pick up for $ 80 instead of the requested $ 265 cabinet . I think it's a fair price.

After a few hours in my shop I have achieved this:

P1110428.jpgP1110428.jpg

P4290148.JPGP4290148.JPG
To make the hinge cover look like this, took me over one hour. But it's more satisfying to restore the original then buying new, I think.

#2 9 years ago

Is that last picture the same playfield from your game?

#3 9 years ago

Nah, he just posted a picture of someone else's game to mess with us.

#4 9 years ago
Quoted from Ramakers:

After a few hours in my shop I have achieved this:

um...i'm not thinking so comparing those 2 pics of the PF, unless you can repaint/touch up a playfield to that kind of status in 2 hours, or do a PF swap in 2 hours?

#5 9 years ago
Quoted from EMsInKC:

Nah, he just posted a picture of someone else's game to mess with us.

I vectorized the playfield graphics and had them printed on a sticker. I sanded the playfield and put the sticker on.
Here a jpeg of the playfield. If somebody likes the illustrator file, let me know.
speelveld vlak.jpgspeelveld vlak.jpg

#6 9 years ago

someone attacked that game with a sharpie

#7 9 years ago
Quoted from Ballsofsteel:

um...i'm not thinking so comparing those 2 pics of the PF, unless you can repaint/touch up a playfield to that kind of status in 2 hours, or do a PF swap in 2 hours?

By a few I didn't mean just 2. There were several hours just vectorizing it.

#8 9 years ago
Quoted from iwantansi:

someone attacked that game with a sharpie

And he didn't even bother to use the correct text!

#9 9 years ago
Quoted from Ramakers:

I vectorized the playfield graphics and had them printed on a sticker. I sanded the playfield and put the sticker on.
Here a jpeg of the playfield. If somebody likes the illustrator file, let me know.

speelveld vlak.jpg 243 KB

I knew you did it. Some folks wouldn't like it though. They demand originality...

#10 9 years ago
Quoted from EMsInKC:

I knew you did it. Some folks wouldn't like it though. They demand originality...

As you can see by the hinge cover, I also prefer original, but if the original is gone I go for the second best thing, self made. To keep close to the original I used the German text as well.
I don't want to see a pinball go to waste, so I make it playable again. If I ever find a lonely original playfied I will buy it to replace this "counterfeit".

#11 9 years ago

I think it looks great. I'm also a big fan of originality but your overlay is a huge improvement over the blown out original.

#12 9 years ago

for those who think I should have touched up the original, here is a complete overview of the bare playfield, was there any way to bring this back to its original state?

link:
for those who think I should have touched up the original, here is a complete overview of the bare playfield, was there any way to bring this back to its original state?
https://farm8.staticflickr.com/7362/12541459164_6491838764_o.jpg

#13 9 years ago

Considering what you had to start with an overlay, especially of the quality you presented, is fine in my book.

Mike O.

#14 9 years ago
Quoted from Ramakers:

for those who think I should have touched up the original, here is a complete overview of the bare playfield, was there any way to bring this back to its original state?
link:
for those who think I should have touched up the original, here is a complete overview of the bare playfield, was there any way to bring this back to its original state?
https://farm8.staticflickr.com/7362/12541459164_6491838764_o.jpg

It'll buff out

In all seriousness, your restore job looks good

#15 9 years ago

How do you scan these playfields? The entire thing, not a certain spot. Anyone have a picture of it being done?

#16 9 years ago
Quoted from desertT1:

How do you scan these playfields? The entire thing, not a certain spot. Anyone have a picture of it being done?

I took picture like this:

P1100650.JPGP1100650.JPG

Then I used photoshop to crop them with the perspective option on. Then scaled them to the known size of the grid on the framing page. After this I stitched all pictures together.
After a first drawing of the holes in the playfield I made a test print on paper to find out the result is not really accurate but I managed to correct some dimensions so I could use the image to trace the artwork.

#17 9 years ago
Quoted from Ramakers:

for those who think I should have touched up the original, here is a complete overview of the bare playfield, was there any way to bring this back to its original state?

Depending on your skill set, another option might have been to do something like this:

Clean the PF (however you like - ME, novus etc.)
Frisket/Airbrush the solid colors
Touch up the key lines, (masking tape, frisket, roller with ink, compatible pen) all options
Re-do the lettering with a screen print or water slide decal

That's what I would have done anyway, but it would have had to be a pretty unique situation and rare game etc., for me to go to that length. BTW, the sticker thing wouldn't have been an option for me, since that isn't in my skill set anyway.

#18 9 years ago
Quoted from Ramakers:

I took picture like this:

Then I used photoshop to crop them with the perspective option on. Then scaled them to the known size of the grid on the framing page. After this I stitched all pictures together.After a first drawing of the holes in the playfield I made a test print on paper to find out the result is not really accurate but I managed to correct some dimensions so I could use the image to trace the artwork.

P1100650.JPG 212 KB

A lot more involved than I guessed. It turned out great though. That's how Ben did the prototype of America's Most Haunted, and I'm pretty sure all of the production games are getting an overlay and a clear coat. Do you plan on clearing it? I don't imagine a vynal material to be durable enough on its own.

#19 9 years ago
Quoted from Ramakers:

I took picture like this

I love your method, and I think your finished product looks great!

#20 9 years ago

Could you tell us more about the sticker, is it vinyl? Do you have clear portions over the inserts or holes cut out? How hard was it to get the colours correct, did you use a colour profile for a known printer? I am in the middle of the same thing for a Bally Eight Ball. I have completed the vector artwork in Inkscape. I have a spare PF that I put new inserts into. I plan to have it printed in a flat bed printer, no sticker and then clear it.

#21 9 years ago

looks great man! awesome restoration

#22 9 years ago
Quoted from EMsInKC:

I knew you did it. Some folks wouldn't like it though. They demand originality...

I'm for originality in most cases, but when a pin is this blown out, I'm for whatever it takes to bring it back. This is an outstanding restoration and really demonstrates how modern technology can be applied to save these old treasures.
Wonderful job! Great job on reshaping that bracket too. It looks almost as good as new.

#23 9 years ago

In one word-FANTASTIC!!!
-Chris

#24 9 years ago

Great Effort.

#25 9 years ago

Another EM saved from the parts bin and a super nice restore as well.

Ken

1 week later
#26 9 years ago

Yet another step closer to a nice Camelot:

P1090756.JPGP1090756.JPG

The coin slots got bent to avoid paying taxes as it was used in a youth center. These were rendered unsalvageable so I made new ones.

P1110436.JPGP1110436.JPG

P1110431.JPGP1110431.JPG

The coin return buttons where severely rusted, so I derusted them in hydrochloric acid en zinc plated them for protection.
I'm planing on making a topic abou DIY zinc plating if there is some interest.

#27 9 years ago

Nice work. You're truly a devoted pinhead!

3 weeks later
#28 9 years ago

+1 for the DIY zinc plating

very nice work, looking forward to see a full view of your pin, or at least a populated playfield and backglass too. Loving the medieval theme.

prices in Pfennig ^^

#29 9 years ago

Is Zinc plating something you can do from home? Count me in.

-c

#30 9 years ago

How did the shooter lane turn out? Where did you get the wood part of the photo? It looks right to scale so that is why I am curious.

#31 9 years ago
Quoted from futurepinhead:

How did the shooter lane turn out? Where did you get the wood part of the photo? It looks right to scale so that is why I am curious.

Did you mean the wood part on the wood in the picture of the total playfield? This I found on google, but I didn't print it to put on the playfield. I use the original wood.

Here you can download the wood I used:
http://helioz.ru/wp-content/uploads/2012/06/PO025502.jpg

I'm working on a tutorial for DIY zinc plating. I'll make pictures when I do it the next time.

#32 9 years ago

That's where I got confused. I figured you printed off one full sheet including the wood part. I really want to get into repairs like this.

#33 9 years ago
Quoted from Ramakers:

The coin slots got bent to avoid paying taxes

Why didnt i think of that.

Reply

Wanna join the discussion? Please sign in to reply to this topic.

Hey there! Welcome to Pinside!

Donate to Pinside

Great to see you're enjoying Pinside! Did you know Pinside is able to run without any 3rd-party banners or ads, thanks to the support from our visitors? Please consider a donation to Pinside and get anext to your username to show for it! Or better yet, subscribe to Pinside+!


This page was printed from https://pinside.com/pinball/forum/topic/the-ruins-of-camelot and we tried optimising it for printing. Some page elements may have been deliberately hidden.

Scan the QR code on the left to jump to the URL this document was printed from.