(Topic ID: 271489)

Teenage Mutant Ninja Turtles Club(Stern 2020): Cowabunga! It’s Pizza Time!

By Tuxedomask23

3 years ago


Topic Heartbeat

Topic Stats

  • 11,954 posts
  • 822 Pinsiders participating
  • Latest reply 32 hours ago by Rampmaster
  • Topic is favorited by 334 Pinsiders

You

Topic poll

“Which model are you going to purchase”

  • Pro 285 votes
    50%
  • Premium 166 votes
    29%
  • LE 119 votes
    21%

(570 votes)

Topic Gallery

View topic image gallery

IMG_3566 (resized).jpeg
PXL_20240316_051625591 (resized).jpg
PXL_20240316_034508453 (resized).jpg
IMG_3277 (resized).JPG
20240308_213544 (resized).jpg
20240308_211320 (resized).jpg
20240308_211805 (resized).jpg
20240215_093714 (resized).jpg
pasted_image (resized).png
1EB20A79-521C-4BEB-AAA6-F2E7D64EE9D1 (resized).jpeg
IMG_5494 (resized).jpeg
IMG_5493 (resized).jpeg
IMG_5489 (resized).jpeg
IMG_5492 (resized).jpeg

Topic index (key posts)

17 key posts have been marked in this topic, showing the first 10 items. (Show topic index)

There are 11,954 posts in this topic. You are on page 50 of 240.
#2451 3 years ago
Quoted from Hewitttech:

So the LE is my first pinball. I noticed when I got it the right ramp sign had been in contact with the glass during shipping and rubbed scratches into the glass coating. Not a huge deal but also thought the sign looked a little bent. I have played it a few hundred games now and it has been fine but just had the ball kick back from what seemed like the right ramp gate wire. I started looking at and noticed the ramp plastic is cracked where it mounts. I don't know if I just never noticed it or it happened while playing but I don't remember seeing it last week when I cleaned things of ball crud. Maybe it was overtightened and the ball hitting it made it crack? Is this something that would be covered under warranty? I have no problems working on and fixing pins but just curious what the best thing for me to do would be...

Send pictures to your distributor and see what they can do for you. Since it's cracked right where the sign mounts, it could be a problem later on.

Rob

#2452 3 years ago
Quoted from chuckwurt:

Just put a flipper rubber over it. Haha
[quoted image]

That is so genius!!

#2453 3 years ago

Has Stern given a solution to the rear diverter cutting into the ramp plastic yet? I'm not sure if you can adjust the diverter to not extend as far somehow?

#2454 3 years ago

Please check out this video and let me know if you have noticed anything similar. What happens is that I'm getting what sounds like audio feedback from the spinner motor and also the upper left up post when it' energized. It's a 'beeping' type sound which repeats very fast. Also, when trapping balls during pizza parlor multiball, the spinner stops when instant info shows and it shimmies as seen in the video. This only happens in PPMB so I have no idea why it does that.

For reference, I have an LE.

#2455 3 years ago
Quoted from PokerJake:

How do you relight the multiballs? Also, is the lair shot supposed to be makeable with the upper flipper down?

Lair you need to shoot with the flipper up - often I'll drop it as the ball goes under so it doesn't land on the crux of it and the bottom of the flipper will knock it all the way into the shot.

To relight both Ninja Party and Turtle Power you have to get to Team Up first. So a good way to score is to get through the first four modes so you can relight both MBs and use them to complete modes.

#2456 3 years ago
Quoted from Hewitttech:

So the LE is my first pinball. I noticed when I got it the right ramp sign had been in contact with the glass during shipping and rubbed scratches into the glass coating. Not a huge deal but also thought the sign looked a little bent. I have played it a few hundred games now and it has been fine but just had the ball kick back from what seemed like the right ramp gate wire. I started looking at and noticed the ramp plastic is cracked where it mounts. I don't know if I just never noticed it or it happened while playing but I don't remember seeing it last week when I cleaned things of ball crud. Maybe it was overtightened and the ball hitting it made it crack? Is this something that would be covered under warranty? I have no problems working on and fixing pins but just curious what the best thing for me to do would be...
I feel the left drain problem and like 60% of the time the lair drop does a double bounce to drain o cant stop. Other times it is like the balls a re magnetic to the left drain wall but can't sense any residual magnetism in the stock balls that came with it.
I have had one ball get hard stuck behind the van twice now and have to remove the glass the get it. I will look at the diverted etc as others have mentioned if I have to replace the ramp.
[quoted image][quoted image][quoted image]

I knew it, and I'm really sorry you are the first one who found this out the hard way.
I have had a TWD and the right ramp was broken too because of flying balls, especially when hitting the ball on the fly from an orbit shot.
This spot is a predetermined breaking point so you have to make sure it can't get hit.
I saw that sign shaking from the beginning and i knew it will break sooner or later.

Here is what i alread wrote on post #1881

"The best and easiest thing i did is the airball protector on the right ramp. It is important to screw it on both sides of the ramp so it will stabilize the whole ramp and the Training sign with the switch will not rumble and it cant be hit from flying balls. I can't believe how smooth that ramp feels now, rock solid but like silk. if you build one too, make sure you take material you can bend with hot water (PETG for example), because attachment on the bottom is too high for a straight piece. Do not screw it to the rubber posts that will be too low for fast balls!"
7ab0cab488e668ccbc9fc341c084f84151e20732.gif7ab0cab488e668ccbc9fc341c084f84151e20732.gifff18e2bae9a37204fcb5163ca20227e95cb0aea9 (resized).jpgff18e2bae9a37204fcb5163ca20227e95cb0aea9 (resized).jpg

35
#2457 3 years ago

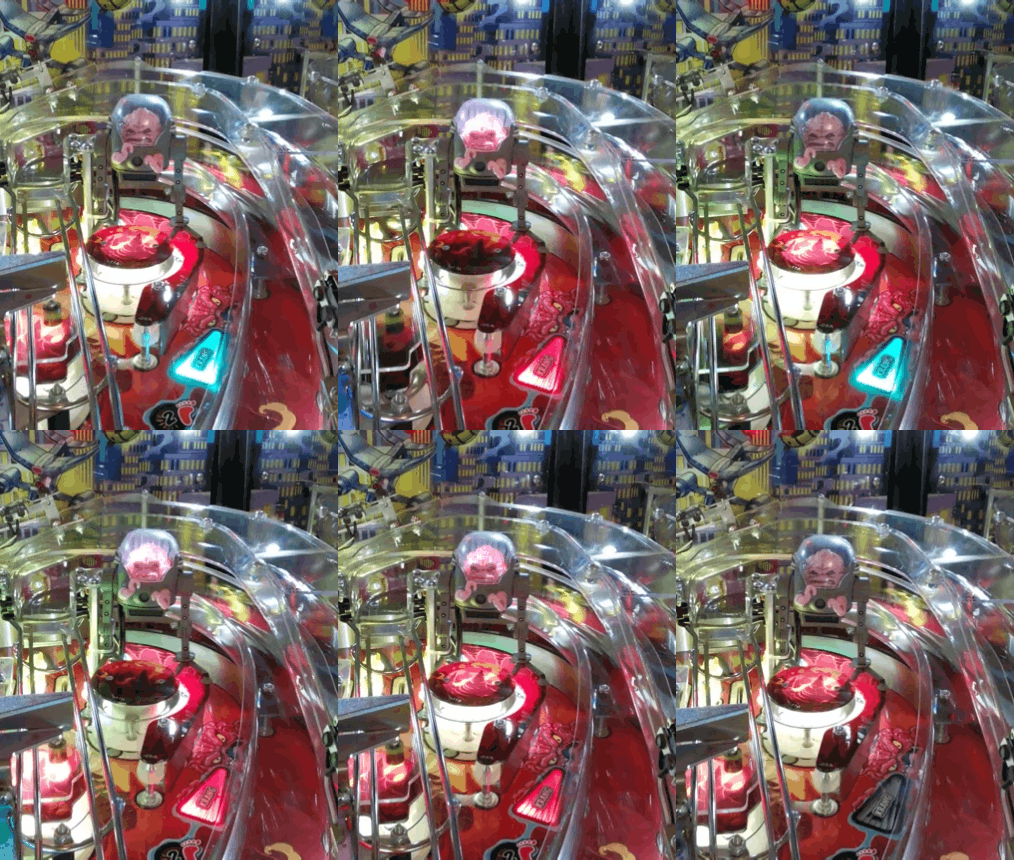
KRANG MOD GUIDE (pro model)

I am very proud and i hope you enjoy this mod too, it came out way better than i thought.
20200813_220102.gif20200813_220102.gif20200813_222400.gif20200813_222400.gif

Buy this Toy: Neca Donatello vs Krang
neca (resized).pngneca (resized).png

Cut the back of Krang for the LED illumination
cutting (resized).jpgcutting (resized).jpglumin (resized).jpglumin (resized).jpg

Drill a hole in Krangs mechsuit in the size of a LED Socket and hot glue it from the back later. Make sure you do not glue where the LED has to be attached, for a good electrical connection and you can swap LEDs later too. I did use a cold white 8 SMD LED, make sure Krang has enough room in the mechsuit too because of the LED inside. Glue Krangs arms into his mechsuit, so they don't get lost.
hot glue (resized).jpghot glue (resized).jpgled front (resized).jpgled front (resized).jpg

The LED connection has to be solderd on the red LED of the Krang insert. So Krang will light up when you shoot the center loop, he does his call outs or the Krang shot Hurry up is running. You can see the two blue heat shrink tubings, those are the cables I cut and where I soldered in the Krang cables too, make sure you don't mix +/- connection. You always can go into LED test in the settings, make sure to press the coin door switch, otherwise the LED test will not work.
led soldering (resized).jpgled soldering (resized).jpg

I attached the toy with a cable clamp, just make sure the toys feet don't get under the pop bumper.
mounting (resized).jpgmounting (resized).jpgtop view (resized).jpgtop view (resized).jpg

#2458 3 years ago
Quoted from ABE_FLIPS:

LED KRANG MOD GUIDE
I am very proud and i hope you enjoy this mod too, it came out way better than i thought.
[quoted image][quoted image]
Buy this Toy: Neca Donatello vs Krang
[quoted image]
Cut the back of Krang for the LED illumination
[quoted image][quoted image]
Drill a hole in Krangs mechsuit in the size of a LED Socket and hot glue it from the back later.
Make sure you do not glue where the LED has to be attached, for a good electrical connection and you can swap LEDs later too.
I did use a cold white 8 SMD LED, make sure Krang has enough room in the mechsuit too because of the LED inside.
Glue Krangs arms into his mechsuit, so they don't get lost.
[quoted image][quoted image]
The LED connection has to be solderd on the red LED of the Krang insert. So Krang will light up when you shoot the center loop, Krang does his call outs or the Krang shot Hurry up is running. You can see the two blue heat shrink tubings, those are the cables I cut and where I soldered in the Krang cables too, make sure you don't mix +/- connection. You always can go into LED test in the settings, make sure to press the coin door switch, otherwise the LED test will not work.
I attached the toy with a cable clamp, just make sure the toys feet doesn't get under the pop bumper.
[quoted image][quoted image][quoted image]

Nice work!

#2459 3 years ago
Quoted from Happy81724:

All my keeper pins have voodoo glass (Invisiglass). It’s awesome

+1

#2460 3 years ago
Quoted from ABE_FLIPS:

KRANG MOD GUIDE (pro model)
I am very proud and i hope you enjoy this mod too, it came out way better than i thought.
[quoted image][quoted image]
Buy this Toy: Neca Donatello vs Krang
[quoted image]
Cut the back of Krang for the LED illumination
[quoted image][quoted image]
Drill a hole in Krangs mechsuit in the size of a LED Socket and hot glue it from the back later. Make sure you do not glue where the LED has to be attached, for a good electrical connection and you can swap LEDs later too. I did use a cold white 8 SMD LED, make sure Krang has enough room in the mechsuit too because of the LED inside. Glue Krangs arms into his mechsuit, so they don't get lost.
[quoted image][quoted image]
The LED connection has to be solderd on the red LED of the Krang insert. So Krang will light up when you shoot the center loop, he does his call outs or the Krang shot Hurry up is running. You can see the two blue heat shrink tubings, those are the cables I cut and where I soldered in the Krang cables too, make sure you don't mix +/- connection. You always can go into LED test in the settings, make sure to press the coin door switch, otherwise the LED test will not work.
[quoted image]
I attached the toy with a cable clamp, just make sure the toys feet doesn't get under the pop bumper.
[quoted image][quoted image]

That was Sterns new $99 add on.

#2461 3 years ago
Quoted from Kiwipinhead:

That was Sterns new $99 add on.

hehe unfortunately they will never sell such upgrades for the pro model because noone will buy premiums anymore

#2462 3 years ago
Quoted from Maide:

Has Stern given a solution to the rear diverter cutting into the ramp plastic yet? I'm not sure if you can adjust the diverter to not extend as far somehow?

Supposedly the Premiums might have the fix.

#2463 3 years ago
Quoted from mbrave77:

This hardly works for me. Its usually a lucky backhand or just random. Maybe i need to watch deadflip play this game some more

If you’re struggling, try adjusting your flippers a little so they are not as steep. This worked wonders for us

#2464 3 years ago

Update to post #2390 regarding bumper rubber added to reduce number of left outlane drains -

Update Results : After adding the bumper it has evened out Left and Right drains.

The next 104 balls played - 16 left, 17 right, and 71 center drains.

Looks like this has worked. Has cut down on ricochet type drains on the left side ....

(Previous tally before bumper 64 left, 19 right, 151 center at 234 balls played)

left outlane 1 (resized).JPGleft outlane 1 (resized).JPG
#2465 3 years ago
Quoted from ABE_FLIPS:

KRANG MOD GUIDE (pro model)
I am very proud and i hope you enjoy this mod too, it came out way better than i thought.
[quoted image][quoted image]
Buy this Toy: Neca Donatello vs Krang
[quoted image]
Cut the back of Krang for the LED illumination
[quoted image][quoted image]
Drill a hole in Krangs mechsuit in the size of a LED Socket and hot glue it from the back later. Make sure you do not glue where the LED has to be attached, for a good electrical connection and you can swap LEDs later too. I did use a cold white 8 SMD LED, make sure Krang has enough room in the mechsuit too because of the LED inside. Glue Krangs arms into his mechsuit, so they don't get lost.
[quoted image][quoted image]
The LED connection has to be solderd on the red LED of the Krang insert. So Krang will light up when you shoot the center loop, he does his call outs or the Krang shot Hurry up is running. You can see the two blue heat shrink tubings, those are the cables I cut and where I soldered in the Krang cables too, make sure you don't mix +/- connection. You always can go into LED test in the settings, make sure to press the coin door switch, otherwise the LED test will not work.
[quoted image]
I attached the toy with a cable clamp, just make sure the toys feet don't get under the pop bumper.
[quoted image][quoted image]

Nice job. We have one similar. I was hesitant to tap off the node board and most of our customers cant solder so we tapped off the pop bumper with clips, it’s just easier for most people. Ours can be retrofitted if anyone wants to solder as shown by Prodoshi. We mount ours over the screw on the hex post with a mount we made, I think it’s more stable. Prodoshi, if you want the mount, let me know, happy to send you one.

#2466 3 years ago
Quoted from ABE_FLIPS:

KRANG MOD GUIDE (pro model)
I am very proud and i hope you enjoy this mod too, it came out way better than i thought.
[quoted image][quoted image]
Buy this Toy: Neca Donatello vs Krang
[quoted image]
Cut the back of Krang for the LED illumination
[quoted image][quoted image]

Drill a hole in Krangs mechsuit in the size of a LED Socket and hot glue it from the back later. Make sure you do not glue where the LED has to be attached, for a good electrical connection and you can swap LEDs later too. I did use a cold white 8 SMD LED, make sure Krang has enough room in the mechsuit too because of the LED inside. Glue Krangs arms into his mechsuit, so they don't get lost.
[quoted image][quoted image]
The LED connection has to be solderd on the red LED of the Krang insert. So Krang will light up when you shoot the center loop, he does his call outs or the Krang shot Hurry up is running. You can see the two blue heat shrink tubings, those are the cables I cut and where I soldered in the Krang cables too, make sure you don't mix +/- connection. You always can go into LED test in the settings, make sure to press the coin door switch, otherwise the LED test will not work.
[quoted image]
I attached the toy with a cable clamp, just make sure the toys feet don't get under the pop bumper.
[quoted image][quoted image]

Awsome!! The only feature that i want from a Premium/LE. Can you show us a video in action with sound?

#2467 3 years ago
Quoted from jurulz:

Awsome!! The only feature that i want from a Premium/LE. Can you show us a video in action with sound?

#2468 3 years ago
Quoted from Lermods:

Nice job. We have one similar. I was hesitant to tap off the node board and most of our customers cant solder so we tapped off the pop bumper with clips, it’s just easier for most people. Ours can be retrofitted if anyone wants to solder as shown by Prodoshi. We mount ours over the screw on the hex post with a mount we made, I think it’s more stable. Prodoshi, if you want the mount, let me know, happy to send you one.

I bought yours and it works great. You are saying I can take the alligator clips and connect it to the node board like he has without issue?

#2469 3 years ago
Quoted from joelbob:

I bought yours and it works great. You are saying I can take the alligator clips and connect it to the node board like he has without issue?

you have to cut the alligator clips off and solder to the wires like he did. One of the clips has a mark on it, that is the power wire (red wire), the other wire is the ground (black wire). it's all 5v.

#2470 3 years ago
Quoted from Lermods:

Nice job. We have one similar. I was hesitant to tap off the node board and most of our customers cant solder so we tapped off the pop bumper with clips, it’s just easier for most people. Ours can be retrofitted if anyone wants to solder as shown by Prodoshi. We mount ours over the screw on the hex post with a mount we made, I think it’s more stable. Prodoshi, if you want the mount, let me know, happy to send you one.

thanks, but the last order from the US took about 5 months via USPS

#2471 3 years ago
Quoted from Lermods:

you have to cut the alligator clips off and solder to the wires like he did. One of the clips has a mark on it, that is the power wire (red wire), the other wire is the ground (black wire). it's all 5v.

Cool. Thanks for the info!

#2472 3 years ago
Quoted from ABE_FLIPS:

thanks, but the last order from the US took about 5 months via USPS

sorry, didn't realize you weren't in the US. yeah, mail delivery in the US is very bad these days.

#2473 3 years ago
Quoted from Lermods:

most of our customers cant solder.

Scary, I thought that was mandatory knowledge when owning a pinball machine. Well i guess time change.
Maybe they wasn't around the WMS days.

#2474 3 years ago

We take it for granted. Many pinball owners don't even know how to take the glass off, or are scared to do so. Soldering would seem like brain surgery to them...

That Krang mod is awesome!

#2475 3 years ago

one guy did not know their was a on/off switch under the cab. so i posted LMAO. i was told to be nice. so i apologized

#2476 3 years ago
Quoted from NoQuarters:

Update to post #2390 regarding bumper rubber added to reduce number of left outlane drains -
Update Results : After adding the bumper it has evened out Left and Right drains.
The next 104 balls played - 16 left, 17 right, and 71 center drains.
Looks like this has worked. Has cut down on ricochet type drains on the left side ....
(Previous tally before bumper 64 left, 19 right, 151 center at 234 balls played)
[quoted image]

im thinking about this now. you have a link to the exact part? How did you get it to stick?

#2477 3 years ago
Quoted from NoQuarters:

Update to post #2390 regarding bumper rubber added to reduce number of left outlane drains -
Update Results : After adding the bumper it has evened out Left and Right drains.
The next 104 balls played - 16 left, 17 right, and 71 center drains.
Looks like this has worked. Has cut down on ricochet type drains on the left side ....
(Previous tally before bumper 64 left, 19 right, 151 center at 234 balls played)
[quoted image]

To be honest, I don't think anything was wrong with your previous numbers. The right outlane is just very forgiving which means the left outlane is always going to have higher numbers. If the left outlane was nearly the same, or higher than center drains, then I think that would need some adjustment. I never checked, but I wonder if the left post can be lowered?

Rob

#2478 3 years ago

@ Rob G - there are no extra post holes on the left. So no adjustments. Wider gap at left lane.

mbrave77 - it's just a black rubber cabinet drawer bumper. Self adhesive. Backer pulls off. Check you local hardware store. The ones I got came on a sheet. Have had them forever I guess. Whats nice is you can just peel it off if and when you want as you just apply it to the metal side rail. They stick real well - just apply where you want and press.

#2479 3 years ago
Quoted from Rob_G:

To be honest, I don't think anything was wrong with your previous numbers. The right outlane is just very forgiving which means the left outlane is always going to have higher numbers. If the left outlane was nearly the same, or higher than center drains, then I think that would need some adjustment. I never checked, but I wonder if the left post can be lowered?
Rob

The previous #'s they listed were in line with 3 different TMNT audits that I've seen, including my own. I think I'm running at a 28% left drain / 61% center drain / 11% right drain with no rubber on post.

#2480 3 years ago

First Stern game that I've owned where there was no ability to adjust the gap on the left outlane. I will be trying the cabinet bumper workaround soon as the frustration level is mounting... it's especially frustrating when the ball comes out of the lair and makes an immediate u-turn into the outlane.

#2481 3 years ago
Quoted from parsonsaj:

First Stern game that I've owned where there was no ability to adjust the gap on the left outlane. I will be trying the cabinet bumper workaround soon as the frustration level is mounting... it's especially frustrating when the ball comes out of the lair and makes an immediate u-turn into the outlane.

Is there not a ball save option you can add to the Lair release in the settings, similar to the ball save timer you can add for the Star Wars Tatooine/Mystery scoop? Draining from a Lair release is hot garbage, so hopefully there is a timer if that kind of drain is a possibility (it sounds like almost an expectation in this game)!

#2482 3 years ago

*Self-quote post accidentally*

#2483 3 years ago

Unboxed my new Pro yesterday.
Not impressed at all with the printing job here. It looks awful.
Give me some chipped clear around some posts all day long over this garbage.

2EE5A383-80B1-4087-88B1-2BDEF7C9FFD9 (resized).jpeg2EE5A383-80B1-4087-88B1-2BDEF7C9FFD9 (resized).jpeg67D51FBF-C680-4B45-BE1C-8B09AF9B3499 (resized).jpeg67D51FBF-C680-4B45-BE1C-8B09AF9B3499 (resized).jpegBE1EFA3C-16E8-4A48-8AA5-E05440CEE6E8 (resized).jpegBE1EFA3C-16E8-4A48-8AA5-E05440CEE6E8 (resized).jpeg
#2484 3 years ago
Quoted from jfrazie:

Unboxed my new Pro yesterday.
Not impressed at all with the printing job here. It looks awful.
Give me some chipped clear around some posts all day long over this garbage.
[quoted image][quoted image][quoted image]

Getting that would piss me off for sure

#2485 3 years ago

I don't feel that my left drain is much worse than right.
155 Games 356 balls. 40 ended games
215 center drains
84 Left
57 right

#2486 3 years ago
Quoted from zeldarioid:

Is there not a ball save option you can add to the Lair release in the settings, similar to the ball save timer you can add for the Star Wars Tatooine/Mystery scoop? Draining from a Lair release is hot garbage, so hopefully there is a timer if that kind of drain is a possibility (it sounds like almost an expectation in this game)!

This pin has a lot of ball save timers. You can set the main timer to 1min. which is crazy.

#2487 3 years ago
Quoted from jfrazie:

Unboxed my new Pro yesterday.
Not impressed at all with the printing job here. It looks awful.
Give me some chipped clear around some posts all day long over this garbage.
[quoted image][quoted image][quoted image]

That's me. I would rather have the clear problems. 6k and a 100.00 inkjet playfield.

#2488 3 years ago
Quoted from jfrazie:

Unboxed my new Pro yesterday.
Not impressed at all with the printing job here. It looks awful.
Give me some chipped clear around some posts all day long over this garbage.
[quoted image][quoted image][quoted image]

I just received my pro as well. Printing looks terrible. Had my distro fill a complaint with Stern. I’m sure nothing will happen.

85B49D85-7906-48EB-990F-DF6A69D928B7 (resized).jpeg85B49D85-7906-48EB-990F-DF6A69D928B7 (resized).jpegDE05BFAC-9BFE-423A-A65B-A42C26186BF2 (resized).jpegDE05BFAC-9BFE-423A-A65B-A42C26186BF2 (resized).jpegF86E81CB-DF88-445D-A457-DC76DA534E1E (resized).jpegF86E81CB-DF88-445D-A457-DC76DA534E1E (resized).jpeg230112F3-B2BD-4184-92BE-607F20C0797C (resized).jpeg230112F3-B2BD-4184-92BE-607F20C0797C (resized).jpeg
#2489 3 years ago
Quoted from Pmaino:

I just received my pro as well. Printing looks terrible. Had my distro fill a complaint with Stern. I’m sure nothing will happen. [quoted image][quoted image][quoted image][quoted image]

Looks horrible. This is holding me back from buying this machine. Everyone should cancel or stop their orders and not buy it until Stern comes out with a statement on guaranteed quality playfields. I won't buy that garbage. If it was $2000 machine sure, but brands new at $6000+, not acceptable. People need to fight this with their wallets and refuse to purchase this machine or future Sterns until they can promise quality.

#2490 3 years ago
Quoted from JonCBrand:

I don't feel that my left drain is much worse than right.
155 Games 356 balls. 40 ended games
215 center drains
84 Left
57 right

Mine on 180 games is the following
Left - 136
Center - 310
Right- 59

I put bigger post rubbers so it makes sense I have that many center drains

#2491 3 years ago

Whoever at stern reads this thread. Fix this. You need to replace everyone’s playfield that has this shoddy printing. This is unacceptable. These machines will be worth nothing for resale. New owners, try to check at their distro before you pick up. Don’t take this garbage if it’s there.

Edit: owners that already have this, don’t despair. Keep the pressure on stern and your distro. Jjp said they would not replace pirates playfields. Well they backflipped and gave out new playfields. I was one of those people that wrote letters of complaint. If you can prove the issue and enough people do it then they will Come around.

#2492 3 years ago
Quoted from nitroman28:

That's me. I would rather have the clear problems. 6k and a 100.00 inkjet playfield.

You can fix the clear pooling. You're stuck with the bad print quality. I'd take soft clear issues over print quality issues all day if I have to pick a defect.

The first run pros will be the desirable ones - good print quality AND mostly or fully cured clear.

#2493 3 years ago

Which is ironic because first runs went to location where they don’t care as much.

Quoted from PinMonk:

You can fix the clear pooling. You're stuck with the bad print quality. I'd take soft clear issues over print quality issues all day if I have to pick a defect.
The first run pros will be the desirable ones - good print quality AND mostly or fully cured clear.

#2494 3 years ago
Quoted from PinMonk:

You can fix the clear pooling. You're stuck with the bad print quality. I'd take soft clear issues over print quality issues all day if I have to pick a defect.
The first run pros will be the desirable ones - good print quality AND mostly or fully cured clear.

I'm biting my nail waiting on my Premium, which should be here around Thursday.

#2495 3 years ago
Quoted from jfrazie:

Unboxed my new Pro yesterday.
Not impressed at all with the printing job here. It looks awful.
Give me some chipped clear around some posts all day long over this garbage.
[quoted image][quoted image][quoted image]

Looks like these things are being printed with an Epson home printer from 1995.....

#2496 3 years ago
Quoted from jfrazie:

Unboxed my new Pro yesterday.
Not impressed at all with the printing job here. It looks awful.
Give me some chipped clear around some posts all day long over this garbage.
[quoted image][quoted image][quoted image]

Wow.

#2497 3 years ago

Anyone have closeups of the same areas they can post from a “good playfield”?

#2498 3 years ago

anyone care to offer thoughts on game strategy to score higher? What to go for first, second, third, etc...thanks!

#2499 3 years ago

Surprise waiting for me when I got home today...no call, text, email or any communication since I ordered it. Thankfully the babysitter hadn’t taken my kids anywhere and was home to open the garage!!!

No issues with the printing on this premium btw, it’s absolutely beautiful

2C6112EE-3C52-4850-A725-21DF22AAB15B (resized).jpeg2C6112EE-3C52-4850-A725-21DF22AAB15B (resized).jpeg895C92B2-9FE3-4BBB-93B4-713776194CC4 (resized).jpeg895C92B2-9FE3-4BBB-93B4-713776194CC4 (resized).jpeg
#2500 3 years ago
Quoted from Thomas3184:

Which is ironic because first runs went to location where they don’t care as much.

Given that a ton of locations were closed the whole time or closed then open then closed, etc. I doubt most of them saw much play.

Promoted items from the Pinside Marketplace
From: $ 1.25
Hardware
Pinball Haven
Hardware
There are 11,954 posts in this topic. You are on page 50 of 240.

Reply

Wanna join the discussion? Please sign in to reply to this topic.

Hey there! Welcome to Pinside!

Donate to Pinside

Great to see you're enjoying Pinside! Did you know Pinside is able to run without any 3rd-party banners or ads, thanks to the support from our visitors? Please consider a donation to Pinside and get anext to your username to show for it! Or better yet, subscribe to Pinside+!


This page was printed from https://pinside.com/pinball/forum/topic/teenage-mutant-ninja-turtles-club2020-cowabunga-its-pizza-time/page/50 and we tried optimising it for printing. Some page elements may have been deliberately hidden.

Scan the QR code on the left to jump to the URL this document was printed from.