(Topic ID: 21828)

Spot touch up with clear coat.

By tta583

11 years ago


Topic Heartbeat

Topic Stats

  • 42 posts
  • 21 Pinsiders participating
  • Latest reply 5 years ago by jlbintn
  • Topic is favorited by 49 Pinsiders

You

Linked Games

Topic Gallery

View topic image gallery

207_0748 (resized).JPG
208_0847 (resized).JPG
208_0846 (resized).JPG
53-2007PowerBallOnDrillLG.gif
turtle-wax-polishing-compound.jpg
PDR_0239.JPG
tz.JPG
PDR_0439.JPG
PDR_0341.JPG
PDR_0248.JPG
#1 11 years ago

I am tearing down an Addams Family. It has some wear at the vault as well as around a few inserts. Ideally I would like to touch it up with some Acrylic paints then protect the touch up with some brushed on clear. Everything I am seeing on-line deals with a complete clear of the entire PF. I am not wanting to go that deep into it. Any tips on how to go about doing this without having the touch ups stick out like a sore thumb?
Clay recommends "Varathane Interior Diamond Wood Finish (Water-Based)". Not sure yet how that will look. I do have a place at the swamp that is hidden under a plastic that I can use as a test bed.

brent

#2 11 years ago

Honestly, do your touch ups and send it out for a real clear coat.

Brushed on clear will make more work for someone latter when you decide that you should have got a real clear coat sprayed on it.

#3 11 years ago

Id say vid1900 is right but I was just recently looking at an automotive clearcoat pen for small repairs. My CV needs a little.

#4 11 years ago

I think you all may be misunderstanding what I am asking. I am not looking to brush clear the entire PF. I have the tools and ability to spray a clear over the entire PF if I wanted to do that. In this case I am looking to touch up and "spot" clear those small areas as I know the acrylic paint alone will not survive very long. My goal is to clean it up, make it more presentable, protect areas that are already getting bad (vault, some inserts, ball drop spot from the wire form that crosses the PF, etc..) and play it. The game, overall, is in fair shape but to "do it right" I would need to totally tear it down and address cab and all. I am not looking to do that. I want it as a solid player game. Frankly, for the time involved I would just sell this one down the road and "buy up" if I decided I needed to have a nicer game.

#5 11 years ago

If you are just going to play it and don't care, I would put a piece of Mylar over it to keep it from getting worse. This will protect it and make it easy for someone latter to do a proper restore.

But if you have the gun, booth and respirator to do a clear, I'd just pull the top components off the playfield, plug the lamp holes and clear the whole thing. It will only take a few hours.

#6 11 years ago

I never said I didn't care. Trying to touch it up a bit and protect some small areas should be evidence of that.

Frankly, every machine any of us touchs does not automatically trigger a factory fresh style restoration. This is a player game. I think your estimate of a few hours to prep and clear is completely unrealistic. At least unrealistic in terms of how I do things.

If there are no suggestions or tips in terms of some simple spot fixes short of fully strip and clear of the entire PF I will stick to my original plan and figure it out myself.

#7 11 years ago

WOW. love the attitude.

#8 11 years ago
Quoted from tta583:

I never said I didn't care.

Don't get defensive, no one say you could not care less, just that you don't care to have a fully cleared playfield.

Touch it up, put a Mylar piece over it. The wear at least won't get worse. Latter when you or someone else wants to make the game 110%, it will be easy to finish it up the right way.

If you don't take everything off of the bottom of the playfield, clearing the top is really easy (assuming you already have all the gear and spraying experience).

#9 11 years ago
Quoted from AkumaZeto:

WOW. love the attitude.

Yeah, exactly how I feel. Granted, your meaning and mine are surly from different perspectives.

Vid1900 I took your comment "If you are just going to play it and don't care" as if I did not care about the game overall and, thus, I was not fixing it correctly as opposed to not being concerned about a full clear. Looking at your last post I can see how I misconstrued the original intent. On topic, the vault entry is rather chipped. I had not considered mylar as a way to shore up that area. I think that is the way to go in that spot. Appreciate the idea!

This aside I am not sure where we de-railed. I am an old school car guy so let me put it this way. I have a bad alternator and I asked for tips on a swap. Everything I hear back is directing me to completely swamping the engine. A solution far beyond the scope of the problem. The question is far simpler than that.

To clear the air.
I am not pulling and clearing the entire PF.

I understand the idea of a future potential restoration to be completed by a potential future owner. I have shown cars for 25 years as well has had a video game collection for around 8. I do all of my own work to include fixing the transgressions of past owners. Given this, in all of these hobbies I realize, as we all do, what is ours is ours, what is some other person's is theirs. We can do what ever we want with our own stuff. If I want to touch up and spot clear some areas I can do that just as I can decide to pour sand in the PF and start playing games. It's mine. I do appreciate the ideas of a full clear but, as I said, its not in my cards for my game for reasons that are my own.

To address the couple of additional hours to clear the PF. To be at the point of just being a couple of hours some assumptions beyond what I mentioned would have to be made. In other words, unless you are in front of my game you don't know what state its in. I am stripping it but not to the point of having every single thing off. I am stopping at wire ball guides and a few supporting pieces I can easily clean and wax around. There is also factory mylar in several large areas. I am not even pulling the stand up targets unless they need replacing. Ramps, pops, (most)posts, plastics, bookcase, Thing, etc...are all off or out. I am not near the point, nor will I be, of being only a couple of hours away from a clear. For me to consider a clear I would go as far as pulling the harness as opposed to dropping targets and sockets. Personally, I would also have to build a fixture to hold the PF while I worked.

Consider this a deep shop job as opposed to a full resto. Frankly, this Addams is already much better off than it was 6 months ago. I got it from a building that was stating to develop moisture issues. Its been sitting since the late 90's. I have already had to strip the lower 1/3 of the CPU board (switch matrix area mainly) due to acid damage. Pulled a favor for a bead blast to clean up the acid, then rebuilt everything including a lot of lost traces and vias. The DMD had a dead column that I fixed and documented for others as my first pinside post:
http://pinside.com/pinball/forum/topic/fixing-a-dead-dmd-column-or-row-cherry-4205-dmd

Now its getting a good shop out so that it can be a good playing game. Even at that I am looking to spruce it up a bit beyond cleaning. It's not going to be perfect. For example, there are 2 flipper buttons on the left side currently. The game was routed where the location owner's son had MS. So that he could play pinball the OP installed redundant buttons for the right flipper on the left side of the pins at that location. As the new owner, having to work with transgressions of the past, I have to accept a button plug on the left of my cabinet.

Anyway....back on topic. I think I can go the mylar route up by the vault. I do have several inserts that would be nice to touch up while waiting for other things. Mainly back key lines and other small areas that would not be good a good candidate for pieces of mylar. I can go enamel and let it fly or acrylic with a dab of some kind of clear....so I am still back to my original question of wondering of anyone has tips for spot touch ups. I would prefer using acrylic as its easier to color match but would need protection. I am mainly dealing in black but there is a little color in the Mansion area.

#10 11 years ago

It is easy to print Black key lines on Clear Laser Water Slide Decals and just completely restore them.

If you have a color Laser printer at work (or if you are wealthy, at home) you can print full color touch ups with White Laser Water Slide Decals.

Always clear after the decals dry.

#11 11 years ago

Any pics? We all need to touch up playfields every now and then. I did not know about the water slide decals. Heres more...

Copy any pre-printed design or create your own artwork with ink and paper or a computer drawing onto the blank, water-slide decal paper using an office copier, laser printer or ALPS printer.

How to print:

Begin by printing your image(s) from your computer onto your laser printer, color copier or ALPS printer with the use of BEL INC blank laser printer.

Print on the glossy side of the blank paper. If you have purchased soap paper or candle decal paper, your paper will have a plastic film to protect the sheets. Remove this film before placing it into the printer. Note: You should feed your printer one sheet at a time to avoid jamming the printer since this paper is thicker than regular paper. If you take it to a copy center, instruct the operator to feed the copier one by one the sheets to the copy machine.

Allow the ink to dry and set into the paper for at least five minutes and it should be ready for application.

Cut out the image(s) as close as possible to the actual design and place them in lukewarm water for approximately 30 seconds. Hold the decal carefully to avoid tearing. You will begin to feel the printed image start to slide off the white backing paper. This means it is ready to apply onto your surface to decorate.

Gently slide the decal into place. Use a clean damp cloth or paper towel to wipe off excess water and remove any air bubbles that may appear. Allow setting time of about 3 hours. Your decorated object is ready! Note: You can speed up drying time by placing your decorated object under/near a fan.

If you wish to protect your decorated item from surface scratches, moisture, or fading then spray your dried decorated surface with an acrylic varnish such as Krylon Crystal Clear finishing spray.

#12 11 years ago

Didn't read all of the posts , some got too lengthy and I decided not to read everything , sorry . Agreed with vids first 2 short posts and I don't think he meant any disrespect . My advice for fixing smaller areas is automotive base and clear. Clean and scuff area , mask off area of one color past the damaged area .Over reduce base a little and then mix with clear 50/50 , and spray with airbrush blending into undamaged area.

#13 11 years ago
Quoted from tta583:

Clay recommends "Varathane Interior Diamond Wood Finish (Water-Based)". Not sure yet how that will look. I do have a place at the swamp that is hidden under a plastic that I can use as a test bed.

It will look good. You don't need to go all out auto clearcoat, not every machine needs to be a showpiece. Varathane will give you a very close finish to the original. Others have used krylon Crystal Clear with similar results.

I have done a lot of spot clearing and can offer the following-

1)Scuff up area you are going to touchup/paint/clear with 800-1000 grit paper

2)If your area is recessed in the wood from severe wear, fill with a product like dolphin glaze, and sand level

3)Apply your touchups (wipe Naptha quickly over touchup area to verify color when cleared)

4)Lightly scuff touchups with 1000 grit (not a necessary step, but one that is a judgement call)

5)Make sure your playfield is completely level, and then layout shop towels around the area where you would normally mask off. Alternatively, you can mask off the area where you want the clear to stop. If you do this, mask along defined artwork lines, this will blend better. I used to use tape, but went to shop rags awhile ago, it keeps the edges far less sharp and will allow you far less sanding before you buff.

6)After following your spray products directions for application, allow product to cure. For Varathane, if you did several thin coats (which is what I do- 4-5 thin/medium coats), approx time before sanding/polishing is about 4 days.

7)Remove all masking, and lightly scuff up (not too abrasive) your cleared area and the uncleared areas around your cleared area. You want to make sure you have a smooth transition from the factory to your touchup. You don't want any hardlines.

8)Buff the entire area with Novus 2, I use a drill with a small buffing ball that allows more flexibility in work area.

9)Wax

10) Play

#14 11 years ago

And here is a GNR I recently did using the steps I outlined above- try to see if you can see where the Varathane starts and the factory finish stops.

PDR_0248.JPGPDR_0248.JPG PDR_0341.JPGPDR_0341.JPG PDR_0439.JPGPDR_0439.JPG

#15 11 years ago

For whatever it's worth, many pin owners can't/won't send out a pf for a clear coat because they don't have the ability or desire to unpopulate the pf.

I'm in that grouping and it's for lack of confidence in taking apart the pf.

#16 11 years ago

And one more recent one where someone used the wrong sized screw in a TZ, and drove it through the playfield from the underside.

tz.JPGtz.JPG PDR_0239.JPGPDR_0239.JPG

#17 11 years ago

Blackbeard, I am in your group as well. To the OP, I used brush on polycrylic to make some spot touchups. My Pin is a player and I just wanted it to look better than exposed wood.

Here's some before and after pics - certainly not the best ever, but at least eye clear for the most part (my first attempt at touch ups).

http://pinside.com/pinball/forum/topic/1st-timer-pf-touchupclear-advice-needed

#18 11 years ago
Quoted from ralphwiggum:

I have done a lot of spot clearing and can offer the following-

Nice detailed explanation. Thanks.

#19 11 years ago
Quoted from ralphwiggum:

And one more recent one where someone used the wrong sized screw in a TZ, and drove it through the playfield from the underside.

Holy crap! I have damage from a screw in the exact same spot on my TZ.

#20 11 years ago
Quoted from gweempose:

Holy crap! I have damage from a screw in the exact same spot on my TZ.

I had the same damage to an Addams Family at one point as well. Going from memory, I *think* that is where the playfield support bracket screws into the playfield and after time, the holes there start to loosen up and people just throw in a bigger (and most often- longer) screw to fix the loose bracket.

#21 11 years ago

I will also add that in my description, I specifically am referring to smaller spot touchups areas. In areas where there is significant wear, I will actually lay down a coat of varathane *Before* starting any touchups as it seals the wood nicely and the paint flows a lot nicer on the wood/clearcoat.

Also forgot to add, when wiping with Naphtha to see how the clearcoat will look, wait for the paint to dry before wiping with Naphtha. Obicvously your paint would disappear if still wet.

#22 11 years ago
Quoted from ralphwiggum:

It will look good. You don't need to go all out auto clearcoat, not every machine needs to be a showpiece. Varathane will give you a very close finish to the original. Others have used krylon Crystal Clear with similar results.

I have done a lot of spot clearing and can offer the following-

Thanks for the notes.

Robert

#23 11 years ago
Quoted from ralphwiggum:

I *think* that is where the playfield support bracket screws into the playfield and after time, the holes there start to loosen up and people just throw in a bigger (and most often- longer) screw to fix the loose bracket.

Ah, that would make sense as to why this same phenomenon is seen in multiple games in the exact same spot.

#24 11 years ago

Glad my TZ has avoided this tragedy!

#25 11 years ago

I use practically the same procedure as ralphwiggum and have been very pleased with the results. If you niether want/or need a full clearcoat, the method described works great.

I completely understand and agree with your comment "A solution far beyond the scope of the problem". Is a full clear a good solution? You bet but it's not the ONLY solution. You're on the right path.

Done right it's functional, undetectable and you wont have to wait until February to play your pin again which sounds like the solution your looking for.

Carry on.

Randy

#26 11 years ago

I would touch up with acrylic paint(u can wipe off with a damp cloth if color dosnt match when dry)

After finding color mix that matches simply put a piece of Mylar over it and DONE!!

5 months later
#27 11 years ago

This is a good thread, wanted to comment & give a bump. I've owned pins for like 5 years now & I've got paint & ready to try my hand at some simple touch ups. I don't have any A list games or collector quality stuff that would really warrant a proper pro clear coat job. Plus just having the funds for that sort of thing, then the patience to wait long periods of time for that stuff to dry, it all just seems like overkill for a small touch up on a cheap-ish machine.

However, I would still like to do touch ups. Say you are just touching up a solid black area. Hey, even an uprotected touch up is better than none at all, right?
For those that use mylar, is mylar better these days? Or is there a way to apply it to ensure that if you or a future owner wants to take it off that it won't lift factory paint?
I just had a bad experience with removing mylar that was applied mid-life many years ago. Not sure what that owner could of done, if anything, to prevent this paint lifting up years later.

Btw, where can I get good, thin mylar? I think I looked at amazon but didn't turn up anything obvious.

#28 11 years ago
Quoted from robx46:

This is a good thread, wanted to comment & give a bump. I've owned pins for like 5 years now & I've got paint & ready to try my hand at some simple touch ups. I don't have any A list games or collector quality stuff that would really warrant a proper pro clear coat job. Plus just having the funds for that sort of thing, then the patience to wait long periods of time for that stuff to dry, it all just seems like overkill for a small touch up on a cheap-ish machine.
However, I would still like to do touch ups. Say you are just touching up a solid black area. Hey, even an uprotected touch up is better than none at all, right?
For those that use mylar, is mylar better these days? Or is there a way to apply it to ensure that if you or a future owner wants to take it off that it won't lift factory paint?
I just had a bad experience with removing mylar that was applied mid-life many years ago. Not sure what that owner could of done, if anything, to prevent this paint lifting up years later.
Btw, where can I get good, thin mylar? I think I looked at amazon but didn't turn up anything obvious.

Mylar- http://pinrestore.com/Supplies.html
You can also use clear shelf paper with good results. It has less adhesive than the mylar, but still works well. I think it is a little less clear than traditional mylar.

As far as mylar goes.... Lay down a fresh coat of wax before applying mylar, that will allow it to come off easier if you want to remove it.

#29 11 years ago

I think I would want mylar to be as clear as possible. Why go with anything but the clearest stuff? Right?

#30 11 years ago

I havent put them side by side to compare, but was going by memory. There are applications where you don't really see mylar at all (like on the ball launch on BSD), so having the clearest doesn't always matter...

1 month later
#31 11 years ago
Quoted from ralphwiggum:

And here is a GNR I recently did using the steps I outlined above- try to see if you can see where the Varathane starts and the factory finish stops.

How did this hold up long-term? Any discoloration or anything? I'm thinking of doing the same thing to a Getaway I just picked up.

Thanks again, by the way, for one of the most informative and helpful posts made on this forum! Your write-up of how you did that is great, and especially useful for those of us who are still being told "strip and clear the whole damn thing." That gets annoying fast. Thanks!

#32 11 years ago
Quoted from Collin:

How did this hold up long-term? Any discoloration or anything? I'm thinking of doing the same thing to a Getaway I just picked up.
Thanks again, by the way, for one of the most informative and helpful posts made on this forum! Your write-up of how you did that is great, and especially useful for those of us who are still being told "strip and clear the whole damn thing." That gets annoying fast. Thanks!

As I replied in the other thread (just keeping this response here for others searching threads), this holds up really well..... Three machines with 8+ years and no wear.

1 month later
#33 10 years ago

Ralphwiggum, would you mind sharing what you did exactly after the varathane cured? Any tips would be appreciated.

#34 10 years ago

Ralphwiggum, would you mind sharing what you did exactly after the varathane cured? Any tips would be appreciated.

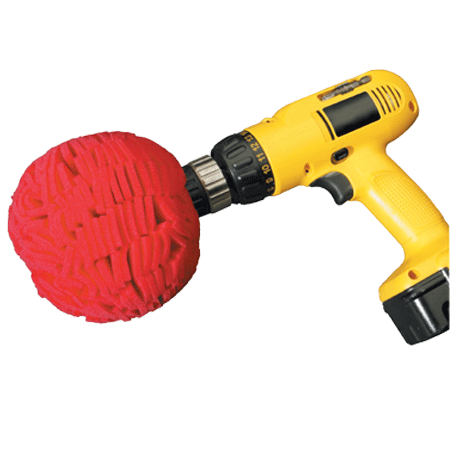
On my second to last coat, I sand flat with a 1000 grit paper, and then when everything is perfectly smooth I lay the final varathane coat. After about a week, I hit the whole playfield with a Turtle Wax polishing compound and a mothers ball and mothers mini ball with a cordless drill. You have to be careful not to burn through with this, but if you take your time, the results turn out really well. After that, I hit it with Novus 2, and then a couple of coats of wax.

turtle-wax-polishing-compound.jpgturtle-wax-polishing-compound.jpg 53-2007PowerBallOnDrillLG.gif53-2007PowerBallOnDrillLG.gif

#35 10 years ago

I can’t believe you guys are not using this stuff

KBS diamond finish clear coat

It’s a single pak you can brush it on perfectly smooth when thinned, air brush or even roll this shit on.
It’s perfectly clear and does not discolor.
Its flexible and wont crack like some auto clears.
It’s cheap compared to 2 paks.
I like the fact it’s a single pak and not as toxic as a 2 pak when sprayed

http://www.kbs-coatings.com/diamondfinish-clearcoat.html

#36 10 years ago
Quoted from jimjam:

I can’t believe you guys are not using this stuff
KBS diamond finish clear coat
It’s a single pak you can brush it on perfectly smooth when thinned, air brush or even roll this shit on.
It’s perfectly clear and does not discolor.
Its flexible and wont crack like some auto clears.
It’s cheap compared to 2 paks.
I like the fact it’s a single pak and not as toxic as a 2 pak when sprayed
http://www.kbs-coatings.com/diamondfinish-clearcoat.html

Hmm interesting. Do you have any examples that you've used it on? What's the whole process and how many coats should you apply?

#37 10 years ago
Quoted from ArcadiusMaximus:

Hmm interesting. Do you have any examples that you've used it on? What's the whole process and how many coats should you apply?

I don’t want to hi-jack this thread the op wants an opinion for a spot repair on a playfield I suggest this product would be ok without seeing any pictures of the damage.

I have used KBS on playfield repairs with an air brush for spot repairs and a roller \ spay gun for full playfield clear coat. Cabinet repairs with a spay gun.

I first saw this KBS clear being used on the Aussie Arcade forum
Where a member trialed this clear coat on a TOM playfield applied with a roller. This guy did an amazing job.

If you want to see the process which is very detailed I can post a link but I suspect you will have to sign in to view it, but worth it for you people who want to learn an easier way to clear coat without any spray equipment.

Link

http://www.aussiearcade.com.au/showthread.php/41828-Theatre-of-Magic

#38 10 years ago
Quoted from tta583:

I am tearing down an Addams Family. It has some wear at the vault as well as around a few inserts. Ideally I would like to touch it up with some Acrylic paints then protect the touch up with some brushed on clear. Everything I am seeing on-line deals with a complete clear of the entire PF. I am not wanting to go that deep into it. Any tips on how to go about doing this without having the touch ups stick out like a sore thumb?
Clay recommends "Varathane Interior Diamond Wood Finish (Water-Based)". Not sure yet how that will look. I do have a place at the swamp that is hidden under a plastic that I can use as a test bed.
brent

I use House of Kolor enamels and have done spot touch up on many games. I did a TAF for a friend and he came in with a brush on lacquer (Super fine brush) and covered over it. We then sanded it smooth and sanded the edges to blend. Polished the entire field. By the time we were done you could not tell it was on the playfield. We used the lines in the artwork as the stopping point for the clear. All in all it looked great and was the only area needing this touch up and not a full tear down.

I was originally not a big fan of this but after doing it; there are many situations where this makes alot of sense. Especially if you don't want to get into a huge job of doing a full restore. Also I don't recommend mylar.

5 years later
#39 5 years ago
Quoted from Blackbeard:

For whatever it's worth, many pin owners can't/won't send out a pf for a clear coat because they don't have the ability or desire to unpopulate the pf.
I'm in that grouping and it's for lack of confidence in taking apart the pf.

I am in the process of finishing a brush coating on a Fireball II playfield.

Hindsight is an unkind mistress LOL

I did not know what I did not know. Last June I started a playfield swap, took me about six weeks to get everything moved over, got it up and running and playing but realized then that I probably should have cleared it first.

I'm new to this stuff. Seems like instead of trouble-shooting little things, I dive right into the hard stuff.

So, since I didn't want to de-populate the PF, I decided to use the KBS stuff and brush it on. It turned out pretty well, and the field is protected (it had some planking) and it shines real pretty. I just finished the cutting polish, and am working on the final polish before letting it sit for a week or two before waxing.

This game is a restore, I am not worried about value per se, because I'm keeping it to pass on to my kids or grand-kids one day, but I made some mistakes, mostly in the leveling of the clear.

Everybody here that has recommended spraying is spot on correct, but these fields can be brushed with minimal PF de-population, while still "in" the machine. It's much harder and perfect results may not be achieved like a spray clear, but it can be done.

And as some others have pointed out, when it comes to clear-coating a playfield, less is more. That was my biggest mistake (and I didn't even use a lot), but I didn't know what I didn't know as it pertains to brushing on a clear-coat.

This playfield had some weird risings around the Fireball Bonus section, that perfectly reflected the inserts. There was some of that up top coming off of the sploosh waves that are around the pop bumpers, and they ran out to the side. Some of the irregularities with how the clear settled may be tied to that and the minor planking that existed.

I will try to post some pictures soon. I shot some yesterday, but I am not happy with how they turned out. I may get the tripod out and take some formals. And I am not worried about criticism.

Test rolled the ball down and across the field yesterday and the ball seems to roll fine, even across the inserts.

But, in the way of being repetitive, those who suggest clear-coating by spraying, are absolutely correct. But there is hope for those of us who don't want to completely depopulate a playfield.

Just be careful, and remember these friendly unsolicited words of advice: I am my own warranty station

#40 5 years ago

ive brushed on clear over small touch ups and it works fine. Ive even sprayed small areas without taking out the playfield(masking it off) and that works ok too if your not trying to spend all the time to remove everything. when you brush it, just be careful to brush on one quick thin layer. if you keep brushing it can easily smear the touch ups. good luck

#41 5 years ago
208_0846 (resized).JPG208_0846 (resized).JPG208_0847 (resized).JPG208_0847 (resized).JPG
#42 5 years ago

Prior to applying the clear, the Fireball Bonus ring and that area around the middle drop targets was raised, slightly. This had nothing to do with the minor planking I noted on the board, it looked like it was designed that way.

Those are some areas where I ran into trouble with leveling.

Anybody know anything about NOS Fireball II playfields, from the design perspective. The old playfield - pictured here showed no signs of this, but that playfield was, shall we say, completely shot.

I bought it that way back in 2006, as a dead machine from an ebay sale. $300

TBH, I will always know I could have done some of the areas a bit better if I had more experience. But some of the imperfections that are not a result of the inserts, I can live with and won't be really noticeable. Still, the do it right part of me is tempted to sand a bit more to try to smooth them out, but that little voice in my head keeps telling me, this doesn't look that bad, don't go there

It's a lot of work. I've got about seven weeks into this.

ahh, if I only knew now, what I didn't know then

I do have a spare, almost stripped D&D playfield that is in great shape. I may finish stripping it for spare parts, and spray that down just for the fun of it.
207_0748 (resized).JPG207_0748 (resized).JPG

Promoted items from Pinside Marketplace and Pinside Shops!
From: $ 134.99
Lighting - Led
Comet Pinball
 
$ 35.00
Various Other Swag
JK Pinball
 
11,695
Machine - For Sale
Livermore, CA
$ 9.95
Eproms
Pinballrom
 
€ 47.00
Playfield - Toys/Add-ons
PPmods
 
11,000 (OBO)
Machine - For Sale
Hanford, CA
$ 24.00
Various Novelties
Pinball Photos LLC
 
$ 41.99
Lighting - Interactive
Lee's Parts
 
$ 26.99
Playfield - Other
Lee's Parts
 
$ 35.00
Cabinet - Other
Rocket City Pinball
 
$ 28.99
Playfield - Protection
Lee's Parts
 
From: $ 1.00
Playfield - Other
Rocket City Pinball
 
$ 65.00
Cabinet - Armor And Blades
arcade-cabinets.com
 
20,000 (OBO)
Machine - For Sale
Oakdale, CA
$ 9.99
Eproms
Matt's Basement Arcade
 
14,500
Machine - For Sale
Pleasant Hill, MO
$ 29.95
$ 62.00
Playfield - Toys/Add-ons
Lermods
 
$ 119.00
Playfield - Toys/Add-ons
Loop Combo Pinball
 
$ 25.00
Playfield - Decals
Metal-Mods
 
$ 24.00
Various Novelties
Pinball Photos LLC
 
$ 159.00
$ 24.00
Various Novelties
Pinball Photos LLC
 
$ 15.00
Pinball Machine
Uberlaser
 
$ 29.00
Cabinet - Other
Filament Printing
 
$ 159.00
Playfield - Toys/Add-ons
Sparky Pinball
 
$ 84.99
Playfield - Toys/Add-ons
GMods
 
$ 58.00
Playfield - Toys/Add-ons
Lermods
 
Great pinball charity
Pinball Edu

Reply

Wanna join the discussion? Please sign in to reply to this topic.

Hey there! Welcome to Pinside!

Donate to Pinside

Great to see you're enjoying Pinside! Did you know Pinside is able to run without any 3rd-party banners or ads, thanks to the support from our visitors? Please consider a donation to Pinside and get anext to your username to show for it! Or better yet, subscribe to Pinside+!


This page was printed from https://pinside.com/pinball/forum/topic/spot-touch-up-with-clear-coat?hl=jvice and we tried optimising it for printing. Some page elements may have been deliberately hidden.

Scan the QR code on the left to jump to the URL this document was printed from.