(Topic ID: 258878)

Spblat's Game Room

By spblat

4 years ago


Topic Heartbeat

Topic Stats

  • 74 posts
  • 8 Pinsiders participating
  • Latest reply 3 years ago by spblat
  • Topic is favorited by 5 Pinsiders

You

Linked Games

Topic Gallery

View topic image gallery

IMG_0390.PNG
IMG_0389.PNG
3.png
2.png
1.png
5.png
4.png
3.png
2.png
1.png
IMG_3842 (resized).jpg
IMG_3843 (resized).jpg
IMG_3844 (resized).jpg
IMG_3845 (resized).jpg
IMG_3846 (resized).jpg
lamptest.gif
There are 74 posts in this topic. You are on page 1 of 2.
#1 4 years ago

Wasn't sure where to put this thread. I'll be documenting the work I do on my games. I don't quite think this qualifies as "restoration" so here goes:

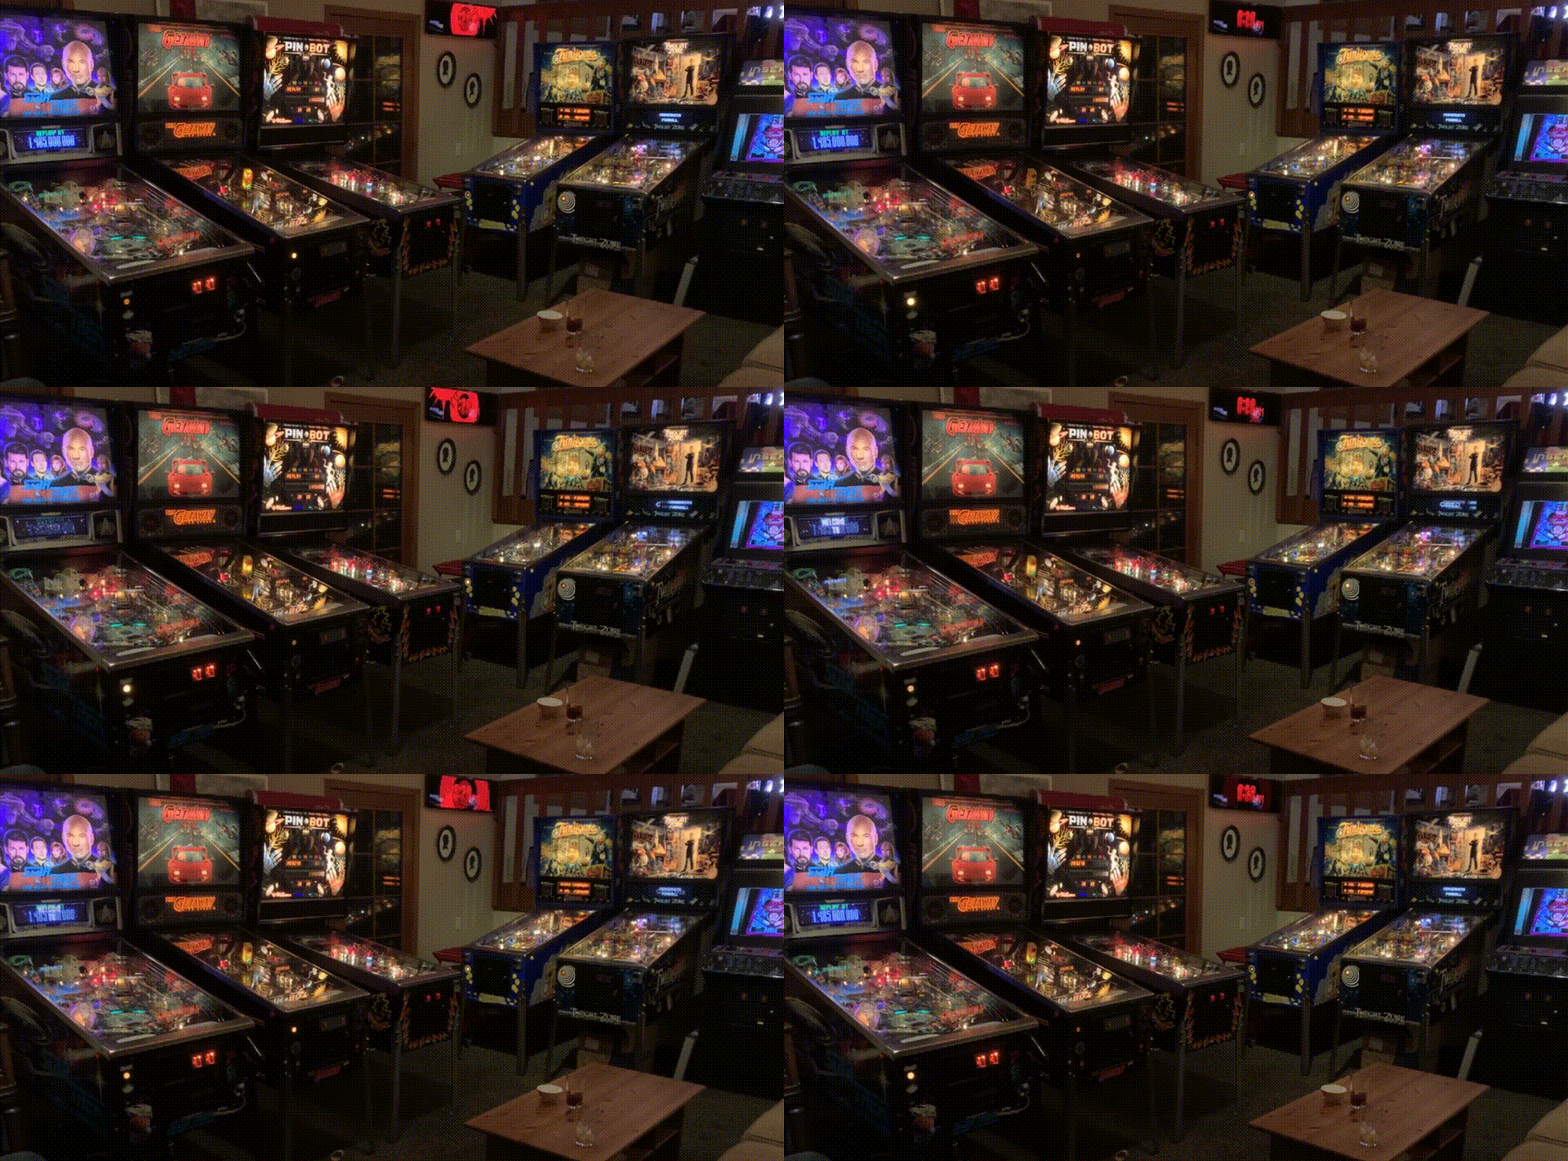
spblat_gameroom.gifspblat_gameroom.gif
...the arcade machine on the right is an old MAME project from 2006. Since then I've replaced the linux box with retropie. Original build documented here: https://web.archive.org/web/20100627024448/http://www.irace.net/tz/images/mametempest/

#2 4 years ago

I thought I would have kept the Earthshaker longer than I did. Needed to make room!

#3 4 years ago

Rudy's eyes work correctly.

https://www.instagram.com/p/B65_tXihHYJ/

This site was helpful overcoming my reluctance to get in there. My issue was the same. http://www.pinthugs.com/funhouse/eyelids.htm

At last he can close his eyes properly again!

A8C6164B-C4E8-4E88-955D-31FA63C8D7F0 (resized).jpegA8C6164B-C4E8-4E88-955D-31FA63C8D7F0 (resized).jpeg
#4 4 years ago

Getaway. Somebody used an erector set or something to repair the supercharger sign. Got the proper part from Marco, trimmed the broken plastic. Much better. Installed some super bands while I had the glass off.

C1783EF4-79D9-478A-8E56-37E7F6512850 (resized).jpegC1783EF4-79D9-478A-8E56-37E7F6512850 (resized).jpeg75FC69BD-0D2C-436D-B0B8-586B1A91067C (resized).jpeg75FC69BD-0D2C-436D-B0B8-586B1A91067C (resized).jpeg
#5 4 years ago

Last night I (hopefully) got to the end of my TNG reset issue.

Quoted from spblat:

Wasn’t a permanent fix. I was having an epic game and got a reset during final frontier. Reinstalled Kahr and it’s back to crashing under the specific conditions noted above.
- TP1: 13.8V
- TP2: 5.4V (LM323 was previously replaced with PSU5)
- TP3: dips from 12.00 as low as 9V during attract mode light show. Also the bulbs are unsurprisingly dimmer when more of them are on
- TP4: (I don’t have an oscilloscope)
- TP6: 0.12VDC (?!)
- TP7: 1.0VDC (?!)
- TP8: 18V, dipping to 13V as above during attract mode light show.
More questions! This is my first PDB troubleshooting exercise.
- TP6 value seems perplexing as hell. All the individual coils, flippers and flashers work. Should I head straight to BR3 and C8?
- TP7 value is also weird considering the game mostly works. BR4 and/or C11?
- Is it normal for TP3 and TP8 to lose voltage? Seems unlikely, in which case BR1 and/or C6 and/or C7 are implicated.
- That would be a lot of failed components, which doesn’t seem to make sense. I haven’t yet checked what’s coming in at J101 and J102 and I’m away from the game for a few days. Would I be looking for a voltage drop coming into the rectifiers? A problem with the main transformer? [Edit: but my Getaway PDB works great in my TNG, so it’s the PDB. Reflow and/or repin J101 and 102?]

Added yesterday: Edit 2: Cabin fever sets in and I've made a list of measurements to take upon returning home
https://docs.google.com/spreadsheets/d/1xAs0xf04wZ_hGGXHXc6Nr5s0VL5HApUfSta8i9XYlf8/edit?usp=sharing

Quoted from spblat:

Closing the loop on my resets (hopefully):
- Closer inspection of PDB showed no evidence of caps or BRs being replaced. This is odd because somebody went to the trouble of replacing the LM323 with a PSU5. But no caps or BRs?
- Also no header discoloration nor leakage from C2 or anywhere else.
- But under Q17 and elsewhere I noticed a surprising lack of solder on the contacts.
- Also surprising: a few (but not all) of the pins under U3 had been soldered, without cleaning the flux afterward. [Edit: now it just looks like some kind of goo, not resoldering. Anyway I cleaned it up.]
What I did:
- Replaced C2 because I was there and because I have a shiny new desoldering gun. Tore out an eyelet anyway. I’ll get better. Made sure enough solder went in to get to both sides of the board.
- Re-flowed solder on every PDB jumper because another WPC reset thread ended up with problems with connectors.
- Cleaned up flux with alcohol, reinstalled PDB, removed Kahr, forgot to power the flippers.
- Got kind of worried, fixed the error.
- Played game with a long Final Frontier, no resets.
This is the same result I got after simply reseating the PDB so don’t know if it’ll hold. Then again maybe there wasn’t a prolonged FF after that. If I get another reset I’m tempted to replace the other 7 electrolytic caps and all of the BRs because I need soldering practice and there are three other WPCs in my life that’ll need some combination of this someday ¯\_(ツ)_/¯
[quoted image][quoted image]

83381677-53CB-4BAB-AAE2-5B61506CFCA4 (resized).jpeg83381677-53CB-4BAB-AAE2-5B61506CFCA4 (resized).jpegD6B7EF9C-97C3-4AAF-A1CA-73C61E1539E5 (resized).jpegD6B7EF9C-97C3-4AAF-A1CA-73C61E1539E5 (resized).jpeg
#6 4 years ago

TNG tie back mod.

Quoted from spblat:

This may be frowned upon, but rather than re-pinning anything I used a pair of taps (one red, one blue) to bridge J107-1 on the driver board to J4-1 on the 8 driver PCB. Mine is the black wire, which I will label for the next guy.[quoted image][quoted image][quoted image]

#7 4 years ago

Pinbot LED adjustment

Quoted from spblat:

Out with the cool bright GI, in with the warm retros from Comet[quoted image][quoted image]

#8 4 years ago

Careful study of this photo allowed me to figure out which diode was responsible for a failed bulb in pinbot’s matrix.

0C3EFF9E-895C-4642-80CF-DCB749EA1509 (resized).jpeg0C3EFF9E-895C-4642-80CF-DCB749EA1509 (resized).jpeg
#9 4 years ago

Earthshaker fault diverter fix

Quoted from spblat:

Thanks to the suggestion from jhanley I got some help from a buddy with a welder. We filled in the space, ground it flat, then dremeled in a new slot. Earthshaker fault problem fixed!
[quoted image] [quoted image][quoted image][quoted image] [quoted image][quoted image][quoted image][quoted image][quoted image]

#10 4 years ago

This...needs to be patched.

D68B42FA-11D9-408A-8BCA-02CE9AC1EA9A (resized).jpegD68B42FA-11D9-408A-8BCA-02CE9AC1EA9A (resized).jpeg
#11 4 years ago

Also known as my happy place

331A71A6-4115-473A-BF8F-C062FF9E7318 (resized).jpeg331A71A6-4115-473A-BF8F-C062FF9E7318 (resized).jpeg
#12 4 years ago

My approach to apron cards is to print the original rule cards on the left in simple black-and-white, and I have customized a pricing card for each of the games. Each one has a paragraph from my pinside review of the game, alongside some interesting details (or Easter egg clues). Happy to share source files if there is interest.

010702E1-D334-443E-B5AC-8BDAC7848924 (resized).jpeg010702E1-D334-443E-B5AC-8BDAC7848924 (resized).jpeg49DF91B5-2DC4-4BF0-9465-619BB32007D4 (resized).jpeg49DF91B5-2DC4-4BF0-9465-619BB32007D4 (resized).jpeg5C55E07A-DF05-451F-838B-7B8F7BF6BD9E (resized).jpeg5C55E07A-DF05-451F-838B-7B8F7BF6BD9E (resized).jpeg944C5798-7A78-46D8-BDCA-81B00A4F49B6 (resized).jpeg944C5798-7A78-46D8-BDCA-81B00A4F49B6 (resized).jpegD376E51C-597D-4865-92E5-5EF5305D5A5F (resized).jpegD376E51C-597D-4865-92E5-5EF5305D5A5F (resized).jpeg
#13 4 years ago

TNG. This one has a pinbits shaker in it and the vibration from the backglass was kind of nutty. Installed a couple of foam protectors I had picked up for another purpose from Marco: 23-6534-9. There are still plenty of rattles but the worst one is taken care of.

404EDF82-D682-431E-A45F-2502392DA215 (resized).jpeg404EDF82-D682-431E-A45F-2502392DA215 (resized).jpeg
#14 4 years ago

Pinbot!

Reflowed janky drop targets.

The visor hasn’t been going down all the way. When a ball hits it, it’s at the right level, but gravity alone hasn’t been enough.

Off by like a quarter’s thickness, enough to brick the first eye shot.

ABC21B1E-6738-4BE5-9FA0-F030539DFDFA (resized).jpegABC21B1E-6738-4BE5-9FA0-F030539DFDFA (resized).jpeg

Press down with finger or hit it with a ball and it’s level.

EFC3F38E-6EF2-411C-81FF-918136B7CA7A (resized).jpegEFC3F38E-6EF2-411C-81FF-918136B7CA7A (resized).jpeg

Looking inside we see a slot that the cam moves up and down.

EBD191EA-F948-42D6-A312-9958ACF6BFCC (resized).jpegEBD191EA-F948-42D6-A312-9958ACF6BFCC (resized).jpeg

A few layers of gorilla tape in the slot reduces the amount of play...

A8723930-CC44-459C-B1E9-7BA172C3836B (resized).jpegA8723930-CC44-459C-B1E9-7BA172C3836B (resized).jpeg

3355B206-18EB-4545-96B0-51FAF725B8A8 (resized).jpeg3355B206-18EB-4545-96B0-51FAF725B8A8 (resized).jpeg

And it’s fixed!
586133D5-1404-4F3A-B175-074157CE7655 (resized).jpeg586133D5-1404-4F3A-B175-074157CE7655 (resized).jpeg
On to cliffy. <strikeout>Outhole</strikeout> Shooter eject first:
C8C5EBF6-E05B-4B4D-8044-3EEC918C50AC (resized).jpegC8C5EBF6-E05B-4B4D-8044-3EEC918C50AC (resized).jpeg
The wooden rail is secured by four screws.
1AB395E0-B88D-4C1C-AE4D-5F99EA1ED769 (resized).jpeg1AB395E0-B88D-4C1C-AE4D-5F99EA1ED769 (resized).jpeg
Slide it in, re-tighten stuff, done.
23549498-FD81-49A7-A9A3-B573408C6D03 (resized).jpeg23549498-FD81-49A7-A9A3-B573408C6D03 (resized).jpeg
Now lane guides. Over the years the metal deforms. Cliff has new ones for us!
81BBDCC2-3FF2-4C1F-9462-E927489D4AF7 (resized).jpeg81BBDCC2-3FF2-4C1F-9462-E927489D4AF7 (resized).jpeg
Old, bad
6DA9CF4C-DC6F-4B38-8762-E0E5FD1A2FFF (resized).jpeg6DA9CF4C-DC6F-4B38-8762-E0E5FD1A2FFF (resized).jpeg
New, good. More Cliffy later.
114D1200-3F80-438D-B548-9BD7F361A030 (resized).jpeg114D1200-3F80-438D-B548-9BD7F361A030 (resized).jpeg
What was that about bourbon and pinball?
5B60B816-12EE-46A3-BD2D-55790EAFCC81 (resized).jpeg5B60B816-12EE-46A3-BD2D-55790EAFCC81 (resized).jpeg
#15 4 years ago

I was asked in PM for more detail on LCD vs LED ColorDMD.

Quoted from spblat:

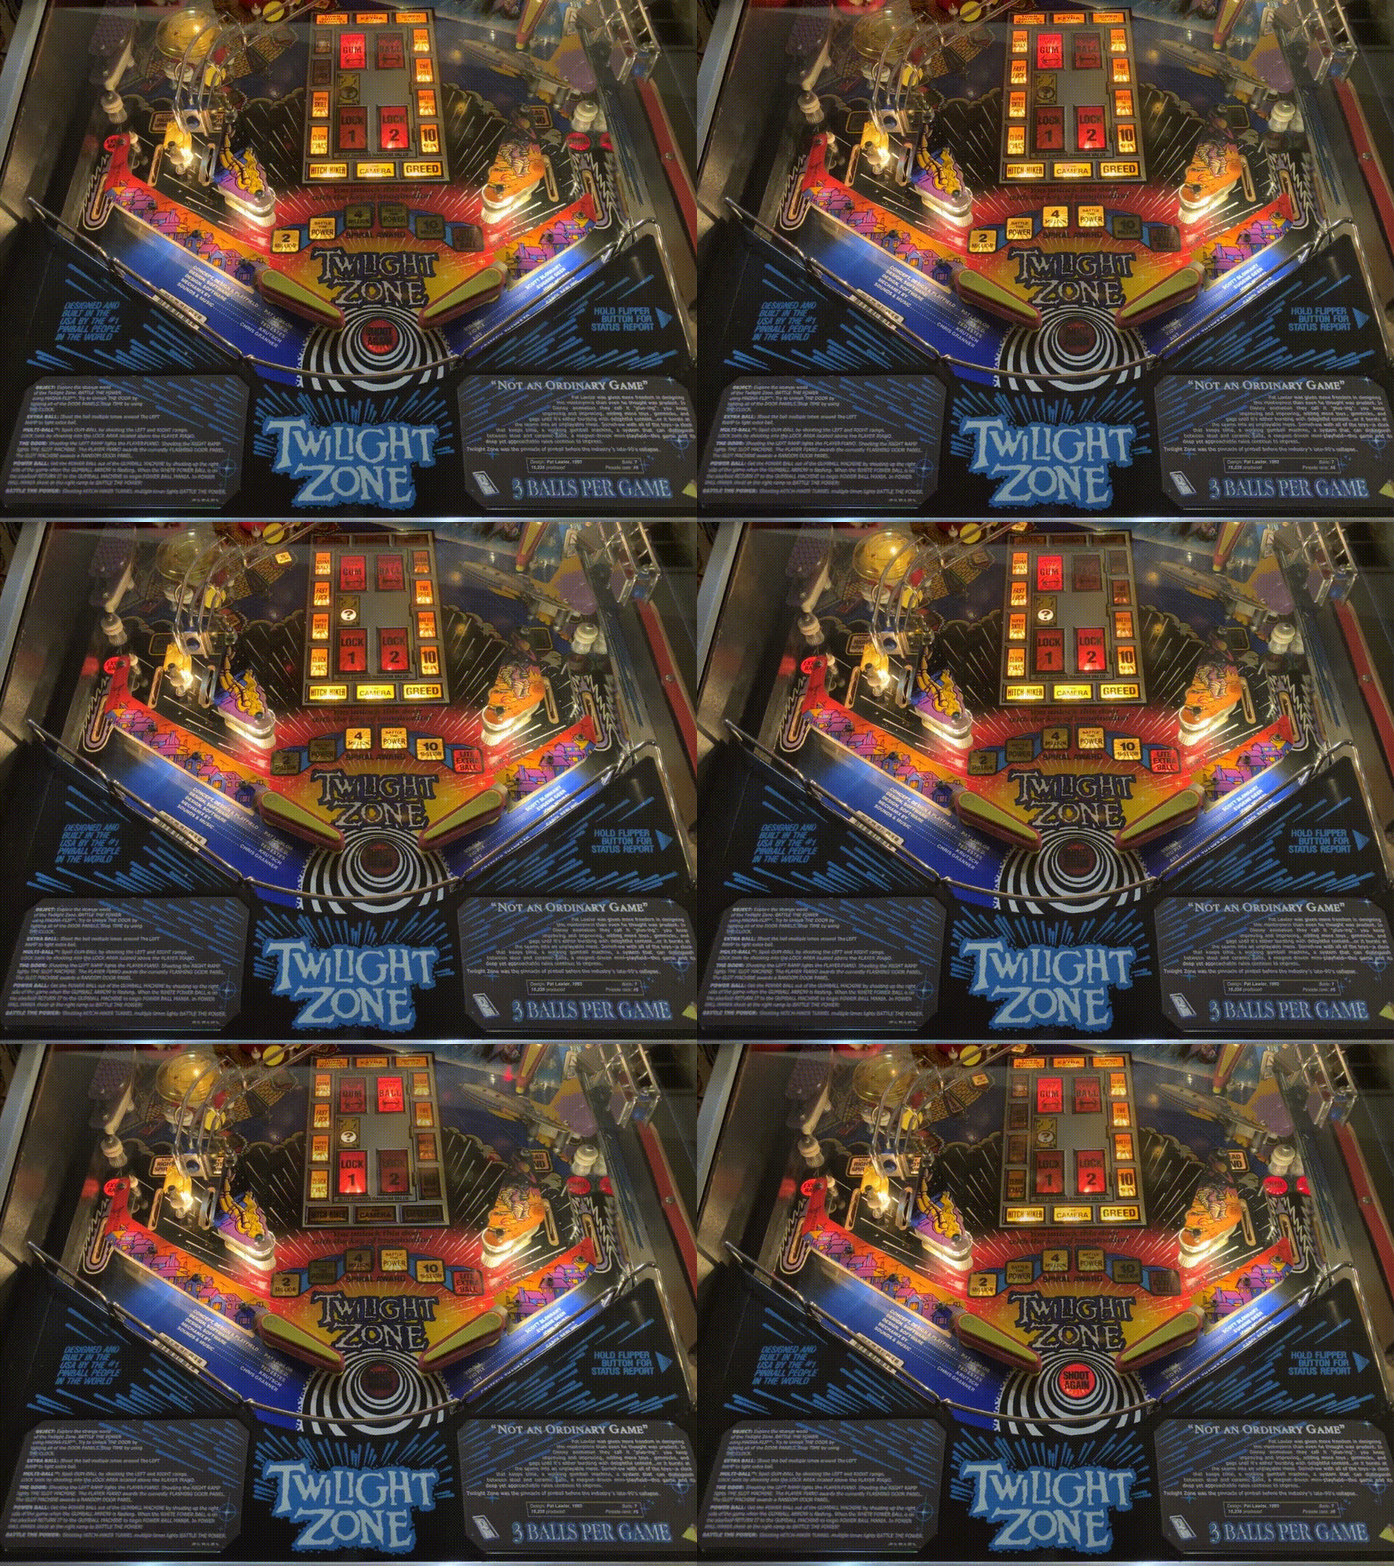
I picked up a Star Trek TNG that had a LED ColorDMD in it. I swapped it with the LCD that I had in my Twilight Zone and I cannot overstate how much better I think TNG is with “DotXL” compared with those little points of LED light.
I think Twilight Zone isn’t worse with LED than it was with LCD: I think that one is maybe a toss-up. [EDIT: no, it’s WAY better with LED. Those twinkling stars are stunning!]
Getaway I’ve only seen with LED and I think it is super duper that way.
[quoted image]

None of these GIFs do justice to the original colors but here's what I think:

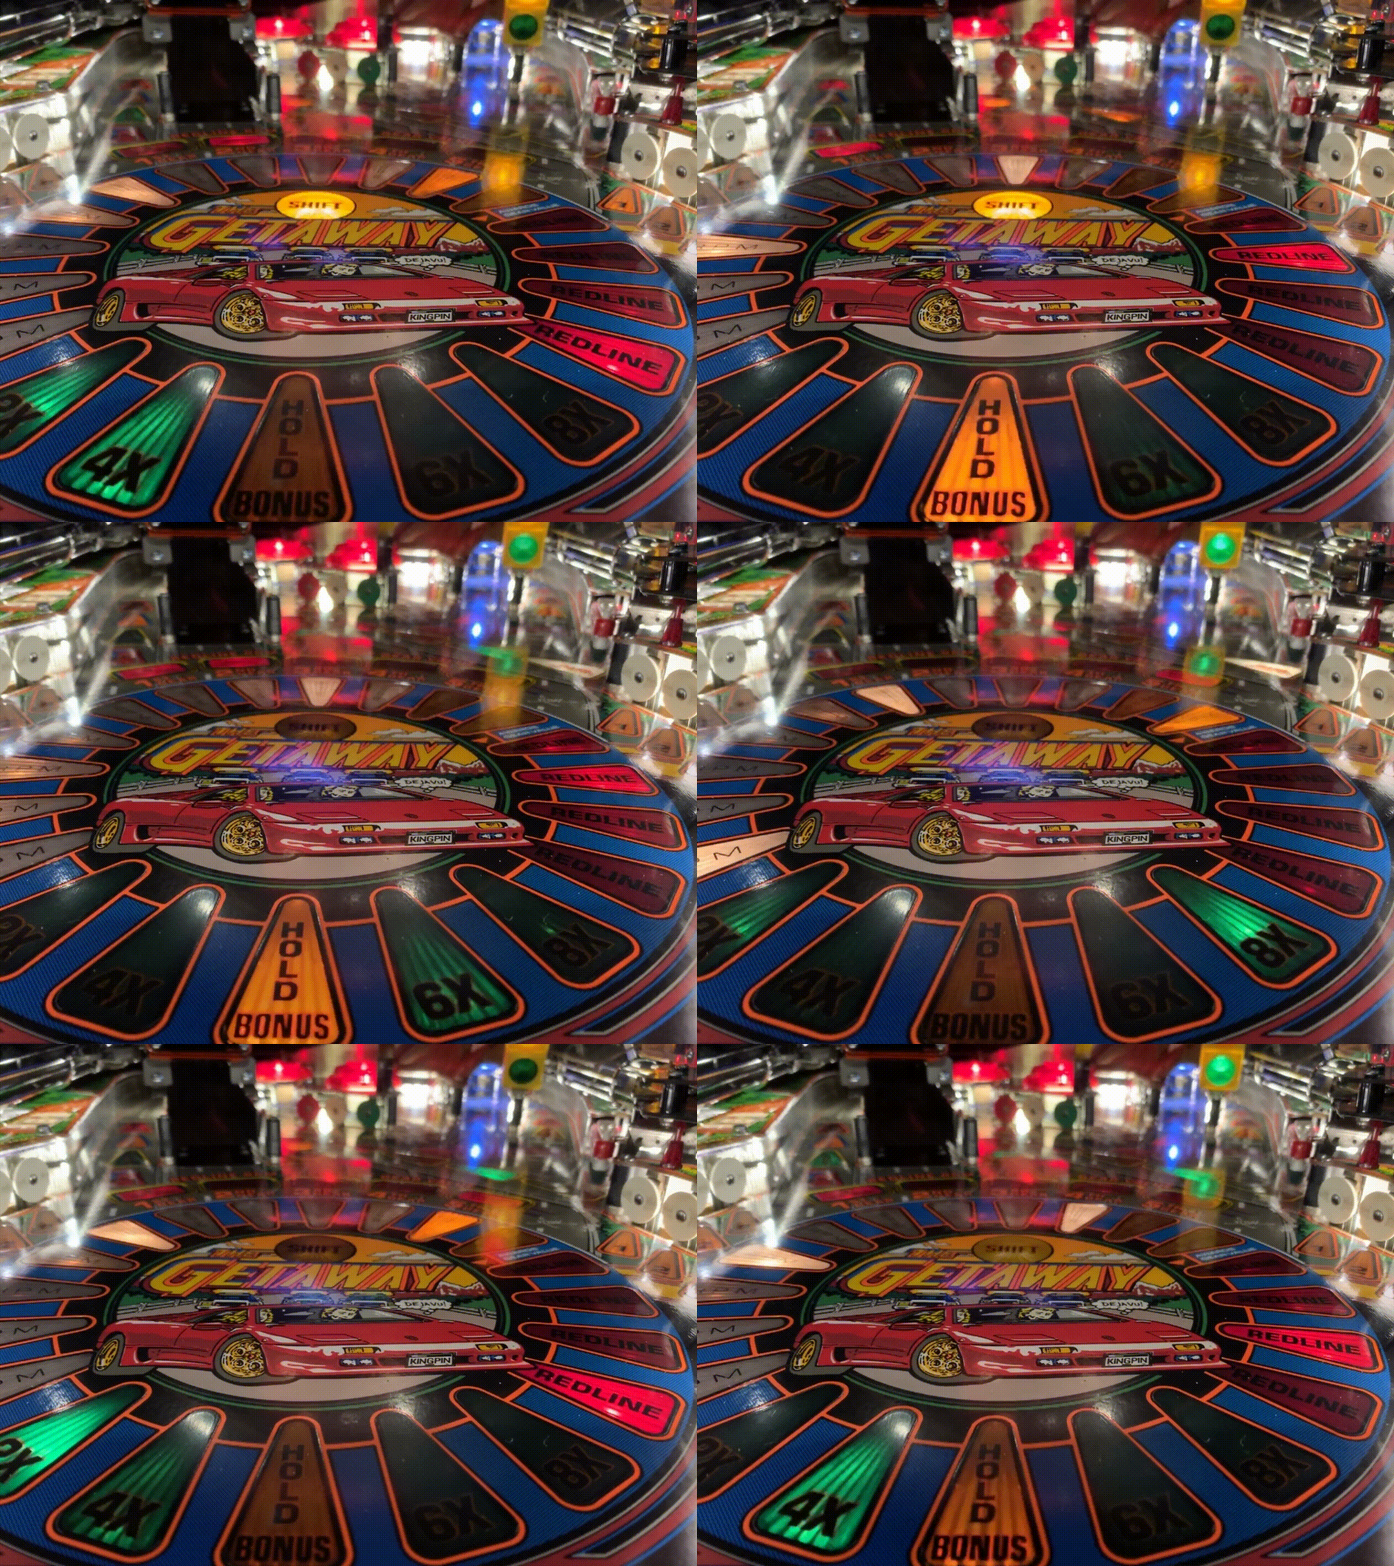
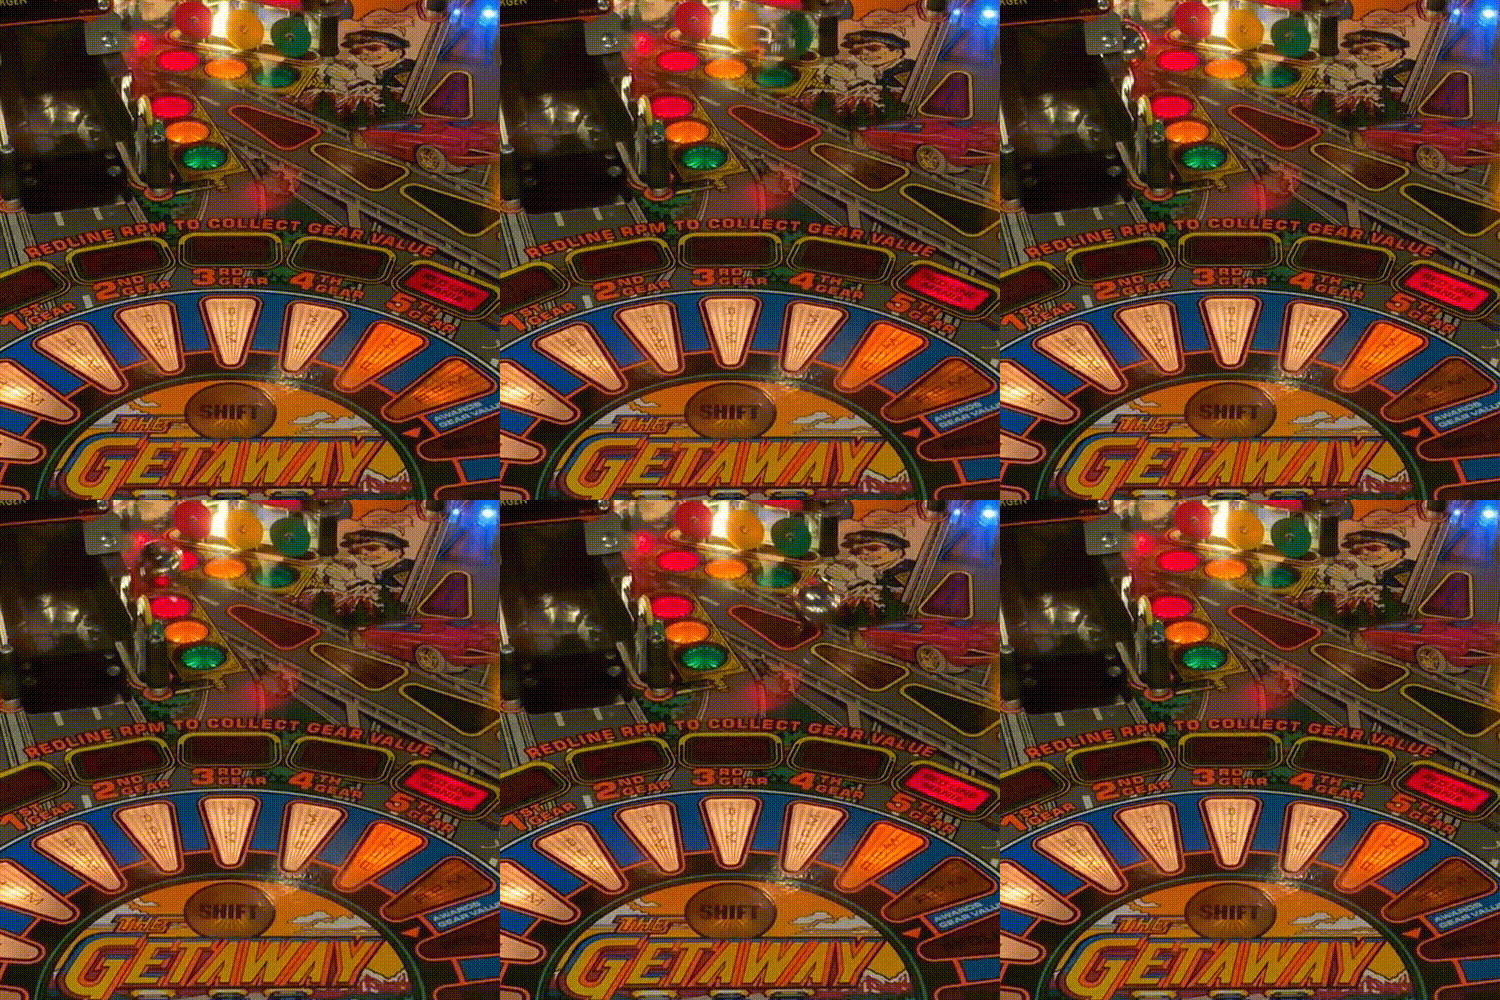
Getaway in LED. Love the pinpoint blazes of light.
1.gif1.gif
2.gif2.gif

My TNG came to me with a LED ColorDMD. On a whim I put the LED in my TZ and the LCD from my TZ in my TNG. So this is TNG in ColorDMD LCD. I think this screen in particular is helped by the LCD panel's "DotXL" mode. The muted colors are, I think, consistent with the overall Star Trek design aesthetic, and perhaps it's the case that some of the animations are so intricate that they're made clearer in DotXL. Or perhaps it's that the LCD display offers a wider range of colors that are needed by TNG, whereas TZ and Getaway rely more on primary colors? Perhaps it's that. Whatever it is, I love TNG in LCD.
3.gif3.gif

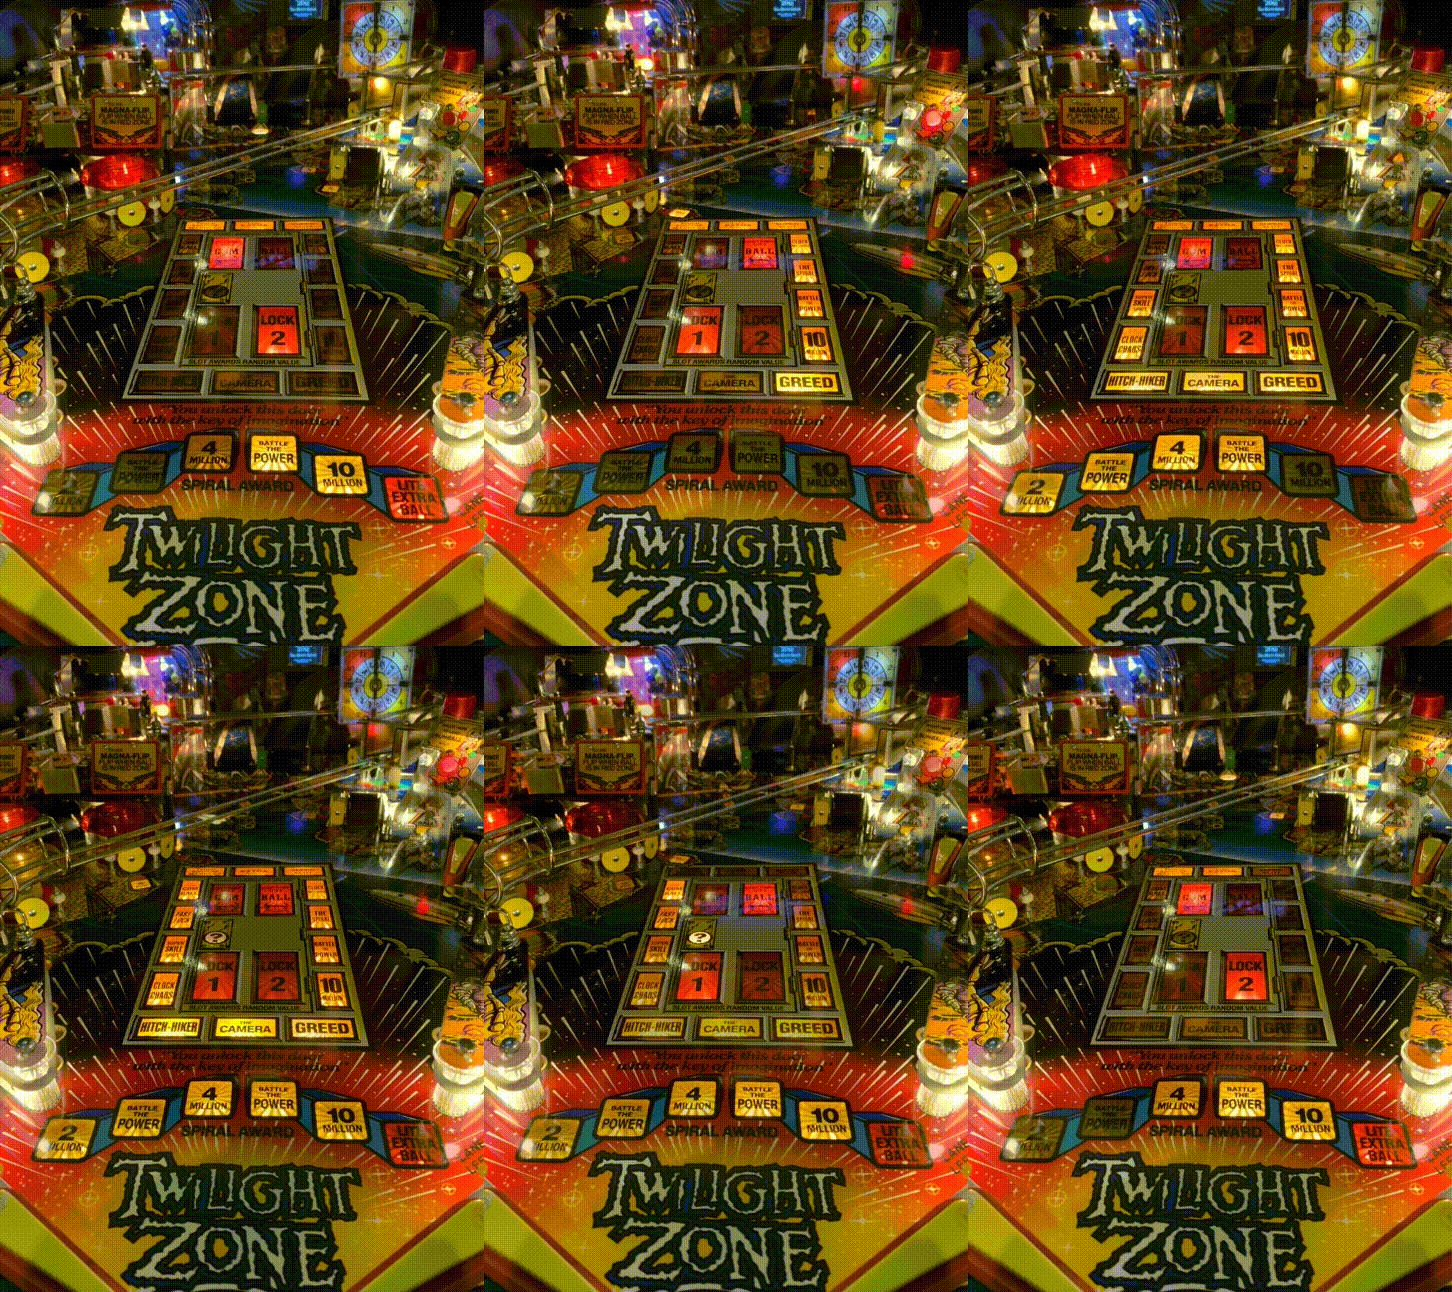
And I never noticed the twinkling of stars in TZ using LCD the way they pop in LED.
4.gif4.gif6.gif6.gif

#16 4 years ago

My son and his girlfriend stumbled into a Police Force
05EC326F-F42C-4F87-B538-9041B12C22CE (resized).jpeg05EC326F-F42C-4F87-B538-9041B12C22CE (resized).jpeg

D178066A-1951-4414-A469-61B6FE40044B (resized).jpegD178066A-1951-4414-A469-61B6FE40044B (resized).jpeg
#17 4 years ago

Note to self: WPC PDB capacitors and bridge rectifiers to consider replacing

C4 - 470uF 25V radial
(5) C30, C11, C5, C7, C6 - C15KM25VRS 15,000 uF 25 v
C8 - 100uF 100V
C2 - 100uF 25V
(5) BR - KBPC3504-W

Marco's WPC-PDA12697X includes the 5 big caps, 5 BRs, and C8. C2 and C4 sold separately.

#18 4 years ago

Well it was a perfectly good capacitor I took out of TNG. I suppose if the fix holds it’s because reflowing the solder on all of the headers did the trick.

image (resized).jpgimage (resized).jpg
#19 4 years ago

Got a shipment in from pinballlife
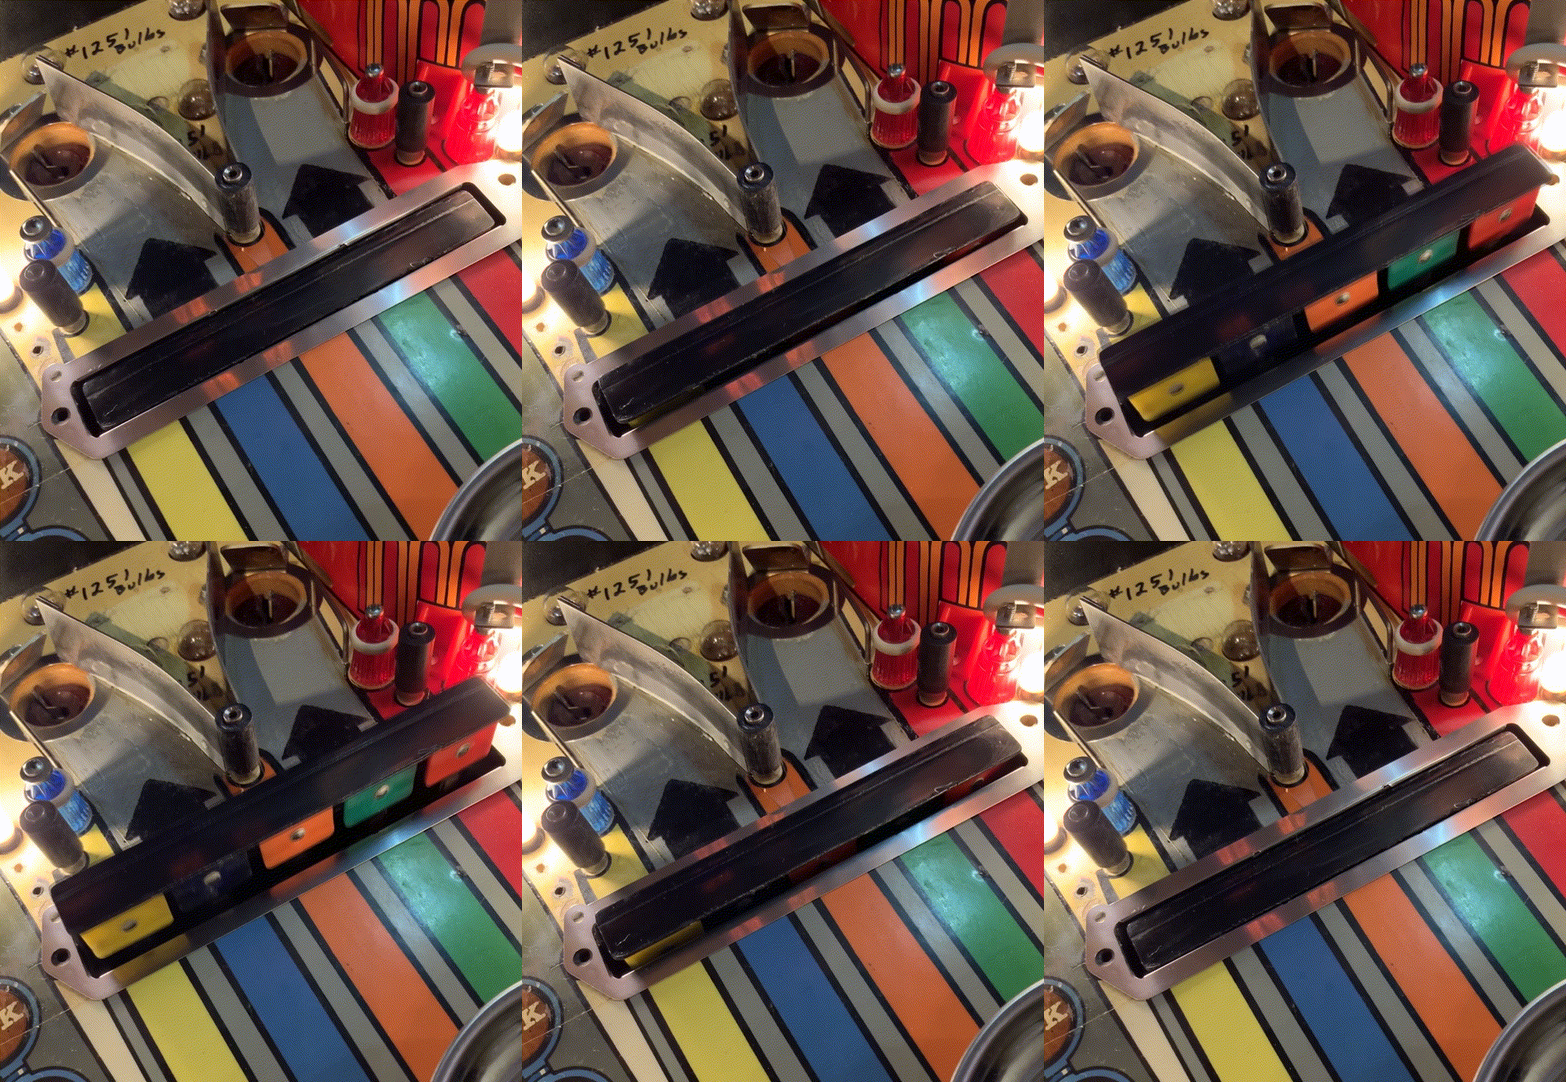
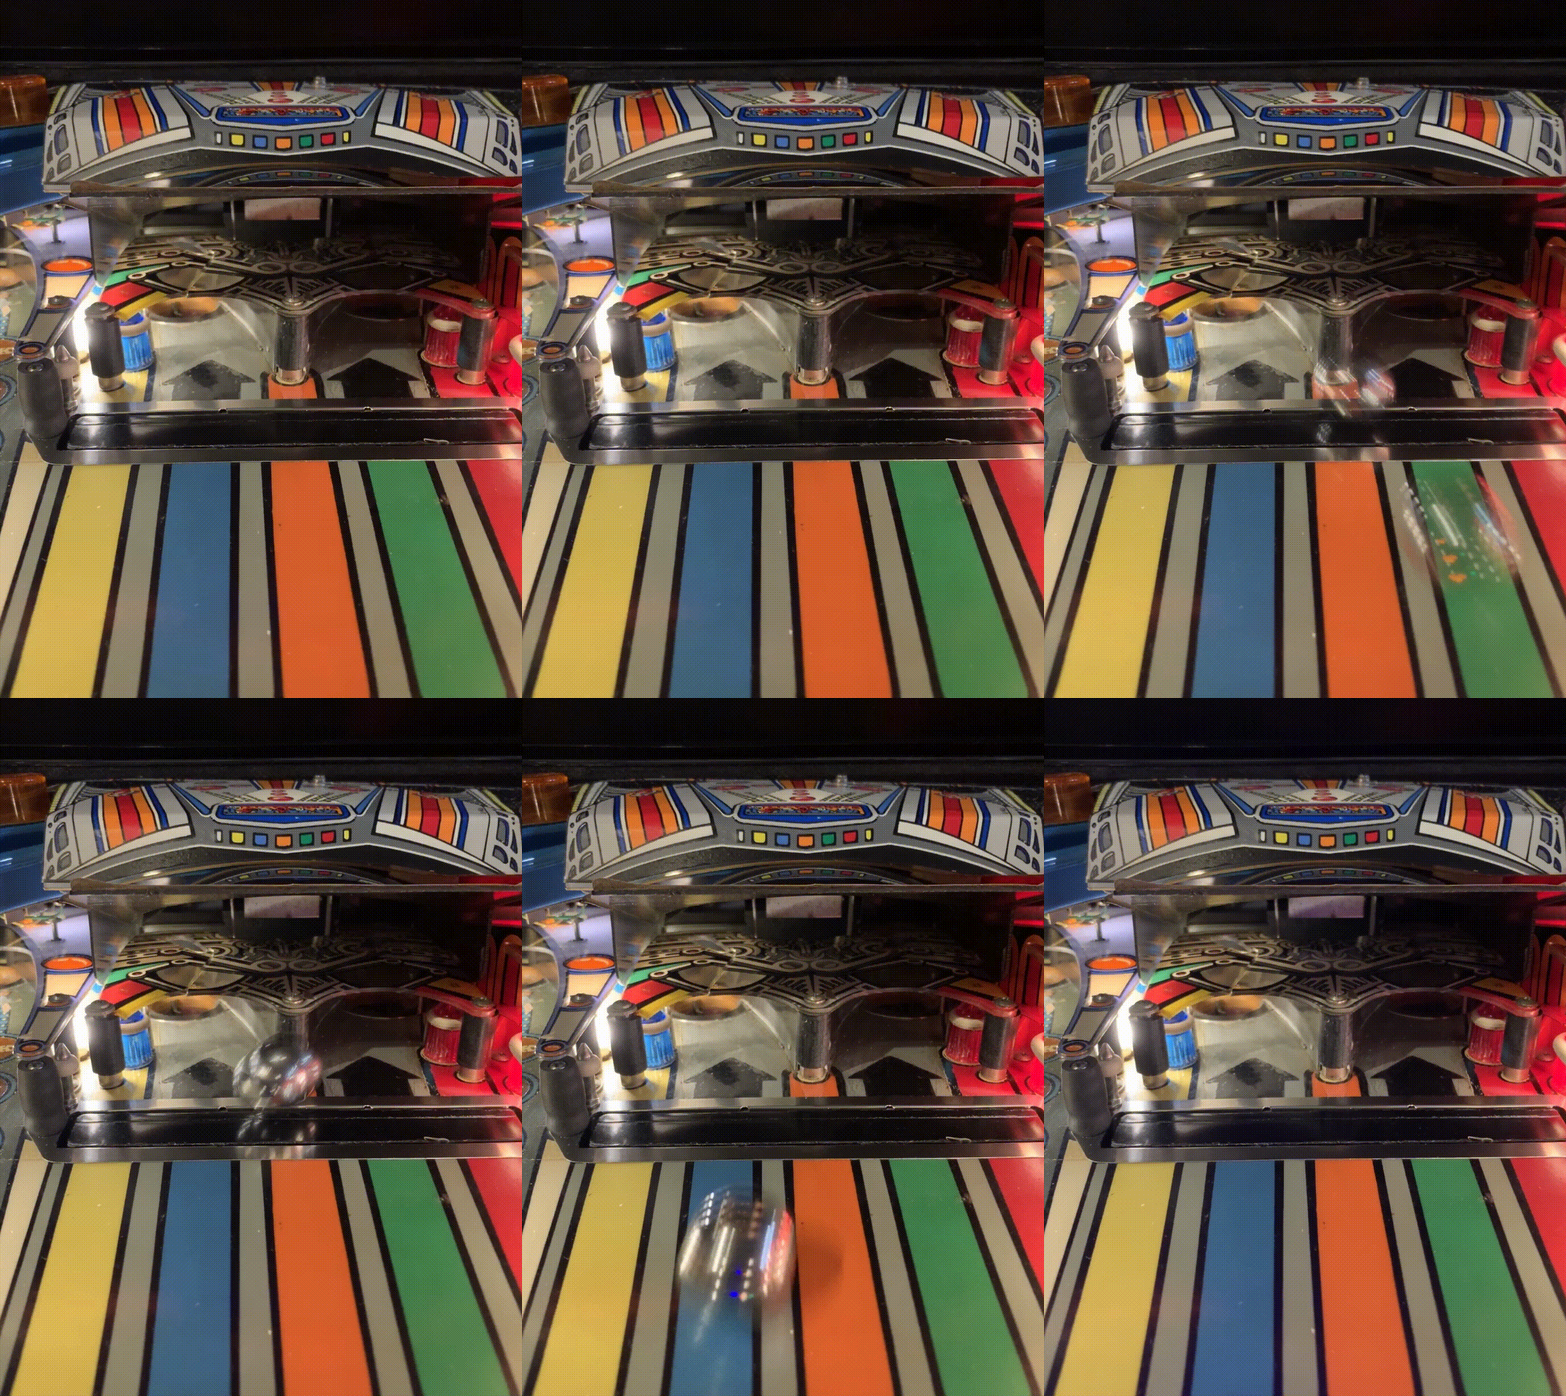
Pinbot visor baffle.
pinbot.gifpinbot.gifBritemods LED flipper buttons for the Getaway. Not sure the other games need them.
6245115E-1362-4583-8D67-12D825EC558A (resized).jpeg6245115E-1362-4583-8D67-12D825EC558A (resized).jpegNew locks for all the games, keyed alike. Hid a spare key where *no one* will *ever* look
E7FEC72A-1D7E-4D44-ADCE-0405A843E71A (resized).jpegE7FEC72A-1D7E-4D44-ADCE-0405A843E71A (resized).jpegPingulp for all the games and cabinet protectors for all the legs.
2B536D0F-F6FF-42E3-A569-8141C395201B (resized).jpeg2B536D0F-F6FF-42E3-A569-8141C395201B (resized).jpegPinbot ramp is stuck.
DB815E98-09A7-4350-9163-0143360C6368 (resized).jpegDB815E98-09A7-4350-9163-0143360C6368 (resized).jpeg

#21 4 years ago

LED OCD in Funhouse. GI OCD was already installed. I think both are essential for this game. Tweaked GI OCD but the LED OCD seems to be just right out of the box.

spblat_fh_ocd.gifspblat_fh_ocd.gif
#22 4 years ago

Completing the Cliffy install on Pinbot.

Pierce the adhesive so you can spot the hole from the other side and use the hole to align.
9E6A78E4-8B41-415E-A227-40C0686DB2E8 (resized).jpeg9E6A78E4-8B41-415E-A227-40C0686DB2E8 (resized).jpegHere's the left eject ready for cliffy.
2C868844-9B61-441E-9AE8-4B7747409C0B (resized).jpeg2C868844-9B61-441E-9AE8-4B7747409C0B (resized).jpegPush the wire guide through the hole in the cliffy and get it carefully positioned before committing the adhesive.
97EEEB15-DF10-4EA8-9958-867F101C75B1 (resized).jpeg97EEEB15-DF10-4EA8-9958-867F101C75B1 (resized).jpegLeft eye. Again, using the pokie tool and the wire guide to align the cliffy before pressing the adhesive.
38CD4BFA-B0CA-4803-B06A-1A6F2284A92C (resized).jpeg38CD4BFA-B0CA-4803-B06A-1A6F2284A92C (resized).jpegRight eye.
FB1F30E8-43E1-4472-A3C1-150005779A87 (resized).jpegFB1F30E8-43E1-4472-A3C1-150005779A87 (resized).jpegLordy but it takes a lot of disassembling to get to this point. Take pictures along the way.
3DC99F64-6907-4631-880E-B33149613736 (resized).jpeg3DC99F64-6907-4631-880E-B33149613736 (resized).jpegOn mine, the visor's upper left hole wasn't right. I have Kwikwood for the Getaway patch so let's see if it works.
E8BFE0AC-71EB-4C29-8E5F-68ABC5349CB9 (resized).jpegE8BFE0AC-71EB-4C29-8E5F-68ABC5349CB9 (resized).jpegHole patched. Left a hunk aside to see how quickly it cured. Drilled an hour later.
59914F24-1E79-4731-AACF-BB7AF7AB16BD (resized).jpeg59914F24-1E79-4731-AACF-BB7AF7AB16BD (resized).jpegBefore peeling the adhesive, lay in the visor cliffy and be sure there's no rubbing.
pinbot1.gifpinbot1.gifAdjusted visor height. Smooth baby!
pinbot2.gifpinbot2.gif

#23 4 years ago
Quoted from spblat:

On mine, the visor's upper left hole wasn't right. I have Kwikwood for the Getaway patch so let's see if it works.

Yeah apparently williams had several runs of pin*bot and several playfield makers even well beyond the games release. I'll be elongating that hole in the next runs to accommodate variances.

#24 4 years ago

Getaway day!

Patched cabinet holes. Made a bit of a mess but it’s my first experience with KwikWood. Three coats of S100 and it’s a bit cloudy. Looks great from the player’s position. Installed Cliffy for the shooter eject. Only ball trail left is in the plunger lane. And a new beer barrier!
074745A5-C67E-449D-96C5-4F6CE03162E5 (resized).jpeg074745A5-C67E-449D-96C5-4F6CE03162E5 (resized).jpeg34F57A3C-2451-418F-88EE-4E5762DF5518 (resized).jpeg34F57A3C-2451-418F-88EE-4E5762DF5518 (resized).jpeg14BB1EDC-6A19-4578-9258-670C0B5E0143 (resized).jpeg14BB1EDC-6A19-4578-9258-670C0B5E0143 (resized).jpeg11CDAC90-8108-4786-8266-973A6E1EF283 (resized).jpeg11CDAC90-8108-4786-8266-973A6E1EF283 (resized).jpeg47CB2681-232D-4478-A1B2-6FDEB67447A3 (resized).jpeg47CB2681-232D-4478-A1B2-6FDEB67447A3 (resized).jpeg67BBF130-E0CC-494E-A34C-B0E141002ED7 (resized).jpeg67BBF130-E0CC-494E-A34C-B0E141002ED7 (resized).jpeg
getaway.gifgetaway.gif

266F8E24-ED8A-4665-BE22-F4FD5269600E (resized).jpeg266F8E24-ED8A-4665-BE22-F4FD5269600E (resized).jpeg
#25 4 years ago

Assessed the coil stops in all the games, and found a missing bolt on a TNG coil stop! Replaced the bolt, applied loctite to all of the games’ coil stops but Funhouse, which is beyond ready for rebuild. It shows: the flippers have been a little lackluster. Plus new beer barriers for all the games but TZ, which was pretty clean already. And S100 wax for the Funhouse. After rebuilding the Funhouse flippers I need to clean the ball trails off the TZ and TNG.

AF21E959-16B9-47DC-A797-F44E1D58F1A3 (resized).jpegAF21E959-16B9-47DC-A797-F44E1D58F1A3 (resized).jpeg295D2328-1ADF-4080-8F4D-3A6E96C5E050 (resized).jpeg295D2328-1ADF-4080-8F4D-3A6E96C5E050 (resized).jpeg3A963457-FFC0-4946-ABAC-2AD7DB4488B3 (resized).jpeg3A963457-FFC0-4946-ABAC-2AD7DB4488B3 (resized).jpeg7D99FCFC-A043-4D68-B486-F5ACD746BA04 (resized).jpeg7D99FCFC-A043-4D68-B486-F5ACD746BA04 (resized).jpeg616CD00F-89BF-4748-B680-FC776EFCE901 (resized).jpeg616CD00F-89BF-4748-B680-FC776EFCE901 (resized).jpeg
#26 4 years ago

Funhouse flippers rebuilt.

Two coils needed replacing. Got rid of the old-style plunger springs and used the smaller fliptronic springs for that snappy feel.
0EA7418B-FC3F-4F42-A599-E6DB2B9656BB (resized).jpeg0EA7418B-FC3F-4F42-A599-E6DB2B9656BB (resized).jpeg I hadn’t realized Funhouse had NC EOS switches.B341CD83-762D-4690-9503-B5B2E6A2CBA2 (resized).jpegB341CD83-762D-4690-9503-B5B2E6A2CBA2 (resized).jpeg Is this where this sticker goes? 0845550C-E0D0-4949-AD46-FEDC813E3D99 (resized).jpeg0845550C-E0D0-4949-AD46-FEDC813E3D99 (resized).jpeg How does this happen?EE2BB893-A0E9-47A5-9C97-9EEAAB62565C (resized).jpegEE2BB893-A0E9-47A5-9C97-9EEAAB62565C (resized).jpeg

#27 4 years ago

You have been busy. Im jealous.

#28 4 years ago
Quoted from Chitownpinball:

You have been busy. Im jealous.

I’m a pig in shit lately

#29 4 years ago

Solved Funhouse flipper lag

Quoted from spblat:

This thread came up while I was looking for a flipper lag solution on my funhouse. I had rebuilt the upper flipper, including the coil, and it was still staying up for a moment after releasing the button despite a flawless mechanical arrangement.
Turns out the flipper button gap was too narrow in the second stage. Cleaned the contacts and widened the gap and all is well.[quoted image][quoted image]

#30 4 years ago

Day saver: clever approaches to a work surface. Beats the hell out of trying to solder stuff in open space.

03B7EEB0-ACAD-4B7B-B8E3-AFAF98AB371F (resized).jpeg03B7EEB0-ACAD-4B7B-B8E3-AFAF98AB371F (resized).jpeg6A6177C8-DA0A-4428-A68C-F1759E495B6F (resized).jpeg6A6177C8-DA0A-4428-A68C-F1759E495B6F (resized).jpeg
#31 4 years ago

Cleaned out the funhouse cabinet and took a crack at the lockdown receiver with some Brite Boy. It’s not HEP clean but it’s improved.

7A14824B-8179-4F38-8D4C-FE096137414C (resized).jpeg7A14824B-8179-4F38-8D4C-FE096137414C (resized).jpeg0ABB7AFD-DF66-4AF0-8612-92831377D796 (resized).jpeg0ABB7AFD-DF66-4AF0-8612-92831377D796 (resized).jpeg
#32 4 years ago

I never replaced the stripped leg plates when I got my TZ in the 90s. At some point I added the lesser plates. Why?
B7D85A10-867F-430E-A03E-DD6E2772A215 (resized).jpegB7D85A10-867F-430E-A03E-DD6E2772A215 (resized).jpeg
Anyway, now my TZ has 4 new leg plates and the cabinet protectors are now installed on all the games.
DF8C3453-7534-4F3A-AC61-00CE680328DC (resized).jpegDF8C3453-7534-4F3A-AC61-00CE680328DC (resized).jpeg
Broken TZ lane guide
2C0C9DB0-B1C5-40F9-976E-73639AE435B9 (resized).jpeg2C0C9DB0-B1C5-40F9-976E-73639AE435B9 (resized).jpeg
Replaced.
4F8079FA-5C0F-4BCD-B601-CC3DA5D71B12 (resized).jpeg4F8079FA-5C0F-4BCD-B601-CC3DA5D71B12 (resized).jpeg
Waxed. It's still a bit cloudy in the wrong light, and there are still faint ball trails.
760D0260-CD89-46D2-8BBE-ECBEEFAAB310 (resized).jpeg760D0260-CD89-46D2-8BBE-ECBEEFAAB310 (resized).jpeg
But in proper light it looks lovely.
tz.giftz.gif

#33 4 years ago

Started working on a Getaway Pinsound mix.

Quoted from spblat:

Two things:

1) If you download a fresh copy of the factory sound set from Pinsound you will find that the events you've marked yellow are not among the files.
2)
I have started a new spreadsheet in google sheets for planning purposes.<-- click
a) Everyone is free to copy this sheet for your own use.
b) Everyone is free (and encouraged) to edit column D in my copy, which is a note about each sound. Many of the descriptions are self explanatory, but there are some that need a more human description. For example, when specifically do we hear "main_theme_4" as opposed to "main_theme_3"? If you know, click above and enter it in! I'll be adding the notes @estroh
made earlier. Let's crowdsource some intelligence about these actions!
c) As I make progress in my first orchestration I'll be filling in column E. Then I'll probably amend the
scriptI made earlier to take data from this sheet and assemble the folders, taking factory files for any action that has a blank cell.

#34 4 years ago

TNG day.

Playfield glass was resonating with the thundering bass from the subwoofer. Replacing the beer barrier with thicker foam solved it.

Replaced coil interlock switch with a “cheater” version you can pull to engage, instead of clipping on that dumb yellow bracket.

Last night the trough optos all failed. Someone had diddled with the 5 pin connector on the emitter side and it didn’t take. Spliced one wire with heat shrink and used a punch tool to improve the connection. My next Marco order will include the parts needed to replace this connector.

0066F512-1FD0-4804-B2D9-FE01B6787C90 (resized).jpeg0066F512-1FD0-4804-B2D9-FE01B6787C90 (resized).jpegF4FEC78C-3D2D-47B4-9ACC-1739DC92F5B3 (resized).jpegF4FEC78C-3D2D-47B4-9ACC-1739DC92F5B3 (resized).jpegDFE8E809-D8C0-4BA1-9C92-239CF7C9BAA0 (resized).jpegDFE8E809-D8C0-4BA1-9C92-239CF7C9BAA0 (resized).jpeg
#35 4 years ago

Getaway. Replaced white standup with yellow. Nothing left to do on this but LED and Pinsound. Well, maybe a cabinet touch up.
8A9241E8-36F1-434D-9D89-8AA4C591EF3F (resized).jpeg8A9241E8-36F1-434D-9D89-8AA4C591EF3F (resized).jpeg751A03D6-DA2C-40B3-A44A-F5A34280D694 (resized).jpeg751A03D6-DA2C-40B3-A44A-F5A34280D694 (resized).jpeg

Edit: The multiball release had a tendency to release more than one ball. Disassembled it and found the coil sleeve was kinda gummy. Rubbing alcohol, new sleeve, a second spring in parallel with the first, and it seems good!

1 week later
#36 4 years ago

My TNG hasn't been right for months and I didn't quite realize it. Oops

Quoted from spblat:

I was today years old when I realized that most of the time the drop target should be down during the plunge. My "drop target down" coil (the red one, pictured above the green one) was energizing but the target wasn't dropping except on ball impact. Turns out the "down" coil was a bit loose, and the plate the coil pulls on was snapping away too far and binding against the PCB holding the lane lights. So I added a bit of foam, circled in red. Now the game plays as it should![quoted image]

1 week later
#38 4 years ago

You're a genius! I'm really impressed by your sound and mixing abilities, I don't know if I want to invest in a PinSound board but if I do this would be the version I would choose. For me, it retains enough of the original sounds and effects but adds an upbeat current theme, especially with how the music intensifies as the stress levels increase.

How did you get Jade Asha to do the voices?

Awesome work!

#39 4 years ago
Quoted from spblat:

I thought I would have kept the Earthshaker longer than I did. Needed to make room!

Awesome job!

#40 4 years ago
Quoted from tiltmonster:

I'm really impressed by your sound and mixing abilities, I don't know if I want to invest in a PinSound board but if I do this would be the version I would choose. For me, it retains enough of the original sounds and effects but adds an upbeat current theme, especially with how the music intensifies as the stress levels increase.

Thank you! Prodigy is 90% done, I’ll post here when it’s available. Main theme is “Smack My Bitch Up,” but you will not hear that phrase in the mix.

I paid Jade for her VO (we both use the same VO marketplace) but ended up not using her samples; my hitchhiker is now artist Mandy Michaels.

#41 4 years ago
Quoted from spblat:

Thank you! Prodigy is 90% done, I’ll post here when it’s available. Main theme is “Smack My Bitch Up,” but you will not hear that phrase in the mix.
I paid Jade for her VO (we both use the same VO marketplace) but ended up not using her samples; my hitchhiker is now artist Mandy Michaels.

Very cool, so is Mandy the one who did the version you posted? Who ever it is did a great job... I especially like the Yahoo fo the high scores, it blends perfectly with the music.

#42 4 years ago

Here's a wild little moment where a ball got perched on top of a standup target. This is from my forthcoming pinsound mix featuring Prodigy.

getaway heel flip.gifgetaway heel flip.gif
#43 4 years ago

Drop target on Star Trek: The Next Generation. A metal hook that holds the plate close to the small knockdown coil had broken off. And the “down” microswitch had a bad center terminal. Replaced the knockdown assembly, the coil sleeve, and the switch. Next game was 3.7B
195440B3-E9AE-4EEC-A639-7ADD21D4162C (resized).jpeg195440B3-E9AE-4EEC-A639-7ADD21D4162C (resized).jpeg88C898F0-CEBD-4E0C-B3C8-6DCA81BCCD0B (resized).jpeg88C898F0-CEBD-4E0C-B3C8-6DCA81BCCD0B (resized).jpegFAEC009A-EC0D-4135-8FA3-EF521EC2C0C3 (resized).jpegFAEC009A-EC0D-4135-8FA3-EF521EC2C0C3 (resized).jpeg

#44 4 years ago

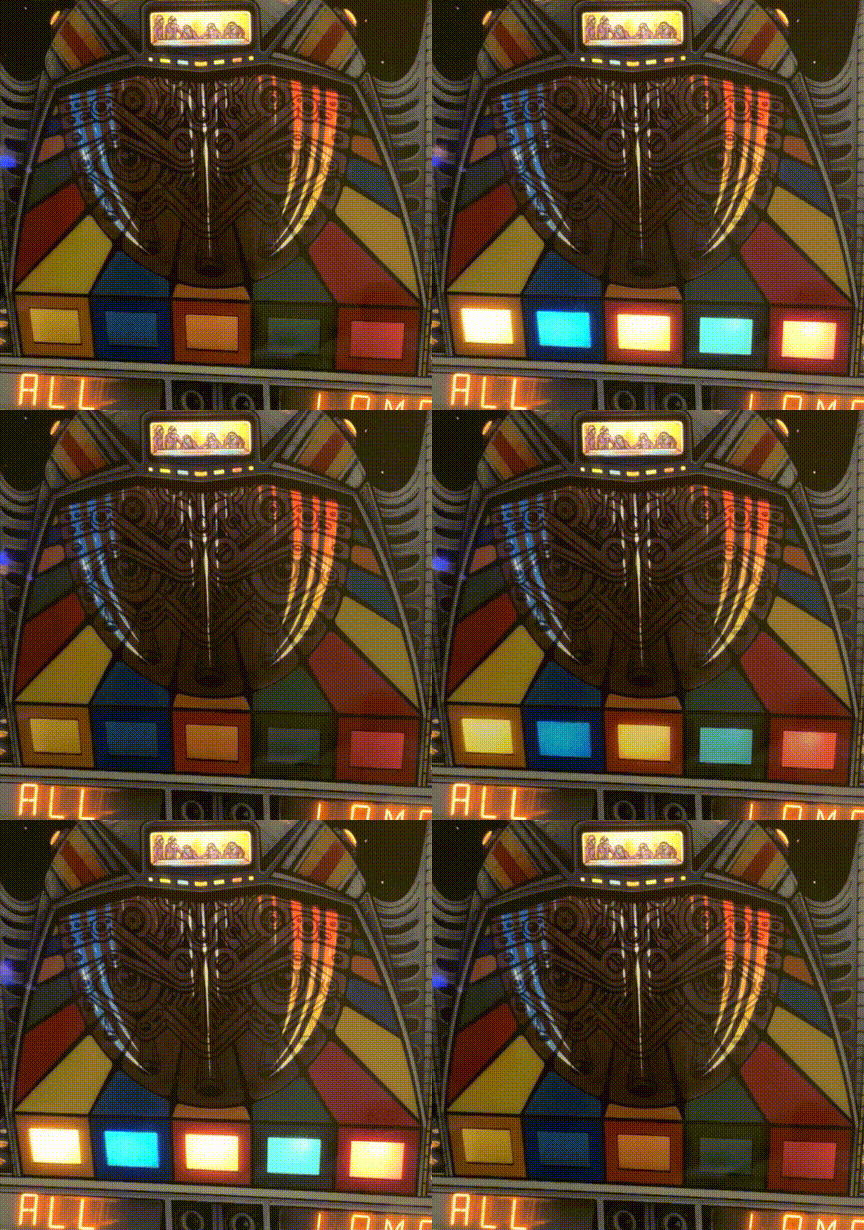
Made a couple of composite images to aid in GI LED planning.

getaway backbox GI planning (resized).pnggetaway backbox GI planning (resized).pngpinbot backglass GI planning (resized).pngpinbot backglass GI planning (resized).png
#45 4 years ago
Quoted from spblat:

Made a couple of composite images to aid in GI LED planning.

Well, I don't recall seeing this done before but what a great idea to aid in planning out the LED conversion! Assuming you just applied a transparency to the translite photo and slid it over the lightboard photo - any special effort to do the alignment or just eyeball it?

#46 4 years ago
Quoted from ReadyPO:

Well, I don't recall seeing this done before but what a great idea to aid in planning out the LED conversion! Assuming you just applied a transparency to the translite photo and slid it over the lightboard photo - any special effort to do the alignment or just eyeball it?

Yep! Took two photos from roughly the same spot, one with translite off. Used Pixelmator to make one layer slightly transparent, Shifted and rotated a layer until it was mostly aligned, and played with brightness and contrast on the layer without the translite. Lots of experimenting and voila!

#47 4 years ago

I happen to have both of those games and STTNG, and I see you have STTNG too - how about you do that one too

#48 4 years ago
Quoted from ReadyPO:

I happen to have both of those games and STTNG, and I see you have STTNG too - how about you do that one too

ok

tng backbox planning (resized).pngtng backbox planning (resized).png
#49 4 years ago

Nice - thanks!

#50 4 years ago

Pinbot before and after. Not sure it domes through in the pictures but I really like the way I’ve accentuated the reds and blues with cooler and warmer LEDs. 2SMDs under the logo, retro SMDs here and there. Full details at https://docs.google.com/spreadsheets/d/1yi1aMKf22rPwLJtvBYuXuRHJPTCvngrHMzTXRGXzllA

9DA9F969-A82E-481F-A7BF-7B71AAAE6BF0 (resized).jpeg9DA9F969-A82E-481F-A7BF-7B71AAAE6BF0 (resized).jpegBCEAF6C7-3D9A-446E-889B-6A39821429CD (resized).jpegBCEAF6C7-3D9A-446E-889B-6A39821429CD (resized).jpeg
Promoted items from Pinside Marketplace and Pinside Shops!
From: $ 29.00
From: $ 179.95
Gameroom - Decorations
pinballmod
 
$ 10.00
Playfield - Protection
UpKick Pinball
 
$ 9.95
Eproms
Pinballrom
 
$ 14.95
Playfield - Toys/Add-ons
ULEKstore
 
$ 17.95
Playfield - Toys/Add-ons
ULEKstore
 
$ 85.00
Cabinet - Other
Pinball Haus
 
Wanted
Machine - Wanted
Newcastle, OK
$ 79.99
Cabinet - Armor And Blades
PinGraffix Pinside Shop
 
$ 145.00
Cabinet - Other
Pinball Haus
 
5,500 (OBO)
Machine - For Sale
San Martin, CA
$ 38.00
Cabinet - Other
Pinball Mod Co.
 
$ 18.95
Eproms
Pinballrom
 
$ 1.00
Pinball Machine
Pinball Alley
 
Wanted
Machine - Wanted
Pleasanton, CA
6,300 (OBO)
Machine - For Sale
Newtown, CT
$ 11.95
Playfield - Toys/Add-ons
ULEKstore
 
$ 30.00
Playfield - Other
YouBentMyWookie
 
$ 20.00
Playfield - Plastics
G-Money Mods
 
$ 45.00
Playfield - Toys/Add-ons
Just 3D Mods
 
$ 599.00
Cabinet - Toppers
Juz PINBALL Mods
 
$ 29.95
$ 19.99
Eproms
Matt's Basement Arcade
 
$ 10.00
Playfield - Protection
UpKick Pinball
 
$ 27.95
Eproms
Pinballrom
 
$ 79.99
Cabinet - Armor And Blades
PinGraffix Pinside Shop
 
There are 74 posts in this topic. You are on page 1 of 2.

Reply

Wanna join the discussion? Please sign in to reply to this topic.

Hey there! Welcome to Pinside!

Donate to Pinside

Great to see you're enjoying Pinside! Did you know Pinside is able to run without any 3rd-party banners or ads, thanks to the support from our visitors? Please consider a donation to Pinside and get anext to your username to show for it! Or better yet, subscribe to Pinside+!


This page was printed from https://pinside.com/pinball/forum/topic/spblat-s-game-room/page/1 and we tried optimising it for printing. Some page elements may have been deliberately hidden.

Scan the QR code on the left to jump to the URL this document was printed from.