(Topic ID: 190820)

Shadow Refresh

By Lamprey

6 years ago


Topic Heartbeat

Topic Stats

  • 24 posts
  • 7 Pinsiders participating
  • Latest reply 6 years ago by Aurich
  • Topic is favorited by 2 Pinsiders

You

Linked Games

Topic Gallery

View topic image gallery

left_ramp_before (resized).jpg
left_ramp_after (resized).jpg
right_ramp_before (resized).jpg
right_ramp_after (resized).jpg
battlefield_no_light (resized).jpg
battlefield_light (resized).jpg
playfield_clean_1 (resized).jpg
13 playfield_dirty_1 (resized).jpg
playfield_right_side_lower (resized).jpg
playfield_right_ramp_top_down (resized).jpg
playfield_middle_upper (resized).jpg
playfield_left_ramp_top_down (resized).jpg
playfield_front_full_with_all_light (resized).jpg
playfield_left_ramp (resized).jpg
playfield_front_full_no_light (resized).jpg
playfield_front_flippers_w_light (resized).jpg
#1 6 years ago

I purchased my first pinball - The Shadow - several (8) months ago that needed some TLC. I wasn't sure to what level I should attempt "restoring" it with my limited knowledge of pinball. I have, however, restored several arcade machines. So, I wasn't too worried about fixing the cabinet. But, I wasn't too sure if I should do anything with the playfield as it only really has one issue.

In hind-sight, with the time it took to do certain things, I probably should have done the playfield too. I may do it in the future...

I am hesitant to post this is as I had an issue with an SD card in my camera and lost a bunch of pictures. Mostly, ones pertaining to fixing of the cabinet. But, I figures what the heck, so I'm posting anyway.

Anyway on to the machine as I bought it.

The front-right corner was coming apart:

The left corner (bottom) was damaged a bit:

The right side had a bunch on small holes in it:

The start button was cracked in half:

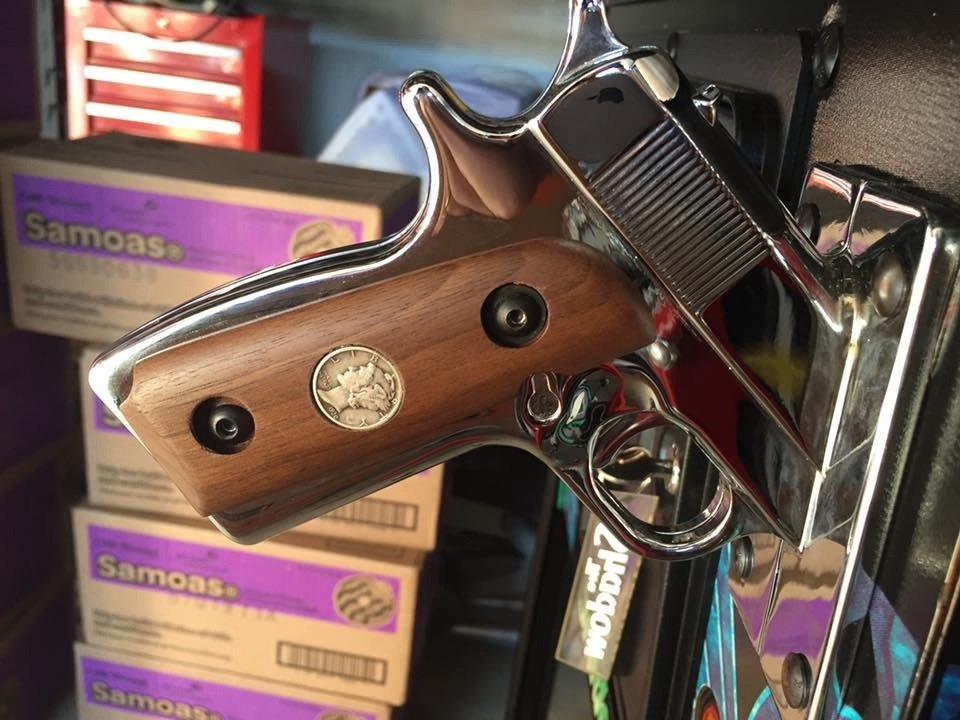
The gun was tarnished/rusted:

The buttons where wrong, one set was clear with LED lighting:

1 cab_left_front (resized).jpg1 cab_left_front (resized).jpg

3 cab_front_gun (resized).jpg3 cab_front_gun (resized).jpg

2 cab_front_start_button (resized).jpg2 cab_front_start_button (resized).jpg

5 cab_right_closeup (resized).jpg5 cab_right_closeup (resized).jpg

4 cab_right (resized).jpg4 cab_right (resized).jpg

6 cab_right_bottom_corner (resized).jpg6 cab_right_bottom_corner (resized).jpg

7 cab_right_top_corner (resized).jpg7 cab_right_top_corner (resized).jpg

8 cab_left (resized).jpg8 cab_left (resized).jpg

9 cab_left_bottom_corner (resized).jpg9 cab_left_bottom_corner (resized).jpg

#2 6 years ago

Here are some pics of the back box and play field:

10 backbox_left (resized).jpg10 backbox_left (resized).jpg

13 playfield_dirty_1 (resized).jpg13 playfield_dirty_1 (resized).jpg

11 backbox_right (resized).jpg11 backbox_right (resized).jpg

12 backbox_top_corner (resized).jpg12 backbox_top_corner (resized).jpg

14 playfield_dirty_sanctum (resized).jpg14 playfield_dirty_sanctum (resized).jpg

15 playfieldy (resized).jpg15 playfieldy (resized).jpg

#3 6 years ago

Again I'm missing pictures of the cabinet repairs, but here are a couple of the back box and the cabinet in progress:

And some random rusty bolts

16 backbox_stripped (resized).jpg16 backbox_stripped (resized).jpg
17 cab_stripped_glued (resized).jpg17 cab_stripped_glued (resized).jpg
18 bolts_rusty (resized).jpg18 bolts_rusty (resized).jpg

backbox with bondo (resized).jpgbackbox with bondo (resized).jpg

#4 6 years ago

Here are a few pics of the metal part dirty

cab_screen_dirty (resized).jpgcab_screen_dirty (resized).jpg

playfield_metal_original (resized).jpgplayfield_metal_original (resized).jpg

metal_origial (resized).jpgmetal_origial (resized).jpg

#5 6 years ago

Here is the metal cleaned and, in some cases, plated:

cab_screen_clean (resized).jpgcab_screen_clean (resized).jpg

playfield_metal_cleaned (resized).jpgplayfield_metal_cleaned (resized).jpg

metal_after_plating (resized).jpgmetal_after_plating (resized).jpg

#6 6 years ago

Sadly I lost the pic of the bolts all together finished, but here are two pics of the bolts all rusty and with the rust buffed off:

bolts_original (resized).JPGbolts_original (resized).JPG

bolts_smoothed (resized).jpgbolts_smoothed (resized).jpg

#7 6 years ago

Here are pics of the cab painted and decaled. One picture shows the right corner I glued back together.

1 cab_right_top_corner_glued (resized).jpg1 cab_right_top_corner_glued (resized).jpg

2 cab_painted (resized).jpg2 cab_painted (resized).jpg

3 cab_left_angle_decaled (resized).jpg3 cab_left_angle_decaled (resized).jpg

#8 6 years ago

Here is the back box with the back stencil and the side stickers.

4 backbox_back (resized).jpg4 backbox_back (resized).jpg

5 backbox_right_side (resized).jpg5 backbox_right_side (resized).jpg

#9 6 years ago

Here is the cab re-assembled and some close ups of the replaced buttons and gun. For the gun I made custom white-pearl grips. The legs has a bit of rust, mostly on the inside. I evapo-rusted them and buffed them up a touch.

6 cab_front_coin_door (resized).jpg6 cab_front_coin_door (resized).jpg

7 cab_front_right_gun (resized).jpg7 cab_front_right_gun (resized).jpg

8 cab_left_front_side (resized).jpg8 cab_left_front_side (resized).jpg

#10 6 years ago

Here are some playfield shots. I re-did all the lights with LEDs. I tried to keep true to the original by using warm white lights. I used a couple of accent colors to transition the middle of the play field to the back. All the rubber was changed to purple and the flippers changed to gold (to match the other parts of the machine). Added he gold side mirrors to add a little bling. I also added 4 pot lights to help accent the gold/brass plating as well as make it playable in the dark.

Additionally, I tried to replace all the visible screws/nuts with brass to further accentuate the existing brass.

I was never really able to get a good shot with the lights on. All the shots make the lights look too white, they appear much warmer in person.

playfield_front_flippers_w_light (resized).jpgplayfield_front_flippers_w_light (resized).jpg
playfield_front_full_no_light (resized).jpgplayfield_front_full_no_light (resized).jpg
playfield_left_ramp (resized).jpgplayfield_left_ramp (resized).jpg
playfield_front_full_with_all_light (resized).jpgplayfield_front_full_with_all_light (resized).jpg
playfield_left_ramp_top_down (resized).jpgplayfield_left_ramp_top_down (resized).jpg
playfield_middle_upper (resized).jpgplayfield_middle_upper (resized).jpg
playfield_right_ramp_top_down (resized).jpgplayfield_right_ramp_top_down (resized).jpg
playfield_right_side_lower (resized).jpgplayfield_right_side_lower (resized).jpg

#11 6 years ago

Beautiful Job!
Did you restore the playfield?

#12 6 years ago

Nice job

#13 6 years ago
Quoted from bballfan:

Beautiful Job!
Did you restore the playfield?

It looks like there's a full playfield protector on there, which looks real nice and glossy.

#14 6 years ago
Quoted from bballfan:

Beautiful Job!
Did you restore the playfield?

I didn't.

There really only is one blemish no the play field so I decided not to do anything other than clean it up and buff it. Additionally, as noted by Rum-Z, there is a full playfield protector on their too.

Since this was my first restore I was a little hesitant to tackle painting or decaling and then clearing the playfield. But, in the future I think I'd be willing to tackle that job now that I have some experience disassembling and reassembling the majority of the playfield.

Mostly the playfield was just dirty and had a bunch of wax on it. Here is are before and after pics on one spot. I was able to buff out the ball marks in this area, but don't have a pic of that.

13 playfield_dirty_1 (resized).jpg13 playfield_dirty_1 (resized).jpg

playfield_clean_1 (resized).jpgplayfield_clean_1 (resized).jpg

#15 6 years ago

Always love seeing a clean Shadow!

Any details on how you did the pearl gun grips? I made one attempt at my own, didn't care for the end result and scrapped it. Now I have a chromed gun with custom wooden grips that I embedded 1930 silver dimes in (year The Shadow was first on radio), but the pearl grips are rad and more theme accurate.

#16 6 years ago
Quoted from Aurich:

Always love seeing a clean Shadow!
Any details on how you did the pearl gun grips? I made one attempt at my own, didn't care for the end result and scrapped it. Now I have a chromed gun with custom wooden grips that I embedded 1930 silver dimes in (year The Shadow was first on radio), but the pearl grips are rad and more theme accurate.

Indeed!

I struggled with how to tackle the grips myself. First I just ordered some 1911 grips, but found out that the holes don't match up. So, I looked around for some blanks. You can buy a "chunk" of the white pearl used for gun grips, but I didn't trust myself to mold them without messing them up. So, ended up getting a couple pair from Tombstone Gun Grips modeled after 1911 grips (http://www.tombstonegrips.com/mm5/merchant.mvc?Screen=PROD&Store_Code=TGG&Product_Code=Blank_147b&Category_Code=Blanks). I emailed Dave, at Tombstone, and he said to make a note that I didn't want holes drilled, since the 1911's don't line up The Shadow holes. I then drilled them myself using a combination of regular bits and forstner bits. Additionally, I tried to make the notches match up to the stock ones.

I didn't ask Dave, but I know he takes traces of grips to make sure everything lines up, so you might be able to trace the stock grips and he could probably do it all for you, not 100% though given they way the bolts recess into the handle.

#17 6 years ago
Quoted from Lamprey:

I emailed Dave, at Tombstone, and he said to make a note that I didn't want holes drilled, since the 1911's don't line up The Shadow holes. I then drilled them myself using a combination of regular bits and forstner bits.

Smart stuff! I'm happy with my custom grips, don't think I'll change them. Here's a photo, dunno how to re-embed it from a Pinside post

https://images.pinside.com/e/5e/e5e426cd4530ec5e950be768000da23908403998/resized/large/e5e426cd4530ec5e950be768000da23908403998.jpg

#18 6 years ago

Oh I forgot to add, I installed the LED OCD as to retain the fade in fade out look of the incandescent lights. It looks soooooo much better with that than the instant on/off of the LED without it.

Also, I picked up the "battle field light mod" from GRUMPY. Here are a couple of pics without light and with light:

battlefield_light (resized).jpgbattlefield_light (resized).jpg

battlefield_no_light (resized).jpgbattlefield_no_light (resized).jpg

#19 6 years ago
Quoted from Aurich:

Smart stuff! I'm happy with my custom grips, don't think I'll change them. Here's a photo, dunno how to re-embed it from a Pinside post
https://images.pinside.com/e/5e/e5e426cd4530ec5e950be768000da23908403998/resized/large/e5e426cd4530ec5e950be768000da23908403998.jpg

Yeah, I don't much need to change those out. They look pretty damn good to me!

#20 6 years ago

Looking good on the restoration! I'm always awed by the work some of you guys do. Was there any Sanctum wear when you got it?

#21 6 years ago
Quoted from FatPanda:

Looking good on the restoration! I'm always awed by the work some of you guys do. Was there any Sanctum wear when you got it?

Not very much. If you look at my second post about the 5th pic, there it shows the sanctum. I buffed what little of a "scuff" there was away.

Here is a direct link:
https://images.pinside.com/7/1e/71e7381932df68bc07948a435c7fdc6b8e13473c/resized/large/71e7381932df68bc07948a435c7fdc6b8e13473c.jpg

#22 6 years ago

Here are a couple before and after pics of the ramps. Probably not a real fair comparison as I didn't have the lights on in the before shots..

right_ramp_after (resized).jpgright_ramp_after (resized).jpg

right_ramp_before (resized).jpgright_ramp_before (resized).jpg

left_ramp_after (resized).jpgleft_ramp_after (resized).jpg

left_ramp_before (resized).jpgleft_ramp_before (resized).jpg

#23 6 years ago
Quoted from Aurich:

Smart stuff! I'm happy with my custom grips, don't think I'll change them. Here's a photo, dunno how to re-embed it from a Pinside post
https://images.pinside.com/e/5e/e5e426cd4530ec5e950be768000da23908403998/resized/large/e5e426cd4530ec5e950be768000da23908403998.jpg

Damn bro, you like them cookies or what?

And nice grips.

#24 6 years ago
Quoted from radium:

Damn bro, you like them cookies or what?
And nice grips.

We're the central storage for the whole troop of 30 or so girls, during cookie season I give up the garage for a bit. I'm gluten free, can't even eat them!

Promoted items from Pinside Marketplace and Pinside Shops!
$ 54.95
Eproms
Pinballrom
 
From: $ 399.95
Boards
PinSound
 
$ 78.50
Cabinet - Shooter Rods
Pinball Haus
 
$ 49.99
Cabinet - Toppers
Lighted Pinball Mods
 
€ 38.00
Playfield - Toys/Add-ons
PPmods
 
$ 43.00
Playfield - Toys/Add-ons
Pinball Mod Co.
 
5,800 (Firm)
Machine - For Sale
Thornton, CO
From: $ 17.99
Eproms
Matt's Basement Arcade
 
$ 259.99
Cabinet - Toppers
Lighted Pinball Mods
 
$ 29.50
Playfield - Plastics
Pinball Haus
 
$ 58.00
Lighting - Interactive
Pinball Mod Co.
 
€ 8.50
Flipper Parts
Pin-Decals
 
$ 30.00
Playfield - Other
YouBentMyWookie
 
$ 5.00
Playfield - Decals
Pinball Haus
 
$ 16.00
Playfield - Other
Slap Save Creations
 
$ 45.00
Playfield - Toys/Add-ons
Pinball Mod Co.
 
€ 47.00
Playfield - Toys/Add-ons
PPmods
 
$ 329.99
Lighting - Other
Lighted Pinball Mods
 
$ 69.50
Boards
Pinball Haus
 
6,800 (OBO)
Machine - For Sale
Denver, CO
From: $ 35.00
Playfield - Decals
Pinball Invasion
 
7,250 (Firm)
Machine - For Sale
Hamilton, ON
€ 8.50
Flipper Parts
Pin-Decals
 
$ 9.95
Eproms
Pinballrom
 
€ 47.00
Playfield - Toys/Add-ons
PPmods
 
5,200
Machine - For Sale
Buffalo, NY

Reply

Wanna join the discussion? Please sign in to reply to this topic.

Hey there! Welcome to Pinside!

Donate to Pinside

Great to see you're enjoying Pinside! Did you know Pinside is able to run without any 3rd-party banners or ads, thanks to the support from our visitors? Please consider a donation to Pinside and get anext to your username to show for it! Or better yet, subscribe to Pinside+!


This page was printed from https://pinside.com/pinball/forum/topic/shadow-refresh and we tried optimising it for printing. Some page elements may have been deliberately hidden.

Scan the QR code on the left to jump to the URL this document was printed from.