(Topic ID: 298861)

Seawitch from scratch, Allentown edition (Bally/Stern multi-game platform)

By gdonovan

2 years ago


Topic Heartbeat

Topic Stats

  • 1,881 posts
  • 61 Pinsiders participating
  • Latest reply 2 days ago by gdonovan
  • Topic is favorited by 57 Pinsiders

You

Linked Games

Topic Gallery

View topic image gallery

20240417_063054 (resized).jpg
20240417_062508 (resized).jpg
Pinside_forum_8128739_3858925 (resized).jpg
Pinside_forum_8128739_3858924 (resized).jpg
20240414_120632 (resized).jpg
20240414_120610 (resized).jpg
20240407_132248 (resized).jpg
20240405_065536 (resized).jpg
20240407_124243 (resized).jpg
20240407_123430 (resized).jpg
20240407_122531 (resized).jpg
20240405_065541 (resized).jpg
20240404_182152 (resized).jpg
20240404_065347 (resized).jpg
20240403_081625 (resized).jpg
20240402_201304 (resized).jpg

Topic index (key posts)

33 key posts have been marked in this topic, showing the first 10 items.

Display key post list sorted by: Post date | Keypost summary | User name

Post #142 Converting Bally drop target assemblies for use with Stern targets. Posted by gdonovan (2 years ago)

Post #213 Converting Data East LAH flippers to "classic Stern" use. Posted by gdonovan (2 years ago)

Post #618 Seawitch, first gameplay video. Posted by gdonovan (2 years ago)

Post #639 3d printed lamp shields Posted by gdonovan (2 years ago)

Post #690 Cabinet decal work starts. Posted by gdonovan (2 years ago)

Post #792 Seawitch, second gameplay video showing flasher operation. Posted by gdonovan (2 years ago)

Post #794 Centaur "module" section begins. Posted by gdonovan (2 years ago)

Post #796 Seawitch portion of project is complete. Posted by gdonovan (2 years ago)

Post #802 Seawitch at Pintastic 2021. 500+ games in less than 48 hours! Posted by gdonovan (2 years ago)


Topic indices are generated from key posts and maintained by Pinside Editors. For more information, or to become an editor yourself read this post!

You're currently viewing posts by Pinsider gdonovan.
Click here to go back to viewing the entire thread.

1,360 posts in this topic match your search for posts by gdonovan. You are on page 1 of 6.
15
#1 2 years ago

Edit: Title has been adjusted to reflect that this particular project is not only the refurbishment of a Seawitch playfield but also the building of a universal Bally/Stern cabinet that will run any Bally or Stern standard playfield from 1977 to 1986. Pretty much any MPU-100, MPU-200, -17 or -35 game that is supported by Alltek or Weebly MPU's. In the future I'll also be dabbling with the Arduino Nano add on for rules changes and upgraded sound effects.

--------------------------------------------------------------------------

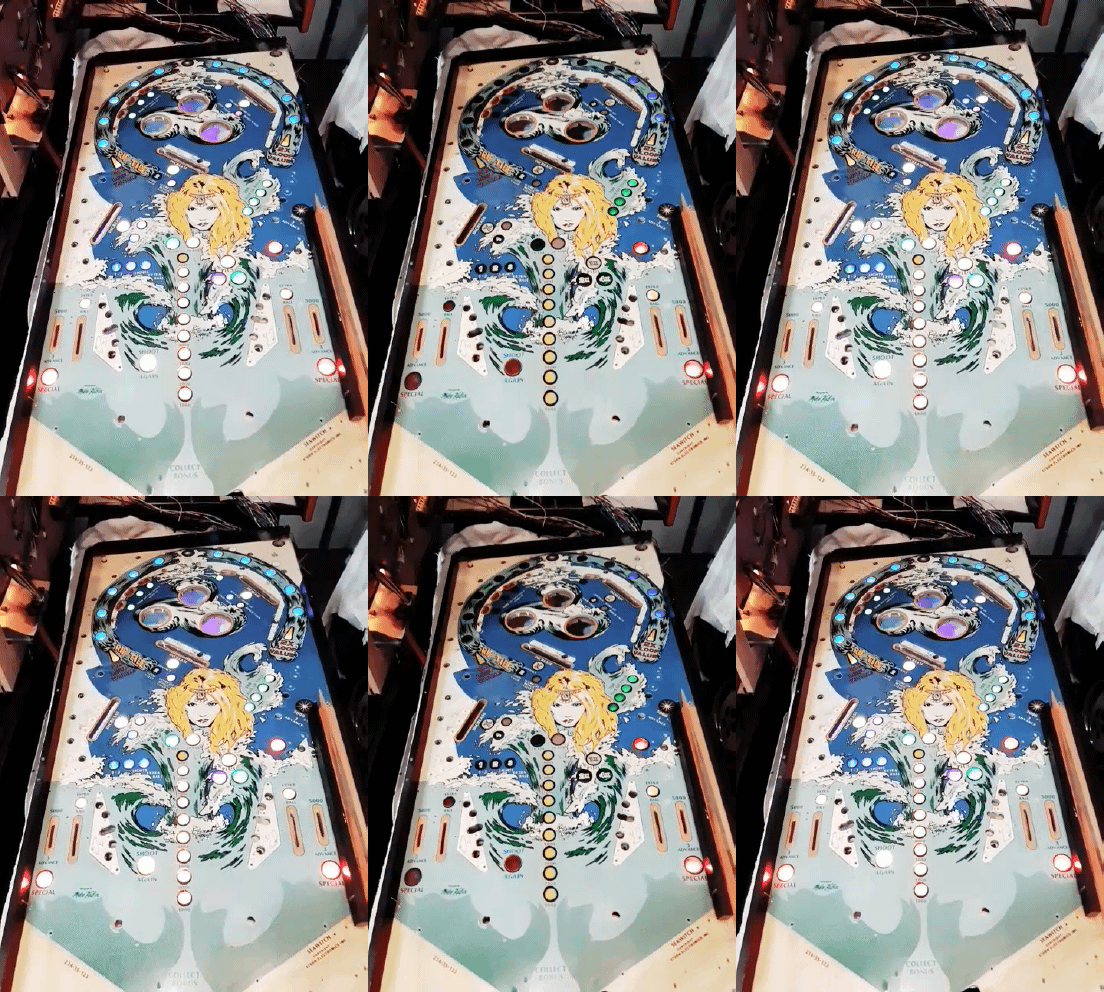
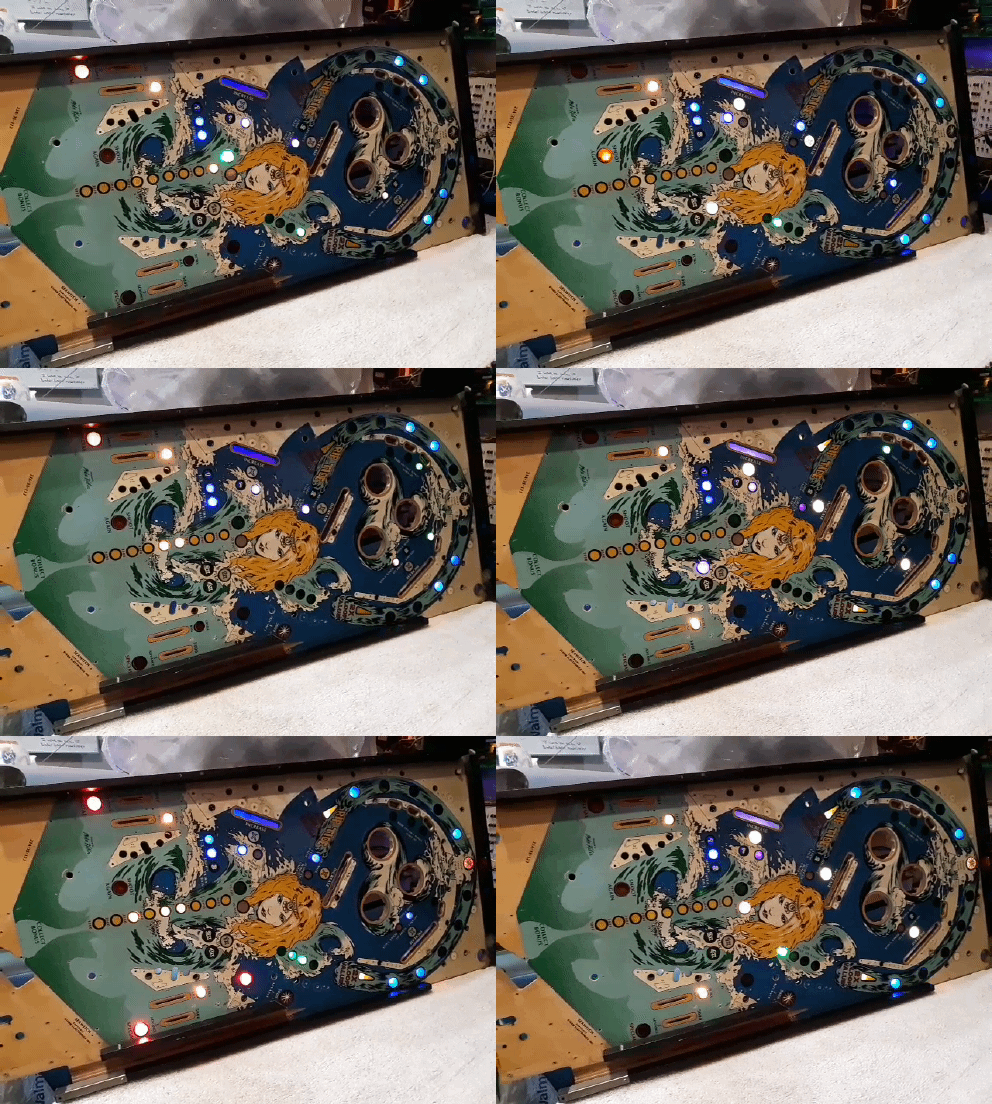
This thread is documenting a Seawitch being built with nothing to start with but a $60 wall-hanger playfield purchased by random chance while leaving Allentown (in the parking lot no less) and a backglass obtained at the same time. No classic Stern pin was sacrificed in the collecting of parts by me to make this pin a reality but surely when I'm done there are those who wish I had! I'll freely admit to looking but there is nothing trashed out there worth my time for sale.

My stash of parts collected over the years is going to take a beating.

------------------------------------------------------

fa27f6bc50f (resized).jpgfa27f6bc50f (resized).jpg
37538611ef2d21c6c1a4a15d76db55c85fc13af6 (resized).jpg37538611ef2d21c6c1a4a15d76db55c85fc13af6 (resized).jpg

#3 2 years ago

While formulating a plan I started on the playfield. A number of holes needed to be filled, areas touched up, etc.

The paint wear isn't hard to fix but ball swirl is pretty nasty. I even went as far as to start sanding down the factory coating with 800 grit before stopping. Currently I'm waiting for additional clear to arrive so I can fill in a few inserts, do some water slide decals, blending, paint the white ares, clearcoat and block flat.

Some difference in colors in the pictures is normal, its not done and clear coat will equalize the sheen differences.

The red 2X text on the left is getting water slide as is the bonus ladder text.

a51dc339eb6abea52471691d994635a4bc9f5671 (resized).jpga51dc339eb6abea52471691d994635a4bc9f5671 (resized).jpgc6e9b14499c1ea98a778f2aff220e4b6afc37bc3 (resized).jpgc6e9b14499c1ea98a778f2aff220e4b6afc37bc3 (resized).jpg

70936aab4208efea90de0c72af81686b54448c6e (resized).jpg70936aab4208efea90de0c72af81686b54448c6e (resized).jpg

#4 2 years ago

Parts start showing up! CPR plastics, some used drop target assemblies, Pinitech displays and a superb set of steel guides from Mantis.

Spring gate on the way from Cliffy!

0cc334dd54edf0b538d3504751a76904c36acf5f (resized).jpg0cc334dd54edf0b538d3504751a76904c36acf5f (resized).jpg89dd4bd1b43e19056ebfcec7f9ad9aea66798e66 (resized).jpg89dd4bd1b43e19056ebfcec7f9ad9aea66798e66 (resized).jpgc960534363da455bad451740a598f66ef8ebcc2a (resized).jpgc960534363da455bad451740a598f66ef8ebcc2a (resized).jpg

#5 2 years ago

What will be undoubtedly the most controversial item on this project... I'm using a Data East Laser War cabinet to house it. The cabinet came with a Secret Service I had purchased that the former owner was going to swap. The Secret Service cabinet was actually very repairable so the Laser War cabinet went up into the storage rack.. till last week.

It was total surprise to find out that the Seawitch glass fit PERFECT in the Laser War head. I added a channel in the bottom to retain the glass and away we go.

And so the die was cast.
2773e7f3653efe8df3f307f939230de665def0de (resized).jpg2773e7f3653efe8df3f307f939230de665def0de (resized).jpg

f4cd0cd1f70983f570f47e651c5bdfe64482fdf3 (resized).jpgf4cd0cd1f70983f570f47e651c5bdfe64482fdf3 (resized).jpg

#6 2 years ago

So last night my wife helped me disassemble a spare Last Action Hero harness that was left over from a playfield swap and I started making a harness from scratch for Seawitch. The Stern wiring diagrams are horrible! I'm actually maintaining factory color codes and use as documented in the manual and it might be the only Seawitch to have all the right colors "as documented"

The harness is being scratch made 100%, all to factory code. Its also being done in such a way that should the opportunity presents it self in the future the playfield can be swapped into an actual Stern cabinet and just plug right in.

Some notes from resident Bally/Stern guru:

1) the coin door/cabinet wiring is that Stern shifted all their switches onto strobe #0 - no strobe #1 running into the cabinet/door.

2) The second (memory clear) switch on the coin door just replicates SW33 from the MPU board so you can zero audits without opening up the backbox.

3) The volume control is a 25k logarithmic pot - different to Bally and it's not connected in series with the speaker like Bally.

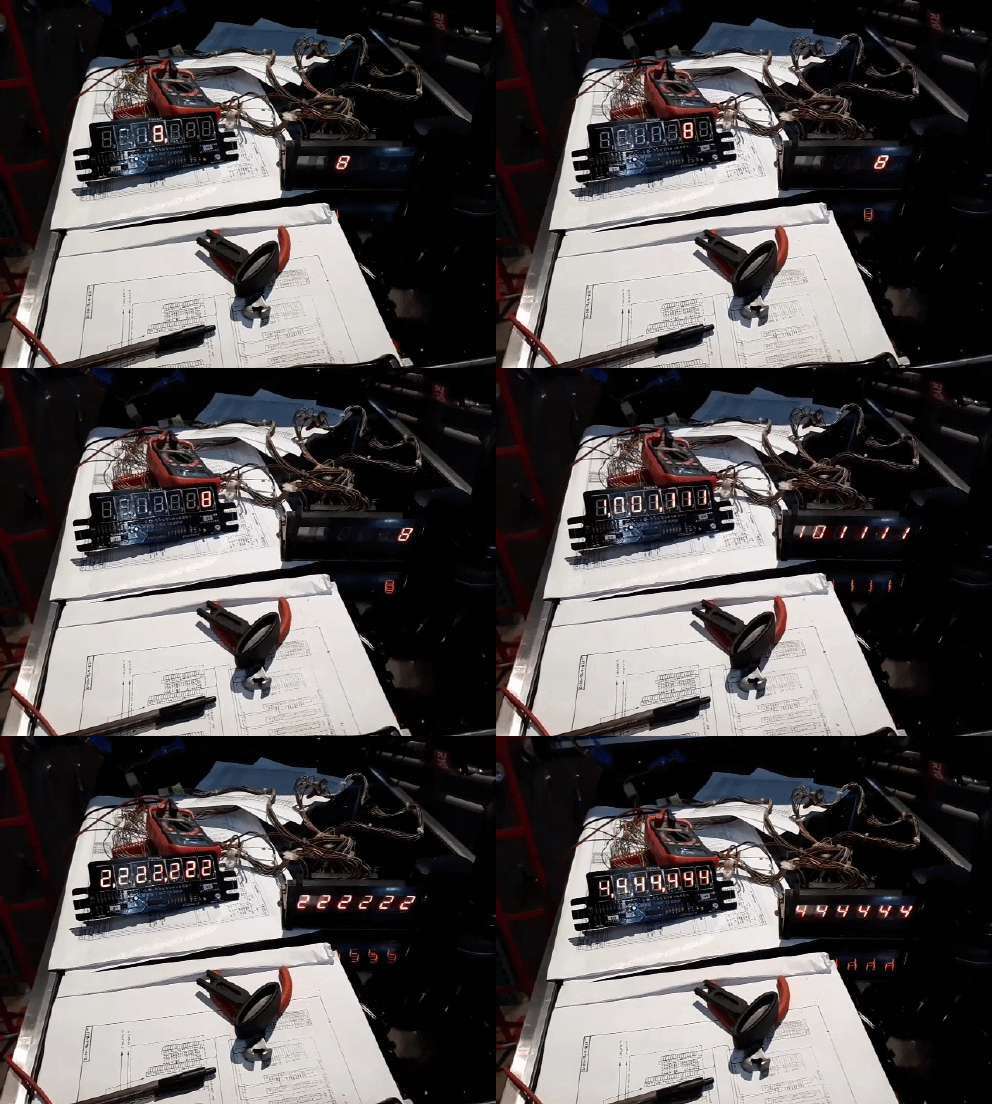
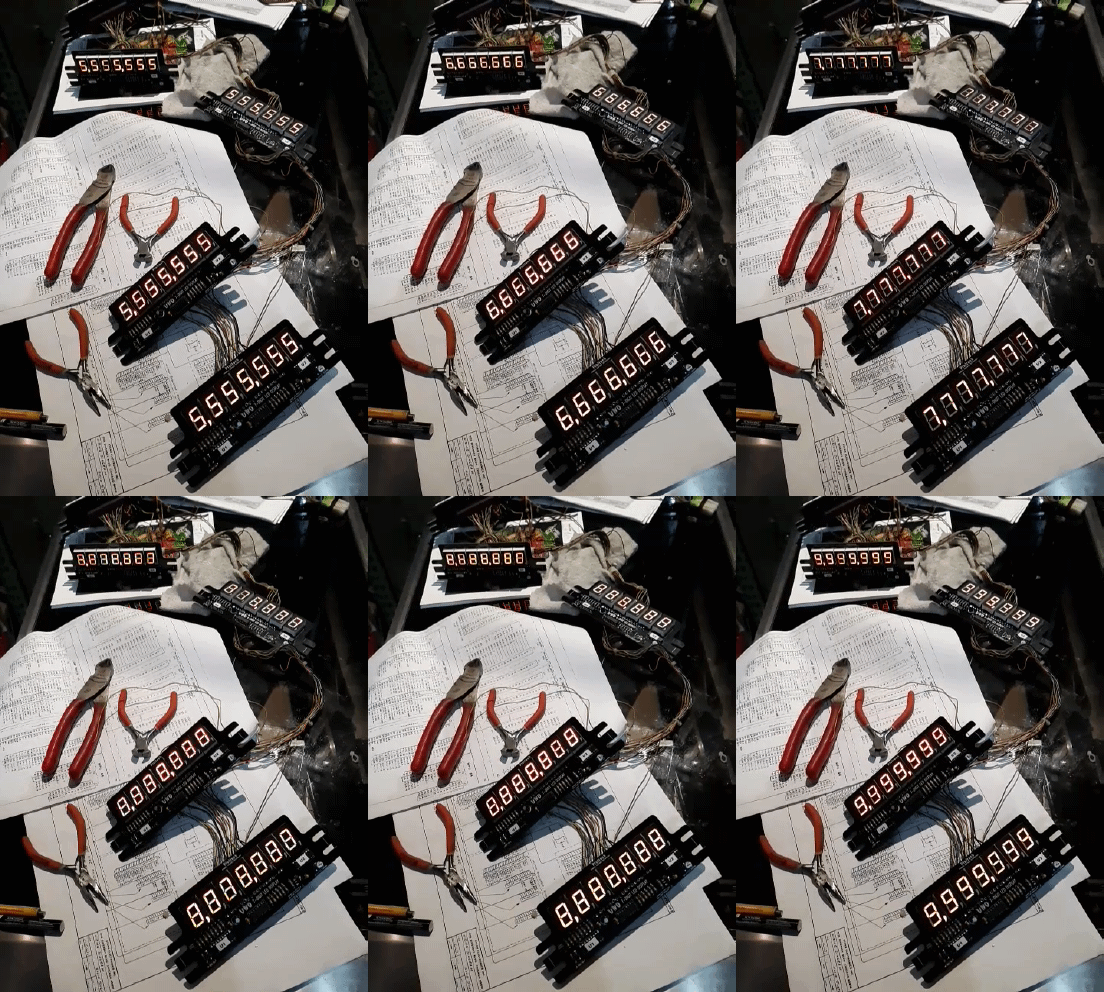
4) displays, the 7th (millions) digit enable signal is on different pins at the display connector comparing Bally (pin 12) vs Stern (pin 11). The Pinitech displays should handle both.

I take great amusement know a fair portion of this Seawitch is actually using Stern parts.. although from a different era Stern machine (Data East)

839aa6546cf23979e51aeb79bbb9bb9d3a2693aa (resized).jpg839aa6546cf23979e51aeb79bbb9bb9d3a2693aa (resized).jpgdcfdc5a12ce23354f91a619965ef58ebfd1a3814 (resized).jpgdcfdc5a12ce23354f91a619965ef58ebfd1a3814 (resized).jpg

#7 2 years ago

So for the rest of this build..

MPU and SB-300 sound board are from Weebly, have a spare Stern solenoid and lamp driver boards that I had refurbished months ago for spares and the displays are Pinitech 7 digit single PCB. For the moment I'm borrowing the transformer and A2 power board from Flash Gordon and will swap it out when a suitable replacement comes across my path. FG is being bogged down with playfield work and there is still much to do in other areas before the transformer is required back.

Proper Stern spec volume control is already on the way from Ebay.

For the cabinet a DE new coin door, DE shooter assembly and other odds and ends are in route from Pinball Life and Marco.

Playfield mechs are going to be a mix of the Stern and Bally drop mechs you already have seen, Last Action Hero lower flipper mechs and sling kickers with Stern coils and new upper Stern flipper mechs from Pinball Life. Poppers are drop in units also from Pinball Life with proper Stern classic coils.

The missing wire lane guides are going to be made from stainless wire, already had practice on Flash Gordon making them from scratch.

The missing carriage bolts for various posts on the playfield are being replaced with t-nuts and threaded shoulder posts.

a40461cbf36cdaec933c7598ca85c821b9142b4b (resized).jpga40461cbf36cdaec933c7598ca85c821b9142b4b (resized).jpg
#8 2 years ago

The only apron I have to work with, going to repaint and stencil with Stern graphics.

20210818_082109 (resized).jpg20210818_082109 (resized).jpg
#9 2 years ago

I'm aiming to have this beast at Pintastic this fall, if all goes well I'll have a rattlecan paint job on it and might even do some wood trim work on the head to make it look even more like a classic Stern.

Been flirting with buying a Cameo vinyl cutter to make my own stencils for cab and playfield work, this might be the project that pushes me over the edge.

#11 2 years ago
Quoted from cottonm4:

About the only part of my DE pin that is DE is the sling shot bracket. Everything else on a DE has Gary Stern and Stern Electronics name written all over. Need a lockdown bar and receiver? Data East parts fit right up .

Actually might be using a Bally unit as that is what is available.

Current legs of a Bally too!

12
#14 2 years ago
Quoted from sulli10:

Cool project! Always fun to find a use for those parts lying around the pin room .

Good thing.

I have a Bally Supersonic at work watching nervously, good thing it is in too nice a condition to molest and I have such an extra pile of parts to work with. The residents love it!

e8ff2bf2f37c1486ff29f9a0735e8d50bbcad7ba (resized).jpge8ff2bf2f37c1486ff29f9a0735e8d50bbcad7ba (resized).jpg
#16 2 years ago
Quoted from zacaj:

How exactly are you going to make the coils work? Classic Stern coils are a different size, and modern stern/de coils are single wound. Why not just order the proper flipper mechs from pinball life?

1) I already own the 2 flipper mechs, I'd run 4 DE flipper mechs if I had them.

2) Already ordered the 2 correct Stern coils and double stack high current EOS switches.

The DE mechs already have EOS switches and mounts, trivial problem swapping coils and switches.

#17 2 years ago

Let's talk backglass.

Flakey but I have touched up much, much worse. Currently on the back burner while banging away on wiring. Depending on how it comes out I might seek a new one out, I'm funny about backglasses.

20210818_175242 (resized).jpg20210818_175242 (resized).jpg20210818_175826 (resized).jpg20210818_175826 (resized).jpg

#18 2 years ago

Last Action Hero coughs up a few more needed parts. Going to use the diode stand offs to mount the upper flipper resistors.

20210818_174851 (resized).jpg20210818_174851 (resized).jpg
#19 2 years ago

A Bally receiver and lockbar look viable, I'll know for sure once the DE coin door arrives and check clearances.

20210818_174516 (resized).jpg20210818_174516 (resized).jpg
#22 2 years ago

While waiting for some colored wire to arrive, moved over to rebuilding the GI circuit. No smoke yet! Should have GI done tomorrow.

20210818_191928 (resized).jpg20210818_191928 (resized).jpg
#23 2 years ago
Quoted from cottonm4:

Stern/ Data East pretty much coped Bally on just about everything. I think, but do not know, that Bally and Stern used the same lockbar shell.
You are really moving along fast on this project. Impressive for sure.

The Bally lockbar receiver isn't bad but I see why DE went with their own design as the release lever pivot bolt head is REALLY close to the radius of the door bezel. Matter of fact with the original door that is used on Laser War it would have crashed into for sure.

The later door I have on order don't have the squared off bezel so looks doable.

The benefit and curse of running two projects is when you get bogged down on one just shift to the other to keep momentum going. If I had a week off from work I could smoke this out rapidly just being held up on parts.

Everything is connected and has a snowball effect.

I was going to do waterslide decals on Gordon inserts but want to make stencils and paint them ideally.. Now that I'm doing Seawitch I want to make my own stencils for that so makes more sense to buy a Cameo Silhouette 4 for the cabinet and apron work. So Gordon most likely will get painted rather than waterslide insert keylines which will look nicer in my opinion.

2ae3fadb40f52e08a9eb29d4c3c8ab55accaa800 (resized).jpg2ae3fadb40f52e08a9eb29d4c3c8ab55accaa800 (resized).jpg500-5018-17 (resized).jpg500-5018-17 (resized).jpg
#25 2 years ago
Quoted from fnord:

Looking good I'll be following.
The Sanctum has a Seawitch if you ever need a reference for anything.

Thanks! James is good people. So far I have found most of the references I need on the board but will be asking for close ups on a few spots that I'm unsure of the color codes and locations.

#28 2 years ago
Quoted from 29REO:

On the Bally receiver, you could weld a pivot bolt to the receiver and counterbore the cabinet inside to provide for bolt head clearance. Which is what Bally should’ve done in the first place.

I had given that some thought, now that you bring it up I think that is what I'll do.

#30 2 years ago

Playfield GI done but the center socket! I missed that while making runs, easy fix.

20210819_092250 (resized).jpg20210819_092250 (resized).jpg
#31 2 years ago
Quoted from dasvis:

Seawitch is getting a lot of love as of late, good to see as it's a fun player.
I picked mine up for $100.00 a few years back.. one of my better LEP buys. Not working with normal wear but complete. Cleaned it up & repaired it plays great.

To be frank, Seawitch is the only classic Stern I have enjoyed playing at the shows. There isn't a lot there but it makes the most of it with unique layout and twitch fest action. I'm not a big fan of games with more than two flippers either so curious how long it holds my attention.

One facet of this project which I have not mentioned is I have an eye towards making this a universal Bally/Stern cabinet where playfields can be swapped out in minutes. The hardest part would be sound, though I might just add a dual pole switch to swap the speaker and volume control from Stern to Bally with a flip.

#32 2 years ago

Parts raining in today! Sound board with cables from Weebly and a bunch of smaller parts and coils from Marco.

#33 2 years ago

While working giving paint some thought. My initial thought was do a modified Seawitch stencil but currently leaning towards "Generic Stern" as utilized on Viper and Orbitor One in Seawitch colors.

Thoughts?

085bd9147c76cbc727a3a14227c20377099cdb5d (resized).jpg085bd9147c76cbc727a3a14227c20377099cdb5d (resized).jpge48152b5cb122f014d5dd242848ff027fb86e8fd (resized).jpge48152b5cb122f014d5dd242848ff027fb86e8fd (resized).jpgf647afc5c9597868dfed1daafb56231b4916a705 (resized).jpgf647afc5c9597868dfed1daafb56231b4916a705 (resized).jpg
#35 2 years ago
Quoted from A_Bord:

Unless this is a really faithful purist restore go for something unique. I really dig that general Stern look.

Well if I was a purist it would not be in a Data East cab

I could go either way, I'm just thinking of the swappable nature of what I'm building and it would look funny with a Meteor or Galaxy playfield and a Seawitch cabinet.

#40 2 years ago
Quoted from RatShack:

This is what I am doing with a Star Trek cabinet & Magic playfield. Interested in what you come up with. I had to add a coin button to run Stern.

I'm considering IDC style .156 connectors for the major assemblies and then using a patch cable to swap pin assignments.

Decided that is how I'm going to install the drop assemblies so that they can just be unplugged and removed with ease. I certainly have enough molex and z connectors about along with Trifurcon .156 contacts.

#42 2 years ago
Quoted from Quench:

Stenciling generic Stern on the side of the cabinet will look out of place when it's set up as a Bally game.

I'm open to suggestions. I did consider a Stern/Bally logo which would confuse the hell out of people.

Something like the Bally Midway cabs came to mind.

image-3 (resized).jpgimage-3 (resized).jpgimage-9 (resized).jpgimage-9 (resized).jpg
#44 2 years ago
Quoted from RatShack:

You don't play the cabinet. Function > Form.

I do like a good cabinet job though, give it more thought as we move closer to completion.

20210624_184438 (resized).jpg20210624_184438 (resized).jpg
#47 2 years ago
Quoted from BorgDog:

Or change Midway to Stern

Ding Ding Ding!

That where my head is after looking things over.

#48 2 years ago

Parts raining from sky today!

20210820_164945 (resized).jpg20210820_164945 (resized).jpg20210820_165405 (resized).jpg20210820_165405 (resized).jpg20210820_172806 (resized).jpg20210820_172806 (resized).jpg

#50 2 years ago
Quoted from cottonm4:

Make sure there are diodes on those Pinball Life pop bumpers.

How rude, no diodes. I would have caught it when wiring but still. Thanks!

#54 2 years ago

Work is tight in spots!

Dick move on Sterns part, they start recycling color codes! Upper spinner lamp and stand up lamp both yellow/green!

Can someone confirm double loop value (2× loop value on playfield) are hooked to each other, blue/white to A5J1-23? Thanks!

20210821_131538 (resized).jpg20210821_131538 (resized).jpg20210821_140511 (resized).jpg20210821_140511 (resized).jpg

#56 2 years ago

A few people have mentioned using this product for filling inserts, thought I'd give it a try.

20210821_163551 (resized).jpg20210821_163551 (resized).jpg20210821_163605 (resized).jpg20210821_163605 (resized).jpg
#57 2 years ago
Quoted from cottonm4:

I can confirm I have a blu-W wire crossing between of the double loop value arrows. And this Blu-W wire travels to LDA J1-23.
Per print, Spinner lamp is YEL-G and travels to LDA J3-2
Per print, Left SU target is Y-G or Yel-G and travels to LDA J1-7

Thank you sir!

#59 2 years ago
Quoted from cottonm4:

Interesting. Keep us posted on how this stuff works. Is this something that could brushed on insert flameouts to prevent further wear?

On that I don't know, I do know one or two people have done or tried doing complete playfields with the stuff. I'm more interested in just filling divots and insert edges. Manufacture states can be sanded in 24 hours and can be covered by auto clear or put over auto clear. I have no problem drawing some from a quart and using a dropper to fill. Very easy and controllable, more than Spraymax 2K is when doing fills.

#63 2 years ago

I'm at work today for the hurricane so the work station and printer goes brrrrr.

Here you go, half assed cover for Seawitch manual.

Just used MS paint or whatever is on this workstation, maybe I'll do something nicer when I'm home and have access to Photoshop.

catalog file (resized).jpgcatalog file (resized).jpg

20210822_090141 (resized).jpg20210822_090141 (resized).jpg

#65 2 years ago
Quoted from cottonm4:

I think I have an extra original Seawitch manual if you are interested. They used to show up on Ebay but I think they are getting harder to find now.
I have ordered reprints of many of the classic Stern manuals, and in some cases, find them blurry and hard to read.

Appreciate the offer but the downloadable copy works fine for me! I was just dinking around while at work. Quiet while the storm rolls in.

#66 2 years ago
Quoted from gdonovan:

A few people have mentioned using this product for filling inserts, thought I'd give it a try.
[quoted image][quoted image]

As of this morning this had set nicely, still not fully cured yet. I could fingerprint the surface with ease and it would
"fade out" in a minute or two. See what it is like tonight. Did not note any shrinking.

#68 2 years ago

These should be on the way soon.

IMG_5296 (resized).jpgIMG_5296 (resized).jpg
#69 2 years ago

Slightly less hacky manual cover.

NEW_MANUAL_COVER (resized).jpgNEW_MANUAL_COVER (resized).jpg
#70 2 years ago

Update on the Diamond clear: Still pretty soft, so much so I used a razor blade to dig an imperfection out of one of the inserts with ease and refilled with new product. Would recommend letting what you are filling to set at least a few days, the manufactures statement of 24 hours might be optimistic under best conditions.

For reference, the lamp wiring from the back edge of the playfield to lamp board connector is 64 inches. I came up with this number to work with after measuring the Mr. and Mrs. Pac-man harness that will be used in Flash Gordon and after test fitting in cabinet looks good. You might be able to go a little bit shorter but might be pushing your luck when standing the playfield upright.

The last of the parts I need will be on the way!

IMG_5302 (resized).jpgIMG_5302 (resized).jpg
#71 2 years ago

Shout out to board member Brian3120 whom I have purchased several parts from, great service!

Checked the clear I dipped into an insert a day and half ago, seems to solidified nicely. I don't think it is 100% yet but thats fine as I don't plan to sand it flat till I'm done with the bulk of the playfield wiring.

#73 2 years ago
Quoted from cottonm4:

Is that Bally or Stern lockbar and receiver?

Bally.

#74 2 years ago

I'm really hating Stern right now.

Not only do the wiring diagram have stuff missing but no 2 machine agree on color codes!

#76 2 years ago
Quoted from cottonm4:

Stuff missing ? Wait until you look at a Catacomb print.
What road blocks are you running into ?
Oh, are talking about how the inlane/outlanes on Big Game have different colors of wires than Seawitch does on its inlanes/ outlanes? That kind of stuff?

Colors in print not matching bits on playfield sockets and sometimes not matching pinwiki either.

I'm working through it. Have the four spinner lamps and 3 lamps for center drops and I can start pinning connector.

Flipping blue with white tracer used three times! Must have been on sale.

#78 2 years ago

Controlled lamps are complete.

I'll start pinning the connectors tomorrow so I can plug into Fireball for a light show but they have all been tested with a battery.

20210823_182913 (resized).jpg20210823_182913 (resized).jpg

#79 2 years ago

Last of the parts is on the way!

#81 2 years ago

Something I'm working on for the next poor schmuck.

LAMP CHART (resized).jpgLAMP CHART (resized).jpg
#84 2 years ago

If someone could be so kind to eyeball this to see if there is any errors so far, I'll work on it again at break time.

Runaway Special is the only one I'm unsure about.

Gary

LAMP CHART_V2 (resized).jpgLAMP CHART_V2 (resized).jpg
#85 2 years ago
Quoted from SantaEatsCheese:

It pleases me greatly to see this playfield going to good use. I think you bought this from me about 2 minutes after I bought it on a pre-arranged deal when it wouldn't fit in my van. It looks much better coming to life than it would on my wall. Congrats, my apologies to your wife, and good luck!

That was you? I would have chatted longer, though we were already pressed for time.

My wife is a trooper and most of the work is getting done when she is either at work or sleeping. I'm a VERY early riser and will amble off to the workshop while she is still out cold. This morning I started separating lamp runs into connectors J1/J2/J3 so I can start stripping and crimping. That when I had the idea it would be so nice to have a lamp chart and started banging away on that.

#87 2 years ago
Quoted from cottonm4:

Runway Special is a yellow wire in my Seawitch play field. I have not traced the wire to its connecting pin.

Is that particular insert Runway Special?

#89 2 years ago
Quoted from cottonm4:

It just says Special on my play field, but it is the Runway Special. Sitting behind that upper right hand flipper.

Thank you! Think I'm starting to get the hang of the MS paint tool.

LAMP CHART_V4 (resized).jpgLAMP CHART_V4 (resized).jpg
#91 2 years ago
Quoted from cottonm4:

By the time you get every insert market out on that drawing it risks being a clogged up mess.

I'm already working on reducing clutter on the print, work in progress!

Quoted from cottonm4:

I'm confused about "Game Over". This must be for the Game Over on the back box.

Yes there is several items for the backbox noted, which I'll expand on when I'm done going over the playfield.

Version 5

LAMP CHART_V5 (resized).jpgLAMP CHART_V5 (resized).jpg
#93 2 years ago
Quoted from slochar:

I know you're using MSpaint but consider getting GIMP and putting the info on layers that way you can custom create final pics with different types of information on it.

I'm just goofing off at work.

Thought I'd make this up for a reference to double check my work tonight and share.

LAMP CHART_V6 (resized).jpgLAMP CHART_V6 (resized).jpg

#96 2 years ago

Using my handy chart I found four errors to my chagrin and in process of repairing with correct color codes.

20210824_172613 (resized).jpg20210824_172613 (resized).jpg
#97 2 years ago

Ball trough parts are Stern, receiver and brackets are Bally.

#98 2 years ago

Let's get to it! I want to see this lit up by an MPU tonight.

20210824_180910 (resized).jpg20210824_180910 (resized).jpg
#100 2 years ago

Well I got one connector done. Time consuming as I am toning every single wire before it is crimped after verifying color code and location.

All three of the lamp control lines are going to be individually bundled. When the connectors are completed the three will be bundled together. Just easier to diag in the future should some problem arise. Just cut the main tie wraps holding them together and *poof* you have three seperate bundles again.

20210824_193525 (resized).jpg20210824_193525 (resized).jpg

#101 2 years ago

Version 7 and should be the last.

1) Inserted one missing color code
2) Redid some of the bonus insert information
3) Added backbox controlled wiring
4) Clarified "shoot again" location on right side as factory was vague.

LAMP CHART_V7 (resized).jpgLAMP CHART_V7 (resized).jpg
#102 2 years ago

Only a few pins on J1 this morning, woke up at a normal hour unfortunately! Counting the hours at work till I can bail out. Can't wait to see this puppy light off when plugged in.

Thursday I have off and the last of the packages will be in, going to be a busy day.

After the lighting checks out, the next step is the coil harness which should be a snap. Power and control of the coils will have its own harness and the tie wraps will be a unique color to identify such harness. As with the main lighting harness it will be attached to "the mains" with large tie wraps which can be removed to separate the light/switch/coil harnesses for troubleshooting.

#104 2 years ago
Quoted from cottonm4:

I like separating the bundles, too.

It just makes sense from a service point of view.

Might never been needed but at a cost for a buck or two of extra tie wraps why not do it anyways?

#106 2 years ago

Forgot to mention: Current plan for the cabinet is to paint a nice semi-gloss black and then decal and paint as necessary. At a minimum it will be painted and be ready as a blank canvas for Pintastic. I'm even going to call up a buddy who gets his van wrapped and look into wrapping the cabinet as an option.

10
#107 2 years ago

We got a heartbeat! ONE LIGHT out.

20210825_195622_1.gif20210825_195622_1.gif
#108 2 years ago

And the light out is a bad driver on the driver board.

#109 2 years ago

The Pinball Resource gets in on the parts action too.

20210826_055436 (resized).jpg20210826_055436 (resized).jpg
#110 2 years ago

Replaced the bad lamp driver, removed some excess solder on the socket and loaded the Weebly mpu.

I'd say it looks like a success! Now back to work on the playfield. Once it is cleared I'll go back to work on the wiring while its curing.

20210826_082055_1.gif20210826_082055_1.gif
#113 2 years ago
Quoted from cottonm4:

How are you powering the MPU while the play field is laying on a table?

<chuckle>

I'll post a pic in a minute.

#114 2 years ago

I'm not proud on this project, if a few sockets needed a little help they got it. Spent a small fortune on all new sockets for Flash Gordon.

Connectors have key pins in place and labeled of course.

20210826_100524 (resized).jpg20210826_100524 (resized).jpg20210826_100613 (resized).jpg20210826_100613 (resized).jpg

#115 2 years ago

Fireball Classic has been pressed into service as a test rig and workbench. Sound board and solenoid outputs disconnected to be safe as is the switch matrices. The displays don't read correct since Stern and Bally 7 digit output are slightly different but that is not an immediate concern as I'm just working the lights at the moment. By the time I get to displays, the other cabinet will be up and running.

Power is obtained from a jumper wire clipped onto the backbox controlled lamp string. With both pins fully led the load is negligible.

20210826_101144 (resized).jpg20210826_101144 (resized).jpg

#116 2 years ago
Quoted from slochar:

OK I see ONE thing that I'd change about seawitch'es software.... the attract mode is a little 'busy'

It changes too, not like some Bally's of this vintage. Most notably the upper blue lamps change patterns a few times in attract mode..

#118 2 years ago
Quoted from cottonm4:

I applaud your for getting solder to stick on the steel base of the lamp socket.

Dremel with an abrasive flapper takes the coating off in seconds, sticks great after that.

#120 2 years ago

Playfield scan of right side- Coworker is going to vectorize and use it to waterslide repair the left side so it looks nice.

loop (resized).jpgloop (resized).jpg
#124 2 years ago
Quoted from cottonm4:What little tabs, please?

Solder tabs, I used them on Flash Gordon.
20210516_190422 (resized).jpg20210516_190422 (resized).jpg

#125 2 years ago

Nice chart! Might have sped things up slightly but not significantly. The biggest time suck was the learning process, by the time I got to the third connector I had streamlined the process considerably and moving right along. Doing this little side project will help me immensely when I get to the wiring stage for Flash Gordon.

Just having a playfield "map" with the wire locations and color codes for quick reference I think helped the most.

#126 2 years ago

Curious, looking over the Pinitech display instruction and there is no notation about differences between Stern and Bally 7 digit displays. I was assuming there was a jumper but don't see one. The 7 digit displays on Fireball are not displaying correctly when the Seawitch MPU is onboard so I guess I'll find out once I assemble a display what is going on.

The LED boards might be pre-jumpered so a non-issue I think.

#128 2 years ago
Quoted from slochar:

Pins 11 and 12 get connected together to interchange Bally/stern 7 digit displays.

That is the conclusion I came too after looking up interchange of displays.

#129 2 years ago

If the weather cooperates and work not too unpleasant going open up the pop bumper holes tonight for for the DE/Stern poppers and prep for clearcoat.

Oh and I sanded down the diamond coat in the one insert, tough stuff! At one point I was actually blading it down with a single edge razor and finished off with 800 grit.

#131 2 years ago
Quoted from SantaEatsCheese:

I am super impressed. I still have not finished getting the other playfields I scored at Allentown up on my wall.

Once the first coat of clear is laid I'll be able to hit the rest of the wiring while its curing.

#133 2 years ago
Quoted from Tsskinne:

I've used these displays in both bally and stern machines, they work with either upon assembly. There is a built in jumper on the boards to set them to display commas or not..

Yes I saw that in the instructions.

Forgot to mention, hat tip to @cliffy! The spring gate for the shooter lane is on its way and in considerably less time then quoted.

#134 2 years ago

Stripped the mylar off the popper area, unfortunately there was drama on one of them and paint touch up was required.

#135 2 years ago

Whites done, lock down coat in progress.

20210828_104658 (resized).jpg20210828_104658 (resized).jpg
#136 2 years ago

Table saw goes brrrrrr.

Little stuff bothers me sometimes. No one but I would see that mangled piece at the back of the playfield.. but easy to fix.

20210828_113543 (resized).jpg20210828_113543 (resized).jpg
#137 2 years ago

Switch matrix on deck!

20210828_141425 (resized).jpg20210828_141425 (resized).jpg
#138 2 years ago

Started roughing out the switch matrix wiring on the playfield, PITA without switches in place. Might just switch over to doing the cabinet wiring for now as I feel like I'm wasting time that could be better utilized. I also have some drop target banks that need modification too.

#140 2 years ago

Stripped the Data East hardware out and did some paint work.

Fresh tin work installed.

Boards mounted. Placement makes sense if you think about for a bit. Can't mount the soundboard on the side, not enough room.

20210829_135610 (resized).jpg20210829_135610 (resized).jpg
20210829_135556 (resized).jpg20210829_135556 (resized).jpg
20210829_135537 (resized).jpg20210829_135537 (resized).jpg

#142 2 years ago

Ok lets talk drop targets! Since I'm poking the switch matrix this week and I need to get the drop targets prepped. Stern targets installed and then .156 connectors so they can be easily dropped in place or removed for service.

Well not so fast.. Some differences between Bally and Stern drops shown below as well as solutions.

The number one difference between Bally and Stern is where the "catch" is located on the drop target. Stern's is lower down and Stern owners will tell you this is why Stern's don't "brick" when hit and Bally's do. I'll be testing that out!

The four bank Bally unit I'm utilizing is from an early solid state title Mata Hari for reference, the later Bally units do have subtle differences!

The primary difference between the Stern and Bally is the screw pattern to the playfield is slightly wider on the Bally, the catch location of course and on these the catch plate had to be clearanced for PF lamps. Not all Bally units have to be clearanced! My Flash Gordon they were already clearanced for lamps but Mata Hari and Mr. and Mrs. Pacman are not. No idea why Bally used two part numbers when the "Flash Gordon" plate would have worked with everything.

Of interest on the Stern unit the drops sit too low when dropped, I'll have to make a spacer so they are flush with the playfield. One Pinsider used magnet strips, I'm going to use some flat stock I think. Most Ballys have an adjustable stop.

-----------------------------------------------------------

So on the Bally remove the plate, clearance for the lamps and then flip it upside down. The sides are fine but you will have to slot the 2 machine screws opening on the backside as they will be off about an 1/8" With the plate flipped the drops sit perfect when upright but a new problem rears its head as you can see in the second picture. With the plate flipped the drop targets don't have an "alignment fixture" to keep them straight.

I see two or three solutions.

1) Flip the plate back, grind out notches to clear the Stern catch ribs and make a catch stop below the alignment plate.

2) Nylon rollers added to each side of the drop to keep them perfectly upright.

3) An alignment bar below the catch plate like Stern did.

Stay tuned...
20210829_180014 (resized).jpg20210829_180014 (resized).jpg20210829_180037 (resized).jpg20210829_180037 (resized).jpg20210829_180112 (resized).jpg20210829_180112 (resized).jpg54246044146f52b443662f07182ba661432503eb (resized).jpg54246044146f52b443662f07182ba661432503eb (resized).jpg

#143 2 years ago
Quoted from flynnibus:

Impressive project and speed! Love following your progress!

Thank you, things are coming along nicely.

Now if the post office can get of their duff and find the priority package that was suppose to be Thursday..

#145 2 years ago
Quoted from cottonm4:

It took 8 days for my PBR order for some switch contacts to arrive

August 27, 2021
In Transit, Arriving Late
Your package will arrive later than expected, but is still on its way. It is currently in transit to the next facility.

Priority mail once meant something, now its just more expensive first class.

Package was shipped 7 days ago, last time from same Pinsider was here in 2 days flat.

#147 2 years ago

Low energy after a hard Monday at work but here is tonight's shenanigans.

I wasn't done with the Stern 3 bank just yet as I did not like the return spring mounting. Bally had also used the method but had changed it to a separate spring bar on later units. Flipping through several Stern restorations I see that Stern did something similar and in a fairly clever way.

Stern took a hollow tube and held it in place with one screw of the coil bracket and a new screw on the other side. Well I can do the same thing! Picked up some 7/32" aluminum tube at the local hardware store and some 8/32" x 3" machine screws. The tube was cut down till it was just a snug fit in the housing and the machine screws cut down so they meet in the middle but not touching. After that I added the wiring to the switches and coil and added a molex connector and contacts. The wiring order is "coil hot - switch one - switch two - switch three - switch return - coil ground" so if I have a senior moment and flip the connector at worse the switch matrix is still isolated from the coil power.

20210830_180231 (resized).jpg20210830_180231 (resized).jpg20210830_192515 (resized).jpg20210830_192515 (resized).jpg20210830_192538 (resized).jpg20210830_192538 (resized).jpg
#148 2 years ago

On the Bally four bank unit I decided to make a guide out of aluminum angle. If the steel guides don't wear out the drop targets then the drop targets are certainly not going to wear out an aluminum guide! Some scrap around the garage happened to fit perfect on top of the mounting tabs and after some careful work with a nibbler and file good fitment and operation was achieved.

20210830_192558 (resized).jpg20210830_192558 (resized).jpg20210830_192622 (resized).jpg20210830_192622 (resized).jpg20210830_192642 (resized).jpg20210830_192642 (resized).jpg
#150 2 years ago
Quoted from cottonm4:

I like to Data East style wire connectors.

1) They work well.
2) Convenient for servicing.
3) I have a pile of them.

#151 2 years ago

Package update! Missing package will be here today along with package from Cliffy.

#154 2 years ago
Quoted from Isochronic_Frost:

Where can you order a menagerie? I’ve got quite a few DE’s now and I like using those connectors

The Z-Connectors you can get from Pinball Life, the Molex .156 from Ed at Great Plains.

https://www.pinballlife.com/mm5/merchant.mvc?Screen=PROD&Product_Code=MWWS156-1624&Category_Code=

The Z connectors comes in different sizes or you just get the largest and cut off what you need.

https://www.greatplainselectronics.com/categories.asp?cat=37

https://www.greatplainselectronics.com/products.asp?cat=86

#155 2 years ago

Now we're cooking!

20210831_163731 (resized).jpg20210831_163731 (resized).jpg
#156 2 years ago

Drop target #2 ready.

20210831_165808 (resized).jpg20210831_165808 (resized).jpg
#159 2 years ago
Quoted from Madmax541:

Why a Z connector in place of molex?

1) They work well.
2) Convenient for servicing.
3) I have a pile of them.

Technically they are Molex, just different style and I have plenty of Trifurcon contacts.

The Z connector itself is just a gender changer so you can hook two female Molex connectors together, very common on Data East.

#161 2 years ago
Quoted from Madmax541:

So it’s really reason 3 you have plenty of them.

Well it doesn't make any sense to order up ANOTHER type of Molex connector and contacts when you already have plenty of these on hand and they are known to work very well on Data East pins for target and assembly hookup. I keep contacts and 9 pin on hand for doing GI repairs on DE titles. For the hell of it I ordered a bunch of different sizes a year or two ago to have on hand and then ended up with a bunch of 6 pin for a project I was dabbling in for a bit.

These are very common connectors and used on all brands.

#164 2 years ago

Always looking for a neater and faster way of doing things, I ended up clearencing the other four bank Bally drop with a hole saw. Looks neat and clears the lamps with room to spare. Drop target assemblies done!

20210901_155818 (resized).jpg20210901_155818 (resized).jpg20210901_155843 (resized).jpg20210901_155843 (resized).jpg20210901_155907 (resized).jpg20210901_155907 (resized).jpg20210901_155937 (resized).jpg20210901_155937 (resized).jpg
#166 2 years ago

Light work- assembled new coils, plungers and springs to the sling mechs I had on hand and replaced one missing switch, diode and kicker head.

20210901_181038 (resized).jpg20210901_181038 (resized).jpg
#168 2 years ago
Quoted from KenLayton:

Those are modern Stern slingshot assemblies. Do the switches on them line up with the holes in the playfield?

1) They are from Data East Last Action Hero, cool to find out Stern still using them!

2) Yup, sure do!
20210902_053225 (resized).jpg20210902_053225 (resized).jpg20210902_053822 (resized).jpg20210902_053822 (resized).jpg

slings (resized).jpgslings (resized).jpg
#169 2 years ago

Change of plans on transformer; I was going to highjack the one from Flash Gordon II for now since its still a ways out in the project queue but an early Stern 16B-3 came across the transom. Of course now I need to find a rectifier board! I had this Star Trek unit that I was going to press into service but alas it has two bad bridges and headers are in tough shape. For the trouble it would cost me I contacted the Weebly fellow and just had a kit sent for $35.

It was clearly in my recycle pile for a reason and I'd forgotten why, perhaps I should tag it this time.

20210901_162327 (resized).jpg20210901_162327 (resized).jpg

#170 2 years ago
Quoted from play_pinball:

Scratch building my Star Gazer, I ran into a clearance issue with the older style Stern drop target mechs (not to mention also learning I had to file out the pass-through holes because the repro targets are too dang wide). I put a lie-down style socket in but Seawitch looks like it has more bulbs to deal with under there.
[quoted image]

I'm using the Bally mechs on the four target banks, like I mentioned above odd that Bally had two plates, with and without cutout.

Usually the accountants will be all over duplication like that!

#171 2 years ago

So what are people using for a cheap 6" 8 ohm speaker?

#173 2 years ago
Quoted from play_pinball:

Right, I followed that but you cut the second one for clearance so I showed my solution for the same issue using the older style Stern mech.

Well the first Bally was clearenced as well but with a cutoff wheel and a belt sander to clean up.

Hole saw was faster and nicer looking.

Quoted from play_pinball:

I love to see that Bally drops can be modified to fit Stern designs honestly

Frankly I would have used Gottlieb or Data East assemblies if they had presented themselves.

Bally was the easiest and first to pop up.

Quoted from play_pinball:

I also saw you mention you were going to route out your pop bumper holes to fit newer style mechs. I’ve had that thought for my older games because I hate the original metal base plate design. I don’t have photos at the ready but to fit one in my Trident, I just shaved down the plastic ring on the base plate. It did not solve the issue of new rings being too wide to pass through when installing a fully assembled mech however.

I thought of it to and perhaps if I had a new playfield I would have turned down the bases or simply duplicated the old Stern sheet metal mounting. But it isn't a new playfield and bang for buck the new assemblies can't be beat.

#174 2 years ago

Turned a four bank drop target bank to a three target inline unit for the second Flash Gordon I'm building, anything is possible if you are motivated enough.

1452ba8ebd79bf66f9b6ec295fea225e8691fe24 (resized).jpg1452ba8ebd79bf66f9b6ec295fea225e8691fe24 (resized).jpg

#176 2 years ago
Quoted from BorgDog:

That's interesting. Got more details on that? Always looking for ideas for homebrew.

https://pinside.com/pinball/forum/topic/flash-gordon-part-ii-

Still in progress, doing playfield work side by side with Seawitch.

Mater-of-fact some waterslide decals will be printed out for both shortly.

#178 2 years ago
Quoted from Mad_Dog_Coin_Op:

This one:[quoted image]

I'll have to check the mount on the DE cab and make sure it's the same. What is the measurement from stud to stud?

It looks like the PDMR6 is popular too, the power ratings don't matter much though since the original was a 10 watter more or less.

#180 2 years ago
Quoted from cottonm4:

Soory. I did not mean to hijack the thread but thought this might be relevant.

All good if there is something new to be learned!

#184 2 years ago

Guess what's coming next...

20210902_173149 (resized).jpg20210902_173149 (resized).jpg
#185 2 years ago

Time to get back to matrix wiring

20210902_174346 (resized).jpg20210902_174346 (resized).jpg
#188 2 years ago
Quoted from slochar:

I was looking forward to having pacman standup faces on the seawitch....

Sorry, they were replaced with new faces, white with blue stars.
=)

#190 2 years ago
Quoted from cottonm4:

My math was off. Yours is off, too.
Back to the show.

From chaos will come order.

20210902_184802 (resized).jpg20210902_184802 (resized).jpg
#191 2 years ago

Ok, tonight's work was rounding up all the leaf switches (from a stripped Flash Gordon playfield) needed, cleaning, setting up the stand up targets and installing them all so I can do switch matrix wire runs.

I REALLY wanted to avoid going this route as at this time I have to uninstall several switches after so I can finish the playfield but you do what you have to do in the time you have available to keep moving forward.

Was able to get several lines run and should be done on Saturday. Tomorrow night I'll be tied up at a family function.

#193 2 years ago

'Morning gents

20210903_053717 (resized).jpg20210903_053717 (resized).jpg
#195 2 years ago
Quoted from cottonm4:

How is it going, Speedy?

Not bad, as with the lamp matrix as I progress and refine I'm picking up speed. Middle drops are done and I'm currently at the point where I have to make up a junction for the three pop bumpers.

#197 2 years ago
Quoted from cottonm4:

I would like to see some pics showing progress of your wiring to this point.
Thanks

Its like making sausage, the process isn't pretty but the end product worth it.

Didn't take any pics this morning.

#198 2 years ago

Bonus fonts this morning, 19 point, Columbia Serial Bold. Had to tweak the spacing a tad but looks spot on.

Once the switch matrix wiring is completed, flip back over and sand the clear flat, waterside and hit with clear again.

20210903_084306 (resized).jpg20210903_084306 (resized).jpg

#200 2 years ago
Quoted from cottonm4:

Impressive. Very. What kind of printer did you use for those? And are they printed on decal paper?

Printed on white copy just to compare, will be printed on clear waterside once I confirm size and spacing. We have already overlaid it on playfield scan but you know what happens when you assume. Color sampled from scan.

Printed with $40,000 copier unit at work as it does a nicer job than my $300 Dell laser.

Font was confirmed by scanning in playfield, isolating text and uploading to font detection website on web.

#201 2 years ago

My wife states a heavy box arrived today.

Feeel the power!

#202 2 years ago
20210903_155643 (resized).jpg20210903_155643 (resized).jpg
#203 2 years ago

See? Big ball of spaghetti.

20210903_160549 (resized).jpg20210903_160549 (resized).jpg
#204 2 years ago
20210903_163152 (resized).jpg20210903_163152 (resized).jpg
#205 2 years ago

Roughed out the last of the wire runs, switch matrix should be completed in the morning.

20210903_165959 (resized).jpg20210903_165959 (resized).jpg
#206 2 years ago

Time to get to work!

#207 2 years ago

Showtime!

Bumpers bypassed for the moment, installing fireball Mpu for testing.

20210904_073348 (resized).jpg20210904_073348 (resized).jpg
#208 2 years ago

Success! Well mostly!

I ran the wht/blue return to both the four drop units, a simple matter of removing the offending wire and running the correct wht/yel one after breakfast. Aside from one set of numbers coming up twice everything worked perfect indicating switches and diodes are all good.

20210904_075115 (resized).jpg20210904_075115 (resized).jpg20210904_075123 (resized).jpg20210904_075123 (resized).jpg

#210 2 years ago
Quoted from cottonm4:

Nice work on the wiring. Nice and tidy.

Even better now, after routing the correct switch return line, installed a bunch of wire retainers and did some general tidying up. Will get tightened up even more when the flipper mechs and power/control harness go in, some stuff is still loose for "adjustments"

Playfield switch matrix is now 100%

All that is left to do there is add caps to the stand up targets and install the poppers.

Oh and it is so nice being able to unplug the drops and set aside.
20210904_091037 (resized).jpg20210904_091037 (resized).jpg

#211 2 years ago

Looks like we have some machining to do boys!

20210904_113013 (resized).jpg20210904_113013 (resized).jpg
#212 2 years ago

Snug but hardly problematic.

20210904_114427 (resized).jpg20210904_114427 (resized).jpg
#213 2 years ago

In the unlikely event someone wants to convert a DE flipper for use in a "Classic Stern" here is what you do.

A) Take your classic coil and install against coil stop, take the front retainer and clamp in place, drill and tap and install. The rear coil stop and flipper bushing distance will be exactly the same as the classic Stern flipper pieces.

B) Take off your EOS bracket and position so that when the flipper is fully extended the EOS is properly opened. Clamp, drill, tap, install.

C) Throw away the DE spring return bracket, going to be using the same spring return as the classic Stern flipper assemblies.

DE_Flipper (resized).jpgDE_Flipper (resized).jpg

#214 2 years ago

Testing the EOS switch. If installed correct, the EOS will be open and the other switch which provides power to the upper flipper will close.

20210904_122932 (resized).jpg20210904_122932 (resized).jpg

#215 2 years ago

Stern and Data East in comparison.

20210904_122948 (resized).jpg20210904_122948 (resized).jpg
#217 2 years ago
Quoted from KenLayton:

By the way, I'd suggest you paint or powder coat the Data East baseplates. They look awful.

Gold Cadmium plating, more common in automotive applications.

#219 2 years ago

Easy as pie, another fine product from Weebly. Took me less that a half hour to assemble.

20210904_163331 (resized).jpg20210904_163331 (resized).jpg

#220 2 years ago

Cabinet power coming soon I think.

A2 board bracket made up of some scrap around the garage.

20210904_174953 (resized).jpg20210904_174953 (resized).jpg
#221 2 years ago

Things just moving right along! Receiver installed.

20210904_180440 (resized).jpg20210904_180440 (resized).jpg
#222 2 years ago

Sharp eyed viewers will no doubt see something different from factory, see if you can guess why =)

A2 Power connector and harness to playfield is complete.

If you are wondering about tie wrap color coding, wonder no more!

White = exclusively lighting circuit, GI and Controlled.

Blue = switch matrix

Red = coil power and control

Black = mixed wiring, proceed with caution.

For example where the A2 wiring exits the playfield there is both lamp power and coil power in the same bundle since they share the same destination. The coil power wiring is indicated with red wraps and when the lamp power wiring is added to it, black is utilized to secure.

9dfa7add079db9f07fbc2251870bc77e26207c0d (resized).jpg9dfa7add079db9f07fbc2251870bc77e26207c0d (resized).jpg

#224 2 years ago
Quoted from Quench:

Rookie error!
Those three wires on the right need to be shifted left one position.

Damn you got me! I recycled a Bally connector and did not catch it was 9 pin not 8 pin.

Thanks for the spot!

Updated picture with text.

#226 2 years ago
Quoted from Quench:

BTW, what's the second solenoid bus wire for?

My concern is I'm using a smaller transformer I'm utilizing and I'm looking to maximize the current available to the flippers. Some people have reported no issues with the smaller units but I'm looking to hedge my bets by of course using new wire which has less resistance than 40 year old wire and double the amount of wire capacity by simply doubling up on the wire going down to the flippers.

Also I don't like the fact the flippers are fused only at the A2 board (effectively) and the fuse on the playfield is used as a junction with the other coils being fused there. I intend to have three fuses at that location with the two feed wires being being a "common" for all three fuses.

One fuse will be for the flippers, one for the drops and the last for poppers & outhole. This will also make diagnostics easier should there be a short in any of the circuits as at most you will have 4 coils to check depending on which fuse fails.

20210905_081600 (resized).jpg20210905_081600 (resized).jpg

#230 2 years ago
Quoted from Quench:

The weak point is not necessarily the wire, it's that single crimp at the connector. Find a way that you're comfortable with to get a second pin/crimp on that connector for the solenoid bus.

Modifying any of these has the potential for damage if the playfield/rectifier board is swapped out for something that doesn't respect the change.

I'm not comfortable with doing that as compatibility is one priority of mine, though I did check the diagram to see if there was two live solenoid bus lines on the connector. I did of course use a trifurcon contact (which I'm using exclusively on all .156 connections) for maximum contact and even soldered it for good measure.

Ultimately even with a "big transformer" the power would still be flowing through a single pin to the playfield and I have made that "link in the chain" as robust as possible. The lines from the transformer to the A2 board will be oversized as well. This may all be preventive work that might make no difference at all, but makes sense to do while the machine is being assembled.

#231 2 years ago
Quoted from Quench:

If the 16B-3 is lackluster, gdonovan could try hot tapping it.
A friend of mine has a Magic with a very early Stern transformer that came from an imported Stern "Pinball" that has no voltage input selection lugs. It's fixed at a lower input voltage effectively running it hot tapped and the flipper action is great - better than any other MPU-100 game I've played.

I may keep that in mind, lets see how it plays first.

#233 2 years ago

Back to work!

20210905_131535 (resized).jpg20210905_131535 (resized).jpg
#234 2 years ago

Time to move over to control wiring

20210905_134749 (resized).jpg20210905_134749 (resized).jpg
#235 2 years ago

Well the moment I was concerned about has arrived- I'm going to have to differ from the factory wiring in regards to color codes, I simply don't have enough of the proper gauge wire in the proper colors for the coil controls. I'll document everything of course but still disappointing.

#236 2 years ago

Spaghetti back on the menu!

20210905_153808 (resized).jpg20210905_153808 (resized).jpg
#237 2 years ago

I tell you with all this wiring? I'm becoming intimately familiar with the Bally/Stern system.

#238 2 years ago

Playfield wiring has exited the building! No more to be done here till the playfield sees its final clearcoat and buff followed by through mechs being installed and wired.

20210906_091822 (resized).jpg20210906_091822 (resized).jpg
#240 2 years ago
Quoted from cottonm4:

I went with a double fuse setup on my build. You have 3 fuse blocks. Please tell us what 3 fuses will are for.
Thanks.

1 is for flippers (which technically are already fused via the A2 board) 1 is for lower half playfield coils, 1 for upper half playfield coils.

#241 2 years ago

Whole lot of wiring in the past week or two.

20210906_113348 (resized).jpg20210906_113348 (resized).jpg20210906_114532 (resized).jpg20210906_114532 (resized).jpg
#242 2 years ago

Looks like it filled and leveled well.

20210906_133912 (resized).jpg20210906_133912 (resized).jpg
#243 2 years ago

Well if you are going to get all crazy with a classic title what is another hole in the playfield? That lamp on the right side looked lonely.

20210906_133948 (resized).jpg20210906_133948 (resized).jpg
#246 2 years ago
Quoted from Madmax541:

I install LED strip under plastic not to distract player in middle drop target bank.

Usually something in direct sight like that my regular lamp of choice is Comet retro warm white with frosted dome.

A pair of them will work nicely there and I have plenty of them and sockets.

Wet sanding went well today, a few low spots that I have to fill but not bad at all for first pass in clear and a playfield in tough shape. I have a few spots I'm going to revisit as well for better paint matching.

#247 2 years ago
Quoted from Madmax541:

What size fuses are you using on 3 fuse holder bank?
Normal for a single bank is 1 amp fuse

I planned on 1 amp, same as factory except for the flipper fuse which I was going to size at 5 amps.

From the factory the flipper circuit is only protected at the A2 board, (F4 7A slow blow) which also covers everything else in need of 43 volts.

#248 2 years ago

So there was some scrap hanging around the garage.. you know the rest..

20210906_153920 (resized).jpg20210906_153920 (resized).jpg
#249 2 years ago

Time to hit up the cabinet wiring.

20210906_154800 (resized).jpg20210906_154800 (resized).jpg
#250 2 years ago

A genuine Bally power cord and a few parts from Marco, we now have power to the A2 bridge board.

20210906_165350 (resized).jpg20210906_165350 (resized).jpg
#252 2 years ago
Quoted from cottonm4:

Looks like the transformer arrived. How was the packaging?

Outstanding!

Question: J2 Pin 10 of the A2 power board states that is AC power ground, where does that wire in particular go on Sterns? I'm trying to find out looking at pictures without success. On the Bally diagram it shows it grounded to the AC filter body which is where I was going to attach it.

#253 2 years ago

If all goes well tonight the transformer and A2 board will be wired together and thats where things start to get interesting as I work my way toward the cabinet head. I'm still on the fence as to where to mount the knocker.

In the head as where Data East had it located or in the lower cabinet? I'm leaning toward the head location, shorter wiring run.

#255 2 years ago
Quoted from Skidave:

Enjoying the progress of this build. With all the zip-ties on the wiring harness, I hope you are using a pair of flush cutting dykes. That is a lot of tails that could be very sharp as you service the machine.
Coming to the York show in October (hint, hint)?

Yes to both questions, though the machine will not be at York. I really like the York show, very relaxed atmosphere.

Bare minimum I'm going to let the playfield set 8 weeks after final coat of clear due to clear coat dieback. At the 8 week mark I'll wet sand out the finish with 1000/2000 and then buff. I'd like to let it sit longer (4 to 6 months) but it would be nice to make Pintastic in Massachusetts and its hardly a 100 point restoration.

During this 8 week period I'll be working on the cabinet, wiring and backboard for lighting plus a few other ideas I have been kicking around.

Tested the bonus ladder text yesterday, its off one size. There is a slight difference between the playfield scan and the real thing which jarred a memory of why some people include a ruler in their scans. Some subtle difference in the scanned surface and the distance to the scanning head I bet. Not critical if scanning in moms pictures or documents but makes a huge difference when doing playfield repairs!

#256 2 years ago

Printed out some Space Invaders schematics this morning, beats dashing back to the computer to look up some missing detail on the Stern schematics.

20210907_095937 (resized).jpg20210907_095937 (resized).jpg

20210907_101517 (resized).jpg20210907_101517 (resized).jpg
#258 2 years ago
Quoted from cottonm4:

Keep good records. Maybe someday the Stern manuals can be cleaned up.

That could be a good winter project , I'm certainly getting familiar with them at this point.

#260 2 years ago
Quoted from Quench:

FYI, Bally and Stern ran the 43V solenoid bus wire for the knocker in the head from the rectifier board J3 pin 13.
Recommend you also install a fuse by the knocker, otherwise when things go wrong they like to melt thanks to the 5 amp fuse on the rectifier board.

Yes, I had already thought to set aside a fuse holder and one amp fuse if it ends up in head. Letting the smoke out of the wires is bad and to be avoided.

If I install in head I'll just grab power at the A3 board and add a quick disconnect.

#262 2 years ago
Quoted from Quench:

Recommend you also install a fuse by the knocker, otherwise when things go wrong they like to melt thanks to the 5 amp fuse on the rectifier board.

Just caught the amp rating you mentioned, interesting that Stern calls for a 7 Amp but the Weebly board and Bally schematics indicate 5A.

#264 2 years ago
Quoted from Quench:

It's dependent on the number of flippers. Some Bally manuals state that games with 4 or more flippers spec a 7 amp fuse rather than 5 amp.
Plus Stern coils are higher power so they spec'd a larger fuse.

Space Invaders has 4 flippers, it's the schematic I referenced when checking.

#266 2 years ago
Quoted from Quench:

Space Invaders doesn't use a higher current spec solenoid transformer.
Some '81 games (eg Medusa) state 4 flippers or more use a 6A fuse.
'82 games they changed it to 4 flippers or more use a 7A fuse.
You've got lower power coils on your new Stern flipper mechs (25-600)

475 and 600s per spec for Seawitch.

I'll start out with a 5 amp and go from there.

#268 2 years ago
Quoted from Quench:

Ah, I thought you'd be putting the new mechs in the primary positions.

The lower mechs are Data East LAH with Stern 475 coils and the uppers are new Stern repo mechs with 600s and will have resistors as well as spec'ed by Stern.

My thinking is the Data East mechs are FAR more durable than the repos so prefer them where most of the action is going to be. They have also a physically larger foot print and space at the upper locations is already tight.
acfc745007fd909c9d66be5020ebc3a3354a7864 (resized).jpgacfc745007fd909c9d66be5020ebc3a3354a7864 (resized).jpg

#272 2 years ago

Looks "high tapped" right out of the box.

20210907_163740 (resized).jpg20210907_163740 (resized).jpg
#273 2 years ago
Quoted from cottonm4:

So, just add a fuse inline to one of the knocker solenoid wires? And add it to the positive wire, or does that matter?

The positive side would be best.

#274 2 years ago

The wiring here came out satisfactory.

20210907_172620 (resized).jpg20210907_172620 (resized).jpg20210907_172635 (resized).jpg20210907_172635 (resized).jpg
#275 2 years ago

Question for Quench: My voltage for high voltage displays are low.

I'm seeing 178-183 volts AC in from lugs 8 and 10 (correct) but only 183 VDC at the 230 volt test point.

I compared it to Fireball Classic which shows 240 VDC at TP4 on the solenoid board, when I remove the SB high voltage display fuse the voltage rises to 250VDC.

Thoughts? I'm thinking a bad diode or something characteristic of this power board but I'm done for the evening and have not checked out the diodes yet.

I popped out to the garage.. and the diodes look ok. The fuse had a touch of resistance so I replaced it, even checked the AC voltage at E5 and E6 where the power comes in and it is spot on at 183 volts AC.

#277 2 years ago
Quoted from zacaj:

Do you have the driver board plugged in?

Nothing is plugged in aside from the A2 board.

According to Bally I should be seeing 230VDC +/- 27V which is what I'm seeing on Fireball Classic.

#278 2 years ago

Just heard back from barakandl this is normal without the filter cap being in place from the driver board. He indicates Ballys documentation is poor in regards to cap in place or not for testing.

#280 2 years ago
Quoted from Quench:

Yeah inline on the positive wire. When the fuse blows you want no voltage on the downstream device.

LOL, they list 230V at TP2 (but you only get it when the SDB is connected)
yet they list 11.9V at TP3 (but that's when the SDB is NOT connected).
confusing?

Yes, he indicated that as well.

All part of the learning experience, enjoying getting down in the weeds and learning systems.

If I'm lucky I'll have the final connector for the A2 board done tonight, depends if I have all the right colored wire and time. Have a meeting to attend at 7 or so, will be close. Actually started pinning the connector this morning so at least have a head start.

#281 2 years ago

Whole lotta wiring right there.

20210908_164216 (resized).jpg20210908_164216 (resized).jpg
#283 2 years ago

The spaghetti monster returns!

20210908_173740 (resized).jpg20210908_173740 (resized).jpg
#284 2 years ago

Look what I found out in the shed! Run this up the flagpole and see how it sounds.

20210908_181350 (resized).jpg20210908_181350 (resized).jpg20210908_181432 (resized).jpg20210908_181432 (resized).jpg
#285 2 years ago
Quoted from arcademojo:

Great work! Following.

I have completed a visual of the wiring done yesterday, tonight I'll tone it out as a backup to make sure and start pinning connectors at the SDB and LDB. I'm really hoping to hit the switch this weekend and have the main boards powered up.

#287 2 years ago
Quoted from cottonm4:

The switch matrix diagram is easy. Wiring the lamps diagram is easy.
I'm waiting for you to tackle getting the sound wired up. It is all schematics. I had to ask Shawn "how" and I am still struggling with it.
Like everybody else, I have been enjoying watching the speed-build.

Oh the sound I'm not concerned with a bit, pretty sure I have that sussed out and hope to be hearing some sound this weekend.

The lamps were taxing due to all the vague documentation, it almost got down to process of elimination.

And if I was not fixed on following the factory color codes would have been faster too! For the most part they have been followed aside from the coil/SDB interface.

#289 2 years ago
Quoted from cottonm4:

That is an understatement.

I'm seriously thinking about generating new schematics with copious footnotes when this project is completed.

#295 2 years ago

Toned out twice, pin assignments checked 4 times to make sure all is well. Don't want to make a mistake in this area!

20210909_161955 (resized).jpg20210909_161955 (resized).jpg
#296 2 years ago

Connector J4 on the MPU is done, 100%

20210909_192602 (resized).jpg20210909_192602 (resized).jpg
#297 2 years ago

I'm thinking we might see a full power up event perhaps tonight, tomorrow at the latest.

1) Started pinning the J1 connector for the MPU this morning, will be done after work. (Displays and lamp board control)

2) I think I'm going to use the Mr. and Mrs. Pacman wiring harness for the displays. They are in a suitable arrangement and have a connector.

3) Will need to assemble at least one LED 7 digit display as the Bally displays will not read correct with Stern output. I could modify the Bally 7 digit displays but saving them for Flash Gordon and have to assemble the LED ones regardless. Will have a six digit plasma display in position 5 to test high voltage circuit.

4) Have to still do a cabinet harness for flipper, test, credit, tilt, mpu reset buttons, volume control and speaker.

Getting close! The J4 MPU connector toned out to J3/J4 SDB without issue this morning.

#299 2 years ago

Getting close brother, getting close. Wiring the longest yard in this project.

#300 2 years ago

Juggling three, sometimes FOUR wiring diagrams.

Displays were challenging.

20210910_173151 (resized).jpg20210910_173151 (resized).jpg
#302 2 years ago

"Seawitch has been added to your collection "

#303 2 years ago

She fired up sweet as pie, voltages were spot on.

20210910_191118_1.gif20210910_191118_1.gif
#304 2 years ago
Quoted from cottonm4:

I like where you have located your SB-300 sound board. All I would need to do is extend the 4 or 5 wires that plug into the sound board and get some longer ribbon cables ( Amazon has all lengths of ribbon cables ) and make the move. It is too late for my current build but for the next I am going to make that move with SB-300.

1) I'm actually going to rotate it 90 degrees and move it over to the right so there is room for a Bally sound card to the left since this is a dual purpose machine.

2) Display wiring gave me fits tonight. Decided to highjack the display wiring from Mr. and Mrs. Pacman since I was going to use the display wiring from the Star Trek head I acquired for Flash Gordon as it is closer in fitment. Very carefully removed just the display wiring I needed without disturbing anything else from the harness. Started pinning the MPU -> Display interface and ended up with an extra wire, WTH! After looking at four different diagrams figured out Bally added an extra wire that goes from A4J1-7 (unused on Space Invaders and Seawitch) to Display Pin 12. Since the wire was there in the harness added it to the MPU connector.

3) Finished wiring MPU J1 plug and the LDB strobe lines and power feed. Double checked all the connectors to make sure all the wiring was present and where it was suppose to be.

4) Powered up with just the wounded -35 (waiting for parts) I was using to do wiring runs. Did voltages checks, everything was spot on.

5) Powered up with Weebly board, we have 8 flashes!

6) Powered up with displays, scrambled but there! I'll assemble an LED display unit tomorrow.

7) Powered up with playfield lamp matrix plugged in, WOOP!

Game plan tomorrow is to move soundboard and wire, cabinet wiring for flippers, mpu buttons, credit button, etc and assemble at least one LED display.

Gary

#305 2 years ago

Garage cleaning and organizing this morning.

20210911_065547 (resized).jpg20210911_065547 (resized).jpg
#307 2 years ago

All I had time for this morning before taking off with the Mrs. Have to go over the display strobe lines and figure out what is crossed. Mr. and Mrs. pacman does have some odd display wiring and I think this is biting me on the ass now. I'll get it!

Display works fine in Fireball Classic.

Great kit from @Pinitech!

20210911_103100 (resized).jpg20210911_103100 (resized).jpg20210911_103432 (resized).jpg20210911_103432 (resized).jpg20210911_103506 (resized).jpg20210911_103506 (resized).jpg

#308 2 years ago
Quoted from cosmokramer:

Watching what some of you guys are able to do is amazing and very inspiring. Its great following along and learning things that I would like to try to do myself in the future.
Great work!

Thank you sir! Hoping to have the rest of the harness done tonight and hear some sound and enable diagnostics.

#310 2 years ago
Quoted from cottonm4:

Those UNO displays rule.

I'm baffled.

Toned out the MPU connector to display one and everything is fine but the display is dead. Display works perfect in Fireball.

Going to change the jumpers to Star Trek and pop in a 6 digit display and see if I get anything.

#311 2 years ago

Ok, MPU not having any issue driving 6 digit plasma display while set to Star Trek.

20210911_143333 (resized).jpg20210911_143333 (resized).jpg
#312 2 years ago

Ok, after that I set MPU to Fireball to enable 7 digit Bally mode and was missing the first digit. Replacing the black wire with yellow tracer brought that up.

Now time to swap MPU back to Stern mode and see what happens.

20210911_144543 (resized).jpg20210911_144543 (resized).jpg
#313 2 years ago

I think were in business!

20210911_145300_1.gif20210911_145300_1.gif
#314 2 years ago

Question for Stern owners- If the audits are cleared will the displays show anything in attract mode? I think this is what threw me off because aside from the digit walk when the MPU test button is pressed the displays are blank when in attract.

#316 2 years ago

Started work on the cabinet switch wiring this afternoon and installed the tilt bob. Knocker will be in lower cab after all. Quick disconnect at the solenoid board so playfield can be pulled without having to pull cab harness too.

20210911_172001 (resized).jpg20210911_172001 (resized).jpg
#317 2 years ago
Quoted from slochar:

If you reset the hstd it will show 00. Until you play a game the players scores may or may not show anything if the memory was cleared to$ff it will be blank

Weebly indicates hitting test and clear memory at the same time wipes all stored data so I'll guess I'll find out in a few days when I finish the harness.

The display and harness are correct, you can clearly see it operate in test mode so that's good.

#319 2 years ago
Quoted from cottonm4:

I'd like to see the quick disconnect you are using, please.

Just a 6 pin molex with key, DE style. You can see in picture above, lower left of SDB.

Has 2 wires for flipper buttons, 1 wire for knocker and 1 wire for test switch and memory switch return. All go to A3J2 connector.

#320 2 years ago

Today's plan is to wrap the cabinet wiring up and find a chunk of cardboard so I can start mocking up a lighting/display backboard. Amused that I'm now using wiring from a FORTH machine now, Laser War in this case. The cabinet was empty aside from the flipper/credit button/tilt/slam/speaker wiring so its being utilized.

Been giving a lot of thought to game interchange. Some games would be difficult because of the radical amount of wiring they have.

Take Flash Gordon for example; I was considering doing the FG playfield wiring using this cabinet as a setup platform but there is so much going on with FG playfield lamps and interfacing with the FG A9 Auxiliary lamp board that it might not be practical.

Other games like Star Trek, Night Rider, Super Sonic or even Xenon would be fairly easy though.

Bally sound doesn't look to be an issue, the wiring looks fairly straightforward.. Mostly power and grounds and a few address lines from the MPU.

That leaves the backglass which I'm kicking around a few ideas. Changing and making a lamp board sounds like a PITA. One thought I had was to move the displays out as far as you could and get a translight made to fill in the "art area" This is just a crude Photoshop I ran off in a few minutes to get some idea of what I was thinking.

The other thought is to move the displays just above the playfield, since I have to make a cosmetic plug there regardless. Then you could use a stock backglass, but then you have blank openings.

I third idea just game to mind- The Uno display is pretty flat, perhaps some velcro mounting and ribbon cables you could could simply move them around as you see fit. Hmm, I like this idea.

This gives me a further idea with "Yoppcicles"

A plan is forming gents.

BG mockup (resized).jpgBG mockup (resized).jpg

#321 2 years ago

20210912_151244 (resized).jpg20210912_151244 (resized).jpg

Credit button, Test button, Memory clear button and Stern volume control.

#323 2 years ago
Quoted from BorgDog:

have you seen what this guy is doing on interchanging playfields? https://www.facebook.com/howtobuildapinballmachine/?ref=page_internal

Cant say I have, avoid FB like my life depends on it.

#324 2 years ago

Rough sledding today for some reason, everything just seemed to take longer than it should.

1) The bracket; Credit button (coin #1) MPU Test, MPU clear and volume control and a few extra holes for future expansion.

For some reason the clear button does nothing, I'll have to re-tone that one out again. Not sure if something to do with the Weebly MPU or not as it has its own button which works fine.

2) Credit button and tilt panel are 100% Switches #1, #6 and #7 work like a charm.

3) Displays were not displaying HSTD as the data was corrupt. Stepping through audits and clearing them one by one with the Weebly audit clearing button and they work fine now (displaying 00)

4) Sound is now functional, Speaker sounds fine. Sound does sound choppy on coin up, I'll post a clip later. Speaker and volume are hard wired but I still have to wire up power, currently running off Test Point 5 and a ground jumper.

All I got for the day, some progress though.

20210912_165011 (resized).jpg20210912_165011 (resized).jpg

#326 2 years ago
Quoted from slochar:

Some earlier weebly boards do not bring the door clear button to the mpu.

I sent BarackandI a note inquiring, I'll let you know what he says.

#329 2 years ago
Quoted from flynnibus:

all that work and keeping old capacitors on the SDB?

Placeholder board for the moment, new parts are on the bench waiting for a less hectic moment of time.

#330 2 years ago
Quoted from Quench:

Did you mock up a simple way to switch the strobe lines for the coin/tilt/slam switches?

In audits and shown on displays, switches are functional and the connector is complete. The only thing I have left to do in cabinet wiring is power for the flipper buttons, wire the knocker and wire the coin mechs.

Home use but why not wire the mechs? Gone this far.

#331 2 years ago
Quoted from BorgDog:

have you seen what this guy is doing on interchanging playfields? https://www.facebook.com/howtobuildapinballmachine/?ref=page_internal

Peeked in from work computer, that fellow is quite the fabricator with a nice shop =)

Running these old tables with some stout new hardware.

Only work this morning was half assembling one 7 digit UNO display, I doubt it will be finished tonight as I have a road trip after work and there will be two more pins crowding the garage spaces. Sometimes I will just move over to something "brainless" when I have a few minutes to spare as the neurons are not always firing first thing in the morning.

Doing the wiring definitely requires all the neurons working.

#333 2 years ago
Quoted from Quench:

Don't forget the switch strobe lines change between Bally and Stern which is what I was getting at.

Everything off that Mpu connector is wired per Stern diagram and working aside from mpu reset.

Could be a bad switch or being ignored

#335 2 years ago
Quoted from Quench:

I think it's missing from that board. If pin 5 on J3 isn't marked with it then it's not traced.

I'll try to check when I get home, but were going to be in a hurry to get out the door for a pin(s) pickup.

#336 2 years ago
Quoted from slochar:

Some earlier weebly boards do not bring the door clear button to the mpu.

I think you called it.

Don't mind doing the extra wire, always a chance any number of different MPU will be installed for testing.

20210913_151245 (resized).jpg20210913_151245 (resized).jpg

#338 2 years ago
Quoted from slochar:

I know because I reported it to Andrew a while ago and he confirmed it
//<![CDATA[
window.__mirage2 = {petok:"0fcc35a1af15ba6d1fa7d1785d21aed2b8cfa4d0-1631574029-1800"};
//]]>

A notice on his site would be nice.

#339 2 years ago

Displays done, Pacman wiring a PITA till the bitter end but finally under control.

20210914_185350_1.gif20210914_185350_1.gif
#340 2 years ago

Well another evening where I'm not where I want to be progress wise but the ball is moved downfield. Displays are done and tested, display wiring sorted out finally and the lower harness has several pieces pre-positioned for tomorrows work.

Should finally be wrapped up there after work or if I wake up early in the morning.

#341 2 years ago

Like my improvised knocker? It hits with AUTHORITY.

As a Data East VUK unit I may have to de-rate the coil for this application, the DE knockers do typically sound like gunshots when they go off though.

Flipper grounding circuit is done as well this morning along with the GI power and ground feeds run to coin door so work at the A2 board is now 100% complete.

All I have to do tonight is wire coin door switches and GI bulbs and lower cab is complete. In the upper I have to move SB300 to final location, permanent power and ground for it along with fabrication Z brackets.

20210915_054928 (resized).jpg20210915_054928 (resized).jpg20210915_054945 (resized).jpg20210915_054945 (resized).jpg
#343 2 years ago
Quoted from Quench:

The knocker might accidentally trip the tilt plumb-bob!

That actually gave me a well needed laugh at work.

#344 2 years ago

Back at it..

20210915_171753 (resized).jpg20210915_171753 (resized).jpg
#345 2 years ago

Mechs from my stash are older than dirt but work perfect.

20210915_190218 (resized).jpg20210915_190218 (resized).jpg
#346 2 years ago

Getting serious when the shop vac gets deployed.

20210915_191728 (resized).jpg20210915_191728 (resized).jpg
#347 2 years ago
20210915_192427 (resized).jpg20210915_192427 (resized).jpg
#348 2 years ago

More scrap becomes SB300 brackets and the sound board finds its final destination. Plenty of room for a Bally sound board next to it.

20210915_200920 (resized).jpg20210915_200920 (resized).jpg20210915_200944 (resized).jpg20210915_200944 (resized).jpg
#349 2 years ago

Final sound board wiring.

Stern looks to power the SB300 by having power and ground pass through the board before continuing on to the MPU. I elected to power the board by grabbing unregulated 11.9V power and ground directly at the A3-J3 connector as it comes from the A2 power board.

20210916_070856 (resized).jpg20210916_070856 (resized).jpg
#351 2 years ago

Busy morning, details below.

1) Receiver done; replaced the carriage through bolt with a regular hex 1/4-20 and dremeled the cabinet wall to clear the bolt head. Minor clearence notch to clear upper center DE coin door fastener.

2) Playfield support rails located & PF support brackets installed. Made note for where I wish to notch them out for when the playfield is in the upright service position, will paint them black at same time.

3) Quick connector completed at SDB, wiring tested again. This allows quick playfield removal without having to pull a chunk of the cabinet wiring out.

Four wires in quick connector are flippers, ground for test switches and knocker.

20210916_101125 (resized).jpg20210916_101125 (resized).jpg20210916_104510 (resized).jpg20210916_104510 (resized).jpg20210916_104832 (resized).jpg20210916_104832 (resized).jpg20210916_105846 (resized).jpg20210916_105846 (resized).jpg20210916_110250 (resized).jpg20210916_110250 (resized).jpg

#352 2 years ago
Quoted from cottonm4:

Do you have a degree in electronic engineering? You sure seem to know your way around some obscure wiring challenges with regards to building a pinball machine.
I'm about ready to grab a prayer rug and worship at your feet.

Nah, always had an affinity for electrical systems in auto repair, made me popular in the shop because nobody liked electrical repair. I'd get all the fun stuff, always liked a good challenge. Still do apparently.

#353 2 years ago

Prop rod and stops done, yes more stuff from around the garage.

20210916_142057 (resized).jpg20210916_142057 (resized).jpg
#354 2 years ago
20210916_145355 (resized).jpg20210916_145355 (resized).jpg20210916_145412 (resized).jpg20210916_145412 (resized).jpg20210916_145431 (resized).jpg20210916_145431 (resized).jpg
#355 2 years ago

Nice. And NOT from scrap from around my shop.

Scrap from work. Heh.

20210916_150333 (resized).jpg20210916_150333 (resized).jpg
#356 2 years ago

Momentarily taken aback this morning- Been pounding along on the wiring and now that its done have to figure out what to do next!

1) Checked the sizing of the playfield bonus fonts this morning, still unsatisfactory and will work out another batch today. Still have some flattening and insert leveling of the playfield to do before another layer of clear along with some additional touch ups.

Still have to open up holes for popper mechs.

2) Backbox insert panel; 24" high and 28" wide, roughly. Should have that buzzed out today, trimmed to size and hinged this weekend and will start working on display placement.

3) Leads and connectors for poppers, will do this weekend.

4) Minor cab repairs and paint.

5) Strip apron & shooter gauge and prep for paint.

#358 2 years ago
Quoted from cottonm4:

What are these two pieces you hit with the hole saw? What is their purpose?

Notches for the support rails for when the playfield is vertical.

4c7545eae12fadf378d2bfffeba2cb094c979dcf (resized).jpg4c7545eae12fadf378d2bfffeba2cb094c979dcf (resized).jpg
#360 2 years ago
Quoted from cottonm4:

I see. I can see how easy it will be to stand the play field up vertical. But what I can't figure out is what lever you will use to remove the play field from the vertical and the cutout and lay it flat again.

Cut out is pretty standard Bally, except not made out of plywood. I'll do a video later.

Attached are two examples from Bally, the blue cabinet is Mr and Mrs Pacman which used the later metal rails and Flash Gordon which has the cheesy plywood supports.

3080989e7f775c9d6afa8dd8673a617a4f731e00 (resized).jpg3080989e7f775c9d6afa8dd8673a617a4f731e00 (resized).jpg9a4d701902f797da360ce8b494eeb59c74fdf110 (resized).jpg9a4d701902f797da360ce8b494eeb59c74fdf110 (resized).jpg
#361 2 years ago

Playfield up and down.

20210917_195044 (resized).jpg20210917_195044 (resized).jpg

20210917_195025 (resized).jpg20210917_195025 (resized).jpg

#362 2 years ago
20210917_195059_1.gif20210917_195059_1.gif
#367 2 years ago
Quoted from cottonm4:

Why the white paint around the saucers? Stern did this, too. I can't figure it out.

The only thing I can come up with is they wanted the area where the ball sits in the saucer to be white and the easy way to paint it was to blast from the underside.

Why? That I can't answer.

#368 2 years ago

Cut plywood, mounted hinges and drew out a grid pattern. Before I assembled the Uno boards I ran the PCB through the copier at work so I could cut them out and work out positioning.

20210918_164925 (resized).jpg20210918_164925 (resized).jpg20210918_164944 (resized).jpg20210918_164944 (resized).jpg
#369 2 years ago

Ok, finally have display locations.

20210919_131925 (resized).jpg20210919_131925 (resized).jpg20210919_131946 (resized).jpg20210919_131946 (resized).jpg
#371 2 years ago
Quoted from cottonm4:

Running those thru the copier is a nice trick. I wish I had thought of that.

Worked out well, still have to do final tweaking.

20210919_180456_1.gif20210919_180456_1.gif
#373 2 years ago
Quoted from Madmax541:

Looking good, you should be able to make Pintastic
I have ball guides for you.
Keep up good work.

Thanks! I had a chance to use router for first time yesterday, woot! Fun toy. Made doing the back panel easy, setting up the guides took longer than the actual work.

#375 2 years ago

Backbox insert controlled lamps are online.

20210920_203030 (resized).jpg20210920_203030 (resized).jpg

#376 2 years ago

So for the final bit of wiring, I'm going to take a page from cottonm4 and use strip lighting for the backglass.. but with a twist. Stay tuned for details. A nice roll of led lamps is on the way from Amazon and will be here Friday and I'm hoping to have everything complete before the weekend is out.

It just does not make sense to buy a bunch of sockets and LEDs when building from scratch and you are not concerned with originality.

10e6272c8cbe4348be64017d38cf547a871ab5e1 (resized).jpg10e6272c8cbe4348be64017d38cf547a871ab5e1 (resized).jpg

#378 2 years ago
Quoted from flynnibus:

I worry with that kind of design you are going to get lots of shadowing where the outter 1/5 of the glass is going to be dark all around. You aren't going to have a ton of reflective bounce in there to get those outter areas lit up.

Wait and see, I have not shown the lamp panel for a reason yet.

#380 2 years ago
Quoted from mrm_4:

[quoted image]

I have some mischief I'm up to, obvious solution to a problem once you ponder it a bit.

#382 2 years ago
Quoted from flynnibus:

put the lights on the inside edge of the head instead of the light panel?

Nope, don't overthink it too much and I have already posted clues!

#385 2 years ago
Quoted from mof:

As long as you have a pot for those things, imo.
Make sure you can control the level of glare on the PF.
I keep my bulb counts down to 10 plus or minus, and I test the bulb locations -- to make sure there's no glare in low lighting situations.
-mof

Getting warmer

#389 2 years ago

1) Made up a support for the lamp board for when it is in the closed position.

2) Wired up the poppers; they are all wired and keyed the same so they can be interchanged.

3) First test of playfield solenoids, success! Went off without a hitch.

20210921_194501 (resized).jpg20210921_194501 (resized).jpg20210921_194518 (resized).jpg20210921_194518 (resized).jpg

#391 2 years ago
Quoted from cottonm4:

I see 2 of your drop targets have the switches mounted on the bottom. Some say they have trouble with those. I like them. I have had zero issues and they sure are easier to service when that time comes around.

Those are the Bally units from a Mata Hari, will find up soon enough if they are "a problem"

Rolling along smartly, my box of parts is growing smaller by the day.

#396 2 years ago
Quoted from slochar:

The issue with the bottom mounted switches is when they get dead spots on them, or how much bounce they have when they reset. As long as they are clean and adjusted properly they're fine.
Because of the bottom mount and the way some people lift/move the playfields up and down though it can be easy to mangle the switches if you're not careful.

Worse case the bottom mount switches can be swapped for side mounts.

#397 2 years ago
Quoted from cottonm4:

As noted, I lit up my Robocop with Comet 2smd bulbs. It looked beautiful but also made the game unplayable.

I'm not a fan of 2SMD in the general illumination myself, even illumination I'm fanatical about though which is one reason I don't care for incandescent.

2SMD or 4SMD work nice in certain inserts though.

#399 2 years ago
Quoted from cottonm4:

Send Mirco a communique asking when he is going to finish the Dragonfist that Craig sent him Squeaky wheels get the grease.
Mirco says he has the files ready to go, but that he is busy and backed up with regular production runs. Considering of how Covid 19 has affected the world economy and the fact that pinball is hotter than a firecracker, I can see reasons for the delay. I try to be patient but until I get that play field back all I have is an empty box.

I'm waiting for him to get rolling on Alien Star

#401 2 years ago

Different router bit tonight, woot!

20210922_183705 (resized).jpg20210922_183705 (resized).jpg

#402 2 years ago

Finalizing some display wiring last night, I'd show you a picture but my usual camera has a broken lens. damnit.

#403 2 years ago

Ready for some pictures?

#404 2 years ago

Ok; The main problem with this machine is it is going to be used (hopefully!) with a few different titles which means more often than not different display & controlled lamp configurations for the back panel. So how do we get around this problem without having separate backpanel inserts?

When working on Flash Gordon I noted that most of the Bally backglasses had the displays in the same spot, at least the ones here at the house do (Star Trek, Flash Gordon, Supersonic, Xenon) and it struck me that with the UNO displays I could make a fairly small hole for the connector and just move them around as needed.

Step one was to make a blank panel and start hanging paper displays on it and marking display locations and routing them out... As you can see with the Flash Gordon backglass not bad at all.

Since the displays were going to be mobile the next problem was the factory display harness would not work. So I made a new harness where displays can pretty much reach all corners of the board.

20210922_162223 (resized).jpg20210922_162223 (resized).jpg20210922_165933 (resized).jpg20210922_165933 (resized).jpg20210924_190051 (resized).jpg20210924_190051 (resized).jpg
#405 2 years ago

Next problem: Relocatable controlled lights for tilt, shoot again, game over, match, etc.

Answer? Yoppsicle lamps mounted with velcro which can be moved in moments.

20210920_200454 (resized).jpg20210920_200454 (resized).jpg20210920_200503 (resized).jpg20210920_200503 (resized).jpg20210920_203030 (resized).jpg20210920_203030 (resized).jpg

#406 2 years ago

Last problem: GI lighting and what maybe my more interesting and convoluted solution.. but works as the power is already there and I have the parts on hand.

I used USB 5V strip lighting (240 LEDs, 16 feet) cut into sections and soldered by back together.

Power? I took the 6VAC GI lighting feed to the backbox, ran it through a bridge rectifier to get DC voltage and then ran the output through a buck booster to get the desired voltage and brightness levels. The advantage of this setup is I can tune the light levels to anything I like by simply turning the voltage up or down at the buck booster. I actually found with all the LEDs present 2.75V to 3.0V looks great. A trimmer would have done the job I'm sure but I had the booster kicking around from an old problem so in it went.

Need to get some light shields around the controlled lamps, and the displays looked better once I installed the foam light blockers on them, all and all pretty pleased with the results.

20210925_075531 (resized).jpg20210925_075531 (resized).jpg20210925_075609 (resized).jpg20210925_075609 (resized).jpg

20210925_080013 (resized).jpg20210925_080013 (resized).jpg
Promoted items from Pinside Marketplace and Pinside Shops!
$ 18.95
Eproms
Pinballrom
 
$ 169.00
$ 18.95
Eproms
Pinballrom
 
$ 99.00
7,500 (OBO)
Machine - For Sale
Sandusky, OH
$ 189.00
Flipper Parts
Mircoplayfields
 
$ 15.00
Hardware
Volcano Pinball
 
$ 179.00
$ 29.00
Boards
RoyGBev Pinball
 
$ 100.00
Cabinet - Shooter Rods
Super Skill Shot Shop
 
$ 69.00
Gameroom - Decorations
Pinball Pimp
 
From: $ 20.00
Various Novelties
Pinball Photos LLC
 
$ 90.00
3,100 (Firm)
Machine - For Sale
West Chester, PA
$ 10.95
Eproms
Pinballrom
 
Wanted
Machine - Wanted
Gilbert, AZ
$ 7.00
Playfield - Decals
Pinball Haus
 
$ 959.00
5,800
Machine - For Sale
Spring Grove, IL
£ 195.00
$ 45.00
Pinball Machine
Wall To Wall Pinball
 
$ 69.00
Gameroom - Decorations
Pinball Pimp
 
$ 15.00
Hardware
Volcano Pinball
 
$ 179.00
$ 18.95
Eproms
Pinballrom
 
$ 110.00
Cabinet - Shooter Rods
Super Skill Shot Shop
 
1,360 posts in this topic match your search for posts by gdonovan. You are on page 1 of 6.

You're currently viewing posts by Pinsider gdonovan.
Click here to go back to viewing the entire thread.

Reply

Wanna join the discussion? Please sign in to reply to this topic.

Hey there! Welcome to Pinside!

Donate to Pinside

Great to see you're enjoying Pinside! Did you know Pinside is able to run without any 3rd-party banners or ads, thanks to the support from our visitors? Please consider a donation to Pinside and get anext to your username to show for it! Or better yet, subscribe to Pinside+!


This page was printed from https://pinside.com/pinball/forum/topic/seawitch-from-scratch-allentown-edition?tu=gdonovan and we tried optimising it for printing. Some page elements may have been deliberately hidden.

Scan the QR code on the left to jump to the URL this document was printed from.