(Topic ID: 298861)

Seawitch from scratch, Allentown edition (Bally/Stern multi-game platform)

By gdonovan

2 years ago


Topic Heartbeat

Topic Stats

  • 1,882 posts
  • 61 Pinsiders participating
  • Latest reply 2 days ago by gdonovan
  • Topic is favorited by 57 Pinsiders

You

Linked Games

Topic Gallery

View topic image gallery

20240421_122121 (resized).jpg
20240421_112528 (resized).jpg
20240417_063054 (resized).jpg
20240417_062508 (resized).jpg
Pinside_forum_8128739_3858925 (resized).jpg
Pinside_forum_8128739_3858924 (resized).jpg
20240414_120632 (resized).jpg
20240414_120610 (resized).jpg
20240407_132248 (resized).jpg
20240405_065536 (resized).jpg
20240407_124243 (resized).jpg
20240407_123430 (resized).jpg
20240407_122531 (resized).jpg
20240405_065541 (resized).jpg
20240404_182152 (resized).jpg
20240404_065347 (resized).jpg

Topic index (key posts)

33 key posts have been marked in this topic, showing the first 10 items. (Show topic index)

There are 1,882 posts in this topic. You are on page 26 of 38.
#1251 2 years ago
Quoted from Joydivision:

Very interested to see how the Coos version works out in terms of how it looks backlit in particular & the process of applying the film to the glass. I Had already decided to purchase a Coos QS glass as reviews I have read on other titles have all been excellent, but was considering a film also instead of a completed glass.

Well we wont know till Tuesday as the idiot at the glass shop cut the wrong thickness glass.

They didn't know what 3mm was and guessed wrong.

#1252 2 years ago

Guides came out most satisfactory.

20220326_184602 (resized).jpg20220326_184602 (resized).jpg20220326_184618 (resized).jpg20220326_184618 (resized).jpg20220326_184637 (resized).jpg20220326_184637 (resized).jpg
#1253 2 years ago

Almost showtime!

The oak rail is notched so the stainless guide is sunk into it for a seamless transition.

20220327_081107 (resized).jpg20220327_081107 (resized).jpg20220327_081124 (resized).jpg20220327_081124 (resized).jpg
#1254 2 years ago
20220327_152627 (resized).jpg20220327_152627 (resized).jpg
#1255 2 years ago

Worked pretty much out of box, just had to tweak a switch.

#1256 2 years ago

your guides are sexy! would love to hear more about your methods there!

#1257 2 years ago

Update in a few.

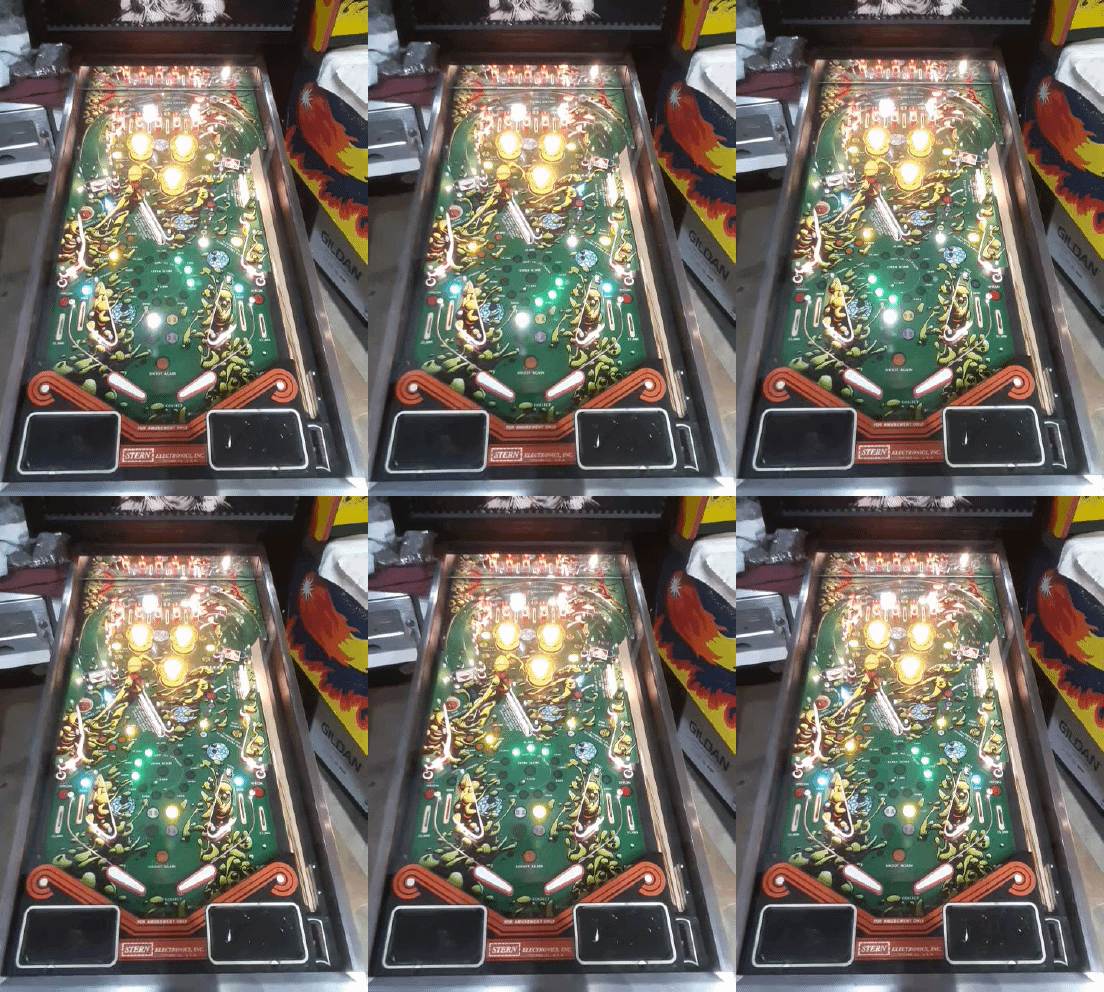
Here is your update; Not bad, very few problems aside from one switch which was stuck (a return lane) and tuning the EOS switches as they were gapped out too large out of the box. I have to lower the back of the cab, unlike Seawitch & Centaur, Quicksilver doesn't seem to like the more aggressive angle compared to the first two titles.

Tomorrow the glass should be done so I can install Coo's film and I have to strip, paint & decal the apron. Aside from that, have some backglass controlled lamps to be done and its finished.

Trying not to form an opinion just yet of the game since its not complete. Like the sounds and the "chase the lamp for extra ball" is cool, need to get the angle set before I play more however.

20220327_164013_1.gif20220327_164013_1.gif

#1258 2 years ago
Quoted from flynnibus:

your guides are sexy! would love to hear more about your methods there!

1) Start with some polished mirror finish stainless from McMastercarr or Grainger

Polished Multipurpose 304 Stainless Steel Strip, Mirror-Like #8, 1" x 36", 0.0300" Thick

2) For the tighter radius pieces you will need a roll machine for a really nice job, I used a KAKA 3-In-1/8,8-Inch Combination Sheet Metal Brake,Slip Roll Machine and Brake Shear Roll Machine from Amazon which was roughly $300. Its also handy for making the 90 degree brackets and shearing the metal to length. The larger guide was just gently curved by hand.

3) Used 1/8" rivets from Pinball Life with a rivet setting tool from Amazon.

I made the uprights from thicker stainless I had lying around in my scrap pile so can't help you there! The uprights are 3/4" wide to match the dual screw pattern in the playfield.

A typical guide you start with one end, this will be your anchor point that everything else will flow from. Bend the metal to the rough shape you need it to be and place on the playfield using spacers to keep it off the playfield surface. I used some silicone post washers I was using during assembly.

Once you have the one end anchored, go to the next point and mark the centerline between the 2 screw holes in the playfield for the next bracket. Use a sharpie and mark the back of the new metal for that location.

Remove the guide back off, scribe a line at that location on the back of the guide so you have a vertical hole drill location. I used an old Bally guide that had 2 holes in it to place over the new metal to get my horizontals. Once you have your two locations, centerpunch briskly and then use a 1/16" bit to make the initial holes and then move up to 1/8" drills. You will be tempted to skip and run right to the larger bit, you are better off doing it in two stages. Once you have your two holes, clean off the burrs with a larger bit (5/16 for example) and place the guide back on the playfield.

Screw down your initial anchor point and with the guide in position, scribe the 2nd upright for rivet attachment holes using the freshly drilled guide as locator. I used a 90 degree pick and just wiggled around the hole, it will leave a clear round marking on the stainless.

Take both pieces back off, center punch the upright, drill and rivet together. Test fit making sure there are no burrs (use file) before hand and then proceed to #3

Rinse and repeat.

This is very time consuming; I had two days time making these two parts but they came out most satisfactory and I was moving at a good clip by the end. The metal brake is also very handy for bending the wire for perfect 90's on the wire ball guides.

#1259 2 years ago

This machine has been added to your collection.

#1260 2 years ago
Quoted from gdonovan:

The metal brake is also very handy for being the wire for perfect 90's on the wire ball guides

yeah that machine looks pretty slick for our pinball parts needs. Thx for the details... now to convince myself not to buy it immediately Having a break just around period is tempting...

Having the 1" stock w/o cutting was the other aha moment that made that more achievable.

Kudos on your no excuses push on these things. Lots of interesting challenges have been overcome.

#1261 2 years ago
Quoted from flynnibus:

yeah that machine looks pretty slick for our pinball parts needs. Thx for the details... now to convince myself not to buy it immediately Having a break just around period is tempting...
Having the 1" stock w/o cutting was the other aha moment that made that more achievable.
Kudos on your no excuses push on these things. Lots of interesting challenges have been overcome.

Like I said, Skateball is on deck soon (after Flash Gordon is complete or at a minimum while the FG playfield is curing) and I'll have to do guides regardless.. so this was a good learning experience.

Oh, the spinners are not painted yet as I have not decided on what color and emblem I'm going to place on them.

I really need a second cab, one for building and another for long term play.

#1262 2 years ago

Someone mentioned the posts I was using and I'd throw the part number out there.
Data East/Sega/Stern 530-5005-00
Substitute for
Williams : 02-4177
Bally: S2145
Bally ASE-2836-1
Bally AS-2836-1
Gottlieb® 25161
While I have run across them in Gottlieb (hence I used the term fat Gottlieb post) PBR uses a Data East part number. This is a #10 fastener so you will have to drill the playfield for the larger opening. This is an awesome replacement for the early Bally units which just bend like wet noodles over time. PBR has them for $3 a pop and you never have to worry about ripping them out. For good measure I use a small stainless washer top and bottom to spread the load out even further when installing.

de-530-5005-00 (resized).jpgde-530-5005-00 (resized).jpg

#1263 2 years ago

I have used those posts for blown-out Bally playfields and I also use a decent size washer under the playfield too. I like to use a keep nut (the nut with the external star washer in one assembly) on the underside with my washer.

#1264 2 years ago
Quoted from Skidave:

I have used those posts for blown-out Bally playfields and I also use a decent size washer under the playfield too. I like to use a keep nut (the nut with the external star washer in one assembly) on the underside with my washer.

Keep nut or elastic stop nut are my favorites.

#1265 2 years ago

Video uploading now.

20220328_161755 (resized).jpg20220328_161755 (resized).jpg
#1266 2 years ago

Just a follow up on the film application- On Coos "how to video" he leaves the clear edge on to be cut off later. I cut off the clear portion (and a sliver of art) before so that the glass is a 1/16" larger all around than the film. This way you don't have to worry about catching the edge of the plastic and lifting it off the glass. You cannot cut the plastic off when it is on the glass and make it flush, the glass edge dulls the blade quickly.

Sharp scissors are fine or a fresh razor and metal ruler.

#1267 2 years ago

Awesome! I bet that's way more reasonably priced than having a complete glass shipped. Care to say how much? It was over $500 when I inquired a complete glass

#1268 2 years ago
Quoted from play_pinball:

Awesome! I bet that's way more reasonably priced than having a complete glass shipped. Care to say how much? It was over $500 when I inquired a complete glass

OK here is the deal with going with Coos this time around.

1) Coos has a few films for titles that are not available anywhere else. I wanted to sample his product for evaluation towards future purchases. There is an Olympic Hockey sitting in the back of my restoration queue my wife and I adore. Coos has the film.

2) I didn't want to wait 2 or 3 month lead time for BG Resto to get around shipping a backglass. I know the guy has another job and very appreciative of the fine products he makes but the time frame utterly did not work for me. By the time it shows up, I'll be 2 playfields ahead already. Coos shipped inside a few days and it was here very quickly.

Also see point #1 above.

3) Last point is price.. which frankly once you are this far into the program is almost immaterial. Coos was $245 USD for the film shipped plus $21 for a local glass shop to cut me a 28-1/2" x 25-7/16" x 1/8" piece of glass. $266

BG Resto I was quoted $355 shipped.

If I was building a bling bling Stern cab Quicksilver clone.. It would have taken longer and I might have gone with the BG Resto for that extra bump.

#1269 2 years ago

Gameplay video here in 45 minutes.. uploading now.

#1270 2 years ago

I’m mostly interested in the mirrored versions he’s able to recreate (or in some instances, custom make). So do you feel a bgresto looks better than the film? It seemed like a very quick install. I assume you’ll tape the edges like bgresto does?

#1271 2 years ago
Quoted from play_pinball:

I’m mostly interested in the mirrored versions he’s able to recreate (or in some instances, custom make). So do you feel a bgresto looks better than the film? It seemed like a very quick install. I assume you’ll tape the edges like bgresto does?

1) I had no plans to tape the edges, just add the factory trim.

2) Can't say without having them side by side, it looks very good lit from behind by the shop lights. I think anyone would be hard pressed to tell the difference.

#1273 2 years ago

Brilliant! thanks for posting a detailed vid of the film application.

#1274 2 years ago

Going to work on stripping and painting apron tonight, clocks ticking!

#1275 2 years ago

Unnf, that scoop sound - :51 in the video - I need that in my life! I can't think of another sound I love so much in pinball...

#1276 2 years ago
Quoted from Joydivision:

Brilliant! thanks for posting a detailed vid of the film application.

I'm not that happy with it at the moment, I suspect the film really doesn't adhere at all to the glass once the water evaporates so in reality no better than a translite. I'm waiting on Coos for a reply so I'd hold off on thoughts of an order for a moment. I will do a follow up video if need be.

Aside from that I tweaked both spinner switch stacks so they REALLY spin something fierce. Stripped and painted the apron base color and letting it dry now.

20220329_193119 (resized).jpg20220329_193119 (resized).jpg
#1277 2 years ago
Quoted from gdonovan:

I'm not that happy with it at the moment, I suspect the film really doesn't adhere at all to the glass once the water evaporates so in reality no better than a translite.

I wonder if Coos offers a ready to install "printed directly on glass" version of QS as a option to a DIY film? or were all the finished QS glasses he supplies done the same way using a film?

#1278 2 years ago
Quoted from Joydivision:

I wonder if Coos offers a ready to install "printed directly on glass" version of QS as a option to a DIY film? or were all the finished QS glasses he supplies done the same way using a film?

Anyone know Nick Baldridge? Coos asked me to reach out to him as he has had good luck with the films.

#1279 2 years ago

Ok, think I got hold of Nick on Pinside so will let you know how things go.

Tonight I think I'm going to grab the spare cabinet and head and try to mate them up into cabinet #2. This will primarily be for setup & testing of boards and playfields so its not going to be pretty. I have the head harness from Mr & Mrs Pacman I'm going to use for board interconnect and I'll drop in the transformer and -54 I was going to use with Flash Gordon.

I despise pulling down a perfectly operating game to test some board or in this case pulling Centaur to setup Quicksilver. So this will be of great help, especially when troubleshooting boards. Combined with a scope I hope to get one of these days I can really sharpen my troubleshooting skills.

#1280 2 years ago
20220331_181101 (resized).jpg20220331_181101 (resized).jpg
#1281 2 years ago

Done.

20220331_184508 (resized).jpg20220331_184508 (resized).jpg
#1282 2 years ago
20220331_190428 (resized).jpg20220331_190428 (resized).jpg
#1283 2 years ago
Quoted from gdonovan:

Done.
[quoted image]

Apron look amazing! how did you do the correct apron graphics as per original? is that a decal created from a scan of an original apron?

#1284 2 years ago
Quoted from Joydivision:

Apron look amazing! how did you do the correct apron graphics as per original? is that a decal created from a scan of an original apron?

Scan of an original, Cameo 4 pro recut in individual vinyl colors.

Apron is painted Hunter Green (Rust-o-lium) and the light green is neon green vinyl and the black is vinyl too.

Vinyl sheets picked up from local hobby store. cut decal applied dry very carefully with transfer tape.

Below is a Bally apron done up to look like a Stern for Seawitch, same process. They are not exactly the same so I had to resize the card graphics and of course Bally has a credit lens.

e298d015e99f9052fbdf699c4a4e7dd08a42d378 (resized).jpge298d015e99f9052fbdf699c4a4e7dd08a42d378 (resized).jpg
#1285 2 years ago

Stuff left to do;

1) paint spinners, decide on graphics (DONE)

2) nut inserts for apron hold downs (DONE)

3) Finalize back glass

4) New locations for displays (time to break out the router again) (DONE)

5) Controlled lamps in backglass (Tilt-HSTD-Game Over) DONE

I'm toying with the idea of moving the tilt - HSTD - game over lamps down to the mirrored area over the playfield along with the credit display. This would speed up game swaps as there would be less to move.

6) Graphics for popper tops maybe

#1286 2 years ago

Apron area complete

20220404_060001 (resized).jpg20220404_060001 (resized).jpg
#1287 2 years ago

Getting better with vinyl cutter but the program still sucks.

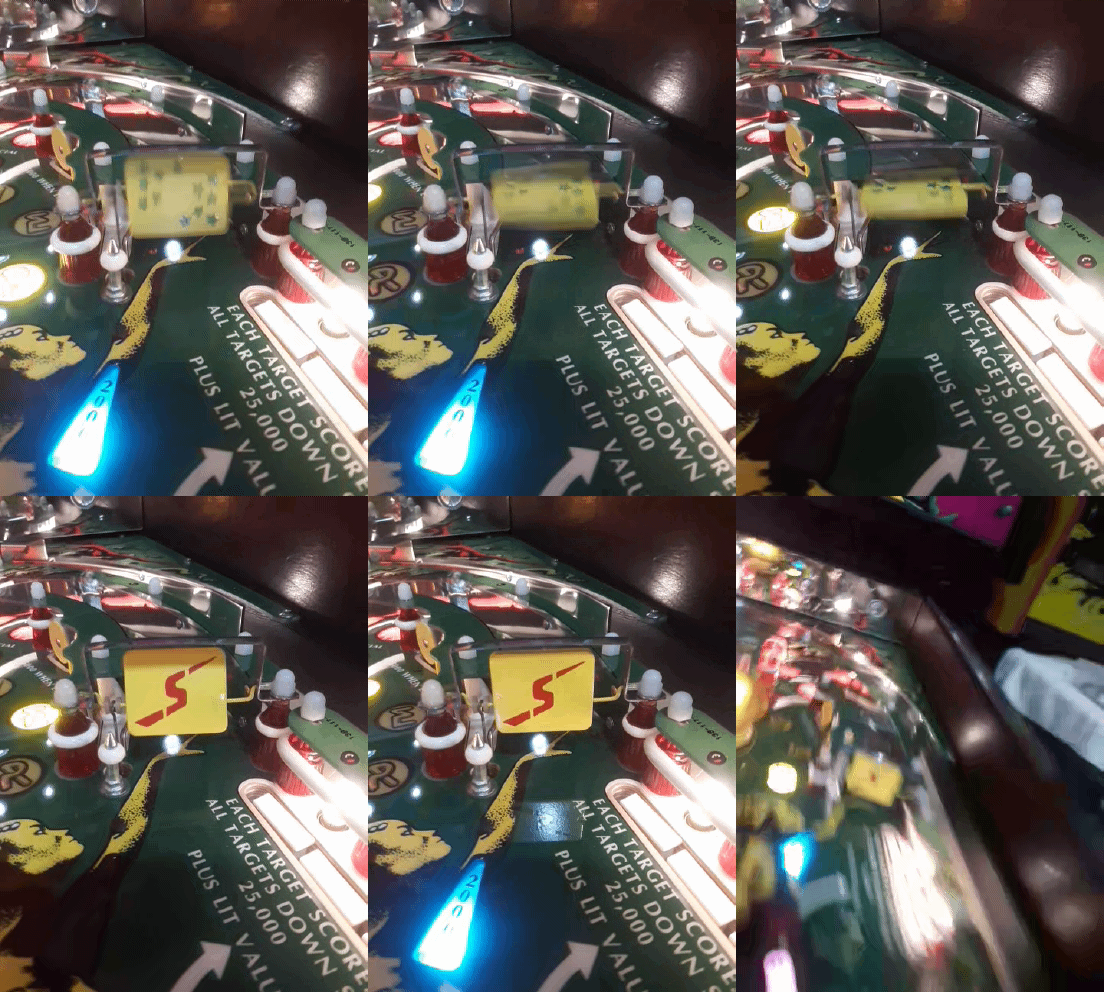
20220404_172745 (resized).jpg20220404_172745 (resized).jpg
#1288 2 years ago

Looks great. Curious to hear any further details on the Coos stuff. Been cleaning up some Magic Circle art to send to him for a film.

#1289 2 years ago
20220404_175320 (resized).jpg20220404_175320 (resized).jpg
#1290 2 years ago

Spinners done.

20220404_181242_1.gif20220404_181242_1.gif
#1291 2 years ago

Playfield is 100% done.

20220404_181700.jpg20220404_181700.jpg
#1292 2 years ago

Started on backbox lamps, will be rattling off 3d prints when I get home. Should be done tonight.

Decided on going forward will limit the number of lamps in the backbox as this will get unwieldy very, very quickly. While I will wire the harness for all lamps will only install as needed. Stern titles going forward for example will not have "player shoots again" if there is an indicator on the playfield like Quicksilver and Seawitch. Quicksilver will only have "tilt" and "Game Over" illuminated.

I'm also not going to light "High Score to Date" as to me its pretty self evident if you are familiar with Bally or Stern pins.

#1293 2 years ago

Almost there...

20220405_171434 (resized).jpg20220405_171434 (resized).jpgbacklight (resized).jpgbacklight (resized).jpgshield (resized).jpgshield (resized).jpg
#1294 2 years ago
Quoted from gdonovan:

Playfield is 100% done.

Game came out awesome!

#1295 2 years ago
Quoted from gdonovan:

Almost there...
[quoted image][quoted image][quoted image]

Finished backglass looks great from this pic, what is your assessment on how the the Coos film turned out overall?

#1296 2 years ago
Quoted from Joydivision:

Finished backglass looks great from this pic, what is your assessment on how the the Coos film turned out overall?

I'm very pleased with Coos product and customer service, so much so that I have ordered Olympic Hockey, Star Trek proto and Silverball and will be doing a more detailed installation video in the near future.

I'm almost done tweaking the lighting, wanted to wait till then before posting a picture. I'm going to 3d print a shield or two for the unused spots (I can faintly see HSTD) and I don't want to reduce the brightness. One of the spinners looks like it is getting chips on an edge, might pull off, touch up and try some diamond hard clearcoat.

Rerouting the switch matrix wiring and running caps on the flipper coils SEEMS to have cured the phantom coil firing problematic to this platform. I can't recall at any time during gameplay an errant pop of the slings or poppers.

25 plays on the Micro playfield and no issues. I'm told the 100 game mark is where you know if you have a stinker or not. Fingers crossed.

Due to my upcoming recuperation I have to hustle the rest of the month. I have to pull the other Bally cabinet down from the overhead and assemble for a test cab. Space Shuttle I have to shoot a gameplay video and put in storage near the door as I might be swapping it out with a friend. Have to setup the bench with Flash Gordon so I can start airbrushing the insert keylines and prep for final clearcoat.

Thanks for following along!

20220406_052419 (resized).jpg20220406_052419 (resized).jpg
#1297 2 years ago

Lighting and displays not final on this one, but you get the idea.

20220406_050342 (resized).jpg20220406_050342 (resized).jpg

#1298 2 years ago
Quoted from gdonovan:

I'm very pleased with Coos product and customer service, so much so that I have ordered Olympic Hockey, Star Trek proto and Silverball and will be doing a more detailed installation video in the near future.

Good to hear! the colours & resolution backlit certainly looks very, very close to an original overall. I will be definitely be ordering a film to do a backglass myself when the time comes.

#1299 2 years ago
Quoted from Joydivision:

Good to hear! the colours & resolution backlit certainly looks very, very close to an original overall. I will be definitely be ordering a film to do a backglass myself when the time comes.

Look for a more detailed video in another week or two- Personally I think the film looks better than some backglasses from the factory. The original Skateball backglass I have the mask layer is so thin I can actually see the banding of the strip lights. This is not present at all with Quicksilver and I have not changed the brightness level when I went from Centaur to Quicksilver. It looks very rich, vibrant and pleasing to the eye.

The only downside on a shipped film is no mirroring. I did order a Silverball Mania and accept that is will be a reflective gray compared to the original. Since I'm into the complete playfield for little money I don't mind this compromise.

I'm going to practice some airbrush stencil repair and clearcoat Silverball. Play it for a bit and then sell the restored playfield "module" as a package with the backglass. I'm sure someone would be interested in it for a reasonable price or trade. I had picked it up for the harness and mechs but since it is very repairable & complete I don't have the heart to strip it.

#1300 2 years ago

The next contestant steps right up!

20220406_185619 (resized).jpg20220406_185619 (resized).jpg
Promoted items from Pinside Marketplace and Pinside Shops!
5,000 (OBO)
Machine - For Sale
Houston, TX
$ 99.00
$ 1.00
Pinball Machine
Pinball Alley
 
$ 15.00
Hardware
Volcano Pinball
 
$ 18.95
Eproms
Pinballrom
 
1,700
Machine - For Sale
New Brighton, PA
$ 959.00
Wanted
Machine - Wanted
Gilbert, AZ
$ 100.00
Cabinet - Shooter Rods
Super Skill Shot Shop
 
$ 25.00
Playfield - Plastics
20eyes
 
$ 17.50
Lighting - Led
Pinballrom
 
$ 7.00
Playfield - Decals
Pinball Haus
 
$ 69.00
Gameroom - Decorations
Pinball Pimp
 
$ 69.00
Gameroom - Decorations
Pinball Pimp
 
$ 69.00
Gameroom - Decorations
Pinball Pimp
 
$ 55.00
Cabinet - Toppers
Slipstream Mod Shop
 
$ 100.00
Cabinet - Other
Volcano Pinball
 
$ 45.00
Pinball Machine
Wall To Wall Pinball
 
$ 12.00
Playfield - Toys/Add-ons
UpKick Pinball
 
$ 22.95
Eproms
Pinballrom
 
From: $ 20.00
Playfield - Protection
UpKick Pinball
 
3,100 (Firm)
Machine - For Sale
West Chester, PA
$ 115.00
Cabinet - Shooter Rods
Super Skill Shot Shop
 
$ 5.00
Hardware
Volcano Pinball
 
$ 179.00
Cabinet - Other
Pinball Pimp
 
$ 18.95
Eproms
Pinballrom
 
Great pinball charity
Pinball Edu
There are 1,882 posts in this topic. You are on page 26 of 38.

Reply

Wanna join the discussion? Please sign in to reply to this topic.

Hey there! Welcome to Pinside!

Donate to Pinside

Great to see you're enjoying Pinside! Did you know Pinside is able to run without any 3rd-party banners or ads, thanks to the support from our visitors? Please consider a donation to Pinside and get anext to your username to show for it! Or better yet, subscribe to Pinside+!


This page was printed from https://pinside.com/pinball/forum/topic/seawitch-from-scratch-allentown-edition/page/26?hl=skidave and we tried optimising it for printing. Some page elements may have been deliberately hidden.

Scan the QR code on the left to jump to the URL this document was printed from.