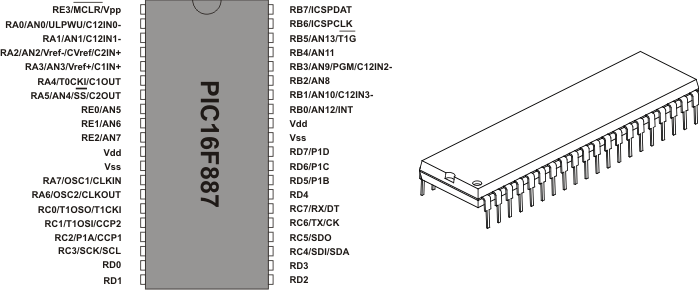
Does any of you know if the chip can be programmed via the ICSP connection directly on the RUN-DMD board? Having taken my 3x clocks/frames apart 2x times for updating firmware is a pain. Was thinking of connecting a cable and leaving it there. When a new version comes out untuck it, flash it, tuck the calbe back in, then I'm done.
You're currently viewing posts by Pinsider ddebuss.
Click here to go back to viewing the entire thread.
Quoted from docquest:if you look at the FAQ page you'ss sell that you can if you have a rev A through F board:
Thank you docquest. I thought I looked there but didn't see it. Next time I upgrade I'm adding a cable to each of them. Hopefully that will be the last time they have to come apart.
Any status on the EXP3? I have all the parts to build 5 more clocks (minus the Run-dmd) but am waiting for EXP3 since I will want my frames to have the right holes in the right places.
Quoted from j_m_:- move the position of the run-dmd pc board (one more time) to eliminate the need for the low profile ribbon cable connector
- open up the access hole over the run-dmd pc board (making it easier to either connect to the ICSP or remove the pic chip) for firmware updates
- add additional mounting holes to support the addition of the EXP ONE board
Exactly the 3 things I was going to do. I never want to take one of these apart again. I'm installing a ICSP cable permanently in all of my clocks going forward since it's a pain to update. Simply untuck the installed cable, update, retuck cable. Hopefully the mounting holes on the EXP THREE are in the same place as the Run-Dmd holes. My plan was for the Run-dmd board to put a much bigger hole just left of the center if looking at it from the back and the holes for the EXP THREE just right of the center. I don't care if I can access the menu buttons while it's on the wall since there's a remote and I generally don't' change settings after installing it. I'll send you a cutout template I was planning on using if you are interested.
You're currently viewing posts by Pinsider ddebuss.
Click here to go back to viewing the entire thread.
Reply
Wanna join the discussion? Please sign in to reply to this topic.

Hey there! Welcome to Pinside!
Donate to PinsideGreat to see you're enjoying Pinside! Did you know Pinside is able to run without any 3rd-party banners or ads, thanks to the support from our visitors? Please consider a donation to Pinside and get anext to your username to show for it! Or better yet, subscribe to Pinside+!


 Cumming, GA
