(Topic ID: 94507)

ROBOCOP Club if you own one or use to

By JCJP

9 years ago


Topic Heartbeat

Topic Stats

  • 1,953 posts
  • 122 Pinsiders participating
  • Latest reply 3 months ago by mad_carl
  • Topic is favorited by 45 Pinsiders

You

Linked Games

Topic Gallery

View topic image gallery

RoboCop (resized).png
IMG_5028 (resized).jpeg
Screen Shot 2023-11-15 at 9.32.40 AM (resized).jpg
20231021_134249 (resized).jpg
Screenshot_20230907-160615 (resized).png
cn8 and 9 (resized).jpg
cn8 and 9 2 (resized).jpg
20230820_094642 (resized).jpg
IMG_7293 (resized).jpeg
20230813_172213 (resized).jpg
MPU004.pdf (PDF preview)
Pinside_forum_7704045_0 (resized).jpg
20230807_161942 (resized).jpg
Screen Shot 2023-08-07 at 7.45.08 AM (resized).jpg
Screen Shot 2023-08-07 at 6.49.04 AM (resized).jpg
16913159548263188604343872213635 (resized).jpg

You're currently viewing posts by Pinsider thehipster.
Click here to go back to viewing the entire thread.

360 posts in this topic match your search for posts by thehipster. You are on page 1 of 2.
#356 4 years ago
Quoted from cottonm4:

Check out the new toy I got for my Robocop. Now, I just have to figure out how I am going to spotlight it.
Yes. It does not interfere with a ramp ball in any way. I would have liked to set it a little lower into the ramp but ball clearance would have been an issue.
It is just a little toy that adds nothing to game play.
[quoted image]
[quoted image]
[quoted image]
[quoted image]

I liked this idea so much I did something similar with mine. I have some matrix strip leds on the way from Comet. Just got to decide where to put them. Oh and I am going to attach an easy clip on red led to the red hand-cuff lamp socket and put it under the car so that people who are under my height can see when Dick Jones is in custody.
robo (resized).jpgrobo (resized).jpgrobo2 (resized).jpgrobo2 (resized).jpg

#357 4 years ago
Quoted from puck:

I would try, but no one can explain it better then Vid. Check out Vid's GUIDE To Rebuilding Pop Bumpers.

Puck here is the link for Vid's guide to Rebuilding Pop Bumpers.

https://pinside.com/pinball/forum/topic/vids-guide-to-rebuilding-pop-bumpers

#361 4 years ago
Quoted from gdonovan:

Do you have a good picture of where the flasher is mounted there on the top left of the playfield? Someone removed mine and I'm looking to see where and how it is mounted. Thanks!

Do you mean the green flasher or the one in the very bottom corner?

#362 4 years ago
IMG_20200314_203507 (resized).jpgIMG_20200314_203507 (resized).jpgIMG_20200314_203451 (resized).jpgIMG_20200314_203451 (resized).jpg Added over 4 years ago:

These pics show my car mod with added led strip under the ramp decal.

#364 4 years ago
Quoted from gdonovan:

Top left under the police car.

I am away from home until Wednesday so will get a pic then.
It might be better if you send me a pic of where it isn't on your pin.

#376 4 years ago
Quoted from gdonovan:

[quoted image]

Seems cotton 4 has beat me to it but I'm gonna have a look out of curiosity.

#379 4 years ago
Quoted from gdonovan:

I looked close at mine before work, no evidence of flasher ever being mounted there. I'll pull the plastic off after work and take a picture.

Me too. No evidence of a socket being there. Mine is deep within the ramp structure in the top left corner of the playfield.

#380 4 years ago

Deleted post

#382 4 years ago
Quoted from cottonm4:

Wow! Some tech talk on Robocop. Cool. I know about the skill shots. I'll do a switch test and see what comes up.
It think I am going to have to do some repin work. Some of my lights get a little funky.
Here is a another one for you. Sometimes when things are going real fast and I make a ramp shot, all of the feature lights freeze. The pin still plays fast but the feature lights for frozen. After 10 seconds or so, the lights seem to catch up to game play action and start lighting "normal" again.

Yes that does happen on mine. I just thought it was a glitch and it doesn't spoil the game for me. Mine also gets confused when fully loaded with locked balls and the 'everything lit' feature starts. When this happens the pin takes longer than normal to launch the balls back into play (so the countdown for the everything lit feature is at about 8 or 9 seconds by the time it starts.)

#383 4 years ago
Quoted from gdonovan:

Here is mine.[quoted image]

I took mine apart last night and I do indeed have a flasher under 209. I could not find if it worked or not. Can you tell me when in the game it comes into effect. I think I might have a faulty socket but if I know when it should fire up I can check it in game play.

Added over 4 years ago:

I have tested the flasher lamp in the back box and it is working fine.

#387 4 years ago
Quoted from gdonovan:

Here is a gif when the skill shot hits and sets off the flasher.[quoted image]

Thanks for the gif. I am pretty sure that doesn't happen on mine. I will test it tonight.

#391 4 years ago
Quoted from cottonm4:

Can we talk about the skill shot? Mine always would only shoot for the right hand inlane. The number #9 of the 209. Basically, there was no skill shot. Todd Tuckey talks about this on one of his Robocop videos.
So, I started tweaking the chrome wires on my wire ramp. Now the ball is directed to exit a little more to the right. And by varying my plunger pull strength I can get the ball to bounce of of a post ring and make a directed shot to each lane number. The #2 is a hard skill shot to get. The #0 is a little bit easier but no slam dunk. And the #9 is an easy shoot-hard-and-hop- for-the-best type of shot. It adds dimension to the game when you can get an extra 600,000 points by making all 3 skill shots.
So, can you guys make your skill shots on the 2-0-9? Or are you sort of stuck with only being able to shoot the #9?

My skill shot option gives me a chance with the amount of pull back I use on the plunger. A small amount gets me the 9, even softer for the 0 (after messing about with the rubbers on the 9) and full on for the 2.

#392 4 years ago
Quoted from gdonovan:

Here is a gif when the skill shot hits and sets off the flasher.[quoted image]

My two flashers the one under the cop car and the one under the 209 do not work. I tested the lamps and they are fine. All wiring is intact and I want to chase the wiring back to the board.

Do you or anyone else have a playfield lamp matrix chart I could look at. My instructions were downloaded and the matrix is on page 34 where my booklet only makes it to page 31. I am scouring the internet for a picture of one but I have been looking for well over an hour atm to no avail.

#394 4 years ago
Quoted from cottonm4:

I could probably get you one scanned tomorrow.
I'm sending you a PM.

I just had a thought. I didn't check the fuse.

#396 4 years ago
Quoted from cottonm4:

I have made that oversight, as well. LMK.

I think I have found the problem. See pic. But without a diagram I am unsure which gap to push it I to.

IMG_20200320_182025 (resized).jpgIMG_20200320_182025 (resized).jpgIMG_20200320_182123 (resized).jpgIMG_20200320_182123 (resized).jpg
#399 4 years ago
Quoted from cottonm4:

Here is a PPB scan. I'm surprised it scanned as well as it did because this drawing measures 3" x 3" on the page. Your violet wires are all listed here.
There is a violet/ gray in here. But I don't see voilet/white listed anywhere.
[quoted image]

Thank you very much for that. There is no reference to the top left flashers either but I suspect that the stray wire is the culprit. I will need to tra e it which means the top left upper playfield will have to be removed because the sockets are riveted underneath.

#400 4 years ago
Quoted from Thehipster:

I think I have found the problem. See pic. But without a diagram I am unsure which gap to push it I to.[quoted image][quoted image]

I think I see what you mean. Where the tip of a purple wire is showing but there doesn't seem to be anything coming out of the bottom. Am I oorrect?
I am off to work before the UK goes into lock down.
Hold the phone!!!! Thank you guys. Problem solved. It always amazes me how simple things can cause so many problems. It was the loose wire and it was from the connector point that KBZ identified. All looking good now.

#401 4 years ago
Quoted from Thehipster:

I think I see what you mean. Where the tip of a purple wire is showing but there doesn't seem to be anything coming out of the bottom. Am I oorrect?
I am off to work before the UK goes into lock down.

Hold the phone!!!! Thank you guys. Problem solved. It always amazes me how simple things can cause so many problems. It WAS the loose wire and it was from the connector point that Kba identified. All looking good now.

#403 4 years ago
Quoted from cottonm4:

Here is a PPB scan. I'm surprised it scanned as well as it did because this drawing measures 3" x 3" on the page. Your violet wires are all listed here.
There is a violet/ gray in here. But I don't see voilet/white listed anywhere.
[quoted image]

I am gonna save this cottonm4. It has scanned really well as you say.

#404 4 years ago
Quoted from cottonm4:

Here is a PPB scan. I'm surprised it scanned as well as it did because this drawing measures 3" x 3" on the page. Your violet wires are all listed here.
There is a violet/ gray in here. But I don't see voilet/white listed anywhere.
[quoted image]

I just spotted the top left flasher on this schematic. I was reading it upside down. And it was the place that I reconnected the wire. Thanks again.

#410 4 years ago
Quoted from kba78:

Great, glad to help

I thought I would share a gif to show that all was up and running after replacing the violet/grey wire into the connector but I can't get it to run sorry..

gif (resized).pnggif (resized).png
#413 4 years ago
Quoted from gdonovan:

When you upload a gif have to pick gif in drop down menu[quoted image]

I had to resize the gif but I think I have got the hang of it now. Learning something new everyday from you guys.

flashergif.gifflashergif.gif
#417 4 years ago
Quoted from cottonm4:

These are what is on my Robocop. Or at least, some that look like those. They look nice, however, they looked washed out when you have the lights on. They do the job and look OK but the blue is not quite as rich when they are lit up.
But I would still buy them if I needed them

I have had a set on back order / their waiting list for about three months and I purchased a set this morning.

My plastics are just about done so they will be far better than what I have. From the set I won't install the flipper lane plastics as they are the first to go. My ramp sign is in two pieces which are glued and taped together (funny though it looks okay) so I might change that, might not. My yellow target plastic has been moved so much without taking all of the screws out that the decal has pulled away from the plastic so I will swap that (and it has faded from even the lighter blue that it was when it was replaced first time round (not by me)). I will keep the other pieces for when I sell the pin, which will be NEVER.

I managed to crack the corner of the 'graffiti wall' plastic (not in the mini set) but it happened in such a way that it turned the corner into a concave curve which fits the place I have it on the pin fine.

I don't know how the guys who make these things can't get the depth of colour right. Maybe someone can tell me the process. I have original pieces of plastic all over mine that could be sampled and used to get that colour restored.

Although because this pin is getting rarer (some people on these forums will be quick to point out NOT THAT RARE) these plastics will disappear soon. When you think I paid £134.00 ($159.00 US) for a alpha numeric 16 digit display £67.00 ($80.00US) shipped is quite a lot to pay for these plastics.
graffiti wall plastic (resized).jpggraffiti wall plastic (resized).jpgleft flipper bumper plastic (resized).jpgleft flipper bumper plastic (resized).jpgleft flipper lane plastic (resized).jpgleft flipper lane plastic (resized).jpgramp plastic (resized).jpgramp plastic (resized).jpgramp plastic rear (resized).jpgramp plastic rear (resized).jpgright flipper lane plastic (resized).jpgright flipper lane plastic (resized).jpgyellow target plastic (resized).jpgyellow target plastic (resized).jpg

#421 4 years ago
Quoted from cottonm4:

Lexan protectors cannot hurt. My Robo used to have lots of air balls. I mean some real air balls. It was thrilling for about 5 minutes. After that it is just a pain in the ass. Air balls are what get that banner going across the ramp broken.
I cured the air ball problem and recommend this for anybody. All it is is a defector that screws down on the plastic at the lower pop bumper. Put one of these on and no more airballs and no more broken plastics.
[quoted image]

The first time I saw this I thought it was a great idea but I couldn't find the material in the UK for a reasonable price.

#425 4 years ago

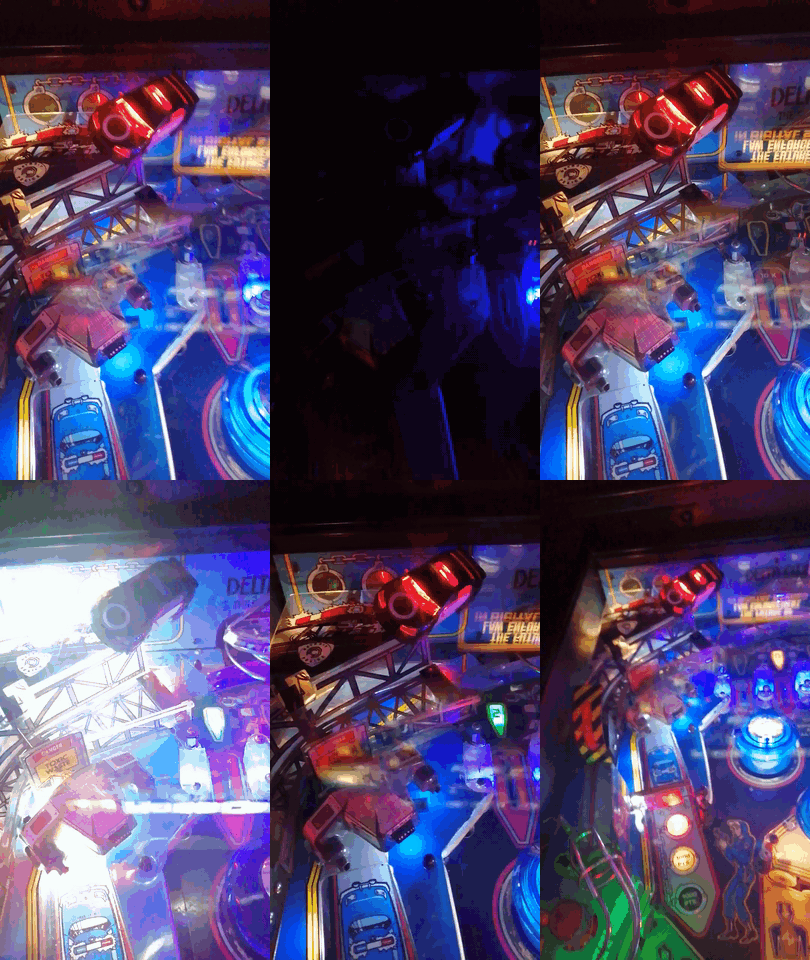
I have finally lit my ramp jump cop car. It is lit by matrix leds from Comet Pinball and connected to the corner white 44 lamp with a bayonet matrix adapter which has a white flex led in it that you don't lose the original lamp effect in the corner.
I am waiting for a small blue led to place on top. I placed a small piece of mirror tile vinyl sheet under the red 'Dick Jones in custody' light which reflects what is blocked by the car for people who are not as tall as myself. It is just a bit of fun but I like it.
copcar-ramp-jump.gifcopcar-ramp-jump.gif

#426 4 years ago
Quoted from cottonm4:

Great. When you make it just trace out that plastic at the pop bumper and extend it out 1.5" or 38mm beyond. I tried using one that only extended about 1" because I would really like to have one that did not kick out so far, but it did not work as well. If you have been having air ball problems you will notice the change immediately.

Will do thanks for the tip.

#429 4 years ago

I lit my flying cop car with a blue light. I think it looks okay

IMG_20200327_183512 (resized).jpgIMG_20200327_183512 (resized).jpg
#434 4 years ago
Quoted from cottonm4:

OK. Thank you. I have done that. Score ED209, get multi-ball and get the jackpot. It is a good feeling.
Do you know the answer for this: There is a mode where "Everything is lit." comes up on the display. Other than trying to score the extra ball, I really do not know what one is supposed to in 15 seconds with "Everything is lit".
My main frustration is to send a bell up the right hand Robocop, light up ED209, only to have the ball get shot from the saucer, only to wind up getting stuck in the pops as your 15 seconds gets wasted in the pops.
And do you know what action turns on the extra ball lights in the inland/outlanes?

I know that extra ball lights if I complete x5 multiplyer and then one extra by lighting the three 209 lanes again and I have it set at extra ball at 2.6 million score.

#435 4 years ago
Quoted from tullster:

On mine, I've backlit the coolest plastic on the game!
The strategy I always use when playing it is... Get your two arrests locked and enable the third then, complete ED209 and shoot the ramp. You get the million for Ed 209 and start Multiball.[quoted image]

I love this idea but I have had a look at where it is located on the playfield and it does not appear to be in an area where it would be easy to light. How did you do it?

#438 4 years ago
Quoted from vec-tor:

On the Robocop I had at the time, I took the "I'll buy that for a dollar"
plastic set piece and pitched it so the viewer could see it.
Today, it is neat to see the mods that are available.

I took on board your relocation idea for the TV. Did you do this?

IMG_20200331_102454 (resized).jpgIMG_20200331_102454 (resized).jpgIMG_20200331_102518 (resized).jpgIMG_20200331_102518 (resized).jpg
#442 4 years ago

It was a cool idea so thanks for that. Just ordered a cool white spot light for behind it. The bracket on the spot should sit on the now freed up spacer. Fingers crossed.

#443 4 years ago

These pics are slightly out of focus but it shows the lit 'buy that for a dollar' TV.

dollar3 (resized).jpgdollar3 (resized).jpgdollar2 (resized).jpgdollar2 (resized).jpgdollar1 (resized).jpegdollar1 (resized).jpeg
1 week later
#453 4 years ago
Quoted from cottonm4:

After 2 years I finally discovered an answer to one question. But more questions remain.
The first question:
What action make these Extra Ball inserts in the inlanes/outlanes light up? I'll be playing along and the next thing I know is that they are lit and I cannot figure out what action lights them up. Anybody ??
[quoted image]
---------------------------------------------------------------
The other question I have been wanting to know about was answered yesterday.
I had the extra ball lit up in the Robocop lane and scored the extra ball.
[quoted image]
And I also had the "extra ball" lit up in the inlanes/ outlanes and scored that as well.
My question was : Does Robocop award multiple extra balls?
The answer is yes.

The out-lanes light extra ball if you get a 5x multiplier then get an extra multiplier from the 209 lights at the top of the playfield. So essentially they light up on the '6x' multiplier. When this occurs the pop bumpers rotate the lane lights and you can also alternate them manually using the flippers.

The random selector right lane awards extra ball attempt light (I think that this can be modified manually on the expanded audit (AU 12 then AD 17 expand adjustments) to a percentage of the amount of times the ball locks in the random sequencer and you can definitely set the maximum amount of extra balls (E AD 23) awarded in the expanded adjustments too).

The right lane hit 7 times (lighting the word ROBOCOP one letter at a time) in one game will light the extra ball light.

#454 4 years ago

Finally got my 'more substantial' ED209 on the pin. Lit using the original leds which were simply glued onto the underside of the existing ED209 with 'flexi' glue (probably old epoxy) which just peeled off.
I extended the wires and hid them behind the leg structure.
The model stands on two hi-tack self-adhesive (Velcro brand) hook and loop circular pads, one under each foot which holds it rock steady and allows it to be easily lifted off when required.
The positioning also exposes the 'Toxic Waste' sign more-so than with the original, behind the ED209 and on the side of the left ramp, and allows it to be lit by the full beam of the flasher (under ED209).
The red band on the left arm of the ED209 is not by design but was an elastic band holding the led in place until the glue set. I liked it and left it on.

ED209 on machine (resized).jpgED209 on machine (resized).jpg
#456 4 years ago
Quoted from loneranger:

You will also light Extra Ball if you have a low score going into ball 3. I'm not exactly sure of the threshold but I think it's around 500k.

Forgot about that one. On mine it is below 400k.

#461 4 years ago
Quoted from cottonm4:

What I have discovered during game play: When you get multi-ball, and then also hammer the jackpot, you can only score one jackpot. After the ball scores, any subsequent balls are just kicked back out to the play field. During M-B you can not shoot the ball back to the top and make any more arrests.
This relates to shooting ball 1 and it will usually feed into the 9 of the 2-0-9. Hitting that 9 is what lights up Dick Jones and makes the ramp active. So, a newbie can drop a coin, hit the the 9, and have a shot set up for the ramp. If by some chance, the ball feeds the 2 or the 0, then neither Emil nor Bodicker will light up on one pass thru. And if that is followed with a ramp shot, the ramp shot will be a dry shot--which would not be good juju for a newbie.

I have just discovered that during multi-ball you can get the Jackpot score up to 1 million very quickly if you hit the yellow and green targets during the event.

#462 4 years ago

Does anyone know where I can buy these inserts, any colour but preferably the original (picture borrowed from Bay78). They have rounded edges (the decals make it look as though they have hex-style ends) and are about 3 and 1/4 inches x 1 inch. I can't find them on my searches.
Also I have noticed the 'Arrest' inserts at the foot of the right ramp need to be removed from the top of the playfield as they seem to sit in a rebated or counter sunk hole. Does anyone have any experience of removing these who could give me some tips as mine are pretty badly melted and alter the run of the ball.

insert (resized).jpginsert (resized).jpg
#466 4 years ago
Quoted from cottonm4:

All I can tell you is that all inserts are installed from the top. The only way I know to remove these inserts is that you have to remove the mylar covering the play field. As you can se e form the picture you linked is that the mylar might not come off cleanly.

I used a craft knife to remove the damaged decal area and epoxy glued the holes caused by the heat but it left the plastic mottled in appearance. The mylar came off very easily.
I think the insert thing may be to complicated for me if I have to cut away all of the decal. As you know getting decals for Robocop is just about, if not impossible.
I will post a pic of what I did with some self adhesive plastic sheet tomorrow, problem being that it is glossy and I need matte finish. I am waiting for some dark blue transparent acrylic self adhesive sign sheet in dark blue. Then I was planning on putting a self made matte decal on top of that.

#467 4 years ago
Quoted from cottonm4:

This guy has peeled the mylar from his Robocop. He is from Canada. A pinsider translated the French for me. Would have to search for that.

The guy made that look easy. What was he spraying on to the surface?

#476 4 years ago
Quoted from gdonovan:

Maybe excessive, but why not.[quoted image]

That looks great. I used the plastic that cottonm4 recommended me to use for the air-ball stopper on the yellow targets. Your lexan looks more robust. What thickness is it and how did you cut it?

#482 4 years ago

I don't know if this is relative to this forum but I have a humming sound in the background when playing Robocop (I don't have the volume very high). When I first got the pin the sound was much louder but I found that the large 'capacitor' on the power board was hanging off. An engineer secured it and soldered it back on (before I had a clue how to even switch on a soldering iron) and the sound went away almost entirely.
The humming/buzzing seems to be coming from the speakers which are grounded really well so I don't think that it is a grounding issue.
Has anyone else had this problem?
Has anyone any idea if it is as simple a fix as replacing the large 'capacitor' (I think that is what it is) or any advice on how I test this part. It is the large, silver cylindrical part on the power board.

#490 4 years ago

I am re-posting this post to see if a picture will help me get some help.
I don't know if this is relative to this forum but I have a humming sound in the background when playing Robocop (I don't have the volume very high). When I first got the pin the sound was much louder but I found that the large 'capacitor' on the power board was hanging off. An engineer secured it and soldered it back on (before I had a clue how to even switch on a soldering iron) and the sound went away almost entirely.
The humming/buzzing seems to be coming from the speakers which are grounded really well so I don't think that it is a grounding issue.
Has anyone else had this problem?
Has anyone any idea if it is as simple a fix as replacing the large 'capacitor' (I think that is what it is) or any advice on how I test this part. It is the large, silver cylindrical part on the power board.

powerboard (resized).jpgpowerboard (resized).jpg
#492 4 years ago

Thanks gdonovan. I read the first two pages then page 11 and that was very informative. Basically I can live with the slight buzz.

#496 4 years ago
Quoted from gdonovan:

With sunlight white or blue leds[quoted image][quoted image]

I have the white in the in and out-lanes and blue in the slingshots which I like. I think too much of the blue gives a ultra violet effect which can be overwhelming. Might just be me.

#498 4 years ago
Quoted from gdonovan:

I ended up where I started with the sunlight white in both locations, I feel that the blue led did not improve the plastic appearance so wasn't to my tastes. I do like the single blue one behind the re-light laser kick target and in the pops though.

Because I only have one pin and RC is it I have messed about a lot with lighting. I tried blue at the ED209 multiplier lights with blue posts and that was quite good but when I reverted back to cool white with the blue posts I thought it looked fantastic. I have yellow leds under the yellow targets and green leds under the green targets.
I put a red led strip in the out-hole to warm up the bottom of the table a little and an amber strip on the shooter lane.
I have illuminated my new ED209 with a cool white spotlight because it was very dark because it is somewhat larger than the original and I put a white led strip in the '3rd locked ball' pop lane (it was really dark over there).
I'm leaving it at that for now.
Oh, I also put bright white flexy leds behind the speaker sign because I saw someone on you tube do it during a restoration and thought it looked cool. It sometimes reflects in the glass but I don't find it a problem.
I like playing it best at dusk. That is when it looks at its best in my humble opinion.

#499 4 years ago

Does anyone know which typeface is used on the '3. UPHOLD THE LAW' decal? I am trying to reproduce it using transparent self-adhesive sheet.

Added over 4 years ago:

Update! I have found a site that identifies fonts (or tries) and if it can't find it you get options of fonts that are similar. Quite clever really.

#504 3 years ago
Quoted from puck:

In search of a better scan of this plastic. Thanks in advance!
[quoted image]

Is this one any good? It magnifies really well on photo viewer. I took it off my pin and after scanning I tidied it up in photoshop. If it is any good I did all of the small plastic set except the ramp sign.
Robo-target practice (resized).jpgRobo-target practice (resized).jpg

#514 3 years ago
Quoted from gdonovan:

Installed Titan elastics, buffed and waxed playfield, lubed spinner, swapped out some led and did some touch up around poppers. If I place another order, think I'll get red rings for the upper lanes as it would be more pleasing to the eye.[quoted image][quoted image]

I love the blue rings but it is hard to get anything other than white, black or translucent in the UK or Europe. I have transparent/clear lane guides at the 209s with cool white lamps and blue posts. It looks icy when the sun is down but here's what it looks like on a dull spring day in the UK.

209 (resized).jpg209 (resized).jpg
#515 3 years ago

Cottonm4 I know what you mean. I have a brother 4120 ink jet printer. The colour is correct but faded from scan to decal paper (see pic before I touched up the damage on photoshop and they look like new now). I am waiting on some matte white label paper and I thought that if the colours were okay I would put the decal on the top of the plastic and then protect it with lexan. I might even experiment with other colours and see how they turn out.

Scan_20200427 (resized).jpgScan_20200427 (resized).jpg
#516 3 years ago

Help needed.

My lock ball ramp spring flap has split (see pics). I have replaced it temporarily with a piece of lexan which seems to be working really well but I don't think it will have the staying power that the original metal one had.

It measures 2 1/4 inches by 1 1/4 inches and, as with everything else Robocop pin related, they are like rocking horse poop. I have found one in the Netherlands which is shorter at 1 3/8 inches (this is marked as a replacement for a 'Scared Stiff' pin playfield part).

I don't have a micrometer so I was hoping someone on the forum has and would be able to measure the thickness for me. I would then buy the steel sheet and cut it myself.

Marco supplies a piece of 0.006inch thick blue spring steel which I think would do but it would cost me $40 plus for the shipping to the UK when the item is only $5.

spring flap1 (resized).jpgspring flap1 (resized).jpgspring flap2 (resized).jpgspring flap2 (resized).jpg
#521 3 years ago
Quoted from cottonm4:

Mine is cracked like that. But not quite as bad. But it was bad enough to not work correctly I braced mine with a couple of washers under the screws which is working OK.
My machine is all together and that flap is buried too deep for me to measure it.
Marco has this that measures .006".
https://www.marcospecialties.com/pinball-parts/66-FSS006
And this one that measures .010".
https://www.marcospecialties.com/pinball-parts/66-FSS01
I would probably go with the .010" piece. The .006" is very thin. Perhaps too thin?
They are not that expensive. Maybe you could buy both?
Or could wait to order when you have a quantity of items to order. I imagine your Lexan flap will work for a lot longer than you think. And if you have more Lexan, you can always make another.

UPDATE!! Thank you once again Cottonm4. I have located some 0.006inch at https://www.pinballshop.nl. They are in the Netherlands but they are my preferred supplier now due to the quality and service of three previously delivered orders and superb communication on their part and they have a great range of parts.

I think the 0.1inch metal is for ramp entrance but I would like someone to confirm this.

The sheet is 6" x 6" and is labelled as blue spring steel flap material. They are a supplier who goes a little further on their website with descriptions of the products and what they can be used for. Their shipping service to the UK is about 3 days which is fantastic at the present time.

I find that most of the suppliers expect you to know the exact specification of the every product (no room for beginners at all).

I thought it would be a good idea to put a couple of washers on the lexan but they reinforced the plastic so much that the weight of the ball would not drop through (and I did it twice with 2 different sized washers).

#523 3 years ago
Quoted from cottonm4:

I would not think that the Lexan that you made would need any reinforcement. Just attach it with the two screws and call it a day.
I was speaking about bracing my cracked metal flap being reinforced with 2 not very large washers.
But steel flap material is what you want.

I have just been playing it for about an hour and the pin is working as it should. I would recommend the Lexan as a stop gap but I am looking forward to the metal arriving.

#534 3 years ago
Quoted from vec-tor:

Is ti possible to make a pattern copy of the part on paper/pdf file? I could use a copy...
The one I have was all hacked-up, and I never knew how it was supposed to look.
Regards.

I have just scanned this so it should be the correct size if printed on A4 paper.
Scan_20200430 (resized).jpgScan_20200430 (resized).jpg

Forget that! I have just saved it from here and printed it on A4 paper and it is about 5% smaller than the actual flap.
PM me and I will send it to your personal email address. That should keep the size to scale.

#536 3 years ago
Quoted from cottonm4:

I'll step back and if this works for Vet-Tor I'll leave my Robocop alone.

Yeah. I didn't mean to tread on your toes. You are totally correct and it does make sense since my flap was already off the pin. I find the left ramp the most difficult part of the playfield. Not many screws but they are in awkward places even with the correct tools. Plus the off ramp is hard-wired in and short of taking off the wiring I find that it is an awkward area to work in (I have been in there a few times in the last 6 months).

#539 3 years ago
Quoted from cottonm4:

Get yourself a molex connector and fix that hardwire business. That is the first thing I did when I pulled that left ramp. I didn't even think about it. I cut the wires, installed the molex and went on with my business. On mine, there was enough excess wire that I was able to do this. If there was not enough excess wire I would have cut the wire right at the switch and added some new wire to the switch.

Good idea. I am going to do that. I have enough wire there I think. I will probably do the right ramp wiring too.

#542 3 years ago

I printed these with my inkjet printer (bit of bleeding but nothing too bad) onto transparent self adhesive sheet then stuck it to 3mm Perspex and covered with matte white paper. I cut them out using a jigsaw with t-blades T101AO and hand-sanded the edges. They are now on the pin and look okay and are an adequate substitute after paying £67.00 for my manufactured set which I am saving for the day I sell the pin (probably not in my lifetime).

I did the same with the other plastics too and it all worked out at about £9.00 per set and about 4-5 hours work.

The only problem I find is that the self adhesive glue creates a slight texture and isn't completely clear.

Can anyone recommend the quality of transparency sheet to use to allow crystal clear transfer?

plastic (resized).jpgplastic (resized).jpg
#545 3 years ago
Quoted from cottonm4:

I's like to see them lit up on your pin. But I cannot answer your questions.

Funny you should say that because the two slingshots show diffused light through them and I have decided to put another layer of matte white on them (upping the cost by 70c). I will take a pic when done.

#546 3 years ago
Quoted from cottonm4:

I's like to see them lit up on your pin. But I cannot answer your questions.

These have blue leds under them. The right one is the new bought plastic. The left one is the one I printed and stuck to the plastic now with two layers of matte white underneath. There is no yellow line through the centre of the left one it is a reflection. You can see the clarity of the part numbers is better on the manufactured new plastic but they are not too different. The right one has a protective layer of lexan over it.

left (resized).jpgleft (resized).jpgright (resized).jpgright (resized).jpg
#547 3 years ago
Quoted from vec-tor:

cottonm4
I need the pattern to the tempered blue steel flap that breaks. The one I have
is all mutilated... I never knew how it is supposed to be...
Regards.

I don't know if you got your flap printed and made but I made mine today and it turned out that the flap is not scale critical. I cut mine slightly out of line but it works perfectly. I just made sure that the screw holes were in the right place. The trimmed shape isn't critical either.

#555 3 years ago
Quoted from cottonm4:

OK. Someone who might understand about something that is hard to describe. I'll pull the glass and start manually operating the switches. I'll need a couple of days.
---------------------------------
Also, mine has one other issue. Sometimes during heated and fast gameplay like multi-ball, if I make the ramp shot or a spinner shot all my feature lights freeze. Nothing else is affected. The game still plays and all switches work but ALL of the lights freeze. After several seconds the lights will return to normal.

The light freezing happens on mine too. I think it must be a common thing.
Question. When the pop bumpers power the ball into the random award generating hole (firing right from the left hand pop bumper) the sound on mine does not operate (the display scrolls randomly with no sound, sometimes maybe I hear the swooshing sound very quietly in the background) but it works every time the ball goes into the hole via the right side tunnel. Does this happen on yours?

Also I find that the various sounds over take each other depending on what is happening on the playfield. A classic one in when it could be saying 'I'll buy that for a dollar' and then the ball goes up the spinner channel and cuts the vocal into a machine gun effect regardless of which part of the sentence is being spoken.

Could you send me the link to your remedy for the stop at the random generator hole please.

#558 3 years ago
Quoted from gdonovan:

I have not had any light freezing, just the sound issue. I'll upload a video tonight, what version MPU software are you running? I have 3.5, confirmed on boot up and on hand written decal.
This weekend I think I'm going to swap sound boards between Phantom of the Opera and Robocop, they should interchange and see if the problem follows the rom or boardset from pin to pin.

Mine boots as Robocop 4.0. What could that mean?

#561 3 years ago
Quoted from cottonm4:

European, perhaps?

Will I find the OS on the chip?

That ball stop mod looks great. If I get tired of it bumping the ball out I will do it. I can live with it for now though. Looks like a days work.

#562 3 years ago
Quoted from gdonovan:

Just a revision that has not been uploaded to IPBD is all. I plan on pulling mine and reading the chips and uploading to the guys over there. I'm not aware of a list of revisions for various DE pins, be nice if someone had that information.
Do you have a chip burner to read the program?

No I don't have a chip burner. I am old and rickety and still living in the olden days . I don't think I will ever own a chip burner sorry.

#565 3 years ago
Quoted from gdonovan:

Notes from tonight's tomfoolery..
Swapped sound boards from POTO and Robocop. Volume levels for voices are very different between the two. I suspect some difference in resistors, this has been noted before on another DE title. I tried the POTO board and its roms in Robocop which was very odd and then swapped roms. Robocop sound board worked flawless in POTO. The POTO board exhibited the same issues as the Robocop board when installed in Robocop.
To recap: Slingshots, in lanes, flippers, poppers, upper roll overs and rebound switches will randomly not play their sound effect the first one or two strikes of the switch but the MPU is seeing the switch hit as the score goes up and/or will trigger lamp effect. After a switch strike or two, will start playing sound effect normally. Will stop again if other switches are hit and repeats behavior.
MPU software is A3.5, sound roms verified as good, sound boards swapped, sound cable swapped with no change.

Youtube video and time when no sound effect occurs after switch strike.
21 seconds, yellow lane rollover
51 seconds, rebound bumper
1:01 upper lane roll overs
1:13 first flipper activation
1:32 upper roll over
1:40 upper roll overs
2:06 rebound bumper
2:37 lower pop bumper
2:40 left sling
3:00 upper roll overs
3:30, you can see me press the red lane switch several times before the sound effect is fired.
My next step is to try MPU version A2.9 as it is available on IPBD. Perhaps a bug was introduced which may have been fixed with a later software revision. Maybe this is something chadh could take a look at, resident DE software guru! The only other thing I can think of is there is something funky with the PIA that handles the sound calls but would wager that a long shot. All voice and music call outs work fine.
Ironically after I put the glass on and played a game or two the issue got notably worse, was fairly mild during filming. Flippers stopped making effects for awhile, inlanes acted up a few times too.
[quoted image][quoted image]

All of the sounds are good on mine. The 209 lights do not sound on the first ball down (unless you hit the skill shot lane) but everytime after that there is a little 'ring'. There is no problem with the police siren on the inlanes or the pop bumper side rubber or the pops.
I took a pic of the chips which I think are A3.0 (original?). Maybe your idea of using the A2.9 might be a good call.

AO3.0 (resized).jpgAO3.0 (resized).jpg
#573 3 years ago
Quoted from gdonovan:

I have on file now 2.9, 3.0, 3.4 and 3.5. One poster here states they have 4.0.
3.5 was on my machine when I purchased it.

My Robocop boots as A4.0 on boot up but I don't have a chip reader or know how to use one. Sorry.

a4.0 (resized).jpga4.0 (resized).jpg
#575 3 years ago
Quoted from cottonm4:

I don't know.

It took about 2.5 hours. And part of that was figuring out what needed done. I play Robocop a lot. As noted earlier, it has only failed me once. When I hammer the ball in there it stays put.

I got to the ball stop today and it looks quite easy to move but I thought that I would try a foam pad first. It has certainly improved greatly but I am after a 99% stop so I am going to move it tomorrow. The only thing that worries me is that I don't really want to modify the metal stop itself. Is this essential?

#577 3 years ago
Quoted from cottonm4:

I first tried with just adding the anti-bounce foam. It still bounced out. So I had to get radical. The metal stop is just a piece of soft metal then bends without too much force. If you don't want to bend it, try to find a piece of metal at the hardware store and make your own.
IMO, the metal needs to be bent forward in an effort to throw the ball down when the ball hits the metal. However, you could leave yours bent as it is and see what happens. Also, you are going to have to drill two new holes in a new location for the metal stop to work. If it still does not work then you will need to bend it and probably have to drill two more new holes to make it work.
All you have to do to bend it is lay it down of a section of sidewalk and lightly tap it with a hammer---it is that soft. If you have a bench vise that is even better; Just give it a squeeze.
I had my 2nd bounce out failure this morning. I waxed the play field and loaded 3 smooth shiny news balls. And a fast pin got way faster. Before I made this mod is was getting bounce outs 95% of the time.
I will tell you one thing you can do and not have to mod anything. You can get a Rottendog FLP-023 flipper board. I found out when I installed the RD board that it was just a smidge less on power. Just enough that all my airballs went away and the bounce outs also went away. The tradeoff was more than half of my ramp shots failed; There was just not quite enough of the power that I require.
Using the FLP-023 galvanized me into action to get my DE flipper board fixed.
I cannot tell you what to do. But these are your options.

Thanks I appreciate the advice. I am going to adapt it and see what happens. To be honest mine works quite well as it is. I will keep you updated.

#590 3 years ago

3 Questions.
I have been trying to manufacture a '3. Uphold The Law' decal to replace the damaged one that I removed when I repaired the burnt out insert.
I have been ink jet printing both self adhesive white matte paper which looks okay but is not waterproof and transparency but the printer does not print light grey on transparent sheet and this comes out as virtually no colour when I background it with the dark blue and when put it onto the existing dark blue of the insert the wording disappears.
Question 1. Would a laser printer create the grey I need on a transparency?
Question 2. It's a long shot but does anyone have a scaled scan of the actual decal? Otherwise it is trial and error for size of text and I am already frustrated with it as I have searched far and wide for the typeface/font.
Question 3. Are these decals available anywhere? I think this question has already been answered by the fact I have not been able to find any in the last eight months.

#591 3 years ago

I have been wondering, after more than a small amount of research online, why there were (supposedly) only 1500 Robocops produced? The normal production run for licensed movie or tv show pins is between 7,000 and 11,000 and sometimes more than 20,000.
It just seems such a small amount. I don't know how the movie performed in the USA but it was massive in Europe.
Could it be that it was something to do with Data East buying, selling or merging the company at the time of its' manufacture or could the company have backed away from the high financial implications of licensed manufacturing.
I am curious because the only downside I find about the low production number is that it is virtually impossible to have the opportunity to restore mine to new.

#595 3 years ago
Quoted from cottonm4:

10 months ago I stripped the lower part of my play field to scan this area for someone. It was a bit of work to make this happen.
I emailed my scans but never heard back from the guy until 10 months later. Now he needs the scans and I cannot find them.
I can make these scans again----someday. I have too much other stuff going right now to do this again. Maybe later.

That seems like a lot of work. I wonder why it took 10 months for the guy to need them (and then lose them, oh dear) but, then again, if he was doing a full refurb. For both of you to misplace them is a small catastrophe. I'm sure that they will turn up. If they do I would really appreciate the '3. UPHOLD THE LAW' scan as Robocop is the only pin I have at the moment. I am sure that you have checked your pinside pm files?

#600 3 years ago
Quoted from Bay78:

I was the one who cottonm4 sent the pictures to. Sorry I had thought I lost them but I didn't. We were moving last year during that and I had to move many many games out of my basement. And Robocop was no exception but the problem with Robocop was it was all taken apart already and I had the parts everywhere. Anyway here are the pictures he sent me. If anyone needs them just PM me your email and I'll send it off to you.
[quoted image][quoted image]

Thanks for that I have pm'd Bay78. Thanks cottomm4.

#602 3 years ago

Here are a couple of queries.
1. I recently changed my DE flipper bats, the right one was cracked. I provisionally changed the right bat with a generic one until the new set arrived. Shortly after that the left bat started sticking in the up position. I took the assembly off the machine and cleaned it down. I found that the coil sleeves could not be removed. I don't know if some coils come like this or whether they had 'melded' onto the inside of the coil shaft (the right flipper coil was the same).
Anyway I re-installed it and it worked okay. I thought that I would order a couple of new flipper coils and installed them. Now my right flipper VERY occasionally sticks when I am holding a ball in the flipper. I have tested both diodes and they are fine.
2. I also installed black 'Titan' rubbers on the bats and the slingshots. The flipper rubbers are awesome and I would recommend them highly as they do not show any 'flaking' on the sweet spot on the tip like less expensive rubbers do. However the ball would not go down the in-lanes because the rubbers were fatter than normal. I put my old rubbers back on.
Help required!

#606 3 years ago
Quoted from Titan_Pinball:

thehipster Try loosening the posts next to the outlane and make sure they are pushed towards the center. There is usually a little play between the OD of the screw and the ID of the plastic or metal post. Also, pull on the rubber to make sure any slack is on the slingshot arm side.

I will try this tomorrow. Thanks for the tip. I will let you know how it turns out.

Added over 4 years ago:

UPDATE! - I have moved the slingshot posts and the rubbers are working great. They are far superior to the two sets I have had on it thus far and moving the posts was the most productive 5 minutes of my early pinball life (well that and stumbling across a dangling wire in the back box which turned out to operate two flashers that I never knew that I had). Thanks again for the tip. It will be Titan all round from now on.

#609 3 years ago
Quoted from gdonovan:

I'm working on this right now, will go out Tuesday =)
I delayed doing it till had I had some time, what I feared came to pass. Comparing my regular paper prints to the actual plastics the sizes don't agree. It isn't much but enough and very notable with the center piece, I'm going to clean up the image in Photoshop and resize slightly. Off just an 1/8"

I am working on getting the colour of my amateur plastics to be the same as all of the original plastics on mine but they are a 'turquoise' colour or 'aquamarine'. I have tried altering the colours on photoshop, lowering the blue and increasing the green and while they look okay on the screen my inkjet printer is having a problem reproducing it both with the printer deciding the colours and with Photoshop deciding the colours.
I think that I am going to have to strip the left side large plastic off the pin and scan it.
I will publish the scan on here to see what you guys think about the original colour. The new manufactured plastics seem to be erring towards more of a mid to darkish-blue colour.
I would like to know if my fellow RC pin owners have the same colour on the other plastics as me.

#611 3 years ago
Quoted from gdonovan:

Nailed it.
I did not think you would mind, I was able to rearrange things a bit and generate an extra set of slingshots for you and 2 plastics for my sons JP with what was leftover.
[quoted image]

They look fantastic.

#613 3 years ago
Quoted from gdonovan:

Since I have a few original plastics I'm considering scanning one in to do a color grab and play around with the images.

It would be nice to see if you could get them like the original. I have been making plastics for about three months but it gets a little tiresome on the jigsaw. I am trying different thicknesses of Perspex. I have used 3mm and now I am trying 2mm.

Also it is impossible to get the finish that the manufactured ones have. They are probably water jet cut. Or laser cut.

I have added some design changes to mine just to personalize them a little.

I really need to take my scans to a print shop to get some quality printing and clarity or buy a laser printer. They are not expensive but the toner should be renamed liquid gold. I priced a printer at £99 and the toner was £147.

#615 3 years ago
Quoted from vec-tor:

Steel rule cut dies.

Just had to search online to find out what a steel rule die was and it looks industrial. Are they a flexible/interchngeable steel system that you make the shape you require with or is it more complicated than that?

#617 3 years ago

Flipper assembly question:-
I have recently changed the coils on my flippers.
Everything is working okay but I have noticed while finding how-tos online that 'normal' flippers have an end of stroke switch and a spring on the side of the pivot arm.
On mine the spring is on the plunger as in the pop bumpers, between the pivot and the coil sleeve and there is no end of stroke switch. Is this correct?

#619 3 years ago
Quoted from cottonm4:

Yours is correct. These flippers are called by a different name. I'll have to look in my books but I think it is "deger". These are 50 volt flippers and no EOS switches are used.
Here is the link. There is so much good info in this link for Robocop that I printed every page out for hard copy.
http://techniek.flipperwinkel.nl/desega/index2.htm#flip0
Right after I got my Robocop my display went dark. This manual told me what was wrong, and what parts I needed to make the repair.
Don't leave home without it.

Thank you...…….again

#620 3 years ago
Quoted from cottonm4:

I fixed that ball that keeps bouncing out of the right hand ball ramp/lane. If you play Robocop you know what I am talking about. Like when you really hammer the ball with the left flipper and the ball bounces out of the saucer and comes back you with out scoring anything. I fixed that.
First, I had to make some mods to the ball stop up at the saucer.
This pic is the un-modded ball stop.
[quoted image]
This is the side view of the ball stop. I had to open up both angles at the bend points. Look closely and you can see some black rubber. It is called dead-drop foam. It is an impact absorbing material.
[quoted image]
Then I had to remove a fairly large area of the stop on its outboard edge.
[quoted image]
Then I had to relocate this ball stop by drilling 2 new holes in the play field. The top 2 holes in this pic are the factory drilled ball stop mounting holes. The 2 lower holes that are sitting at a different angle are holes I drilled. While the dead drop foam absorbed some of the ball impact that still was some problem with bounce outs.
What I was trying to do with these offset holes was to slant the ball stop in such a way that any bounce back would be "pushed" towards the back of the hole for an instant stop.
[quoted image]
Here is the finished installation. The ball stop has been moved toward the saucer so that the ball will hit the dead foam first thing. The offset position pushed the ball towards the back of the hole where is stays until the saucer kicker kicks the ball back onto the play field. If you have cussed that ball for bouncing out and wish for a way to make it stop, the way to make the ball stop dead has arrived.
I .was not sure it would work and was pleasantly surprised after I had an afternoon session with no bounce outs.
[quoted image]
Here is where you can buy the foam. THe shipping is more than the product.
https://www.pinbits.com/index.php?main_page=product_info&cPath=17&products_id=131&zenid=c6a18417a1d3c1fc358a9203db48163f

I am on the verge of adapting this stop but I cannot find the drop dead foam anywhere (there is no foam on my stop atm). The link you sent is out of stock. I am trying to source something similar. Any ideas? Do you think it will have some impact without the foam if repositioned?

#622 3 years ago
Quoted from cottonm4:

I’m thinking that a piece of Scotchbrite might work OK.
Or possibly even a piece of Velcro
Edit: maybe even a piece of felt.

Wow! Lucky me. When I stripped the top corner of the playfield I found the original or replacement foam under the 'road' plastic, rammed between an led and a spacer. A friend replaced the lamps with leds about 7 months ago. How did he miss that? Maybe it has worked loose since. I have glued it onto the stop and put the stop in its' original position.
Before I found the foam I had moved the stop forward and drilled the holes but it was worse than before with about 50% ball stopping (this was without modifying the stop).
In it's original position with the foam it has 90% stop rate.
I am going to modify the stop and reposition it tomorrow and see if it gets that magic 100% catch rate.

#624 3 years ago
Quoted from cottonm4:

I did not know foam was installed from the factory. I saw no telltale signs of any adhesive on my stop. If you go back and look at my pictures, you should see the angle I set the stop at to eliminate the bounce backs. When I put that foam on and left the stop in its original placement I still got bounce outs because the impart foam did not work all that well. I even emailed the shop that I got the foam from, voicing my concern. But I never heard back from them; Which does not surprise me.
So, I tried mounting the stop with that little twist to minimize any contact with the ball and the stop. The ball only catches the edge of the stop. And the reason I modded the stop by "tilting" it forward is to try and deflect the ball into a downward move.
Maybe the foam is not needed at all. Maybe just making the twist with the mounting and modding the stop would work just as well. I could try that but what I came up with worked and I moved on to other things. And I don't want the ball slamming into a sharp metal edge all of the time.
--------------------------------------------
I find my self thinking, " Why did Stern / DE not catch this ball bounce action?" I mean, surely Stern play tested the pin, right? And then the conspiracy theorist in me says:
1) The pin was designed for a short life span.
2) It was designed to pick your pocket
3) And a bounce out robs the player of points. A player walks into a bar or a bowling alley, drops a couple of coins, doesn't like the action and moves on. I mean, who is he going to call? Is he going to call the operator? And the operator is going call Stern? Maybe today with these premium priced HUO pins, but not then.
EDIT: I play Robocop a lot. I have had 3 or 4 bounce outs.

Yes I know. I am committed to adapting it. The foam was like the type I have edging my playfield on to the lock bar so probably not on from the factory.

I agree about the short life span and that would explain the small production run of this pin. I sent a linkedin custom message to Joe Kaminkow the other night asking him why the run was short and guess what? Yeah he has not replied lol.
But the short life span theory sort of throws doubt on the manufacturers integrity. I mean surely they want to be the best at what they do and produce the most memorable and playable machines that they can. Or am I being naïve?
I understand the need to produce money makers but it must be counter productive to make the game overly frustrating and impossible to play.
I remember playing STNG and The Addams family in a local pub when they were new to the market and I 'mastered' them both in a short period of time and I loved playing them. My money went a long way on those two pins much to the chagrin of the local pub landlord.

#625 3 years ago

No post

#626 3 years ago

IMG_20200601_220257 (resized).jpgIMG_20200601_220257 (resized).jpg

I am quite pleased with my home made OCP decals and clear pop bumper caps. I like the way you can see the mechanics when the bumpers are operating

#627 3 years ago

For information.

There is a guy on Ebay parting out a Robocop. I don't think he has many parts left. I have had contact with him and bought the left side plastic with the yellow broken target decal and the larger blue plastic part that sits under it. The playfield has gone and the inserts were with it (bummer) but there are some good pieces left. There are none of the most sort after plastics but the right hand plastic and the back plastics are all there. AND ONE RIGHT HAND SLINGSHOT PLASTIC. He is also selling the left hand wire form and a few assemblies with coils like the out-hole coil assembly.

Just search Robocop pinball parts. They are all there.

He seems like a good guy and is closer to most of you guys than me. His prices do not seem unreasonable. I think he is in Florida so the shipping is prohibitive for me in the UK.

#628 3 years ago

I have been messing around with colours on my home made plastics and decided to reverse the original colours from my bought plastics on photoshop. What do you think? Please don't feel the need to comment on my poor tooling. I only started using a jig-saw three months ago.

left slingshot yellow (resized).jpgleft slingshot yellow (resized).jpgright slingshot yellow2 (resized).jpgright slingshot yellow2 (resized).jpg
#630 3 years ago
Quoted from gdonovan:

Just another data point: just finished bringing a dead DE MPU back to life and testing with Robocop A-35 and the problem is still there. I was not expecting it fix it, just additional info.

I have posted before on this issue. The only sound on mine that 'drops' is the first rollover (and then they ring every time) on the 209 multiplier lanes unless you hit the skill shot lit lane which gives a fanfare and light show. All of the pop bumper skirt switch sounds work every time as do the in lane sirens and the left hand of the pop bumper rubber slings. Oh and the gun shot flipper sound is not instantaneous it comes after a couple of flips.
I wish there was some way that I could read these chips but it is beyond me. An engineer in the UK is welcome to come read them but I think that they are thin on the ground.

#637 3 years ago
Quoted from Dee-Bow:

Im in the club! What did i get myself into tho?! Muahahaha
[quoted image]

Welcome.
I got mine last year and didn't know where to start with certain fixes and just general advice. It was my first pin.
You will find great help and advice from the people on this forum. They have been fantastic with their time and patience with me. I can't thank them enough. When I bought the pin I thought that I was buying a playable game (it was sold to me as 'refurbished' from a dealer) but it had so many issues that I had to seek help. They have helped me with electrical and mechanical fixes and have given me the confidence to carry on loving my Robocop and a zest for wanting to own more. It plays well now and I spend at least 4 hours a day either playing it or working on it ( I can only afford this time while in lockdown in the UK). If it wasn't for this forum I would have given up in the early stages. Rock On guys!

#638 3 years ago

Help!
When the random award generator gives POPS3000 the pop bumpers, when hit, light the flashers under the ED209 and in the top left hand corner under the ramp. My top right popper has stopped activating this action at the moment while the other two are fine. It had previously been fine.

I have checked the wiring and everything is in place (nothing loose or missing) and it had been working fine until today.

I had been working on the yellow target switches as two wires had come loose. Could this affect the lack of flasher on the pop bumper?

Have I wired the switches okay (see attached pic)?

switch (resized).jpgswitch (resized).jpg Added over 4 years ago:

I am beginning to think that the right hand popper has never lit the flashers but it just appeared that way when the ball was vigorously bouncing between the three bumpers.

#639 3 years ago
Quoted from cottonm4:

Yours is correct. These flippers are called by a different name. I'll have to look in my books but I think it is "deger". These are 50 volt flippers and no EOS switches are used.
Here is the link. There is so much good info in this link for Robocop that I printed every page out for hard copy.
http://techniek.flipperwinkel.nl/desega/index2.htm#flip0
Right after I got my Robocop my display went dark. This manual told me what was wrong, and what parts I needed to make the repair.
Don't leave home without it.

I have read and re-read this tech help. It is a concise and thorough guide. I have printed it off and I will refer to it on many occasions in the future. The person who compiled it is knowledgeable and intelligent. I take my hat off to them. Anyone who has a Data East game should do the same thing. I have learned so much using this reference.

#642 3 years ago
Quoted from cottonm4:

How come the wire pair on the bottom looks different the the two upper pairs?
[quoted image]

It must be the angle I have took the shot. They are all the same with live beige to unbanded side of diode and the wire out of the banded side of the diode to the centre lug and the green wires to the rear lug.

#643 3 years ago
Quoted from cottonm4:

Here is what I would like to have:
With the pops, it seems like when the pops are worth nothing the ball gets trapped inside them and bounces around forever. However, whenever I make the right hand chute and it turns on the 3000 point pops for the big points the ball manages to make 1 or 2 hits and bounces out
OTOH, when I make the right hand chute and the 15 second hurry up where "Everything is lit" lights up, the only thing worth hitting is another run up the chute to get that extra ball. Only this time, the ball gets trapped inside those pops and eats up my 15 seconds of time.
I would like to have some way to turn the pops off so the ball will come to me so I can try to make the hurry up shot.
=====================================================================
I have a computer simulated pinball game called Timeshock. Perhaps some of you have heard of Timeshock and Pro Pinball. Computer games are like cartoons in that they can deny the laws of physics.
Timeshock has a feature when you can press both flippers at the same time and the pops will be disabled. With the pops disabled the ball will fall out and give you time to make your hit.
This is what I would like to have on my Robocop: Some way to disable the pops when the 15 second hurry up is active. I could do some wiring mods and add a third flipper button to disable the pops. I just don't want to make any wiring mods and I don't want to add a third flipper button.
Is there some sort of electronic switch I could buy that would trigger the pops to turn off when I press both flipper buttons?
This is a long shot question. But it does not hurt to ask.
Thanks.

I like this idea because the short time lapse makes the game even more difficult than it already is (my audits show a 60% hit 'Special' rate).
Because it is my only pin I am getting fairly good at it.
I have it set to hard rules but with an extra ball at the four backup replay levels 3.5m - 4.7m - 6.5m and 9.5m. I also have the 1meg targets at 4 hits (which goes to 5 hits for the second 1meg and then 6 and so on)and the special everything lit at 3 ramps. I have the random hole set to 40% extra balls too. Without this the game is impossible. I might have to go extreme hard rules with no buy-ins to get a true test of the machine as I regularly roll the total.
Incidentally I have never had an 'Everything Lit' award from the random generator only a 'Light Special'.
I never got around to adapting my random lane stop. I was about to start on it when I was shopping for parts and I stumbled across the type of dead stop rubber that you had mentioned before (see pic). It was very inexpensive and in the UK so I thought that I would give it a try. It stays in the hole 99% of the time. Super fast, slow or medium pace.

blue rubbber (resized).jpgblue rubbber (resized).jpg
#647 3 years ago
Quoted from cottonm4:

You make me thing I am missing something. I have mine set to "factory rules". I tried "easy rules" and turned that off after a couple of minutes. I have n to tried "hard rules" as the game kicks my ass regularly with factory rules. But everything else you mention is lost to me. What is the "random hole", for example?
EDIT: What shop did you buy the dead stop rubber from? I might like to try it. As you have read, I bought some dead stop rubber for mine but it did not seem to work all that good and to reposition my ball stop to improve my bounce outs.

The random hole is what I call the top right lane hole because it randomly generates awards.

I don't know if you are aware of the following but...…..
With the green service button in the up position switch the machine on and press the black button once. Factory altered will appear on the dot matrix. Put the green button in the down position and press the black button twice. The first press will show AD55 Factory Restore the second press shows AD16 High Score Reset on the screen. Return the green button to the up position and press the black button again and you will see AD17 Expand Adjustments. Press the start game button and you will have the access to the finer adjustments such as set replay levels and setting the 1meg target to however many target hits (green, yellow or red) you need to light it. The same goes for the amount of ramp shots you need to light the special light. I am pretty sure that you can alter the time allowed to get to the special ramp shot to make it a little more reasonable.
You can also set the target level and the spinner if I am not mistaken from easy to hard and the same with the re-light laser kick from easy to hard (I assume 'hard' will be more than one hit on the channel ball).
You can also set what type of award you would like for hitting the replay scores and for getting the 'special'. There is extra ball, certificate or credit (and the amount of credits can be altered in here too. So you can refine you gameplay. I just use trial and error.
If you did not know about these then you are going to be in for a pleasant surprise.

By the way, the next time you get a Pops3000 award would you take a look at the pop bumpers and see if they all light the top left hand flashers when hit as only two of mine do it.

Here is the link to one of my preferred suppliers in the UK for the rubber.
https://www.pinball.co.uk/spares-accessories/blue-bumper-pad-23-6629/

#648 3 years ago

Replied instead of editing my own post sorry.

#651 3 years ago
Quoted from cottonm4:

1) Thanks for the good instructions.
2) I am aware of all the extra adjustments. I just got lazy and went with factory rules and did not pay much attention. Maybe I need to mix my Robocop up a bit.
3) Thanks for the link. I will have to see if they ship to the states. And it will be a $2.00 item and $20.00 shipping

If the shipping is prohibitive I will get it and post it airmail to you at no extra cost to you. Just let me know.

I have just seen that Cyroute has found the stuff at Marcos.

#652 3 years ago
Quoted from cyroute:

cottonm4 marco has that rubber https://www.marcospecialties.com/pinball-parts/23-6629 I have also seen this used before for dead stop rubber
ebay.com link

Yep that is the exact same rubber and it definitely works.

1 week later
#658 3 years ago
Quoted from STXDrew:

Hey all,
Just heard back from retro refurb and they will have another batch of plastics ready by July, 10th

They are good plastics. A word of advice when putting them on (which I am sure you don't need) do not over tighten the nuts, plastic or otherwise, as this will crack the new plastics. I found out the hard way. Especially the nut that holds the left hand wireform to the slingshot.
You will find also that if you do not protect them with lexan or put safety measures in place to stop air balls they will break frequently. When I first got mine I broke both slingshots, the graffiti wall, the ramp plastic, the right side base plastic and the centre yellow target plastic in the first couple of months.
Message cottonm4 if you want a cool protector that stops the yellow targets from flying balls all over the machine. I used it and I have not had one problem with plastics since.
You will also find that it is not too difficult to make your own using 3mm clear perspex, self adhesive transparencies and a decent printer and a scroll saw. (I say this as I make my own that are passable but not great and I am no craftsman). I can send you scans of all of the main plastics if you need them.
You will find that you will have a lot of questions about this pin but luckily you will find the answers on here. Good luck with your Robocop.

1 week later
#660 3 years ago

Has anyone had to do this with a rubber band to pull the 'leg' wires together and stop the ramp plastic from moving back and forth when hit by balls that take off at the base of the ramp or is there a better 'fix'? ( I don't have a riveter or rivets, hence the bolts ).

20200704_095053 (resized).jpg20200704_095053 (resized).jpg
#663 3 years ago
Quoted from cottonm4:

1) Mine had been broken and taped back together. I finally took it off for a cleaner look.
2) There are 2 holes on each side of the ramp. Each wire has a loop in the wire for a screw and above each screw loop is another wire loop that locks into that 2nd hole in the ramp. Since you are using screws in the sign instead of rivets, just adjust and tighten the mounting wires a little bit closer together. This will give you the tension you need to keep the sign in position. And it will likely get broken eventually.
3) Another deflector I have been working on is a top, or tunnel like cover to put over the ramp entry point to control the balls going up the ramp and stop launches coming off the ramp. It worked but my first try was a lousy fit. As noted, I just took the sign down for a cleaner look.
4) You dod not need a riveter to install those rivets. They are hollow tube rivets. You can get them from Pinball Resource. All you need is a hard surface and a small ball peen hammer lock those rivets down. Put every thing together. Lay the rivet head down on the hard surface and apply pressure. Then start tapping the butt of the hollow rivet down until it is tight.

Yeah the rubber bands pull the two upper loops inwards and keeps the sign in position. It is super effective but the ball very occasionally jumps up and hits the band. Even if I bend the wire into the securing holes they work their way loose.

I have never seen those rivets before. Would it be the same rivets on the metal entry ramp on the right ramp? There are a couple on the 'grafitti' sign too and one on the toxic waste sign. Are they all the same type?

#665 3 years ago
Quoted from cottonm4:

The rivets come in different lengths and different diameters.
They are the same rivers that hold your standup targets together

I have had a good look at the Pinball Resource and it is amazing the amount of supplies they have. There is nothing like that in Europe. I have asked them how much shipping is as this is the only drawback of living in the UK when it comes to pin parts.

#666 3 years ago
Quoted from cyroute:

Just wanted to let fellow ROBOCOP owners know that there is a place selling full sets of plastics. They are not as blue as the originals but if you are going to replace all of them I don't see an issues with them. I bought my set and they showed up within a week!
http://www.pinball.center/en/shop/pinball-parts/playfield-parts/plastics/6770/plastic-set-for-robocop
When you add them to your cart and select the 39.00 shipping it lowered the price to 133 for the plastics so a total of 172 which is about 200US shipped... if you need some other stuff maybe order more stuff I think the shipping stays the same.

I have just received and fitted this set of plastics. The colour is a faded blue but when all of the plastics are on the playfield they look superb.
I had problems with the right hand side plastic which covers the trapped ball lane. I had to widen the three holes near the bottom end as they were nowhere near to the posts and to get it anywhere near covering the lane although it is still a couple of millimetres off centre. It is also short on the side rail and leaves a gap between itself and the corner plastic.
The biggest problem was with the back plastic. I had to cut a centimetre off the left hand edge to get the holes for the 'arrested' lights to centre the inserts. I had to cut a new hole where the right hand lamp socket was and trim the inside curve of the centre arch to allow it to sit over the ball ramp entry (luckily I have invested in a scroll saw or this would have been impossible for me to do). Then I had to drill all new pilot holes for the screws because the holes were out of line with the original plastic.
To be fair all of the other plastics had their holes in the exact place.
They are a little thinner than the originals that I had on the pin and to be honest I thought that the £174 euros (including shipping) I paid for them was a little steep. But just to reinforce the most important part about them which is that they look great.
If you are looking to use just one or two of these parts and keep the rest as spares they won't look great when fitted next to either original or older shades of these repros.

#667 3 years ago

Robocop Plastic Set from pinball center.

I have just replied to a post from about 3 years ago from Cyroute. This is what I have found. I hope it can be of help to anyone looking for replacement plastics.

I have just received and fitted this set of plastics. The colour is a faded blue but when all of the plastics are on the playfield they look superb.
I had problems with the right hand side plastic which covers the trapped ball lane. I had to widen the three holes near the bottom end as they were nowhere near to the posts and to get it anywhere near covering the lane although it is still a couple of millimetres off centre. It is also short on the side rail and leaves a gap between itself and the corner plastic.
The biggest problem was with the back plastic. I had to cut a centimetre off the left hand edge to get the holes for the 'arrested' lights to centre the inserts. I had to cut a new hole where the right hand lamp socket was and trim the inside curve of the centre arch to allow it to sit over the ball ramp entry (luckily I have invested in a scroll saw or this would have been impossible for me to do). Then I had to drill all new pilot holes for the screws because the holes were out of line with the original plastic.
To be fair all of the other plastics had their holes in the exact place.
They are a little thinner than the originals that I had on the pin and to be honest I thought that the £174 euros (including shipping) I paid for them was a little steep. But just to reinforce the most important part about them which is that they look great.
If you are looking to use just one or two of these parts and keep the rest as spares they won't look great when fitted next to either original or older shades of these repros.

#669 3 years ago
Quoted from cottonm4:

Oh wow. You got a complete set. And now they are out of stock.
https://www.pinball.center/en/shop/pinball-parts/playfield-parts/plastics/6770/plastic-set-for-robocop
Here is the other kit that was sold out sometime back. It was for only 6 pieces.
https://www.retrorefurbs.com/shop/robocop-plastics-set/

I bought the small set in February (well I ordered it in the previous November and would you believe that the supplier (Retro-refurbs) is only 10 miles from me) and almost immediately cracked three of them putting them on. I am much more careful now. The reason that I decided to go full set was the uniformity of colour.
With Robocop being my only pin I want it to look as good as possible.
Making my own was fun and I will continue to make replacements but the problem is I have to make the 2 slingshots and the yellow target plastic and the in lane plastics together or they look disjointed with colour differences.

Judging by the condition of the backing paper on the new full set I would think that it had been sitting there for some time as it had dirty and moist brown edges and the protection plastic covering the fronts was discoloured. I was deflated when I first looked at them and almost sent them back but it was superficial and when I had stripped the protection off they were in great condition.

#671 3 years ago

Does anybody know if anybody is manufacturing/printing Robocop decal sets or part sets?

Or does anyone know of a company that can produce a one-off set or short run?

#675 3 years ago
Quoted from cottonm4:

What are you wanting decals of?

I could do with Emil, Dick jones, boddicker, uphold the law and jackpot. I have burnt out inserts and I have taken out the old emil and jackpot and made my own decals (I will take a pic tomorrow) but I was thinking of replacing all of the inserts and could do with the original decals.

#676 3 years ago
Quoted from cottonm4:

What are you wanting decals of?

These are pics of my much needed decals.

The first is Emil as he was with burn marks. The second is my amateur attempt to recreate him. I cut the old decal out with the tip of a craft knife and it came off very easily and then scraped off the adhesive powdered residue. I am going to do another and my daughter is going to paint in the white shadow by hand (she is a bona fide artist). The dark marks on the right of the picture are on the burned out insert underneath.

The third pic shows Jones and Boddicker. The white cloudiness is the dried out adhesive under the decal and it scrapes off with a craft knife. Their inserts are burned out too.

If you look closely at the Boddicker and Emil decals you will see that the true circle of the decal is in the white handcuff design. I am going to make my replacement like those. Since I have never attempted or know how to change an insert there are exiting times ahead.

I have ordered three new 1 1/2 inch inserts from pinball center in Germany and I hope they fit (another item that is not readily available in the UK).

Old Emil (resized).jpgOld Emil (resized).jpgNew Emil (resized).jpgNew Emil (resized).jpgBoddicker and Jones (resized).jpgBoddicker and Jones (resized).jpg
#678 3 years ago
Quoted from cottonm4:

I can scan you pics of three perps easy enough. Any other scans will require me to remove the flippers, flipper plates and slings.
The problem with the scans is that the inserts colors will scanned, as well. You will need to use Photoshop or GIMP to remove any details you don’t want on your decals that you make.
As far as removing inserts, you need an industrial type heat gun. You apply some heat on the lower side of the play field. Just a little heat; Not too much. Then take a piece of pipe or a socket wrench and tap the insert out.
Be careful you don’t take out the Mylar with the inserts; You may need to cut an outline around the insert with a razor knife.

Thanks for the offer. It is very much appreciated.

Do you reverse the process to get the new insert in? I mean do you heat it to make it flexible or does it just tap into the hole?

Also do these inserts measure 1 1/2 inch diameter?

#682 3 years ago
Quoted from cottonm4:

I just took a closer look. To scan the perps, I will need to remove my lower pop bumper, the stand up targets, and remove the ramp, etc.
It will be a little whole before I can make this happen. I have to get some other pins back together first.
[quoted image]

C. It's not worth the work for you my good man. I can recreate the decals without you having to go to the trouble but thanks anyway.

#683 3 years ago
Quoted from cottonm4:

To install an insert, take whatever adhesive/ epoxy? you are going to use and apply that to the inside of the hole the insert is going into; If you put the epoxy on the insert and drive it in you will leave a big epoxy mess on your play field.
Then lay your insert into the hole and start tapping it in with a block of wood. Wipe any excess epoxy from under the play field.
I don't know what they measure. I'll have to measure when I pull the glass to make you some scans.

I got the inserts out and new ones in without a problem (they look great) but the new inserts are ever so slightly proud of the playfield but not on the full circumference of the circle just on a couple of edges. It does not interrupt fast play but can alter a slow ball.

Should I heat them from above and then use a block of wood and a mallet/hammer to level them?

#685 3 years ago
Quoted from cottonm4:

Did you use epoxy when you installed them or did you install th dry?
If you epoxied them in you are probably going to have to live with it.
If you put them dry then you might be able to tap them a bit with a small hammer and a block of wood. Tap softly; I am curious as to what might be keeping them from going all the way in.

They ARE all of the way in but about half a centimetre of the circumference is still showing proud of the lip on each of them. They were a tight fit and it took slightly more than a gentle hit to get them in but they were identical at 1.5 inches diameter as the ones I took out.

#687 3 years ago
Quoted from cottonm4:

The only thing I can think of is this. On my old Stern pinball machines, there are two different size inset holes. There is the larger hole the insert goes into. Down lower in that hole is a smaller hole that leaves a ledge for the insert to set down on. It might be you are having some interference with your insert and that ledge. I would mark my high areas, pull the insert and remove a little bit of the insert sidewall and see if that will let you set down even on the play field.

Yes there is a ledge. I'm going to try that. Thanks.

#688 3 years ago
Quoted from cottonm4:

The only thing I can think of is this. On my old Stern pinball machines, there are two different size inset holes. There is the larger hole the insert goes into. Down lower in that hole is a smaller hole that leaves a ledge for the insert to set down on. It might be you are having some interference with your insert and that ledge. I would mark my high areas, pull the insert and remove a little bit of the insert sidewall and see if that will let you set down even on the play field.

Turned out the problem was caused by a combination of two things.

Firstly the decal on the playfield (of the hand cuffs) which was left after I took of the circular felon decal that covers the circular insert was slightly encroaching on the lip of the hole and had been dragged into the hole when I pushed in the insert. I trimmed that with a craft knife.

Also there was a residue of old epoxy which was almost transparent and I only noticed it with a close up torch light. I had to use a fine chisel to remove it. Now the inserts are perfectly level.

1 week later
#689 3 years ago

As you may know I have been searching for a 89mm x 25mm x 4.2mm insert to replace my burned out 'Uphold The Law' insert.

I figured that if I could not get any help here that there was nowhere that I would find one.

By luck a work colleague of my wife said that he could 3D print one for me.

He has been very diligent in his efforts. I am at the stage where he has done these prototypes for size (he is upgrading the quality of the material to suit it's purpose).

Now he is working on a dark blue translucent one to match the original.

If anyone has burned out inserts this size (or maybe need a hard-to-get insert like me) let me know.

insert (resized).jpginsert (resized).jpg
#691 3 years ago
Quoted from kba78:

Do you still need scans of the criminals?

I would be grateful of them but I have made my own which look okay and I have my daughter painting some from pics I got off Cottonm4. Thanks.

#693 3 years ago

What is the best coil for a Robocop slingshot? Mine seem a little weak.

#695 3 years ago
Quoted from cottonm4:

I am going to say the coil that DE designed into the machine. If you have not done so, take your sling assembly apart, check to make sure your plunger is not mushroomed; if it mushroomed, then file it back into spec or replace it. Replace your coil sleeve. And soak the plunger and link assembly in a good cleaner to get all of the junk washed off.
Put it back together. If it is not working any better, maybe we can go looking for a coil.

The assemblies are fine and I have given them a clean (no mushrooming on the plungers and the sleeves are fine) and they are working without a hitch. Don't get me wrong they work okay but they just don't seem to have that extra oomph.

#705 3 years ago
Quoted from vec-tor:

Do you have the right caps to the switch actuators?

I will check thanks.

#706 3 years ago
Quoted from sixtyfourbits:

Thanks for another great write-up.
I will likely still try making a flap out of the lexan I have, but will also try to see if I have some thinner material that may work better as well.
I wouldn't mind hearing how you made the mod. So far, I would say that 75% of my plunges go straight to the 9, and about 15% to the 0 and 10% to the 2. But it is admittedly a small sample size so far.

Cottonm4 is the man.
May I suggest a fix for the 'skill shot' as I hit it 80 percent of the time. I'm pretty much sure that cm4 will have tried this. Replace the shooter tip and the rubbers up and around the 209 lights and put a strong spring on the shooter rod. Then soft power on the shooter should get you 9 lots of power will get you 2 and play around between the two for the 0.

#711 3 years ago
Quoted from cottonm4:

No. What I did was tweak/attmept to tweak the shooter lane habit rail. I took a small wrench and tried to pull the two lower wires closer to the back of the game to get them more in the back of the ramp and also attempt to shoot the ball into the right hand rubber in the 2-0-9 area.
What I can say is that chrome metal wire is super hard. It did not bend easy. This made me fear trying for more tweaking; I was afraid I might tweak too much and not be able to fix it if I made mistake. If you do something like this, you risk doing something that might be easy to reverse.
If I shoot slow, getting Dick Jones lit up always happens. A medium pull will get me to the "0" fairly easily. But getting the correct pull on the shooter to get the "2" is a bit of a challenge. I make this shot maybe 60 % to the time;Maybe a little less like 50%.
Also, when you screw the ramp down, the ramp will most likely interfere with the habit rail wires, which alters ball action.
Dramatization: The wrench will apply bending pressure on the tube. A tube can slowly be tweaked to change direction.
[quoted image]
[quoted image]

Sorry C but I don't even know what this part is.

#712 3 years ago
Quoted from sixtyfourbits:

Funny enough, I just solved it this evening. And you were right. I took a better look at the trough switches and triggers, and noticed that one looked very odd. It wasn’t in the trough, it was pointing down. Someone at some point had installed it backwards. It was for ball #1.
[quoted image]
So I corrected it, and now multiball is working as it should. I bet that trough trigger was upside down for the last 10 years, as it’s only noticeable in multiball, and the previous owner never got balls locked as his ball diverting flap was missing. He owned the game for ten years and didn’t know how to remove the glass, so I’m guessing it was the owner before him that performed most of the hacks and questionable choices I’ve come across so far.
Also, a bit of a story. One of the main reasons I’ve always wanted a Robocop pin, is because on the one plastic, it has both my name and my wife’s name as graffiti on a wall, with a heart beside it. It’s not the only reason I’ve wanted a robocop (I love the theme and layout) but it’s such a neat coincidence that it made me extra want one.
Well, that plastic on this particular robocop had been twisted And moved, so that you could no longer see the front of it when playing the pin. It was pretty much on backwards.
[quoted image]
So after completely removing the large plastic to get at the screws nut that was holding it, I relocated the plastic over just a bit, so that the player could actually see the artwork on it.
[quoted image]
[quoted image]
It’s not perfect, but it’s much better than it was before.
[quoted image]

I could say that this is a bit slushy but since I made my own sign with mine and my wifes' name on it I would sound ever so slightly hypocritical.

#715 3 years ago
Quoted from cottonm4:

It is not a pinball part. It is a tool for squeezing the tabs on the little barbs that hold the circuit boards. The tube slides over the barbs and release the circuit board from the back box.
That is why I called the 2 pics a Dramatization. I used the wrench as a lever to tweak the chrome shooter habit rail so I could state making the skill shots .

Ah! Got it. I could use one of those tools.

#718 3 years ago
Quoted from Action53:

I just joined the club, I'm a huge robocop fan and I've been looking for one forever

[quoted image][quoted image]

Welcome to the club.

#720 3 years ago
Quoted from sixtyfourbits:

Is there anywhere to get repro plastics for robocop that has them in stock? I could use the usual ones, being both sling plastics, the plastic above the yellow targets and the bridge sign. I see there was a set released a while back that just had those, but seems they’re sold out everywhere now

I waited a while for Retro refurbs to get them back into stock but they came eventually. Email them and they will tell you when they are due to be back in stock.

#721 3 years ago
Quoted from sixtyfourbits:

That’s a neat idea too thehipster .
So I made a rough flap out of the lexan I have, just to see if it will work. The lexan was a bit thick, so I ended up drilling holes and sanding it a bit. It’s not pretty, but it works great! I can always go back and make a cleaner one later if I decide to.
[quoted image]
As I mentioned though, every time I fix one thing, I find another lol.
I noticed now that when all three of the balls are out of the ball trough (either two locked and one in play, or all three in play for multiball) the coil to kicked the ball out of the trough constantly fires. And it only stops after the three balls drain. Now I need to look into that.

I love this idea of drilling the holes as I tried it without and it worked but it was slow at letting the ball through. I got metal from a dealer in the Netherlands and it is the perfect replacement. Marco does the same 'blue metal' ramp material. I would recommend a sheet of both thicknesses for spares.

2 months later
#804 3 years ago

Hello everyone. Schoolboy error alert on my part. A switch stuck on one of the slingshots and heated the coil enough to warp the sleeve and melt it in place causing the popper plunger to stick in the coil.

I ordered up a new coil and when I fitted it I thought I would use the 'there are only two coloured wires. what can go wrong theory' instead of taking a pic.

My problem arose when I went to wire the new coil and found that it had three tabs instead of two (one lug was not connected to the coil wires).

I think I wired it with the anode and cathode in the wrong direction and fried the diode. I tested the diode and it was dead so I put on a new one. I wired it up the other way around with the 28v to the lined side of the diode. Nothing.

I then swapped the coil with the one in the other slingshot and nothing. I now have two non-working slingshots.

I was hoping that one of you guys would be kind enough to send a pic of the correct wiring on your Robo slings.

Thanks in advance.

#805 3 years ago
Quoted from cottonm4:

Twice in the last week, the last time was about 30 minutes ago I am rolling up points on the pin. I am approaching 10 million points. From what am seeing it looks like Robocop does not displays scores above 9,999,999. At 9 million and change I will make some good ED-209 ramp points and look up and my score went from 9 million down to 300,000-400,000 points. It's like starting over.
So I took a real close look at the score display and I do not see an extra place for the 10 million digit. Looks like we are stuck with a 7 digit score system. Somebody tell me I am not looking at something correctly, please.

You are not seeing things. Rococop does rollover at 9,999,999. Play it on hard settings. You will very rarely rollover unless you use the 'buy in' feature.

#806 3 years ago
Quoted from Thehipster:

Hello everyone. Schoolboy error alert on my part. A switch stuck on one of the slingshots and heated the coil enough to warp the sleeve and melt it in place causing the popper plunger to stick in the coil.
I ordered up a new coil and when I fitted it I thought I would use the 'there are only two coloured wires. what can go wrong theory' instead of taking a pic.
My problem arose when I went to wire the new coil and found that it had three tabs instead of two (one lug was not connected to the coil wires).
I think I wired it with the anode and cathode in the wrong direction and fried the diode. I tested the diode and it was dead so I put on a new one. I wired it up the other way around with the 28v to the lined side of the diode. Nothing.
I then swapped the coil with the one in the other slingshot and nothing. I now have two non-working slingshots.
I was hoping that one of you guys would be kind enough to send a pic of the correct wiring on your Robo slings.
Thanks in advance.

Can anyone help on this please? Just advice on which lug for which wire would be a great help. Or which colour wire goes to the banded side of the diode?

#808 3 years ago
Quoted from cottonm4:

Put up a couple of pic, please.

20201106_203108 (resized).jpg20201106_203108 (resized).jpg20201106_203123 (resized).jpg20201106_203123 (resized).jpg
#809 3 years ago
Quoted from Thehipster:

[quoted image][quoted image]

Is there a fuse just for the slingshots?

#813 3 years ago
Quoted from cottonm4:

I'm busy for awhile. Later on today I will open up my Robo and have a look.
Stand by.
Also, do you have a Robocop manual? If not, you should get one. They are on Ebay all of the time.

I have a manual of sorts. I have changed coils many times but i did not follow my own rule of taking pics before desoldering.
It is getting late in the UK so I will await your findings. Thanks again

#814 3 years ago
Quoted from vec-tor:

Red wires go to the cathode side of the diodes.

Is that where I have them now? Striped side of the diode?

I just looked it up and yes I have them on that side. Do the slings have a fuse that I may have blown when I was putting them on the wrong way round wiring wise?

#821 3 years ago
Quoted from sixtyfourbits:

Left
[quoted image]
Right
[quoted image]
Not sure if these help or not as my coils only have 2 tabs. But thought I’d post anyway

This is a fantastic help. Thank you.

#822 3 years ago

Well the fuse had blown and I don't have a replacement atm.

Going to order a pair of new coils and some fuses.

#823 3 years ago

Well two new coils fitted in 'the correct' manner (red to banded side of diode), new fuses checked and changed.
Absolutely nothing from the slingshot bumpers.

Have I damaged the switches or is it something else?

What tests do I need to carry out (at the weekend) to diagnose the fault?

I have just discovered that S5 fuse for the slingshot is blowing on power up so where do I look for the short please?

#824 3 years ago
Quoted from Thehipster:

Well two new coils fitted in 'the correct' manner (red to banded side of diode), new fuses checked and changed.
Absolutely nothing from the slingshot bumpers.
Have I damaged the switches or is it something else?
What tests do I need to carry out (at the weekend) to diagnose the fault?
I have just discovered that S5 fuse for the slingshot is blowing on power up so where do I look for the short please?

UPDATE! At the advice of a friend and fellow enthusiast I had a close up look at the transistors and found that I had fried Q10. I have decided to change the TIP122 bank with new ones. It means that I check that I haven't damaged the reverse side of the board at the same time.

#826 3 years ago
Quoted from miracleman:

Zitt is doing a group order (cutoff 11-30-20) for Pinball Center parts, it appears the Robocop plastic set is in stock.
https://www.pinball.center/en/shop/pinball-parts/playfield-parts/plastics/6770/plastic-set-for-robocop
Read thread and contact Zitt soon for details...
https://pinside.com/pinball/forum/topic/pinballcenter-parts-needed

I got their last set earlier this year and it was the best thing that I have done to my Robocop but if anyone is thinking about buying a set please be aware that you will have to drill a couple of holes on them here and there as they do not match exactly. (Pinball center may have addressed this issue) and the trickiest one is the back plastic where you may have to re-drill some pilot holes and cut off about 2 centimetres of the left hand side to make it fit. Also the plastic that covers the laser kick re-light channel does not sit correctly and leaves a slight gap near the metal guides.
I can, however reiterate that your Robocop will look amazing when you put the full matching set of plastics on the playfield.
The Robocop keyring is an added bonus.

#828 3 years ago
Quoted from cottonm4:

An airball broke mine. I found a replacement on Ebay but the clear area is nicotine yellow. On several of my pins, I have had to make some of the mounting holes a little longer for better fit. Would enlarging the holes help with alignment?

I have one of the 6 piece "replacement" plastics kit on mine. They looked all washed out color wise when the GI lights are on. How do they look with this complete kit? Better? $130.00 is a lot of money for 6 pieces of plastic. Is there that much of an improvement?

Yes some of the parts just need the holes enlarging but the plastic over the re-light the laser kick is not large enough to adjust.

The plastics are more opaque than the 6 piece set and look a lot better with GI.

I love mine and I would advise anyone with a Robocop to fit them as long as they fit a cottonm4 air ball prevention mod on the yellow targets. As far as the price tag is concerned I would honestly say that it is the best value for money I have found in my (short) pinball life.

#830 3 years ago
Quoted from cottonm4:

Thank you for answering. I have a gap between the laser kick plastic and metal guides. Perhaps the gap you have is different.
I'm thinking hard about buying a set. It is just that it is hard to pull the trigger when I only need 6 of the plastics.

I had a full set on but most of the usual suspects had been replaced or got damaged over the years. It just looks fab with everything the same colour. The large set even includes the same colour speaker plastic. And don't forget that the repro key rings go for about $50.
It is difficult to describe the way that they look and photographs don't show the true colour but trust me they look amazing.

#831 3 years ago
Quoted from cottonm4:

Left sling coil. ( 2 lugs only)
Red is the banded side of the diode.
[quoted image]
Right sling coil. (2 lugs only)
[quoted image]
I read somewhere that not all Robocops have this fused harness but if yours has the harness you are lucky. It is is up high on the right side of the backbox.
[quoted image]
Both slings and all 3 pops are fused with 2.5 amp slo-blows. They are represented on page 35 of the manual.
Trust me, there will come a day when you will wish you had the complete manual. It takes a whole lot of study to figure out how to read the DE manuals.
Study this harness and drawing until you you are blue in the face. Pay attention to the wire colors. It is good training for learning how to read the DE prints. E.G. The top row is your coils. The bottom row is the switches. The Right pop is controlled by a Blu-ORN wire and its switch is a ORN-BLK wire.
Your right sling is BLU-GRN and its switch is ORN-GRN.
This should get you going.
Keep us posted, please.
[quoted image]
Sidebar: Robocop flipper coils are also of 2-lugs only. There is no EOS switch as the EOS function is part of one the circuit boards.

I replaced the tip 122 for the left slinger and checked the switches were open and that the fuses were okay. Someone had been at the back of the board with some wiring across parts of it which is beyond my understanding.
I switched on and the right slinger fuse blew.
I am now organising for the board to be repaired.

1 week later
#852 3 years ago
Quoted from cottonm4:

I also talked about how when I removed my lockdown bar that my play field glass would just start sliding out on its own. Indeed, I was not paying a close attention to this and almost had my glass slide all the way out and was going to be on its way to crashing to the floor.
There are several ways to fix this problem but those ways might be a hassle to mess with.
What I did was lay down 3 thicknesses of Gorilla duct tape. This had the effect of making the glass "thicker" so it would offer resistance inside the glass channels.
In an effort to allow the tape to be easy to use and not roll backwards over itself, I stair stepped the the 3 layers to make for an easy reinstall of the back glass.
[quoted image]
Then I slid the glass into position and slid a nice sharp razor blade along the edge of the rail which cut away all of the excess tape. I did this tape action for both sides. Now the glass stays put until I take positive action to remove it. And cutting the tape with the razor blade lets the tape hide in plain sight.
[quoted image]

I have this problem also. Thanks for the tip.

1 week later
#910 3 years ago
Quoted from cottonm4:

I bought 2 sets of the full plastic sets that Zitt is bringing over.; One set for me and one set for a friend. That is a pricy set of plastics with the dollar being weaker than the Euro.
I looked at the web site and they are sold out again.

You won't be disappointed with your plastics my friend.

#911 3 years ago

Hi everyone. Update on my coil/switch problem .
I have had the board repaired.
When I put it back on the pin it won't let me into diagnostics.
Also the right sling activates the left pop bumper, itself and the left sling simultaneously so there is a switch problem but since I cannot get into the diagnostics I can't id it. Also the right and middle pops are dead.
Could someone remind me how to test fuses in case I am doing it wrong.

#913 3 years ago
Quoted from cottonm4:

In the upper right hand side of your back box there should be a wire harness with 5 fuses. 3 pops and 2 sling shot fuses. To test a fuse you need a multimeter set to read ohms. If the fuse is good you will get a reading. A blown fuse will give no reading. If this is what you are asking.
I say there should be a harness in the upper right hand side; I read or heard that some early Robocops did not have this harness installed at the factory.

I have the harness and all fuses okay. I have got the diagnostics back. It was a loose connector. I think the resistors have gone on the board for the poppers. I'm struggling with the right slingshot causing the left slingshot and the left popper to pop simultaneously.

#915 3 years ago
Quoted from cottonm4:

I had some pop issues on my MPU board. My problem was a couple of dead pop bumpers. I replaced several SCRs and some of the smaller transistors as well and could not get the problem fixed. I had to send the board out to a pro for repair.
What happens if you pull the fuse for the right sling? What happens if you pull the fuse for the left sling? What happens if you pull the fuse for the pop bumper? What changes happen when you pull each fuse one at time?
If I were you, I would be contacting your board repair guy and see what's going on.

I will contact him. He is a good guy and extremely helpful. I am going to try the diagnostic on the fuses to see what is going on there.

#916 3 years ago

UPDATE.
Advice to self. Always wear spectacles and use bright lights when connecting MPUs. Because it does not matter how careful you think you are one pin out on the connector above the coil relay could cause damage.
Now repositioned and fully working.

#938 3 years ago

I have posted on this several times. They look better with the protective plastic removed and only really work when all of the plastics are put on the pin as a set.

I agree that the supplier could have done a better job on the colour (a much better job) but trust me they do 'work' when a full set is on the pin.

I think we should contact the supplier as a group and ask them to try something with the colour. At least then future buyers might get a better match.

I buy a lot of stuff from Pinball Center and I find them a very good supplier generally and good with communication and I don't have the access to parts being in the UK that some of you guys get in the U.S.

Oh and I did warn everyone about the bad positioning of the holes but it does not take much effort to rectify the short-comings.

#940 3 years ago
Quoted from Lostcause:

I did read what you had found and was expecting it from them anyway.
Yeah, most people in the UK know their plastics are pretty bad. Found out today the main back piece with the 3 lights don’t line up, going to be a pain in the arse as I will have a gap on the right when I correct it.
Will look best with warm white GI as they are lighter blue.

I found that the back plastic only required about a centimetre off the left edge and a re-drilling of the the starter holes for the screws.

The small gap at the right edge is barely noticeable because of the black background and the position on the playfield.

I know that everyone expects their own standard but when it comes to the look of their pins and although I was disappointed when I originally opened the packaging on my plastics I still love the way they look as a full set.

#941 3 years ago
Quoted from Lostcause:

I love LED’s, put them in all the wpc pins I’ve had but have to also put in led ocd as well or the euro equivalent Afterglow. Have a few spare of those. Fast on off looks bad to me.
Spent a few hours stripping the playfield and polishing the mylar to get some shine, looking better now.
I am trying to find a cliffy ramp protector for the right entrance, so far the Iron Man one looks pretty close to me.
Definitely will be going warm white with LED’s if I use them for GI and colour match inserts if it looks ok otherwise warm whites again or maybe sunlight.
If they strobe I will be taking back out as that will annoy me.
Also got some new return lane guides coming from cliffy.[quoted image][quoted image]

What I would give for that playfield. I had so many burnt out inserts on mine that I had to replace them and make my own decals to go on top. One of the inserts is impossible to source (the Uphold The Law lozenge) and I had a friend 3D print one for me.

But Robocop was my first pin and I will cherish it forever.

#945 3 years ago
Quoted from Lostcause:

I have bought a few things from cliffy, new ball return guides as mine were worn down causing ball hop and ramp protectors. Right ramp entrance has a crack and Cliffy’ s Genesis ramp protector fits the bill. I hope it all comes quick.
A pic he sent me of the Genesis protector on Robocop.
[quoted image]

Do you have link for these please

#956 3 years ago
Quoted from cottonm4:

A couple of days ago my Robocop started doing something strange. I don't know what make of it. You know how the lights start blinking up in the back to signal the skill shot. I was playing and all at once when the ball would hit the play field after launch. As soon as the ball drops and hits the play field it cancels the blinking lights. And now I cannot make my skill shots since the ball hits the play before it goes down the rollover. I made some movies.
The way it used to work was the ball would go over the rollover wire and then the lights would quit blinking as I made the skill shot.
I am scratching my head as to just why a ball impact on the play field would make these lights quit blinking. It started in the middle of a game. And this also cancels any chance to make a skill shot.
Any ideas would be appreciated.

I have had this happen twice and both times it was the green 4 target switch (top one looking up the playfield).
The switch test showed me that it was green 4 when I used the right flipper.
The indicator board flashed right flipper and then immediately green target 4.
The switch contacts were touching on both occasions and I just eased them apart with a switch tool.
Obviously it may be a different switch on yours but give it a try and see if it helps.

#978 3 years ago
Quoted from Lostcause:

My new Pinball Center sling shot plastics, holes too big. I wouldn’t buy that for a dollar!!!
Still have protective layers on and protectors below.
Be interesting to see what they say about this as well.[quoted image][quoted image][quoted image]

The holes on mine were oversized in places but they still held the nut in place. I will take some pics at the weekend.
I think that the supplier could be over compensating the positioning of the holes because they have never had an original set to work from.
These plastics are so rare a good manufacturer could do really well making and selling them.
When I bought my RC I did not expect parts to be so scarce but it has added to the experience.
On another note I have found the lozenge shaped inserts for the 'directive' lights impossible to source and a friend 3D printed some for me and they are usable but they are not an exact fit.
If you know where to get some I would be very grateful.

#984 3 years ago
Quoted from cottonm4:

For those Prime Directive inserts, 2 blue and 1 red, I think they are solid pieces and not "hollow" like all of the other inserts. So, if they are a flat piece of plastic, perhaps you could get a small piece of red plastic and small piece of blue plastic and cut and file your own into etc correct shape.
If you cannot source the plastic in the UK, I live about 6 miles for a plastics supply and could procure and ship you some small pieces you could cut to fit.
=================================================
Oh, yeah, 1500 Robocops were built. I have no idea how many are left. Making anything dedicated to Robocop involves some risk.

I never thought of that. I have a scroll saw so it is doable. I will try to source the plastic and get back to you. Because of pinball I invested in a digital micrometer (among lots of other tools) so I can get the sizes no problem.

#989 3 years ago

'Say hello to my little friend'.

littlerobo (resized).jpeglittlerobo (resized).jpeg
#990 3 years ago
Quoted from cottonm4:

For those Prime Directive inserts, 2 blue and 1 red, I think they are solid pieces and not "hollow" like all of the other inserts. So, if they are a flat piece of plastic, perhaps you could get a small piece of red plastic and small piece of blue plastic and cut and file your own into etc correct shape.
If you cannot source the plastic in the UK, I live about 6 miles for a plastics supply and could procure and ship you some small pieces you could cut to fit.
=================================================
Oh, yeah, 1500 Robocops were built. I have no idea how many are left. Making anything dedicated to Robocop involves some risk.

I should have the plastic in a couple of days. The thickness according to my micrometre is 5mm so all I need to do is cut the shape and sand it. Fingers crossed.

#994 3 years ago
Quoted from JustEverett:

I'm needing to replace all my standup targets. Marcos shows these translucent greens a compatible with RC, but they don't list any for the yellow. I did find some translucent yellows listed under related items that look like they will work. Since I don't have a manual I'm hoping someone can who does have a manual will let me know if these will work. I do kind of like the translucent as opposed to the solid color standups.
https://www.marcospecialties.com/pinball-parts/515-5966-04 <green
https://www.marcospecialties.com/pinball-parts/515-5966-16 <yellow

I would love these but in Europe all I can get are opaque standups. I would have thought these would work on RC no problem. They are pretty standard and with a diode should be a straight replacement.

1 week later
#1013 3 years ago
Quoted from Action53:

My amazing wife got me a Cricut Explore air 2 for Christmas so I finally got around to playing with it tonight. Freshened up my pop bumpers, made a decal for my truck (I stream the pin) and made a splatterpunks decal for the back glass.
I think I might replace the white with silver for the pop bumpers
[quoted image][quoted image][quoted image]

These look really cool.
I had a quick look at the the printer/cutter online and would like to know if this machine makes it possible to create decals for the playfield that are washable? Some of the inserts on my playfield were in a poor condition when I got it, burnt and melted. I replaced them but my home made decals, although pretty good, are not colour fast and when I clean the playfield with Novus I have to be careful not to go anywhere near the ink as it washes off.

#1015 3 years ago

Does anyone have a pic of the MPU board schematics. I know I need to buy one.
My slingshot coil has stuck on again after changing resistor q10 and it working for a while I would like to check the other components in that row.

#1018 3 years ago
Quoted from Lostcause:

Think you should also change the diode on the coil and maybe the coil, the protective layer can burn off the coil wire and cause issues.
My left slingshot quit the other day, ordered some TIP102’s as that row of Q8 to Q13 looked to have got hot going by the board.
Also got a new pinled flipper board on the way and some ball return guides and ramp protectors arriving shortly.

I have just replaced the coil and had an engineer fix the board which I had damaged trying to sort out the coil first time round (in a previous post on about page 19 or something of this thread).

It was the TIP 102 that he changed and he fixed some pretty bad hacks. The slingshot worked fine for about 2 weeks then locked on again. That got me thinking it might be something on the way to the TIP102.

#1019 3 years ago

That is brilliant. Thanks.

I've been meaning to ask. My shooter wire-form has started restricting my skill shots and a wire at the top has come loose from the form. Does this affect to way the ball goes through the wire-form and if it does will I need to weld it back onto the main cage work?

#1021 3 years ago
Quoted from Lostcause:

Do you have the correct size fuse for the special coils, slingshots and pops? Should be 2.5amps sb I think. Mine are screwed in the right hand topside of backbox.
Will be putting a set of new fuses in as I know they look different without checking properly.
That’s annoying, something not right.

Yes the fuses are all correct. My engineer pal should be able to sort it.

#1023 3 years ago
Quoted from Lostcause:

Return lane guides arrived today[quoted image]

They look great!

I have emailed Cliffy to see if he can give me a non-prohibitive cost for shipping to the UK.

I could do with the pair of return lane guides as mine are so warn that occasionally they hold the ball in front of the flipper bat and I have to give the pin a nudge to get it moving again.

It's not the end of the world but it can get annoying at times.

Added over 3 years ago:

UPDATE! Cliffy got right back to me and he is making them for me. Very reasonable on the shipping too.

#1025 3 years ago
Quoted from cottonm4:

You are creative. Get some .030 polycarbonate plastic. Trace your cut lines around your new guides and add just a little bit extra to close the gap between the flipper and the guide. Place your newly cut guides on top or below the factory guides. End of problem.

I must admit that I thought about a remedy but for the low cost (I know it is relative) I made a time/effort decision on this and Cliffy got the gig.

#1028 3 years ago
Quoted from cottonm4:

One of my flipper mounting plates was broken like that. I think I got my replacement at Pinball Life.

Quoted from Lostcause:

Great!
My metal posts were seized, one snapped and another I had to hacksaw off. The nut on top was next useless for grip.
Going to order new posts and t nuts, had to take both flipper plates/mechs off to get to t nuts as spinning
Also found one of the flipper plates was bodged together and fell apart!
[quoted image][quoted image]

I hate it when people bodge things.
I have been lucky with no seized nuts or bolts. I have on hand about 30 of each 6/32 and 8/32 nuts with nylon thread and the same of bolts. I prefer them to tee-nuts if the countersunk hole is not already drilled under the playfield. I've just got to remember to order posts with the longest threaded length.
My Robocop has sleeve posts to protect the ramp front and I have snapped the left side one 6 times in the last year so I usually have a half dozen at hand.

#1030 3 years ago
Quoted from gdonovan:

I'm frugal, bust out the welder =)
Just had to repair my DE Star Wars ramp which had all the welds broken, came out great.

I would probably weld myself to the pin

#1038 3 years ago
Quoted from Lostcause:

No flipper base plates in the uk so will have to order from Germany, postage costs the same as the plate so I might put it back as it was until I need to order some more stuff .
Ordered the posts etc, new flipper coils arrived today as wrong ones were fitted.
Anyone got a pic of the flipper coil as I want to check where the diode stripe should be, new coils are opposite to how they are on my machine.
My pinled flipper board should be here anytime now, can’t wait to get it all back together.
Still need to pull out mpu and check replace slingshot transistor, have a new coil for that as well so might as well change it.
Ahh although my sound is ok somehow I noticed the bb speakers have perished so will need to order some new ones, weird size for here in the uk.

I'm in the UK too so welcome to my world. Everything Robocop is so hard to find. Have you looked at pinball.nl? They are pretty good and the they charge a lot less than the German companies for shipping. I think it is about 9.95 euros.

#1039 3 years ago
Quoted from Lostcause:

No flipper base plates in the uk so will have to order from Germany, postage costs the same as the plate so I might put it back as it was until I need to order some more stuff .
Ordered the posts etc, new flipper coils arrived today as wrong ones were fitted.
Anyone got a pic of the flipper coil as I want to check where the diode stripe should be, new coils are opposite to how they are on my machine.
My pinled flipper board should be here anytime now, can’t wait to get it all back together.
Still need to pull out mpu and check replace slingshot transistor, have a new coil for that as well so might as well change it.
Ahh although my sound is ok somehow I noticed the bb speakers have perished so will need to order some new ones, weird size for here in the uk.

Is this the one you need? Its at pinball heaven.

515-6617-01 (resized).jpg515-6617-01 (resized).jpg
#1041 3 years ago
Quoted from Lostcause:

Thanks but no that’s not the one, pinparts has that one too. Data East parts need some research to get part no.s, getting used to it though.
Yep Pinball.nl have the one I need in stock and 4 euro cheaper than Germany, thanks for reminding me will see what else they have that I might or might not need lol

Yeah I just realised it is a simpler base plate for Data East. I usually go to Marco specialities site for the part numbers. I would use Marcos as a go to supplier but the shipping is about £50 from the US.

#1045 3 years ago
Quoted from Lostcause:

Pinball.nl want nearly €20 postage to me so will leave for now.
Yeah the plate had some extra pieces of metal and screwed elsewhere to the playfield, was solid enough. I will look into it.
Bit of bond which I have and a screw here and there and should be good. When I need to place an order worth doing I will get one.
The left side has been replaced by someone already with the unpainted version and then they put self tappers through the coil stop holes, have ordered the machine screws for these.

I forgot to say that I was on pinball nl the other day and it wouldn't let me do the normal 9.95 euro delivery and only came up with a 24.95 euro option. I cancelled the basket and got the stuff from pinball center. 3 day delivery door to door excluding weekends which I think is pretty good during the new year holidays.

#1047 3 years ago
Quoted from Lostcause:

Pinball centre now want €35 or a cheaper untracked way with up to 30 days delivery!!!!

That's too much!!!! It essentially puts the price of the parts up 33%.
We'll just have to ask Phil at Pinball Heaven and the guys at Pinball Mania to be a bit more adventurous with their range of parts
Data East is very poorly represented generally in Europe and the UK although some of the Stern products are a decent substitute.

#1062 3 years ago
Quoted from Lostcause:

Took the mpu out today to fix the slingshot that quit, was told boards are clean by seller.
Special coil transistors Q8 on have been ‘worked’ on and two pins resting against the long join, don’t know how they even worked!
All working now and glad not to have to see that mess until the next time.....
[quoted image]

Mine was like that before the engineer got to work on it. I don't think mine was as bad but the hack was a diamond of short wiring all around the Q10 area. I didn't know where to start.

Actually having said that I messed up the power supply board on a Zacarria that I acquired recently and a guy on the Zac forum in pinballinfo.com talked me through replacing all sorts of parts (bridge rectifiers, transistors, resistors, heat sinks and what to do with thermal paste) until it was fixed (all done via messages) and I got it fully restored thanks to his generosity and found out loads about AC and DC voltage readings and testing parts and connector before powering up.

My Q10 has gone again but I think it was a wire from the end of stroke switch which I found to be loose and I think it may have shorted the coil on again and blowing the slo-blo 2.5 fuse. The engineer has told me not to attempt it myself but I am going to look at it when the tip122s arrive and if the area around Q10 is clean I may give it a go but probably not. Anywhere near the wire hack and it will be going to him but he's not available for a couple of weeks.

The game is playable with just one sling but I want it back up to normal asap.

By the way I have just ordered ramp protectors from Cliffy. He seems like a top bloke.

#1075 3 years ago

UPDATE on my slingshot problem.
My board went to an engineer and he swapped the Q10 transistor tip122 and removed some of the really bad hacking and tidied the area up around the special sling coil transistors.
This worked for a short while and then the coil locked on again and blew the fuse.
I today changed the tip122 myself and took care to copy the original soldering and when I put the board back on the fuse blew again. It has also taken out the right and centre thumper bumpers (fuses are fine).
Does anyone know if the component in the picture has any relevance to the problems I am having. It is attached to one of the pair of switches on the slingshot. The other switch does not have one, nor a diode. The other slingshot switches are a mirror image.
I have messaged another engineer who comes highly recommended for a cost to repair the board.

switch (resized).jpgswitch (resized).jpg
#1078 3 years ago
Quoted from cottonm4:

Capacitors can go bad and short out. I had cap go bad on the tilt bob of one of my early solid states and it would cause the game to tilt 100% of the time. I clipped one wire and the game has been behaving perfectly for several years now and I never tilt
Some of those tiny caps on my Robo have had a wire cut and are non-functional. I'm thinking you can clip one of the wire and disable the cap. You can always buy replacements and reinstall. Worth a try.
With the glass off, can you manually operate each switch and see which one is causing the fuse to blow? Or is your pic of the item that is causing you problems?

It could be a switch but there are no shorts and they all seem in good order but the q10 transistor area is blowing the fuse. As I said the tip122 was replaced and it worked for a short period

This pic shows the state of the board before tidy up. I will take another pic tomorrow.

20201117_173744 (resized).jpg20201117_173744 (resized).jpg20201117_173800 (resized).jpg20201117_173800 (resized).jpg

#1079 3 years ago

Here are a couple of pics of the switches on the left slinger.

switch1 (resized).jpgswitch1 (resized).jpgswitch2 (resized).jpgswitch2 (resized).jpg
#1080 3 years ago
Quoted from cottonm4:

With the glass off, can you manually operate each switch and see which one is causing the fuse to blow? Or is your pic of the item that is causing you problems?

Just to clarify the fuse blows on startup.

#1082 3 years ago
Quoted from cottonm4:

Start up as in turning the pin on. Or start up meaning you hit the credit button to start a game?
If you pulled the fuse beforehand, can you still do a start up? If you can start it up without the fuse, what happens to a good fuse it you were to start up and just hols a fusion your fingers and make contact with the fuse and fuse clips? Will the fuse still blow? ( I don't know if that would mean anything, I'm just trying to figure out a good place to start.

When I switch on the pin the slingshot fires and blows the fuse immediately. This morning I switched on the pin after changing the tip122 at Q10 and that was what happened. I watched the slingshot arm fire and stay for about 3 or 4 seconds, checked the fuse and it was blown. I then re-seated the two connectors next to the fuses, power in and power out to the special coils, put in a new fuse and tried it again and the fuse blew.

At the same time the centre and right thumper bumpers stopped working and I checked their fuses and they were fine.

I will post a pic of the refurbished and tidied back of the board tomorrow. You might notice something obvious that is outside of my limited knowledge.

#1086 3 years ago
Quoted from Lostcause:

I can’t see clear enough from the pic of the board but I would be checking with a meter that the pins are not shorting anywhere, and checking the transistors to see if they are blown. Easy with a meter. Sounds like there is a short if it has now taken out the 2 pops. Are the 2 pops either side of Q10?

I tested all of the transistors on the board and both the centre and the left poppers were gone but the q10 was okay (the one blowing the fuses).
Strangely the left popper and the left slinger transistors were registering 8.82 ohms instead of between 4 and 6.
I tested them with a DMM with the black lead on the centre and the red and left pin and then right pin. I'm still a bit of a novice with these things but I think I did it correctly.

Weather permitting I am taking the board to Jim tomorrow and while it is away I will test the switches, switch diodes and capacitors under the playfield.

I have a feeling there is shorting going on where the board has been repaired before.

I tested the coils (decided to check all of them since I had the top up). Every diode and coil was good. I think I will order two new leaf switches for the left slinger while I am on.

That way all should be ready for the board returning.

I have every faith in Jim so we will see in a couple of weeks. So fingers crossed.

#1087 3 years ago
Quoted from cottonm4:

It probably means nothing but I am interested in what happen when you pull the fuse and do a start up? And then what happens when you immediately touch the ends of a good fuse to the fuse clips. I will assume with the fuse out that your problems go away; Of course, nothing on that circuit will be working. But what happens if you immediately take a good fuse and touch it to the fuse clips. Does the fuse blow at that time?

Everything except the slingshot works with this fuse out. So a game can be played as it must be the only thing on that circuit.

I have found out a couple of things about the connectors. The left GI went this morning and it was simply the connector not sitting exactly right. The same with the diagnostic from the front door wouldn't let me in until I re-seated the connector on the board.

Board going to expert tomorrow for re-furb and repair.

#1089 3 years ago
Quoted from cottonm4:

OK, your pops and slings all work off of CN-19 connector. There are two transistors and two resistors for each sling and each pop. Have you replaced both transistors?

I started to replace tip122 at the pointsa where I didn't get a reading but the board is not in great condition so I am leaving it it to the professionals and taking it to an engineer tomorrow. He comes highly recommended and I am sure that he will sort it for me.

#1091 3 years ago
Quoted from vec-tor:

Note: I got a batch of TIP122 that are bad...
The transistors worked fine when it fired off the brights/flasher lamps...
but when I would add a known good new coil, the transistor would fail!!!
Yes, the transistors came from the "other country..."
I had to replace the TIP122 from another lot and all is fine.
It really sucks having to rely on components from a country that short changes you...
I have noticed that in the past twenty years IC's are not as good has the ones made
back in the seventy's/eighty's... plus the practice of white washing the chips with new
numbers sucks... you never know what IC your are really getting and whether or not
it is, what is marked.

I only bought two from this supplier and although despatched from the UK to me in the UK they did not have clear markings and they were clearly from the other country. I tested them and they were okay but I don't know if they will last.

I am pretty sure that the engineer I am using will have bona fide parts.

#1093 3 years ago

HELP!!!
Are these switches wired correctly? (I am pretty sure they are and I took pics to guide me). The new switch's lugs were the opposite way round to the existing so that is why I am asking.
With my MPU board away being fixed I thought that I would give the slinger a refurb.
So I have put in new switches and checked the diode on the end of stroke switch which was okay but since I had to remove it to check it I replaced it.
I didn't replace or check the capacitor because I don't know how to.

Slinger Switch1.jpgSlinger Switch1.jpgSlinger Switch2.jpgSlinger Switch2.jpgSlinger Switch3.jpgSlinger Switch3.jpg
#1095 3 years ago
Quoted from Lostcause:

[quoted image][quoted image]

Thanks for taking the time to post these. They look like mine so I am reassured.

The only thing which seems odd is that on mine there is no 'resistor' between the cap and the lug but since it worked fine for 2 years I'm guessing it didn't need it.

#1098 3 years ago
Quoted from vec-tor:

The resistor/capacitor part of the switch, is designed to hold the pulse of the switch contacts
long enough so as the ic's can process the pulse to make a good transistor ground bleed.

So could a faulty cap blow a transistor on the MPU? Or is it more likely that the fuse would blow?

Oh and should I set my switch up like that?

#1099 3 years ago

Lostcause vec-tor cottonm4

I have been interacting with Jim at myPinball who has fixed my board.

He advised me, as Lostcause did also, to check for shorted switches before installing the board upon its return. From previous posts you may have seen that I have put new switches in the slinger that initially caused the board problems.

Today I checked the two poppers and found one had a shorted switch and another had lost part of the switch itself. It must have snapped and was at the bottom of the cabinet. (See pictures).

I didn't have a replacement so I had to deconstruct/reconstruct the EOS switch using parts from a couple of leaf switches that I had in reserve. I think all is okay now.

Jim has fitted a nvram and new game roms as apparently I had 3.0 not 3.4 so I'm eager to see how that changes things.

EOS (resized).jpgEOS (resized).jpg

#1100 3 years ago

I have got my MPU board back from Jim at myPinball and it is working perfectly.
He has done a fantastic job. He comes highly recommended from me just as he was from @lostcause.
Some pics of the repair below.
Pic 1 with the blue wire is before repair and 2 and 3 are after

IMG_8510 (resized).jpegIMG_8510 (resized).jpegIMG_8512 (resized).jpegIMG_8512 (resized).jpegIMG_8513 (resized).jpegIMG_8513 (resized).jpeg

#1102 3 years ago
Quoted from Lostcause:

That’s much better, I just received the big capacitor replacement which is much smaller. The one in the bottom left of backbox and v3.4 roms as he was burning some for you as mine were v3.0 as well. I don’t have a clue what is different and played a load of games, one weird thing happened though it didn’t manage to kick out a locked ball properly after game over but kicked one out in the shooter lane for some reason in attract mode. That’s a first!
Jim told me to double check my switches as well.

I have noticed that the sound doesn't override itself . And as I said before the 209 lamp freeze hasn't happened yet.

#1115 3 years ago
Quoted from Lostcause:

I had a spare cab speaker from my MMR as I upgraded the sub, fitted it in this today now sounding really good with the Boss speakers.
Now my displays have started to fade away, looks like an led upgrade coming. More money
Don’t know what it is with this game but I just keep playing it game after game.

My display gassed out after I had it for about 3 months. I bit the bullet and bought a new one. It looks fantastically bright and vibrant. I just went with the traditional colour after toying with different colour variations for a while. I'm pleased that I stuck with the original colour.

#1118 3 years ago
Quoted from Lostcause:

Mines not gassing out, when turned on its very bright. Plus it was stored for over 20 years so seen less action.
I have ordered some resistors and diodes and hoping I don’t have to spend any more money.
I can play for 30 plus mins before it starts to fade so not the end of the world yet

Ah okay. I'm sure you will sort it. I hope so. I'm hoping I am at the end of my major spends on my Robocop.

#1119 3 years ago
Quoted from cottonm4:

In my youth, I was more concerned about winning games, and Specials than the score that I got. I still have that mindset and would be better served by having a stopwatch telling how many minutes of seconds I played. So, for a couple of weeks I played with out any display at all and was perfectly happy.

I played mine for 4 weeks without a left slinger and was still happy.
It's nice to have the pin working as it should.

I sometimes just practice the ramp jump record or how many times I can hit the Dick Jones target or the scanner lock.

I don't know if you recall me asking you some time ago about whether all three pop bumpers operate the flashers under the 209 model when pops 3000 registers on the scanner. Well after I adjusted the switches under there last week all of the bumpers now flash when in that mode.

#1121 3 years ago
Quoted from Lostcause:

And the sound effect from the pops are great

After I saw your post yesterday I decided to turn the sound on mine up as I normally have it all the way down. I couldn't believe the 'new' sounds that became evident. The slingers and the pops as well as the two switches at the top left of the bumpers. And the gun shots from the flippers.

#1125 3 years ago
Quoted from cottonm4:

I get those "turbo sounds" from my pops and my flippers. My slings are silent. I have bought a recap kits from a seller on Ebay but have not installed them. I am hoping some news caps offer some help.
And, of course, I still deal with the inlanes not making the siren sound until a 2nd ball goes down the inlane.

Update on the 3.4 rom.

With the 3.0 roms if the top right scanner hole was hit early on and a 100k (or something similar) score was awarded it didn't register on the score display. It does now.

Also, without tempting fate, I have not had a 209 lamp freeze since the board was fixed and upgraded.

#1127 3 years ago
Quoted from cottonm4:

I know you had your board repaired. I missed reading that it has been upgraded. What is/was the upgrade about?

It was just an upgrade of the roms. Apparently I had 3.0 roms and the engineer put in 3.4s. He also put in nvram.

#1128 3 years ago
Quoted from Lostcause:

What are you mad, Robocop has some of the best sounds in a pinball. Mine is sounding great now with the new speakers and better now most of the pops are scoring

I have decided to have the volume up during the day. Call me courteous to my neighbours at night since you know how loud this pin can go. (I think it has an '11' setting on the volume control). And 'in digital stereo'.

#1129 3 years ago

UPDATE! Lostcause cottonm4

I had a lamp freeze today but it was a nothing like the ones I used to get with my old roms. Just about 3 seconds of gameplay where the lights froze.

I can't put my finger on it but the whole feel of the game is better. The scores gained in the scanner all register. This was not the case before at the low end, at the beginning of each game.

On a different point when I get instant x2 at the beginning from the scanner the multiplier lamp does not light (this was the same with my old roms).
Does anyone else have this problem or can tell me what I need to do to rectify it. Is it a programming problem or electrical?

#1131 3 years ago
Quoted from Lostcause:

Thought my x2 lit but will check it out, still a few bugs now and again but I’m just concentrating on my pop bumper scoring now as I fitted 3 Bally/Williams populated pop switches which fitted nicely.
Game is playing great now, just waiting on some diodes for the 100v power (have resistors) but takes over an hour now before display starts to fade.

It sounds like you going to fix the display. Good stuff

#1135 3 years ago
Quoted from Lostcause:

Changed the 2 resistors put back in and display faded away as usual, board back out and changed the 2 diodes and has been on quite a while now and looks really bright and solid. Happy days.
Thanks cottonm4 for prodding me into fixing it, saved me over £200
Had a game and rolled it with over 11mil and 14 jumps
No name up though

How do you have the gameplay set?

I have hard rules and I tweak the intermittent high score awards to free balls, 2 million, 2.6 million, 4 million and 6.4 million.
The 1 meg target is set at 2 target practice hits, then 3, then 4 etc (award 1 million), special at 2 ramp shots (award 1 million), everything lit at 2 ramps. stand up targets hard, spinner target easy, kick back re-lit at easy.

I also have buy in set to on which is the biggest cheat. I am going to set everything to hard this week and take away the extra balls as I got 28 million or so last friday.

My record for ramp shots is (believe it or not 48). I currently have 26.

I have noticed that the scoring is a lot more generous since the new roms went in (I think).

#1138 3 years ago
Quoted from Lostcause:

Settings are all standard, no buy ins though. Right outlane wide open. Mine is set quite steep which makes it harder and play faster.
Just checked and it’s 7.8 pitch Still flies over the jump.
I had just under 10 mil on 3.0 Roms with no pops scoring at the time.
Seems similar scoring to me but not played enough on the 3.4 yet really.
28 mil is a great score.
[quoted image]

Have you been into the expand adjust on the diagnostics? If so which are you using as standard settings?

In the diagnostics you can have 'factory' rules, 'hard' rules or 'easy' rules. I have always regarded standard rules as factory settings. There is also a setting for novelty rules but I have never tried them and don't know what they are.

#1147 3 years ago
Quoted from gdonovan:

I should send him a scan of the original keychain, I don't see it in the plastic set.

I got the key chain with my set from pinball center but most people are not happy with their sets. I was and still am.

#1148 3 years ago
Quoted from cottonm4:

Thank you. I'm waiting for Lee to send me a quote for 2 sets. My friend has a Robocop, too. He played mine and was hooked.

Who wouldn't be hooked after spending more than 30 minutes playing Robocop.

#1150 3 years ago
Quoted from Lostcause:

Yeah I meant factory settings with the only change being no buy in and free play, 7.8 pitch which makes it much more interesting

I am going to try factory settings. I've never tried it before.

#1154 3 years ago

Are power board or back box board fixing screws a standard size?

If so, what size?

And does anyone have a link for a supplier in the UK?

1 week later
#1159 3 years ago
Quoted from cottonm4:

Problems.
Before I go bury my head in the manual, I'm hoping someone can get me going.
Yesterday, I fired up Robocop for a few quick games. Then turned it off and went on with my business.
Today, I turn on, some of the play field lights turn on and immediately go dead. All I have is GI lights.
Where is a good place to start looking for my problem?
GI lights is all I have. No display lights. No feature lights. No sounds. No nothing except for GI.
Where do I start looking?
Thanks

When I replaced my MPU I had a problem with the Robocop lamps (red and blue) under the up ramp. They were intermittent and I couldn't find anything in the manual or schematics to locate the wiring. I traced it back to the brown wired connector and sure enough two wires were loose.
Don't know if that will help.

#1167 3 years ago
Quoted from cottonm4:

Found it. Thank you again.
I also found the kit on Pinball Life, as well.
Time to do my part to feed the US Postal Service. Lemme see, what else can I order that I don't already have 3 of?
PL also sells the DE power supply board. $140.00 is not bad. Not bad at all.
Amazing the amount of items one can buy to keep the 35 year old pins running.

There is a working power board on ebay UK for £85. It has had a hack but it is being sold as working. Came out of the guys HOOK. Don't know if it would help but here is the link.
https://www.ebay.co.uk/itm/Data-east-pinball-machine-power-supply-working-condition/193884618318?hash=item2d246c7e4e%3Ag%3AwmgAAOSwLEtdrdP-&LH_BIN=1

#1169 3 years ago
Quoted from gdonovan:

1) Which is $120 USD
2) Seller doesn't ship to US
3) Has really sketchy repair on traces
4) Still has original caps
For that amount of funds better off with new board or just simply repairing existing board which is my preferred route.

Yeah it has been on ebay since I got my Robo over a year ago I think.

#1177 3 years ago
Quoted from cottonm4:

I just noticed another difference.
These are the original plastics on my Robocop at the spinner. Notice that part of the part number is cut off at the spinner clearance notch in the yellow.
[quoted image]
The repro forward plastic has the complete part number listed because the notch has not been cut. So I will have to cut the notch. But while the remainder of the part number is in the yellow on my original plastic, on the repro, the part number is in the blue.
[quoted image]

This is a great post. I wish now that I had done something similar when I had to mod mine to compare the sitting of the star posts and metal posts etc to see if they vary pin to pin.

Also IIRC there was a post on here from someone who was having trouble with the spinner sticking and he cut that notch into his original plastic. I am wondering if it is an original design flaw.

#1179 3 years ago
Quoted from cottonm4:

If you enlarge and look at the notches on my plastics you will a small 45 degree angle I cut into the notch on my back plastic due to spinner interference. Perhaps this is what you are thinking of.

Ah it was you haha. I knew someone had a problem with the spinner.

#1186 3 years ago

I have some semi-great news but I need help.

I have been in touch with someone at Pinball Center (I know there have been issues with the plastic set but I use them a lot without issue) and they will make a set of Robo Decals but they need scans.

Does anyone have or can scan the following please or advise on how to do it?

The three felons.
Ed 209 (below the felons)
Special When Lit
Jackpot When Lit
The 3 Prime Directives
Extra Ball when lit?

and anything else that you would like to include.

I can photograph these but mine are replacements and I think he is going to need actual sized scans but I don't know how to do it.

Thanks in advance chaps. I know it is a big ask but I don't know any other way to get a set of these and I have needed them and searched for them for nearly two years.

#1188 3 years ago
Quoted from cottonm4:

Go to post #594 and start reading. See if Bay 78 is still around and see if he still has my scans. If not, I will try to help you, but to get what you need I will have to remove: Lower pop and stand up targets. The ramp has to come down. And the lower sling has to be removed.
I have other items in front of this; You will have to be patient.
I would like to have some of these decals for myself. Someday I would like to pull my mylar and clear my play field.
Please keep me advised on how it is going.

Last resort to rip everything off the playfield but thanks for the offer. I will have a look for Bay 78.

How do I get a scale scan of these on mine because I don't mind taking the playfield apart because I really want to help myself and others with these things?

I see all of your unspoiled decals and get very frustrated even though my own felon decals aren't bad I can't get 'Uphold the Law' right no matter what I do.

#1190 3 years ago
Quoted from cottonm4:

I bought a 2003-2004 Hewlett-Packard glass bottom scanner from Ebay. The software has not been updated to current computer standards. I use a Mac. So, I have to buy a 2003 MacBook to use the software.
( I had to buy 2 of these. The first one shipped was broken--I got my money back).
ebay.com link: HP Scanjet 4600 Transparent See Thru Flatbed Color Scanner New Open Box
I have heard of guys taking the cover off of their flat bed scanner and turning it upside down.

I have just thought that the scans I would do would include the decals I need so it would be a pointless exercise haha.

That does look like a nice piece of kit though.

#1191 3 years ago

This may seem a little 'garish' to the traditionalists among us but I like it.

20210224_195737 (resized).jpg20210224_195737 (resized).jpg
#1193 3 years ago
Quoted from cottonm4:

It's out there.

I've gone back a little.

20210226_180008 (resized).jpg20210226_180008 (resized).jpg
#1195 3 years ago

The left side of my GI just went off.

I have checked all of the fuses and they are okay.

Any advice would be most welcome as I am scratching my head as to what might have caused this.

UPDATE. Pin wiki page suggested jiggling CN8. It took me a while to find it and sure enough after the jiggle the GI is fully restored.

https://www.pinwiki.com/wiki/index.php?title=Data_East/Sega

#1198 3 years ago

Okay boffins. My slingshots are pretty weak, compared to the pop bumpers and the flippers. Because I am still in my pinball infancy I need your help.
Can I simply increase the size of the slingshot coils to make the slingers themselves have more power?

#1208 3 years ago
Quoted from gdonovan:

Switch gaps is where I start.

Don't get me wrong the slingers are more than adequate for a really good game but in my recent posts about my plunger sticking and burning out the coil and the resistors at the 'Q' positions and the amount of time and money I have spent on new switches and plungers and an engineer re-doing the board will show that everything is new, including the coils.

The problem is that the power of these slingshots have been the same since I got the pin.

I need to check what size coils I have on them and then maybe you fellow owners might be able to advise if anything is not correct with the setup.

I will check the size etc tomorrow and let you know. Thanks.

#1215 3 years ago
Quoted from cottonm4:

I would like to make a suggestion: The reason Robocop has all of these broken plastics is that Robocop is an airball machine. I made a clear polycarbonate deflector that sits under the the lower pop bumper and above the yellow stand up targets. Call it an airball eliminator: No airballs, no broken plastics.
Perhaps, if not too costly, you could make one and include it in your plastics kit. Not everybody has the tools or the skills or easy access to the raw material to make one.
[quoted image]
Just installing your plastics with the correct color of blue has improved the looks of my play field tremendously.
Here is a color comparison from what I had with that one repro set from several years ago to what you are offering up.
[quoted image]
BRAVO !!

This is the single-most best invention for a Robocop. I smashed loads of plastics (some which were already broken I broke some more) before installing this 'saviour'. Touch wood but not one plastic has bitten the dust since.

I still get air-balls because of the slightly uneven inserts I had to replace at the base of the ramp but they tend to go onto the wire form or drop into the random selector kick out hole.

#1217 3 years ago
Quoted from Lostcause:

If changing the coil for higher power beware that it can send the ball flying in the air, I noticed one of my sling coils on my FT was the wrong one (lower power) fitted the correct one and it has sent the ball over into the drain out lane on the opposite side a few times!

These are what are on mine.

20210304_165725 (resized).jpg20210304_165725 (resized).jpg
#1220 3 years ago
Quoted from cottonm4:

Unfortunately, the manual does not show the part number for the coils. I do not know what the OT on yours stands for but everything else is the same.
[quoted image]

I am sure that I was reading something about the OT and HT when ordering from pinball center? I think it is a designation of the lugs and the diodes. I could be wrong.

#1222 3 years ago
Quoted from Lostcause:

Just had a package from Germany -pinball center, to replace some I had with oversized holes.
Problem is they have now corrected the colour and although they look great and are correct they don’t match the rest
[quoted image]

Bummer. Did you get the full set from them and do you think that they would accept a full swap? I find them super helpful and I have had a few conversations with them over the last couple of years.

#1232 3 years ago

Does anyone have the part number for connectors or even the specification of the guage for CN17. Mine could do with a rewire.
If type is not critical what would you recommend as a replacement and would I need specific wiring tools? TIA.

#1258 3 years ago
Quoted from Colsond3:

PM sent. Thanks man.
After replacing a few more bulbs and glancing back at the pics I posted above, realized the whole right side of my playfield GI is out. And two pop lamps. I need to grab a manual.
Anybody know what connector that might be, or something bad indicated by the lamp matrix?

I had the same problem last week when the left side GI just went out. I have a pin wiki page which helped. I jiggled CN9 on the power supply board and it all came back on. Check the page out.

https://www.pinwiki.com/wiki/index.php?title=Data_East/Sega#General_Illumination_Issues

1 week later
#1269 3 years ago
Quoted from cottonm4:

Some research is suggesting a voltage regulator 7905C may have blown which will take out 3 each MC3403 chips. Great Plains has these in stock. About $5.00 worth of chips and $8.00 worth of shipping (jeez).
I may also have a blown speaker amplifier. The board uses 3 MB3730 amplifiers at $12.00 each. And it would be from a different supplier with another shipping charge.

Hopefully it's the 3403s. Good luck.

#1285 3 years ago
Quoted from gdonovan:

I'd have to look at a diagram, but cant recall it being a critical item.

When I first got my 'refurbished' Robocop I had to send the power supply board to an engineer for a rebuild. When it arrived back the large capacitor was loose from its' top solder position (I did not notice this when I put it back on the pin and I got a loud buzzing noise, it was so loud that I thought I had better switch the pin off). I then noticed the loose connection.

I phoned the guy who fixed it and he said that it wasn't important and to re-solder the connection.

At the time I did not even have a soldering iron.

I took the whole pin to an engineer friend of mine to sort (he wasn't a friend as such at and got paid for the work). He had it for about a month.
When it got to him the capacitor was completely off the board. He fixed it and did a number of other jobs that I had listed for him.

I picked it up and I have had no issues with buzzing since.

I wonder what the purpose of that large capacitor is.

1 week later
#1287 3 years ago

After a year of trying I am just about there with my repro decal. Slight border resize and tweak the grey colour and I think I will be there.

20210327_174438 (resized).jpg20210327_174438 (resized).jpg
#1289 3 years ago
Quoted from cottonm4:

If you can hold on a little bit longer.....

Of course I can.

#1290 3 years ago

Did anyone get a chance to check if, before x2 is lit by 209, that when the ball lock right lane randomly awards x2 that the x2 light comes on? Mine doesn't.

#1294 3 years ago
Quoted from Lostcause:

Ordered this mid December and only arrived last week, from a slow boat from Korea.
Will probably add an led strip underneath to come on with something.
[quoted image]

I made my topper based on a guy on here's better one.
It flashes with the red and blue flasher lamps via a length of Comet matrix cable and led strips and attached to the lugs on the lamp sockets with crocodile clips.

20210331_184931 (resized).jpg20210331_184931 (resized).jpg20210331_184937 (resized).jpg20210331_184937 (resized).jpg
#1301 3 years ago
Quoted from kba78:

I believe my topper is the one hipster is referring to. I think his came out nice too! Great job
[quoted image]

Yes it was yours. I couldn't get the bar plastics in the UK so I just glued perspex sheets together and got a sticker from Redbubble.
It is very effective when lit.

#1303 3 years ago
Quoted from kba78:

Came out nice!

I prefer the rounded edges of yours but I am happy with mine nevertheless. Thanks for the inspiration.

#1306 3 years ago
Quoted from cottonm4:

You must be living right. My Robocop has been down for a week. I still have problems with my flippers. And I am going to re-cap my sound board and hope I can get my cabinet speaker working.
But in the meantime, I"m tired of troubleshooting this bitch. So, I am going to do something easy and strait forward, just grunt work. I am going to strip the play field for a super shop job and while it is stripped I will be scanning as much of the play field as I can and will scan all that I can access without have to remove the side rails.
Get your email address ready.

Sounds like a trial by Robocop but I think the end product will justify the effort.
I will pm my email. Ignore the z(s) for code.

#1310 3 years ago

I have taken to doing a little light reading and I am working my way methodically through the Robocop manual.
I came across this simple chart to explain the difference in the easy, factory, hard rules settings.
I know this question is asked regularly so I decided to post it.

20210402_100340 (resized).jpg20210402_100340 (resized).jpg
#1311 3 years ago
Quoted from Lostcause:

Looking good!
My targets have no foam but are straight and can be hit as hard as you like and have no air balls, my Dialed In targets have foam but give me nasty air balls when hit hard, go figure

The bars on my yellows were like Cottonm4s when I got the pin so I straightened them and they sent air balls all over the place. I had to re-bend them and they have worked fine since then but I have my protector/deflector fitted and I wouldn't remove it tbh. I have smashed the yellow targets three times so I try to keep back up spares just in case.
Another thing that I try to keep as a spare are the post sleeve posts as I have snapped three at the base of the ramp (poor aiming ).
I would like to fit the translucent targets but they are hard to get in the UK.

#1315 3 years ago
Quoted from cottonm4:

What I am seeing with the easy vs. factory vs. hard setting are:
On easy setting, Just about every time you hit a green stand up target the ED 209 1,000,000 lights up for a ramp shot. ( Not fun to play)
On factory setting, you have to hit a green SU 3 or 4 times for Emil to light up on the ramp shot.
And on hard setting, you have to hit a green SU target many times to get Emil to light up.
In all cases, making a spinner shot and dropping the ball down an inlane also counts toward lighting up a Perp.

Are you saying that when you straightened the yellow targets metal backstops that the airballs got worse?

1. My hard setting is a bit more regimented. You have to hit the green and yellow targets in sequence to light a perp and the spinner does nothing but add to the score. I independently set the 1 Meg target at 4 and the All Lit feature to 6 in the adjustments.

In factory setting the lights and the targets are randomly hit to catch a perp. I leave the 1 Meg and the All Lit as above.

On easy settings everything lights the perps and the ! Meg.

2. Yes the air balls got worse and the switches needed constant adjustment.

1 week later
#1336 3 years ago

Well I have straightened the bars behind my yellow targets and checked the switches before re-installation. (I am more confident with things than I was back when I first attempted this).
They are working great. I will take off the air ball guard tomorrow night and see what happens.

#1344 3 years ago
Quoted from cottonm4:

Did you make yourself a wooden block to back the targets with?

Not yet. Probably be the weekend.

#1345 3 years ago
Quoted from cottonm4:

Drat. The new bride rectifier seems to have made my pops and slings more snappy and the flippers seem to hit harder, as well. However, after some spirited game play, my flippers are acting up again. The flipper power ebbs and flows. And all of a sudden I start getting weak hits for a few seconds and the ball whacking power returns. And then goes weak again.
I am at a loss on this flipper business. The only thing I have not done yet is to convert the flipper switches to micro switches like I read that DE did with some pins. That is my next step as soon as I find the part number for the proper micro switches.

I am now wondering if the bridge rectifier is the reason why my slings are week.

#1350 3 years ago
Quoted from SantaEatsCheese:

It looks like I'm going to be picking up a working Robocop, sight unseen as part of a small package deal this weekend. Is there anything I should be looking out for on this that is unobtanium or a high failure rate item? Machine comes with troubled GI, but a new display and is supposedly fully working otherwise. Never played one either!

You will be able to sort the GI by following posts on here or there is a good pinwiki page for fixing them.
Things like playfield decals are impossible to source.
The crew on this forum are great with their time and knowledge.
Everything you need to overcome most problems can be found here.
I was a complete novice when I got mine and this forum helped me immensely.
Enjoy your Robocop. It is one of the most under-rated pins out there.
There is some great design work on it too.

3 weeks later
#1365 2 years ago

Has anyone had a chance to see if, on start up if they get awarded a instant x2 by the right channel random award hole when it is not already lit that the light does not go on at the bottom of the playfield?

#1369 2 years ago
Quoted from Lostcause:

Not sure if I understand what you are saying but I started a game got the ball in the right unlit random award hole and no x2 light came on.

Yes exactly that. But i mean when the random award is instant x2 but the x2 light has not previously been lit by getting the 209 multiplier. When I do it the 2x light does not come on.

#1370 2 years ago
Quoted from Max_Badazz:

Can anyone recommend the best settings for this game to play in a tournament? I am trying to avoid the scores rolling over so the harder the better
Not sure if anyone has had a Robocop in a tourney before and has played around with a bunch of setting combinations

For me it would be hard rules with 1meg target at 5 and all lit at 5 with no buy in. Relight kick back at easy.

2 weeks later
#1373 2 years ago

Slingshot issue.

So my slingshots are playing fine (almost).

I have tweaked the switches and they are super sensitive now and sling the ball at the slightest of touches to the rubbers. All wiring at the connectors and the coils and switches are fine.

Some of you may know that I have recently had my MPU board overhauled by a pro engineer in the bumper and slingshot area.

Recently the slingshots just stop working in the middle of a game and then start again at the next ball. They always work in switch test mode.

This is really puzzling me now.

Any ideas on what would cause this?

#1376 2 years ago
Quoted from cottonm4:

Is it just the slings that stop working? what about the pops?

I've just been playing it and the slings are fine for the most part and then, every so often, they will not register a strike of the ball. The pop bumpers are fine.

When I had my problems before I noticed that the right pop bumper switch was causing problems with the slings because it was badly adjusted so I will have a look at that also.

I am going to experiment with the rubber and the star posts at the outer right and left positions because I have noticed that on mine the outer side posts are not through playfield fixed and are quite slack.

I'll keep you posted.

#1377 2 years ago
Quoted from cottonm4:

Is it just the slings that stop working? what about the pops?

UPDATE!

Okay so today I had the playfield up and had a look at the pop switches and the slinger switches using a magnifier app and all seemed to be as it should be.

I did a switch test and everything was fine. I then re-seated the rubbers and checked the tensions. Everything was okay.

I played a couple of games and during the second game the slingers did not react to the ball hitting them for about 15 seconds and then resumed as normal.

I am going to look at the connectors tomorrow night after work.

Which connector runs the slingers? Is it the connector on the MPU board or should I be looking at the switch connectors?

I am not totally sure but I think the slingers stopped during a Robocop lamp freeze. I am going to keep my eye on it although I have never noticed that before and the pops work fine during the freeze.

#1378 2 years ago
Quoted from Thehipster:

UPDATE!
Okay so today I had the playfield up and had a look at the pop switches and the slinger switches using a magnifier app and all seemed to be as it should be.
I did a switch test and everything was fine. I then re-seated the rubbers and checked the tensions. Everything was okay.
I played a couple of games and during the second game the slingers did not react to the ball hitting them for about 15 seconds and then resumed as normal.
I am going to look at the connectors tomorrow night after work.
Which connector runs the slingers? Is it the connector on the MPU board or should I be looking at the switch connectors?
I am not totally sure but I think the slingers stopped during a Robocop lamp freeze. I am going to keep my eye on it although I have never noticed that before and the pops work fine during the freeze.

Connectors are okay.
Now in switch test mode the slingshot switches do not register but they light the lamps below the ramp and the green and yellow target lamps.
Flipper button switch indicates a short with 10pts top rebound switch. So I am going to try and find the short.
I have had this before with the green target switches cutting out the skill shot flashers.
Wish me luck.

I have now taken the right slinger assembly off (but still wired). I cleaned the contacts and tested the switch while it was out of it's playfield position and it registered as it should as the right slingshot in switch test mode.
I put it back in position and then it worked but did not register as right slingshot in switch test mode.
I played a game and got the switch drop out on both slingers half way through. And then they decided to work again after about 15 to 30 seconds.
I am pretty sure that this is not as bemusing to some of you guys on here as it is to me.
I would appreciate any help even if someone could just reassure me that I should work through all of the switches.

#1379 2 years ago
Quoted from cottonm4:

Is it just the slings that stop working? what about the pops?

Well I thought that I had solved the problem finding a loose diode and I tested it and soldered it back on and everything worked for a while. Then same problem. Now the switches do not fire the coil and the eos switch registers the right and left slingshots in switch test mode.
I think I may have fried the tips on the mpu board again as the fuses are fine ( I really hope not as I was careful not to short anything).

Incidentally when I test the switches on the slingers the prime directive lamps come on.

Help would be appreciated if you have any ideas.

#1383 2 years ago
Quoted from cottonm4:

I assure you that I am not laughing. I am dealing with some serious shorting issue on a pin I am scratch building. I hate chasing electrical problems. If I could afford it, I would hire out all my electronics work.
A couple of years ago, after spending endless hours and replacing almost every TIP on the MPU I had to raise the white flag. My pops were not working correctly. I located a guy who goes by BORYGARD on Pinside. I PM'd him and described my problem and he told me to send him the MPU. For $150.00 it came back working correctly and I have not any more problems. I hated to spend the money but my time was more than toying with the headache.
Sorry I cannot help you more than this.
But I feel your pain.

I just got my board back from an engineer. Been working fine after a £150 outlay. I'm getting a bit frustrated and I think I am going to give it a while before revisiting.

#1384 2 years ago
Quoted from Shogun00:

The switch test is pretty worthless for the slings, since only the switches under the playfield are connected to the switch matrix. The 2 visable switches on each slingshot go to directly to PPB and then to the power supply relay. Further more, those 2 switches are connected to the same circuit.
I ran into a similar problem with my right sling shot. Some times it wouldn't fire. It turned out that bottom switch (for the 2) was broken. The upper switch was doing all of the work and I didn't even realize it because the upper switch was very sensitive. I only found out after removing the rubber and pressing each switch individually.

Tonight mine worked fine then intermittently stopped. I took the right sling assembly out of the board and tested it in switch test mode and the coils fired and the eos switch registered the sling on the test and then I noticed a loose diode on the eos switch.
I repaired it and all was fine then the switches dropped out and came back on during a game.
I removed the assembly again and the switches did not fire the coils but lit the middle three prime directive lamps.
I checked the fuses off to the right of the MPU. All okay.
Earlier I removed all of the target switch assemblies and adjusted them so they are all fine.
Other than the TIP 122s I am lost for tests and even then I have forgotten how to test a TIP on a board.
I think it is an ohm test from the middle leg and either of the outer legs.
My instinct is a short circuit but I am stumped, frustrated and deflated at the moment.

#1386 2 years ago
Quoted from Shogun00:

Just out of curiosity, which version of the ROM are you using?

When my board came back from the engineer he had put in 3.4s.

#1387 2 years ago
Quoted from Shogun00:

The switch test is pretty worthless for the slings, since only the switches under the playfield are connected to the switch matrix. The 2 visable switches on each slingshot go directly to PPB and then to the power supply relay, avoiding the MPU completely. Further more, those 2 switches are connected to the same circuit.
I ran into a similar problem with my right sling shot. Some times it wouldn't fire. It turned out that bottom switch (of the 2) was broken. The upper switch was doing all of the work and I didn't even realize it because the upper switch was very sensitive to the rubber. I only found out after removing the rubber and pressing each switch individually.

Just to add, the left slinger switches are producing the same results as the right slinger. i.e. no activation of the coil.
Could this be a connector problem at the PPB board?
Which connector fires the coils? For some reason I have CN16 in my mind from the manual but I can't even find CN16.

#1390 2 years ago
Quoted from Shogun00:

It's possible!
I don't remember which connector off the top of my head. I have to look when I get home.

So this morning before work I decided to play a game without slingers and guess what?........yep the slingers worked. But the right popper didn't.
I investigated the pop assembly and a screw was lodged in it. I removed it and all worked okay. Will have another look tonight.

#1391 2 years ago
Quoted from Shogun00:

It's possible!
I don't remember which connector off the top of my head. I have to look when I get home.

I am trying to work through the logic of what had happened with the sling shots.
When I first began exploring the switches (taking the whole assemblies off the board) the only one that was suspect was green target 4 although all the switches needed a good clean. This is the same switch that caused me a problem previously with 1. fast scoring, then 2. the skill shot 209 lights dropping out.
I took the slinger assembly off the board and when I was replacing it I dropped a hex screw. As usual I could not find it and used a spare.
I then tested the slingshot switches and they did not fire the coil and I got frustrated and left it to the next day.
The screw must have shorted the row of switches. Then when I put the playfield back down the screw must have dropped and lodged in the right bumper switch, cutting out the pop bumper and allowing the slingshot to operate.
I took the screw out of the switch and everything has been fine since.
Weird as hell.
Has anyone else had this experience?

Promoted items from Pinside Marketplace and Pinside Shops!
Wanted
Machine - Wanted
Asheville, NC
$ 27.95
Eproms
Pinballrom
 
$ 1.00
Pinball Machine
Pinball Alley
 
$ 15.00
Cabinet - Sound/Speakers
Gweem's Mods
 
$ 18.95
Eproms
Pinballrom
 
$ 18.95
Eproms
Pinballrom
 
From: $ 19.99
Eproms
Matt's Basement Arcade
 
$ 54.99
Cabinet - Shooter Rods
Lighted Pinball Mods
 
$ 12.00
Tools
Nezzy's Pinball Prints
 
$ 15.00
Playfield - Decals
Metal-Mods
 
Hey modders!
Your shop name here
360 posts in this topic match your search for posts by thehipster. You are on page 1 of 2.

You're currently viewing posts by Pinsider thehipster.
Click here to go back to viewing the entire thread.

Reply

Wanna join the discussion? Please sign in to reply to this topic.

Hey there! Welcome to Pinside!

Donate to Pinside

Great to see you're enjoying Pinside! Did you know Pinside is able to run without any 3rd-party banners or ads, thanks to the support from our visitors? Please consider a donation to Pinside and get anext to your username to show for it! Or better yet, subscribe to Pinside+!


This page was printed from https://pinside.com/pinball/forum/topic/robocop-club-if-you-own-one-or-use-to?tu=thehipster and we tried optimising it for printing. Some page elements may have been deliberately hidden.

Scan the QR code on the left to jump to the URL this document was printed from.