(Topic ID: 154032)

Quicksilver Club all welcome

By TigerLaw

8 years ago


Topic Heartbeat

Topic Stats

  • 1,831 posts
  • 153 Pinsiders participating
  • Latest reply 5 days ago by GoldenOreos
  • Topic is favorited by 61 Pinsiders

You

Linked Games

Topic Gallery

View topic image gallery

Pinside_forum_6910935_1 (resized).jpg
Screen Shot 2024-03-31 at 7.56.01 AM (resized).jpg
image (resized).jpg
IMG_3747 (resized).jpg
IMG_3746 (resized).jpg
IMG_3748 (resized).jpg
IMG_3760 (resized).jpg
IMG_3753 (resized).jpg
20230903_112757 (resized).jpg
20230902_143322 (resized).jpg
20230902_124820 (resized).jpg
image-5 (resized).jpg
pasted_image (resized).png
IMG_8003 (resized).png
IMG_8005 (resized).png
There are 1,831 posts in this topic. You are on page 23 of 37.
#1101 4 years ago
Quoted from cottonm4:

pictures, please. Was it hard to make? How long of tube rivet do you have to use? So many of my bad sockets are just from the material at that brass washer getting loose and not making good contact. And I think the looseness is from the fiber insulation washer drying out and shrinking.

Actually, the brass eyelet, clinched end, on the inside of the base breaks.
When this happens it causes a slack to the assembly.
A small brass ring will pop out if you cut the contact rivet head off.
If there is still a good compression to the assembly, then re-striking the eyelet is sufficient
to re-clinch the assembly together.
As for eyelet size, GS5-7B Brass. This size seems to work best... I have to pre-flare the end...
and then the clinching gives a better results.
I had to buy many sizes to find the right size... So -7B is the smallest that works.
Other sizes were not long enough. -5B, -6B ect,etc,etc.
-8B might work but I have not bought any to tryout.
I have had to buy brass tubing at the hobby shop and use it to make
the eyelets to clinch switch stacks to European pinballs.
A tough game to fix, that was time consuming, was Top Speed.
It was just one thing after another... But, I was able to fix the lamp sockets.
( The drum lights to the back box were a pain )
As far as the tools you need two parts... A base with the inverted cup and hole,
and the clincher that has a nose that fits into the hole of the base.
the clincher should have a small curved rounded base that flares the eyelet end.
I need to get a better base made that has one side of it cutoff to fit "lay-down" style
lamps. "rollover button" style lamp sockets.
eg Bally E-120-155, E-120-99 etc,etc,etc.
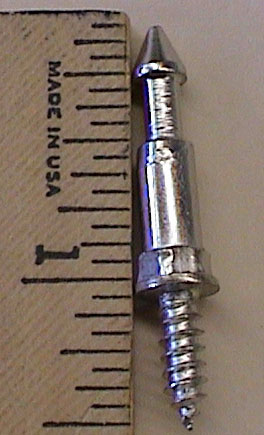
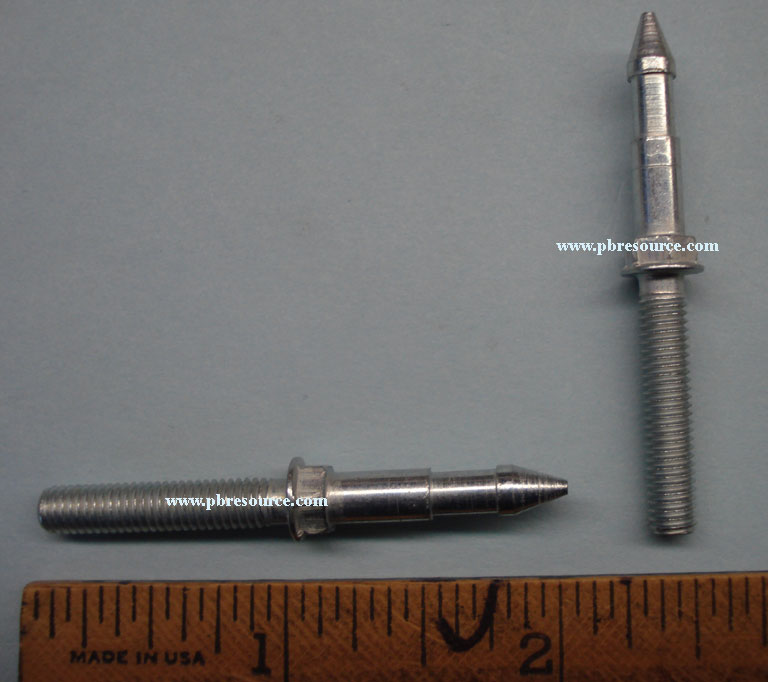
As for semi-tube rivets, steel rivet size -18 seems to fit along with size -19.
TSC0818,TSC0819. It depends on the lamp socket.
Bally had an inverted cup stem rivet to some of their lamp sockets.
In all, when the lamp sockets are all knowingly good the game looks better
and is fun to watch if you have a feature that has strobing lamp fx...
I just finished the lamps to a Bally Freedom... it is so nice to hit the
spinners and watch the wheel lamps wiz around and around.

#1102 4 years ago

A question to the Quicksilver faithful, the QS Parts manual states a SW-474 switch (or something similar) for the flipper button switches. Is there a modern equivalent to this? Or can someone recommend a switch which will do the job. I’ve found a couple which look possible, but they don’t state dimensions so it’s hard to tell.

#1103 4 years ago

Here’s the cabinet flipper switch from pinball life for comparison. (The sw-10a-48 switch)

It’s a little thicker, so I’ll remove some spacers if needed.
06928200-2B73-432F-B4E7-CAF7BADE8F0B (resized).jpeg06928200-2B73-432F-B4E7-CAF7BADE8F0B (resized).jpeg

#1104 4 years ago
Quoted from djblouw:

Here’s the cabinet flipper switch from pinball life for comparison. (The sw-10a-48 switch)
It’s a little thicker, so I’ll remove slime spacers if needed.[quoted image]

I would keep the OEM switch stack and just replace the contacts with the new ones.
That way it has the same footprint.

#1105 4 years ago
Quoted from vec-tor:

I would keep the OEM switch stack and just replace the contacts with the new ones.
That way it has the same footprint.

I did that. I was surprised at how easy the contacts are to replace.

While we area it, vec-tor, does the switch blade material have an end of life? Does the metal blade work harden after 5000 hits?

#1106 4 years ago
Quoted from vec-tor:

I would keep the OEM switch stack and just replace the contacts with the new ones.
That way it has the same footprint.

There’s a thought. Not something I’ve done before, is there an easy way to determine what’s needed or just get out the measuring tape?

#1107 4 years ago
Quoted from Flynnyfalcon:

There’s a thought. Not something I’ve done before, is there an easy way to determine what’s needed or just get out the measuring tape?

The contact is that little button on the end of the switch blades. You drill off the back side of the contact, push it from the hole, put a new contact in place and tap it with a hammer until it is locked in solid. It is like a small rivet.

A set of flipper switches will set you back about $16.00 for a pair. Contacts cost something like 5 cents each.

#1108 4 years ago
Quoted from cottonm4:

The contact is that little button on the end of the switch blades. You drill off the back side of the contact, push it from the hole, put a new contact in place and tap it with a hammer until it is locked in solid. It is like a small rivet.
A set of flipper switches will set you back about $16.00 for a pair. Contacts cost something like 5 cents each.

Ahh, I was thinking he meant the entire blades, now that does sound promising!

#1109 4 years ago
Quoted from Flynnyfalcon:

Ahh, I was thinking he meant the entire blades, now that does sound promising!

I’m already doing an order with Marcos, another from PB resource inc shipping will negate any savings sadly Entire switches it is.

#1110 4 years ago
Quoted from Flynnyfalcon:

I’m already doing an order with Marcos, another from PB resource inc shipping will negate any savings sadly Entire switches it is.

PBR has all of the switch blades if you want to build your own. PBR is where I got my contacts from, Pinball Life is where you get complete classic Stern flipper assemblies. Marcos is where you get lots of stuff plus reprinted and bound Classic Stern manuals. If you are ordering from Marcos you may as well get yourself a Quicksilver manual.

None of them have everything.
The only one-stop shop is the U.S. post office. I have a fortune in just shipping fees.

The contacts are cheap. Get some of those to have handy for later on.

#1111 4 years ago

I have seen contact points wear out and eat into the metal blade.
I never have seen a flipper contact blade fatigue to the point of breaking.
I have seen flipper contacts spacing fatigue to a more or less wide open position.
I have seen flipper contacts get oxidized to a point were current could not pass
and thus could not make the flippers function.
I have used Gottlieb's cabinet flipper switches as replacement for Bally's.
-----------------------------------------------
Williams' cabinet flipper contacts I have saved...
I have been able to piece together new/used cabinet switches,
by using good condition used blades.
One contact blade point would be shot... but the other still good...
Oddly, Williams' as three to four subtle design changes to the same cabinet switches.
( this is were you swap out the bad contact blade/or point and reassemble )
so as to keep the same footprint and can easily be reinstalled into the cabinet.
-----------------------------------------------
I have done some subtle odd bends to the long blades so as to make
the contacts points come together vertically...
I have done the "new bend" to the outside long blade.
( it refrain's the contact blades from spreading apart ) or
( it adds stiffness to the outside blade against the contacts from the
inside blade ) Etc,etc,etc.

#1112 4 years ago
Quoted from djblouw:

Here’s the cabinet flipper switch from pinball life for comparison. (The sw-10a-48 switch)
It’s a little thicker, so I’ll remove slime spacers if needed.[quoted image]

I just take the new switch stack apart and use the new blades in the original stack.

#1113 4 years ago

I use a 2.2 Mfd 250v Mylar capacitor across the EOS switch like system 11’s use. Never arc again.

I presume you could do the same on the cabinet flipper switches as well.

#1114 4 years ago
Quoted from vec-tor:

Williams' cabinet flipper contacts I have saved...

This deserves its own thread...

#1115 4 years ago
Quoted from pinfixer:

I use a 2.2 Mfd 250v Mylar capacitor across the EOS switch like system 11’s use. Never arc again.
I presume you could do the same on the cabinet flipper switches as well.

Be careful... too many capacitors on the +48 volt line will filter-out the ripple
that the zero crossing needs for the CPU to work.

#1116 4 years ago
Quoted from vec-tor:

Be careful... too many capacitors on the +48 volt line will filter-out the ripple
that the zero crossing needs for the CPU to work.

The EOS only "filters" during the exact moment the EOS opens. I've added them to every Bally game I've worked on for decades and never had any phantom reset issue.

#1117 4 years ago
Quoted from pinfixer:

The EOS only "filters" during the exact moment the EOS opens. I've added them to every Bally game I've worked on for decades and never had any phantom reset issue.

I went gun-hoe with capacitors many years ago...
the game would just stop.

#1118 4 years ago

3 spinner questions:

1. How far away should the bottom of the spinner be from the playfield? Mine is 3/4” but want to make sure that is correct.

2. Also, why does it look like the red plastic posts on the spinner have a screw holding it down on one side but a metal post post (which usually allows for a plastic piece to go on top) on the other?

3. On the post of the left, I’ve seen some games with a straight metal post (with a small rubber on it) and some with a red plastic post (with a 5/16” rubber on it). Which way is it supposed to be? Obviously this post is to protect the spinner mech, so the metal pokey post makes more sense to me, but again, I’ve seen it both ways!

image (resized).jpgimage (resized).jpg
#1119 4 years ago

The post on the right side of the spinner should be a machine screw mounted from underneath with a nut on top or a machine screw mounted to a t-nut under the play field. If just a wood screw it will strip taking pop bumper hits and missed shots at the spinner.

Your spinner should be perpendicular to the playfield, or leaning very slightly forward from the top. Your spinner arms aren't square and it's off balance/leaning way too far forward. You're also missing the original Stern spinner which is superior to that repro. If you have the original, it will work better. If the original is beat up and you don't want to use it, sell it to me.

My QS has a star post in front of the left spinner and a mini post in front of the right which is what's depicted on the game flyer so I would assume that's the correct way. Also, make sure it's mounted through the playfield and not with a wood screw only.

#1120 4 years ago
Quoted from seshpilot:

3 spinner questions:
1. How far away should the bottom of the spinner be from the playfield? Mine is 3/4” but want to make sure that is correct.

You’re spinner posts are correct. You want the tall ones.

#1121 4 years ago
Quoted from dothedoo:

You’re spinner posts are correct. You want the tall ones.

Best if your posts are on the long machine screws coming up from the bottom. Just like slingshots. High impact points.

#1122 4 years ago
Quoted from seshpilot:

3 spinner questions:
1. How far away should the bottom of the spinner be from the playfield? Mine is 3/4” but want to make sure that is correct.
2. Also, why does it look like the red plastic posts on the spinner have a screw holding it down on one side but a metal post post (which usually allows for a plastic piece to go on top) on the other?
3. On the post of the left, I’ve seen some games with a straight metal post (with a small rubber on it) and some with a red plastic post (with a 5/16” rubber on it). Which way is it supposed to be? Obviously this post is to protect the spinner mech, so the metal pokey post makes more sense to me, but again, I’ve seen it both ways![quoted image]

To directly answer your question, the spinner should be low enough for the ball to just touch the bottom 1/8", may be a little less. But using the correct parts makes in a no worry item.

This is the post that is correct.

http://pbresource.com/postscrew.html

http://pbresource.com/hhouse/gtb-a14792.jpg

But those post take a lot of impact and can damage the hole they are screwed into.
---------------------------------------------------------

I have one of these one pin. It works fine. You drill out bigger hole and lock it down with a washer and a nut underneath

http://pbresource.com/postscrew/de-530-5005-00.jpg

http://pbresource.com/postscrew.html
---------------------------
I have one of these 8/32s on a another pin. Again without issue. I prefer this one as it has a little bit bigger base on top to better take the impacts.

https://www.marcospecialties.com/pinball-parts/02-4003

And there is this 10/32 which will also work.

https://www.marcospecialties.com/pinball-parts/02-4660

But one I found I like the 8/32 style. I am staying with that as it works with drilling a smaller hole in the wood.

Make sure you have good nice size washer underneath to help spread the load.

#1123 4 years ago
Quoted from seshpilot:

red plastic post (with a 5/16” rubber on it). Which way is it supposed to be?

OEM is with the red post.
The post helps protect the side of the metal bracket that has
---- the left eject hole.

2 months later
#1124 3 years ago

What are ya’ll guys doing about the missing key line on the star rollovers on the micro playfield? I am thinking of leaving it as is but was wondering what others were doing.

Also is anyone putting Mylar around the pop bumpers or just leaving it alone with no protection. I am on the fence on this before populating the playfield.

4 weeks later
#1125 3 years ago

Anyone have a nice apron they would sell? LMK

#1126 3 years ago
Quoted from China_Grove:

What are ya’ll guys doing about the missing key line on the star rollovers on the micro playfield? I am thinking of leaving it as is but was wondering what others were doing.
Also is anyone putting Mylar around the pop bumpers or just leaving it alone with no protection. I am on the fence on this before populating the playfield.

I'm leaving it as is. Not much else you can do economically.

It's polyurethane clear coat. I am not using any mylar anywhere. If I really wanted pop bumper protection, I would use those non-stick mylars Gottlieb used. The only problem is that you would need to build up your pop bump bumper assemblies on the play field like you would need to on the Bally's of the era.

#1128 3 years ago

If they were close by I would be buying both of them. I would not think twice. And the seller is looking for offers, too.

1) One is a complete play field with all of the parts plus wiring. And all 3 plastic pop bumpers.

2) One is mostly complete. Missing the plastic pop rings. But the wiring is there.

Both play fields are weak. But Mirco comes to that rescue.

#1129 3 years ago
Quoted from cottonm4:

If they were close by I would be buying both of them. I would not think twice. And the seller is looking for offers, too.

1) One is a complete play field with all of the parts plus wiring. And all 3 plastic pop bumpers.

2) One is mostly complete. Missing the plastic pop rings. But the wiring is there.

Both play fields are weak. But Mirco comes to that rescue.

Looks like someone else here thought so too The seller said that they were both sold and going to the USA

#1130 3 years ago

Holy crap that guy had no idea what he was selling. The 4-bank alone is worth half the asking price. I would have bought in a heartbeat.

1 week later
#1131 3 years ago

SS - next time you see something like that text me. I offered the guy double and id come and collect but he already posted them!

#1132 3 years ago

what are folks using to replace bulb sockets?

Neil.

#1133 3 years ago

Buy all new sockets, they are cheap enough not to mess with used ones.

#1134 3 years ago
Quoted from perryd:

Buy all new sockets, they are cheap enough not to mess with used ones.

Agreed, after messing around to try and fix them, i just replace them now as soon as i find one flaking. a bit more work upfront but much less pain later. Pinballlife makes good cheap replacements (Inserts socket https://www.pinballlife.com/miniature-bayonet-base-1-lead-socket-with-long-mounting-bracket.html)

#1135 3 years ago

I just tumbled and dremeled all of mine. A lot of work with no guarantees, personally spend the bucks and buy new.

#1136 3 years ago
Quoted from hisokajp:

Agreed, after messing around to try and fix them, i just replace them now as soon as i find one flaking. a bit more work upfront but much less pain later. Pinballlife makes good cheap replacements (Inserts socket https://www.pinballlife.com/miniature-bayonet-base-1-lead-socket-with-long-mounting-bracket.html)

PBL charges $1.40 each for the #44 lamp sockets. $1.40 can add up real fast.

Here is another option:

https://www.surplussales.com/Bulbs-Incan-Panel/LampSockets.html

Screen Shot 2020-07-25 at 10.00.19 AM (resized).pngScreen Shot 2020-07-25 at 10.00.19 AM (resized).png

Screen Shot 2020-07-25 at 10.02.39 AM (resized).pngScreen Shot 2020-07-25 at 10.02.39 AM (resized).png

The guy bought a load of NOS sockets. If you buy 100 of them you can get them for 50 cents each.

The downside: They are coin door sockets with the two terminal lugs. You have to solder a small piece of ground wire between the ground lug and the socket barrel. But the pricing discounts make the extra solder work worth it, IMO.

The plus side: These are the longer bracket style. You can take one of these and a pair of needle nose pliers and bend the bracket to what ever height you like and use them anywhere on your play field that does not require a lay-down type bracket.

#1137 3 years ago
Quoted from cottonm4:

PBL charges $1.40 each for the #44 lamp sockets. $1.40 can add up real fast.

Here is another option:

https://www.surplussales.com/Bulbs-Incan-Panel/LampSockets.html

that is pretty good! I buy mine by the 100 on PBL so it goes down to $0.80 a piece. sockets do add up.... redoing a backbox alone is 30-40 of them.

#1138 3 years ago
Quoted from hisokajp:

that is pretty good! I buy mine by the 100 on PBL so it goes down to $0.80 a piece. sockets do add up.... redoing a backbox alone is 30-40 of them.

.80 for new, as opposed to NOS, is a pretty good deal.

A friend of mine and I split 1000 of the NOS units. .35 each was just too good to pass up.

.

But for backboxes, I am a confirmed Comet Matrix user. You can put these Matrix strips anywhere to light your backboxes up. I have done both my Big Game and Seawitch this way.

This is big Game. I have not pulled all of the bulbs, yet. But on BG the only thing that lights up is the face of the tiger. You should think about giving them a try.

https://www.cometpinball.com/products/lighting-strips

IMG_4062 (resized).JPGIMG_4062 (resized).JPG

IMG_4064 (resized).JPGIMG_4064 (resized).JPG

#1139 3 years ago

Hey quick question guys. I don't want to repost all the photos here, so I'll just post the link to my rebuild thread. Please take a look.

https://pinside.com/pinball/forum/topic/my-2nd-restoration-quicksilver-scratch-build#post-5766499

I received my QS plastics from Mirco recently. You can read the post for the details, but I was shocked at how they arrived in the mail with no post-production prep.

In any case, the main issue is that one of my plastics is printed incorrectly. The artwork doesn't go to the edge in multiple spots & black lines are present. See the arrows. Looks terrible to me, like it was printed/cut wrong. The other plastics were ok. I just want to verify that this was a printing error & it not the way the plastic is supposed to look.

I've reached out to Micro, but no reply yet. I'm not looking forward to getting a replacement as they have been very difficult to get a response from in the past.

QS PLASTIC (resized).jpgQS PLASTIC (resized).jpg
#1140 3 years ago
Quoted from HoakyPoaky:

Hey quick question guys. I don't want to repost all the photos here, so I'll just post the link to my rebuild thread. Please take a look.
https://pinside.com/pinball/forum/topic/my-2nd-restoration-quicksilver-scratch-build#post-5766499
I received my QS plastics from Mirco recently. You can read the post for the details, but I was shocked at how they arrived in the mail with no post-production prep.
In any case, the main issue is that one of my plastics is printed incorrectly. The artwork doesn't go to the edge in multiple spots & black lines are present. See the arrows. Looks terrible to me, like it was printed/cut wrong. The other plastics were ok. I just want to verify that this was a printing error & it not the way the plastic is supposed to look.
I've reached out to Micro, but no reply yet. I'm not looking forward to getting a replacement as they have been very difficult to get a response from in the past. [quoted image]

That’s the way all of the ones I’ve seen from Mirco are printed. Here’s mine:

03C13602-521C-44E0-A9B9-78E8A5318D46 (resized).jpeg03C13602-521C-44E0-A9B9-78E8A5318D46 (resized).jpeg

Then, here is a set from Pinballrescue that arrived today:

66F8135A-5A8F-41C4-8518-575E44502E5A (resized).jpeg66F8135A-5A8F-41C4-8518-575E44502E5A (resized).jpeg

The printing is different.

I’ve got some other comparisons I’ll do later on, and post, between the two sets.

#1141 3 years ago

Thanks for posting. So the Micro plastics are wrong to begin with. Talk about laziness. That's absurd, especially when paying $170 for plastics. But not surprising when dealing with Mirco. Did you complain about yours?

I was going to buy the pinballrescue set, but I figured the colors on the Mirco set would match the repro playfield inks.

Is pinballrescue shipping again? He's been shutdown due to international postal COVID issues.

#1142 3 years ago
Quoted from HoakyPoaky:

Thanks for posting. So the Micro plastics are wrong to begin with. Talk about laziness. That's absurd, especially when paying $170 for plastics. But not surprising when dealing with Mirco. Did you complain about yours?
I was going to buy the pinballrescue set, but I figured the colors on the Mirco set would match the repro playfield inks.
Is pinballrecsue shipping again? He's been shutdown due to international postal COVID issues.

play_pinball has a spare set of plastics he was going to sell (I got him a set for his birthday but he also bought a set I didn't know about). I don't know if he's sold it yet or not. You could message him to see

#1143 3 years ago
Quoted from pinball_ric:

play_pinball has a spare set of plastics he was going to sell (I got him a set for his birthday but he also bought a set I didn't know about). I don't know if he's sold it yet or not. You could message him to see

Actually, this is the exact set. I bought them from him.

Quoted from HoakyPoaky:

So the Micro plastics are wrong to begin with.

To be honest, I really don’t which set is correct. I’m just showing the difference between the two vendors.

#1144 3 years ago

Here's what I see:

A sloppy art job by Micro, but the colors are spot on & match the repro playfield.

A proper art job by PinballRescue, but the green color is way off.

It just burns my ass is all. I've read the stories with Mirco & decided to take the risk. It took over a month to ship my "in stock" playfield & he never responded to request for a tracking number. Same thing happened with these plastics. They just showed up on my doorstep.

#1145 3 years ago
Quoted from HoakyPoaky:

Here's what I see:
A sloppy art job by Micro, but the colors are spot on & match the repro playfield.
A proper art job by PinballRescue, but the green color is way off.
It just burns my ass is all. I've read the stories with Mirco & decided to take the risk. It took over a month to ship my "in stock" playfield & he never responded to request for a tracking number. Same thing happened with these plastics. They just showed up on my doorstep.

When I bought my beater populated QS play field, a Mirco play field and plastics were not an option. Pinball Rescue net was not an option.


The seller of my play field asked me if I would like to buy a new plastic set, too. He and a contact had some connections and had someone make up 4 sets of "bootleg" QS plastics. I was sworn to secrecy.

Assuming my bootleg plastics have any accuracy at all, then I will say that Mirco's art work matches what I have. The green on my plastics are just a little bit lighter with the green background, but with the play field lights on and a glass on, no one will ever notice the green is off by one shade.

Mine also has the strip of clear along the edge of the part. So I'm guessing that Mirco copied the plastic from the donor exactly as it was. I see no sloppy work.

If the clear border bothers anyone, just sand or file off the clear border.

IMG_4068 (resized).JPGIMG_4068 (resized).JPG

#1146 3 years ago

Yeah sorry guys my donor plastic was printed that way so it rolls down hill.

#1147 3 years ago
Quoted from HoakyPoaky:

Hey quick question guys. I don't want to repost all the photos here, so I'll just post the link to my rebuild thread. Please take a look.
https://pinside.com/pinball/forum/topic/my-2nd-restoration-quicksilver-scratch-build#post-5766499
I received my QS plastics from Mirco recently. You can read the post for the details, but I was shocked at how they arrived in the mail with no post-production prep.
In any case, the main issue is that one of my plastics is printed incorrectly. The artwork doesn't go to the edge in multiple spots & black lines are present. See the arrows. Looks terrible to me, like it was printed/cut wrong. The other plastics were ok. I just want to verify that this was a printing error & it not the way the plastic is supposed to look.
I've reached out to Micro, but no reply yet. I'm not looking forward to getting a replacement as they have been very difficult to get a response from in the past. [quoted image]

Another in a long line upset with Mirco’s shonky practices. Hope you’re able to get it sorted out.

#1148 3 years ago
Quoted from Crispin:

Yeah sorry guys my donor plastic was printed that way so it rolls down hill.

It is not a big deal. A Dremel sanding drum and all will be well. I am so glad that you stepped up and donated your QS play field.

#1149 3 years ago
Quoted from Crispin:

Yeah sorry guys my donor plastic was printed that way so it rolls down hill.

Well now that sure is interesting! Thanks for the backstory

Is what it is at this point. I don't expect to hear from Mirco at all. As cottonm4 stated, it can just be sanded down. I'll have to decide down the road.

In more pleasant news, my re-cleared playfield is currently on it's way from Ron Kruzman, should arrive later this week

#1150 3 years ago
Quoted from HoakyPoaky:

Well now that sure is interesting! Thanks for the backstory
Is what it is at this point. I don't expect to hear from Mirco at all. As cottonm4 stated, it can just be sanded down. I'll have to decide down the road.
In more pleasant news, my re-cleared playfield is currently on it's way from Ron Kruzman, should arrive later this week

I am so happy with the quality of the clear on my Mirco Quicksilver play field and my CPR Catacomb play field that I am going use them as they were shipped to me.

Promoted items from Pinside Marketplace and Pinside Shops!
$ 10.00
$ 149.95
Boards
Allteksystems
 
$ 12.00
Playfield - Toys/Add-ons
UpKick Pinball
 
$ 12.00
Electronics
Yorktown Arcade Supply
 
$ 859.00
Flipper Parts
Mircoplayfields
 
5,800
Machine - For Sale
Spring Grove, IL
From: $ 115.00
Playfield - Protection
Beehive Pinball Co.
 
7,500 (OBO)
Machine - For Sale
Sandusky, OH
$ 189.00
Flipper Parts
Mircoplayfields
 
$ 3.00
Cabinet Parts
20eyes
 
From: $ 20.00
Various Novelties
Pinball Photos LLC
 
$ 69.00
$ 55.00
Displays
PinballSolutions.eu
 
$ 959.00
Hey modders!
Your shop name here
There are 1,831 posts in this topic. You are on page 23 of 37.

Reply

Wanna join the discussion? Please sign in to reply to this topic.

Hey there! Welcome to Pinside!

Donate to Pinside

Great to see you're enjoying Pinside! Did you know Pinside is able to run without any 3rd-party banners or ads, thanks to the support from our visitors? Please consider a donation to Pinside and get anext to your username to show for it! Or better yet, subscribe to Pinside+!


This page was printed from https://pinside.com/pinball/forum/topic/quicksilver-club-all-welcome/page/23?hl=pinball_ric and we tried optimising it for printing. Some page elements may have been deliberately hidden.

Scan the QR code on the left to jump to the URL this document was printed from.