(Topic ID: 225496)

Stern Electronics Club (1977-1984).

By Mitch

5 years ago


Topic Heartbeat

Topic Stats

  • 10,733 posts
  • 442 Pinsiders participating
  • Latest reply 25 hours ago by dothedoo
  • Topic is favorited by 244 Pinsiders

You

Linked Games

Topic Gallery

View topic image gallery

IMG_1147 (resized).jpeg
IMG_1145 (resized).jpeg
20240418_085522 (resized).jpg
under pf (resized).jpeg
IMG_6077 (resized).jpeg
Pinside_forum_8106235_0 (resized).png
Pinside_forum_7773109_2 (resized).jpg
229391849964f82d3332d2d885e9b99981792afa (resized).jpg
Pinside_forum_6864620_0 (resized).jpg
20240412_202742 (resized).jpg
20240412_202714 (resized).jpg
Pinside_archive_84_21371 (resized).jpg
Pinside_forum_7930847_0 (resized).jpg
Pinside_forum_7961451_3722489 (resized).jpg
Pinside_forum_7933786_0 (resized).jpg
DSCN9287 (resized).jpg

Topic index (key posts)

11 key posts have been marked in this topic, showing the first 10 items.

Display key post list sorted by: Post date | Keypost summary | User name

Post #227 Various gate tips. Posted by cottonm4 (5 years ago)

Post #269 Hi quality thoughts from Cotton about inlanes. Posted by cottonm4 (5 years ago)

Post #279 Playfield touch up tips. Posted by klr650 (5 years ago)

Post #309 Stern inserts suggestions. Posted by cottonm4 (5 years ago)

Post #310 Seawitch gate flap solution. Posted by frunch (5 years ago)

Post #1033 Bally drop targets on the classic stern, even mix and match. Posted by cottonm4 (5 years ago)

Post #1958 Star Gazer podcast episode link. Posted by DRDAVE (4 years ago)

Post #2587 Link to 3D printed parts available from HHaase. Posted by HHaase (4 years ago)

Post #2590 Link to 3D printed parts by Swinks, available at Shapeways. Posted by swinks (4 years ago)


Topic indices are generated from key posts and maintained by Pinside Editors. For more information, or to become an editor yourself read this post!

You're currently viewing posts by Pinsider lovef2k.
Click here to go back to viewing the entire thread.

#7317 1 year ago

I'm getting ready to restore 2 meteors and a Seawitch. I generally re-plate most of the metal pieces of the PF mechs and cab parts. The thing that bugs me about SEI drop targets is the excessive wear on the dt links and shafts. I have done several bally games and never have see this much wear on their dt parts. So why bother to re-plate worn parts? I have a coworker that has a side biz doing automotive audio and custom wheels etc. He told about a new machine they recently got it that will make just about anything. So I thought I would have him make up a repro SEI DT link. I sent him an NOS piece to mock up.

So on this post I was going to ask the group about how much would somebody pay for these if I did a bunch of them. As I was getting ready to take some pics, I noticed that some of the links have a half moon notch cut out on the bottom edge. In the first pic, the 2 upper links are NOS, the bottom is a beat original. So why the cut-out and does it make a difference? I have a pile of these links that mostly all came from F2K or Meteor and I have a mixture of both, with notch and w/o notch.

Secondly I can't find an actual image of these links on any of the parts catalogs I have or found online. The second pic shows a Bally NOS link P-1973-337 that looks like the 1A-491 in the Stern book. The size and hole spacing is the same as the links in the first pic with the "hook" at the end. Is this one also a 1A-491? On Marco search for the P-1973-337 they list it as a Bly part on the page but in description they say used on SEI drop targets.

Can anyone shed some light on this please?

PA010219 (resized).JPGPA010219 (resized).JPGPA010220 (resized).JPGPA010220 (resized).JPG
#7320 1 year ago
Quoted from cottonm4:

I don't know why the cutout. I'm guessing it does not make a difference. Seeing and getting some sort of understanding of the lengths Stern went to save a buck, maybe Stern had some extra sheet metal laying around with a hole drilled in and figured out a way to recut this metal and make some useful parts. It is just a guess.

[quoted image]
The only thing I can see and say about the beat OG link is that the hole that slides onto the pivot shaft might be a little worn, it is not a precision part. All that happens is that the drop target makes the link drop down and activate the blade switch. On the left side with the point poking up, there is a little notch in that hook; All that is is from the link being pulled back up where it contacts/slams? into the backing metal of the drop assembly.
[quoted image]
To answer your questions, a little wear does not bother me, I would buy some of these if I was missing some. It is buried inside the drop assembly and out of sight. No one ever sees it. If I had one very rusted, I would sand it clean and slop a little spray can paint on; What ever color I had sitting around. Plating is nice but get the cheapest plating you can get.
I have a Bally drop assy. with the kinds of links you show, but I also have this Bally drop assy. And the actuator links have a very large hook on them.
[quoted image]
All that said, with the SEI drop assys. getting hard to find, any part for a Stern drop is a good part. Marco sells several pieces that can be used to build a SEI drop assy., but not all of the parts available. I would think there would be some people who would like to have some of these.
See what others opinions are. John Greatwich knows a lot of what is happening with the Marco inventory.
You might want to contact Marco and see if Marco would stock them.
https://www.marcospecialties.com/control/keywordsearch?SEARCH_STRING=drop%20target&VIEW_SIZE=60&VIEW_INDEX=2&view=card&sortOrder=SortKeywordRelevancy
EDIT: My SEI parts catalog
[quoted image]
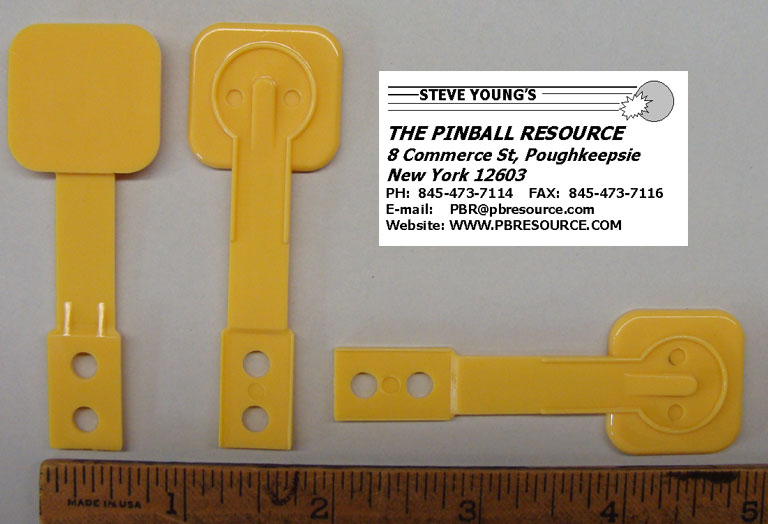
shows the style of link that is in the bottom of your pic with a part number of 1A-491. But this blow up pic of the drop assy. is the early style of drop with the switches on the bottom. With this style, the drop target itself activates the blade switch that has one of those nylon nubs attached to the blade.
[quoted image]

Thanks for your detailed reply.

So now I now the hooked link is only for rear mounted switches. I just don't know if the part number was changed. I bought some hooked links from PBR about 10 years ago, as seen in pics. I will have to back and look at the invoices to see what part number they used. Interesting about the extra notch, but makes sense. My Seawitch has brick patter cab floor, so yeah, cheap.

As far as wear. When I go through the trouble of rebuilding a mech, I want the newest and parts I can find. OCD. True, it's a cosmetic thing, but does the wear cause any reset issues?

As far as the wear, true they usually work fine. I was only concerned about the reset. Would correct adjustment of the A-375's prevent this? Or does the reset rely on the links getting slammed up into the grooves of the back plates?

As far as making a bunch of these. I did think about Marco. It will depend on the cost to make them compared to what Marco will sell them for. They have the A-491 listed for $4.99. It will probably cost me close to that just make each one, so I don't know if it will be worth it.

#7322 1 year ago
Quoted from Lovef2k:

Thanks for your detailed reply.
So now I now the hooked link is only for rear mounted switches. I just don't know if the part number was changed. I bought some hooked links from PBR about 10 years ago, as seen in pics. I will have to back and look at the invoices to see what part number they used. Interesting about the extra notch, but makes sense. My Seawitch has brick patter cab floor, so yeah, cheap.
As far as wear. When I go through the trouble of rebuilding a mech, I want the newest and parts I can find. OCD. True, it's a cosmetic thing, but does the wear cause any reset issues?
As far as the wear, true they usually work fine. I was only concerned about the reset. Would correct adjustment of the A-375's prevent this? Or does the reset rely on the links getting slammed up into the grooves of the back plates?
As far as making a bunch of these. I did think about Marco. It will depend on the cost to make them compared to what Marco will sell them for. They have the A-491 listed for $4.99. It will probably cost me close to that just make each one, so I don't know if it will be worth it.

I went back to a 2012 PBR invoice and the did use the A-491 for the hooked link.

#7323 1 year ago
Quoted from 20eyes:

I made a bunch of these a while back if anyone needs some.
[quoted image]
I also have a pile of used original ones I just put new ones on when I take apart the mechs. As far as the notch cutout some mechs had them and some didn't not sure why.
[quoted image]

So you made both notches and no notch? What type of metal?

#7325 1 year ago
Quoted from 20eyes:

Stainless steel. Correct I made both, no real reason for making both. I made the Bally and Gottlieb ones also mostly because I can and I'm too cheap to buy it if I can just make it. After I went through a pile of mechs I found one with the notch so I just started using those because why not. I don't know if it serves any practical purpose but it adds clearance when the target is in the raised position.
[quoted image]

Ok that makes perfect sense. So maybe it was a design change?

#7328 1 year ago
Quoted from hisokajp:

here are the repro pop housing/base from PPS (white) next to an original Stern (bleu), pretty much copy confirm
[quoted image][quoted image][quoted image]

Do you have a link for these?

#7336 1 year ago
Quoted from vec-tor:

Note:
Data East, Wico contracted "pop bumper"/"thumper bumper"
1) 1st generation = black base... many small changes to the way the switch assembly is installed...
2) 2nd generation = yellow base Simpson,Batman etc.
3) 3rd generation = blue base LW3, Star Wars etc.

Did any of the other brands use plastic parts, rod & ring, yokes like SEI did?

#7339 1 year ago
Quoted from hisokajp:

ok so i tested those in game and the big holes for the pop ring leg are narrower, likely for teh metal style so to use the plastic pop ring i had to drill them a bit bigger. easy enough and works well installed.

Thanks for that feedback. Now I'll be ready if I need to ream them out.

2 weeks later
#7445 1 year ago
Quoted from vec-tor:

Note:The odd shaped one [key] is O.E.M. style for the coin industry back in the day.
1) The jagged edge part is tobe facing right [center "V" slot facing down][coin door]
1a) Nobody really pays attention to how the keys are to be installed.

Interesting but I don't fully understand. If the locks are double bitted, why would the direction of the key matter? But I see now that a lot of these vintage keys have different shapes from one side to the other.

I started this thread a year ago but it didn't catch on. I thought it would be cool to have some kind of key registry or at least post extra key numbers, wanted or don't need.

https://pinside.com/pinball/forum/topic/pinball-keys-and-locks

I started a search for backbox locks for early Bally and Sterns. The original lock has a threaded stud and a nut to hold the locking bar in place. The newer locks use a small screw which works but seems cumbersome to install and sometimes do not fit as well as OEM. I bought the last NOS Bally lock from John's Jukes a while back for a resto. I like to have original locks on my games. I did find the Fort Maxi blanks, so for locks where I only have one key, I can have a spare cut at the hardware store. I also found some cool locks on ebay over the years.

PA230263 (resized).JPGPA230263 (resized).JPGPA230264 (resized).JPGPA230264 (resized).JPGPA230265 (resized).JPGPA230265 (resized).JPG
#7446 1 year ago

Oh, I wasn't thinking, I forgot the key only goes in one way, DOH!

#7460 1 year ago
Quoted from cottonm4:

I did not know you could still buy these cable clamps. All nice and shiny white. No 40 years worth of nicotine staining.
[quoted image]
The source
https://shop.hillmangroup.com/ccrz__ProductList?operation=quickSearch&searchText=clamp&cclcl=en_US

It's cheaper to buy them in bulk. 25 or 100 pieces per bag. It's hard to find the smaller sizes in half inch wide like used on Bally games but Grainger has them.

#7461 1 year ago
Quoted from snyper2099:

"MAXI" brand blanks. Those are cool as hell. I also try to keep original keys for my games (or find the correct era) for each game, when I buy them... especially for the heads.

ebay.com link: itm

2 months later
#7745 1 year ago
Quoted from PinFixin:

For a classic stern lockdown bar receiver. It doesn't look like any parts can be disassembled minus the spring. How do you guys hammer spray paint it? Just cover the whole thing? And one coat? I'm concerned the paint will stick on the sliding parts making it difficult to slide back and forth?
Also, finally found a Data East Playboy lockdown bar receiver. It is >>>>EXACTLY<<<< the same as the one for my hot hand. I think this was already documented, however I thought I'd say it again.
-Pat

I bought a repro lockdown receiver for stern games from Marco about a year ago. I haven't installed it yet to five a review. I'm pretty sure it is stainless steel. IIRC it cost $149 then. Placing the oem and repro side by side they looked very close in comparison.

#7763 1 year ago
Quoted from play_pinball:

Don’t toss it. It can be repaired or turned into a needed Nine Ball spinner.
[quoted image][quoted image]

which game has the duck?

#7765 1 year ago
Quoted from play_pinball:

It’s a broken spinner I had in a box of parts. Originally off Fun Land.

Interesting, so a off set Stern spinner on an GTB EM?

#7768 1 year ago
Quoted from vec-tor:

By part # Gottlieb
A-11254
1968
Fun Land, Fun Fair, or Fun Park.

The "S" led me to think it's a stern spinner.

#7786 1 year ago
Quoted from cottonm4:

I saw this show a gew years ago. I thought this one with the side tanks was idiotic.

I saw it as well. I remember them breaking the backglass and having to find a replacement.

3 weeks later
#7845 1 year ago
Quoted from 20eyes:

I have had some requests from people to buy these so I finally decided to set up a shop to officially sell them. Hopefully I have it all set up right.
https://pinside.com/pinball/market/shops/1475-20eyes/07810-classic-stern-drop-target-reset-link
If/when I ever make another batch of these I will probably just make the ones with the notch rather than make both seems pointless to make both.
[quoted image]
[quoted image]

I'm definitely in on these.

#7885 1 year ago
Quoted from cottonm4:

I got a new tool from Amazon the other day. I got tired of buying batteries for my label maker so I got this.
amazon.com link »
" Wefomey 120W Universal Power Supply Adjustable DC 4V ~ 24V Variable Switching AC/DC Adapter 100V-240V AC to DC 24V 5A Converter with 14 Tips & Polarity Converter - 5000mA Max"
[quoted image]
3 batteries in a battery holder work fine for checking GI but this is sweeter. I don't think I would have bought it just to check GI lights, but since I have it, why not?

It comes with an assortment of all kinds of adaptors. Plus the adaptor I was able to install a pair of test leads into.
[quoted image]

Radio Shack had something similar back in the day. It was a plug in adapter with a slide switch for various voltages and a 4 way plug adapter. I think I still lying around somewhere. But this is way better, thanks for sharing!

2 months later
#8573 11 months ago

I recently noticed this serial number tag in my Seawitch at the coin box location. I have never seen one on my other Sterns, I guess they get dislodged and lost.

Is it a coincidence that the colors match or are they all this color? Also any idea what formica means?

P4250360 (resized).JPGP4250360 (resized).JPG
#8588 11 months ago
Quoted from cottonm4:

The heavier spinners spin longer. So, juicier spins.
Of the spinners I have, the MPU 100 pins such as Dracula, Hot Hand, and Nugent weigh 27 grams.
My Big Game and Seawitch spinners weigh 33-34 grams. I have several other Stern spinners coming at 34 grams; I have 3 spinners that came from a Cheetah but I do not know which ones they are.
There was a time not that long ago when I thought all spinners were the same.
That Williams spinner that Marco says weighs 1.5 oz is equal to 42.5 gram. And I question Marco's 1.5 oz statement on its site. I do not have any Williams spinners to verify this, though.
I have some Bally spinners that come in at 38 grams. They spin very well.

The Bally spinners also have a thicker wire.

#8591 11 months ago
Quoted from jj44114:

They all had these under the coin box. They were white but got oversprayed I’m some cases.

Thanks for clarifying.

4 weeks later
#8757 10 months ago
Quoted from HoakyPoaky:

Hey I know where that’s going! Wonderful job. He’s going to be very happy

No doubt!

#8758 10 months ago
Quoted from Mad_Dog_Coin_Op:

I have been using these. They look a little different but work good.
uxcell 100 Pcs Nylon Push-in Style Standoff PCB Support Spacer 5mmx3mm https://a.co/d/0Iu7KqW
The larger end will fit into the support bracket if you work it a little bit. I basically install them upside down for the Classic Sterns.

How much working are we talking about? The ones from PBL I have to force in the brackets with pliers.

#8761 10 months ago
Quoted from Mad_Dog_Coin_Op:

Nothing like that. Just twist them back and forth with some pressure applied. Using them on my current build now.
[quoted image]

Sounds better to me! Stargazer?

Thanks for the link.

#8770 10 months ago
Quoted from Mad_Dog_Coin_Op:

By the way, I now have two Star Gazers. Mine has the original reproduction backglass while the new one is the Coos mirrored glass. They both look great. I would say the mirrored one is better but it is also more expensive. You really can't go wrong.
[quoted image][quoted image]

Nice touch on the coin drop inserts.

2 weeks later
#8849 10 months ago
Quoted from Tsskinne:

I have a question for stern group here. I delivered a scratch build star gazer a couple weeks ago. The new owner sent me a message tonight about a hole potentially missing a post near the drain. I looked at my Dracula and it does have the post. I looked at my Stars and it doesn't. The Meteor that we used as a donor did not have the post. My Dragonfist did not have the post. I did not install one in my first scratch build Star Gazer two years ago, and looking through the Star Gazer thread it does seem that some games have it and some don't. So anyway my question is what is the purpose of this post and is it necessary? If so I want to make sure to get him the correct post to place in there although it just seems to be a 6-32 machine screw with a metal sleeve essentially. Anyway help us out and solve the mystery of the purpose of this post! Thank you. -Tommy
Hole in question.
[quoted image]
Random Star Gazer
[quoted image]
My first scratch build.
[quoted image]
Donor Meteor
[quoted image]
Dracula with post
[quoted image]
Stars with no post
[quoted image]

I have two Meteor PF's and both have the post with a white plastic sleeve.

1 month later
#9081 9 months ago

Taking a poll here,

How many would be interested in a repro set of the SEI coin door trim set? 2 or the 3 hole option. I myself am having a hard time finding them in good condition.

#9125 9 months ago

I'm working with Marco on these, I hope it comes to fruition.

#9126 9 months ago

As part of my restores, I like to make the metal work look as new as possible. We all know the SEI metal is crap, soft and wear badly compared to other MFRS. I usually get parts re-plated in zinc and/or nickel. I de-rust light rust in Evaporust. I dipped some SEI parts in and I saw this green slime covering the parts after 24 hours. Bally parts never did this to me. IDK what it is, possibly some type of rust inhibitor? So from now on, I will dip all part, rusty or not, into the Evaporust for 24 hours. To get the slime of, I run them in the ultrasonic in very hot water. Then can plate.

The cleaner is a 10 to 1 mixture with water. No directions on bottle, read it in the reviews. Best degreaser by far for ultrasonic cleaners.

P7110052 (resized).JPGP7110052 (resized).JPGP7110053 (resized).JPGP7110053 (resized).JPGP7110054 (resized).JPGP7110054 (resized).JPGP7110055 (resized).JPGP7110055 (resized).JPGP7110056 (resized).JPGP7110056 (resized).JPGP7110058 (resized).JPGP7110058 (resized).JPGP7110059 (resized).JPGP7110059 (resized).JPG
#9127 9 months ago

Forgot to add, this also takes away that chalky finish from SEI parts.

#9130 9 months ago
Quoted from NeilMcRae:

Yeah that’s on our list to fix, game is in our lock up - hoping the flipper mechs haven’t been butchered!

The good thing is most of the parts are available.

#9138 8 months ago
Quoted from northvibe:

Slochar is right[quoted image]

And if header pins are pre-installed I cut pin 9 off to iliminate confusion.

#9142 8 months ago
Quoted from cottonm4:

And still use a blocker key in the connector?

Of course

#9143 8 months ago
Quoted from tatman9999:

Picked this up today to go next to dragonfist, stars, big game , now I need a quicksilver. Star gazer came with 2 new playfields.
[quoted image][quoted image][quoted image][quoted image][quoted image][quoted image][quoted image][quoted image]

Some people have all the luck. Congrats

#9148 8 months ago

These pics may help. The switch at the end of the tilt roll doesn't have a contact like a normal switch. When the ball touches the blade it closes the circuit between the roll tilt and the switch since the ball is a conductor. Pics from galaxy.

20230727_123929 (resized).jpg20230727_123929 (resized).jpg20230727_123933 (resized).jpg20230727_123933 (resized).jpg20230727_123937 (resized).jpg20230727_123937 (resized).jpg20230727_123951 (resized).jpg20230727_123951 (resized).jpg
#9149 8 months ago

Make sure the switch blade isn't touch the roll cage.

#9150 8 months ago

I just caught this, under your plum bob upper bracket there's a wire with a lug and screw going nowhere. That lug goes under the front of roll cage. Someone removed the screw causing the roll cage to slope towards the front of the cab. See my pic.

#9155 8 months ago
Quoted from tatman9999:

Anyone know the color of stern legs and coin door? Want to repaint them.

Rustoleum silver hammer tone is the closest match I have found. Here's mine

16904881108085706740499762923552 (resized).jpg16904881108085706740499762923552 (resized).jpg16904881304866110886848798125413 (resized).jpg16904881304866110886848798125413 (resized).jpg
#9163 8 months ago
Quoted from Mad_Dog_Coin_Op:

Hammered silver Rustoleum is the best color if you are looking to spray paint the legs and doors. Powder looks great and in a nice upgrade. This is my goto color.
https://www.tiger-coatings.com/us-en/shop/show/39-90980[quoted image]

Thanks for posting this link, I have been wanting to PC legs and door for Seawitch, Meteor and Galaxy

#9164 8 months ago
Quoted from splattii:

Thanks but I'm looking for the standup/static target assemblies like the following pics (yellow square targets, common looking circle targets below/right);[quoted image][quoted image]

Pinball Resource has the blue star targets, but only the target with the rivet. You'll need a rivet squeezer to install them. They also have these: https://www.pbresource.com/switches/bly-c1024-3.jpg

#9167 8 months ago
Quoted from cottonm4:

A stand up target is a stand up target. They will interchange.

Agreed, only the faces are different on some but you can pull them apart and build the switch need/want.

#9169 8 months ago
Quoted from cottonm4:

You can knock down the target face rivets with a small ball peen hammer and a center punch. One you get the rivet flared with the punch you can tap it on down with the ball side of the ball peen hammer.

I have the tool so never tried that method.

#9190 8 months ago
Quoted from Its_me_aj:

Ok this might be some of the issue. It does have a nvram in it

If the mpu has/had corrosion the U8 and/or U13 sockets may be flaky.

#9197 8 months ago
Quoted from Its_me_aj:

It was well worth the try

Did you try to reseat the NVRAM?

#9201 8 months ago
Quoted from Tyamry:

What is better to buy for a Ali with LEDs, an Allteck MPU or a WEEBLY? Or is it just preference?

I'd say preference. Both are good products.

#9207 8 months ago
Quoted from barakandl:

They save me some time which is the major bottleneck. All through hole stuff is done by hand soldering, so anything that can be reasonably changed to a smt part i usually go for it.
I typically include a tooth pick to manipulate the dip switches with. They are roughly the size of a SOP16 chip.
I just recently updated the replacement mpu's combo rom with every public custom rom I'm aware of.

When will these be back in stock?

1 week later
#9279 8 months ago
Quoted from Ollulanus:

Anyone know a specific part number or have a link for the through-the-playfield bolts for posts used on 80s sterns? The ones that run upward through the playfield, hammered flush to the bottom. Got a couple on this lightning that are stripped and having a hard time finding them.

I have never seen replacements the them. It's like a mini carriage bolt. I eliminated all of them with a standard 6-32 Phillips head machine screw cut to proper length. This way you can put a screw driver in them if they turn when trying to remove your plastics when shopping the game. T nuts are another good option if there's space under pf.

1 week later
#9351 8 months ago
Quoted from Tsskinne:

Just use electrical tape on the other trim and on the glass itself. It will fit and hold and not scratch anything up.

I do that as well. Bally did the same back in the day.

#9367 8 months ago

Question, coil j25-475 I have has CL-200 under the numbers and has orange wrapper vs the yellow. Any difference?

16927570428119194183965802138885 (resized).jpg16927570428119194183965802138885 (resized).jpg
#9407 7 months ago
Quoted from gdonovan:

Thinking about running off another batch of vinyl cut decals, let me know if you are interested.
[quoted image][quoted image]

I'm in.

#9411 7 months ago
Quoted from cottonm4:

Which parts are you speaking of from 40 years ago before China manufacturing entered the mix?
AFAIK, one company, Ravenswood, made transformers for Bally and Stern. And while I don't know, it seems that pop bumper parts and slingshot parts would have all been made by one company that would have supplied parts to the industry.
I have a selection of Bally and Stern drop target assemblies. The Bally units have a better quality of zinc plating on, but other than that, I see no difference in the quality of the drop assemblies' parts.
I have observed when comparing my Stern's general assembly practices to Bally or Gottlieb, or Williams, that Stern slopped these pins together---no close tolerances were observed. I have had posts mis-located, lamp socket holes mis-located, flipper bushing holes in the play field mis-located, etc.
But the parts from pin to pin to pin all look the same to me. There is wire, lamp sockets, pop assemblies, drop assemblies, and sling shot parts. They all look the same to me. What am I not seeing?

I agree with most of what you are saying, except for the quality of the Stern mechanical parts. Stern drop target banks wear like a SOB. I have rebuilt several of both brands and the Bally parts show very little wear. Stern links, shafts and side plates show significant wear. I think the difference is in the steel not being hardened on stern. And that funky plating? I dunno, I posted earlier in this thread about the green slime that I get when I dunk stern parts in Evaporust. I'm not trashing Stern, I love their games and some of the mechs they have designed are genius, F2K ball walker for eg.

#9418 7 months ago
Quoted from chuckwurt:

I don’t know about this. It’s cool, but I’ve gone through two separate walker mechs and both have issues with not walking the balls properly, and two balls get stuck in one position and have to be manually freed.

Original pf or cpr?

#9419 7 months ago
Quoted from Lovef2k:

Question, coil j25-475 I have has CL-200 under the numbers and has orange wrapper vs the yellow. Any difference?
[quoted image]

Anybody?

#9421 7 months ago
Quoted from chuckwurt:

CPR I think. But it’s the mech that has issues not the slots in the playfield. The fingers bind up.

Replace nyliners? I put a dab of white litho on mine almost 10 years ago and it has worked great

#9423 7 months ago
Quoted from chuckwurt:

Thanks. The one I had and now my buddy has and is getting ready to sell. I’ll try that.

I had cut grooves on my cpr clear since the balls were getting hung up.

I'm pretty sure it uses the same Nyliner that's on bally drop banks. I would disassemble and clean thoroughly. Reassemble w new nyliners. The return spring is pretty strong but make sure the coil plunger isn't hanging up. Clean plunger w steel wool and replace coil sleeve too.

2 months later
#9938 5 months ago
Quoted from cottonm4:

I need to check what diameter of wire I have been using. The smallest stainless welding rod I can find is .045. I think I have been using .047 piano wire.
Will stainless wire forms hold their shape?
I'll have to go down to welding supply had see what I can find.

Stainless holds shape very well. I recently bought stainless wire from McMaster Carr. They sell it in various lengths. I found they had 4mm wire that I need for Galaxy large upper ball guide which the original is bent and kinked.

#9939 5 months ago
Quoted from cottonm4:

Cool.
What kinds of tools are you using to make your bends?
I have figured out how to mod a nut and bolt to make a good wire bender and this has helped with accuracy in my bends. But it is not without a couple of challenges.

Where are you finding 4-position memory drop targets at?
AFAIK, Galaxy is the only Stern pin to use 4-position memory drop targets. I suppose you might locate a 5-position Trident drop target to modify but still no easy task.
Modifying, or trying to modify, a standard 4-position drop target would be a Herculean task. How do you make this mod?

I use this: https://pepetools.com/collections/ring-benders-and-stretchers/products/superior-ring-bending-tool#

#9940 5 months ago

Is Trident the only game that used the memory 5 bank?

3 weeks later
#10178 4 months ago

For you restore guys like me. Stainless coin door bolts. You can get a mirror finish on these with a Dremel and rouge.

https://www.mcmaster.com/products/carriage-bolts/thread-size~10-24/

1 1/4 long for Stern coin door and side rails.

#10179 4 months ago
Quoted from Lovef2k:

For you restore guys like me. Stainless coin door bolts. You can get a mirror finish on these with a Dremel and rouge.
https://www.mcmaster.com/products/carriage-bolts/thread-size~10-24/
1 1/4 long for Stern coin door and side rails.

I ordered the 18-8 stainless.

#10185 4 months ago

From my experience Stern has 10-24 course thread coin door bolts. At least all that I have come acrossed.

#10186 4 months ago
Quoted from Quench:

You should consider using polished stainless steel carriage bolts to accessorise the chrome coin entry bezel rather than matching the hammertone door

Exactly.

17010637969014178288794762103600 (resized).jpg17010637969014178288794762103600 (resized).jpg
Promoted items from Pinside Marketplace and Pinside Shops!
$ 15.00
Playfield - Protection
UpKick Pinball
 
$ 12.00
Playfield - Toys/Add-ons
UpKick Pinball
 
$ 959.00
4,999 (OBO)
Machine - For Sale
Vaudreuil-dorion, QC
$ 12.00
Playfield - Toys/Add-ons
UpKick Pinball
 
$ 300.00
Cabinet Parts
Fantastic Pinball Inc.
 
$ 15.00
Playfield - Plastics
Pinball Haus
 
$ 20.00
Playfield - Protection
arcade-cabinets.com
 
$ 169.00
$ 999.00
Flipper Parts
Mircoplayfields
 
$ 29.00
Boards
RoyGBev Pinball
 
$ 1.00
Pinball Machine
Pinball Alley
 
Wanted
Machine - Wanted
Middletown, OH
$ 12.00
$ 189.00
Flipper Parts
Mircoplayfields
 
$ 17.50
Cabinet - Sound/Speakers
Pinball Haus
 
$ 189.00
Flipper Parts
Mircoplayfields
 
4,300
Machine - For Sale
Copenhagen
$ 319.99
Cabinet - Other
PinGraffix Pinside Shop
 
Wanted
Machine - Wanted
Crown Point, IN
$ 1,199.00
Flipper Parts
Mircoplayfields
 
$ 29.99
Cabinet - Shooter Rods
Pinball Shark
 
From: $ 10.00
Playfield - Protection
UpKick Pinball
 
$ 79.99
Cabinet - Armor And Blades
PinGraffix Pinside Shop
 
$ 29.00
Cabinet - Sound/Speakers
RoyGBev Pinball
 
From: $ 50.75
Playfield - Other
Rocket City Pinball
 
$ 33.00
Boards
PinballReplacementParts
 

You're currently viewing posts by Pinsider lovef2k.
Click here to go back to viewing the entire thread.

Reply

Wanna join the discussion? Please sign in to reply to this topic.

Hey there! Welcome to Pinside!

Donate to Pinside

Great to see you're enjoying Pinside! Did you know Pinside is able to run without any 3rd-party banners or ads, thanks to the support from our visitors? Please consider a donation to Pinside and get anext to your username to show for it! Or better yet, subscribe to Pinside+!


This page was printed from https://pinside.com/pinball/forum/topic/price-check-1980-sterns-quicksilver-stargazer-seawitch?tu=lovef2k and we tried optimising it for printing. Some page elements may have been deliberately hidden.

Scan the QR code on the left to jump to the URL this document was printed from.