(Topic ID: 277423)

Official Avengers Infinity Quest owners thread. "Pinsiders Assemble!"

By CoolCatPinball

3 years ago


Topic Heartbeat

Topic Stats

  • 12,769 posts
  • 932 Pinsiders participating
  • Latest reply 2 hours ago by awesome1
  • Topic is favorited by 386 Pinsiders

You

Topic poll

“Of the Avengers featured on the inserts, who is your favorite?”

  • Hulk 141 votes
    21%
  • Iron Man 127 votes
    19%
  • Captain America 76 votes
    12%
  • Black Widow 51 votes
    8%
  • Thor 72 votes
    11%
  • Black Panther 35 votes
    5%
  • None of those weakling, THANOS! 158 votes
    24%

(660 votes)

Topic Gallery

View topic image gallery

3.4 Billion Super Victory Laps Champion AIQ awesome1 (resized).png
2.3 Billion Soul Gem Jackpot Champion AIQ awesome1 (resized).png
312 Million Iron Man Multiball Champion AIQ awesome1 (resized).png
awesome1 AIQ Leaderboard 4-21-2024 Stern Insider Connected.PNG
awesome1 AIQ Leaderboard 4-2024 Activity Stern Insider Connected.jpg
12 Billion AIQ Pinball Grand Champion awesome1.JPG
IMG_1998 (resized).jpeg
awesome1 Thanos Attacks! Champion 362 Million (resized).JPG
IMG_1989 (resized).jpeg
IMG_1987 (resized).jpeg
look (resized).png
Screenshot_20240402_132312_Stern IC (resized).jpg
magnet (resized).jpg
tmold (resized).jpg
Avengers Right Orbit rattles.gif
05.jpg

Topic index (key posts)

19 key posts have been marked in this topic, showing the first 10 items. (Show topic index)

There are 12,769 posts in this topic. You are on page 168 of 256.
#8351 2 years ago
Quoted from 1956PINHEAD:

With less friction the disc will come to rest at the 6 o'clock position most of the time, but there are occasions it won't. If you have a shaker it will most likely end up there. As Sleal16 mentioned I use the upper flipper to both spin the heck out of the disc, and also hit the sanctum target off the post or to clear it. Adds a different way to attack the shot, but over time it's now just part of how I make the shot work, and I also think I've had less SDTM drains off that target as a result. Your results may vary

Totally missed sleal16's post! Thanks for the clarification. I'd agree, you'd just get used to it.

#8352 2 years ago
Quoted from EaglePin:

On mine when I first got it the ball had a tendency to veer left as it went across the shooter lane metal ramp. As you said, that shooter lane metal ramp is very flimsy and it seems to have a lot of bounce and wobble to it, and it isn't supported much at all underneath it. I propped a Lego brick with a cabinet dot/bumper on top of it underneath the left side in the middle of the ramp to counter the movement of the ball and it's worked great ever since. Made it so the ramp wasn't tilting that way anymore.
Here's a post that has a picture of where I put the brick/bumper stack under the shooter lane:
https://pinside.com/pinball/forum/topic/official-avengers-infinity-quest-owners-thread-pinsiders-assemble/page/108#post-6152817

Interesting. I'll try that lego approach see if changes anything.

#8353 2 years ago
Quoted from Sleal16:

Interesting. I'll try that lego approach see if changes anything.

Worth a try to counter whatever direction the ball is going on yours. There's a hole in the playfield under the shooter ramp, so that made it easy to stuff the shim in there without having to remove the ramp from the top of the playfield.

#8354 2 years ago
Quoted from 1956PINHEAD:

With less friction the disc will come to rest at the 6 o'clock position most of the time, but there are occasions it won't. If you have a shaker it will most likely end up there. As Sleal16 mentioned I use the upper flipper to both spin the heck out of the disc, and also hit the sanctum target off the post or to clear it. Adds a different way to attack the shot, but over time it's now just part of how I make the shot work, and I also think I've had less SDTM drains off that target as a result. Your results may vary

Agreed, this is how I always attack the spinner and sanctum target: from the upper left flipper. Much safer shot than from lower flippers. No STDM troubles no matter where the disc post is located. Put upper left flipper to its full use and work the disc from a distance where no one misses.

Really enthused how the mod eliminates the stock spinner “thud”, by hitting it straight on, where original spinner didn’t actually move at times.

#8355 2 years ago

Pardon my ignorance.

Can someone please explain how RPMs are calculated on Dr. Strange? How does the machine know how many rotations?

I understand how it counts the rotations on a spinner like the Hulk. But I don't quite understand how it does it on the Dr. Strange disc.

#8356 2 years ago
Quoted from marioparty34:

Pardon my ignorance.
Can someone please explain how RPMs are calculated on Dr. Strange? How does the machine know how many rotations?
I understand how it counts the rotations on a spinner like the Hulk. But I don't quite understand how it does it on the Dr. Strange disc.

Not sure on the exact method it uses (electronics wise), but theres a magnetic sensor at the bottom of the assembly, in which the rod is also magnetic. So when it rotates, I guess the software counts the amount of times it toggles the sensor. It'll grab the first second or so of spins and fit it in the "per minute" math to calculate how many rotations it would have gotten if it maintained its initial velocity throughout a whole minute. For the sake of RPM, thats about it. From then it'll still count rotations while its spinning to tally up score/etc but wont really tie in with the RPM math. The number ends up being a little arbitrary.

#8357 2 years ago
Quoted from Sleal16:

Not sure on the exact method it uses (electronics wise), but theres a magnetic sensor at the bottom of the assembly, in which the rod is also magnetic. So when it rotates, I guess the software counts the amount of times it toggles the sensor. It'll grab the first second or so of spins and fit it in the "per minute" math to calculate how many rotations it would have gotten if it maintained its initial velocity throughout a whole minute. For the sake of RPM, thats about it. From then it'll still count rotations while its spinning to tally up score/etc but wont really tie in with the RPM math. The number ends up being a little arbitrary.

Thanks for the info.

I guess I am more curious on the electronic part of the process. How does the magnetic sensor count the spinning? I am hoping someone way smarter than me can dumb it down and explain it.

#8358 2 years ago
Quoted from roar:

I like the looks of this mod, looks really well fabricated which is cool... but I'm not sure I want more spins on the disc... that thing gets in the way already, more spins will just make it harder to hit that darn sanctum target .

Quoted from Sleal16:

That's the only drawback. Even if it lands out of the 6oclock position, through the shaker motor and other little vibrations it'll move back to that spot. On the plus side, I've gotten pretty decent at hitting it from the upper flipper. Whenever I need to hit the sanctum, I'll shoot it to the right ramp to feed to it. Long run, with either stock or upgraded spinner, I think the sanctum shots might be more reliable that way (guess unless the post is between 9-12 o'clock)

Quoted from 1956PINHEAD:

With less friction the disc will come to rest at the 6 o'clock position most of the time, but there are occasions it won't. If you have a shaker it will most likely end up there. As Sleal16 mentioned I use the upper flipper to both spin the heck out of the disc, and also hit the sanctum target off the post or to clear it. Adds a different way to attack the shot, but over time it's now just part of how I make the shot work, and I also think I've had less SDTM drains off that target as a result. Your results may vary

Quoted from Thunderbird:

Agreed, this is how I always attack the spinner and sanctum target: from the upper left flipper. Much safer shot than from lower flippers. No STDM troubles no matter where the disc post is located. Put upper left flipper to its full use and work the disc from a distance where no one misses.
Really enthused how the mod eliminates the stock spinner “thud”, by hitting it straight on, where original spinner didn’t actually move at times.

It seems no harder or easier for me to hit the sanctum shot with the new Disc. It can actually still "thud" which is rare, but if you hit the post exactly straight on...

The shaker can slowly make the post rotate down towards the bottom, but my original disc would do that a little as well.

I also use the upper flipper, but mostly the lower right flipper to go for the Sanctum shot.

No new RPM record yet, but did get all gems, defeated Thanos, reached Trophy Mania and got my new high of 660M in Super Victory Laps last night on my way to a 3.88B game (my 3rd highest)!

IMG_1388 (resized).JPGIMG_1388 (resized).JPG
#8359 2 years ago
Quoted from marioparty34:

Thanks for the info.
I guess I am more curious on the electronic part of the process. How does the magnetic sensor count the spinning? I am hoping someone way smarter than me can dumb it down and explain it.

Till someone can explain it better, this page has some good briefs and illustrations:

https://www.akm.com/us/en/products/rotary-encoder/angle-sensor/

#8360 2 years ago
Quoted from awesome1:

No new RPM record yet, but did get all gems, defeated Thanos, reached Trophy Mania and got my new high of 660M in Super Victory Laps last night on my way to a 3.88B game (my 3rd highest)!

[quoted image]

You are my hero.

#8361 2 years ago
Quoted from Sleal16:

Till someone can explain it better, this page has some good briefs and illustrations:
https://www.akm.com/us/en/products/rotary-encoder/angle-sensor/

Very informative. I am trying to see if I can make any adjustments to it. I feel like I am ripping that disc and my RPMs aren't as high as I would have imagined.

#8362 2 years ago

Re AIQ. Are the outlanes tough on this game say as compared to a IM ?

#8363 2 years ago
Quoted from marioparty34:

Very informative. I am trying to see if I can make any adjustments to it. I feel like I am ripping that disc and my RPMs aren't as high as I would have imagined.

It does need to be a set distance between the two points.

Too close and/or sightly not angled correctly (not centered and not perpendicular) will register faster hits.....too far and won't register enough.

How high are you getting? I do think 600-800 are healthy averages if everything is perfectly calibrated

#8364 2 years ago

I am in the 500 to 600s. When I first installed the Dr Strange mod, I got up to 1300s. I assumed that would be a common occurrence. But in 20 games or so games since, I have yet to break 800.

Perhaps the sensor is too close. I heard that it needs to be a credit card thickness distance between sensor and bottom of rod. Mine is pretty close.

#8365 2 years ago
Quoted from marioparty34:

I am in the 500 to 600s. When I first installed the Dr Strange mod, I got up to 1300s. I assumed that would be a common occurrence. But in 20 games or so games since, I have yet to break 800.
Perhaps the sensor is too close. I heard that it needs to be a credit card thickness distance between sensor and bottom of rod. Mine is pretty close.

yeah, thats really the only thing you can adjust at this point. With both the carrier and the disc upgrade, we hit up to 1100 but stay in the 700-900 range on good days. Only thing I didnt install was the extra bearing insert, since with the carrier it was an optional thing to add. I'm not concerned with RPM's, so havent taken the time to take it apart again to put that in. Mostly what I love about the new equipment is the more rotations we get out of it. My wife can keep her RPM high score of 1500 (she hit that with stock stuff, but both bearings had fallen out of the OG carrier and the disc was flopping all over the place).

#8366 2 years ago
Quoted from Bos007:

I put in 2 bumper rubbers[quoted image][quoted image]

That is exactly what I was looking for, thank you! Do you have a part number or pinlife/marco link? Do you feel it does a good job protecting those bricks off the metal lane without affecting shot geometry?

#8367 2 years ago
Quoted from DavidJames-1863:

Re AIQ. Are the outlanes tough on this game say as compared to a IM ?

Yes, outlines are hungry. You have to learn when to nudge for sure. However, even with that, they can be brutal. I had a first ball today in the 400 millions and then had a few unfortunate slingshot directly to outlane drains. Really killed what could have been a great game. Ended with~600 mill. Frustrating when you feel you are on your way to a 1B+ game.

#8368 2 years ago
Quoted from Insanity199:

Yes, outlines are hungry. You have to learn when to nudge for sure. However, even with that, they can be brutal. I had a first ball today in the 400 millions and then had a few unfortunate slingshot directly to outlane drains. Really killed what could have been a great game. Ended with~600 mill. Frustrating when you feel you are on your way to a 1B+ game.

I adjusted my slingshots up +5 clicks from the stock settings and I no longer get straight slingshot drains to the outlanes.

This is much better than turning the slingshots down which is counterintuitive since the slingshots are designed to create havoc with the ball.

#8369 2 years ago
Quoted from marioparty34:

Very informative. I am trying to see if I can make any adjustments to it. I feel like I am ripping that disc and my RPMs aren't as high as I would have imagined.

Quoted from Sleal16:

It does need to be a set distance between the two points.
Too close and/or sightly not angled correctly (not centered and not perpendicular) will register faster hits.....too far and won't register enough.
How high are you getting? I do think 600-800 are healthy averages if everything is perfectly calibrated

Quoted from marioparty34:

I am in the 500 to 600s. When I first installed the Dr Strange mod, I got up to 1300s. I assumed that would be a common occurrence. But in 20 games or so games since, I have yet to break 800.
Perhaps the sensor is too close. I heard that it needs to be a credit card thickness distance between sensor and bottom of rod. Mine is pretty close.

Quoted from Sleal16:

yeah, thats really the only thing you can adjust at this point. With both the carrier and the disc upgrade, we hit up to 1100 but stay in the 700-900 range on good days. Only thing I didnt install was the extra bearing insert, since with the carrier it was an optional thing to add. I'm not concerned with RPM's, so havent taken the time to take it apart again to put that in. Mostly what I love about the new equipment is the more rotations we get out of it. My wife can keep her RPM high score of 1500 (she hit that with stock stuff, but both bearings had fallen out of the OG carrier and the disc was flopping all over the place).

As a point of reference I set the gap between the bottom of the magnet and the sensor using my credit card. I've set it up this way from day one of testing the disc mod to make sure my set up was consistent during testing. When I set the gap I make sure that the card slips between the sensor and the magnet easily with no drag. Using my calipers to measure the thickness of my CC it shows .033, or about 1/32". I also used some feeler gages to find the exact gap between the magnet and the sensor without moving or distorting the sensor plate away from the magnet, it measured .037. So I think it's safe to assume that a minimum gap of 1/32" is good, but wouldn't exceed 1/16" as that is probably to big. Lastly I make certain that the sensor is centered with respect to the magnet in all directions, not off to one side, left or right, and top to bottom.

For those that have installed the bearing carrier mod as well you really do not need to install the thrust bearing. The upper bearing installed into the bearing carrier has an extended inner race, that is what the bottom of the disc rides on while it spins. I did make some tests with the thrust bearing in combination with the bearing carrier and I didn't really find that it made any real difference.

Hope this helps, feel free to reach out to me if anyone wants to discuss in detail further.

sensor gap (resized).jpgsensor gap (resized).jpgcalipers (resized).jpgcalipers (resized).jpg
#8370 2 years ago

Got my tibetan breeze flipper cooling kit from PinMonk today and can attest that installation was a breeze (bad pun intended).
I haven't put the machine through a torture test yet but in sure it will fix the fade!

I noticed that my table was flat and let out the rear leg adjusters so the bubble on the right side is centered now, however the inclinometer shows only 6.1 degree. Should i make it steeper? What angles are you all playing?

#8371 2 years ago
Quoted from T3quila:

Got my tibetan breeze flipper cooling kit from PinMonk today and can attest that installation was a breeze (bad pun intended).
I haven't put the machine through a torture test yet but in sure it will fix the fade!
I noticed that my table was flat and let out the rear leg adjusters so the bubble on the right side is centered now, however the inclinometer shows only 6.1 degree. Should i make it steeper? What angles are you all playing?

Never trust the bubble I’ve been told.

I have my AIQ set at 6.9 degrees and it plays fast and fun. Can’t stand machines that have the ball just float around.

#8372 2 years ago

Hey guys! Can someone point me to the best place to buy cliffy protectors for my AIQ?

#8373 2 years ago
Quoted from Tippyroad:

Hey guys! Can someone point me to the best place to buy cliffy protectors for my AIQ?

From the man himself:

https://www.passionforpinball.com/wip.htm

Scroll about half way down for avengers. Email address up top - email him direct.

#8374 2 years ago

I probably should have asked or dug around a bit before adding the ant-rattle tape to the glass, but.....Is it recommended to tape all sides or just the ends? I ended up taping each side and it was a b&%*# to slide the glass back on. Very tight. Mostly asking so if only the ends are really needed I'll remove the side ones.

#8375 2 years ago
Quoted from CashMoney:

Never trust the bubble I’ve been told.
I have my AIQ set at 6.9 degrees and it plays fast and fun. Can’t stand machines that have the ball just float around.

The inclinometer is like a 20$ from Amazon, I wouldn't bet too much on that either, but if the bubble is meaningless that kinda sucks too...

#8376 2 years ago
Quoted from Sleal16:

I probably should have asked or dug around a bit before adding the ant-rattle tape to the glass, but.....Is it recommended to tape all sides or just the ends? I ended up taping each side and it was a b&%*# to slide the glass back on. Very tight. Mostly asking so if only the ends are really needed I'll remove the side ones.

I just do the upper corners of the playfield glass - about 1/2" square.

I actually usually use some stiff, thin cardboard (like from a beer or soda 12 pack) and tape it on top with packing tape (cut just larger than the cardboard piece, but wrap around to the bottom of glass).

This works great with my shaker and sub.

Sometimes I also have to put a little electrical tape where the backglass rests in the channel as well to eliminate rattles.

#8377 2 years ago

Did my first mod installation! Table already had a ton of mods (Avengers tower, Pym, Black Widow ramp building).

I think I did ok for my first time

719A16E2-D342-44B0-8B74-66CD33B5FA94 (resized).jpeg719A16E2-D342-44B0-8B74-66CD33B5FA94 (resized).jpeg94F3BAB3-7ACC-4DB3-B06F-24AA45DB4BB3 (resized).jpeg94F3BAB3-7ACC-4DB3-B06F-24AA45DB4BB3 (resized).jpegF736142A-80B4-4177-B85F-A38210ACF6B6 (resized).jpegF736142A-80B4-4177-B85F-A38210ACF6B6 (resized).jpeg
#8378 2 years ago
Quoted from Sleal16:

With the stock equipment, we never hit above 600-700 if everything was aligned properly. When the copper bushings would pop off and the rod would get slightly slanted, the sensor would freak out and register up to 1500. I would then realign the bushing and rod, and would go back to the normal RPM. Either way, not an issue anymore with the mood and everything is smooth like butter

can you elaborate on that a bit more? I noticed ours was registering 1200+ where our pro used to top out at like 600ish. I thought maybe it was a premium vs pro difference, but your description fits. Can you elaborate on what you saw?

#8379 2 years ago
Quoted from flynnibus:

can you elaborate on that a bit more? I noticed ours was registering 1200+ where our pro used to top out at like 600ish. I thought maybe it was a premium vs pro difference, but your description fits. Can you elaborate on what you saw?

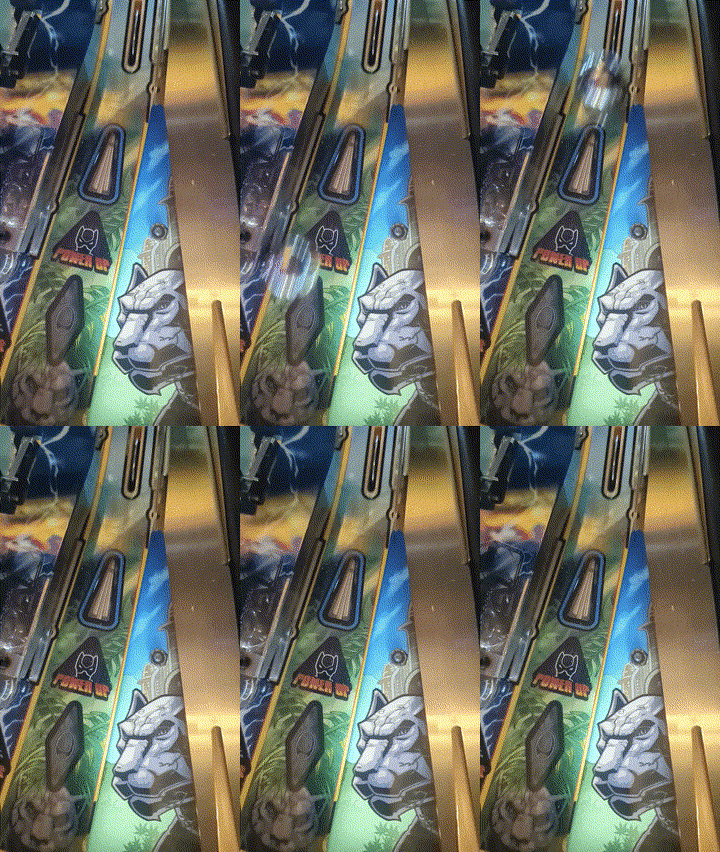
So in this photo, the bearing popped off and caused the rod to go from slightly to badly slanted. When the rod would slant, the bottom tip would not be centered and perpendicular to the sensor. The sensor would rely on that precision to count correctly. If the magnetic poles end up being funky, it picks up triggers when it shouldnt. At its worst, the whole table would be at rest with the ball cradled, and the disc would be adding to the score and filling up the STRANGE letters.

The other photo was before I adjusted it last month, so the pole is pretty far from the sensor, but shows how its supposed to be centered. Whenever I get under it again I'll check with the calipers and probably close the current gap a little anyway...probably get an extra "oomph" in speed if the current setup is farther than it should.

I think that with the Pros, since it doesnt have that extra mechanism to lift it, they're more commonly configured the same without it falling out of place.

2021-08-31 14.51.48 (1) (resized).jpg2021-08-31 14.51.48 (1) (resized).jpg2021-08-31 16.16.30 (1) (resized).jpg2021-08-31 16.16.30 (1) (resized).jpg
#8380 2 years ago

Is it normal for the last finger in the subway to be wiggling freely up towards the back box and down towards the apron if you shake the machine? Or is mine finally about to break? If someone could shake their machine a little and see if theirs wiggles, I’d appreciate it. May save me from taking some stuff apart if I don’t have too.
BA03BBFF-598E-4003-BA3C-EECC0A4B124C (resized).jpegBA03BBFF-598E-4003-BA3C-EECC0A4B124C (resized).jpeg

#8381 2 years ago
Quoted from 1956PINHEAD:

As a point of reference I set the gap between the bottom of the magnet and the sensor using my credit card. I've set it up this way from day one of testing the disc mod to make sure my set up was consistent during testing. When I set the gap I make sure that the card slips between the sensor and the magnet easily with no drag. Using my calipers to measure the thickness of my CC it shows .033, or about 1/32". I also used some feeler gages to find the exact gap between the magnet and the sensor without moving or distorting the sensor plate away from the magnet, it measured .037. So I think it's safe to assume that a minimum gap of 1/32" is good, but wouldn't exceed 1/16" as that is probably to big. Lastly I make certain that the sensor is centered with respect to the magnet in all directions, not off to one side, left or right, and top to bottom.
For those that have installed the bearing carrier mod as well you really do not need to install the thrust bearing. The upper bearing installed into the bearing carrier has an extended inner race, that is what the bottom of the disc rides on while it spins. I did make some tests with the thrust bearing in combination with the bearing carrier and I didn't really find that it made any real difference.
Hope this helps, feel free to reach out to me if anyone wants to discuss in detail further.[quoted image][quoted image]

Quoted from Sleal16:

So in this photo, the bearing popped off and caused the rod to go from slightly to badly slanted. When the rod would slant, the bottom tip would not be centered and perpendicular to the sensor. The sensor would rely on that precision to count correctly. If the magnetic poles end up being funky, it picks up triggers when it shouldnt. At its worst, the whole table would be at rest with the ball cradled, and the disc would be adding to the score and filling up the STRANGE letters.
The other photo was before I adjusted it last month, so the pole is pretty far from the sensor, but shows how its supposed to be centered. Whenever I get under it again I'll check with the calipers and probably close the current gap a little anyway...probably get an extra "oomph" in speed if the current setup is farther than it should.
I think that with the Pros, since it doesnt have that extra mechanism to lift it, they're more commonly configured the same without it falling out of place.[quoted image][quoted image]

Are you guys also checking/adjusting the field strength in the Disc test menu according to Stern's recommendations?

#8382 2 years ago
Quoted from Magicmike0:

Is it normal for the last finger in the subway to be wiggling freely up towards the back box and down towards the apron if you shake the machine? Or is mine finally about to break? If someone could shake their machine a little and see if theirs wiggles, I’d appreciate it. May save me from taking some stuff apart if I don’t have too.
[quoted image]

That last finger is the one known to cause problems... as long as it stands all the way up, you should be OK. With that said - it seems to be the "slop" in the mechanism that allows that finger to slide down where it shouldn't be and that causes the problems.

Pretty easy to take apart and probably can inspect enough without taking anything apart.

#8383 2 years ago
Quoted from Sleal16:

So in this photo, the bearing popped off and caused the rod to go from slightly to badly slanted. When the rod would slant, the bottom tip would not be centered and perpendicular to the sensor. The sensor would rely on that precision to count correctly. If the magnetic poles end up being funky, it picks up triggers when it shouldnt. At its worst, the whole table would be at rest with the ball cradled, and the disc would be adding to the score and filling up the STRANGE letters.
The other photo was before I adjusted it last month, so the pole is pretty far from the sensor, but shows how its supposed to be centered. Whenever I get under it again I'll check with the calipers and probably close the current gap a little anyway...probably get an extra "oomph" in speed if the current setup is farther than it should.
I think that with the Pros, since it doesnt have that extra mechanism to lift it, they're more commonly configured the same without it falling out of place.[quoted image][quoted image]

Thanks, but I'm still struggling to understand what you are talking about with " the bearing popped off" - there is no bearing in the assembly so I'm not understanding what you are saying was out of place.

#8384 2 years ago
Quoted from flynnibus:

Thanks, but I'm still struggling to understand what you are talking about with " the bearing popped off" - there is no bearing in the assembly so I'm not understanding what you are saying was out of place.

Bushing. Sorry mind fart on terms. The copper part in the photo.

#8385 2 years ago
Quoted from awesome1:

Are you guys also checking/adjusting the field strength in the Disc test menu according to Stern's recommendations?

I'll check for that setting. Was using the default factory installed.

#8386 2 years ago

Holy c*** 1956PINHEAD is quick sending those disc kits out, it already arrived today! Likely won't have time until the weekend to install it though, but I'm super excited. At lunch I got the 4.5 mm wrench and a XActo Knife to cut out the hole in the sticker. I think I'm all prepared now, LOL

#8387 2 years ago
Quoted from awesome1:

That last finger is the one known to cause problems... as long as it stands all the way up, you should be OK. With that said - it seems to be the "slop" in the mechanism that allows that finger to slide down where it shouldn't be and that causes the problems.
Pretty easy to take apart and probably can inspect enough without taking anything apart.

I believe I've seen a post where someone took the mech apart where the last "finger" fell forward due to slack in the linkage and put some sort of shim in there to tighten it up. He/She was making it more slick by sanding it to account for the added tension in the mechanism with the fix if I remember correctly. Maybe someone remembers what I am talking about? I can look for the post later, but it may be a different issues you are having.

#8388 2 years ago
Quoted from T3quila:

I believe I've seen a post where someone took the mech apart where the last "finger" fell forward due to slack in the linkage and put some sort of shim in there to tighten it up. He/She was making it more slick by sanding it to account for the added tension in the mechanism with the fix if I remember correctly. Maybe someone remembers what I am talking about? I can look for the post later, but it may be a different issues you are having.

Here's a couple ideas of different "fixes"... see this post from me and the one below it from MartinAcoustic :

https://pinside.com/pinball/forum/topic/official-avengers-infinity-quest-owners-thread-pinsiders-assemble/page/161#post-6483577

#8389 2 years ago
Quoted from awesome1:

Are you guys also checking/adjusting the field strength in the Disc test menu according to Stern's recommendations?

I haven't gone into the menu to look for that setting/adjustment yet, but since I've never made any changes I assume it would be set to whatever Stern had set it to maybe? I will go into the menu and check it out. Thanks for pointing this out

14
#8390 2 years ago

Finally joined the billion club

A6FC957C-7214-4184-9103-735B3B587411 (resized).jpegA6FC957C-7214-4184-9103-735B3B587411 (resized).jpeg
#8391 2 years ago

Look what turned up today. It’s a piece of art in itself - very impressed with the quality. I can tell just by holding it how well this thing will spin. Can’t wait to install this bad boy this weekend.

Thanks 1956PINHEAD !
2ACD75B0-8B16-484F-998C-3536E6CAC333 (resized).jpeg2ACD75B0-8B16-484F-998C-3536E6CAC333 (resized).jpeg

#8392 2 years ago
Quoted from 1956PINHEAD:

I have many of these discs out there now and the feedback from some is that the decal could be made from a little thicker material, this is something I am investigating for incorporating in the near future

Has anyone looked into ordering the og Stern one? Or is that no better?

#8393 2 years ago

I think the included sticker is fine. I cut a piece of mylar to go over mine to protect the edges of the sticker as much as the top. The mylar goes close to the edge of the top of the disc. I'd stay with the thinner sticker, and send a piece of precision cut mylar to go on top instead.

20210827_234703 (resized).jpg20210827_234703 (resized).jpg
#8394 2 years ago
Quoted from gorditas:

I think the included sticker is fine. I cut a piece of mylar to go over mine to protect the edges of the sticker as much as the top. The mylar goes close to the edge of the top of the disc. I'd stay with the thinner sticker, and send a piece of precision cut mylar to go on top instead.
[quoted image]

I have been in the process of investigating obtaining thicker decal material, awesome1 also gave me some info for that as well. The decal that comes with the mod kit is about the same thickness as the original, as that is what I gave to the company I used as a sample to get them made. I do like your idea of using a piece of clear mylar over top of the decal, that might actually be better in the long run as the decal will be protected. I'm going to look into that as well, thanks for that suggestion gorditas

#8395 2 years ago

Anyone looking for a topper? I have my game listed with the topper, but may separate the two. I see one listed for 1100 right now. How about 1000 and I cover the shipping if its in the 48. Thanks

#8396 2 years ago

Did I get the wrong kit to fix the level of my spinning disc? I have a premium and they sent me a kit for the pro. That’s confusing too, because the pro disc doesn’t even raise. I guess pro owners are having disc level issues too?

image (resized).jpgimage (resized).jpg

#8397 2 years ago
Quoted from Magicmike0:

Did I get the wrong kit to fix the level of my spinning disc? I have a premium and they sent me a kit for the pro. That’s confusing too, because the pro disc doesn’t even raise. I guess pro owners are having disc level issues too?
[quoted image]

Think mine said pro too. Those are the important parts anyway to level it and should be the same ones across all builds. The carrier was the biggie when people's spinner would slant.

#8398 2 years ago
Quoted from cooked71:

Look what turned up today. It’s a piece of art in itself - very impressed at the quality. I can tell just by holding it how well this thing will spin. Can’t wait to install this bad boy this weekend.
Thanks 1956PINHEAD ![quoted image]

Glad you like the Disc mod, looking forward to seeing some photo's after the installation. May the Spins be with you

#8399 2 years ago

Question: I had too many power consuming mods so that the table didnt work. I deactivated the quintjet and it worked. Now i installed the power consuming shooter rod and now the third flipper orbit opto doesnt work anymore obviously bc there isnt enough power anymore. I dont want to deactivate another mod thats why im asking is there any way to increase the power level?

#8400 2 years ago

Could I ask a favor of the owners with a stern topper please? Mine is totally dead, I want to verify all of the wiring. Could I please ask for picture of the cabling in the head and in the actual topper where the 3 boards are please? The back of the topper might be useful as well if something came loose. The box was in rough shape, so I need a little help please.

Promoted items from Pinside Marketplace and Pinside Shops!
From: $ 50.00
Cabinet - Other
Inclusive GameWerks
 
From: $ 45.00
Cabinet - Armor And Blades
arcade-cabinets.com
 
$ 26.00
Playfield - Toys/Add-ons
The MOD Couple
 
7,000
Machine - For Sale
Nashville, TN
€ 48.00
Cabinet - Shooter Rods
Kami's Pinball Parts
 
$ 36.00
Playfield - Other
Pin Monk
 
$ 17.95
Playfield - Toys/Add-ons
ULEKstore
 
€ 50.00
Playfield - Toys/Add-ons
Pino Pinball Mods Shop
 
$ 16.00
$ 30.00
Playfield - Other
YouBentMyWookie
 
$ 27.00
Playfield - Toys/Add-ons
The MOD Couple
 
From: $ 25.00
Cabinet - Sound/Speakers
PinEffects
 
$ 6,999.00
Pinball Machine
Quality Billiards
 
8,499
Machine - For Sale
West Chicago, IL
$ 135.00
Gameroom - Decorations
Dijohn
 
€ 40.00
Playfield - Toys/Add-ons
Pino Pinball Mods Shop
 
€ 50.00
Playfield - Toys/Add-ons
Pino Pinball Mods Shop
 
€ 40.00
Playfield - Toys/Add-ons
Pino Pinball Mods Shop
 
$ 6.00
Playfield - Toys/Add-ons
Twisted Tokens
 
$ 5.00
Cabinet - Decals
Pinball Fuzz
 
5,612
Machine - For Sale
Lake Elsinore, CA
5,100 (OBO)
Machine - For Sale
Whispering Pines, NC
$ 19.95
Playfield - Toys/Add-ons
ULEKstore
 
There are 12,769 posts in this topic. You are on page 168 of 256.

Reply

Wanna join the discussion? Please sign in to reply to this topic.

Hey there! Welcome to Pinside!

Donate to Pinside

Great to see you're enjoying Pinside! Did you know Pinside is able to run without any 3rd-party banners or ads, thanks to the support from our visitors? Please consider a donation to Pinside and get anext to your username to show for it! Or better yet, subscribe to Pinside+!


This page was printed from https://pinside.com/pinball/forum/topic/official-avengers-infinity-quest-owners-thread-pinsiders-assemble/page/168 and we tried optimising it for printing. Some page elements may have been deliberately hidden.

Scan the QR code on the left to jump to the URL this document was printed from.