(Topic ID: 113331)

My new original Metallica hammer design

By Aurich

9 years ago


Topic Heartbeat

Topic Stats

  • 488 posts
  • 117 Pinsiders participating
  • Latest reply 8 years ago by Aurich
  • Topic is favorited by 28 Pinsiders

You

Linked Games

Topic Gallery

View topic image gallery

metallica-ride-the-lightning-shirt-bi.jpg
image.jpg
520947.jpg
giphy.gif
image-627.jpg
image.jpg
image.jpg
image.jpg
IMG_0005-884.JPG
IMG_0004-842.JPG
IMG_3771.GIF
FullSizeRender-2.jpg
FullSizeRender.jpg
20150303_171425.jpg
20150301_132347.jpg
image-522.jpg

You're currently viewing posts by Pinsider aurich.
Click here to go back to viewing the entire thread.

33
#1 9 years ago

I love my Metallica LE, one of the best Stern games ever IMHO. The Premium features rule, make the game so much more fun. But ... I'm not a huge fan of the hammer. Mostly because it, well, huge.

Honestly I did get pretty used to it after some time, but I couldn't help but wonder if making it smaller would work.

I did some prototyping and found that it really doesn't need to be that big to work at all. The ideal size is wide and tall enough to hide the arm and mech behind it, and no more. Still fits over the ball, but the shot to Sparky is much easier to see, no more guessing, and if you have the captive ball (and you should, way better than the block) you can see it more clearly now.

I've played games with a prototype installed no problem, I'm pretty certain this is going to work. I'll have fun testing it, that's for sure!

#2 9 years ago

So the trick with the hammer is it needs to be hollow to hide the ball during the disappearing trick, and it has to be big enough to cover the ball with a little slop to cover wiggle of the hammer arm and the ball not centering properly. But that's it. If the ball is off just a little more it's a sphere, and the edge of the hammer striking it will shift it over just fine. I haven't even had that happen though, the magnet holds it pretty much in the same spot every time.

My experimenting found that nominal 1.5" PCV pipe was basically perfect, so that's what I used as the armature for my sculpt. I cut a section of pipe 3" tall, and drilled a 1" hole in the back to accept another piece of PCV, this with a 20mm inside diameter.

Over this I started sculpting using Apoxie Sculpt, which is a 2-part epoxy.

IMG_3308.JPGIMG_3308.JPG

My design is meant to look like wooden planks held around a wood core with iron bands, topped with steel spikes. Gotta keep it mean for Metallica.

I settled on 10 spikes going around, seemed like the right density. I printed a template to guide me in spacing them, and stuck them into the wet epoxy clay (to be removed later, leaving the indentations).

IMG_3310.JPGIMG_3310.JPG

Here's the top and bottom spiked up, with a Sparky for scale.

IMG_3314.JPGIMG_3314.JPG

I built a rough prototype before going all in, to test the sculpting idea, see how paint adhered etc. Here's the proto next to the in progress final design.

IMG_3319.JPGIMG_3319.JPG

Now the final design with initial base coating. Whole thing painted black, and then I started picking out the wood grain and details.

IMG_3320.JPGIMG_3320.JPG

#3 9 years ago

Here you can see the base coats fairly finished. I sprayed a couple coats of Krylon matte poly in between major sections to protect the finish as I worked, didn't want to rub the acrylics off as I handled it. After that I'd do another layer of detail, like a black wash, or pick out edges in a lighter color, paint in some simulated wood grain, dry brush a lighter silver over the darker, etc.

IMG_3321.JPGIMG_3321.JPG

A shot in the sun, this is before some final paint. I didn't document it again after that until install, I was basically just taking pictures randomly to show the process, not trying to do a step-by-step tutorial or anything.

IMG_3322.JPGIMG_3322.JPG

Once the paint was done I sprayed it with more matte poly and let it dry. Then I used Gorilla Glue 2-part epoxy to attach the spikes (except the top one, that one screws on since I was able to do that easily). This is the real test, will the spikes take the occasional ball strike. If that becomes an issue I'll drill out the holes and get longer screws for the spikes and mount them threaded from the inside. I don't think I'll have to do that though.

Here's a close up installed. I used a shorter bolt to attach it since it's narrower.

IMG_3325.JPGIMG_3325.JPG
And a couple shots of it from further away so you can see the whole game.
IMG_3323.JPGIMG_3323.JPG
IMG_3324.JPGIMG_3324.JPG

#5 9 years ago
Quoted from GAP:

come on what is taking so long!!!!

Working on it!

#8 9 years ago
Quoted from kpull:

Love it so far. You do some awesome work Aurich!
Keith

Thanks, got the rest of the pics up.

Let me know if anyone has questions or anything. Was a fun little project. For the record it's not the Metallica project I've teased before, just a distraction I got sucked into like the shooter rod. Can't seem to help messing with this game, I've got more schemes!

The epoxy on the spikes should be dry enough now, but I'm gonna let it sit for at least a few more hours before really testing that.

#13 9 years ago

Didn't think to take a pic with the old one for scale. Makes it clearer I think.

image.jpgimage.jpg

#15 9 years ago
Quoted from Rob_G:

The ball may knock the lower back spikes off the hammer.

Yeah, that's the test, have to see if that's an issue. If so I'll just remove the back 3 or so, you really can't see them from the player perspective anyway. But I'll work about that after it's proven to be an issue, figured might as well go all out first.

I wouldn't put something like this on location, but for a home game I'm not worried. I took the ugly clear plastic off between the snake and the hammer too, I don't think I need it. See if that's true!

#23 9 years ago

Thanks guys. I had fun with this one, and I really like how the game shoots better now. Have to see how the final one holds up.

I honestly wasn't planning on making more, they're pretty time intensive since they're made from scratch, and not from a mold or something. I'd probably have to charge more than people wanted to pay to make it make any kind of sense.

#24 9 years ago

I dunno how serious people in this thread are about wanting one, but I've gotten PMs from people who do. I'll figure out what it would take and let people know the price, and if it's too expensive then no worries. I wasn't planning on selling these, it was just a personal project. I just have to be careful of my time, I don't have enough of it.

I made a little list to keep track of interest in case it works out.

In the meantime I'm going to do some extensive play testing!

#33 9 years ago

Okay, I'm not happy with the strength of the epoxy for the spikes, just not secure enough.

I'm going to re-engineer it to be even stronger. This may end up being prototype 2, if I can improve the design. Need to research some parts.

I was thinking too, I may add to the paint. The hammer might be interesting with some graphic line art on it (maybe a stylized letter M, or could letter out Hammer of Justice, have to think about it), make it feel like it matches the feel of my shooter rod more:

metallica-shooter.jpgmetallica-shooter.jpg

So if I'm rethinking the engineering and design I'll try and figure out if I could realistically do a small run of them for people who were interested.

If I like the way a graphic on the hammer works then maybe I'll do a custom painted one for each hammer I make, then no two will be the same. This would have to be some LE shit man, because I just don't have enough free time to do more than a limited run.

Anyone who's expressed interest just PM me, if you mentioned it in this thread I noted you already though. I'll just warn you, even though it will go a lot faster when I know what I'm doing and not having to experiment as I go, I spent time over 3 days making this, including letting things harden overnight before doing more sculpting the next day.

I just can't see being able to make these for under $200. So if that seems too expensive I'll totally understand. It needs to be more solidly engineered first.

I'll start working on that, I really like the way it plays, I want it working. It feels awesome to see more of the playfield, IMHO it's not just a cool visual mod, but one that actually improves the gameplay. Especially if you've swapped your block for the captive ball.

#47 9 years ago
Quoted from Hdmike444:

This looks amazing! I would love one, and agree the hammer is a little to big. How about instead of spikes all around old looking metal rivets or cut nails.

The nails might be too much, wouldn't want anything too jagged, but metal rivets could definitely work as an option. Still give it that "weighty" look without being so in your face like the spikes.

Someone has already asked me if I could built a no-spikes version if I do these, and I said that would be no problem. Since they're all hand built wouldn't be a big deal to work out some options I guess.

I'll keep it in mind while I work on tweaking the design.

#48 9 years ago
Quoted from pascal-pinball:

that new hammer looks nice, but it has nothing to do with Metallica.
the Original hammer come's from the "and justice for all" artwork

Yup, well aware of the history, I'm from San Francisco, been listening to Metallica since before that shirt existed. To me the Dirty Donny art has nothing to do with Metallica, I would have loved it so much if they'd had Pushead do the pin. So I really don't feel bad changing it.

Honestly as much fun as it is to make up little mods like this and customize the look of my game, this is actually a functional mod first, and visual second. I really like how my LE plays better now with the smaller hammer profile, it opens up the sight lanes to the shots.

#50 9 years ago
Quoted from 85vett:

Looks great. You should contact mezel mods to see if the can 3D print it for you. Save a lot of molding time.

Heh, I've already talked to Tim.

I think what I would do is make a limited run of hand made ones, no two alike. And then let Tim work up a 3D printed version he could offer as a "mass produced" one that would be more affordable and he could keep it at an in stock item for any time.

So basically the Stern LE model I guess, but instead of being an artificial thing it would be because I truly can only make a limited run.

Honestly if everyone who's on my list actually wants to stay in I'm already approaching my limit.

#53 9 years ago
Quoted from IdahoRealtor:

I think thin metal straps going around the top & bottom of the hammer would look much better than the molded clay ones. Something weathered and unpolished would look tough, or polished brass if you want the gavel look.

Yeah, I'm going to explore options there. Now that I'm thinking of this as prototype 2 and rethinking some parts I see things that are bugging me and could be improved. I want to fasten the spikes on mechanically instead of with glue, so a metal strip is one option to use as a mounting surface. Have to see how they feel, they need to be thin to be workable.

#55 9 years ago
Quoted from hollywood:

Please let me on that list

Can you PM me so I don't forget? Visiting family for Christmas and don't have my Excel sheet here.

#58 9 years ago
Quoted from hollywood:

Please let me on that list

Nevermind, no need to PM, I'm home and remembered to add you.

#59 9 years ago

I spent the weekend working on re-engineering this. Did some 3D modeling and some materials prototyping work after a trip to the hardware store. I think what I'm doing will improve the feel, make it stronger and more unique, and be doable as a small limited edition run of handmade ones.

I don't have anything I'm ready to show yet, but I'll keep this thread updated as I go.

Next step is to research getting some parts cut on a water jet I think.

#61 9 years ago
Quoted from Concretehardt:

Aurich can you add me to the hammer list as well please.

Sure thing. If everyone on my list actually wants one then I'm just about tapped out on how many I can make I think. I'll try and accommodate everyone who gets on it though, and I'm sure some people will drop out, so not worried.

#66 9 years ago
Quoted from algrande:

I am also interested in one as well......Thanks

Got it. I'll try and make yours just a tiny bit more special than pingod's.

Quoted from Frax:

Damn. I was hoping what you were working on was gonna be something that would fit pros too. Oh well.

The other things I'm messing with will work on all games!

Quoted from PinCrush:

This hammer business is distracting you from the other MET project you've mentioned in the past. I'm waiting anxiously to see what you're going to do with that one as that area is kinda blah right now!

Heh. I'm still working on the other parts, don't worry. The electronic design is moving along (getting an assist from wolfmarsh on making PCBs thanks man!). Still doing prototyping and figuring out all the parts.

The truth is I'm taking a little break from the art because I just ordered a new toy. Getting a Wacom Cintiq tomorrow, and I'm really looking forward to using it to draw for this. So I've kind of stopped doing much until I have it set up, because I know I'll just want to redo anything with it.

I'm anxious to have something show, definitely not dropping this one. This hammer thing is going to be a limited run, I just can't keep up hand building a bunch of them. I will keep exploring ways to make a mass produced version though.

#68 9 years ago
Quoted from PinCrush:

Had to Google that one... although I know next to nothing about such things, it LOOKS really cool. Can't wait to see what you do with it! Have fun.

It's old hat to people like Rarehero, but I've never used one. So we'll see what the learning curve is like. Being able to draw directly to digital, with all the controls that a pressure sensitive input device gives you, just seems like too much fun. Probably should have done this years ago, I've always avoided tablets for some reason.

I'm good with a mouse, been using Photoshop for decades, but for straight up drawing there's just no comparison, mouse doesn't cut it. Even without the pressure sensitivity, though that's a big deal for really good stroke nuance.

I was drawing with ink on paper and scanning it in for this, but it's just too cumbersome, that's what pushed me over the edge to just spend the money.

#71 9 years ago
Quoted from T-800:

Funny, my Cintiq 24HD just showed up a couple days ago... Haven't had a chance to fire it up yet, but I can't wait - it's amazing what you can get done with just a mouse, but I really felt like it was time to upgrade - especially with the holiday price drop.

Sweet. The 24 felt too big, I'm going to pair this with a 27" retina iMac, both on articulating arms. So I'll have a large super high rez screen to work on, I just needed the Cintiq to be big enough to not restrict my drawing while I have palettes and tools open. Will double as a handy low rez (1080p) monitor for the iMac too, which is nice for doing things like 300x250 banner ads etc. That stuff looks pretty crap on the retina screen.

I was going to get it tomorrow, but UPS just dropped it off. Sadly the DVI to Display Port adapter I need to actually plug it in is still out for delivery. So can't play with it until later. You enjoying it?

Quoted from T-800:

This mod looks sweet. My biggest beef with the MET:LE is trying to shoot anything near that gavel. IMO it's the one reason I'd stick with the pro model. I bet if you could make a cool mounting bracket for that, you'd get a lot of pro owners looking at getting one just to install it just as a cosmetic upgrade.

Yeah, it's really a functional mod for me, I really like shooting with it more open, improves the game a lot. Obviously I want it to look cool, but it's not just bling. I am working on blinging out the final production version more though.

I was talking with some friends of mine who might help me work out a mass produced version that doesn't involve 3D printing, I'm not convinced the quality is there for that, and they mentioned making a bracket for the Pro too. Certainly something we can look into after I get the initial hand made batch done and we see what kind of interest there is.

Quoted from T-800:

Can you (or someone else) enlighten me on the other LE mode features that are so superior in the LE as compared to the pro? I haven't played the LE enough to see it for myself...

The biggest difference for me is the interactive lighting. Both the color changing inserts and the "color changing" GI. Which is red, blue and white, and each zone can be controlled separately. So for instance when you have one shot left to make cross multiball the GI shifts towards blue. Or during Fade to Black crank it up the whole game slowly fades to just blue light, getting darker as you play into the mode.

Obviously the spinners, those are fun to shoot.

And the snake jaw can close, not only eating a ball inside, but becoming a switch. So you can hit the closed snake jaw to trigger it to open. Fun to shoot, but also gives you a visual indication of where the snake status is.

#74 9 years ago
Quoted from hollywood:

Thanks a lot man! I appreciate it!

My pleasure. I didn't intend for this project to turn into anything other than a one-off personal thing, but I'm enjoying figuring out how I can make a limited run. I wouldn't have explored things like have custom metal cut on a water jet for just one, but when you have multiple ones to do it starts becoming more practical.

I have a lead on a water jet place, gonna check that out shortly.

13
#75 9 years ago

Got my Cintiq. Going to take some practice to get used to drawing on it, but I'm already loving it. Being able to sketch straight to the screen is awesome.

Sparky-Sketch-1.jpgSparky-Sketch-1.jpg

#76 9 years ago

So I tried to order a 3D print for a test of a hammer armature design from makexyz.com, what a weird site. They took my order, and then 48 hours later told me they weren't going to do it, and they wouldn't take my money. Uh, okay, thanks, but I wanted the print. I guess they farm it out to people and no one wanted to print it?

Never trying to use them again, that's for sure!

#82 9 years ago
Quoted from Tmezel:

You betcha! We have the capacity to print it, today!

Hey Tim be happy to talk to you more about it, you didn't answer my last PM about the best email address to use. Get back to me, I've already started my own 3D sculpting!

I'm not sure 3D printing is the right answer for a "mass produced" version, I think casting is the only way I'll get something I'll be happy enough with the surface detailing, talking to some people about that already. I'm picky about things my name is attached to. But my plan is to 3D print armatures to sculpt over, and I'll need someone who can handle doing enough to cover this list that keeps growing.

I'm already at more than I had planned on making, but we'll see if everyone still wants to stay in when I PM the details.

Quoted from Menator:

Could you please add me to your hammer list if space still available.

Added. I'll commit to doing enough for everyone who's on the list, but then I'm gonna say that's it for these hand made ones.

#83 9 years ago
Quoted from Jdfitzy-in-Aus:

@Aurich, you are one super talented sumbitch (totally meant as a compliment), if you find a way to mass produce a version of this I'm sure you'd sell heaps.
That hammer looks absolutely magic.
Will be following this to see what eventuates.
Cheers Fitzy

Hey thanks. Except for breaking off one of the spikes (why I'm re-engineering it to not glue them on) I'm really enjoying playing with it. The size just feels much better on the game to me. I'll definitely try and work on a mass produced version that will be cheaper, with less features. The custom ones first though.

#86 9 years ago

Perfect, emailed you a .stl to take a look at, thanks man.

#87 9 years ago
Quoted from rotordave:

Oh, sell me your SS as well, my mate is asking about it again.

I just can't seem to let go of it! I think it's gonna take something else coming along that I want badly enough to sell it to fund.

#89 9 years ago
Quoted from Pinballer73:

If it's not too late, please add me to the list of people interested.

Done. My list is officially too long! All good, see if everyone actually wants it once I announce a price. Still working on that, I don't actually know my costs yet. Have to see what the 3D printing and water jet cutting costs me before I'll really be able to calculate that, and I need a sample 3D print to verify my water jet measurements before I can order that.

Made progress on that today though. Also, for the people saying "stop getting distracted!" I spent the rest of the day working on my other Metallica mod, getting closer to a fully functional prototype actually installed in my machine. So I'm multi-tasking, don't worry.

#92 9 years ago
Quoted from Law:

Hey Aurich, just wondering- have you considered using off-the-shelf plumbers tape/perforated metallic strip instead of the custom cut steel strip? You won't have as much freedom with the hole placement or strapping width, but for the second run of "not one-off" hammers it would probably be much cheaper.

Well for the mass produced ones I think the only way it makes sense would be to mold the spikes in as one piece, and then just paint things.

So the way I see it (subject to change as I work things out) is this:

LE - Limited to a single run, each one hand sculpted and painted, with real metal strips and spikes. I'll sign and number the backs or something.

Standard - If we can make a mold work we'd cast them as single pieces, spikes and all, and paint them. Still be cool, just not as blinged out and personalized.

I honestly don't know if the standard version will work. I'm willing to try for sure, and I just wanted to be up front about such a thing possibly existing so no one would feel tricked for buying the more expensive version. I've got friends with experience willing to help me try and make it work, because casting isn't something I have any skills with.

#96 9 years ago
Quoted from fosaisu:

And the next logical move of course will be to take your new-found casting experience and make some sweet new grips for The Shadow pistol! (Sorry, can never resist an opportunity to bring this up).

Hey that's not a bad idea!

#98 9 years ago
Quoted from Jeff_PHX_AZ:

I want one, but is Tim gonna do these?
I like your work, but your list is already long enough. Is this a forsure thing as far as final looks, etc.?
I had PR paint my hammer thinking it would be cool, well not so much, its alright but like what you came up with. You said $200, a bit steep right now for me, but when will they be mass produced by Tim at Mezelmods? Thanks Aurich

I don't think I'm going to use 3D printing for final ones, the quality just isn't there for me. Fine for prototyping or a framework to sculpt on top of (I am looking at that) but not a finished surface. If I did mass produce them the only real way to do it would be casting I think.

Once I have a final design made I'll give one to some friends to see if they can make a cast work. If that doesn't work out there probably won't be a mass produced one. So I'm just telling people that it might happen, but no promises.

#101 9 years ago
Quoted from vid1900:

It really looks cool, I hope you can get these made.

Thanks. My friends who know more about that end of things seemed confident. We'd probably have to cast it solid and then route out the inside, short of injection molding I can't see another way. So would take a little material to do.

My plan is to build one extra one, unpainted but otherwise assembled, and send it to them to try and cast.

I just can't say for sure it will work. So no promises, but I will try for sure. My actual hand built list is getting long, so I won't actually be upset if some people drop out when I contact them with the price.

But anyone who's on it and wants to stay I'll commit to doing yours.

#104 9 years ago

I'm still actively working on this project. I have a 3D printed prototype armature to sculpt on top of, and I think it's going to work great to ensure that I have consistent quality for a hand made batch.

I still need to get the water jet quote for cutting the steel, that's next on my list, and then I'll know what my costs will be for the project, and I can calculate the final tally for people on the list so they can decide if they're in or not.

Stay tuned.

Quoted from PinDescabarian:

would you sell one not painted?

If I figure out a mass produced version then getting one not painted is probably easy enough. For my limited edition I'll be painting, signing, and numbering them all and wouldn't sell an unpainted one.

#105 9 years ago

3D proto. Will have hand sculpted wood, water jet cut steel bands for the top and bottom, and metal spikes. You won't see any of the plastic, but it will be black.

The mass produced one if it works won't have any metal.

image.jpgimage.jpg

#108 9 years ago
Quoted from Mudflaps:

This hammer thingy is very interesting, but let's see a teaser of your other Metallica thingy!

Heh. I actually decided last night to scrap the art I've done for it and start over. This is why I don't show work in progress! But I did that because I had an idea that would make it even better.

I kinda expected this to happen, I just got a Wacom Cintiq, and it's so much more fun to use, makes me want to do all the art with it. My friend is working on the electronics still, I'll have to tell him I just complicated his job slightly with my new idea.

So here's your teaser, was sketching notes for the new art last night:

Metease.jpgMetease.jpg

#111 9 years ago
Quoted from Wolfmarsh:

If you need any 3D printing help or prototypes, feel free to hit me up as well.

Thanks man! But I'll be taking advantage of your offer to help with the PCBs, you're being super helpful already for this project.

We're just rethinking some things on them, why I haven't gotten back to you with a schematic yet.

#112 9 years ago

Just a quick update, some people wanted to know how this is coming. I'm still actively working on it, just hasn't been much to share, it's in the more slow "boring" dev phase.

I'm working with Scott Danesi (No Trash Cougar) on building 3D printed armatures for the sculpt. (Thanks to Tim Mezel for assisting too.) Just to emphasize this, the 3D printed part is just the "skeleton" for the 2 part epoxy clay and metal to go over, you won't actually see it. Just replaces the PVC pipe in my first model with something more consistent so that I can make these in a big batch. More expensive this way, but will save a ton of time, and that's the only way I can get all of these done.

Scott is awesome, super helpful, and really knows his 3D printing. I'd use him again for this kind of thing in a hearbeat, super responsive and a problem solver. Hit him up if you need something printed! Prototypes 2 and 3 are in the mail to me, might come today, we're just working on getting the fit perfect and cleaning up some edges and details. It's the base for everything, needs to be solid.

First one was good, just a little loose, and some holes weren't quite right. We'll nail that.

Once that's finalized I can take measurements off the final model for the water-jet-cut steel. I have that prototyped out right now in paper and steel, but it needs to be really precise to line up with 9 holes around a curved shape, so I don't want to have the steel cut until I know for sure everything is locked in.

I have a contact for water jet cutting I'll get a quote from once that's ready, if anyone has a hookup let me know though.

Once I have that quote I'll know the final costs and I'll PM everyone on the list with the price and details. Then people can decide if they're really all in or not.

All I can share for the moment, but feel free to ask questions.

#116 9 years ago
Quoted from Wolfmarsh:

Hahaha. I'll help in any way I can, time allowing.
And no worries Aurich, I've got plenty to keep me busy. Whenever you guys are ready, just reach back out to me.

Cool, thanks. I have several reasons for not showing things in progress, but definitely part of them is that shit just takes a while. You can see in this hammer thread, it's already 3 weeks old, and I don't have much to show since the first post. And yet I've put a bunch of time into it.

Delays happen. Or, like in this one, I come up with a better idea half way through it and just scrap hours and hours of art to start clean.

I know some people dig being in on the process, and following a project for a year etc. I prefer to just do it until it's done and then do a reveal. It's the Stern model vs the boutique one I guess.

#117 9 years ago
Quoted from Caucasian2Step:

For some reason, this hammer makes me think of GWAR.

gwar-b-q-21.jpggwar-b-q-21.jpg

#122 9 years ago
Quoted from dgposter:

Yeah, just don't go all JPOP on us Aurich!

Hahah, never. I'm not afraid to scrap something and start over to make it better, but I like actually finishing projects.

Got the new 3D prints yesterday, didn't have time to test fit them, will do today, and then I'll know how I'm looking as far as being on track.

#123 9 years ago
Quoted from cscmtp:

Dumb question but since I've never seen MET in person, I assume this mod is only for prem/LE right?

Yeah, Pro doesn't have the hammer. The other project I'm doing will work on all MET machines though.

#124 9 years ago

Got the latest prototypes from Scott. Discovered some little issues we're going to fix, and I think the next ones he sends should be final.

The spikes are attached with screws now, so they have a mechanical bond instead of glue. Ball strikes or vibration won't be a problem now. They'll get a dose of red Loctite during the install too to be safe though.

image1.JPGimage1.JPG

#126 9 years ago

I am officially closing the list for the hand made hammers. I've hit the max point I can handle.

I will contact everyone on it once I have a final price and details, I'm actively working that out still. The bands where the spikes go around are still in flux (have some thoughts about them, metal might not be the way I go, still investigating), once I solve that I should know my material costs, and roughly how much work each one will be etc.

If anyone drops out because it's too expensive, or they don't like the final design, or just changed their mind or sold their machine etc then I'm willing to give their spot to someone else, but until then I'll keep it to who's signed up already.

I'm still planning on trying to figure out a mass produced version, but it's too early to say if it will happen or not. At the very least I won't investigate it further until the hand made ones are done, since I'd use one of those as the master for any potential casting.

#128 9 years ago
Quoted from Jdfitzy-in-Aus:

Sure looks purrdy
See what I did there?

cat-remotes.jpgcat-remotes.jpg

#130 9 years ago

I just sent everyone on my pre-order list a PM. The final(ish) details of the project are in it, and a price, and how to sign up for a Google form with your name and email if you're still in.

I've hard capped this project at 30, I won't make any more than that ever. If anyone drops out I'm happy to let you take their spot, but that's the only way I'll add any more people.

I was talking with some friends at Arcade Expo about how we might be able to do resin casts for a mass produced one, they thought it was possible. See how that goes after I finish the hand made ones.

#135 9 years ago

I've have a few drop outs, but also more people asking to be in, so anyone who was wait listed is covered.

As of now I have one free slot. This ended up being a little more pricey than planned, so I won't be surprised if I get some more free (and not offended at all to be clear!).

I'm going to just paste some details from PM I sent everyone here, if anyone is interested after reading it and seeing the price feel free to PM me and see if I have a free slot or not.

---

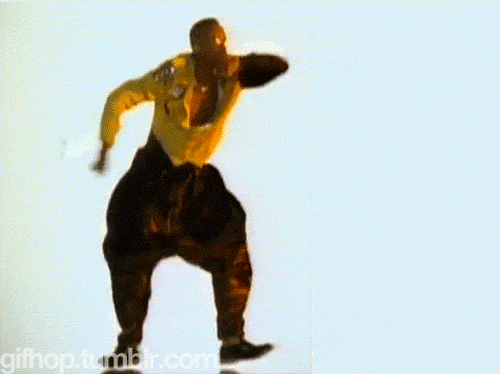
Each hammer is going to be hand sculpted with a rock hard 2-part epoxy clay and hand painted, no two the same, over a custom 3D printed armature printed on a high end printer by Scott Danesi (No Trash Cougar). You might know him from his work for Dutch Pinball, he knows his shit, we've gone through 5 prototypes (so far!) to get things right. It will replace your stock hammer with the existing hardware, you'll only need a screwdriver and probably a pair of pliers to hold the nut while you turn the screw. I'll include full instructions with the package.

The top and bottom of the hammer will be wrapped in custom cut leather, that I will hand dye. I used to make watch straps as a hobby, and have all my leather tools and dyes still, I'll work up an interesting patina. The leather will be studded with 18 metal spikes, made with an alloy that's non-reactive to magnets, and fastened with loctited screws to ensure that they can stand up to the rigors of the game.

Each one will be signed and numbered on the back, out of sight of normal gameplay. I will never make these again for people after this run, it's a limited edition product. I was going to cap the number at 20, but I promised people in the thread that I'd honor everyone who asked in the beginning, and I ended up with 30. I really can't handle making more than that, it's going to be a big project, so that's a total hard cap, no more than 30 made.

These are going be a lot of work to do, and they're going to take a lot of time. As such I've decided that I'm going to have to charge more than I originally expected before I realized how much I was biting off. What can I say, I don't like half assing things, it's my nature to go overboard.

These are going to be $300, shipped worldwide.

I realize that's pricey for a mod, and will feel no offense if anyone wants to drop out. I do still plan on trying to make a mass produced version that's cheaper, without the custom stuff, no metal or leather etc. I can't promise it will happen, but I'll do my best. I won't spend any real time worrying about it until after the limited ones are done.

---

#136 9 years ago

I've had a couple people ask me if this mod will be compatible with what Pinball Refinery and Mezel offer for adding LEDs inside the hammer. Good question!

The inside of the hammer is totally hollow, more space inside it than the stock one actually, so that's not a problem at all.

Where it gets tricky is running the wires out where the sleeve fits over the shaft. I designed in just a little play there, better to be slightly loose as you slide it on than too tight and not fit (will be secured with a screw of course). But we're talking fractions of a mm. So the wires won't fit in there too, there's no "give" in the plastic like the softer, hollow Stern hammer.

To solve that Scott and I are looking at running a channel on the bottom of the sleeve that will fit the wires. So the plan is to have my hammer be compatible will existing LED mods if that's your thing. I haven't seen one in person myself yet, but I have the parts to rig one up I guess if I wanted to test it.

#137 9 years ago

Since I can't attach images to PMs I'm putting this scribble I doodled for Scott in the thread so I can refer people to it, easier that trying to explain the post above if you can't visualize what I'm talking about.

Here's how the wires for an LED inside the hammer would be routed if you have the mod, or think you might want to add it later. You can do it yourself pretty simply with an LED strip, just buy it pre-wired from Comet even, or if you want really simple Mezel Mods has a kit with instructions.

My understanding is that the Refinery one just runs the wires out the bottom of the hammer. This will be better than that, no chance of the wires getting crushed between the ball and the hammer.

I can't recommend it because I've never tried it, but if you have it installed feel free to chime in with your thoughts on it.

wire-channel.jpgwire-channel.jpg

#139 9 years ago
Quoted from swinks:

nice work, could the handle be design with the circle and channel on the inside but on the outside a nice flowing oval sort of shape to give it a cleaner look ??? just an idea.

Oh that's just a rough sketch, it won't be that big. The wires are about 1.5mm thick, I exaggerated to make sure it was clear.

But that's also just the 3D printed part, you won't actually see any of the plastic from that, it's all being covered. It's just the armature or skeleton of the mod. So the channel will be totally hidden.

#143 9 years ago
Quoted from dgposter:

Here's the Refinery mod...

Hard to tell from that pic, but did you have to drill a hole in the back of your hammer to route the wire?

Anyways, all that kind of stuff will be unnecessary with this. Here's a look at the sleeve that slides over the shaft with the wire routing slot Scott and I designed:

Note the bottom where you can see a little channel.Note the bottom where you can see a little channel.

Put your LEDs inside the hammer wherever you please, totally hollow, and then run the wires out the sleeve. Unlike the stock hammer you don't have to try and poke alligator clips or bare wires through a tiny hole, it's super easy to just run them out the opening since it's all open inside. The wires will rest in the channel when you slide it on so they can freely run back along the shaft to be connected to the game.

#144 9 years ago

Also – I'm waiting to hear from 6 people still, and it looks like I'll have at least 4 slots open on this. I'm going to just go ahead and make the full edition of 30, so the extras will be available if people gain interest, first come first served.

#147 9 years ago
Quoted from Roostking:

Right on, Ive got #199 and my buddy has #200, Im trying recruit him, but he's all "I want to keep it stock" Blah blah. He will regret it!!!!

Heh. I can respect keeping games stock. I like my games customized, so long as it's tasteful. It's part of the hobby I enjoy. When he realizes how much more fun it is to shoot with a smaller hammer he'll be sad though.

Quoted from dgposter:

This came pre-installed on my Refinery edition, so I'm not sure how Gio installed it. I'm pretty sure he must have had to drill the hole though.

Ah, gotcha. Yeah, definitely looks like a drilled hole. No big deal, you don't even see it. But this will be a cleaner solution. If I was installing it I'd probably use a couple black zip ties to secure the wires along the shaft of the hammer too. Keep it tight and tidy.

I have some LED strips lying around, I can experiment with how it will look when I get a chance. Been a crazy week, my wife just had emergency gall bladder removal surgery, so I've been in and out of the hospital. She's fine and home now, so I can probably settle back in soon.

#148 9 years ago

A little update. I still have 5 slots open for this. I haven't heard from 2 people, they may or may not be in, I'll send them a note later to check. I'm just gonna build them all, and whenever someone wants the last ones I'll have them.

Getting back on track after a crazy last week, hospitals etc. Scott has been working on the 3D prints in the meantime (the guy is so nice to work with, highly recommended if you need prototyping done) and I should get the first batch by the end of the week. I'll start sculpting on them shortly afterwards.

I just ordered a side of pigskin, once it arrives and I can check it for exact dimensions and any blemishes etc I'll lay out the cut file. I'm thinking that instead of die cutting the leather I'll have it laser cut, so going to try and experiment with burning some designs into the leather with the laser. Going to talk to my friend who's helping out, see what he thinks with the thin leather. If you know leather this is 1-2oz, so under a mm thick.

I've got all the spikes in stock now, and have been experimenting with some of the prototype 3D prints and some scrap leather I have lying around. Here's a couple pics just to give you an idea of my thought process, nothing finished, just feeling through what works. I burned some quickie lines into the leather with a soldering iron just to see how they would hold up under a couple layers of leather dye. I think the idea will work, subtle but nice touch.

Spikes for days!Spikes for days!

Experimenting with the leather, nothing final.Experimenting with the leather, nothing final.

#152 9 years ago
Quoted from MapleSyrup:

Holy crap Aurich. You are making something so ridiculously fantastic here. I can't wait.

Thanks man.

I've never tried doing a true "LE" before, it's not normally in my nature to try and artificially limit something. But this is just too much work to try and keep running as an ongoing project like I do with my translites. I'm really enjoying the process though. I hope to reveal a couple more tricks for it still.

That's actually the other thing I don't do normally, I prefer to announce something when it's done, I don't really do "in progress" reveals. Sort of fun for a change. I'll keep the communication alive, nothing worse than being in on a pinball project and then the creator goes radio silent, I think we can all agree on that!

I'm down to the last two slots, and then I'm closing it down for good, short of someone on the list dropping out for some reason.

#155 9 years ago

Got the leather. Using pigskin for this, need something thin enough to work on a small scale and let the spikes screw in.

Just broke down the side into paper sized sheets for the laser cutting. This lets me choose the best spots from the leather, avoid any big holes and scuffs. These pieces will be tacked down for the laser bed and I'll provide DXF cut files and a PSD for the raster etching. The way I'm laying it out will create extras so even with picking the spots I can still weed out any pieces that are too blemished to look good.

I'll send these off today for the laser cutting. Should get the first batch of 3D printed frames today or tomorrow too. So progress should start cooking in these soon.

The pigskin sideThe pigskin side

Breaking it down into sheetsBreaking it down into sheets

#157 9 years ago

I have one free slot for this left by the way. And one where I still haven't heard back from the person, and if someone wants it for sure I'll give it away, I can't just hold it forever without some kind of response. So not sure about that one.

#159 9 years ago

My 7 year old is home sick from school, so I paid her a buck to sort the screws and spikes into two bowls. Make it faster to assemble now. She was stoked to earn a dollar!

image.jpgimage.jpg

#162 9 years ago

Wait until she gets my 1099 and has to give up a couple dimes!

#165 9 years ago

Just filled the last hammer slot. Short of someone dropping out when the money is due this project is all sold out.

I'll continue to update here though. I don't believe in starting a project in the forum and then taking it private. I'll do some updates over email too though probably.

Heading to post office now to send off the leather to my friend with the laser.

#167 9 years ago
Quoted from kpull:

Bad ass Aurich.
Does pigskin smell like bacon when cut with a laser?
Keith

Hmm, excellent question.

Might have to take a piece of scrap and hit it with my soldering iron to see if I get hungry!

#168 9 years ago

If you're on the list check your email you signed up with, sneak peek on progress.

I'll post some details here later.

#169 9 years ago

First 15 hammers sculpted.

Initial laser tests on leather performed, making adjustments based on that. Progress rolling along. image.jpgimage.jpg

#171 9 years ago
Quoted from Mando:

Darn I missed this thread can i be in the super backup list !

Sure, if someone drops out you're first in line.

#173 9 years ago
Quoted from Mando:

I would probably be interested in a 3d printed Version as well that's less expensive . Still need to put the cative ball in place of the block I assume that's a piece of cake .

Captive ball install is no big deal. I did end up taking my stock hammer off to make it easier though. Probably what pushed me to really do this project.

I'm not really focusing too much on the mass market version right now, but I was talking with someone yesterday about it. We're still looking at casting it, 3D printing just isn't high enough quality for a finished piece.

#178 9 years ago

Got the rest of the hammer frames in. I'll start sculpting them this week.

Leather samples are on their way to me. Laser etched but die cut. Laser cutting didn't work so well, leather was too thick even at 2oz. Won't affect anything in the design for the most part, I may give the edges a treatment since they won't be fused by being burnt through. We'll see.

I orderd some black nylon screws today. I'm hoping they work with the spikes, would be a cleaner way to do it. Have to see, I think they're threaded for #4-48 which is a fine thread and harder to find. I'll still use red Loctite.

image.jpgimage.jpg

#181 9 years ago
Quoted from Razorbak86:

Just out of curiosity, why red Loctite? Red requires heat for disassembly. Not sure why you'd want to disassemble, but if you did, you'd probably destroy it. I would've thought blue would be ideal, since it is medium strength and doesn't require heat for disassembly.

There isn't a whole lot of threading in active contact on these, so I'm looking for maximum hold against an airball strike or the like. Remember my original design had the spikes epoxied to the sculpt, this is not designed to be taken apart. The screws are simply for mechanical support, not user disassembly.

I don't know if there's honestly going to be a quantitative difference between blue and red on this, but I'm going for max strength on principle.

#182 9 years ago
Quoted from S37VEN:

I'm no leather expert, but would a possible treatment to "seal" the edges involve stitching even if the leather isn't a 2 ply? Just throwing it out there...

Yeah, that won't actually do anything, that's just a mechanical hold for the 2 ply. Leather doesn't unravel, so the edge sealing is just about aesthetics for the most part. I don't even know that I'll do it yet, I have to see how it all looks as I put together a final piece. But I have a leather edge seal that I used for my watch strap designs, it's black and coats the edge to smooth and seal it out. Might try that.

If you look at that strap it has raw leather edges, and they're just fine. Beauty of leather, it's a great wearing material, and any minor damage it takes tend to add to the beauty.

This is thin leather, you won't even see much of an edge, it's really about the surface.

#183 9 years ago

3/4ths of the hammers are sculpted now, doing them in batches, you can only sculpt so many at a time within the window of the two part epoxy hardening. Primer will be next.

In the meantime I should have leather samples tomorrow hopefully for real world fit testing and so I can adjust the etching after seeing it in person.

The nylon screws are going to work awesome. Tested with blue Loctite and worked great, but I picked up some red anyways. Really want these to hold up to any ball strikes. Between the Loctite, the cushioning of the leather, and the flex the nylon screws will have I'm confident these will be very strong.

Also the exposed screw heads inside are black and made of relatively soft nylon, so if you manage to hit a ball with one somehow or something there's no issue.

1 week later
#184 9 years ago

All hammers are sculpted. The handles are double wound with waxed nylon cord, and they're all primed with black automotive primer. I'll start on paint this week.

image.jpgimage.jpg

image-115.jpgimage-115.jpg

image-199.jpgimage-199.jpg

image-644.jpgimage-644.jpg

image-569.jpgimage-569.jpg
#187 9 years ago
Quoted from fosaisu:

you should trim your nails before your next hand modeling gig!

You're getting the raw unvarnished process here, no fancy presentations on this one!

#190 9 years ago
Quoted from S37VEN:

Appreciate the updates too - it's so unpinballish of you.

I basically feel like any company that doesn't update at least semi-regularly is being extremely lame at a minimum, and possibly even shady. I work full time (you just see me on Pinside so much because I have a job where I'm in front of my computer for 10-12 hours a day with lots of up and down time and multitasking) plus whatever time I spend on my mods. As well as having two kids and a busy family life.

If I can do it anyone can, they just choose not to.

I hope to have an update on the leather stuff I put in the last email update soon too. I won't post any of those pics to Pinside until they're more final though.

#192 9 years ago

Thanks Joe, we are laser etching them, and my guy did tell me it smells pretty terrible.

#193 9 years ago

Wasn't happy with the primer, so doing more coats with a better covering Rustoleum.

image.jpgimage.jpg

#194 9 years ago

Oh the reason I wasn't happy with the primer by the way was I did a test paint job on one, mounted leather (test scraps, not final) with spikes, the whole nine yards. Didn't take a pic since it wasn't final enough for me to feel like showing, but it was a solid preview before I decided the paint wasn't durable enough. I think people will be happy!

Leather etching and cutting should be happening today (thanks Keith!) so after the primer cures and I start doing real painting I should get final leather and then we'll be in business.

So I could start having final models in a week or so if things go smoothly. They'll all get a matte poly protective coat before the leather too.

Then I just have to decide if I want to open payments, and send them out first come first served as I finish them, or wait until all 30 are done and then mail them as people pay then.

Anyone have a preference?

#197 9 years ago
Quoted from Darkslide632:

Just burnish the edge of the leather, no?

That's an option, but right now I'm planning on giving them an edge coat in black. It's pretty thin leather, 2 oz, has to be to be able to run the screws for the spikes through it, so it's not a lot of edge to be able to stand up to burnishing.

#198 9 years ago
Quoted from pingod:

I'll pay now and be #1

Technically one person did pay me already, he asked if he could even though I wasn't taking payments and I said sure.

Given how people stagger their payments in it probably makes sense to do it that way. I'm going to be painting them in batches, so getting them out won't be a problem. Even if people paid up faster than normal no one would be stuck waiting more the a few days at most before shipping, this isn't some pinball pre-order nonsense.

#200 9 years ago
Quoted from Roostking:

Cool, thanks for the update!!!

Got some a production shot from the laser etching, looking great, can't wait to show that.

#203 9 years ago

Just sent an update with some in progress photos to the email list, check your email if you're on it. I'll put some more pics in this thread when I get a little further along and I'm ready to share them publicly.

But the other news for people who aren't in on the LE run is that I took some time to sculpt what will hopefully be the master model for a mass produced version. I want to see what my friend Keith thinks of it first, he has way more experience than I do with casting, make sure I don't need to change anything to help it cast right, but then I'll show it.

Definitely trying to keep my word and make a cheaper version, stay tuned for more details as we experiment a little.

The focus is getting the LEs done first though, so I doubt I'll have much more to report on that front until after they ship out.

#204 9 years ago

Just got the leather in the mail. Going to start dying them tonight if I can, getting close to having the first batch fully done.

#206 9 years ago

Here's a look at the leather tops for the hammers, with a drawing I did etched in with a laser. I'm dying the outside and leaving the skull raw. I'll use a wood burning kit to write the edition number before the /30 on each one.

image.jpgimage.jpg

#207 9 years ago
Quoted from Mitch:

Very excited wish the canadian dollar wasn't so weak right now

Well on the plus side I'm covering the international shipping out of pocket, so you're getting a little discount!

#210 9 years ago
Quoted from TheNoTrashCougar:

Aurich, these look great! Your work is very impressive.
--Scott

Wait until you see how they fit with those thinner lids you printed me, it's perfect.

#213 9 years ago
Quoted from Mitch:

I'm more then happy with everything especially your updates, shipping and customer service. It's been a great experience since the beginning and can't wait till there done. Although I haven't paid yet or had it shipped I'm 100% sure it's going to go smoothly dealing with you and will gladly buy more mods from you in the future.

I'm on a mission to prove that people doing pinball projects are capable of communicating with their customers!

Seriously, it's not that hard. Anyone who says they can't take 10-15 minutes out of their week to send an email to the people supporting them is full of it. I work full time (in front of a computer all day if my Pinside posting wasn't a clue!) I have a family, including a daughter who's been home sick all week, and I do these projects at night or in my free time. Still find time to keep people updated. And I know from the responses I get how much people appreciate it, which just motivates me to keep doing it.

Now for a really long haul project a weekly update might be overkill, but personally I feel like if you're taking people's money you owe them to keep them involved. I didn't even take pre-order funds for this project, I'd feel doubly committed to updates if I had though. If you want to be secret and work at your own pace, hey great. Don't take money from people first!

Quoted from Mitch:

Hope you look into doing that alternative congo translight someday.

I'm definitely going to explore it, but no promises on timeline or anything. I have some other things I've started that I really want to finish before starting anything new, this hammer project was a bit of a derail, didn't know it would turn into so much work when I posted this thread.

#214 9 years ago

Doing some build testing before final assembly. Making sure everything fits etc. Shot it in slow mo because why not? Be over pretty quick otherwise!

#216 9 years ago

Here are the die cut tops for the hammers, ready to go.

The straps will be dyed to match with their own laser etched design, show those soon, need to finish dying them all still.

image-476.jpgimage-476.jpgimage.jpgimage.jpg

10
#219 9 years ago

Happy to announce that this project is entering the final stage, the first 10 are done, and today I'll be cranking along on the rest of them, the other 20 are all prepped for final painting.

Once the limited edition ones are done I'll spend some energy on the mass market version if people are still interested in it.

Here are some test fit pics of the first one from last night. I'll post some better photos later.

IMG_3526.JPGIMG_3526.JPGIMG_3525.JPGIMG_3525.JPGIMG_3524.JPGIMG_3524.JPG

#225 9 years ago

The rain is really not cooperating with wanting to lay down a coat of matte poly right now!

#228 9 years ago

All 30 hammers have finished paint, I just couldn't seal them because of the rain. Tomorrow should be dry, so I'll spray the final ones. Then I can start assembly of the leather and screws. Probably the biggest PITA part of the whole process by the way ...

The majority of people are already paid up, so I'm basically going to start packing once my boxes and bubble wrap get here, should be Tuesday, I'm not far from U-Line, always next business day delivery.

#229 9 years ago

Sun's back out in SoCal, all is back to normal, so just put the first coat of matte clear on the hammers. Will let that dry a bit then a second coat and they'll be ready to cure up so I can start installing the leather and spikes.

Everything is on track for the schedule I laid out, packaging will be here tomorrow.

#230 9 years ago

Because updates without pics suck.

image-460.jpgimage-460.jpg

#232 9 years ago
Quoted from Wolfmarsh:

The stones give it that zen garden look.

It's windy out today!

#235 9 years ago
Quoted from MJW:

Paid in full. Thanks for making these.

Thanks! People are actually paying up faster than I expected (thanks everyone) so I'll probably end up packing them pretty much all up at once. Will take a little longer to start that way, but will get them all out faster overall. Might need a few days, but sending them out by the end of the week is my goal.

The ones I clearcoated today are ready for final assembly, so I'm really in spikes and leather land (sexy) for a bit more, and then ready to pack them all up.

10
#239 9 years ago
Quoted from kidchrisso:

Delays...Delays...Delays....starting to sound like a jpop thread...

I've decided to scrap all the work I've done and research an entirely new thermoplastic to 3D print the frames with. I'll be taking out several patents on the process, and while it may look just like normal plastic, be assured it's far superior in many ways. Unfortunately if you'd like to hear any details I'll require you to sign an NDA.

In the meantime I have artists working on artwork for a bowling themed hammer, a circus strongman hammer, and one that looks like the Red Queen's croquet mallet. Plans for the Ben Heck hammer have been scrapped, I heard that Charlie once listened to MC Hammer, and now that Ben is working with him I can't have that.

These delays are unfortunate, but I assure you that you'll be very pleased when you get the final product, in three years.

In the meantime everyone will get a form to pick their hammer color, your choices are electric green, electric purple, or electric pink.

#242 9 years ago

Last 20 hammers have leather, going to start spiking them tonight. Packing supplies are here.

image-494.jpgimage-494.jpgimage-778.jpgimage-778.jpg

#244 9 years ago
Quoted from Duex:

Shame that I found this thread too late, would be a perfect buddy present for his round birthday!
Great work as usual, Aurich!

I am going to try and make the cast version work too, so anyone who wants one that missed on on this will still have an opportunity for a similar idea. I'll start a new thread for that if it looks like it will happen. I've already sculpted the master model, just haven't spent any real energy on it since then since I want to get these limited ones out first.

I'm going to start packing them up today. I thought the rain might have knocked my schedule back a day, but I've made up the time.

#245 9 years ago

Boom. HAMMER TIME. I need to take care of work stuff now, but I'll start packing up tonight.

IMG_3546.JPGIMG_3546.JPGIMG_3545.JPGIMG_3545.JPGIMG_3544.JPGIMG_3544.JPG

#251 9 years ago
Quoted from pingod:

I think I see mine in that picture

Technically everyone's is in the last picture, that's all 29. The last one is already installed in my machine for testing.

#258 9 years ago
Quoted from anubis2night:

any chance to see it in a machine? (Can't recall if you posted one in the machine yet, at least one of the finished ones)

Yeah, this post: https://pinside.com/pinball/forum/topic/my-new-metallica-hammer-design/page/5#post-2263209

Quoted from cscmtp:

Aurich did I read a while back that you might try and create another version that might be available at a lower cost?

Yes, I'll post more details on that shortly.

I just packed all the boxes, I'll try and print the shipping labels tonight and get them in the mail tomorrow if I can.

#260 9 years ago

Just got back from the post office, all orders are shipped!

I have two people who asked me if they could wait a bit to pay, they're covered. One person who hasn't responded. If he doesn't get back to me in a bit or drops out his spot will go to the first person on my waiting list.

Looking forward to install pics and reports!

#263 9 years ago
Quoted from Menator:

Looking forward to receiving it, now I just need a pinball machine

Hmm, that's a minor detail! Good luck with that hunt.

#264 9 years ago
Quoted from Razorbak86:

Bravo! You are a real credit to this hobby, Aurich. Beautiful work. Nicely done.

Aww.

#266 9 years ago
Quoted from S37VEN:

Anyone here have the pinball refinery hammer light mod (red) or the mezemods hammer light mod (blue). I was wondering what people's opinions are on which one they prefer. I can't decide from the pictures -- both look great.

I have seen neither, so I cannot help you. But I can tell you that Gio from Refinery ordered one of my hammers, so you might be able to see a pic of the mod installed in it from him.

#269 9 years ago

Well in theory they should be super easy to install, I left the channel in the handle to route the wires out of. But since I don't have the mod I never did test it.

#276 9 years ago

I promise my next Metallica project, which I admittedly side-lined for this hammer, will work for all machines. Time to get back in gear on that, which I'm excited about.

I will though also get the gears moving on the "Pro" version of the Hammer of Justice now that the LE has shipped.

Here's a peek at what it will look like. This is primed black, clearcoated, and ready for taking an impression to make a mold. Once cast we'll experiment with how to paint it best, but the look will be a wood body, with iron bands, cap, and spikes.

Feature and shape wise aside from those outside details it's otherwise the same shape as the LE.

More info on that to come when we've had time to test things.

IMG_1570.JPGIMG_1570.JPGIMG_1569.JPGIMG_1569.JPG

#279 9 years ago
Quoted from Mando:

Did you ever tell us what your other project was ?

Nope! I've hinted, but it's a secret until it's ready, I'm just being a horrible tease.

#281 9 years ago
Quoted from dgposter:

Came home for lunch and the mailman was delivering my hammer. I opened it up to check it out and...WOW!!! This thing looks amazing! I knew it was going to be impressive but this has exceeded my expectations. Great job Aurich. Thanks for your hard work on this!

Sweet, I was hoping I got them to the post office in time for next day for local folks. What number did you get?

#285 9 years ago
Quoted from moto_cat:

Mail lady just left , no hammer in NorCal. Hopefully tomorrow...

You should have gotten a tracking number by email. The USPS tracking generally sucks, but usually you'll at least see if it's out for delivery. I'm hopeful that most people in major cities will get theirs tomorrow, I sent it 2 day priority, but probably Monday if not.

Quoted from dgposter:

Back at work now...but I believe it was #26. Don't tell my boss I'm checking Pinside!

Your secret is safe with me. So long as you post install pics.

#288 9 years ago
Quoted from anubis2night:

I must admit when I read about the pro version my first though was or Metallica pro versions but then I realized the pro hammer is likely the cast version of the hammer. Btw great choice for using dark resin, should look amazing with drybrushing over the high spots and metallizer over the spikes

Just to be clear, while the plan is to use a dark resin, that's not the actual cast one. That's the master hand sculpted version, primed black, and clear coated to be ready for the mold making.

So we haven't actually seen how it will cast yet.

And yes, the "pro" version is just the cast one, seemed easiest to steal the Stern nomenclature to try and explain the difference between the limited one and this other one, which if it works will just be made until there's no more demand. Be that more or less than the LE, no clue!

#290 9 years ago

Excellent, if they made it as far as Minnesota sounds like there's a good chance most US people will get theirs today.

Now I want to start seeing install pics!!

#293 9 years ago
Quoted from MJW:

Looks like Hemi used some heat glue to install the LEDs in the stock hammer. This is going to be a challenge getting it out and trying to fit in replacement hammer.

If it's hot glue then it will respond to heat. Hit it with a hair dryer, and it will soften and loosen and you can probably easily pry it back out.

Since I put the wire channel in the handle you won't have to run it out of the bottom of the hammer at least!

Also, if it wasn't clear from my instructions, that whole metal post coming out of the black handle needs to be removed. It's probably obvious, but just pointing it out in case.

#296 9 years ago

Yesss, you win the first install pic!

Glad to hear the wire channel worked, I don't have that mod, so I never actually tested it myself.

I want to hear how people like playing with it too. Personally I really like the smaller visual footprint.

Edit: Also, good call on doing the captive ball mod, I really like that so much better than the block. It's a must have IMHO.

#309 9 years ago
Quoted from moto_cat:

I'm guessing Aurich has #1 /30, who got #30 /30?

Yeah I kept #1, and kidchrisso requested #30. Whenever I could I honored people's # requests, I only had one conflict where I had to give it to the person who asked for it first.

Love the matching badge pics! My LE number is too high to have been able to match.

#310 9 years ago
Quoted from TrimPin14:

Well that was too easy, thank you again

Glad everyone is getting them installed easily.

#312 9 years ago
Quoted from Mando:

So did that guy pay yet? Do you have #13 left :p

Nope, I haven't heard from him. Hey hollywood, I've emailed and PM'd you, where you at man? I don't want to just dump you, but mandelbloom is staring at your spot hungrily ...

And it's probably not a surprise that #13 was the one that got more than one request! The owner of #13 (first to ask for it) says he even has a 13 tattoo, so I figure he's earned it.

I won't out him, but if you're reading this, let's see a pic of that ink!

#313 9 years ago

The reason I'm posting so much right now is I'm drinking 151 proof rum and procrastinating finishing sorting Star Trek decals into baggies. I love you guys, it truly makes me happy to send you my packages and get all the great feedback, it's the best. But gah, packing all this shit up ...

Also, how metal is it that I found black bubble wrap for the hammers?!

#317 9 years ago
Quoted from KeithElliott:

Aurich, final product looks awesome! It was also great you kept all the outsourcing in community.

I wouldn't want to share the scent of scorched pigskin with a perfect stranger!

Quoted from TheNoTrashCougar:

Agreed on all parts! These look so fantastic. Great work once again Aurich.

Anyone who wants to prototype something in 3D should talk to Scott.

Hell both Scott and Keith are amazing, because it's rare to find people with the same level of enthusiasm I have for getting things right. Wouldn't have wanted to do it with anyone else.

#322 9 years ago
Quoted from dug:

Drinking and Packing / shipping don't mix....Too many mistakes!

That must be why my wife is sorting through bags trying to figure out where I misplaced a decal ...

#325 9 years ago
Quoted from dug:

Ok.... good to see you are under adult supervision!

Well to be fair she's been drinking too ...

Quoted from moto_cat:

Pics don't really do it justice, it really is a nicely made piece. I can't wait to see his other MET project.

Thanks man. I never intended for this to turn into something I'd make a bunch of, was just going to be a one off personal mod, but it turned out to be a lot of fun, even if it was a lot of work. I hope everyone feels like it was worth it, and enjoys. I know I don't miss that big ass stock hammer anymore, they should have gone with something this size from the beginning IMHO.

My favorite part of doing these mods though is getting all the pics and feedback. Makes me happy to make other people happy. All the time feels worth it then. Thanks to everyone who's posted pics, obviously I've seen all your hammers already, but having them installed in a game is where they belong.

#327 9 years ago
Quoted from RyanStl:

You should post a pick int who's drinking thread.

I done drank it all already! Dark and stormy, 2 oz Goslings Dark Seal 151, squeeze of lime, Q ginger beer. I prefer Fever Tree, but I'm all out. The 151 gives it a nice kick to compliment the bite of the ginger, highly recommended if you can get it. I've heard some states don't sell it.

#329 9 years ago
Quoted from Mando:

My birthday is the 13th so I consider it a lucky number
I can wait let's give they guy a chance to chime in.

Just heard from him. He's out for personal reasons so you're in.

#331 9 years ago
Quoted from Razorbak86:

At league last night, a bunch of us were playing the host's METLE, and at least 5-6 people mentioned seeing this mod on Pinside and gushed about how awesome it was.

Well I dropped the master for the Pro hammer in the mail to Keith yesterday. We'll see what we can do about trying to make it work out. I wish I'd though to drop a pine tree air freshener in the box.

#333 9 years ago
Quoted from tilted81:

Hats off to Aurich! Amazing job! I LOVE the new smaller footprint

Nice, makes that custom Sparky that much easier to see. Is that a Dirty Donny job?

Check out that orange captive ball too!

#335 9 years ago
Quoted from kidchrisso:

Glad I didn't need the front screw, so tight the top broke right off in it. Thx for #30!

Yeah, that happened to someone else, and it reminded me that it happened to me, was so long ago I'd forgotten. I think Stern must be putting serious Loctite on that screw. I dunno why it's even there, seems unnecessary, but you definitely don't need it for my design.

#342 9 years ago
Quoted from anubis2night:

a link to the Marco parts list for the hammer (not the best picture o fit but it's the best I could find)
http://www.marcospecialties.com//images/products/511-7481-00/additional3/detail.jpg

Haha, that's funny that their diagram looks more like my hammer than theirs.

#345 9 years ago

What have people been doing with their stock hammers? Keith had a cool idea for making a display stand for them, anyone have any interest in that? Or are you just tucking them away somewhere?

I stuck mine in the cash box for now.

#352 9 years ago

Aw yeah, pic of tattoo as requested! Hopefully you get your hammer soon.

#354 9 years ago
Quoted from wizard1:

Number 9 arrived in Germany !
If you see the pics, it's awesome - but in real, boahhh !!!
Aurich, you're the best
Thanks again

Sweet! Germany can be slow to send to, your customs officials like to hold packages forever it seems like, so glad it made it through so quickly.

#358 9 years ago
Quoted from Mando:

and PS same here, did anyones screw survive? I barely even turned it and snap! Not sure what to do if for some insane reason I ever wanted to put back the old hammer I know lots of removed it to paint etc??

They must have used a crappy quality screw combined with serious Loctite.

Honestly I can't even figure out why they ran that stupid screw from the front in the first place. The handle should be more than enough. The hammer doesn't even contact anything, except maybe a little edge of the ball, and it's just going to nudge the ball over.

#360 9 years ago
Quoted from Mando:

Yea who knows, I think it keeps it from moving side to side a little since its larger and lighter than yours. Anyhow it looks awesome, and the only reason I would ever remove it is if I sold the game an wanted to let someone else have da hamma. But I don't see that happening anytime soon, love the game
this weekend a need to put in the captive ball, that one screw right up against the half circular piece of metal looks like it might be a pain to remove?

Nah, installing the captive ball isn't a big deal. Actually, I took my hammer off to do it, that's when I snapped my screw. So now that I think about it I ran the stock hammer for a while without it just fine.

It's a great upgrade, the metal block sucks, captive ball all the way.

#362 9 years ago
Quoted from Mando:

By the way somehow your hammer causes my coffin lock to work better LOL!

Not sure I can really take credit for that, but sounds good to me!

#364 9 years ago

Love seeing all the custom painted Sparkys too!

#366 9 years ago
Quoted from PinGiant:

Aurich, outstanding job. The hammer is sick. Thanks for
Making these. Glad to have gotten in just in time! #28.

Thanks man, it seems like everyone is happy with this project, and I'm really glad to hear that, was a ton of work!

I'll report back when we make some progress on the cast version. Maybe I should call it the Premium instead of the Pro so it doesn't confuse people into thinking it's for the Pro Metallicas.

#369 9 years ago
Quoted from gambit3113:

I am not pleased that I missed out on this run.

I'll try and make the other version not suck!

#372 9 years ago

The spikes are made out of some alloy (whatever was cheap and shitty I'm sure, thanks China) that is non reactive to magnets. I know this because I tested them. And the screws are nylon. So I dunno what to say there. But if it somehow is helping sounds great to me.

#375 9 years ago
Quoted from Mando:

Wait you used Chinese spikes in my hammer of justice !!! blasphemy LOL.

I bought them from Amazon, but let's be real about where they came from. Everything else was HAND CRAFTED IN THE USA. Artisanal hand crafted hammer, with only the finest laser scorched pig skin. 3D printing by Scott's funky open source printer, surely programmed by bearded men in some dark den of coding goodness!

#378 9 years ago
Quoted from MapleSyrup:

Number 5 is installed with Mezelmods LED Hammer kit too!! Amazing Mod Aurich. Very happy to have it.
image.jpg (Click image to enlarge)

Sweet, looks like all the international shipments are appearing just fine. Always makes me feel better when those show up.

How's the light look inside? I've never tried that mod.

#380 9 years ago
Quoted from rockrand:

Th only thing I did not love about the hammer was the top spike,I suspect aurich new this because it was not held with any lock tight and was easily removed and yes my lock works better than it ever has,I do believe this to be real
image.jpg (Click image to enlarge)

Yeah, I didn't Loctite the top spike. Seemed a little safer to be flexible there, and there's no real chance of a ball strike knocking it off.

I'm totally happy to hear that people's locks might be improved, but I can't take any credit, I have no clue why that would be.

#385 9 years ago
Quoted from pingod:

My hammer just left LA today
Must be using the small planes to ship mine.
Looking good in the games though

Wow, really? The postal service tracking sucks balls, so there's a chance it's just horribly wrong.

I have to say, I've shipped hundreds of packages with them all over the globe, and I really do like their service for the most part, but seriously, tracking? Just terrible. Every other service kills them on tracking.

#389 9 years ago

My best shipping story was sending a package of 3 Helen translites to Austria. Except someone needs new glasses or shouldn't be drinking on the job, because they got routed to Australia instead. Came all the way back to the US, then to Austria. Took like a month, but they did eventually arrive safely!

#391 9 years ago

You realize that man was my governor?

So yeah, pro tip kids, write "Austria, Europe" on your labels, that's the magic trick. Was told that by the person who I was sending it to after this all happened, he said it's actually pretty common!

#394 9 years ago
Quoted from Mitch:

Received mine today. Looks awsome!

Excellent! I think everyone should have them now for the most part. There are two still sitting here waiting for owners to be back from trips. Otherwise they're hopefully all in their new homes.

Quoted from MapleSyrup:

Very easy install, especially while swapping the hammer anyway. It looks great. It's wired to the coffin flashers. I would venture to say that it likely looks better in your design, as the hole diameter is smaller. Light is likely more focused?? I didn't see it in the regular hammer, but it makes sense.

Hmm. Maybe I'll mess with rigging my own some time, easy enough.

#396 9 years ago
Quoted from Mando:

Installed my captive ball today to complement your Hammer Game plays even Better now with the combo.

Way more fun right? You can bank the ball off the captive ball in way more interesting ways. I get why they tried the block, but they should have went "welp, doesn't work, stick the ball back in".

#398 9 years ago
Quoted from pingod:

Mines in Vancouver Canada now
It's coming

It's funny how I can send things to the other side of the world so fast, and Canada is right there above us and taking forever.

#402 9 years ago
Quoted from pingod:

Received mine today #10/30
Looks great,better in person for sure.
Great job Aurich

Wow, sled dog delivered too?! Glad you're enjoying it.

Does anyone have a cliffy on their magnet and the captive ball? Someone thought they were getting some bouncebacks up into the hammer, and I suspect it's the cliffy + captive ball causing air balls, I've heard of others having this problem.

Some people took the captive ball off. Personally I'd remove the cliffy, I don't think it's necessary myself.

#405 9 years ago
Quoted from dgposter:

I had the cliffy around my magnet and was getting tons of airballs off of the captive ball. I removed the cliffy and no more airballs.

I don't really see the purpose of the cliffy on the magnet myself. And if it's interfering with the game, then I'd definitely axe it.

#409 9 years ago
Quoted from Cliffy:

sorry it didn't help anyone I try hard to make only useful protection. I'm leaving it on my own game since it only airballs into the captive block and would rather keep the wood around the mag protected. But I can see others not liking the effect on gameplay. If you all do remove it please soften the adhesive with a citrus solvent. slinking out of here...

Aww, you're the best, you help so many people! I don't think that there's a need for a cliffy in that one spot personally, but without you so many games would be hurting. I have cliffys myself, just not on Metallica.

1 month later
#413 8 years ago

I sent an email to my friend who has the master version to see if he thinks he'll have a chance to look into casting them still or not.

2 weeks later
#415 8 years ago
Quoted from GaryMcT:

I want one! Would love to buy one of these.
On a related note, does everything function properly if you remove the hammer?

I sent a status update email to my friend who's looking at casting them, see if I can report back. Which sounds just like the last update I wrote! I've talked to him since then, and he was going to look at it. I'm guessing he hasn't yet.

Everything functions fine without the hammer. You can even set the code to have it play just like the Pro if you want.

#417 8 years ago
Quoted from thedarkknight77:

Aurich, thanks for looking into this. Question, I was thinking about mounting it on the pro model, any thoughts on how to pull it off?

Just mounted? Or interactive?

I don't have easy access to a Pro to really look at it, but I imagine it would need some kind of bracket that could attach to the plastic next to the snake, that would hold a tube that mounted up inside the hammer.

Interactive would of course be a lot trickier.

#419 8 years ago
Quoted from thedarkknight77:

Thanks, just thinking about mounting it for aesthetics.

I would think you could 3D print a bracket, with a socket for the tube. I can help with any measurements as far as the hammer part goes, but the Pro end would be up to you.

2 weeks later
#424 8 years ago
Quoted from bdaley6509:

I would like one please.

I have no idea what's up with the other version, my friend hasn't answered my last email to him. Might need to figure out option B for getting them made, I'm just so busy right now I haven't been able to make it a priority.

#427 8 years ago

Well there definitely won't be another run of the design I did for people, that was a limited thing and won't happen again. But I would be happy to do a run of the solid cast version if I can get that to happen. People have offered to 3D print it, but that's not high enough quality for my standards. And it's a really inefficient way to make a bunch anyways. Casting just makes way more sense.

#435 8 years ago
Quoted from j_m_:

I think you should alter the design slightly and offer up another limited run. best of both worlds for those that got on the first list and those that missed out (or you chose to ignore [hint, hint]

Heh. The truth is I simply don't have time to attempt something as crazy as that first run again, it was a ton of work hand sculpting every single one etc. Definitely a limited edition project.

I apologize for not being able to get this other idea going, I've been so busy with work and Alien and trying to take care of my other pinball stuff that I just haven't been able to make it a priority. This is all side hobby stuff for me, but I do love it, and I think it's a great upgrade to the game, so I haven't given up.

Problem is my friend who was going to try casting them is basically as busy as me, so between the two of us there just hasn't been much time to tackle it. I might have to find someone else to cast, but that means taking the time to do it, figure out the costs, etc.

#437 8 years ago
Quoted from VacFink:

Are you going to California Extreme? I could help you get a cast. PM if your interested.

Not sure if I can make it, but I'd like to since I missed PAGG. Have to see.

I just heard back from my friend, he's going to get the materials together to try it. I'll report back if there's progress. Thanks for the offer, we'll see what happens!

#440 8 years ago
Quoted from ziz:

Great work Aurich, very nice looking paint. I am painting a Monster Bash set of figures for a friend and am wondering about finishing sprays. I normally use a matte finish on my gaming miniatures, but I see most people clear coating those figures for MB. I'd really rather not clear coat them and I like the matte look on yours. What spray did you use and what is your confidence like in the paint holding up to ball strikes? Did you just spray them with a bunch of coats? Thanks for any advice you can give!

I prefer a matte look myself, glossy tends to look cheesy to me in most cases. For my custom Sparky I finished him matte, but then gloss coated his tongue and eyes, it works in the right places. But for instance I think that Dr. Frankenstein looks weird with a shiny lab coat. Skin and cloth are rarely shiny.

For the hammers I believe I just used a Krylon matte clear finish. I did three coats I think. The can will have directions about multiple coats, but I think you just wait 20 minutes between.

As far as ball strikes go, I mean there's only so much paint on plastic is going to withstand a heavy metal sphere smashing into it. But yes, I'm happy with how it holds up. You can handle it all you want. I painted my Metallica custom shooter rod and coated with the same matte finish, and it's holding up great to being grabbed all the time.

#442 8 years ago
Quoted from ziz:

Sounds great, thanks a lot! I agree about the glossy look, especially coming from gaming miniatures background, no one finishes them glossy.

Exactly. I used to paint WH40K minis myself. The Hammer of Justice sculpts used all my old skills, dry brushing, washes, etc.

#444 8 years ago

The reality is the ball doesn't hit the hammer. You'd have to have one hell of a weird airball to get a ball strike. So I'm really not at all concerned about it really.

1 week later
#446 8 years ago

Just a little update: talked with my friend last night about casting the solid versions of the hammer. He's got some free time now to look at it, he's just been slammed like me. Casting material has been ordered, mold making has started, we'll see what we can do with it.

Might be a little bit before I have a true status update still, we want to make sure this is going to work before promising anything, but I did want to make sure the people who've been asking knew it wasn't dead.

I'll start a new thread when there's actually "news", but no point in doing that now without anything to show.

2 months later
#449 8 years ago
Quoted from TecumsehPlissken:

just checking back here for any news ? I know you guys a real busy so no pressure just wondering....... gonna take my Sparky out this weekend & send him to the Modfather for "modifications" which I will share when finished but , I sure would be super stoked to get a better looking hammer in there too

I have not talked to my friend who was going to look at casting in a while. Last time we chatted he was getting materials, and then I haven't heard from him, and I've just been too busy to follow up.

I have one hammer that had some issues that was returned to me. I refunded the buyer and I'm going to see what work I need to do to fix it up, I just haven't unwrapped it from the bubble wrap he sent it in yet. See again, the too busy part.

Between Alien and 4th quarter madness at my job and school and soccer starting I'm a little more slammed than usual. I will get that hammer fixed up and offer it back up for sale to whoever wants it though when I get some time.

Edit: Hammer spoken for.

#454 8 years ago

The spikes are screwed in, and have red loctite to hold them in place. Not a foolproof design apparently.

3 weeks later
#460 8 years ago

I love Sparky. One of the things that's great about him is he's new and original. Plenty of direct references on the playfield and art to album covers and songs etc, but it's good to see new thinking too.

Metallica is still the last Stern game that I really care about, nothing they've done since has captured me the same way.

#468 8 years ago
Quoted from Roostking:

Aaannnnd, I jinxed myself by breaking off a spike in the left side of the hammer. Had a multiball going and they got jammed up near the snake and hammer and one of the balls went airborn and hit the spike. Not a big deal and love this mod, it goes with the game so much better.
Where did you get the spikes Aurich?? Thanks again!!

Amazon. What's actually broken though? You can just put a little loctite or super glue on and re-attach the spikes. Do you need parts? Let me know how I can help.

#474 8 years ago
Quoted from Roostking:

Ya, I'll see about some glue, I'm on the road again.

Soon as you get back email me a picture so I can make sure I see what you need, and I'll send you something to fix it with.

2 months later
#477 8 years ago
Quoted from kpg:

Any possible way to purchase one of these hammers still? Just got my MET Premium and I really would love one- thanks!

Short answer: no, these were a limited set, and they're long sold out.

Longer answer: I have a friend who has a master that I scultped who's going to try and cast some for me. He's just been crazy busy, and hasn't been able to get to it. He told me he'd still like to, so if he can make it work out for him I'll let people know that there's another option.

I really prefer my game now with a smaller hammer, feels a lot more balanced, so I'll do what I can to make them available.

#480 8 years ago
Quoted from ChrisS:

Hey buddy,
The entire top cap popped off of mine the other night. What glue should I use to reattach it?
Contact cement?

Woah, really? It was superglued on, that's pretty surprising. Any glue for plastics should work fine.

#484 8 years ago
Quoted from Jeff_PHX_AZ:

You know if your buddy is doing the molds? What about Tim at mezelmods, he picking this up? Also I like your shooter rod, are you gonna do more of those? I just thought I ask. Your work is amazing!!

Tim and I had originally talked, but I wasn't happy with 3D printing as the final solution, casting has a much better level of detail.

Tim, you're looking into adding casting to your shop though right?

As for the shooter rod, that was just a personal one off, no plans to make more. Someone else has a kind of similar one, with a skull/piston hybrid, you could look at getting one of those.

#486 8 years ago
Quoted from Tmezel:

Yes, casting, roto mold or injection molding is the only way I would do it for this piece.

Pretty sure we can rule out injection molding for this one.

#488 8 years ago
Quoted from TheNoTrashCougar:

Yeah that would be a 23 part mold. hahah!

Just figure out how to CNC them, what's the problem?

Promoted items from Pinside Marketplace and Pinside Shops!
$ 25.50
$ 7.00
Playfield - Toys/Add-ons
Pinball Z
 
$ 69.99
Playfield - Toys/Add-ons
Lighted Pinball Mods
 
10,600
$ 64.00
Lighting - Under Cabinet
Lermods
 
From: $ 35.00
Cabinet - Other
Rocket City Pinball
 
$ 55.00
Gameroom - Decorations
The Flipper Room
 
$ 69.99
Playfield - Toys/Add-ons
Lighted Pinball Mods
 
$ 29.95
$ 700.00
Hardware
Chrome Candy
 
$ 14.00
Playfield - Protection
SilverBall Designs
 
11,000 (OBO)
Machine - For Sale
Mount Pleasant, WI
$ 9.99
Cabinet - Other
Bent Mods
 
$ 16.00
Boards
Lermods
 
$ 24.00
Playfield - Other
Pin Monk
 
$ 79.99
Cabinet - Armor And Blades
PinGraffix Pinside Shop
 
$ 68.50
Playfield - Toys/Add-ons
Lermods
 
From: $ 30.00
$ 30.00
Playfield - Protection
SilverBall Designs
 
From: $ 5.00
Cabinet - Other
Filament Printing
 
$ 30.00
Playfield - Other
YouBentMyWookie
 
$ 15.00
Cabinet - Other
Rocket City Pinball
 
$ 69.99
Playfield - Toys/Add-ons
Lighted Pinball Mods
 
$ 69.99
Playfield - Toys/Add-ons
Lighted Pinball Mods
 
10,999
$ 22.50
Lighting - Led
Lermods
 
10,650
Machine - For Sale
Ontario, CA
$ 19.95
Playfield - Protection
SilverBall Designs
 
$ 15.00
Playfield - Protection
SilverBall Designs
 
Hey modders!
Your shop name here

You're currently viewing posts by Pinsider aurich.
Click here to go back to viewing the entire thread.

Reply

Wanna join the discussion? Please sign in to reply to this topic.

Hey there! Welcome to Pinside!

Donate to Pinside

Great to see you're enjoying Pinside! Did you know Pinside is able to run without any 3rd-party banners or ads, thanks to the support from our visitors? Please consider a donation to Pinside and get anext to your username to show for it! Or better yet, subscribe to Pinside+!


This page was printed from https://pinside.com/pinball/forum/topic/my-new-metallica-hammer-design?tu=aurich and we tried optimising it for printing. Some page elements may have been deliberately hidden.

Scan the QR code on the left to jump to the URL this document was printed from.