(Topic ID: 165180)

My C37 Restoration or: How I Learned To Stop Worrying and Love The EM

By docquest

7 years ago


Topic Heartbeat

Topic Stats

  • 71 posts
  • 10 Pinsiders participating
  • Latest reply 7 years ago by docquest
  • Topic is favorited by 26 Pinsiders

You

Linked Games

Topic Gallery

View topic image gallery

war room.gif
20160709_174630_(resized).jpg
20160709_174657_(resized).jpg
lockdown_receiver_(resized).jpg
re-rust_(resized).jpg
rusty_lock_down_reciever_(resized).jpg
evapo_rust_tube_(resized).jpg
c37_11x17.jpg
ribbon_orig_(resized).jpg
ribbon_bracket_(resized).jpg
ribbon_dirty_(resized).jpg
ribbon_routing_(resized).jpg
ribbon_routing_2_(resized).jpg
ribbon_attachment_to_wheel_(resized).jpg
ribbon_old_new_(resized).jpg
back_board_painted_(resized).jpg

You're currently viewing posts by Pinsider docquest.
Click here to go back to viewing the entire thread.

#1 7 years ago

I finally finished my Centigrade 37 restoration and decided I should document what I learned to help others who under take their own restoration. It was my first EM and my first full scale tear down of everything on a machine. I probably should have started this thread when I started the restoration and updated it as I went along but I'm a bit of a procrastinator. I guess better late than never, right?

My goal was to get it done in time for the 2016 Pintastic show. I just barley made my goal, it was a lot of work but I learned a lot along the way. It felt good to see so many others enjoying it at the show. I even had a few people who said they don't normally enjoy playing EM's say they liked playing this one.

When I first got into pinball I thought most EM’s were slow and boring but after a while I started to appreciate them more and decided I needed to get an EM machine. I love the sound of the score reels and relays resetting everything when you hit the replay button. Voice call outs and music on modern games are great but nothing says pinball like the 3 tone chime unit on a Gottlieb wedge head, with an occasional bell thrown in when you score the special.

Centigrade 37, aka C37, has always been a favorite of mine due to the cool retro sci-fi artwork and the back box animation of the thermometer. For those that don't know, the title "Centigrade 37" refers to the normal temperature of the human body. Centigrade is the old school name for Celsius and 37 deg Celsius is equal to 98.6 degrees Fahrenheit. It was on my short list for an EM if one ever popped up for sale in my area. You don’t see them for sale all that often and if they are in really nice shape they typically command a high price (for an EM anyways). So when a local pinhead listed a Centigrade 37 for sale almost 2 years ago a reasonable price I jumped at it. It was priced right for it condition which was a little rough around the edges. The good part was that mechanically everything was working fine. This was a big concern for me because I hadn’t owned an EM before so I felt more comfortable buying one that was in full working condition. The game did have some cosmetic issues. The back glass was flaking a bit in the red which seems pretty common for a lot of Gottlieb 70’s games.

20140907_115818_(resized).jpg20140907_115818_(resized).jpg

20140907_114641_(resized).jpg20140907_114641_(resized).jpg

#2 7 years ago

The cabinet was very faded and a bit scratched up. The head had a lot of delamination on the front face that would need to be taken care off. There was a bit of rust on a lot of the metal hardware as well.

20140907_114553_(resized).jpg20140907_114553_(resized).jpg
20140907_114546_(resized).jpg20140907_114546_(resized).jpg
20140907_115955_(resized).jpg20140907_115955_(resized).jpg

#3 7 years ago

The playfield itself wasn’t horrible but it had some issues. I really saw the damage after I started taking it apart. The worst parts of the playfield were near the top arch and on the left side. Based on this and the rusted metal parts I think this machine saw some water at some point.

c37_top_damage1_(resized).jpgc37_top_damage1_(resized).jpg

20150125_202423_(resized).jpg20150125_202423_(resized).jpg

#4 7 years ago

Since the wear areas weren’t front and center in the playfield and a lot of the damage was obscured by some of the playfield parts I could have just waxed everything really well just played it as it. It was a fully working players game as is and my kids really like it.

20140901_135503_(resized).jpg20140901_135503_(resized).jpg

#5 7 years ago

However one of the great aspects of this game is its fantastic art package so I decided it was worthy of a full on restoration.

The back glass was repro’ed by Ron Webb (http://pinballglass.homestead.com/) so that would be an easy fix.

The cabinet and head restoration was something I think I could handle. I was planning on doing my own stencils since no one had any available for this game at that time.

The part I wasn’t sure how to handle was the playfield. One of the first games I owned was Six Million dollar Man that I did some minor touch ups and varathane clear coat on and it came out decent enough. However for this game I think I was in over my head due to the level of wear on the playfield. In addition I wanted a nice automotive clear coat instead of varathane to preserve and protect the restored playfield. So based on that, I decided to find someone to do the playfield for me.

#8 7 years ago

I decided I wanted an auto clear coat on it instead of varathane but I couldn’t find anyone locally at the time who was set up to do that. After some research I found HSA pinball (http://www.hsapinball.com) which does retouching and clear coating. The price for a complete paint restoration as well as clear coating was similar to what CPR charges for a repro playfield on a modern game. There were no rumors of a CPR doing a repro C37 playfield so I took the plunge with Brian at HSA. However there was a recent pinside thread stated Wade Krause might be doing a repro Centigrade 37 playfield if there is enough interest.

The first step was the complete teardown of the playfield. Since this was my first complete playfield strip I went little nuts with the picture taking. Better to have too many than not enough right? Unlike a straight playfield swap (where I would just transfer everything from an old playfield to a new) I wouldn’t be putting the playfield back together until after it came back from HSA which would be a few months so I needed to document everything thoroughly so I could remember where it goes. Compared to a modern game, doing a full EM playfield strip is much simpler since there are no ramps, subways, etc.

I divided up the playfield top and bottom into “zones” and had a plastic bag for each zone. As I took apart each zone (taking pictures the whole time at multiple angles) I would write down in a notebook the size and length of each bolt or screw I removed and put them all in their own zone bag along with any component like posts, rubbers, plastics, lane guides, etc.

For the underside of the playfield I decided to reuse the ground wire and leave all the mechanical parts soldered to the harness. Since HSA also paints the underside of the playfield I needed to remove all of the t-nuts and staples as well so it was just wood. I thought it would be expensive to ship a playfield but it was only $18 via UPS ground.

While the playfield was out I could clean the harness and the mechanical assemblies section by section. For the harness I just used baby wipes and wiped it down thoroughly. It’s amazing how much dirt comes off of the wiring when you wipe it down. I would also take apart each of the major mechanical assemblies (for example drop target bank) and clean them one at a time.

All the plastic and metal playfield parts that were small enough went into my harbor freight ultrasonic cleaner.

http://www.harborfreight.com/25-liter-ultrasonic-cleaner-95563.html

Make sure to use one of those 20% off coupons that always seem to be floating around. This unit has a built in heater as well to make the cleaning solution very hot. I use tap water with some simple green added. After ultrasonic cleaning I throw the metal parts in the tumbler. I would clean all the component ins each zone then return them to their appropriate bag to make re-assembly easy.

Even after cleaning, some of the plastic parts were still showing their age. I decided to replace a lot of it like the lane guides, bumper caps, etc. My go to place for most of the stuff is pbresouce. Also got a copy of the manual and schematic there too (just in case it decided not to work after re-assembly).

http://www.pbresource.com/

#9 7 years ago

Turnaround time from HSA was about 10 weeks. The results were great. The colors really popped now. I think it looks great compared to where it started. HSA has a before/after gallery on his website and my playfield before and after pics can be found at the following link.

http://www.hsapinball.com/HSA_PINBALL/hsa040215c37.html

I would definitely recommend HSA for playfield touchup and/or clear coating.

#10 7 years ago

All the excessive documentation really paid off as I was able to reassemble the playfield completely over a weekend. Having everything cleaned, tumbled, polished ahead of time made it go quick. Once it was all back together I put the playfield in the cabinet and tried it out. I was relieved that it all worked. There were a few playfield switches that need to be tweaked but other than that it all worked as before.

new_playfield_(resized).jpgnew_playfield_(resized).jpg

#11 7 years ago

By this time it was approaching summer 2015 and I knew I wouldn’t be able to finish it in time for Pintastic 2015 so I put it aside for a while and I did some other projects.

One of those other projects was the crazy idea to do a total re-theme of an existing game into a Batman 1966 themed game. I was heavily inspired by Mike's Goonies re-theme:

https://pinside.com/pinball/forum/topic/the-goonies-pinball-project-hollywood-heat-re-theme

So C37 was derailed for a while while I fleshed out my ideas for Batman. My plan was to have my Batman re-theme ready for Pintastic 2016 but as usual these things take longer than expected. My ideas for Batman started out pretty simple (I was originally going to do an EM game) but grew in complexity the more I got into it. Here's a link to my progress on that game:

https://pinside.com/pinball/forum/topic/batman-66-retheme-project-from-diner-to-caped-crusader

Once I realized Batman wasn’t going to be ready for the show I shifted gears back to my C37 to see if I could finish that in time for Pintastic 2016. At this point it was around May 2016 so I had about 2 months to get the cabinet refinished, painted, and stenciled. In the process of fully re-doing the cabinet I also wanted to rebuild all the guts in the cabinet base and the back box.

Full cabinet restore sounds easy enough. What could possibly go wrong?

#13 7 years ago

The head had the most problems wood wise. The front was de-laminating a lot. I had some of the pieces that fell off the front but not all of them. I decided to just replace the whole front piece. I probably wouldn’t have been as confident about replacing it if I didn’t see this great thread documenting how to rebuild a wedge-head head.

https://pinside.com/pinball/forum/topic/building-a-gottlieb-wedgehead-cabinet-from-scratch

Within that thread is a link to some photos documenting a head rebuild which was very useful.

https://picasaweb.google.com/105138985307815515723/HeadRebuild?feat=directlink

I followed the techniques described above and it was a lot easier than I thought it would be.

#14 7 years ago

Like the playfield, I separated all the parts of the head into a few zones and bagged it all up while taking a ton of pictures. Once again I make a trip to harbor freight with my 20% off coupon to buy a router. I also needed a tracing bit to use to cut plywood.

http://www.harborfreight.com/2-hp-fixed-base-router-68341.html

tracing_bit_(resized).jpgtracing_bit_(resized).jpg

#15 7 years ago

The basic procedure as detailed in the other thread involves using the existing front face of the head as a template to cut a new front. First you lay the head on the new plywood and trace the hole outline onto it.

20160508_180553_(resized).jpg20160508_180553_(resized).jpg

head_trace_face_(resized).jpghead_trace_face_(resized).jpg

#16 7 years ago

Then you roughly cut out the hole using a sabre saw leaving some extra space around the outline you drew.

head_outline_(resized).jpghead_outline_(resized).jpg

head_cut_face_(resized).jpghead_cut_face_(resized).jpg

#17 7 years ago

You can then clamp the new plywood to the head and using the router with a tracing bit, follow the outline of the face to match a perfect match on the new wood. The tracing bit had a bearing on the bottom. The router is adjusted so that this bearing follows the edge of the existing face while cutting the rough plywood shape that is clamped above it. as you go around you’ll have to temporarily remove clamps that are in the way of the router. You have to make sure you run the router in the proper direction for a smooth clean cut.

head_clamp_(resized).jpghead_clamp_(resized).jpg

20160508_190512_(resized).jpg20160508_190512_(resized).jpg

20160514_134208_(resized).jpg20160514_134208_(resized).jpg

20160514_134353_(resized).jpg20160514_134353_(resized).jpg

20160514_134459_(resized).jpg20160514_134459_(resized).jpg

#18 7 years ago

Then you can use the router trim the outer edges. Be careful of the vent hole areas on the top side. If your tracing but bearing hits those then it will cause the router to dip into the wood where it shouldn’t.

The pic below shows the new plywood top after trimming the outer edge. You can see the vent holes that need to be avoided by the bearing on the tracer bit. Adjust the height of the tracer bit to avoid them or put tape over them so the bearing doesn't dip into the holes as you trace around the head.

head_flush_cut_(resized).jpghead_flush_cut_(resized).jpg

20160514_135500_(resized).jpg20160514_135500_(resized).jpg

#19 7 years ago

I clamped and glued the new face piece on and also put a few finish nails in it for good measure. Once you fill the nail holes along with any scratch or dings in the rest of the head you can prime and paint. It looks factory fresh when its all done. I'm glad I decided to replace the front instead of just trying to fill in the de-laminating parts. I think it was well worth the extra effort.

20160528_085402_(resized).jpg20160528_085402_(resized).jpg

20160530_183122_(resized).jpg20160530_183122_(resized).jpg

#20 7 years ago

That last pic jumped a head a bit since it was taken after I did the speckling. I'll cover how I did that later. Next update will be all about the cabinet prep and the stencils.

1 week later
#23 7 years ago

Next step is the cabinet. The cabinet paint was faded quite a bit on all sides of the cabinet. The left side also had a ton of scratches in it. Here are some pics of how it looked before.

original_fade_right_side_(resized).jpgoriginal_fade_right_side_(resized).jpg
oriignal_scratch_left_side_(resized).jpgoriignal_scratch_left_side_(resized).jpg
original_front_(resized).jpgoriginal_front_(resized).jpg

head_original_paint_(resized).jpghead_original_paint_(resized).jpg

#24 7 years ago

Once again I took a ton of pics of the interior parts and wiring to make assembly easier. There was a bit of rust on some of the metal within the cabinet so I would need to take care of that as well.

rusty_lock_down_reciever_(resized).jpgrusty_lock_down_reciever_(resized).jpg

orig_rusty_bell_(resized).jpgorig_rusty_bell_(resized).jpg

lockdown_receiver_(resized).jpglockdown_receiver_(resized).jpg

#25 7 years ago

The head and the cabinet have a lot of large metal pieces which required some deep cleaning. I made yet another trip to harbor freight to get a buffing wheel. I also used metal brushes to clean before polishing. Harbor freight is great I'm starting to get to know the cashiers there on a first name basis.

buffer_(resized).jpgbuffer_(resized).jpg

brushes2_(resized).jpgbrushes2_(resized).jpg

brushes_(resized).jpgbrushes_(resized).jpg

#26 7 years ago

I used the metal brushes to remove as much gunk as possible and then polished with the buffing wheel. For some of the more visible metal like coin door and lock down bar, I sanded by hand using increasing grits of sandpaper, i.e. 800 to 1000, then 1500 to 2000,then finish with 2500 to try and get as shiny and smooth of a finish as I could.

#27 7 years ago

Here’s the cab after it was all stripped out of all its parts.

cab_stripped_of_hardware_(resized).jpgcab_stripped_of_hardware_(resized).jpg

#28 7 years ago

The base cabinet was in pretty good shape overall from a wood perspective. There were a few spots on the edges where a little de-laminating was starting. I filled those areas full of wood glue, clamped it down and let it dry then sanded smooth.

clamping_delamination_on_side_(resized).jpgclamping_delamination_on_side_(resized).jpg

clamping_weak_bottom_lip_(resized).jpgclamping_weak_bottom_lip_(resized).jpg

#30 7 years ago

I also decided to paint the inside of the cab. Some people don’t like doing that but I thought it would make it easier to clean in the future and I liked the painted look. This pic is a little out of roder since it was taken after the side stencils were applied. It was the only pic I had of the painted inside though.

cab_interior_painted_(resized).jpgcab_interior_painted_(resized).jpg

#31 7 years ago

I then used "Klean Strip Premium" paint stipper to strip the cabinet and head. I choose that based on a positive recommendation from a fellow pinsider. I didn’t put enough on the first time so it took too passes. Using the stripper made the paint removal pretty painless. After the paint was all gone I then patched in any holes, scratches, and dings then sanded it all smooth and primed it.

stripping_first_pass_(resized).jpgstripping_first_pass_(resized).jpg
sanding_side_(resized).jpgsanding_side_(resized).jpg

head_stripping_(resized).jpghead_stripping_(resized).jpg

#32 7 years ago

I did some research looking for what colors others have used in the past for the base white coat on the cabinet. I choose Rustoleum heirloom white, satin finish, its available at home depot. The heirloom white is a very light tan which looked too dark to me when I tested it on a small area. However when I did a large area test it looked better so I stuck with that.

There is currently a thread discussing the various choices for the base white color in this pinside thread.
https://pinside.com/pinball/forum/topic/gottlieb-wedgehead-cabinet-paint-color#post-3255293

Some think the heirloom white is not white enough so some alternative colors are discussed in that thread. there is no wrong choice. Just pic a shade of white you like and go with it. no matter what you pick it will look better than the scratched up faded cabinet you are starting with.

heirloom_white_(resized).jpgheirloom_white_(resized).jpg

#33 7 years ago

Like most EM’s this game used a speckling or spattering finish on the base coat. This is a random scattering of black paint on top of the white base coat but under the stencils. To achieve this I used a stiff nylon brush from harbor freight. I poured some paint into a wide shallow dish and then dipped the brush in it. I then brushed my thumb against the bristles which would “flick” the paint forward.

I did a few practice runs on some scrap cardboard before trying it on the real cab. I did least visible side of the cab first (the back) to get a little more practice. This technique worked great. I was able to do the whole cab and head in just a few minutes. There were a few big blobs that I wiped off before they were dry and just reapplied in that area again. You can see that in the pic of the backside below. This was taken after I wiped off an area then re-did it later.

speckle_paint_tray_(resized).jpgspeckle_paint_tray_(resized).jpg
cab_back_speckled_(resized).jpgcab_back_speckled_(resized).jpg
cab_front_speckled_(resized).jpgcab_front_speckled_(resized).jpg
cab_side_speckled_(resized).jpgcab_side_speckled_(resized).jpg

head_speckle_1_(resized).jpghead_speckle_1_(resized).jpg

head_speckle_2_(resized).jpghead_speckle_2_(resized).jpg

head_speckly_top_(resized).jpghead_speckly_top_(resized).jpg

#34 7 years ago

Although it looks great in the pictures this is where I did one of my biggest mistakes. I forgot to thin the black paint before applying it. You need to thin the paint so it has a more watery consistency. This is done so that the speckling is very thin on the surface of the cab. That way when you go over it with the stencil colors it’s not a bump in the paint. You want the black paint to be like freckles on your skin (smooth and flush with surface) instead of zits (raised bump).

People like to give the cabinet a gentle sanding between stencil colors. However if you have a black speckle bump under one of your stencil colors and you sand it the stencil color could come off leaving a black mark exposed. This happened to me in a few spots and required me to do a few touch ups between stencils and a few after.

#35 7 years ago

After looking at what others did for the stencil colors, I decided on using Montana gold spray paint. I choose “Citrus” for the yellow areas and “Magenta” for the pink ones. Both were satin finish. I was able to buy it locally and it was only a little more expensive (about $8) than the cheap rattle cans. I also liked that there were a lot more color choices with Montana than the cheap rattle cans.

montana_citrus_(resized).JPGmontana_citrus_(resized).JPG

montnan_magenta_(resized).JPGmontnan_magenta_(resized).JPG

#36 7 years ago

For the stencils I went with pinball pimp (http://pinballpimpstencils.com). He had just finished the C37 design right when I was ready for that step. Using his stencils save me a lot of time since I wouldn’t have to make my own stencils from scratch. I’m sure I would have been able to make my own anywhere near the quality of his. The stencils worked great and I would definitely use him again if I need to do another stencil job.

He has a nice quick video on how to use his stencils here:

#37 7 years ago

The Montana paints dry very quickly (with 5-10 minutes) so you need to remove the stencils fairly soon after painting. If you leave the stencils on too long you run the risk of the paint on the stencil edges lifting paint off of the cabinet when you remove the stencil. If the paint is still wet when you remove the stencil it shouldn’t pull up any paint from the cabinet. So to get a nice crisp edge you need to remove the stencil while it’s still wet. Make sure you mask off all the other areas as you do each layer.

yellow_getting_ready_(resized).jpgyellow_getting_ready_(resized).jpg

yellow_layer_applied_(resized).jpgyellow_layer_applied_(resized).jpg

#38 7 years ago

For people familiar with the C37 artwork, you might have noticed my head graphics are reversed. This was a mistake on my part as the left/right sides of the head stencils are clearly marked by pinball pimp. I wasn’t paying attention and put the wrong side on and painted the first color before I realized my mistake. Lucky for me, the head design is such that when its reversed it still looks ok.

head_yellow_layer2_(resized).jpghead_yellow_layer2_(resized).jpg

head_yellow_layer_(resized).jpghead_yellow_layer_(resized).jpg

#39 7 years ago

I waited a full week between the white base coat and the first stencil color. I also waited a week between stencil color 1, yellow, and stencil color 2, magenta. I wanted to make sure each layer was fully dried before going onto the next layer. I had a couple of small isolated areas where a little bit of the base white came off when I removed the stencil mask. I’m assuming my primer wasn’t applied sufficiently or maybe it’s just a poor performing primer. It was zinsser which is supposed to be the good stuff I thought.

red_layer_on_top_of_yellow_(resized).jpgred_layer_on_top_of_yellow_(resized).jpg

#40 7 years ago

As mentioned before I forgot to thin my black paint so my speckling was thicker than it should be. When I did a light sanding between coats of paint I had a few spots where the black popped through the color. I used some frisket paper (clear self-adhesive vinyl) to touch up a few areas. You just lay the frisket down then use an exact knife to trace the outline of the area you want to touch up. Since the frisket is clear it’s very easy trace the color shape under it.

frisket_touchup_(resized).jpgfrisket_touchup_(resized).jpg

frisket_touchup2_(resized).jpgfrisket_touchup2_(resized).jpg

#41 7 years ago

After it was all dry I decided to put some clear on top of it all. I decided to use minwax polycrylic satin finish for the clear coat. It went on very smoothly with a brush. It came out it on a little thick in a few areas that caused a few runs. After it dried sufficiently I sanded those areas down and touched them up with fresh clear. Putting the clear on helped smooth out the sides a little more. Since my speckling was thicker than it should be.

getting_ready_for_clear_(resized).jpggetting_ready_for_clear_(resized).jpg

#42 7 years ago

Thats it for now. I'll be on vacation for two week but when I get back I'll show what I did to renovate the score motor board in the bottom of the cab as well as replacing the dingy dirty thermometer ribbon with a nice bright red and white ribbon.

1 week later
#46 7 years ago

The score motor board itself was pretty dirty. Since it’s not very complicated I took everything off to make cleaning it easier. I decided to sand, stain, and clear coat the motor board itself so it would look nice and be easier to clean in the future. The harness and components were cleaned one at a time just like I did for the playfield. For the harness I just used disposable baby wipes and wiped the entire harness down section by section. Components on the board were removed one by one and clean individually via wipes or ultrasonic cleaning. I didn’t dissemble each relay stack though. For these I removed the cotter pin so I could get better access and just cleaned each contact with a piece of card stock and a little alcohol. I also used a small brush to clean the white plastic relay switch plates without having to disassemble them. The only assembly that really scared me was the score motor itself. I was nervous about totally disassembling that so I cleaned it the best I could without taking it all apart. I would have loved a mirror like finish on the platters but I decided to settle for just clean for now.

score_motor_board_before_2_(resized).jpgscore_motor_board_before_2_(resized).jpg

score_motor_board_before_(resized).jpgscore_motor_board_before_(resized).jpg

scoro_motor_board_stripped_(resized).jpgscoro_motor_board_stripped_(resized).jpg

#47 7 years ago

I also made some new paper labels using some ivory colored card stock from Staples. The ivory color is a nicer match to the original than using standard white. I scanned in the original labels and made new ones using a font that looked similar. On the pinball rebel custom instruction card site there were some Gottlieb labels already scanned and cleaned up. I used some of those as well.

http://www.pinballrebel.com/pinball/cards/Gottlieb.htm

Pic below shows the reassembled board with the new labels and poly finish.

score_motor_board_done_(resized).jpgscore_motor_board_done_(resized).jpg

#48 7 years ago

Similar cleaning was done on the back box board in the head. The front of the back box board was dirty and the white wasn’t very bright anymore so I decided to go ahead and give it a fresh coat of white paint. After removing all the wiring and mechanisms I put old bulbs in all the sockets before spray painting it. I thought this would keep paint out of the sockets but paint still got in a few of them so I had to clean them out afterwards. One of the bulb shields was missing so I made a replacement out of a small piece of PVC pipe that was about the same diameter.

back_board_orig_(resized).jpgback_board_orig_(resized).jpg

back_board_stripped_(resized).jpgback_board_stripped_(resized).jpg

#49 7 years ago

Here it is after some paint. You can see the painted white light bulbs in there that I didn't remove yet.

back_board_painted_(resized).jpgback_board_painted_(resized).jpg

#50 7 years ago

The thermometer ribbon was also a bit dingy so I decided to replace it. I found some white and red ribbon of almost the exact same width as the original at Joanne fabrics (don’t forget to bring your 50% coupon they seem to have every now and then). Can you tell which is the old vs new ribbon?

ribbon_old_new_(resized).jpgribbon_old_new_(resized).jpg

#51 7 years ago

Took lots of pics of how the ribbon is routed so I can put it back together properly.

ribbon_attachment_to_wheel_(resized).jpgribbon_attachment_to_wheel_(resized).jpg

ribbon_routing_2_(resized).jpgribbon_routing_2_(resized).jpg

ribbon_routing_(resized).jpgribbon_routing_(resized).jpg

ribbon_dirty_(resized).jpgribbon_dirty_(resized).jpg

ribbon_bracket_(resized).jpgribbon_bracket_(resized).jpg

ribbon_orig_(resized).jpgribbon_orig_(resized).jpg

#52 7 years ago

Attached is the image I made to reprint the temperature gauge. I tried attaching the original 11x17 sized image but pinside rescaled it. If you grab the image here you need to re-scale it back to its original size of 3300 x 5100 at 300 dpi. If anyone is interested in the original unscaled file just send my a PM with an email address and I can email it to you.

You can bring the image to staples and have them print it on a piece of card stock for 1 or 2 dollars. I would have just printed it at work but we didn't have any 11x17 card stock.

As you can see in the image I made 2 different spacings of lines. I can't remember which I ended up using for the final strip so you could get it printed and then compare to the originals to see what spacing is best.

Once it was printed I used my Xyron 5" creative station (https://www.amazon.com/Xyron-Creative-Multi-Use-Permanent-Adhesive-Cartridge/dp/B00013MUVS) to apply laminate on the front and adhesive on the back. A simpler approach would be to not laminate it and just put double sided tape on the back. Laminating it might be overkill but I used my sticker machine with the laminate+adhesive cartridge because I had it already.

c37_11x17.jpgc37_11x17.jpg

#53 7 years ago

Can’t forget the legs. You can buy a new set of legs for only $40 but mine were in fairly decent shape already just a couple of small rust spots here and there. I decided to try the “evapo-rust” rejuvenation tube I’ve seen described before. It involves some 4” PVC piping about 3 feet long with one sealed end cap and one screw off cap. One gallon of evaporust (available at our favorite store Harbor Freight) is just enough to nearly fill the tube. This diameter was big enough to do two legs at a time. You just put the legs in, screw on the top, wait about a day, then remove you rust free item. I also used this for a few long thin cabinet pieces that also had rust on them. Works great and real simple to implement, highly recommend tool for the pinball arsenal.

evapo_rust_tube_(resized).jpgevapo_rust_tube_(resized).jpg

#54 7 years ago

speaking of rust I should post a little update I noticed since the show. For some of the really rusted stuff I think I was overly aggressive with the grinding and polishing. for example the lock down receiver was rusted quite a bit.

rusty_lock_down_reciever_(resized).jpgrusty_lock_down_reciever_(resized).jpg

lockdown_receiver_(resized).jpglockdown_receiver_(resized).jpg

#55 7 years ago

I used the wire brushes on my roto tool and also sand paper by hand to scrub the rust off. It had a lot of pitting as well that was so deep I couldn't grind it out but I was able to get all the rust off. It looked great when it was done.

Now about a month or so since I brought it to the show I noticed some of the rust is coming back on the lock down bar receiver. I should have sealed the metal via a clear coat or maybe waxing it.

So far it looks like this piece is the only metal piece I polished that has fresh rust on it so far. In the future I'll definitely need to seal the metal after polishing.

Here's the some of the re-rust coming back on the lock down bar receiver.

re-rust_(resized).jpgre-rust_(resized).jpg

#56 7 years ago

At this point in the restoration all my cabinet work was done, paint was dry, metal cabinet parts were shiny and polished, score motor board was re-assembled with new power cord and labels, and the back box was all back together with my newly rebuilt thermometer and ribbon. The Pintastic show was less than a week away, all I had to do was re-assemble it all and I’d be good to go.

Well the pinball gods were not going to let me off that easily. I put it all back together and it didn’t work. In addition to figuring out what’s wrong with my C37 I have 4 other games to get prepped for the show as well.

So where do I start, I had the dreaded EM problem that seems to pop up all the time. The score just keep running so game doesn’t finish resetting itself. I already had the EM repair guides printed out and along with the schematic of the game and just started going through it.

My initial hurdle is I wasn’t familiar with how the EM schematics were laid out. I initially didn’t realize that the schematic shows the state of the machine after it’s been reset, the ball is put into shooter lane, and then the game is unplugged. I didn’t even know the simple stuff like the relay table index value shows the co-ordinates to locate the relay on the printed schematic. I also didn’t know that the contacts column on the relay chart is telling you how many switches and of what type are on each relay stack. This is all stuff I realized in various “a-ha” moments as I was debugging the game.

I realized that all of my thorough cleaning of things on the score motor board and the back box board moved things around enough to get me in trouble. I had multiple switches that needed adjustment. A lot of them looked great visually, the switch appeared to be closed and open appropriately as I toggled the relay. However they were off just enough to make poor or intermittent contact during actual game play. After a few long nights with my head deep in the cabinet adjusting and tweaking countless relay stacks I finally got it all working.

#57 7 years ago

During the show itself there were a couple times I had some minor issues.

The indexing coil on the thermometer came loose so the thermometer stopped incrementing.

I also had a few switches that were a little too touchy so vibration during game play was setting them off. These were fixed pretty quickly and the machine was running well for most of the show.

I forgot to look at the play meter just before the show started but I know it was a little less than 20K before I did the playfield swap. After the show it was about 20,700 so if you remove the number of times I restarted the machine during debug I’m guessing about 500-600 plays at the show? Almost every time I walked by it there was someone on it.

I got a lot of nice compliments on the game at the show and was happy to get it done in time for others to enjoy.
I might even see it in a future pinball documentary since a film crew was there and captured some footage on it in action on the outside as well as the inside.

20160709_174657_(resized).jpg20160709_174657_(resized).jpg

20160709_174630_(resized).jpg20160709_174630_(resized).jpg

#58 7 years ago

There a few finishing touches I didn’t get a chance to do before the show.

Pinsider Noobee sent me a jpeg of the Gottlieb manufacturer’s certificate to put on the apron. I still need to print that out and attach it.

The Gottlieb logo on my coin door was pretty scratched up so I removed it when I cleaned up the door (didn’t realize those were screened on). So I need to buy one of those labels and put that back on.

I could also use some new carriage bolts for the legs and I need to clean up the back metal door. Anyone have tips on the best way to clean those?

Although it was a lot of time, effort, and money, I think I learned a lot throughout the whole process. I’m glad I tried it. I’m definitely not as intimidated with EM repair as I was starting out and I’m looking forward to doing another one. Hopefully this thread will be use to others in the future doing their own restoration.

#60 7 years ago
Quoted from dasvis:

Evaporust bath, then depending on how it looks, wax heavily, or maybe paint with some sort of metalized coating if it still looks nasty.

What did you use for a big flat square shaped container to hold the evaporust? Or do you just jury rig something out of card board, duct tape and plastic?

#65 7 years ago
Quoted from mcjeremy42:

Test. One, two.
Tried to post this before, and nothing happened...feel free to delete one if it double posts.
Anyways, you have a bell instead of a knocker, which is what I have. Watched a youtube vid, and that guy had a knocker. Wondering which is factory, since the only other C37 I have played was in Vegas, and I don't remember. I have a spare bell, and now you have me thinking about trying it out!

I really like the bell, sounds more "old school" than the knocker. That's what was in my machine when I got it so I don't know if it was original or not.

I'll look at my c37 paper work when I get home tonight and see if they specify a bell or knocker in there somewhere.

#68 7 years ago
Quoted from docquest:

I'll look at my c37 paper work when I get home tonight and see if they specify a bell or knocker in there somewhere.

So I looked in my C37 manual and it lisa a "knicker" coil. Also on the schematic it shows a coil thats also labeled as "Knocker". So unless Gottlieb defines their version of a knocker as a coin hitting a bell, I'm assuming the game was designed to have a B/W style knocker (coil hitting a rigid metal strip or side of cabinet) in a C37. Maybe they started with that and then switched to a bell later?

#69 7 years ago
Quoted from scottslash:

I just want to say I love the topic title. Carry on.

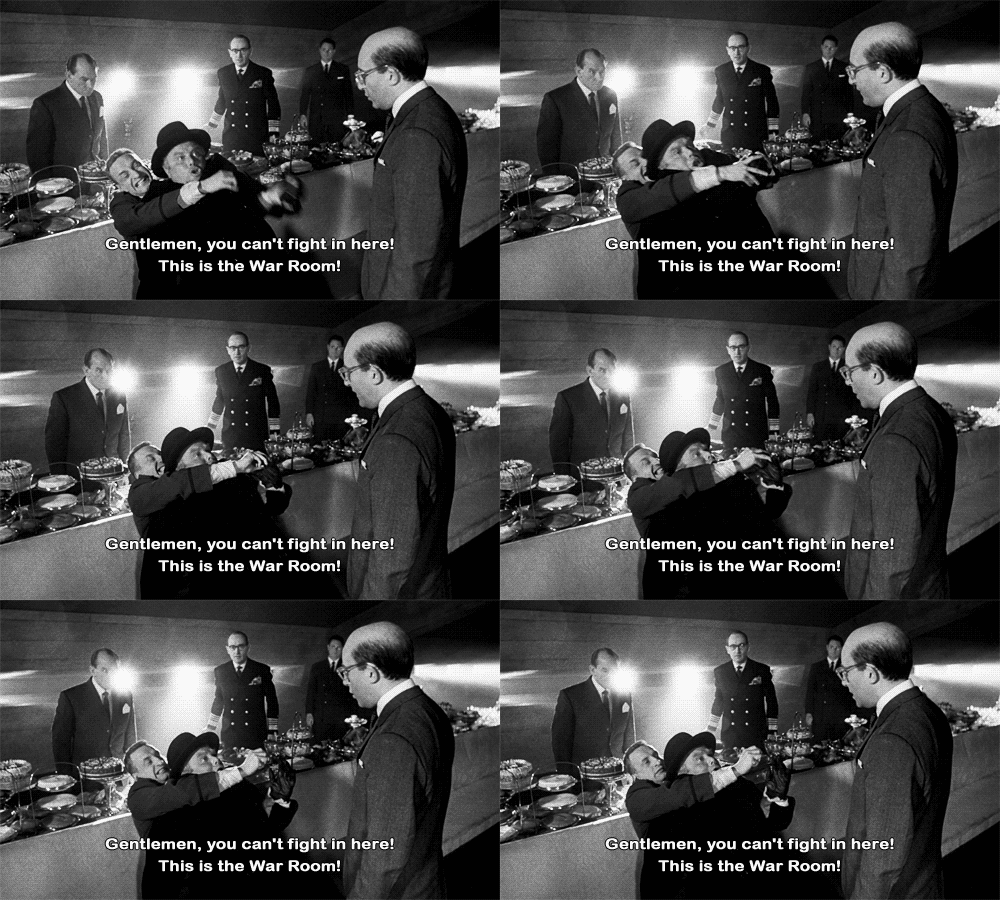
Glad to see others have recognized my homage to an awesome movie, "Dr Strangelove: Or How I Stopped Learned to Stop Worrying and Love the Bomb". Highly recommended for those who haven't seen it.

war room.gifwar room.gif

#71 7 years ago
Quoted from beelzeboob:

You didn't have the knocker in there when you started the restoration? (Sorry if I missed that part of the story!)

No knocker, bell assembly. Since I'm not the original owner I don't know own if it came from factory that way or was added by someone later on.

Promoted items from Pinside Marketplace and Pinside Shops!
From: $ 1.00
Playfield - Other
Rocket City Pinball
 
From: $ 33.00
Gameroom - Decorations
Rocket City Pinball
 
$ 15.00
Lighting
Space Coast Pinball
 

You're currently viewing posts by Pinsider docquest.
Click here to go back to viewing the entire thread.

Reply

Wanna join the discussion? Please sign in to reply to this topic.

Hey there! Welcome to Pinside!

Donate to Pinside

Great to see you're enjoying Pinside! Did you know Pinside is able to run without any 3rd-party banners or ads, thanks to the support from our visitors? Please consider a donation to Pinside and get anext to your username to show for it! Or better yet, subscribe to Pinside+!


This page was printed from https://pinside.com/pinball/forum/topic/my-c37-restoration-or-how-i-learned-to-stop-worrying-and-love-the-em?tu=docquest and we tried optimising it for printing. Some page elements may have been deliberately hidden.

Scan the QR code on the left to jump to the URL this document was printed from.