(Topic ID: 286540)

Mounting Color LCD in Black Rose (fitment issues)

By drsfmd

3 years ago


Topic Heartbeat

Topic Stats

You

Linked Games

No games have been linked to this topic.

    Topic Gallery

    View topic image gallery

    B4849FFA-D254-4F39-AAB3-E63CB61534F3 (resized).jpeg
    77896452-B155-4010-916C-AE6FBBDB438D (resized).jpeg
    551BBDA4-BBC4-4A26-9A21-D69E62AF488E (resized).jpeg
    639F80C4-6409-4006-8504-A03E4198E689 (resized).jpeg
    IMG_20210126_084828.gif
    16116838080682658735168362047583 (resized).jpg
    16116836955671932979587726187887 (resized).jpg
    IMG_20210126_084828 (resized).png
    IMG_20210126_084828 (resized).png
    #1 3 years ago

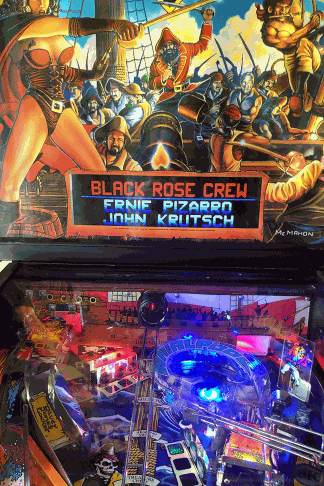
    I'd like to install a color LCD in my Black Rose. I've spoken with Randy at ColorDMD, and the firmware available for the color LED will work with the LCD as well. The problem is fitment.

    Unlike most other DMD games, the DMD in Black Rose mounts to the back panel. The actual Color DMD panel can be mounted to fit in the available space, if I can figure out the logistics of moving the LCD controller from the back of the panel to mount it remotely, as the connectors stick out too far to enable mounting as-is.

    I've got it mostly figured out, but there's a tiny ribbon cable that connects the Color DMD board to the LCD. I need to find a longer cable. My searches have been unsucessful, mostly because I don't know the proper name of that cable. Most of what I'm finding in "ribbon cable" searches are what we would normally think of as a a ribbon cable, not these tiny, thin flat cables.

    So, has anyone successfully put a Color LCD into Black Rose? How did you get around this mounting issue? Did you relocate the board, and if so, where did you find the cable?

    #2 3 years ago

    I think I've figured out the answer myself... but use this information at your own risk.

    The cable is what is called an FFC (https://en.wikipedia.org/wiki/Flexible_flat_cable). This one is a "Type A", meaning that the connectors are both on the same side of the cable. The pitch (distance between pins) is .5mm, and it's a 30 pin connector.

    I am fairly certain that this is the correct cable, and is what I've ordered... hopefully it's not an expensive mistake! https://www.amazon.com/uxcell-Flexible-Ribbon-Player-Laptop/dp/B07TR3FXB4/ref=sr_1_6

    #3 3 years ago

    I have done this .... Took the main board off the Lcd and mounted it inside the backboard light panel worked perfectly!
    Sent this info to Randy when it was done

    #4 3 years ago

    Here you go ...

    IMG_20210126_084828 (resized).pngIMG_20210126_084828 (resized).png
    #5 3 years ago

    That looks great! Can you confirm that the cable I linked to is correct?

    I assume you lose the cannon fuse flasher entirely with this mod?

    #6 3 years ago

    Will have to remove couple of Bulbs where the Lcd panel blocks access, I used flex comet bulbs in their place and ran them up behind the display.
    No extra wiring required I took the Colordmd panel off the display and mounted to the back of the light panel and connected that to the back of the display .

    IMG_20210126_084828 (resized).pngIMG_20210126_084828 (resized).png
    #7 3 years ago

    Will check my Blackrose file on my home computer later today to see if I took pictures of install

    #8 3 years ago
    Quoted from transprtr4u:

    Will have to remove couple of Bulbs where the Lcd panel blocks access, I used flex comet bulbs in their place and ran them up behind the display.
    No extra wiring required I took the Colordmd panel off the display and mounted to the back of the light panel and connected that to the back of the display .
    [quoted image]

    Right, but the cable connecting the LCD to the Color DMD board is far too short to allow the board to be remounted remotely. How did you get around that using the cable that came with the Color DMD?

    #9 3 years ago

    Turned panel upside down when mounting ... connected fine ...

    #10 3 years ago
    Quoted from transprtr4u:

    Turned panel upside down when mounting ... connected fine ...

    Interesting. Can you post a photo of it? I can't picture in my mind how you did this.

    #11 3 years ago

    More than one way to skin a cat.

    16116836955671932979587726187887 (resized).jpg16116836955671932979587726187887 (resized).jpg16116838080682658735168362047583 (resized).jpg16116838080682658735168362047583 (resized).jpg
    #12 3 years ago
    Quoted from Swainer80:

    More than one way to skin a cat.
    [quoted image][quoted image]

    Yikes! I was trying to avoid going that route. I would prefer it to be reversible, leaving only a couple of extra screw holes behind.

    #13 3 years ago
    Quoted from drsfmd:

    Yikes! I was trying to avoid going that route. I would prefer it to be reversible, leaving only a couple of extra screw holes behind.

    Sorry checked for pics , must not have taken any!
    Modifying the light board is not necessary you can do this with only making 4 screw holes into the panel.
    Also you have to remove the old style did stand offs from the front .
    Again remove large controller from DMD and mount to the inside of the light panel...

    #14 3 years ago
    Quoted from transprtr4u:

    Sorry checked for pics , must not have taken any!
    Modifying the light board is not necessary you can do this with only making 4 screw holes into the panel.
    Also you have to remove the old style did stand offs from the front .
    Again remove large controller from DMD and mount to the inside of the light panel...

    Yup. That's the part that I had already figured out. I've ordered the FFC cable to facilitate moving the board. That'll be here in a few days. I'll post pics when I'm done.

    Did you dispense with the cannon fuse flasher, or use a flex bulb for it?

    #15 3 years ago

    Used flex bulbs ... put in before LCD ... run them straight up! After Lcd was installed I set them in place...
    Great mod , and the LCD looks great in smooth mode
    Bit of an effort but worth it!

    #16 3 years ago

    The cable I linked above is indeed correct, and I have successfully installed the LCD into Black Rose. Thanks for your help.

    Imma mark this one resolved.

    #17 3 years ago

    How about posting some pictures of your results.

    #18 3 years ago

    Will do! I’ll take some next time I’m in the basement.

    #19 3 years ago

    Glad it worked out for you! Attached is a picture of mine. Great game ... should never have sold it!

    IMG_20210126_084828.gifIMG_20210126_084828.gif
    #20 3 years ago

    Photos, as requested. Need to figure out a better way to attach the flasher for the cannon fuse.

    551BBDA4-BBC4-4A26-9A21-D69E62AF488E (resized).jpeg551BBDA4-BBC4-4A26-9A21-D69E62AF488E (resized).jpeg639F80C4-6409-4006-8504-A03E4198E689 (resized).jpeg639F80C4-6409-4006-8504-A03E4198E689 (resized).jpeg77896452-B155-4010-916C-AE6FBBDB438D (resized).jpeg77896452-B155-4010-916C-AE6FBBDB438D (resized).jpegB4849FFA-D254-4F39-AAB3-E63CB61534F3 (resized).jpegB4849FFA-D254-4F39-AAB3-E63CB61534F3 (resized).jpeg
    #21 3 years ago

    Thank you for posting pictures of the result.

    Reply

    Wanna join the discussion? Please sign in to reply to this topic.

    Hey there! Welcome to Pinside!

    Donate to Pinside

    Great to see you're enjoying Pinside! Did you know Pinside is able to run without any 3rd-party banners or ads, thanks to the support from our visitors? Please consider a donation to Pinside and get anext to your username to show for it! Or better yet, subscribe to Pinside+!


    This page was printed from https://pinside.com/pinball/forum/topic/mounting-color-lcd-in-black-rose-fitment-issues and we tried optimising it for printing. Some page elements may have been deliberately hidden.

    Scan the QR code on the left to jump to the URL this document was printed from.