Quoted from Dakine747:Also, I'll look forward to seeing the parts from Grainger that you will be using. Thanks!
So, I wanted the 1000lb lift table as I only have modern pins and don't mind that it's tight fit and heavy as I will likely use it to unload from a truck or van, etc and wanted the extra reach.
My mistake was blowing it on the old adage "measure twice, cut once." I got my 1000lb table on the 25% off coupon, brought it home and promptly hacksawed off the bottom 4-1/2" of the legs. I had a set of the one-direction-folding locking Bimini fittings that others have used in this thread. Figuring that since the handle folds forward and locks in the up position, these oriented properly would give me the same functionality in the "pull" direction and let me slide under the machine.
 Hda2000a5540b422b99e813d17b4fac51S (resized).jpg
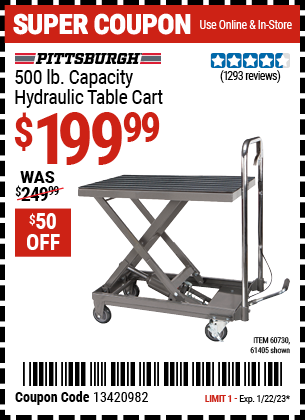
My mistake was assuming that the handlebar on the 1000lb lift cart was 1", like the handle on the 500lb cart. Turns out, it's not. The handle measures right around 28mm or 1.1". So the fittings would not work and I already had a chopped handle.  If I had NOT chopped it, I'd have done what
  Spiderpin and a couple others have done and just drilled out the forward stop and put a hitch pin in that spot.
But, since I already cut down the handle, I needed another solution. There are Chinese suppliers that make 30mm bimini fittings, but nobody that I could find that makes 28mm fittings. I considered ordering 30mm fittings via Alibaba to the tune of around $50 and then just 3D printing myself some liner/spacers to make them fit. But I came across these brackets on McMaster-Carr (sorry, not Grainger) and gave them a try:
https://www.mcmaster.com/2534T33/
2534T33p1-h03a-digitall@2x_636607921685035309 (resized).png
These were a touch small on the ID, but with a bit of effort with a file and a flex hone, I got them to work. I used the "cap" portion on the upper part of the handlebar and the collar on the short section of handlebar at the bottom. The cap portion went on no issue. The collar portion is actually two pieces that keyway together. I ended up filing off some bumps on the ID of the fitting that I think are there to help bite into the material they clamp onto, and although I'm not sure it helped. I ran a 1-1/8" flex hone in the bore to help clean it up, but that probably wasn't really necessary. Then I assembled the parts and used the bolts on the collar portion to pull it into place. Here's how it came out:
IMG_1325 (resized).jpg
Some closer pics of the brackets I used in position:
IMG_1326 (resized).jpg IMG_1327 (resized).JPG IMG_1329 (resized).jpg
I'm pretty happy with this solution. Since it only added a slight offset in the position on the handlebar, and not any more or less rise to the release lever, the factory cable routing for the release is unaffected. In the forward position, the handlebar cams just over center and stands nicely on its own, so it's not "floppy" when it's in the up position. It also allows me to push it forward like a "normal" flat cart:
IMG_1330 (resized).jpg
If I had it to do over again, and knew that I'd be using these brackets, I'd have cut the handlebar at 4" instead of 4.5" where I have it cut now, so that the bracket cleared the load bed and would allow the handlebar to simply lay flat on the bed.
IMG_1333 (resized).jpg IMG_1335 (resized).JPG
The brackets were $8 a set and came in two days from McMaster-Carr, which is awesome. With shipping and tax I'm into it for $27 plus a little bit of my time in addition to the cart itself, and it could have ended much more badly given my premature chop-job on the handlebar.
I'll put a couple tubing plugs in the ends of the stubby handlebar sections just to finish it off. I would have preferred the 30mm locking bimini hinge solution if only because it looks cleaner and I like the idea of a physical lock on the position of the handlebar. But the parts would have taken much longer to get here and the cost would be approx. double for the special versions I'd need to source out of China. I'll stick with these for now and maybe if I get ambitious I'll lop another 1/2" off the lower sections so they sit flat on the load bed, but it stashes under my machines as-is so that'll be for another day when I REALLY don't have anything else to do - like play pinball!
 Champaign, IL

