(Topic ID: 134253)

Meteor Club - "We will let you know when the danger is past"

By pinballholder

8 years ago


Topic Heartbeat

Topic Stats

You

Linked Games

  • Meteor Stern Electronics, 1979

Topic Gallery

View topic image gallery

0a78d113b2b99d36e26fddb76b8ac93ccebcb353 (resized).jpeg
IMG_7769 (resized).jpeg
IMG_4306 (resized).jpeg
IMG_0414 (resized).JPG
IMG_4196 (resized).jpeg
06 (resized).jpg
04 (resized).jpg
0  - Ball Stuck Right (resized).jpg
0B (resized).jpg
0C (resized).jpg
0A (resized).jpg
IMG_4179 (resized).jpeg
IMG_4176 (resized).jpeg
IMG_4174 (resized).jpeg
IMG_4175 (resized).jpeg
20231230_105158 (resized).jpg

Topic index (key posts)

3 key posts have been marked in this topic (Show topic index)

There are 2,930 posts in this topic. You are on page 54 of 59.
#2651 1 year ago

I was wondering if anyone knew what the logic for spotting Meteor targets was? The star rollovers, standup, and inlanes can all spot Meteor drops at various points, and I was wondering how the game decides which of the Meteor targets to drop when one of those switches is hit.

It doesn't seem entirely random which of the METEOR target gets spotted, but neither can I see a distinct pattern. I'm doing some switch matrix troubleshooting, and knowing what the logic is (if any) would help. I was wondering if the game always tries to spot the targets in a particular order, or if the each switch has it's own preferred target to spot? Or if it's entirely random?

Anyone know?

20221107_125959 (resized).jpg20221107_125959 (resized).jpg
#2652 1 year ago
Quoted from Coyote:

+1 for Weebly. Cheaper, better built, better support.

Better support than alltek?! I very much disagree.

Tbh I think both support their products well. In this instance, for the 7 digit displays, I'd go with the Weebly though.

Both are great products.

#2653 1 year ago
Quoted from KSUWildcatFan:

Better support than alltek?! I very much disagree.

Weebly was willing to work with slochar in custom ROM revisions, etc. He can verify, but I believe I recall that the Alltek guy(s) just gave him the shaft, in the summary version. Plus, like was mentioned, you can put custom ROMs in it, but since it's in a uni-rom format, and they don't give any details on HOW to reprogram their EPROM, it's down to you on how to slip in a custom ROM. Weebly? Hell, there's a socket right there, and instructions posted on how to.

#2654 1 year ago
Quoted from Coyote:

Weebly was willing to work with slochar in custom ROM revisions, etc. He can verify, but I believe I recall that the Alltek guy(s) just gave him the shaft, in the summary version. Plus, like was mentioned, you can put custom ROMs in it, but since it's in a uni-rom format, and they don't give any details on HOW to reprogram their EPROM, it's down to you on how to slip in a custom ROM. Weebly? Hell, there's a socket right there, and instructions posted on how to.

Not knocking weebly in any way, just noting I've had exemplary support experience with alltek also.

#2655 1 year ago
Quoted from KSUWildcatFan:

Not knocking weebly in any way, just noting I've had exemplary support experience with alltek also.

Oh, fair. Not meaning to put words in your mouth. Just observations over the last few years, only here on Pinside. (One of my early SS game had an Alltek board in it; came with it, and never had issues with it so never had to personally contact them for support. The board went with the game when it was sold.)

#2656 1 year ago
Quoted from Coyote:

Oh, fair. Not meaning to put words in your mouth. Just observations over the last few years, only here on Pinside. (One of my early SS game had an Alltek board in it; came with it, and never had issues with it so never had to personally contact them for support. The board went with the game when it was sold.)

The lifetime transferable warranty from Alltek is a really nice thing. I just used it, on my friend's boards. Easy peasy. Just had to pay shipping.

#2657 1 year ago

Sharing this here for anyone looking for an original PF. Looks in fairly good shape. I thought about it, but mine is overall similar, minus a scratch from a flipper.

Parts - For Sale
Used, good condition - “Here is for sale an original Stern METEOR pinball playfield. This playfield is in very good and original condition (it was not retouched): see pics and make your own evaluation. ...”
2022-12-17
Ogden, UT
450
Archived after: 45 days
Viewed: 454 times
Status: Not sold: Decided to keep game

#2658 1 year ago

Who here has installed “Franks Battery Board” from TNT Amusements? I ordered one and selected Bally/Stern 1977-1984 from the drop-down menu. However, I don’t see how this is supposed to be installed. The pins and basic footprint of this don’t match up with the Meteor CPU.

3016B7D1-36AB-4976-B169-D0C1562C4CD4.png3016B7D1-36AB-4976-B169-D0C1562C4CD4.png48A17FD2-5133-4CC2-8C25-2D67D89BBD9D.jpeg48A17FD2-5133-4CC2-8C25-2D67D89BBD9D.jpeg
#2659 1 year ago

You will use the larger holes below the battery. You may need to add a small jumper wire to connect the holes to make proper connection if there is any corrosion.
Inked185bb36db564497988da321c516e0b828196de32_LI (resized).jpgInked185bb36db564497988da321c516e0b828196de32_LI (resized).jpg

#2660 1 year ago
Quoted from La4s:

You will use the larger holes below the battery. You may need to add a small jumper wire to connect the holes to make proper connection if there is any corrosion.[quoted image]

Exactly. It fits lower down on the board.

pasted_image (resized).pngpasted_image (resized).png
#2661 1 year ago

Perfect! Thank you!

#2662 1 year ago

I don't even bother running batteries on my games with the new code (galaxy, meteor) since the arduino handles memory features. Just another thought to kick around. The new code is awesome.

#2663 1 year ago
Quoted from KSUWildcatFan:

I don't even bother running batteries on my games with the new code (galaxy, meteor) since the arduino handles memory features. Just another thought to kick around. The new code is awesome.

Or use an nvram 5101 chip.

#2664 1 year ago

Just added the Meteor 2021 code kit to my machine yesterday. Such an easy install and HOLY HELL what a cool upgrade to an already awesome game. Kudos to the creator and RoyGBev for his awesome board kit.

Does anybody have a recommendation for a part that would allow me to control the internal code selection jumper from the outside of the game? A remote controlled jumper if you will.

#2665 1 year ago
Quoted from anathematize:

Just added the Meteor 2021 code kit to my machine yesterday. Such an easy install and HOLY HELL what a cool upgrade to an already awesome game. Kudos to the creator and RoyGBev for his awesome board kit.
Does anybody have a recommendation for a part that would allow me to control the internal code selection jumper from the outside of the game? A remote controlled jumper if you will.

I just used a mini/micro toggle switch and installed it in the mesh screen under the left side of the head. Just ran the wires to ah connector that plugs in the upgrade board. I'll have to see if I can get pictures.

#2666 1 year ago
Quoted from anathematize:

Just added the Meteor 2021 code kit to my machine yesterday. Such an easy install and HOLY HELL what a cool upgrade to an already awesome game. Kudos to the creator and RoyGBev for his awesome board kit.
Does anybody have a recommendation for a part that would allow me to control the internal code selection jumper from the outside of the game? A remote controlled jumper if you will.

Yes, what Robotworkshop said above, but in my case I ran a pair of jumper wires from the Arduino to the front of the cab for easy access in a tight lineup of pins. I used this switch: https://www.amazon.com/gp/product/B07QGDDTWJ
IMG_0962 (resized).jpgIMG_0962 (resized).jpg

0 - Tools (resized).jpg0 - Tools (resized).jpg1 - Arduino (resized).jpg1 - Arduino (resized).jpg2 - Before (resized).JPG2 - Before (resized).JPG4 - After (resized).jpg4 - After (resized).jpg
1 week later
#2667 1 year ago
Quoted from tomdrum:

I just brought a Meteor home, pretty nice original game. Ordered the new code for it, can't wait to install it. I would like to replace the BG. I saw previous post about the color problems with the CPR version. Anyone gotten one recently and are they still off color wise?

Did you ever order a new BG? I'm debating between CRP and Coos. I like that Coos shows an actual picture of the product, but it appears to contain no green at all. I've read through this about the CPR color issues, and I'm still unclear if it's been corrected or not, and also what the mirror quality is like?

Coos
https://www.coos.net/bingo_e/images/Stern%20meteor.jpg

CRP
https://classicplayfields.com/shop/pinball-backglasses/meteor-3/

#2668 1 year ago
Quoted from cookpins:

Did you ever order a new BG? I'm debating between CRP and Coos. I like that Coos shows an actual picture of the product, but it appears to contain no green at all. I've read through this about the CPR color issues, and I'm still unclear if it's been corrected or not, and also what the mirror quality is like?
Coos
https://www.coos.net/bingo_e/images/Stern%20meteor.jpg
CRP
https://classicplayfields.com/shop/pinball-backglasses/meteor-3/

Looking at the picture, the Coos one looks like it has the green layer. In person, the 'green' is a dark, dark almost grey-green. Without it (eg CPR), the cones of the missiles were MUCh more blue in shade.

#2669 1 year ago
Quoted from Coyote:

Looking at the picture, the Coos one looks like it has the green layer. In person, the 'green' is a dark, dark almost grey-green. Without it (eg CPR), the cones of the missiles were MUCh more blue in shade.

Shouldn't the Meteor (object, not wording) be very dark as well, as its mostly green? It looks to be straight mirror on the Coos one, and is dark on the CPR image.

#2670 1 year ago
Quoted from cookpins:

Shouldn't the Meteor (object, not wording) be very dark as well, as its mostly green? It looks to be straight mirror on the Coos one, and is dark on the CPR image.

Ah, good question. I admit, I can't answer that. Maybe someone else can chime in. (When the green/not green came up, I always used the rockets as my benchmark, since it was easy for me to see the differences there.) Sadly, because of my upcoming move, my original Meteor (glass) is now in storage, so i can't check. :/

#2671 1 year ago
Quoted from cookpins:

Shouldn't the Meteor (object, not wording) be very dark as well, as its mostly green? It looks to be straight mirror on the Coos one, and is dark on the CPR image.

The meteor (object, not wording) is stippled between green and mirror so a lot is going to depend on where you're standing. Looking at mine and then at the photos I'd say the Coos version looks more correct. The CPR one has that silver material that doesn't really look like mirroring. There are also incorrect colors on the CPR. For example the R in METEOR should be the same color as the STERN just below it.

3 weeks later
#2672 1 year ago

Getting ready to tear down the meteor. Can anyone confirm this is how the posts came from the factory? Why not just use short posts under the plastics so the screw heads don't scrape? Clearly they had short posts available since they used a couple on the outlanes but under the plastics they appear to be all tall.

IMG_20230202_121909140_HDR (resized).jpgIMG_20230202_121909140_HDR (resized).jpg
#2673 1 year ago
Quoted from polyacanthus:

Getting ready to tear down the meteor. Can anyone confirm this is how the posts came from the factory? Why not just use short posts under the plastics so the screw heads don't scrape? Clearly they had short posts available since they used a couple on the outlanes but under the plastics they appear to be all tall.
[quoted image]

Hey, I recognize that playfield! haha I'm not sure how it came from the factory but when I rebuilt my other Meteor, I replaced all those posts with short ones so they wouldn't scratch the art off my CPR plastics. They probably weren't expecting these games to still be around 44 years later. C'MON Stern!

#2674 1 year ago
Quoted from polyacanthus:

Getting ready to tear down the meteor. Can anyone confirm this is how the posts came from the factory? Why not just use short posts under the plastics so the screw heads don't scrape? Clearly they had short posts available since they used a couple on the outlanes but under the plastics they appear to be all tall.
[quoted image]

Yes, they came from the factory with some tall posts to raise the plastics.

The reason was to prevent air-balls from going on top of the plastic, and potentially getting stuck between the top of the plastic, and the glass.

#2675 1 year ago

Ah that makes sense, thanks. I will probably replace some with shorties like Jakers did to protect the plastics since the game won't be routed.

#2676 1 year ago

I take small pieces of Mylar and place them under the plastics where any screw head is present. Especially on sling plastics. It seems to help.

#2677 1 year ago

Yes, what Robotworkshop said above, but in my case I ran a pair of jumper wires from the Arduino to the front of the cab for easy access in a tight lineup of pins.

So you just spliced more wire onto the 5v supply wires plugged into the new board and ran each end onto an end of the switch? Getting ready to install mine this week.

-Nate

Added 13 months ago:

Didn't mean to quote myself........getting back to the toggle switch, did you guys just extend the yellow and blue wire from the power plug on the new board and solder to an "on off" switch?

Thanks.

1 week later
#2678 1 year ago

Does anyone make a reproduction arch ball guide? Mine has some rust and is going to look crummy with the new playfield so I'd like to replace it. If someone sells metal strip for this purpose I could make one but I haven't seen any "make your own ball guide" parts. It would be a little pricey from online metal places.

#2679 1 year ago
Quoted from polyacanthus:

Does anyone make a reproduction arch ball guide? Mine has some rust and is going to look crummy with the new playfield so I'd like to replace it. If someone sells metal strip for this purpose I could make one but I haven't seen any "make your own ball guide" parts. It would be a little pricey from online metal places.

https://mantispinball.com/product/misc-ball-guide-kit/

You may want to contact Kerry to ensure you get a piece long enough. I can’t recall if there’s a really long one on Meteor off hand.

#2680 1 year ago

Ah, thanks, I thought I had seen that somewhere before. Yes the arch guide is pretty long at 25-3/4in but I will ask if they can cut one for me.

#2681 1 year ago
Quoted from polyacanthus:

Does anyone make a reproduction arch ball guide? Mine has some rust and is going to look crummy with the new playfield so I'd like to replace it.

If you've got a big enough container, you could try restoring it by soaking it in Evaporust for 24-48hrs, then hit with a polisher (Dremel or similar tool) and some Flitz or similar to get back that shine.

#2682 1 year ago
Quoted from Mathazar:

If you've got a big enough container, you could try restoring it by soaking it in Evaporust for 24-48hrs, then hit with a polisher (Dremel or similar tool) and some Flitz or similar to get back that shine.

The original is chrome plated, and besides the rust (from a mouse nest at one point I think) all the chrome is worn off down the center where the ball rubs. I'm not sure it's worth the effort at this point.

1 week later
#2683 1 year ago

I need some help figuring out why two rows of playfield insert lights are out.
All of row 2 for the rockets and the row of six lights for the spinner.
I reseated the connectors and tested the fuses. Is there a common wire that would cause both of these rows to go out?
Thanks

I found the problem. One row had a missing screw and the bracket was tucked under the harness and the other bracket has a loose screw on the ground side.

#2684 1 year ago

My drop targets were bricking really bad and the machine was more frustrating than fun. I have new drops on the way so I decided to experiment with these.
I sanded off half the hood with a Dremel then blocked them with 320 then 600 grit.
The machine plays great now!
I played for around 40 minutes with zero bricks.
I still need to do the hoods on bank 2.

A6F73C2B-F095-4506-AF64-47D018B21ADB (resized).jpegA6F73C2B-F095-4506-AF64-47D018B21ADB (resized).jpeg6ED95E1C-FF9D-4C83-94B0-5F5ED99C88EA (resized).jpeg6ED95E1C-FF9D-4C83-94B0-5F5ED99C88EA (resized).jpegEBC86C8F-C408-4C61-9F2F-00F0F70CFE34 (resized).jpegEBC86C8F-C408-4C61-9F2F-00F0F70CFE34 (resized).jpeg
1 week later
#2685 1 year ago

Just wondering, does the Meteor 2021 Arduino add-on work with a Weebly board?

#2686 1 year ago
Quoted from pintuck:

Just wondering, does the Meteor 2021 Arduino add-on work with a Weebly board?

With a new (recent) weebly board, yes. He added the necessary requirements for the arduous hookup in the last update of the board.

#2687 1 year ago
Quoted from pintuck:

Just wondering, does the Meteor 2021 Arduino add-on work with a Weebly board?

I had this same question since I want to figure out how to add this new code after installing a new Weebly board. Here is the response he sent me.

“The new versions are arduino compatible. The MPU has a socket to plug the arduino directly into the MPU so you don't need any adapter that plugs into MPU j5. Then you move two labeled jumper shunts next to the arduino socket to the arduino position and then remove the U9 CPU.”

Good news but I’ll admit, I’m a but confused on what I actually need to buy or how to install this. Can anyone give a simple list?

#2688 1 year ago
Quoted from djblouw:

With a new (recent) weebly board, yes. He added the necessary requirements for the arduous hookup in the last update of the board.

I have the latest Weebly board and I purchased the ready made Meteor 2021 kit with the J5 adaptor soldered on.
I tried it in the J5 position and didn't work. The install note only mentions the original Stern MPU and the Alltek as compatible. Therefore, I should be able to unsolder the Arduino from the J5 adaptor and plug the arduino into the slot provided, and remove the chip U9 and away it goes?

#2689 1 year ago
Quoted from SteelNation:

Good news but I’ll admit, I’m a but confused on what I actually need to buy or how to install this. Can anyone give a simple list?

You'll need an Arduino, and Weebly board.
May need a couple smaller things to go along with it, but as far as the MPU is concerned - that's it.

Quoted from pintuck:

Therefore, I should be able to unsolder the Arduino from the J5 adaptor and plug the arduino into the slot provided, and remove the chip U9 and away it goes?

Yes, because AFAIK, the Weebly board's J5 doesn't have all traces running to it. ( barakandl may correct me, I'm running on old data here..) So, yeah, unsolder the harness and then plug it in.

#2690 1 year ago
Quoted from Coyote:

You'll need an Arduino, and Weebly board.
May need a couple smaller things to go along with it, but as far as the MPU is concerned - that's it.

Yes, because AFAIK, the Weebly board's J5 doesn't have all traces running to it. ( barakandl may correct me, I'm running on old data here..) So, yeah, unsolder the harness and then plug it in.

You would still need the WAVtrigger for the new sound pack.

If the Arduino you bought is soldered to the J5 adapter board then you are better off buying another plain Arduino board to put on the Weebly board instead of unsoldering it.

#2691 1 year ago
Quoted from Robotworkshop:

You would still need the WAVtrigger for the new sound pack.
If the Arduino you bought is soldered to the J5 adapter board then you are better off buying another plain Arduino board to put on the Weebly board instead of unsoldering it.

Thanks for your answers! I was thinking the same because I have the original Stern MPU, I would put the Meteor 2021 J5+Arduino on it, and get another Arduino only for the Weebly board and keep the single Wav trigger board in there.

Is it easy to upload the code on a blank Arduino? Haven't looked into it yet and figure its pretty easy figure out.
I pulled a copy of the 2021 code in readiness. I figure I can upload the code with it in the game as the game powers the Arduino.

#2692 1 year ago
Quoted from pintuck:

Thanks for your answers! I was thinking the same because I have the original Stern MPU, I would put the Meteor 2021 J5+Arduino on it, and get another Arduino only for the Weebly board and keep the single Wav trigger board in there.
Is it easy to upload the code on a blank Arduino? Haven't looked into it yet and figure its pretty easy figure out.
I pulled a copy of the 2021 code in readiness. I figure I can upload the code with it in the game as the game powers the Arduino.

It isn’t hard to install the code onto the Arduino. Getting things setup to do it the first time involve a few steps on the computer. You need to download and install the Arduino tools on your computer. Then download the BSOS base code and the Meteor 2021 game specific code. In the Arduino tool select the version of the Arduino you have. If using the Nano there are a couple different variations so if one hangs sending the code to it pick the other version with different boot loader. You can program the Arduino with a USB directly without it being in the pinball machine.

Additional things you need to check and may need to alter. In the code itself that you download there are some configuration settings you may need to change. One is for the revision of the adapter on how it plugs in which is 1, 2, 3, or 4. No idea what version the Weebly board supports. The other setting has to do with the WAVtrigger and the version of firmware on that

#2693 1 year ago
Quoted from pintuck:

Thanks for your answers! I was thinking the same because I have the original Stern MPU, I would put the Meteor 2021 J5+Arduino on it, and get another Arduino only for the Weebly board and keep the single Wav trigger board in there.
Is it easy to upload the code on a blank Arduino? Haven't looked into it yet and figure its pretty easy figure out.
I pulled a copy of the 2021 code in readiness. I figure I can upload the code with it in the game as the game powers the Arduino.

Here's a great video that troxel made about the process of installing code on the Arduino for Meteor:

I think that in the video he's building an Arduino Nano, and for the Weebly you'll need the Arduino MEGA 2560PRO:
https://www.amazon.com/SongHe-ATMEGA2560-16AU-Pinheaders-Compatible-Mega2560/dp/B07TGF9VMQ/

But the process of programming is much the same. I've tried to make the programming a *little* easier by including all the files you need in one place:
https://github.com/BallySternOS/Meteor2021

#2694 1 year ago

To install an Arduino on a nvram.weebly.com MPU....

Remove U9 processor.

Plug the Arduino mega directly into the female socket in the top right of the MPU.

Move the nearby jumper shunts up to the Arduino position.

You cannot use the Arduino break out board on MPU j5. It must go into the dedicated Arduino socket.

The reasons for this is the 6802 can't z state the addresses bus so it must be removed. The 6802 has internal clock divide circuitry. When the 6802 is removed, jumpers enable the external oscillator divide by four circuit.

I need to update the pictures..

20230317_232005 (resized).jpg20230317_232005 (resized).jpg20230317_232028 (resized).jpg20230317_232028 (resized).jpg
#2695 1 year ago

I was tired of my Meteor playing like crap so I gave in and pulled the bank again, this time intent on scrubbing it clean (like I've admitted just needs done by default at this point for all the other Sterns I've touched). I had "rebuilt" it multiple times (read: DID NOT CLEAN) and it seemed fine outside the game, but was wildly inconsistent in the game: half dropping targets, repeatedly resetting because some didn't want to stay up, etc.

In addition to the overall filth, I noticed I only had 3 screws and the entire assembly wasn't firmly secured to the playfield. Obviously very, very necessary. All cleaned up and firmly secured, it finally functions properly again.

I have a CPR playfield that was touched up and cleared around 7 months ago. I feel like I'm about ready to swap it but curious from those who have done it, is meteor one of the easiest swaps ever? It seems like it should be..?

Also my upper left plastic was broken and had to be mylar'd back together. Anyone have a decent old one laying around after buying new ones? I don't think this one is commonly broken.

20230322_150954 (resized).jpg20230322_150954 (resized).jpg20230322_153016 (resized).jpg20230322_153016 (resized).jpg20230322_200711 (resized).jpg20230322_200711 (resized).jpg20230322_203756 (resized).jpg20230322_203756 (resized).jpg20230322_204002 (resized).jpg20230322_204002 (resized).jpg20230323_094236(0) (resized).jpg20230323_094236(0) (resized).jpg20220913_142529 (resized).jpg20220913_142529 (resized).jpg20230323_094056 (resized).jpg20230323_094056 (resized).jpg
#2696 1 year ago
Quoted from bluespin:

Or use an nvram 5101 chip.

Missed this comment.

Sure, you can, but it's completely unnecessary if you're exclusively running the Arduino code. It 100% handles all memory functions for you. Save the $ on the 5101 IMO.

#2697 1 year ago
Quoted from KSUWildcatFan:

I was tired of my Meteor playing like crap so I gave in and pulled the bank again, this time intent on scrubbing it clean (like I've admitted just needs done by default at this point for all the other Sterns I've touched). I had "rebuilt" it multiple times (read: DID NOT CLEAN) and it seemed fine outside the game, but was wildly inconsistent in the game: half dropping targets, repeatedly resetting because some didn't want to stay up, etc.
In addition to the overall filth, I noticed I only had 3 screws and the entire assembly wasn't firmly secured to the playfield. Obviously very, very necessary. All cleaned up and firmly secured, it finally functions properly again.
I have a CPR playfield that was touched up and cleared around 7 months ago. I feel like I'm about ready to swap it but curious from those who have done it, is meteor one of the easiest swaps ever? It seems like it should be..?
Also my upper left plastic was broken and had to be mylar'd back together. Anyone have a decent old one laying around after buying new ones? I don't think this one is commonly broken.
[quoted image][quoted image][quoted image][quoted image][quoted image][quoted image][quoted image][quoted image]

I don't think any CPR PF swap is easy. Some easier than others, yes, but.

The dimples are not reliable most of the time and this is huge for drop target banks. These need to be installed in the correct location otherwise you can have issues with them rubbing when they drop or resetting. And since Meteor has 4 DT banks, it won't be straight forward. I had this issue with CPR's EBD and those drop banks.

#2698 1 year ago

I'm about to do mine here soon. Good point about the dimples. The devil is in the details.

#2699 1 year ago

Yeah, I guess I should clarify. I don't think *any* swap is "easy" -- which is why my clearcoated Meteor playfield continues to hang on my basement wall.

I've done a bunch of hardtops and those don't scare me, but something about a swap still has me mystified. But I'll have Meteor and Seawitch to do, at a minimum, before it's all said and done. :\

#2700 1 year ago

I've done several hardtops and now two playfield swaps to CPRs....Meteor was my first, and I just completed a Night Rider playfield swap a couple months ago (working on the cabinet now).

I've gotten over my fear of drilling into a brand new playfield. Once I got by that, the only real fear that lingers is the tediousness of removing the playfield harness and tracking every single point where you're desoldering so that you can correctly solder things back up. That requires a TON of pictures and (at least for me) toe-tagging each connection point and zip typing the tags to the wires.

In for a penny, in for a pound, right? So with the harness removed, you've got to clean it as you'll likely never have that opportunity again. And as long as the playfield mechs are now unencumbered by wires and you have to remove those as well to move them to their new home, you might as well tear them down and clean those, too. If you don't, you'll regret putting parts and wires with 30-40 years of dirt, grime, and black coil dust on a brand, new shiny CPR playfield.

As previous posters said, don't trust the dimples on a CPR playfield. They're great as a guideline, but there will always be ones that are off. From my vast experience of doing this twice, lol:
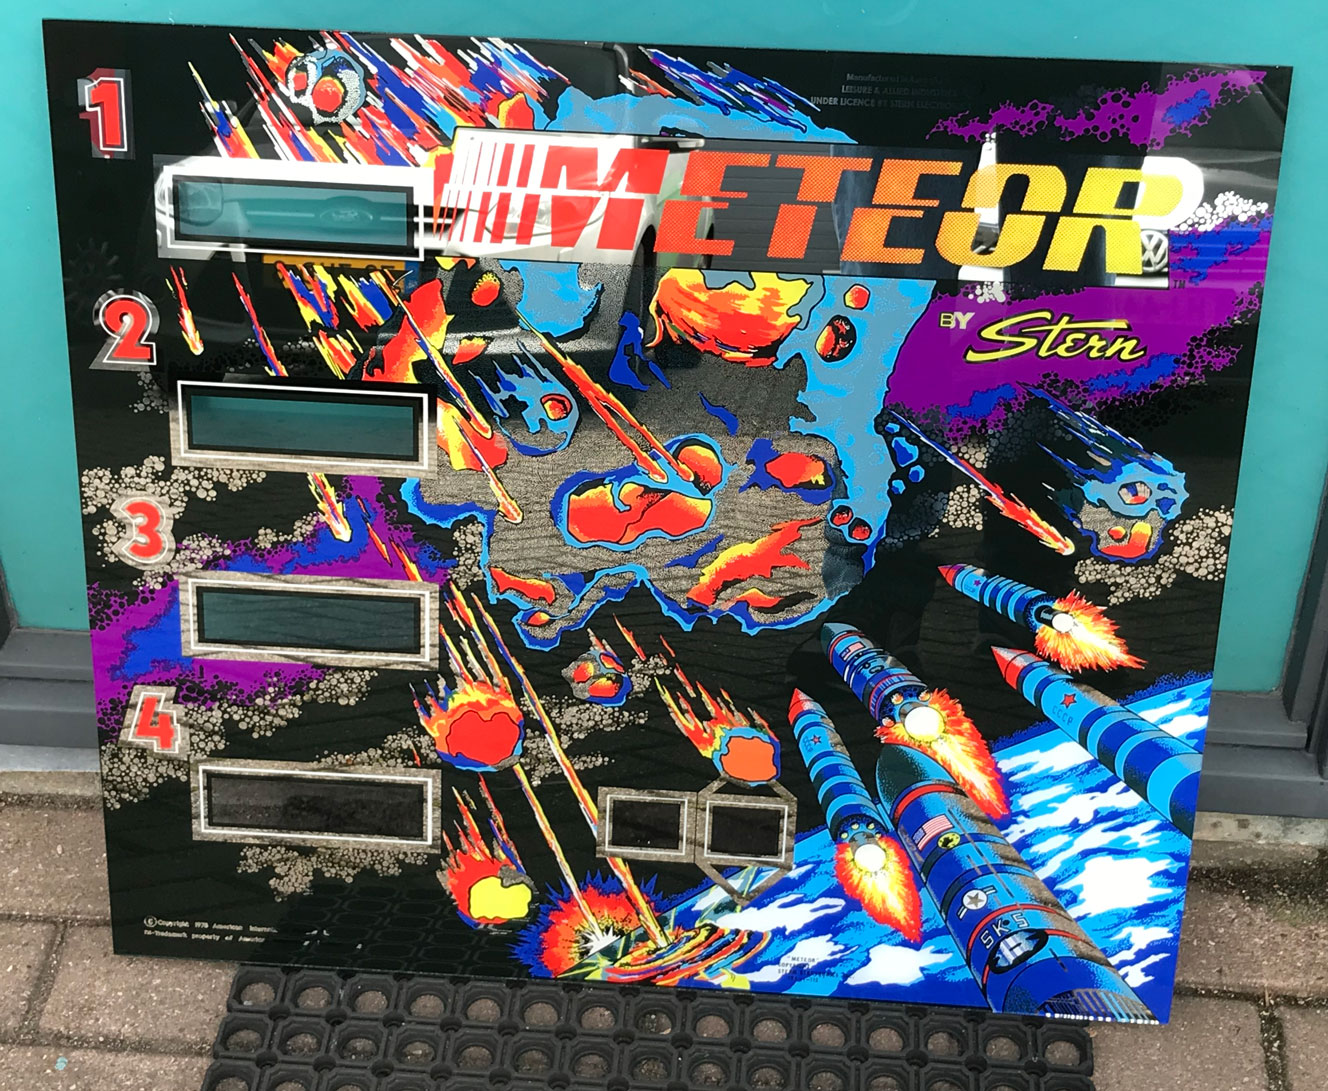
Meteor
- Two dimples were missing topside (for posts) on my edition of the CPR. Unlike the underside, you have to be careful drilling new holes thru the topside clearcoat to avoid cracking. Plenty of videos on youtube show you how this is done and what tools to use.
- At least 20 dimples on the underside were off, a few by a lot. Best advice is to line up your hardware with where it needs to be, hold it in place (a second set of hands is handy at this point), and use an awl to make your own dimple for pre-drilling. This is made somewhat easier by using a playfield rotisserie.
- Three of the drop target banks (111, 222, 333) where a cinch - got those in and working the first time. The METEOR drop target bank was a hot mess. I probably drilled holes, filled in holes, and redrilled holes 3 or 4 times to get the right position for that bank (along with rebuilding and adjusting the assembly multiple times) so that the targets dropped and reset properly.

Night Rider
- Topside dimples good!
- Pretty much every dimple was off on the underside, but it may not totally be CPR's fault. The Night Rider CPR playfield is for the SS version of the pin, and I'm restoring the EM version. So I pretty much had to make my own underside dimples anyway because the wire harnesses for the SS and EM versions are vastly different, of course. And there are extra EM mechs on the underside as well.

Promoted items from Pinside Marketplace and Pinside Shops!
$ 10.00
$ 25.00
Apparel - Men
Slipstream Mod Shop
 
$ 29.00
Boards
RoyGBev Pinball
 
From: $ 14.00
Electronics
Third Coast Pinball
 
$ 169.00
$ 69.00
$ 5.95
Playfield - Protection
The Pinball Scientist
 
$ 3.00
$ 44.00
Boards
PinballReplacementParts
 
$ 29.00
Cabinet - Sound/Speakers
RoyGBev Pinball
 
From: $ 1.25
Playfield - Other
Rocket City Pinball
 
From: $ 130.00
Boards
Troxel Repair
 
$ 29.00
Boards
RoyGBev Pinball
 
$ 40.00
Gameroom - Decorations
The Flipper Room
 
From: $ 115.00
Playfield - Protection
Beehive Pinball Co.
 
$ 3.00
Tools
Nezzy's Pinball Prints
 
Wanted
Machine - Wanted
Middletown, OH
From: $ 33.00
Gameroom - Decorations
Rocket City Pinball
 
There are 2,930 posts in this topic. You are on page 54 of 59.

Reply

Wanna join the discussion? Please sign in to reply to this topic.

Hey there! Welcome to Pinside!

Donate to Pinside

Great to see you're enjoying Pinside! Did you know Pinside is able to run without any 3rd-party banners or ads, thanks to the support from our visitors? Please consider a donation to Pinside and get anext to your username to show for it! Or better yet, subscribe to Pinside+!


This page was printed from https://pinside.com/pinball/forum/topic/meteor-club-we-will-let-you-know-when-the-danger-is-past/page/54?hl=dakotamike and we tried optimising it for printing. Some page elements may have been deliberately hidden.

Scan the QR code on the left to jump to the URL this document was printed from.