(Topic ID: 257700)

Kraken Pinball

By matthies

4 years ago


Topic Heartbeat

Topic Stats

You

Linked Games

No games have been linked to this topic.

    Topic Gallery

    View topic image gallery

    kraken_2.gif
    kraken_1 (resized).jpg
    kraken_4 (resized).jpg
    kraken_3 (resized).jpg
    kraken_2 (resized).jpg
    kraken_1 (resized).jpg
    clapping-octopus (resized).png
    kraken_ramp.gif
    kraken_1 (resized).jpg
    0121201626 (resized).jpg
    kraken_3 (resized).jpg
    kraken_2 (resized).jpg
    kraken_1 (resized).jpg
    kraken-inserts (resized).jpg
    kraken_5 (resized).jpg
    kraken_3 (resized).jpg
    There are 79 posts in this topic. You are on page 1 of 2.
    40
    #1 4 years ago

    The idea behind the Kraken theme is you're the captain of a ship and you hunt mythical sea creatures. I like it when a pin takes me on a journey, and this one will take that literally. When you start the game, you set sail on the open seas. The shots you make steer your ship in different directions. Every encounter you have with creatures or other ships along the way changes the journey you're on. The plan is to be able to upgrade your ship's weapons, crew, etc. as you progress through the locations on a big open map.

    The end goal of this journey is to hunt down and defeat the mythical kraken. The weapons, ship upgrades, and crew you collect over the journey will play a massive role in the end battle.

    This idea is based on the video game 'FTL'. If you haven't played it, the idea is you control a crew on a spaceship and you're on the run from a rebel flagship. The goal is to make it back to your base, then you battle the flagship. Along the way you choose different paths, encounter different enemies and can upgrade your ship and crew in different ways. This means every game is different. Half of your crew may die in one playthrough, then the next time you might be lucky to upgrade to a powerful weapon early on. What makes me keep going back to FTL is the idea that I don't quite know what's going to happen along the way and each game can be quite different.

    I want a similar experience with Kraken - each game has a similar journey, but the path you take and encounters along the way can completely change the later part of the game. If you fly through the modes and avoid conflict, you'll have less weapons and crew to deal with the kraken. If you work hard to get the most out of every encounter along the way, the battle with the kraken will be easier. That's the goal - whether I can code something like this is another story.

    As you can see, this is an ambitious project (at least for me). Multiple branching paths to take and different ship upgrades means I have a lot of coding and media work to do. While I really enjoyed creating pixel animations on the RGB DMD in my last pin, I feel I need an LCD for this one to display the map and objectives as clearly as possible. I feel it's going to be a lot harder making animations and art look good on an LCD, so we'll see how I go.

    The music I created for my last pin was based on a style called synthwave (I was heavily influenced by TNA). It was fun and easy to create after a few YouTube tutorials and really fit the theme. For Kraken, I'm thinking a big and epic journey needs music to match. I'd love to hear suggestions on what type of music you think fits with the theme. I'm thinking big guitar riffs mixed with orchestral parts like a movie soundtrack.

    Cabinet Build
    I've ordered parts and while I wait (I'm in Australia, so everything is slow to get here) I thought I'd whip a cabinet together. I pulled off the lockbar and leg bracket from my other pin to measure up the new one.

    cab_3 (resized).jpgcab_3 (resized).jpgcab_4 (resized).jpgcab_4 (resized).jpgcab_7 (resized).jpgcab_7 (resized).jpg

    I found other people's homebrew threads really helpful when I built my first pin, so I'll try and share as much detail as I can along the way to hopefully help somebody else out.

    Keen to hear what people think of the theme or any ideas on what should happen in the modes!

    #2 4 years ago

    Nice

    #3 4 years ago

    Nice pool!

    Seriously though, I think it's awesome you've got the guts and persistence to make your own game. Must be very rewarding.

    #4 4 years ago

    While I'm waiting for parts, I'm going to start sculpting a big kraken model for the playfield. The plan is to have a big head sticking out of the water and legs looping around the playfield. I like the idea of having the legs wrap around the ramps. Sort of like GOTG where you have Groot's head over a scoop and hands stretching over the playfield.

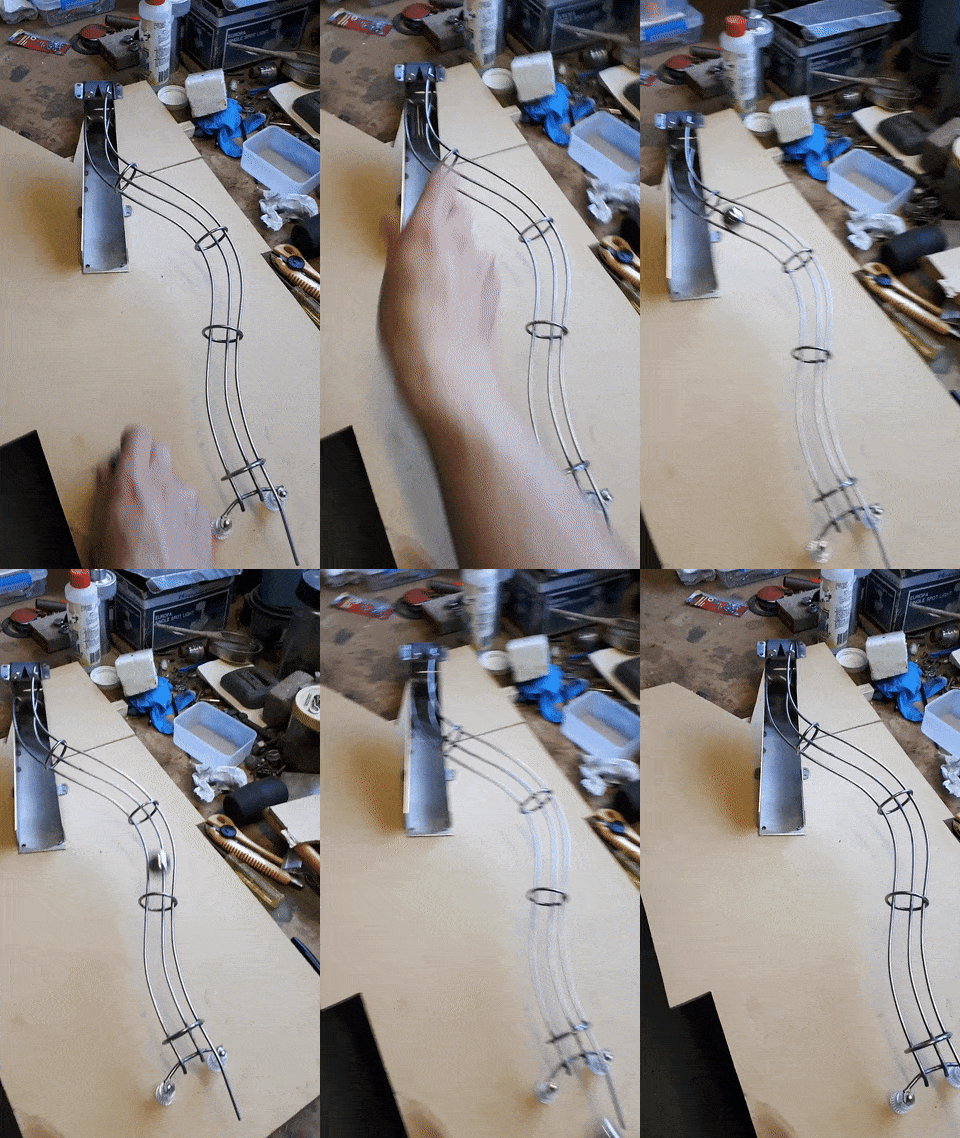
    I bought some Monster Clay, which is used to sculpt these type of things. Never used it before but there are a stack of tutorials on YouTube.

    clay_1 (resized).jpgclay_1 (resized).jpg

    The plan is to sculpt the head in clay, create a silicone mold, then make a rubber cast and paint it. I've never done anything like this before, so I'll be watching a lot of tutorials.

    clay_2 (resized).jpgclay_2 (resized).jpg

    This stuff is surprisingly easy to use. Heat it up in the microwave and it softens until you can scoop it out. It's hard to come up with a good looking design though.

    Knowing that I'll have a big kraken head as the main feature makes it easier to start planning the layout. Here's a rough head and mouth sitting on a MDF board where I've been sketching out different layouts in pencil.

    head_playfield (resized).jpghead_playfield (resized).jpg

    It makes sense to have the head somewhere around here and sit it over a scoop. With the head roughly in position, I spent some time looking over different pins with this main shot. Groot in GOTG, the ship in Star Trek, and Sparky in Metallica are good examples of what I'm aiming for. I like playing those games so they're good starting points.

    Here's my first attempt at a monster head:

    kraken_head_1 (resized).jpgkraken_head_1 (resized).jpg

    More Cthulhu than kraken, but a good practice run.

    Cabinet is now ready for when the legs arrive. I might spray the inside so I can start installing the power supplies and FAST boards straight away (bought them a year ago).

    cab (resized).jpgcab (resized).jpg

    #5 4 years ago

    #6 4 years ago

    That head looks awesome! I'll have to look into that Monster Clay. How far does that stuff go? I have no idea how big of a toy I could make with a 5 lb bucket.

    I'm curious to see how the rubber cast works out. Think it will take the beatings from airballs as well or better than the hard plastic they're usually made from?

    #7 4 years ago

    It's a lot of clay. The good thing is that once you use it to create a cast, you heat it up to melt it back down and you can start again.
    You can't see it in the photo, but the head I made was shaped over an upside-down bowl. So you can cut down on how much clay you need for big objects.

    I guess if the rubber doesn't hold up I re-cast using harder plastic.

    #9 4 years ago

    Your sculpting skills are awesome. This head is really great.

    #10 4 years ago

    Been experimenting with different playfield layouts. I decided on having three flippers before I started, which sort of automatically positions a few shots to feed the flipper.

    The orbits and lower third are pretty basic, so I'm using pieces of paper to quickly sketch out different ideas for the middle shots. It'd be interesting to see how the pros plan out their playfields in the early stages.

    Here are a couple of layouts I like:

    kraken_1 (resized).jpgkraken_1 (resized).jpg

    I want to have lots of loops and use a drop target to block off a path at different times. Some of these shots look tight, so I'm making some cardboard ball guides to quickly test out the layouts.
    If they're too tight, I could cut the two captive balls to one. The idea is to make these look like cannons on the ship.

    kraken_2 (resized).jpgkraken_2 (resized).jpg

    As soon as the parts arrive, I'll be able to wire up the flippers and see how these shots feel.

    kraken_3 (resized).jpgkraken_3 (resized).jpg

    Having my other pin and some spare parts makes this one easy to measure up and get ready for parts.

    kraken_4 (resized).jpgkraken_4 (resized).jpg

    I've seen other people use foam core, but cardboard seems to work just fine.

    At night I've been experimenting with different sculpture designs. Here's one that really didn't work out to show how hard it is to come up with original designs:

    kraken_5 (resized).jpgkraken_5 (resized).jpg

    Those people on YouTube make it look so easy.

    #11 4 years ago

    I love this theme and your idea to wrap tentacles up from “under” the playfield with the head in the middle. Great sculpting so far.

    Octopi have beaks I believe Kraken are mythical so whatever works best should absolutely rule here... but have you considered using drop targets custom made as a beak to guard the entry to its mouth?

    Do you intend to have any portion of the tentacle as a targetable feature? Maybe to fight the Kraken you need to hit the head but also lit targets along the tentacles, kinda like the Jurassic park arcade games where you need to shoot the head but also other parts.

    Such a great theme. Would be amazing if you could cast the tentacles and have targets inside the casting with lights showing through... but probably impossible. Hell- you need to animate a tentacrl while your at it!!

    Cannot wait to see where you take this. The journey will be fun.

    #12 4 years ago

    I like your idea of having a drop target at the entry to the mouth. It sounds like a good way to mix things up during different modes and would look good with a beak decal. I'll see if I can squeeze one in after I try the first layout with the drop in the loop.

    I'd love to have the tentacles move around or even come down onto the playfield to block off shots or use as targets (the suckers on the tentacles would work perfectly as targets). How good would it be to be able to change the layout of the playfield by lowering or raising tentacles!
    But I have no idea how to do something that complicated with off-the-shelf parts. It might be easy for someone like Ben Heck, but it seems like a daunting job for me.

    #13 4 years ago

    Was just thinking. What if you custom cut the actual drop target into a beak shape. Then maybe you could even get by the target and into the mouth.... that way you could do different things depending on if the target is down. Maybe even have it on a counter and you need to snipe it X times to engage a mode.

    My thought was if you could actuall still get into the mouth but miss the tagget, that adds a level of skill for an aimed shot and immediate depth to the rules as two states exist for the mouth- drop up or drop down.

    #14 4 years ago

    Not much time to work on Kraken over Christmas, but managed to set up some cardboard ball guides to test out a layout.

    kraken_1 (resized).jpgkraken_1 (resized).jpg

    Making cardboard ramps might take a bit longer, but should give me a good idea of how this layout flows.

    I wired up the power supplies, FAST Power Filter and Controller boards.

    kraken_3 (resized).jpgkraken_3 (resized).jpg

    I also added some terminals in the cabinet to be able to easily connect and disconnect the playfield.

    kraken_4 (resized).jpgkraken_4 (resized).jpg

    The switches for the flipper buttons and start button also need to connect to the playfield because the switch board will be mounted on the playfield.
    As soon as I have my playfield parts, I should be able to quickly wire it up and test it out.

    #15 4 years ago

    Love the concept being a commercial fisherman myself. Are you basing your Kraken design on the rum bottle?

    #16 4 years ago

    Well, I do have a bottle of Kraken (the ceramic one) sitting next to the cabinet. So it's definitely influencing the design in one way or another...

    #17 4 years ago

    After trying to make a few different monster heads and getting frustrated with them, I thought I'd try a more straight-forward octopus head.

    kraken_1 (resized).jpgkraken_1 (resized).jpg

    Pretty happy with how it opens up at the front for the ball to go in. It should look good with the ball flying in and out. It sort of looks like a mouth without looking weird. Looks more like a kraken than any other attempts.

    kraken_2 (resized).jpgkraken_2 (resized).jpg

    I also made a tentacle loop that will stick out of the playfield in a few spots.

    kraken_3 (resized).jpgkraken_3 (resized).jpg

    I'm boxing it up in cardboard so I can try making a silicone mould. Never tried this before, so it'll be interesting if it works.

    Seeing as I'll be using an LCD for the display, I've been playing around with different layouts on a cheap sketchpad.

    kraken_4 (resized).jpgkraken_4 (resized).jpg

    The idea is that you will have a map showing your current path, what shots you need to take to go to different places, and an overview of your ship with what weapons you have, crew, etc. What else do you consider essential to have on the screen?

    Need to research how other pins use an LCD. I'd love to hear what pin you think does the best job of using an LCD and why. Or what pins do a bad job so I know what to avoid!

    #18 4 years ago

    Found this thread by accident, following great job so far ....

    #19 4 years ago

    Smoothed out the clay head and added some texture to it. Pretty happy with how it turned out.

    kraken_1 (resized).jpgkraken_1 (resized).jpg

    Boxed up the tentacle loop and prepared it for mould making.

    kraken_2 (resized).jpgkraken_2 (resized).jpg

    kraken_3 (resized).jpgkraken_3 (resized).jpg

    It used a lot of the silicone, so I'm going to need to buy a lot for the head. It started to firm up within about 10 minutes, which was plenty of time to work it.

    kraken_4 (resized).jpgkraken_4 (resized).jpg

    Once I cut the clay out, I'll try casting it.

    Not much else I can work on while I wait for parts, so I'm going to start working on the media for the screen. Here's a mockup of the layout I'm thinking about for the main screen.

    kraken_5 (resized).jpgkraken_5 (resized).jpg

    It won't have bright colours like this one, this is just so I can figure out what works and what doesn't.

    #20 4 years ago

    Last time I built a pin, I did all of the physical work first, then started coding at the very end. This time I want to be able to play my pin as soon as possible! So last night I started working in MPF (Mission Pinball Framework) to set up the basic game modes. Went through the MPF tutorial to refresh my memory and set up modes for mystery awards, combos, shots, and skillshots.

    If you're thinking of building a pin, I highly recommend MPF. Once you get used to the basics, it's so easy to use without having to know any programming languages.

    I designed a Kraken logo and used some Adobe After Effects templates to use for different awards and titles.

    kraken-1 (resized).jpgkraken-1 (resized).jpg

    Combos, jackpots, and skillshot awards will pop up over the top of the main screen like this:

    kraken-2 (resized).jpgkraken-2 (resized).jpg

    Found a great template that animates a book and opens up on a page. This is perfect for mystery awards.

    kraken-3 (resized).jpgkraken-3 (resized).jpg

    I was a bit worried at first about using a big display, but this is way better than hand drawing pixel animations frame by frame from scratch for a DMD like I did last time.

    11
    #21 4 years ago

    The resin tentacles turned out fine. It was a bit of work to get the clay tentacle out, but the silicone is pretty flexible.

    kraken-cast (resized).jpgkraken-cast (resized).jpg

    On my first attempt, I didn't add enough resin, but slushing it around was enough to build a firm wall at the ends as you can see above. On the second attempt, I filled it properly and it turned out fine.
    These loops will stick out of the playfield to make it look like the Kraken is coming out of the water.

    Now that I've had some practice, I can finish the Kraken head and try casting it.

    #22 4 years ago

    Parts arrived, so I'll finally get to make some real progress. The plan is to wire up the minimum parts so I can get it flipping and see how the shots feel. Then if I'm happy with the layout, I'll add the other parts and wire everything up.

    kraken_1 (resized).jpgkraken_1 (resized).jpg

    The cardboard ramps were a pain to put together, but they do a good enough job.

    kraken_2 (resized).jpgkraken_2 (resized).jpg

    kraken_3 (resized).jpgkraken_3 (resized).jpg

    kraken_4 (resized).jpgkraken_4 (resized).jpg

    #23 4 years ago

    Did you make the Hyperdrive as well ? Possible to get some pics of that if you have a second?

    #24 4 years ago
    Quoted from transprtr4u:

    Did you make the Hyperdrive as well ? Possible to get some pics of that if you have a second?

    Hyperdrive was the first pin I made back in 2018. It was a practice attempt to see if I could make one and is heavily inspired by TNA.

    You can see the entire build process here with photos and video: https://www.aussiearcade.com/forum/pinball/pinball-restoration-s/home-brew-pinball-projects/99290-homebrew-tna-inspired-build-first-time-build

    #25 4 years ago
    Quoted from matthies:

    Hyperdrive was the first pin I made back in 2018. It was a practice attempt to see if I could make one and is heavily inspired by TNA

    Nice "attempt" .... Impressive,reading that you did this 5 months...
    Forgot ... Thanks for the great read....

    #26 4 years ago

    Wired the FAST boards to the flippers and flipper buttons so I can quickly test the layout.

    kraken_1 (resized).jpgkraken_1 (resized).jpg

    Pretty happy with how the shots feel and make some adjustments to the cardboard positions. But overall, the layout feels good.

    kraken_2 (resized).jpgkraken_2 (resized).jpg

    Now I'll unplug everything, remove the cardboard, then add all the other hardware. I'll trace the layout before I add all the other hardware so I can scan it into my PC and start planning the artwork, inserts layout, etc.

    Wiring up the flippers made me remember how much work it was to wire up my last pin. Not looking forward to doing it all again!

    #27 4 years ago

    Added the other hardware to the playfield. Not really worried about adding rollover targets at this stage, still want to test the layout and make sure the shots feel good.

    kraken_1 (resized).jpgkraken_1 (resized).jpg

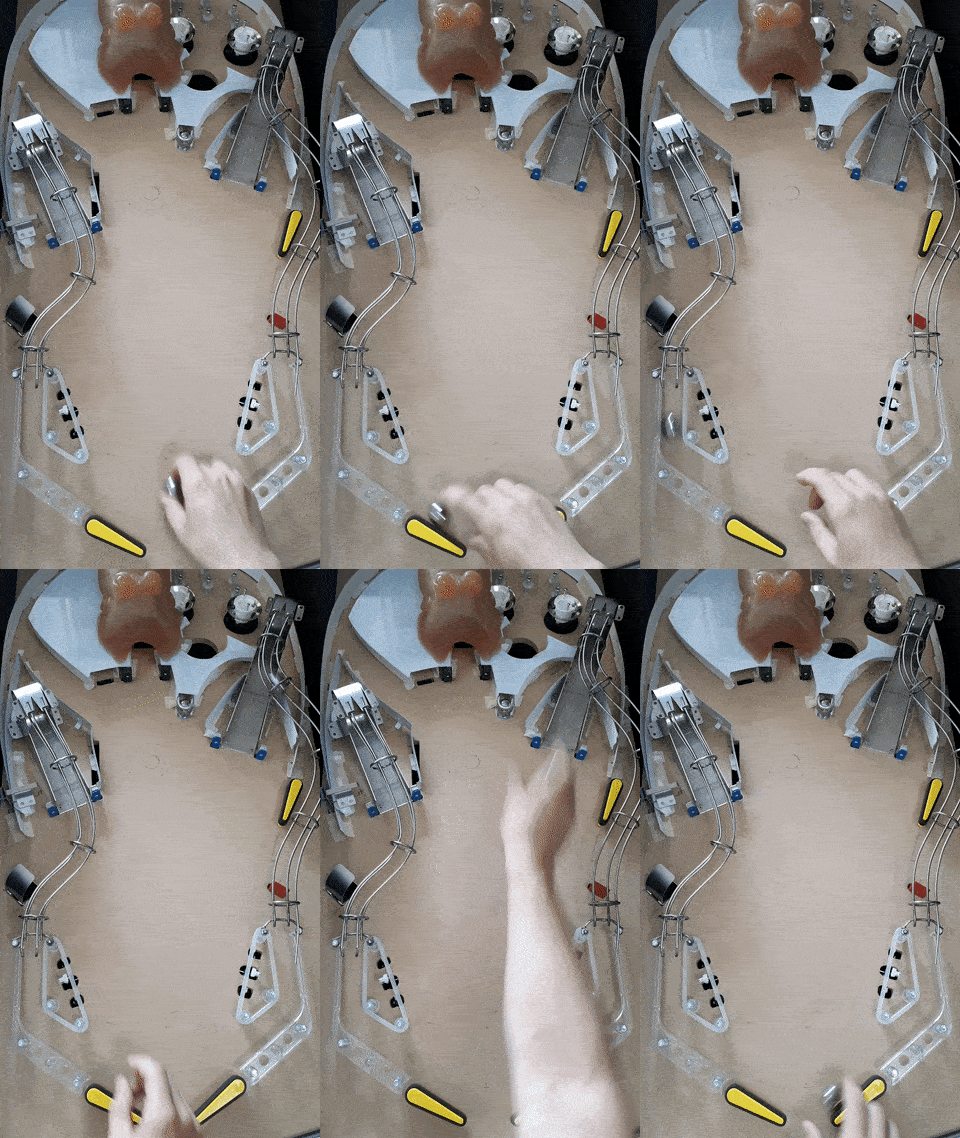
    Added a lower scoop that points at the right loop shot. The idea is that the scoop would return the ball to the upper right flipper. I didn't think it would work but it does. The cardboard does an okay job at passing the ball through towards the right flipper. Hopefully the metal guides will do a better job.

    kraken_2 (resized).jpgkraken_2 (resized).jpg

    Here's a rough idea of what it will look like with the kraken head in position.

    kraken_3 (resized).jpgkraken_3 (resized).jpg

    I'm happy with how it looks so I boxed it up and added the silicone.

    kraken_4 (resized).jpgkraken_4 (resized).jpg

    It would have taken far too much silicon to cover completely, so on the second half I added cornflour to the silicone to thicken it up like a paste. Cut down how much silicone I needed to use by a lot.

    kraken_5 (resized).jpgkraken_5 (resized).jpg

    #28 4 years ago
    Quoted from matthies:

    the layout was based heavily on TNA

    LOL, at least you copped to it right off the bat. The first thing I thought was "Woah, that's almost completely identical to TNA!"

    #29 4 years ago
    Quoted from Frax:

    LOL, at least you copped to it right off the bat. The first thing I thought was "Woah, that's almost completely identical to TNA!"

    In the other thread I linked to in the first post, I talked about how a lot of people do a retheme as their first homebrew as it's easier than starting completely from scratch.
    Hyperdrive is sort of one step above a retheme, but all the credit still goes to TNA for being an awesome layout.

    #30 4 years ago

    Removed the clay from the mould after it cured. This is a big chunk of silicone.

    kraken_1 (resized).jpgkraken_1 (resized).jpg

    It was a pain to pour the resin in the mould. It would have used a lot of resin to fill it, so I had to do it in stages and slosh it around.

    kraken_2 (resized).jpgkraken_2 (resized).jpg

    kraken_3 (resized).jpgkraken_3 (resized).jpg

    While it's fairly flexible, this thing is tough. There's definitely not going to be any problems with flyballs. You can see I added more resin at the front where it is most likely to get hit by a ball.

    kraken_4 (resized).jpgkraken_4 (resized).jpg

    kraken_5 (resized).jpgkraken_5 (resized).jpg

    Just need to trim the edges and clean up the ball entrance.

    #31 4 years ago

    Wow........thats a awesome piece of art!!!!

    #32 4 years ago

    How does the ball load into the scoop on the right? That seems like a tight shot to the side of a scoop. I worry that location does not provide the best bang for your buck. Have you considered replacing the targets on the left with drop targets and "battling" your way through them to a hole in the playfield which would feed the scoop via a tunnel?

    #33 4 years ago
    Quoted from lpeters82:

    How does the ball load into the scoop on the right?

    If you meant the scoop on the left, it's pretty easy to hit it from the right flipper. Instead of aiming straight for the scoop, you aim slightly above it. I'll be putting a post somewhere above it to widen the shot and help the ball bounce in from above. I also managed to hit it a few times from the upper flipper, so I'm not too worried about it.

    #34 4 years ago
    Quoted from matthies:

    In the other thread I linked to in the first post, I talked about how a lot of people do a retheme as their first homebrew as it's easier than starting completely from scratch.
    Hyperdrive is sort of one step above a retheme, but all the credit still goes to TNA for being an awesome layout.

    Yeah, but it's odd to 'retheme' something you never actually owned, I guess. And TNA is much much newer than what most people would retheme. I've got no room to talk since if I ever find the time and money, I'm doing WPT -> Voltron..... I just appreciated the honesty.

    #35 4 years ago

    Designed the two ramps in CAD a week ago after some YouTube tutorials and had them laser cut.

    kraken_1 (resized).jpgkraken_1 (resized).jpg

    It's probably not obvious how these ramps will work, but these photos should give a good hint:

    kraken_2 (resized).jpgkraken_2 (resized).jpg

    kraken_3 (resized).jpgkraken_3 (resized).jpg

    kraken_4 (resized).jpgkraken_4 (resized).jpg

    Have no idea if these will work, but luckily it's pretty cheap to cut different versions if needed.

    10
    #36 4 years ago

    I borrowed a friend's TIG and managed to weld the ramps together. First time using a TIG so I was glad I didn't destroy them.

    kraken_1 (resized).jpgkraken_1 (resized).jpg

    The holes in the sides and the brackets sticking out are for the optos. The sides will be covered with a sticker, so the scratches you can see don't matter.

    kraken_2 (resized).jpgkraken_2 (resized).jpg

    kraken_4 (resized).jpgkraken_4 (resized).jpg

    I like it when I can always see the ball, so I designed these ramps so they don't block the view to the outside orbit.

    kraken_5 (resized).jpgkraken_5 (resized).jpg

    Note that the ramps will be pushed back behind the blue targets compared to what you see above.

    Next job is to make the wireforms. The plan after that is to make tentacles that wrap around the ramps.

    #37 4 years ago

    This is looking awesome!

    #38 4 years ago

    Following!
    Cool!

    #39 4 years ago

    I made some rings so I can start trying to put together the wireforms for the ramps.

    Started by wrapping the wire around an old vacuum pole.

    kraken_1 (resized).jpgkraken_1 (resized).jpg

    Cutting the rings was a bit messy as the tension would change as each ring was cut off. So the wire kept shifting as you can see below.

    kraken_2 (resized).jpgkraken_2 (resized).jpg

    But managed to get a few useable rings out of it.

    kraken_3 (resized).jpgkraken_3 (resized).jpg

    After cleaning up the ends and bending them to form a decent circle, I used silver solder to join the ends. I don't know how well this will hold, but I just couldn't get the TIG to weld it properly.

    kraken_4 (resized).jpgkraken_4 (resized).jpg

    Pretty happy with the end result after cleaning up the join and I couldn't pull it apart with my hands, so that's a good sign.

    kraken_5 (resized).jpgkraken_5 (resized).jpg

    #40 4 years ago

    .......Nice metal work Im populating my playfield too at the moment.....Im also doing the metal work at my own. Also good idea with this place saving ramps.....

    #41 4 years ago

    I'm really impressed by how fast your project is going, when I look at a well known pinball manufacturer that has been spending tons of cash for the last 3 years to get one prototype out, it calls for a lot of respect.

    #42 4 years ago

    Oldfashion handcrafted work.
    Thats the spirit.

    #43 4 years ago

    While I work on the wireforms, I've been trying to figure out what I'm going to do with inserts.

    kraken-inserts (resized).jpgkraken-inserts (resized).jpg

    I'm a bit stuck on what inserts I need to have vs what aren't essential.

    So far, here's the list of must-have inserts: ball lock, playfield X, bonus X, at least one indicator per main shot, ball save, light mode/mode ready.

    What's missing? What indicators would annoy you if they were missing?

    #44 4 years ago

    Extra ball?

    #45 4 years ago

    Without knowing the basic rules of the game its hard to give advise. Is the game just a points scoring game, or a mode based game, character based? If mode based maybe you want to have an insert for each task or mode so the player can see progress. Same if character based. Looks like you have the rest of the standard insert indicators (shot arrows, etc)

    Curious about the left scoop. Is this a scoop to start modes or something you will be deliberately shooting for? If so, how do you access it from one of the flippers? I don't see a flipper shot going directly to the scoop. It would appear for that to happen the scoop should be pointed toward the lower flippers. Unless its an exit from a subway then never mind.

    Quoted from matthies:

    While I work on the wireforms, I've been trying to figure out what I'm going to do with inserts.
    [quoted image]
    I'm a bit stuck on what inserts I need to have vs what aren't essential.
    So far, here's the list of must-have inserts: ball lock, playfield X, bonus X, at least one indicator per main shot, ball save, light mode/mode ready.
    What's missing? What indicators would annoy you if they were missing?

    #46 4 years ago
    Quoted from luvthatapex2:

    Without knowing the basic rules of the game its hard to give advise. Is the game just a points scoring game, or a mode based game, character based?

    It's going to be a mode based game with a lot of branching paths, similar to Stern Jurassic Park. That's why I'm having trouble figuring out what to do. I plan on having a lot of modes, so don't really want to have that many inserts to map the modes out like Stern did.
    The idea is to also upgrade your ship's weapons and crew based on mode performance, so I'm not sure what type of inserts would be relevant for that aspect of the game.

    Quoted from luvthatapex2:

    Curious about the left scoop. Is this a scoop to start modes or something you will be deliberately shooting for? If so, how do you access it from one of the flippers?

    I haven't added it yet, but there will be a post or target somewhere above the scoop to hit from the right flipper that will rebound the ball into the scoop. I tested it by holding a post down with my hand in a few spots and it worked well.

    #47 4 years ago

    More inserts is always better.

    Also, those gape-triangles are too damn big.

    #48 4 years ago

    I now know why so many homebrews don't use ramps or use ramps from other machines. It's a pain to make your own!

    It's surprisingly hard to create smooth curves in the wire. As I mentioned earlier, I'm aiming for maximum ball visibility, so I'm trying to bend it so the ramp isn't blocking the view to the upper flipper.

    kraken_1 (resized).jpgkraken_1 (resized).jpg

    The hardest part was getting the two bottom wires to line up nicely with an even gap all the way along. Once that was done, the job wasn't too bad.

    kraken_2 (resized).jpgkraken_2 (resized).jpg

    kraken_3 (resized).jpgkraken_3 (resized).jpg

    I'm glad I only have two ramps to make. Well done to all the other homebrews I've seen with complicated ramps all over the place.

    #49 4 years ago

    Just a suggestion, I'm looking at the top pic of the ramp forming and you welded the ring on the tracks with the weld from the ring showing on the right side. It may be better to weld it on the bottom. First, it will aesthetically look better and second, the actual weld will never be in contact with the ball in that position. No chance that weld could weaken over time with contact from the metal ball and it won't potentially scar the ball.

    #50 4 years ago

    Thanks for your suggestion, but I didn't weld these. I mentioned earlier that I'm not skilled enough to use a TIG on these so I'm using silver solder. I know soldering isn't as strong as welding (I researched all my options before starting), but that's all I'm capable of at the moment and I'm prepared to deal with issues later on as a result. The gunk all over the place you can see in the photos is flux and will be cleaned off later on.

    There are 79 posts in this topic. You are on page 1 of 2.

    Reply

    Wanna join the discussion? Please sign in to reply to this topic.

    Hey there! Welcome to Pinside!

    Donate to Pinside

    Great to see you're enjoying Pinside! Did you know Pinside is able to run without any 3rd-party banners or ads, thanks to the support from our visitors? Please consider a donation to Pinside and get anext to your username to show for it! Or better yet, subscribe to Pinside+!


    This page was printed from https://pinside.com/pinball/forum/topic/kraken-pinball?hl=adol75 and we tried optimising it for printing. Some page elements may have been deliberately hidden.

    Scan the QR code on the left to jump to the URL this document was printed from.