(Topic ID: 248582)

Jurassic Park (Stern 2019 & 30th) Owners Club. Welcome! To Jurassic park.....

By CoolCatPinball

4 years ago


Topic Heartbeat

Topic Stats

  • 21,321 posts
  • 1,409 Pinsiders participating
  • Latest reply 4 hours ago by jackd104
  • Topic is favorited by 766 Pinsiders

You

Topic Gallery

View topic image gallery

IMG_1230 (resized).jpeg
IMG_7377 (resized).jpeg
IMG_1464 (resized).JPG
IMG_7368-ezgif.com-optimize.gif
IMG_7373 (resized).jpeg
IMG_7372 (resized).jpeg
IMG_7369 (resized).jpeg
pinside.a4cba3d6f022409119bc55bb9a4f9ec272c3d66d (resized).jpg
PXL_20240419_132957235.jpg
PXL_20240419_220243332.jpg
PXL_20240419_132948477.jpg
PXL_20240419_132932956.jpg
IMG_4992 (resized).jpeg
thumbnail_image5 (resized).jpg
thumbnail_image0 (resized).jpg
thumbnail_image1 (resized).jpg

Topic index (key posts)

17 key posts have been marked in this topic, showing the first 10 items. (Show topic index)

There are 21,321 posts in this topic. You are on page 162 of 427.
#8051 3 years ago
Quoted from Royale-W-Cheese:

Here’s what I went with .[quoted image]

I considered that option, but the coloring just seems a little off to me. Ideally, this is where I was going to design my Barbasol can to be and use the light to illuminate the vials, but I don't know if there is enough room right there.

#8052 3 years ago
Quoted from Mr_Tantrum:

And you thought bird poop in the eye was bad.
[quoted image]

Where did you get that MOD?

#8053 3 years ago
Quoted from Mr_Tantrum:

Not yet, trying to decide if I like anything in that spot or not. Is it just a decal or does it have some kind of dimension to it? The more I think about it, it's not my favorite. However, I'm coming up blank for an alternative design that I could create. Any ideas from anyone?

One side have a missile blowing up in front of a dinosaur (maybe Trex) other side dart plugging into blue’s neck

#8055 3 years ago
Quoted from 2manyhobbies:

Where did you get that MOD?

That's the Papo Pteranodon from Amazon, and I formed the support myself using .032" music wire. You could just wrap the wire around the legs of the model (what I did in my DE JP), but this time I drilled a small hole about 1.5" through the body of the model, and superglued it in. Personally, I like the thin wire because it is fairly simple to work with and allows the model to have some movement to it when the area vibrates (which I like). You could use a thicker wire like a coat hanger but it would be more visible and would limit the movement/shake of the model.

#8056 3 years ago
Quoted from 2manyhobbies:

One side have a missile blowing up in front of a dinosaur (maybe Trex) other side dart plugging into blue’s neck

That's seems like a lot of action for a small space, and not sure if I can pull it off or not. I did come up with an idea that is iconic to the original movie, but not sure how if might look. I'll try to work on it this week, and if I like how it turns out then I'll offer it for others to purchase.

#8057 3 years ago
Quoted from apayne82:

I’m comparing purchase options for buying JP Pro, and would love some feedback. Would you get a new-in-box game, or a good condition routed JP with a few thousand plays for $700 less?
I’m leaning new, but am conflicted based on savings.

Don't forget cost of any tax, shipping, and/or delivery for nib. Instead of routed, look for a huo. It will look brand new and you will be able to inspect before buying. Cost savings will be significant.

#8058 3 years ago
Quoted from jawjaw:

Don't forget cost of any tax, shipping, and/or delivery for nib. Instead of routed, look for a huo. It will look brand new and you will be able to inspect before buying. Cost savings will be significant.

Good points, but for me I was able to purchase from an out of state reputable authorized distributor (no sales tax and free shipping). I was going to purchase pre-owned (what I've done for my previous 3 pins), but after looking for several weeks the NIB purchase actually ended up being less expensive than any advertised JP Premiums with in driving distance (my limit is about 6-8 hours one way so I can do it in a single day - but of course then there is the cost of fuel).

I would exhaust both means before deciding new or pre-owned, then weighing all of the factors make my decision. With this pin, there will most likely be a wait until Jan-Feb for NIB given the ongoing demand verses picking it up now for HUO which may be a factor in your decision making.

#8059 3 years ago
Quoted from Mr_Tantrum:

Good points, but for me I was able to purchase from an out of state reputable authorized distributor (no sales tax and free shipping). I was going to purchase pre-owned (what I've done for my previous 3 pins), but after looking for several weeks the NIB purchase actually ended up being less expensive than any advertised JP Premiums with in driving distance (my limit is about 6-8 hours one way so I can do it in a single day - but of course then there is the cost of fuel).
I would exhaust both means before deciding new or pre-owned, then weighing all of the factors make my decision. With this pin, there will most likely be a wait until Jan-Feb for NIB given the ongoing demand verses picking it up now for HUO which may be a factor in your decision making.

All true. The guy I bought my JP from said he had a Deadpool on order that wasn't scheduled for delivery until March or maybe even later. Crazy.

#8060 3 years ago

What does the match number on the egg at end of game mean? I did a search and came up empty.

#8061 3 years ago
Quoted from Hokie822:

What does the match number on the egg at end of game mean? I did a search and came up empty.

When a machine is set to pay-to-play, if that number matches the last 2 digits of your score, you win a free game/credit

#8062 3 years ago

Got my premium yesterday and am enjoying it. 2 notes:
1: Man the O shot for chaos multiball is difficult!
2: The upper flipper loop shot creates so much speed I get a few airballs. One went over the flippers and drained. Is this a pitch issue or just common among all games?

#8063 3 years ago

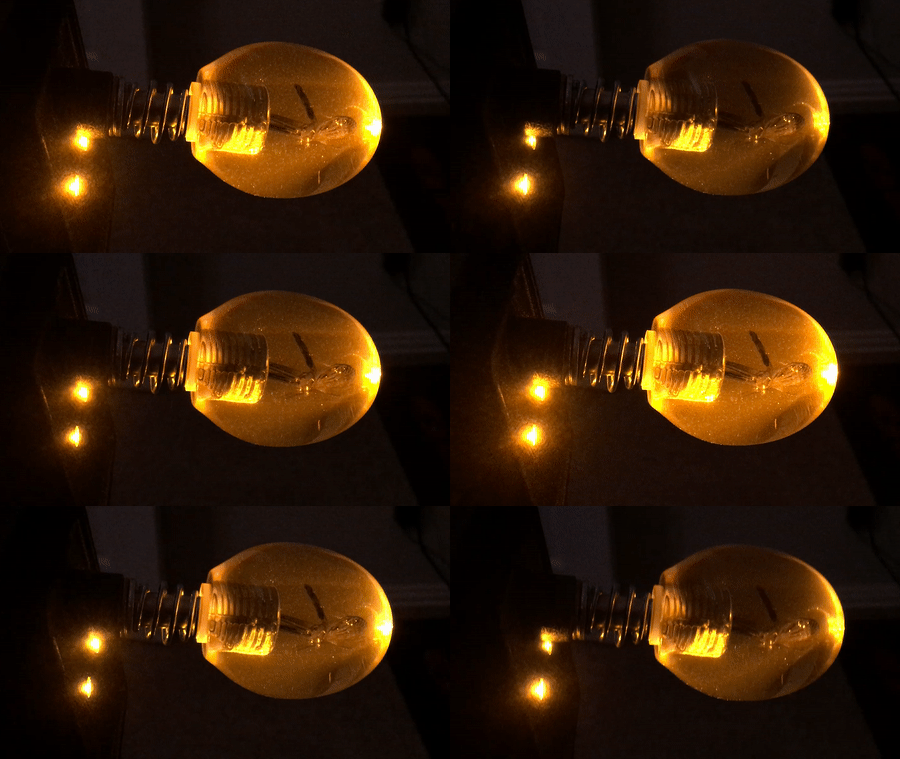
Guess what I'm doing after work tonight! Beautiful amber, great detailed insect, and orange plunger spring - pure awesomeness!

IMG_4709 (resized).JPGIMG_4709 (resized).JPGIMG_4710 (resized).JPGIMG_4710 (resized).JPG
#8064 3 years ago
Quoted from mbrave77:

2: The upper flipper loop shot creates so much speed I get a few airballs. One went over the flippers and drained. Is this a pitch issue or just common among all games?

I haven't had airballs to that extent on mine. I've only very seldom had some that bounced off the supply drop target and back over the pops to the orbit. Not often at all though. Have you tried adjusting flipper power?

#8065 3 years ago
Quoted from Hokie822:

What does the match number on the egg at end of game mean? I did a search and came up empty.

If you match the last 2 numbers of your score, you get a free game. Usually better to match on location, then at home.

#8066 3 years ago

Nitro has Stern JP shooter rods back in stock for Canadians who may be interested:

https://nitropinball.com/collections/stern-shop/products/jurassic-park-led-shooter-rod

#8067 3 years ago
Quoted from Hop721:

When a machine is set to pay-to-play, if that number matches the last 2 digits of your score, you win a free game/credit

It seems to occur when set to Free Play, too! Is a bit obnoxious, but oh well

#8068 3 years ago
Quoted from zeldarioid:

It seems to occur when set to Free Play, too! Is a bit obnoxious, but oh well

I just referenced the manual. Take a look at Standard Adjustments / SPI / #19 (Match Percentage). Try setting this to 0 (if an option) to see what happens.

For fun, you could set it to 100% (not sure if that is even an option).

#8069 3 years ago

Just added my Stern JP 3D printed flipper toppers to the market place: https://pinside.com/pinball/market/classifieds/ad/105741

These are a remake of the ones I did for DE JP a few years ago that were fairly popular. Please PM me if interested.

#8070 3 years ago
Quoted from Mr_Tantrum:

I just referenced the manual. Take a look at Standard Adjustments / SPI / #19 (Match Percentage). Try setting this to 0 (if an option) to see what happens.
For fun, you could set it to 100% (not sure if that is even an option).

IMDN has an option to turn off the end game match feature...I would be surprised if JP doesn't....

#8071 3 years ago
Quoted from zeldarioid:

It seems to occur when set to Free Play, too! Is a bit obnoxious, but oh well

Yes, it does lol
I meant to say that it awards you a free credit when on location. At home it just wakes everybody up

#8072 3 years ago

Amber is a thing of beauty, I tell ya.

IMG_4716.JPGIMG_4716.JPGamber.gifamber.gif
#8073 3 years ago
Quoted from Mr_Tantrum:

Amber is a thing of beauty, I tell ya.
[quoted image][quoted image]

Looks like Stern (or rather their supplier) has sorted out getting insects to appear "life like" and not the "sticks" that we saw in the previous batch. Looks awesome!!

#8074 3 years ago
Quoted from zeldarioid:

It seems to occur when set to Free Play, too! Is a bit obnoxious, but oh well

It’s the pin Gods saying “there is a high score in your future, play one more game”. At least that’s what I hear even though that was my last game’ just finished my last beer and I need to go to bed. But never works out that way

#8075 3 years ago

better spot for a speaker volume control...

Quoted from Mr_Tantrum:

Decided to create a magnetic decal that fits over the bill taker slot.
If anyone is interested in purchasing one, please PM me. I'll sell them for $12 including US Postage ($14 international). The one I decided to go with on my game (premium) features the dino from the premium backglass. I'm happy to use different graphics if anyone would like something different.
The images are printed on photo paper with a photo printer, a clear gloss vinyl is applied on top, decal is then adhered to a magnet sheet, cut to size, corners rounded, and all edges colored black to hide the white edge of the paper.
[quoted image][quoted image]

#8076 3 years ago
Quoted from Gogdog:

OK, I've tried googling "jurassic park ball trap helicopter" but don't see any posts. I keep getting ball traps in the helicopter blades. Do I need to add different washer weights on the blades or ? It seems like it could always be a possibility to get a ball trap here if the blades catch the ball at just the right time?
[quoted image]
[quoted image]

Ok...thanks for the advice. Though...it looks like the main issue is that my helicopter is leaning to the right.

20201116_223153 (resized).jpg20201116_223153 (resized).jpg

Which means the short blades can make contact and "bind" the ball.

20201116_223212 (resized).jpg20201116_223212 (resized).jpg

The angle of the helicopter is completely determined by the plastic its attached to...which....this doesn't look right at all ->

20201116_223640 (resized).jpg20201116_223640 (resized).jpg

Even if I removed the washer under that post, it won't fix all of that bowing. Can someone take a picture of their post under the helicopter plastic please?

#8077 3 years ago
Quoted from Mr_Tantrum:

Amber is a thing of beauty, I tell ya.
[quoted image][quoted image]

Is that supposed to be a mosquito or a dragon fly! Lol

#8078 3 years ago
Quoted from Gogdog:

Ok...thanks for the advice. Though...it looks like the main issue is that my helicopter is leaning to the right.
[quoted image]

Let's not make this political

#8079 3 years ago
Quoted from Freakyguy666:

Is that supposed to be a mosquito or a dragon fly! Lol

Suspend your disbelief - insects were bigger back then.

#8080 3 years ago

By the way, the amber plunger came with the orange spring on it, and now my manual plunges make the loop 100% of the time thus far. This feels like how the original plunger should have been. Also, it was a little bit of a bear to install. The main issue is one screw that is really close to the cabinet but takes all kinds of torque to remove from the old and to screw down with the new. You need a longer large phillips head, but even then you may tear up your hand with some little metal bracket that is mounted just in the wrong spot on the inside of the cabinet. I ended up removing the bracket, then having to push on the screwdriver as hard as I could to get it to bite I was able to turn it about 1/8th of a revolution each time. My forearm is sore, but I was determined and really like the results.

#8081 3 years ago
Quoted from Mr_Tantrum:

By the way, the amber plunger came with the orange spring on it, and now my manual plunges make the loop 100% of the time thus far. This feels like how the original plunger should have been. Also, it was a little bit of a bear to install. The main issue is one screw that is really close to the cabinet but takes all kinds of torque to remove from the old and to screw down with the new. You need a longer large phillips head, but even then you may tear up your hand with some little metal bracket that is mounted just in the wrong spot on the inside of the cabinet. I ended up removing the bracket, then having to push on the screwdriver as hard as I could to get it to bite I was able to turn it about 1/8th of a revolution each time. My forearm is sore, but I was determined and really like the results.

It looks great, and it's nice to see that Stern has finally released another batch.

45
#8082 3 years ago

I just finished my Jeep conversion, and thought I would share. I know there are others who have shown how to do it, but I thought I would walk everyone through my process which was quite simple and yielded perfect results.

With that stated, here we go...

First of all, you need the Jada 1/43 scale Jeep. You can typically find these on Ebay, but may have to come from China depending upon current auctions. Even thought the body is wider, the Jeep has pretty much an identical footprint of the OEM one. Also, you will want to hot glue the doors shut or use some other method to secure them. I opened the door, lined the jam with hot glue, then held it closed for several seconds while the glue firmed.
IMG_4742 (resized).JPGIMG_4742 (resized).JPGIMG_4743 (resized).JPGIMG_4743 (resized).JPG

To remove the Jeep FIRST REMOVE THE BALLS then lift the playfield and you'll use a 3/32" hex wrench to loosen the locks screw on the shaft (pay attention to the orientation of the metal tab as this is what triggers the optos). When removing this be sure to hold onto the Jeep on the topside or it may slide out and damage something. Also, there are 3 washers on the topside including a ball bearing washer. If you lose or break this, your jeep will not rotate properly.
IMG_4747 (resized).JPGIMG_4747 (resized).JPG

Carefully pull out the jeep assembly from the topside, again paying careful attention to catch the 3 washers. When removed set the washers aside, remove the 4 screws holding the jeep to the shaft plate, and also remove the nut & washer holding the newton ball on the shaft to get it out of the way.
IMG_4736 (resized).JPGIMG_4736 (resized).JPG

Now you will want to test position the jeep on the plate so that you know where it needs to sit. This is important for both balance and clearance from the helix when the Jeep is rotating. The proper alignment is where the washer from the center posts is touching the extended plastic around the rear axle of jeep.
IMG_4734 (resized).JPGIMG_4734 (resized).JPG

Turn the Jeep over and position the plate where the extension is towards the rear of the model. The plate will need to be centered horizontally with the two rear holes straddling the raised piece, and again the washer should be touching the base of the raised rear axle plastic.
IMG_4737 (resized).JPGIMG_4737 (resized).JPG

Holding the bracket in place you will want to drill a pilot hole for one of the back screws (do not drill all 4 holes at once. Do them one at a time to ensure proper alignment). I used a 1/16" bit for the pilot holes which worked perfect with the original screws. Once a rear hole is drilled, then insert a screw an tighten to where it is just snug. Don't over do this or you will strip the plastic.
IMG_4738 (resized).JPGIMG_4738 (resized).JPG

Next, drill the pilot hole for the screw that is catty-corner to the first one you did (e.g. if you started with the back right, next will be the front left). When doing the front screws don't over tighten them. You want the metal plate to be parallel to the bottom of the Jeep instead of slanting towards the front. Ideally you would use spacers on the front (I didn't have any, but will probably retrofit them later).
IMG_4739 (resized).JPGIMG_4739 (resized).JPG

Repeat the process with the remaining two screws.
IMG_4740 (resized).JPGIMG_4740 (resized).JPG

When finished, the underside of the assembly should look like this.
IMG_4741 (resized).JPGIMG_4741 (resized).JPG

Reattach the newton ball to the shaft, put the 3 washer assembly back on the shaft, then insert the shaft into the hole on the topside of the playfield. On the bottom side of the playfield slide the collar back on paying attention to the orientation, then tighten the set screw. You will want to leave about 1 mm of clearance between the collar and the bushing, otherwise the Jeep will not rotate freely. However, don't make this gap too large or the metal tab may scrape the lower optos causing less than ideal rotation or worse yet hit the side of the optos and not make the full rotation.
IMG_4748 (resized).JPGIMG_4748 (resized).JPG

Lower the playfield and rotate the Jeep both ways by hand and even by manually slamming the stationary ball with a pinball. You should have a nice smooth full rotation with good clearance at both front and rear.
IMG_4746 (resized).JPGIMG_4746 (resized).JPGIMG_4745 (resized).JPGIMG_4745 (resized).JPG

Finally, add all of the balls back into the game and play a few practice balls. When you are happy with your installation replace the glass and your ready to enjoy your new Jeep!
IMG_4751 (resized).JPGIMG_4751 (resized).JPG

I also wanted to mention that while I've not done it yet I may paint the metal bracket that sticks out from behind the jeep black in order to make it less noticeable.

Another thought is to put a dab of glue where the screws meet the underside plastic of the Jeep to help prevent them from working loose.

Added 94 days ago:

As a follow-up, it's been 3 years since I've installed my Jeep and it still continues to work perfectly. I did paint the back of the bracket black as you can see in the last photo I posted which looks better than the silver sticking out. Also, I never installed spacers for the two screws that could have used them and still nothing has come loose or shifted, so I don't think they are necessary if you choose not to use them.

#8083 3 years ago
Quoted from Mr_Tantrum:

I just finished my Jeep conversion, and thought I would share. I know there are others who have shown how to do it, but I thought I would walk everyone through my process which was quite simple and yielded perfect results.
With that stated, here we go...
First of all, you need the Jada 1/43 scale Jeep. You can typically find these on Ebay, but may have to come from China depending upon current auctions. The Jeep has pretty much an identical footprint of the OEM one.
[quoted image][quoted image]
To remove the Jeep, lift the playfield and you'll use an allen wrench (not sure what size) to loosen the locks screw on the shaft (pay attention to the orientation of the metal tab as this is what triggers the optos). When removing this be sure to hold onto the Jeep on the topside or it may slide out and damage something. Also, there are 3 washers on the topside including a ball bearing washer. If you lose or break this, your jeep will not rotate properly.
[quoted image]
Carefully pull out the jeep assembly from the topside, again paying careful attention to catch the 3 washers. When removed set the washers aside, remove the 4 screws holding the jeep to the shaft plate, and also remove the nut & washer holding the newton ball on the shaft to get it out of the way.
[quoted image]
Now you will want to test position the jeep on the plate so that you know where it needs to sit. This is important for both balance and clearance from the helix when the Jeep is rotating. The proper alignment is where the washer from the center posts is touching the extended plastic around the rear axle of jeep.
[quoted image]
Turn the Jeep over and position the plate where the extension is towards the rear of the model. The plate will need to be centered horizontally with the two rear holes straddling the raised piece, and again the washer should be touching the base of the raised rear axle plastic.
[quoted image]
Holding the bracket in place you will want to drill a pilot hole for one of the back screws (do not drill all 4 holes at once. Do them one at a time to ensure proper alignment). I used a 1/16" bit for the pilot holes which worked perfect with the original screws. Once a rear hole is drilled, then insert a screw an tighten to where it is just snug. Don't over do this or you will strip the plastic.
[quoted image]
Next, drill the pilot hole for the screw that is cattycorner to the first one you did (e.g. if you started with the back right, next will be the front left). When doing the front screws don't over tighten them. You want the metal plate to be parallel to the bottom of the Jeep instead of slanting towards the front. Ideally you would use spacers on the front (I didn't have any, but will probably retrofit them later).
[quoted image]
Repeat the process with the remaining two screws.
[quoted image]
When finished, the underside of the assembly should look like this.
[quoted image]
Reattach the newton ball to the shaft, put the 3 washer assembly back on the shaft, then insert the shaft into the hole on the topside of the playfield. On the bottom side of the playfield slide the collar back on paying attention to the orientation, then tighten the set screw. You will want to leave about 1 mm of clearance between the collar and the bushing, otherwise the Jeep will not rotate freely.[quoted image]

Awesome write up mate - clear, precise instructions with plenty of pics!

Oh and I learnt a new word "cattycorner" - it's not a phrase used down under

#8084 3 years ago

Nicely done. Bookmarked as I await my Chinese jeep arrival

#8085 3 years ago
Quoted from Mr_Tantrum:

I just finished my Jeep conversion, and thought I would share. I know there are others who have shown how to do it, but I thought I would walk everyone through my process which was quite simple and yielded perfect results.
With that stated, here we go...
First of all, you need the Jada 1/43 scale Jeep. You can typically find these on Ebay, but may have to come from China depending upon current auctions. The Jeep has pretty much an identical footprint of the OEM one.
[quoted image][quoted image]
To remove the Jeep FIRST REMOVE THE BALLS then lift the playfield and you'll use an allen wrench (not sure what size) to loosen the locks screw on the shaft (pay attention to the orientation of the metal tab as this is what triggers the optos). When removing this be sure to hold onto the Jeep on the topside or it may slide out and damage something. Also, there are 3 washers on the topside including a ball bearing washer. If you lose or break this, your jeep will not rotate properly.
[quoted image]
Carefully pull out the jeep assembly from the topside, again paying careful attention to catch the 3 washers. When removed set the washers aside, remove the 4 screws holding the jeep to the shaft plate, and also remove the nut & washer holding the newton ball on the shaft to get it out of the way.
[quoted image]
Now you will want to test position the jeep on the plate so that you know where it needs to sit. This is important for both balance and clearance from the helix when the Jeep is rotating. The proper alignment is where the washer from the center posts is touching the extended plastic around the rear axle of jeep.
[quoted image]
Turn the Jeep over and position the plate where the extension is towards the rear of the model. The plate will need to be centered horizontally with the two rear holes straddling the raised piece, and again the washer should be touching the base of the raised rear axle plastic.
[quoted image]
Holding the bracket in place you will want to drill a pilot hole for one of the back screws (do not drill all 4 holes at once. Do them one at a time to ensure proper alignment). I used a 1/16" bit for the pilot holes which worked perfect with the original screws. Once a rear hole is drilled, then insert a screw an tighten to where it is just snug. Don't over do this or you will strip the plastic.
[quoted image]
Next, drill the pilot hole for the screw that is cattycorner to the first one you did (e.g. if you started with the back right, next will be the front left). When doing the front screws don't over tighten them. You want the metal plate to be parallel to the bottom of the Jeep instead of slanting towards the front. Ideally you would use spacers on the front (I didn't have any, but will probably retrofit them later).
[quoted image]
Repeat the process with the remaining two screws.
[quoted image]
When finished, the underside of the assembly should look like this.
[quoted image]
Reattach the newton ball to the shaft, put the 3 washer assembly back on the shaft, then insert the shaft into the hole on the topside of the playfield. On the bottom side of the playfield slide the collar back on paying attention to the orientation, then tighten the set screw. You will want to leave about 1 mm of clearance between the collar and the bushing, otherwise the Jeep will not rotate freely.
[quoted image]
Lower the playfield and rotate the Jeep both ways by hand and even by manually slamming the stationary ball with a pinball. You should have a nice smooth full rotation with good clearance at both front and rear.
[quoted image][quoted image]
Finally, add all of the balls back into the game and play a few practice balls. When you are happy with your installation replace the glass and your ready to enjoy your new Jeep![quoted image]

THIS NEEDS TO BE A KEY POST! Thank you, as I was just about to do this and the helicopter. Now, if somebody could do this for the helicopter installation, I'd be golden. I'll wait.

#8086 3 years ago
Quoted from beelzeboob:

THIS NEEDS TO BE A KEY POST! Thank you, as I was just about to do this and the helicopter. Now, if somebody could do this for the helicopter installation, I'd be golden. I'll wait.

Well, the chopper is still on my “to do” list, so maybe that will be something I can document soon.

#8087 3 years ago
Quoted from Manny65:

I learnt a new word "cattycorner" - it's not a phrase used down under

It is important to do it that way because you don’t want your Jeep to be cattywampus.

#8088 3 years ago
Quoted from Mr_Tantrum:

It is important to do it that way because you don’t want your Jeep to be cattywampus.

Yes that would be a cattyastrophe

#8089 3 years ago
Quoted from Mr_Tantrum:

I just finished my Jeep conversion, and thought I would share. I know there are others who have shown how to do it, but I thought I would walk everyone through my process which was quite simple and yielded perfect results.
With that stated, here we go...

I also wanted to mention that while I've not done it yet I may paint the metal bracket that sticks out from behind the jeep black in order to make it less noticable.

Nice write-up. Thanks. I have my Jeep for a few weeks now and just need to find some time to install it. This will help a great deal.

#8090 3 years ago
Quoted from Manny65:

Yes that would be a cattyastrophe

Now you're just making up words.

#8091 3 years ago
Quoted from beelzeboob:

THIS NEEDS TO BE A KEY POST!

I don't know who the Pinside editor(s) is/are for this thread, but if they deem it to be worthy then I'm sure they will mark it as key.

#8092 3 years ago
Quoted from Mr_Tantrum:

I just finished my Jeep conversion, and thought I would share. I know there are others who have shown how to do it, but I thought I would walk everyone through my process which was quite simple and yielded perfect results.
With that stated, here we go...
First of all, you need the Jada 1/43 scale Jeep. You can typically find these on Ebay, but may have to come from China depending upon current auctions. Even thought the body is wider, the Jeep has pretty much an identical footprint of the OEM one. Also, you will want to hot glue the doors shut or use some other method to secure them. I opened the door, lined the jam with hot glue, then held it closed for several seconds while the glue firmed.
[quoted image][quoted image]
To remove the Jeep FIRST REMOVE THE BALLS then lift the playfield and you'll use a 3/32" hex wrench to loosen the locks screw on the shaft (pay attention to the orientation of the metal tab as this is what triggers the optos). When removing this be sure to hold onto the Jeep on the topside or it may slide out and damage something. Also, there are 3 washers on the topside including a ball bearing washer. If you lose or break this, your jeep will not rotate properly.
[quoted image]
Carefully pull out the jeep assembly from the topside, again paying careful attention to catch the 3 washers. When removed set the washers aside, remove the 4 screws holding the jeep to the shaft plate, and also remove the nut & washer holding the newton ball on the shaft to get it out of the way.
[quoted image]
Now you will want to test position the jeep on the plate so that you know where it needs to sit. This is important for both balance and clearance from the helix when the Jeep is rotating. The proper alignment is where the washer from the center posts is touching the extended plastic around the rear axle of jeep.
[quoted image]
Turn the Jeep over and position the plate where the extension is towards the rear of the model. The plate will need to be centered horizontally with the two rear holes straddling the raised piece, and again the washer should be touching the base of the raised rear axle plastic.
[quoted image]
Holding the bracket in place you will want to drill a pilot hole for one of the back screws (do not drill all 4 holes at once. Do them one at a time to ensure proper alignment). I used a 1/16" bit for the pilot holes which worked perfect with the original screws. Once a rear hole is drilled, then insert a screw an tighten to where it is just snug. Don't over do this or you will strip the plastic.
[quoted image]
Next, drill the pilot hole for the screw that is catty-corner to the first one you did (e.g. if you started with the back right, next will be the front left). When doing the front screws don't over tighten them. You want the metal plate to be parallel to the bottom of the Jeep instead of slanting towards the front. Ideally you would use spacers on the front (I didn't have any, but will probably retrofit them later).
[quoted image]
Repeat the process with the remaining two screws.
[quoted image]
When finished, the underside of the assembly should look like this.
[quoted image]
Reattach the newton ball to the shaft, put the 3 washer assembly back on the shaft, then insert the shaft into the hole on the topside of the playfield. On the bottom side of the playfield slide the collar back on paying attention to the orientation, then tighten the set screw. You will want to leave about 1 mm of clearance between the collar and the bushing, otherwise the Jeep will not rotate freely. However, don't make this gap too large or the metal tab may scrape the lower optos causing less than ideal rotation or worse yet hit the side of the optos and not make the full rotation.
[quoted image]
Lower the playfield and rotate the Jeep both ways by hand and even by manually slamming the stationary ball with a pinball. You should have a nice smooth full rotation with good clearance at both front and rear.
[quoted image][quoted image]
Finally, add all of the balls back into the game and play a few practice balls. When you are happy with your installation replace the glass and your ready to enjoy your new Jeep!
[quoted image]
I also wanted to mention that while I've not done it yet I may paint the metal bracket that sticks out from behind the jeep black in order to make it less noticable.

Thanks for this. Though....I added my jeep about 4 hours before your post following the original instructions, though yours were clearer and made note of the potential pitfalls of the installation. Mine would have gone much faster/better if I had simply waited a bit!

Now...you have a premium JP....so which helicopter mod are you looking to add on next?

#8093 3 years ago
Quoted from Gogdog:

Thanks for this. Though....about I added my jeep about 4 hours before your post following the original instructions, though yours were clearer and made note of the potential pitfalls of the installation. Mine would have gone much faster/better if I had simply waited a bit!
Now...you have a premium JP....so which helicopter mod are you looking to add on next?

Hey, you’re a leader, not a follower.

As far as the chopper goes, the matchbox one that several have done. There are some decent write ups, but I’ll see when I get into it what the challenges may be.

#8094 3 years ago
Quoted from Mr_Tantrum:

Hey, you’re a leader, not a follower.
As far as the chopper goes, the matchbox one that several have done. There are some decent write ups, but I’ll see when I get into it what the challenges may be.

I chose a helicopter that matched the colors on the jeep and the game. Has the reddish orange markings, is pretty realistic, and I think it looks looks nice. Unfortunately I installed it almost a year ago and have no installation instructions.

20201118_082353 (resized).jpg20201118_082353 (resized).jpg20201118_082410 (resized).jpg20201118_082410 (resized).jpg
#8095 3 years ago
Quoted from CoolCatPinball:

I chose a helicopter that matched the colors on the jeep and the game. Has the reddish orange markings, is pretty realistic, and I think it looks looks nice. Unfortunately I installed it almost a year ago and have no installation instructions.
[quoted image][quoted image]

Yeah, I don't think that little hump on top would allow that one to fit under the spinner on a premium, so I think the other jurassic world matchbox is the closest fit

IMG_20201030_164202928 (resized).jpgIMG_20201030_164202928 (resized).jpgIMG_20201030_164214410 (resized).jpgIMG_20201030_164214410 (resized).jpg
#8096 3 years ago

Well done, Tantrum! Big improvement and looks like it belongs there. It would be even better if the headlights and taillights lit up. Don't think that is possible since there is no where to run wires.

#8097 3 years ago
Quoted from jawjaw:

Well done, Tantrum! Big improvement and looks like it belongs there. It would be even better if the headlights and taillights lit up. Don't think that is possible since there is no where to run wires.

Oh, man. If there was a way to wire that up, I'd be in for a jeep with working lights! That would look awesome.

#8098 3 years ago
Quoted from yzfguy:

Oh, man. If there was a way to wire that up, I'd be in for a jeep with working lights! That would look awesome.

Perhaps there is a way to mimic the use of LEDs found in the sole of some kids tennis shoes? They are ON for a split second during motion, and they are battery powered. Hummm... sounds like something that could be engineering into the JADA Jeep? I know it must just be a battery, an LED and a resistor, and some kind of motion sensor contacts, but small and lightweight. Also, the battery would need to be accessible for a year or two down the road when it needs to be changed. But that seems like a lot of work to just get tiny flashes when the newton ball is hit... but I don't see any great way to get power up there otherwise.

#8099 3 years ago
Quoted from Markharris2000:

Perhaps there is a way to mimic the use of LEDs found in the sole of some kids tennis shoes? They are ON for a split second during motion, and they are battery powered. Hummm... sounds like something that could be engineering into the JADA Jeep? I know it must just be a battery, an LED and a resistor, and some kind of motion sensor contacts, but small and lightweight. Also, the battery would need to be accessible for a year or two down the road when it needs to be changed. But that seems like a lot of work to just get tiny flashes when the newton ball is hit... but I don't see any great way to get power up there otherwise.

That was my thought, but I still have a few mods to install then I plan on actually playing and enjoying the game for sometime before I worry about engineering more mods for it (at lease ones that require research). Would definitely be cool, however!

#8100 3 years ago
Quoted from yzfguy:

Yeah, I don't think that little hump on top would allow that one to fit under the spinner on a premium, so I think the other jurassic world matchbox is the closest fit
[quoted image][quoted image]

This is the helicopter I purchased and plan on installing. I know there are a few writeups in the thread currently, but I haven't seen a step-by-step with photos. I'm a little less confident on how to do this one, but I'll read everything there is about it before I undertake it. I'll do my best to document my process and share what I can.

Promoted items from Pinside Marketplace and Pinside Shops!
$ 12,999.99
$ 14.95
From: $ 15.00
Cabinet - Other
Rocket City Pinball
 
€ 40.00
Playfield - Toys/Add-ons
Pino Pinball Mods Shop
 
$ 199.00
Playfields
NO GOUGE PINBALL™
 
From: $ 12.00
Cabinet - Decals
arcade-cabinets.com
 
$ 35.00
Cabinet - Decals
Inscribed Solutions
 
$ 17.00
Lighting - Other
Pin Monk
 
$ 130.00
Gameroom - Decorations
Dijohn
 
6,700 (OBO)
Machine - For Sale
Grand Rapids, MI
$ 32.00
Playfield - Other
Pin Monk
 
From: $ 30.00
Cabinet - Other
Rocket City Pinball
 
$ 9,499.00
Pinball Machine
Classic Game Rooms
 
From: $ 50.00
Cabinet - Armor And Blades
arcade-cabinets.com
 
$ 19.50
Cabinet - Other
NO GOUGE PINBALL™
 
Trade
Machine - For Trade
Pinson, AL
$ 15.95
Playfield - Toys/Add-ons
ULEKstore
 
12,500
Machine - For Sale
Orlando, FL
$ 259.99
Cabinet - Toppers
Lighted Pinball Mods
 
$ 79.00
Playfield - Toys/Add-ons
Lermods
 
$ 5.00
Playfield - Protection
UpKick Pinball
 
$ 15.00
Playfield - Protection
SilverBall Designs
 
$ 49.95
Playfield - Toys/Add-ons
Hookedonpinball.com
 
$ 8.00
Cabinet - Other
Pinball Fuzz
 
9,000
Machine - For Sale
Carmel Hamlet, NY
$ 15.00
Playfield - Protection
arcade-cabinets.com
 
There are 21,321 posts in this topic. You are on page 162 of 427.

Reply

Wanna join the discussion? Please sign in to reply to this topic.

Hey there! Welcome to Pinside!

Donate to Pinside

Great to see you're enjoying Pinside! Did you know Pinside is able to run without any 3rd-party banners or ads, thanks to the support from our visitors? Please consider a donation to Pinside and get anext to your username to show for it! Or better yet, subscribe to Pinside+!


This page was printed from https://pinside.com/pinball/forum/topic/jurassic-park-stern-2019-owners-club-welcome-to-jurassic-park/page/162?hl=hop721 and we tried optimising it for printing. Some page elements may have been deliberately hidden.

Scan the QR code on the left to jump to the URL this document was printed from.