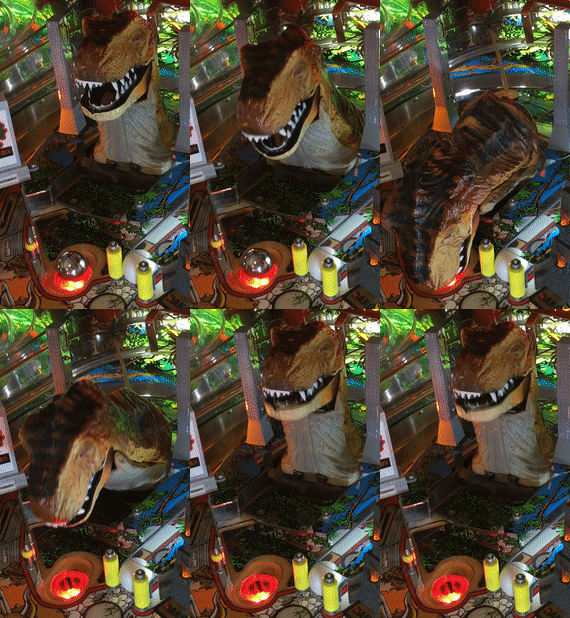
(Topic ID: 80267)

Jurassic Park (DATA EAST) club

By louknees

10 years ago


Topic Heartbeat

Topic Stats

  • 10,132 posts
  • 575 Pinsiders participating
  • Latest reply 16 hours ago by Preacher
  • Topic is favorited by 237 Pinsiders

You

Linked Games

Topic Gallery

View topic image gallery

IMG_0571 (resized).jpeg
IMG_0572 (resized).jpeg
IMG_4177 (resized).jpeg
IMG_4176 (resized).jpeg
IMG_0413 (resized).jpeg
Capture5 (resized).PNG
pasted_image (resized).png
20240321_175612 (resized).jpg
IMG_2307 (resized).jpeg
65CAB543-E774-4E3F-BE43-41A065718418 (resized).jpeg
172457CB-CDD8-4220-83F8-23B672578DD2 (resized).jpeg
IMG_4932 (resized).jpeg
IMG_4931 (resized).jpeg
71ZSWlVWEuL._AC_UF1000,1000_QL80_ (resized).jpg
IMG_2207 (resized).jpeg
unnamed (2) (resized).jpg

Topic index (key posts)

59 key posts have been marked in this topic, showing the first 10 items. (Show topic index)

There are 10,132 posts in this topic. You are on page 141 of 203.
#7001 4 years ago
Quoted from winteriscoming:

You do decal printing. Do you have a plotter to cut out the shapes? Something like a decent quality laminated print that's cut out and installed between the frame and the plastic shell should be possible. I was a potential route for my 3d printed t-rex.

I do all of my cutting by hand, and before I resort to a flat decal option I would like to exhaust my 3D print ideas. Right now I think the lowers look good and work great, so I wanted to match them in style. I won't get into the details of my first uppers design, but there just wasn't enough extra space inside the head. Going after it a little differently now. Time will tell.

#7002 4 years ago
Quoted from Mr_Tantrum:

I do all of my cutting by hand, and before I resort to a flat decal option I would like to exhaust my 3D print ideas. Right now I think the lowers look good and work great, so I wanted to match them in style. I won't get into the details of my first uppers design, but there just wasn't enough extra space inside the head. Going after it a little differently now. Time will tell.

Maybe make top teeth go between the plastic head and the frame? That way they can bite down outside of the lower teeth. I would guess there are other obstructions to worry about, though.

#7003 4 years ago
Quoted from winteriscoming:

Maybe make top teeth go between the plastic head and the frame? That way they can bite down outside of the lower teeth. I would guess there are other obstructions to worry about, though.

That is exactly the method I'm working on. I have to make the print 1mm thin in the area to fit (still very tight), so it is fragile. I have the support piece designed (it partially bridges over the top metal piece), but it is easily broken during install if not careful (have to remove the head with single screw in back of neck, install upper teeth, then re-attach head and screw). Other idea is to just have two strips that adhere to each side of the metal for the uppers, but thought is that they may not be secure enough just stuck to the side w/o the bridge across the top. I'm ready to start working on the contour of the mouth and teeth now, just been interrupted with other real-world responsibilities.
pasted_image (resized).pngpasted_image (resized).png

FYI, I think I'm done with the bottom teeth. They look and perform quite well. I do have to heat and mold them to the lower jaw for proper fit, but not too difficult. I'm using a thin line of mounting tape to secure them which seems to be performing perfectly. You'll notice that the gum line is a 1mm thin flat piece while the teeth are actually 3 dimensional on the outside (conical in shape, but varying sizes and mount angles). This is my same plan for the uppers.
pasted_image.pngpasted_image.png

BTW, since you'll be charging $10K for your full custom T-Rex, I was hoping I could get $500 for just a set of teeth.

#7004 4 years ago

Honestly bro Im really surprised no mod company bought the 3D model off you by now. I thought this would have gone that way. I would think a cool 5k-10k could take it. At $400 a piece thats not long to make that back. Are you listening mod companies?

#7005 4 years ago

Your pricing sounds about right!

Good luck with the teeth.

#7006 4 years ago
Quoted from Chitownpinball:

Honestly bro Im really surprised no mod company bought the 3D model off you by now. I thought this would have gone that way. I would think a cool 5k-10k could take it. At $400 a piece thats not long to make that back. Are you listening mod companies?

I'd probably be open to offers for a per unit fee. I don't know if I'd sell it out right.

Honestly, what I'd love more is for a pinball company to pay attention and let me design a toy for them! I could have made such a better t-rex for the new Stern JP...

#7007 4 years ago
Quoted from winteriscoming:

I could have made such a better t-rex for the new Stern JP...

You and any 5 year old, IMO.

dino0001 (resized).jpgdino0001 (resized).jpg
#7008 4 years ago
Quoted from winteriscoming:

Honestly, what I'd love more is for a pinball company to pay attention and let me design a toy for them! I could have made such a better t-rex for the new Stern JP...

Ya thats true. Surprised they didnt hit you up for this one. I dont think they wanted to spend much on the trex since he already eats the ball. Development on that might have been costly. They probably figured you guys would just make a replacement, which some one will. Hurry up. Lol

#7009 4 years ago

Well, I need a break from working on the teeth, so here is my rendition of the broken T-Rex fence. The two posts are 3D printed then I cover the upper part of the columns with a scratched metal riveted graphic. I then embed 4 frazzled metal wires on each post to represent the broken lines. Secure with some mounting tape on the rotating T-Rex plastic, and they are locked into place.

Simple look, but a little work to pull it off. I had to relocate some palm trees, but overall I really like what they add visually. As usual, I've put these on my JP Mod site (http://thezumwaltfamily.com/jppinball). For anyone interested in purchasing, please PM me. The fence set is $45 including US shipping.

IMG_2716.JPGIMG_2716.JPGIMG_2717.JPGIMG_2717.JPGIMG_2718.JPGIMG_2718.JPGIMG_2720.JPGIMG_2720.JPGIMG_2721.JPGIMG_2721.JPGIMG_2715.JPGIMG_2715.JPGIMG_2719.JPGIMG_2719.JPG
#7010 4 years ago

I think that I'm finally getting very close on having the teeth done. There are a couple of things I need to do when I get home tonight, and if all goes well I'll be posting pics, details, and making them available for purchase. I'm probably going to set the price around $30 (including US shipping), so was wondering who all might be interested? While I'll obviously sell one-offs, my preference would be to do batches. I actually have to heat and form fit the lowers and the front uppers to the actual T-Rex. This means I need to have my game apart to do it, so it would be nice if I could do several at a time (assuming several people are interested, of course).

Also, I did want to let everyone know that for the uppers to fit, I had to make a slight alteration to the upper mouth line of the T-Rex. The plastic head fit over the metal piece so tightly that there just wasn't any room for the upper teeth to fit between the metal upper jaw towards the front and the plastic T-Rex head. I removed the T-Rex head (will be required to install teeth - one screw that is very easy to access), then used a heat gun on the inside of the upper jaw/lips to heat the plastic to the point that it was malleable. I then just pulled out the plastic about 1mm on both sides and let it cool to become solid again. Once I did this, the head fit perfectly down over the teeth.

I'm also finalizing teeth for the front uppers. This will be a small piece that will need to be glued to the metal upper front teeth (one of the things I need to test). I tried using various kinds of tape, but it just didn't stick reliably. I'm going to try just a couple of dots of superglue gel which should do the trick. At first I thought just go without, but leaving the bare metal buck teeth just didn't look right to me.

Anyway, I'm looking forward to posting my final design, and I'll provide plenty of pics and instructions.

#7011 4 years ago
Quoted from Mr_Tantrum:

Well, I need a break from working on the teeth, so here is my rendition of the broken T-Rex fence. The two posts are 3D printed then I cover the upper part of the columns with a scratched metal riveted graphic. I then embed 4 frazzled metal wires on each post to represent the broken lines. Secure with some mounting tape on the rotating T-Rex plastic, and they are locked into place.
Simple look, but a little work to pull it off. I had to relocate some palm trees, but overall I really like what they add visually. As usual, I've put these on my JP Mod site (http://thezumwaltfamily.com/jppinball). For anyone interested in purchasing, please PM me. The fence set is $45 including US shipping.[quoted image][quoted image][quoted image][quoted image][quoted image][quoted image][quoted image]

I have added sound fx of the wires snapping as the T-Rex attacks at the start of tri-ball mode, perfectly synced to the dmd animation, If I get that mod maybe I should sync to the T-Rex itself..?

#7012 4 years ago
Quoted from Hazzard:

I have added sound fx of the wires snapping as the T-Rex attacks at the start of tri-ball mode, perfectly synced to the dmd animation, If I get that mod maybe I should sync to the T-Rex itself..?

That's a cool idea. Did you do it on PinSound? If so, would you mind just sharing the one sound file and let me know which FX event it is?

#7013 4 years ago

see where pinball life has the highly sought after ramp in stock.

#7014 4 years ago

Has your T-Rex had to resort to slurping goat soup instead of shredding lamb chops because it has no teeth? Has it lost its fear factor as the top predictor since all it can do is gum things to death? Despair no more, as I have an answer for you. These full T-Rex implants will bring your little pet's intimidation factor back, and fulfill its lust for raw meat!

These teeth are 3D printed and have depth to them (flat on inside, rounded on outside). The lowers install via lining the inside of the metal lower jaw (uses gray mounting tape), the uppers install on the outside of the upper metal jaw (uses thin adhesive tape), and the fronts glue onto the two metal front teeth (uses Super Glue gel).

Price for the full set of teeth ready to install (all 3 pieces with tape pre-applied to uppers & lowers) is $30 (includes US shipping), and for an additional $2 I will include a tube of Super Glue Gel if needed. As always, I will ship outside of US, but will need to quote shipping based upon destination. As always, please PM me if interested in purchasing, and I've added a link to this post on my JP Mod page (http://thezumwaltfamily.com/jppinball).

Installation Process is as follows:

1) Turn on pin and await the T-Rex test. When T-Rex is in lowered position, turn off pin. With head down, the Philips screw that secures the head/back neck piece is exposed. Remove the screw and lift the plastic piece off the metal skeleton (you will actually slide the piece forward towards the lockbar when in this position).
IMG_2729.JPGIMG_2729.JPG

2) Turn on pin and await the T-Rex test. When T-Rex returns to the upper position, turn off pin. Install the lower teeth first. Test fit to practice positioning before removing the adhesive backing. When ready, remove the adhesive backing. Squeeze the back of the teeth together slightly and position the front of the teeth firmly against the inside lower front metal teeth. Ensure the teeth are sitting flat on the bottom of the mouth and pull outward to secure the front of the teeth. Then use your finger to firmly adhere the rest of the teeth around the contour of the lower metal gums. The lower teeth should be snug up against the metal gums around the full perimeter while also being seated firmly against the bottom of the mouth. If installed correctly, the ends of both sides of the teeth will be just short of where the lower and upper jaw meet.
IMG_2708.JPGIMG_2708.JPG
IMG_2709.JPGIMG_2709.JPG
IMG_2710.JPGIMG_2710.JPG

3) Remove the protective backing from the 3 pieces of adhesive on the underside of the upper teeth. Be very careful when handling this piece, as squeezing it too hard or flexing it will break it. If it breaks, you will need to purchase a replacement (you've been warned). Align the upper teeth so that the front edge aligns with the front edge of the metal gums. Make sure the piece fits firmly snug on the top and along left and right gums. Firmly press all surfaces where adhesive tape is into place.
IMG_2732.JPGIMG_2732.JPG
IMG_2733.JPGIMG_2733.JPG

4) Carefully test fit the plastic head piece over the teeth. Again, don't force it as it could break the upper teeth. If the head will not comfortably slide into place then you will need to modify the upper snout of the T-Rex plastic. The way I did this was with a heat gun. Carefully heating the inside of the snout on one side in the areas where my fingers are holding the plastic, after 15-20 second it became soft enough to adjust. Using my fingers, I pulled out about 1-2mm, let it cool so that it was no longer malleable, and then repeated the process with the other side. Once I did this, the head more easily slid into position. Be careful, and you may need to push up a little on the two large front teeth to keep them in position as you install the head.
IMG_2730.JPGIMG_2730.JPG

5) Turn on pin and await the T-Rex test. When T-Rex is in lowered position, turn off pin. With head down, the hole for the screw that secures the head/back neck piece is exposed. Insert screw into hole and tighten fully.
IMG_2729.JPGIMG_2729.JPG

6) Turn on pin and await the T-Rex test. When T-Rex returns to the upper position, turn off pin. Test fit the position of the upper front teeth. When ready, apply a few small drops of Super Glue Gel on either back of plastic front teeth or along top of exposed front metal teeth. Place the teeth in place ensuring they are centered, and hold firmly in place for at least one minute (when you let go, the teeth should stay in place and not move or lift from the metal teeth)
IMG_2734.JPGIMG_2734.JPG
IMG_2735.JPGIMG_2735.JPG
IMG_2736.JPGIMG_2736.JPG

7) Wait 10-15 minutes to ensure glue is fully dry, and now you are ready to play with your new tooth-endowed T-Rex!
IMG_2737.JPGIMG_2737.JPG
T-Rex.gifT-Rex.gif

Added over 3 years ago:

FYI, The white teeth were my prototype. The actual teeth are printed in an off-white/bone color.

#7016 4 years ago
Quoted from Mr_Tantrum:

Has your T-Rex had to resort to slurping goat soup instead of shredding lamb chops because it has no teeth? Has it lost its fear factor as the top predictor since all it can do is gum things to death? Despair no more, as I have an answer for you. These full T-Rex implants will bring your little pet's intimidation factor back, and fulfill its lust for raw meat!
These teeth are 3D printed and have depth to them (flat on inside, rounded on outside). The lowers install via lining the inside of the metal lower jaw (uses gray mounting tape), the uppers install on the outside of the upper metal jaw (uses thin adhesive tape), and the fronts glue onto the two metal front teeth (uses Super Glue gel).
Price for the full set of teeth ready to install (all 3 pieces with tape pre-applied to uppers & lowers) is $30 (includes US shipping), and for an additional $2 I will include a tube of Super Glue Gel if needed. As always, I will ship outside of US, but will need to quote shipping based upon destination. As always, please PM me if interested in purchasing, and I've added a link to this post on my JP Mod page (http://thezumwaltfamily.com/jppinball).
Installation Process is as follows:
1) Turn on pin and await the T-Rex test. When T-Rex is in lowered position, turn off pin. With head down, the Philips screw that secures the head/back neck piece is exposed. Remove the screw and lift the plastic piece off the metal skeleton (you will actually slide the piece forward towards the lockbar when in this position).
[quoted image]
2) Turn on pin and await the T-Rex test. When T-Rex returns to the upper position, turn off pin. Install the lower teeth first. Test fit to practice positioning before removing the adhesive backing. When ready, remove the adhesive backing. Squeeze the back of the teeth together slightly and position the front of the teeth firmly against the inside lower front metal teeth. Ensure the teeth are sitting flat on the bottom of the mouth and pull outward to secure the front of the teeth. Then use your finger to firmly adhere the rest of the teeth around the contour of the lower metal gums. The lower teeth should be snug up against the metal gums around the full perimeter while also being seated firmly against the bottom of the mouth. If installed correctly, the ends of both sides of the teeth will be just short of where the lower and upper jaw meet.
[quoted image]
[quoted image]
[quoted image]
3) Remove the protective backing from the 3 pieces of adhesive on the underside of the upper teeth. Be very careful when handling this piece, as squeezing it too hard or flexing it will break it. If it breaks, you will need to purchase a replacement (you've been warned). Align the upper teeth so that the front edge aligns with the front edge of the metal gums. Make sure the piece fits firmly snug on the top and along left and right gums. Firmly press all surfaces where adhesive tape is into place.
[quoted image]
[quoted image]
4) Carefully test fit the plastic head piece over the teeth. Again, don't force it as it could break the upper teeth. If the head will not comfortably slide into place then you will need to modify the upper snout of the T-Rex plastic. The way I did this was with a heat gun. Carefully heating the inside of the snout on one side in the areas where my fingers are holding the plastic, after 15-20 second it became soft enough to adjust. Using my fingers, I pulled out about 1-2mm, let it cool so that it was no longer malleable, and then repeated the process with the other side. Once I did this, the head more easily slid into position. Be careful, and you may need to push up a little on the two large front teeth to keep them in position as you install the head.
[quoted image]
5) Turn on pin and await the T-Rex test. When T-Rex is in lowered position, turn off pin. With head down, the hole for the screw that secures the head/back neck piece is exposed. Insert screw into hole and tighten fully.
[quoted image]
6) Turn on pin and await the T-Rex test. When T-Rex returns to the upper position, turn off pin. Test fit the position of the upper front teeth. When ready, apply a few small drops of Super Glue Gel on either back of plastic front teeth or along top of exposed front metal teeth. Place the teeth in place ensuring they are centered, and hold firmly in place for at least one minute (when you let go, the teeth should stay in place and not move or lift from the metal teeth)
[quoted image]
[quoted image]
[quoted image]
7) Wait 10-15 minutes to ensure glue is fully dry, and now you are ready to play with your new tooth-endowed T-Rex!
[quoted image]
[quoted image]

Looking good! Suggestion: instead of pure white, can't you print it in a bone color/light brown (also the inner part, instead of black)?

#7017 4 years ago

I have nvram installed on my DE JP and all my high scores just got erased all by themselves. I hear that if you go into audits there's a setting that erases the high scores after so many games. Does anybody know what # audit setting and what it should be set to? Thanks in advance.

#7018 4 years ago

Lol that trex looks like me as dracula from my 2nd grade costume contest.

#7019 4 years ago
Quoted from Davi:

Looking good! Suggestion: instead of pure white, can't you print it in a bone color/light brown (also the inner part, instead of black)?

I think that more of a beige/tan would be better (not sure how good T-Rex dental hygiene was back in the day). I would have to buy some new filament of that color, and happy to do so if I get at least a couple of orders. Here is a color sample in the brand I typically purchase.
original-137-242-beige3.jpgoriginal-137-242-beige3.jpg

#7020 4 years ago
Quoted from weasel671:

I have nvram installed on my DE JP and all my high scores just got erased all by themselves. I hear that if you go into audits there's a setting that erases the high scores after so many games. Does anybody know what # audit setting and what it should be set to? Thanks in advance.

You would be correct.

Page 21 in the manual | Adj 29 High Score Reset Every. This sets the number of games between automatic resets of high scores (between 100 to 900 games) or you can set to OFF.

#7021 4 years ago
Quoted from Mr_Tantrum:

You would be correct.
Page 21 in the manual | Adj 29 High Score Reset Every. This sets the number of games between automatic resets of high scores (between 100 to 900 games) or you can set to OFF.

Thank you @ Mr_Tantrum. It was set for 600. Geez! I guess I played it alot more than I knew since I got it in May. Lol

#7022 4 years ago

that looks fantastic - great job

I never thought the mold was the problem. It was always the lack of killer teeth and this solves that completely. Must have mod imo.

I do think the off color white would be best -

#7023 4 years ago
Quoted from delt31:

that looks fantastic - great job
I never thought the mold was the problem. It was always the lack of killer teeth and this solves that completely. Must have mod imo.
I do think the off color white would be best -

I’m starting to think that the off white might look best.

Tomorrow, I’ll do a photo edit and see what people think.

#7024 4 years ago

At the request of another JP owner (@jorro), he asked if I could make a 3D fence post to cover the 3 scoop ready light pairs for those who did not have or want the other mods available for them.

I obliged, and here is what I came of with. These are 3D printed and are friction fit (no adhesive) over the existing brackets. Price is $25 for the set of 3 which includes US shipping (will ship outside of US on per quote basis).

As always, PM me if you are interested in purchasing these or any of my other JP mods.

IMG_2751.JPGIMG_2751.JPGIMG_2757.JPGIMG_2757.JPG
#7025 4 years ago
Quoted from Mr_Tantrum:

I’m starting to think that the off white might look best.
Tomorrow, I’ll do a photo edit and see what people think.

Here is an off white rendering for those of you who were curious.

teeth.jpgteeth.jpg
#7026 4 years ago
Quoted from Mr_Tantrum:

Here is an off white rendering for those of you who were curious.[quoted image]

Off white looks great. Pm me when ready to sell. Want a pair.... And I'm not even sure how long I'm keeping this now bc tmnt might be coming out and something has to go but damn it those teeth look fantastic

#7027 4 years ago
Quoted from Mr_Tantrum:

Here is an off white rendering for those of you who were curious.[quoted image]

That look so badass! Are you selling this mod yet?

#7028 4 years ago
Quoted from weasel671:

That look so badass! Are you selling this mod yet?

Absolutely. In white or off-white, or even pink if you want.

#7029 4 years ago

Just received my beige filament . . . T-Rex denture making in progress.

89A2DAAA-D1B9-48B9-AA91-23E124AD72F2.jpeg89A2DAAA-D1B9-48B9-AA91-23E124AD72F2.jpeg
#7030 4 years ago
Quoted from Mr_Tantrum:

At the request of another JP owner (@jorro), he asked if I could make a 3D fence post to cover the 3 scoop ready light pairs for those who did not have or want the other mods available for them.
I obliged, and here is what I came of with. These are 3D printed and are friction fit (no adhesive) over the existing brackets. Price is $25 for the set of 3 which includes US shipping (will ship outside of US on per quote basis).
As always, PM me if you are interested in purchasing these or any of my other JP mods.[quoted image][quoted image]

Very nice. I'd been thinking about those posts for aaaaages and a good way to cover them up as they looked so bad.

I wonder what a stylized version would look like.

#7031 4 years ago
Quoted from Mr_Tantrum:

Absolutely. In white or off-white, or even pink if you want.

I would love to get some dentures for my T-Rex.

#7032 4 years ago
Quoted from koops:

Very nice. I'd been thinking about those posts for aaaaages and a good way to cover them up as they looked so bad.
I wonder what a stylized version would look like.

PM me with some detailed ideas, and I'll consider it.

#7033 4 years ago

Be sure to check out my link above for details regarding ordering and installation for the T-Rex teeth. I did want to let everyone know that based upon popular demand, I've decided to make them in beige/off-white by default unless otherwise requested. Here are pics with the new teeth installed.

IMG_2761.JPGIMG_2761.JPGIMG_2762.JPGIMG_2762.JPGIMG_2763.JPGIMG_2763.JPGIMG_2764.JPGIMG_2764.JPGIMG_2765.JPGIMG_2765.JPG
#7034 4 years ago

Must have mod for sure. Totally makes the trex look menacing! I always loved the mold but thought it looked like a bird. Now it looks much better. Great job

Off white ftw

20190926_185713 (resized).jpg20190926_185713 (resized).jpg20190926_185709 (resized).jpg20190926_185709 (resized).jpg20190926_185652 (resized).jpg20190926_185652 (resized).jpg
#7035 4 years ago
Quoted from delt31:

Must have mod for sure. Totally makes the trex look menacing! I always loved the mold but thought it looked like a bird. Now it looks much better. Great job
Off white ftw[quoted image][quoted image][quoted image]

Looks great! Your T-Rex can fatten up now that dino-meat is back on the menu.

#7036 4 years ago

Repainted rexie today, stll needs a little work but for now she's drying
20190928_155310 (resized).jpg20190928_155310 (resized).jpg

20190928_130752 (resized).jpg20190928_130752 (resized).jpg
#7037 4 years ago
Quoted from jorro:

Repainted rexie today, stll needs a little work but for now she's drying
[quoted image][quoted image]

Well done. What methods and paint did you use?

#7038 4 years ago

Mmm before pic didnt upload
Hi Tantrum, i used olschool acrylic paint and a small brush and some weathering with a big soft brush.
Didnt want it to be to glossy or shiny.
I did the eyes before but desided to make them a little smaller.
20190905_121310 (resized).jpg20190905_121310 (resized).jpg20190928_160910 (resized).jpg20190928_160910 (resized).jpg

#7039 4 years ago

Hi all -

I seem to be missing this metal mini-post near my left gutter on the playfield - does anyone know the part number for this? I think I found it on Marco specialties but i'm not sure if this is the right piece - https://www.marcospecialties.com/pinball-parts/530-5004-01, was just hoping for an easy confirm. Unfortunately this piece isn't "posted" in the manual

I'm pretty sure these are all supposed to have 3/16" rubber rings on them too, right? Mine seem to be missing.
pasted_image (resized).pngpasted_image (resized).png

#7040 4 years ago
Quoted from Nachopark:

Hi all -
I seem to be missing this metal mini-post near my left gutter on the playfield - does anyone know the part number for this? I think I found it on Marco specialties but i'm not sure if this is the right piece - https://www.marcospecialties.com/pinball-parts/530-5004-01, was just hoping for an easy confirm. Unfortunately this piece isn't "posted" in the manual
I'm pretty sure these are all supposed to have 3/16" rubber rings on them too, right? Mine seem to be missing.
[quoted image]

Search for outlane

https://pinside.com/pinball/forum/topic/jurassic-park-club/page/139#post-5166110

#7041 4 years ago

Actually that’s interesting, a quick search showed me that it’s not supposed to be there at all. Time to git gud at pinball I guess. It’s just weird that there is a little hole there that looks like you could screw one in.

My pinball was heavily shopped so I’m adding stuff back in like crazy

#7042 4 years ago
Quoted from Nachopark:

Actually that’s interesting, a quick search showed me that it’s not supposed to be there at all. Time to git gud at pinball I guess. It’s just weird that there is a little hole there that looks like you could screw one in.
My pinball was heavily shopped so I’m adding stuff back in like crazy

Nope. not actually suppose to be one there. Mines still empty.

#7043 4 years ago

Mines empty
Maybe it was optional for making onroute ones easier if needed??

#7044 4 years ago

After the dark bottom layer dried, and som different light situations
Daytime nighttime spolight facing rex.
Im finaly finished with the lighter top layer.
Its pretty difficult to make it looking good in all times of day, and still have a movie like fearsome look without some bright highlights.
For now she's dry and probably the final color, only maybe some little highlights needed.
20190929_195647 (resized).jpg20190929_195647 (resized).jpg20190929_195657 (resized).jpg20190929_195657 (resized).jpg20190929_200729 (resized).jpg20190929_200729 (resized).jpg

#7045 4 years ago
Quoted from Nachopark:

Actually that’s interesting, a quick search showed me that it’s not supposed to be there at all. Time to git gud at pinball I guess. It’s just weird that there is a little hole there that looks like you could screw one in.
My pinball was heavily shopped so I’m adding stuff back in like crazy

I ended up adding one too mine and seemed to be an option since it was pre drilled. Without it the game is a left lane drain monster.... But I'm also not very good!

I put a very small rubber around it and it's a perfect addition

#7046 4 years ago
Quoted from jorro:

After the dark bottom layer dried, and som different light situations
Daytime nighttime spolight facing rex.
Im finaly finished with the lighter top layer.
Its pretty difficult to make it looking good in all times of day, and still have a movie like fearsome look without some bright highlights.
For now she's dry and probably the final color, only maybe some little highlights needed.
[quoted image][quoted image][quoted image]

I think it looks awesome. I'm too chicken to try painting mine. Speaking of chicken, I thought it would be funny to put a custom message on the DMD (there is one screen you can do that). I made it say "T-Rex thinks Zane tastes like chicken" Zane is my son, and it really cracked him up. Now, he loves showing his friends any time one comes over.

#7047 4 years ago
Quoted from Mr_Tantrum:

I thought it would be funny to put a custom message on the DMD (there is one screen you can do that). I made it say "T-Rex thinks Zane tastes like chicken" Zane is my son, and it really cracked him up. Now, he loves showing his friends any time one comes over.

LOL!
Now you need to 3d print a chicken for your t rex and call it Zane

If i was closer i would paint it for you
But the idea of it getting lost in shipping .....

#7048 4 years ago

Hi everyone, turned on my machine tonight and noticed that when the flasher thats below the upper flipper flashes the machine is making a funny "rurp" sound from the speakers and the sound is cutting in and out. Only happens when that flasher is being triggered. I do have a pinsound board in the game if that makes any difference. Played it yesterday and everything was normal. Any suggestions on what to check or what might be causing it? thanks so much

#7049 4 years ago

Could someone snap a couple pics of the bottom right flipper from under the playfield. Need to make sure wiring and installation is correct. Thanks

#7050 4 years ago

Hi,
Only had my game less than a week and having issues.
This morning when I turned it on it did checks as normal but wasn’t set to freeplay anymore...strange, so I put that setting back.
Then when i went to play it came up with attached image, which is pretty standard but won’t move from that??
The game will play but I can’t see score or anything else on display of course...if I press the buttons under cab, I can hear the noise it gives but again, can’t see anything on screen change.
Obviously tried turning on and off but no good.
I did change the batteries in MPU as a precaution which I guess accounts for the freeplay needing to be reset....but not sure why screen is now frozen and how I can get passed that? It sound like everything is working, if I can get off this screen?!
Thanks

12C3CD3A-4FB0-451D-B2A0-E0C69B40DCA6 (resized).jpeg12C3CD3A-4FB0-451D-B2A0-E0C69B40DCA6 (resized).jpeg Added over 5 years ago:

So a tilt got it off the screen although it did come back later...so a tilt is a workaround until my full service on 11th of November

Promoted items from Pinside Marketplace and Pinside Shops!
$ 89.99
Cabinet - Decals
Maine Home Recreation
 
$ 30.00
Playfield - Other
YouBentMyWookie
 
Trade
Machine - For Trade
Needville, TX
$ 1.25
Lighting - Led
Mitchell Lighting
 
$ 10.00
Playfield - Other
Loop Combo Pinball
 
4,500 (Firm)
Machine - For Sale
Ronkonkoma, NY
$ 130.00
Gameroom - Decorations
Dijohn
 
$ 18.95
Playfield - Toys/Add-ons
ULEKstore
 
$ 65.00
Playfield - Toys/Add-ons
G-Money Mods
 
$ 20.00
Playfield - Decals
Nordic Pinball Supply
 
$ 250.00
Playfield - Other
Avid Creations Wireforms
 
4,400
Machine - For Sale
Livermore, CA
$ 29.95
Playfield - Toys/Add-ons
ULEKstore
 
$ 49.99
Cabinet - Toppers
Lighted Pinball Mods
 
$ 49.99
Playfield - Toys/Add-ons
FlipMods
 
From: $ 20.00
Lighting - Led
Mitchell Lighting
 
$ 10.00
Playfield - Protection
UpKick Pinball
 
$ 79.99
Cabinet - Armor And Blades
PinGraffix Pinside Shop
 
$ 18.95
$ 25.00
Playfield - Protection
UpKick Pinball
 
$ 185.00
Cabinet - Toppers
Sparky Pinball
 
Trade
Machine - For Trade
Mariposa, CA
$ 65.00
Playfield - Toys/Add-ons
G-Money Mods
 
From: $ 159.00
Playfield - Toys/Add-ons
Sparky Pinball
 
$ 50.00
Playfield - Protection
Duke Pinball
 
From: $ 33.00
Gameroom - Decorations
Rocket City Pinball
 
From: $ 9.99
Eproms
Matt's Basement Arcade
 
$ 29.95
Playfield - Toys/Add-ons
ULEKstore
 
From: $ 11.95
Playfield - Toys/Add-ons
ULEKstore
 
Great pinball charity
Pinball Edu
There are 10,132 posts in this topic. You are on page 141 of 203.

Reply

Wanna join the discussion? Please sign in to reply to this topic.

Hey there! Welcome to Pinside!

Donate to Pinside

Great to see you're enjoying Pinside! Did you know Pinside is able to run without any 3rd-party banners or ads, thanks to the support from our visitors? Please consider a donation to Pinside and get anext to your username to show for it! Or better yet, subscribe to Pinside+!


This page was printed from https://pinside.com/pinball/forum/topic/jurassic-park-club/page/141?hl=shepp and we tried optimising it for printing. Some page elements may have been deliberately hidden.

Scan the QR code on the left to jump to the URL this document was printed from.