(Topic ID: 244666)

JJPOTC Treasure Chest Open/Close mod, now working!

By pinballj

4 years ago


Topic Heartbeat

Topic Stats

You

Linked Games

Topic Gallery

View topic image gallery

IMG_20230211_193725 (resized).jpg
IMG_20230211_193309 (resized).jpg
IMG_20230211_174738 (resized).jpg
2022-12-10 18.13.36 (resized).jpg
2022-12-03 16.39.16 (resized).jpg
2022-12-03 16.39.03 (resized).jpg
20221109_175012 (resized).jpg
20221109_190714 (resized).jpg
20221109_175033 (resized).jpg
20221109_174757 (resized).jpg
IMG_20221017_152356_edit_415805112164156 (resized).jpg
IMG_20221017_151959 (resized).jpg
IMG_20221017_151839_edit_415860847540189 (resized).jpg
IMG_20221017_151846_edit_415835308941755 (resized).jpg
D51450B8-C097-4943-9B2C-5358436C4892 (resized).jpeg
IMG_2497 (resized).jpg

Topic index (key posts)

4 key posts have been marked in this topic (Show topic index)

There are 1,330 posts in this topic. You are on page 17 of 27.
#801 4 years ago
Quoted from harryhoudini:

When I set the servo initial position in the setup() it goes at full speed, like a banshee out of hell, since there is no control when you "zero" it out. Your lid must snap open and close crazy. Do you have a video you posted?
I can easily circumvent the timers for full speed but it sure seemed hella fast.

Here's the lid with straight 5v and no stepping commands to get it to/from open close, but using a direct command to the open/close position instead. I don't think it's too fast.
chest-with-beat.gifchest-with-beat.gif

#802 4 years ago
Quoted from PinMonk:

Here's the lid with straight 5v and no stepping commands to get it to/from open close, but using a direct command to the open/close position instead. I don't think it's too fast.
[quoted image]

Hate to say this but I actually like the open fairly slow like Harry’s currently and your close speed, like it slams shut.

#803 4 years ago
Quoted from VillaThrills:

Hate to say this but I actually like the open fairly slow like Harry’s currently and your close speed, like it slams shut.

He could easily do a combination, but I don't know if he wants the upgrade headache...

#804 4 years ago
Quoted from PinMonk:

He could easily do a combination, but I don't know if he wants the upgrade headache...

I don't know if he wants it either

I don't know, I think the default timing in my code is pretty close to that. It's definitely slower, but I'll have to grab one and test. I have twinkling stars in front of me today.

#805 4 years ago
Quoted from steigerpijp:

I think it was me attaching it to the forks , and Agima dabbled with his own servo version , and Harry Houdini took it to a production unit from pinballj’ s initial idea. Looks like a winner, more options, more lights
I havent taken it further, still testing it in my personal game and its holding out fine so far. When I hit 250 games I will take it apart and make the dimensions known .
I’m just not prepared to get burned on receiving blame if and when brackets should break.( how many have actually had a bracket break in normal production units) Thats a side of this forum that holds me back.
I’ve yet to experience it. So far so good

Thanks for clarifying, lots of minds and different approaches on this. Your method would certainly produce the satisfying snap open and close I recall from the prototype. We will be interested to hear how it holds up!

#806 4 years ago
Quoted from harryhoudini:

I don't know if he wants it either
I don't know, I think the default timing in my code is pretty close to that. It's definitely slower, but I'll have to grab one and test. I have twinkling stars in front of me today.

That's what I was getting at. The timing is almost the same (yours is just a hair slower), but using direct calls rather than stepping the motor repeatedly in a loop each time it opens and closes is less wear and tear on the servo over time.

#807 4 years ago
Quoted from PinMonk:

That's what I was getting at. The timing is almost the same (yours is just a hair slower), but using direct calls rather than stepping the motor repeatedly in a loop each time it opens and closes is less wear and tear on the servo over time.

I'd just be a few IF statements I'd imagine. I could revisit the speed control for a v1.2

#808 4 years ago

I just got the kit and am installing it. The odd thing is that the servo seems to be moving backwards. When I close he switch, the servo moves counterclockwise. If I hook up he rod the way the installation video show, that would open the lid when the fork moves down. Switch opens, and the servo moves clockwise.

I can move the rod 180 degrees on the servo, more to the 3 o’clock position, but that is opposite of what I think the install idea shows.

#809 4 years ago
Quoted from lhammer610:

I just got the kit and am installing it. The odd thing is that the servo seems to be moving backwards. When I close he switch, the servo moves counterclockwise. If I hook up he rod the way the installation video show, that would open the lid when the fork moves down. Switch opens, and the servo moves clockwise.
I can move the rod 180 degrees on the servo, more to the 3 o’clock position, but that is opposite of what I think the install idea shows.

Yea, I need to update that video apparently. I was backwards when it was made.

#810 4 years ago
Quoted from harryhoudini:

Yea, I need to update that video apparently. I was backwards when it was made.

Good to know I am not completely nuts.

If you don’t mind a suggestion, it would be nice to add a bit about removal of the chest top. It is a bit jarring to go from the second to the third / fourth videos.

Also, in order to tighten down the screws to the fork bracket, I ended up temporarily removing the bottom left PCB. Otherwise I just could not get the screwdriver in there.

Your videos are great. Clear to understand and straight to the point.

#811 4 years ago
Quoted from lhammer610:

Good to know I am not completely nuts.
If you don’t mind a suggestion, it would be nice to add a bit about removal of the chest top. It is a bit jarring to go from the second to the third / fourth videos.
Also, in order to tighten down the screws to the fork bracket, I ended up temporarily removing the bottom left PCB. Otherwise I just could not get the screwdriver in there.
Your videos are great. Clear to understand and straight to the point.

Thanks, something happened in my video posting as I know I made that part but must have cut it out in my editing. I'll make sure to add it back in as well.

Yeah, it's a tight spot. I used an extension on my power screw driver, good note.

#812 4 years ago

It looks like I got this mod working. Thanks for the kit.

IMHO, it might be easier if I had two nuts on the rod - to lock the lid in place. One above and one below the tab to the lid. Unfortunately, I did not have a nut small enough to put on the rod. I tried a plastic wire tide and it made setting up for me easier. The complication was that I had to take the arm off the motor to slip the wire in, since the lower nut locked it on the chest. But without that, the chest seemed to hang up on the rod and ride it up. Bending the rod helped there. But the second nut would really lock it in.

The plastic shield covering the solenoid interfered with the tab on the lid attached to the rod. So I used a dremel to grind the corner down (photos attached). Lots of small towels to keep the debris from the playfield.

The movement of the rod also tends to touch the wires to the solenoid in the back of the chest. I don't think that is a wear issue. I moved them out of the way the best I could.

I also found what keeps the rear of the lid from going all the way down - the plastic insert you provided is thicker and that hits the black metal ball guide on the right side. Nothing I could see to fix that. I would not want to have to remove that black ball guide and grind it. And making the insert on the top thinner might make it too weak.

I need to wrap up some wires where I cut the ties, but other than that, it is good to go.

First pic is the plastic cover for the solenoid prior to grinding. Second is after.

Third shows the metal ball guide that I think keeps the top from coming down because it hits the insert in the top.

Cheers!

IMG_5972 (resized).jpgIMG_5972 (resized).jpgIMG_5975 (resized).jpgIMG_5975 (resized).jpgIMG_5974 (resized).jpgIMG_5974 (resized).jpg
#813 4 years ago

Just a head's up that I'll be streaming my Pirates with the opening/closing chest mod tonight at 8 Eastern, if you want to see it in action: http://www.twitch.tv/buffalopinball

#814 4 years ago
Quoted from lhammer610:

It looks like I got this mod working. Thanks for the kit.
IMHO, it might be easier if I had two nuts on the rod - to lock the lid in place. One above and one below the tab to the lid. Unfortunately, I did not have a nut small enough to put on the rod. I tried a plastic wire tide and it made setting up for me easier. The complication was that I had to take the arm off the motor to slip the wire in, since the lower nut locked it on the chest. But without that, the chest seemed to hang up on the rod and ride it up. Bending the rod helped there. But the second nut would really lock it in.
The plastic shield covering the solenoid interfered with the tab on the lid attached to the rod. So I used a dremel to grind the corner down (photos attached). Lots of small towels to keep the debris from the playfield.
The movement of the rod also tends to touch the wires to the solenoid in the back of the chest. I don't think that is a wear issue. I moved them out of the way the best I could.
I also found what keeps the rear of the lid from going all the way down - the plastic insert you provided is thicker and that hits the black metal ball guide on the right side. Nothing I could see to fix that. I would not want to have to remove that black ball guide and grind it. And making the insert on the top thinner might make it too weak.
I need to wrap up some wires where I cut the ties, but other than that, it is good to go.
First pic is the plastic cover for the solenoid prior to grinding. Second is after.
Third shows the metal ball guide that I think keeps the top from coming down because it hits the insert in the top.
Cheers![quoted image][quoted image][quoted image]

Great notes. I'll look in to all of those items. If the lid is too thick it could be ground down in that spot, I am sure. It's much thicker than it needs to be, just for longevity, but the force on it is so minimal. The tab was the largest concern.

No one else mentioned the solenoid cover, I didn't even think about it. We are making a replacement cover for back there which has a cutout for the tab, which is much more decorative FYI.

#815 4 years ago

Your video shows these holes to be smaller and the screws cut a thread. Either my holes are way too large or the screws are too small. Am I wrong? Both sides are like this.
20190902_134841 (resized).jpg20190902_134841 (resized).jpg

#816 4 years ago
Quoted from javagrind888:

Your video shows these holes to be smaller and the screws cut a thread. Either my holes are way too large or the screws are too small. Am I wrong? Both sides are like this.
[quoted image]

Is the head bigger than the holes? It cuts the thread in the metal brack that piece goes over.

#817 4 years ago
Quoted from PinMonk:

Is the head bigger than the holes? It cuts the thread in the metal brack that piece goes over.

Ah! Ok. Thought it threaded the plastic. Good to know

#818 4 years ago
Quoted from javagrind888:

Ah! Ok. Thought it threaded the plastic. Good to know

No, it threads the metal bracket holes on the jjPotC assembly and holds the plastic piece so it doesn't move.

#819 4 years ago
Quoted from harryhoudini:

Great notes. I'll look in to all of those items. If the lid is too thick it could be ground down in that spot, I am sure. It's much thicker than it needs to be, just for longevity, but the force on it is so minimal. The tab was the largest concern.
No one else mentioned the solenoid cover, I didn't even think about it. We are making a replacement cover for back there which has a cutout for the tab, which is much more decorative FYI.

I dremmelled the spot where the bracket hits. You can see a mark in the plastic where it does. Just use a grinding disc and make an indent at that spot. Chest sits much better at front. Due to the fact that each chest lid is different and local adjustment is required, Scott can’t really grind this spot for us, it needs to be done by the installer. Also it’s not necessary, just makes the front sit better on the right.

#820 4 years ago
Quoted from harryhoudini:

Thanks, something happened in my video posting as I know I made that part but must have cut it out in my editing. I'll make sure to add it back in as well.
Yeah, it's a tight spot. I used an extension on my power screw driver, good note.

Cool, I'll wait until the video instructions are complete before install. I could probably figure it out, but I just want to make sure I get everything right. Can you post here when you get the video updated?

#821 4 years ago
Quoted from javagrind888:

Cool, I'll wait until the video instructions are complete before install. I could probably figure it out, but I just want to make sure I get everything right. Can you post here when you get the video updated?

You bet. I am finishing some star map lighting tonight and I'll get on that video. I just need to do some editing, I think, to add it back in to that video.

#822 4 years ago

Installed it, maybe an hour and a half, but I was messing around with getting the back flush by trimming parts of the plastic connector to the chest lid. This is a terrific mod, love it! So great to get back to the original design, with some enhancements.

#823 4 years ago

it is the mod sell by Pinball Mod Co. ?

#824 4 years ago
Quoted from harryhoudini:

You bet. I am finishing some star map lighting tonight and I'll get on that video. I just need to do some editing, I think, to add it back in to that video.

Hi Scott, did you succeed in finalizing the de-install video of the chest lid? Would be great, because I would prefer having a complete set of instructions before starting the mod install.

Thank you!

#825 4 years ago
Quoted from Zora:

Hi Scott, did you succeed in finalizing the de-install video of the chest lid? Would be great, because I would prefer having a complete set of instructions before starting the mod install.
Thank you!

Hummm you just have to undo what you do no?

#826 4 years ago
Quoted from Thot:

it is the mod sell by Pinball Mod Co. ?

pinballj created it, we sell the kit: https://magicalproductions.miiduu.com/jpinballs-actuated-chest-mod-jersey-jack-pinball-pirates-of-the-caribbean

Quoted from Thot:

Hummm you just have to undo what you do no?

He's asking about the initial removing of the chest lid.

I found it! Not sure why it wasn't part of the other video but here is the specific chest lid removal portion:

Added over 4 years ago:

Edit: Find the chest mod at https://pinballmods.co/PinballJs-actuated-chest-mod-JJP-POTC

#827 4 years ago
Quoted from harryhoudini:

pinballj created it, we sell the kit: https://magicalproductions.miiduu.com/jpinballs-actuated-chest-mod-jersey-jack-pinball-pirates-of-the-caribbean

He's asking about the initial removing of the chest lid.
I found it! Not sure why it wasn't part of the other video but here is the specific chest lid removal portion:

Thanks Scott, you are perfect.

Why is it necessary to remove the coil before unscrewing the two screws of the lid? It seems that the unscrewing can be made without touching the coil.

Second, some concerns were raised that the optos might break when installing the lid. Is that an issue? I do not see any optos which might be in danger.

#828 4 years ago

Nice! I was hoping the videos would be complete by the time I install on Saturday.

#829 4 years ago
Quoted from Zora:

Thanks Scott, you are perfect.
Why is it necessary to remove the coil before unscrewing the two screws of the lid? It seems that the unscrewing can be made without touching the coil.
Second, some concerns were raised that the optos might break when installing the lid. Is that an issue? I do not see any optos which might be in danger.

The optos are black and very hard to see, even in real-life given the cramped conditions. The problem is not that you break the opto itself, but that you pop the opto off (they're held on by little clips) by making contact with the opto body and in trying to snap the opto back on, you break the tiny, fragile clip, which is very easy to do if you don't know what you're doing. Once the clip is broken, the opto won't stay in place and you need a new opto.

BTW, I didn't remove the coil. The access is tight, but it is do-able without removing the coil and just putting the coil cover to the side.

#830 4 years ago
Quoted from PinMonk:

The optos are black and very hard to see, even in real-life given the cramped conditions. The problem is not that you break the opto itself, but that you pop the opto off (they're held on by little clips) by making contact with the opto body and in trying to snap the opto back on, you break the tiny, fragile clip, which is very easy to do if you don't know what you're doing. Once the clip is broken, the opto won't stay in place and you need a new opto.
BTW, I didn't remove the coil. The access is tight, but it is do-able without removing the coil and just putting the coil cover to the side.

Ok, understand, thanks.

#831 4 years ago
Quoted from Zora:

Thanks Scott, you are perfect.
Why is it necessary to remove the coil before unscrewing the two screws of the lid? It seems that the unscrewing can be made without touching the coil.
Second, some concerns were raised that the optos might break when installing the lid. Is that an issue? I do not see any optos which might be in danger.

Like PinMonk said you could do it without removing, I wasn't able to get my socket in there so I did the coil removal part.

The optos are 3 black tabs starting just in front of that coil (along the back of the actual chest). If they do come out of place you'll know it. The game will continually try to kick out a ball from the chest (because the opto switch isn't closed). You could probably see it dangling there too. Sometimes you can pop it back in to place, they are pressure fit clips. If the clip breaks or it won't stay, a dab of hot glue gives you a pretty good fix. Probably better than the original. Breaking the entire opto would be pretty difficult, I've messed with mine a TON and while I've had tabs break (I had to replace my chest bracket, relocating all 6 optos) gluing them back on was a good fix and they all work fine.

#832 4 years ago
Quoted from PinMonk:

Once the clip is broken, the opto won't stay in place and you need a new opto.

A dab of hot glue will secure the opto in place. You don't need to replace it.

I think hot glue is a better solution than the fragile clips.

#833 4 years ago
Quoted from RTS:

A dab of hot glue will secure the opto in place. You don't need to replace it.
I think hot glue is a better solution than the fragile clips.

Same thought.

#834 4 years ago
Quoted from RTS:

A dab of hot glue will secure the opto in place. You don't need to replace it.
I think hot glue is a better solution than the fragile clips.

Hot glue doesn't last. Temporary solution at best for an area like that.

#835 4 years ago
Quoted from PinMonk:

Hot glue doesn't last. Temporary solution at best for an area like that.

Que? It has like no tension or pressure on it. Heck, cyanoacrylate or 2 part epoxy then! My new favorite is the thick cyano with the setting spray. I'm gluing everything!

#836 4 years ago
Quoted from PinMonk:

Hot glue doesn't last. Temporary solution at best for an area like that.

That hasn't been my experience.

I've had hot glue last for years. I've used it on targets on my i500 without problems. And the optos on this game have zero impact with the ball.

It's better than regular glue because it doesn't become brittle when it dries. It's malleable like soft rubber and unlikely to snap and break.

#837 4 years ago

Any updates on what your designing to cover the coil?

#838 4 years ago
Quoted from Psw757:

Any updates on what your designing to cover the coil?

Heh. I have a 3rd prototype to print out but I've been messing with my printer (silent controller install, different bed) so it's waiting to get printed. It's between two things right now.. basic one is a crate. Actually, it looks like two crates next to each other. The other option was a pile of treasure (somewhat akin to the treasure room in the potc ride). The thing is, I don't want to really call attention to the area I don't think... you sort of want it to just go away. I tried repositioning the coil a few different ways and there just isn't any space. I also bent my plastic tabs so it sits lower, but I don't know if I expect everyone to do that so we're making the piece fit over it. We made a cutout for the lid tab, as well.

I'll get it printed this weekend and post pic so you can see. Basically remove the clear protector that is there and screw this guy on. Should be pretty cost effective too, not much material or time to print and not much finish work. Trying to decide if keeping it black or dark is better, again not drawing attention to it, or painting it crate/treasure colors. Maybe I'll print out both and you guys can decide or we offer both.

#839 4 years ago
Quoted from harryhoudini:

Heh. I have a 3rd prototype to print out but I've been messing with my printer (silent controller install, different bed) so it's waiting to get printed. It's between two things right now.. basic one is a crate. Actually, it looks like two crates next to each other. The other option was a pile of treasure (somewhat akin to the treasure room in the potc ride). The thing is, I don't want to really call attention to the area I don't think... you sort of want it to just go away. I tried repositioning the coil a few different ways and there just isn't any space. I also bent my plastic tabs so it sits lower, but I don't know if I expect everyone to do that so we're making the piece fit over it. We made a cutout for the lid tab, as well.
I'll get it printed this weekend and post pic so you can see. Basically remove the clear protector that is there and screw this guy on. Should be pretty cost effective too, not much material or time to print and not much finish work. Trying to decide if keeping it black or dark is better, again not drawing attention to it, or painting it crate/treasure colors. Maybe I'll print out both and you guys can decide or we offer both.

Yeah, I ordered the actuator today and was poking around and thinking what would look good.

Tough spot, between the two ships and behind the chest. I was brainstorming what would make sense within the storyline of the movies?

#840 4 years ago

Yeah, same here. The only thing we could come up with are the crates or loot. The loot doesn't have to be in the chest to be consistent with the ride (Not sure about any scenes in the movie) so that sort of works. But then it draws attention behind the chest, which could be fine. If there are any other ideas, let me know. We can add on to the top of the "base" which is what we had to work on to get the right fit. Putting loot on top or whatever should be no problem.

#841 4 years ago
Quoted from harryhoudini:

Yeah, same here. The only thing we could come up with are the crates or loot. The loot doesn't have to be in the chest to be consistent with the ride (Not sure about any scenes in the movie) so that sort of works. But then it draws attention behind the chest, which could be fine. If there are any other ideas, let me know. We can add on to the top of the "base" which is what we had to work on to get the right fit. Putting loot on top or whatever should be no problem.

Davey Jones figure or head?

Jack Sparrow’s little canoe?

Just thinking out loud.

#842 4 years ago
Quoted from harryhoudini:

Yeah, same here. The only thing we could come up with are the crates or loot. The loot doesn't have to be in the chest to be consistent with the ride (Not sure about any scenes in the movie) so that sort of works. But then it draws attention behind the chest, which could be fine. If there are any other ideas, let me know. We can add on to the top of the "base" which is what we had to work on to get the right fit. Putting loot on top or whatever should be no problem.

Some low island greenery which is the background for the chest for much of the movie where it's out might be good, but it'd have to be low so as not to interfere with the cannon shot...

The only other place where it spends a lot of time is on the sandy beach where it's dug up, but that's no good...

dead-mans-chest (resized).pngdead-mans-chest (resized).png

#843 4 years ago
Quoted from harryhoudini:

pinballj created it, we sell the kit: https://magicalproductions.miiduu.com/jpinballs-actuated-chest-mod-jersey-jack-pinball-pirates-of-the-caribbean

He's asking about the initial removing of the chest lid.
I found it! Not sure why it wasn't part of the other video but here is the specific chest lid removal portion:

Thank God I found this. I'm installing the mod today and could only find it written "remove the lid".... that's it. Yeah...... right! LOL
Thanks for hunting this down and posting it. You should probably add it back to your website instruction area sir. : )

#844 4 years ago

Finally got it installed. Love it! Going to have to play with the bend in the rod a bit more later, but otherwise working great.

Note, mine was working backwards so I had to install my rod on the other side of the servo. Easy enough fix.

Also, my control buttons aren't aligned with the grid, so took me quite a bit to get things back to red and back to normal speed. I'd suggest having a buddy with you to just tell you what color and speed it's on so you don't have to go under and over the playfield 20 times.

#845 4 years ago

Guys - Can someone help me out here? I have the chest mod installed. Opens and closes nicely, and the lights work - but there is a problem....

Check out the video. When I start a game the servo actuates the chest lid as it "finds home". But once I start a game - the servo no longer moves or opens the chest. If I cut the game off, and back on again - same thing... servo finds home - lid opens - but never raises again. I played a game and locked 3 balls and went into multiball - but the chest never opened once. Very frustrating. Help troubleshooting this would be welcomed. - Murphy

#846 4 years ago
Quoted from MurphyPeoples:

Guys - Can someone help me out here? I have the chest mod installed. Opens and closes nicely, and the lights work - but there is a problem....
Check out the video. When I start a game the servo actuates the chest lid as it "finds home". But once I start a game - the servo no longer moves or opens the chest. If I cut the game off, and back on again - same thing... servo finds home - lid opens - but never raises again. I played a game and locked 3 balls and went into multiball - but the chest never opened once. Very frustrating. Help troubleshooting this would be welcomed. - Murphy

My educated guess after doing my own install is your "fork switch" on the chest mod (the leaf/microswitch thing that gets pushed in and out when the forks move up and down, ON the chest mod hardware that you installed) is bunged up somehow.

The chest movement you see is due to the mod getting power, it will go through those motions no matter what (the servo moved a bit up and down if you will during its power on cycle).

BUT it seems that your mod is not sensing the fork movement.

#847 4 years ago

I did this install last weekend; I wasn't timing myself but I swear it took close to five hours.

1 hour of that was performing the code update, most of which was installing the different bits and following the instructions and learning how to use the software. Plus my computer is super old so even the software install took a bit longer than it may for you.

The next day I tackled the mod. I did not know there was a lid removal video so I figured that out myself. I also watched the other install videos as I did the work, so I included that in the time above.

My chest mod also had to go on the opposite arm that was pictured, which did cost me a decent amount of time as I went back and forth trying to figure out what I had missed, and eventually just went with what worked. I also spent a decent amount of time making sure wires were not going to get pinched by the rod or the other parts of the mod. I spent a decent amount of time bending the rod "just right".

Also, getting the rod at just the right height took a while as indicted by everybody else. I had it perfect "on the wrong side", then moved it to the other side and had to do some re-bends, and it was binding or something at a few points where the lid would move as usual, and then retract a bit due to pressure(?) felt by the mechanism.

Anyways with some persistence it worked great.

AND it survived a tournament we had yesterday, so after 75 or so plays it has held up well (knock on wood).

I think my last unresolved Pirates issue is "taming the slings". I am still getting sling escapes on the left sling during intense multiballs....
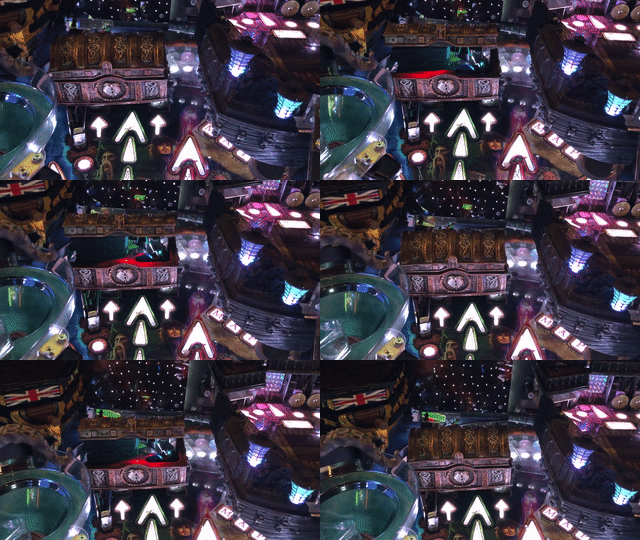
#848 4 years ago
Quoted from MurphyPeoples:

Guys - Can someone help me out here? I have the chest mod installed. Opens and closes nicely, and the lights work - but there is a problem....
Check out the video. When I start a game the servo actuates the chest lid as it "finds home". But once I start a game - the servo no longer moves or opens the chest. If I cut the game off, and back on again - same thing... servo finds home - lid opens - but never raises again. I played a game and locked 3 balls and went into multiball - but the chest never opened once. Very frustrating. Help troubleshooting this would be welcomed. - Murphy

Check your switch bend. It's probably not bent out quite far enough to detect fork down.

Alternately, if that doesn't work, with power on, raise the playfield, raise the forks and manually activate/deactivate the switch. If nothing happens you have a bad switch or bad wiring to the switch.

#849 4 years ago
Quoted from PinMonk:

Check your switch bend. It's probably not bent out quite far enough to detect fork down.
Alternately, if that doesn't work, with power on, raise the playfield, raise the forks and manually activate/deactivate the switch. If nothing happens you have a bad switch or bad wiring to the switch.

PinMonk to the rescue!!! This is exactly what was happening. The Mod switch wasn't fully closing with the forks in the down position. I simply tweaked the switch slightly and violá!
Working during game play now. Simply have to due some fine adjustments to get her to close and open perfectly. : ) - Murphy

#850 4 years ago
Quoted from MurphyPeoples:

PinMonk to the rescue!!! This is exactly what was happening. The Mod switch wasn't fully closing with the forks in the down position. I simply tweaked the switch slightly and violá!
Working during game play now. Simply have to due some fine adjustments to get her to close and open perfectly. : ) - Murphy

Glad it was an easy adjustment instead of a bad switch!

Promoted items from Pinside Marketplace and Pinside Shops!
$ 38.75
Playfield - Toys/Add-ons
The MOD Couple
 
Trade
Machine - For Trade
Vernon, BC
$ 8.00
Cabinet - Other
Side Gig Studios
 
$ 26.50
Playfield - Toys/Add-ons
The MOD Couple
 
$ 32.00
Playfield - Decals
Pinball Mod Co.
 
From: $ 75.00
Playfield - Other
Pinball Mod Co.
 
$ 30.00
Cabinet - Other
Rocket City Pinball
 
€ 99.00
Lighting - Under Cabinet
Watssapen shop
 
22,000
Machine - For Sale
Smithtown, NY
$ 95.00
Playfield - Toys/Add-ons
Pinball Mod Co.
 
$ 24.00
Cabinet - Shooter Rods
The MOD Couple
 
$ 29.00
Gameroom - Decorations
Pinball Photos LLC
 
Wanted
20,000
Machine - For Sale
San Diego, CA
$ 110.00
Cabinet - Shooter Rods
Super Skill Shot Shop
 
From: $ 44.95
Playfield - Toys/Add-ons
PinBoss Mods
 
$ 28.75
Playfield - Toys/Add-ons
The MOD Couple
 
From: $ 110.00
Playfield - Plastics
Pinball Mod Co.
 
$ 24.95
Cabinet - Shooter Rods
Hookedonpinball.com
 
From: $ 30.00
Cabinet - Other
Rocket City Pinball
 
$ 10.00
Playfield - Protection
The MOD Couple
 
$ 29.00
Gameroom - Decorations
Pinball Photos LLC
 
$ 79.99
Cabinet - Armor And Blades
PinGraffix Pinside Shop
 
From: $ 7.50
Playfield - Protection
Pin Monk
 
Hey modders!
Your shop name here
There are 1,330 posts in this topic. You are on page 17 of 27.

Reply

Wanna join the discussion? Please sign in to reply to this topic.

Hey there! Welcome to Pinside!

Donate to Pinside

Great to see you're enjoying Pinside! Did you know Pinside is able to run without any 3rd-party banners or ads, thanks to the support from our visitors? Please consider a donation to Pinside and get anext to your username to show for it! Or better yet, subscribe to Pinside+!


This page was printed from https://pinside.com/pinball/forum/topic/jjpotc-treasure-chest-open-and-close/page/17?hl=arcadem and we tried optimising it for printing. Some page elements may have been deliberately hidden.

Scan the QR code on the left to jump to the URL this document was printed from.