(Topic ID: 240503)

jjPirates of the Caribbean Troubleshooting/Tips/Issues jjPotC Tech

By PinMonk

4 years ago


Topic Heartbeat

Topic Stats

  • 3,536 posts
  • 198 Pinsiders participating
  • Latest reply 58 days ago by wcbrandes
  • Topic is favorited by 125 Pinsiders

You

Linked Games

Topic Gallery

View topic image gallery

fuse-chart (resized).jpg
20230513_093432 (resized).jpg
20230513_093525 (resized).jpg
20230512_223441 (resized).jpg
20230512_223449 (resized).jpg
image (resized).jpg
image (resized).jpg
A96280E7-6037-4CDA-947A-4E847A983A5B (resized).jpeg
8D49233D-E7BC-4D21-B620-430C8D783A7C (resized).jpeg
8A79C258-2737-4892-A6D4-1D5066382A11 (resized).jpeg
D2C5269F-CC9C-4059-B008-7183A9656384 (resized).jpeg
19CB3A9A-2767-4CD7-AA0D-2EAC9D4E8C1B (resized).jpeg
AD9CE6FE-FBDD-40E0-A404-AF37E2A257CD (resized).jpeg
no light 2 (resized).jpg
no light (resized).jpg
IMG_20220709_120144 (resized).jpg

Topic index (key posts)

29 key posts have been marked in this topic, showing the first 10 items.

Display key post list sorted by: Post date | Keypost summary | User name

Post #2 INITIAL CHECK: Install 2 piece MAP Cliffy Posted by PinMonk (4 years ago)

Post #4 INITIAL CHECK: Remove all shipping foam? Posted by PinMonk (4 years ago)

Post #5 TECH: PLAYFIELD. Auto launch issue fix Posted by PinMonk (4 years ago)

Post #7 TECH: PLAYFIELD. Chest rejecting most shots fix Posted by PinMonk (4 years ago)

Post #12 TECH: SWITCHES. [Switch name] is not working Posted by PinMonk (4 years ago)

Post #13 TECH: SWITCHES. Game reports stuck MAP targets Posted by PinMonk (4 years ago)

Post #14 TECH: SWITCHES. Game reports stuck GOLD targets Posted by PinMonk (4 years ago)

Post #35 INITIAL CHECK: Installing Mystery Hole Cliffy Posted by PinMonk (4 years ago)

Post #47 TECH: RAMPS. Stop right ramp decal from tearing Posted by PinMonk (4 years ago)

Post #100 TECH: TILT. Tilt is too active/sensitive Posted by PinMonk (4 years ago)


Topic indices are generated from key posts and maintained by Pinside Editors. For more information, or to become an editor yourself read this post!

There are 3,536 posts in this topic. You are on page 1 of 71.
29
#1 4 years ago

This thread is to share tips and solutions for Jersey Jack's pirates of the Caribbean. I'll curate it with an index more specific than key post listings.
DISCLAIMER: These fixes are shared in the interest of helping others correct issues. Performing any repair is at your own risk, and should be done by experienced and careful individuals only. Contact your distributor first for help, before filing JJP support tickets. They are there to help you and will generally respond quicker.
-----------------------------
INITIAL CHECKS
BOOTING/REBOOTING ISSUES
SOUND ISSUES
SWITCH ISSUES
-----------------------------

Please click on "TOPIC INDEX" at the top of his page and sort by Keypost for these tips

-----------------------------
SHOOTER/PLUNGER ISSUES:
-----------------------------
Manual shooter plunge is inconsistent and/or weak:
https://pinside.com/pinball/forum/topic/jjpirates-of-the-caribbean-troubleshooting-tips-issues#post-4933886

Another Manual shooter plunge issue that causes inconsistent/weak plunges:
https://pinside.com/pinball/forum/topic/jjpirates-of-the-caribbean-troubleshooting-tips-issues/page/6#post-4954102

Metal rails in the shooter lane are malformed, causing bad plunges:
https://pinside.com/pinball/forum/topic/jjpirates-of-the-caribbean-troubleshooting-tips-issues#post-4934023

Autoplunger is inconsistent and frequently fails to launch past the “hill.”
https://pinside.com/pinball/forum/topic/jjpirates-of-the-caribbean-troubleshooting-tips-issues/page/3#post-4941271

Autolaunch misfires:
https://pinside.com/pinball/forum/topic/jjpirates-of-the-caribbean-troubleshooting-tips-issues/page/57#post-5578277

-----------------------------
SHIP RELATED PROBLEMS
-----------------------------
Video demonstrating black pearl removal:
https://pinside.com/pinball/forum/topic/jjpirates-of-the-caribbean-troubleshooting-tips-issues#post-4934914

Black Pearl reporting stuck open switches
https://pinside.com/pinball/forum/topic/jjpirates-of-the-caribbean-troubleshooting-tips-issues#post-4934928

Black Pearl cannon access gate unexpectedly closes when hitting a flipper:
https://pinside.com/pinball/forum/topic/jjpirates-of-the-caribbean-troubleshooting-tips-issues/page/3#post-4941255

Black Pearl Cannon is shooting to the right side of the "target" hole in the Dauntless, causing rejects:
https://pinside.com/pinball/forum/topic/jjp-pirates-of-the-caribbean-official-owners-and-fan-club/page/127#post-4908546

Balls getting stuck at the top of the Black Pearl ramp:
https://pinside.com/pinball/forum/topic/jjpirates-of-the-caribbean-troubleshooting-tips-issues#post-4934019

Black Pearl rocking motion sometimes halts (in game) or struggles (in calibration):
https://pinside.com/pinball/forum/topic/jjpirates-of-the-caribbean-troubleshooting-tips-issues#post-4934020

"Target Ship" (Dauntless) switch errors:
https://pinside.com/pinball/forum/topic/jjpirates-of-the-caribbean-troubleshooting-tips-issues#post-4933955

Left Black Pearl flipper spring is stretching a lot or breaking frequently
https://pinside.com/pinball/forum/topic/jjpirates-of-the-caribbean-troubleshooting-tips-issues/page/3#post-4942259

Dauntless sticking out too far, making the cannon destination hole too far forward:
https://pinside.com/pinball/forum/topic/jjp-pirates-of-the-caribbean-official-owners-and-fan-club/page/127#post-4908546

Balls getting stuck on the "Man Overboard" shelf over the right side of the Pearl (on the main PF):
https://pinside.com/pinball/forum/topic/jjpirates-of-the-caribbean-troubleshooting-tips-issues/page/23#post-5000822

Lanterns on ship are very dim/poorly lit:
https://pinside.com/pinball/forum/topic/jjp-pirates-of-the-caribbean-official-owners-and-fan-club/page/21#post-4693755

Load cannon door partially blocks shots to the 'LOAD' stand up target
https://pinside.com/pinball/forum/topic/jjpirates-of-the-caribbean-troubleshooting-tips-issues/page/31#post-5046699

Load cannon door doesn't fully open or close.
https://pinside.com/pinball/forum/topic/jjpirates-of-the-caribbean-troubleshooting-tips-issues/page/31#post-5046754

-----------------------------
Tortuga/Mystery saucer:
-----------------------------
Eject sending the ball SDTM
https://pinside.com/pinball/forum/topic/jjpirates-of-the-caribbean-troubleshooting-tips-issues#post-4934930

Saucer rejects/bounces out balls
https://pinside.com/pinball/forum/topic/jjpirates-of-the-caribbean-troubleshooting-tips-issues/page/15#post-4981904

-----------------------------
SPINNING DISC ISSUES
-----------------------------

Bubble formed in middle of playfield spinning disc (read this post and the one immediately after)
https://pinside.com/pinball/forum/topic/jjpirates-of-the-caribbean-troubleshooting-tips-issues/page/65#post-5805288

-----------------------------
MISC PROBLEMS / MAINTENANCE
-----------------------------
Balls keep getting magnetized and sticking in chest or ball trough:
DO NOT USE SHINY CHROME BALLS. Buy carbon steel balls only. Anything else magnetizes too easily.

Compass LCD in the apron is flickering suddenly:
https://pinside.com/pinball/forum/topic/jjpirates-of-the-caribbean-troubleshooting-tips-issues/page/61#post-5696564

Chest won't release balls locked in it:
https://pinside.com/pinball/forum/topic/jjpirates-of-the-caribbean-troubleshooting-tips-issues/page/50#post-5433533

Coils don't work on the coil test menu
https://pinside.com/pinball/forum/topic/jjpirates-of-the-caribbean-troubleshooting-tips-issues/page/2#post-4940537

Chapter Select or Left Orbit posts won't rise up
https://pinside.com/pinball/forum/topic/jjpirates-of-the-caribbean-troubleshooting-tips-issues#post-4934088

PROBLEM: "The Depths" eject shoots the ball into the one way gate at the "I" lane, and the gate doesn't open, causing unstoppable drains.
https://pinside.com/pinball/forum/topic/jjpirates-of-the-caribbean-troubleshooting-tips-issues/page/49#post-5406496

Spotlights flickering and/or going out
https://pinside.com/pinball/forum/topic/jjpirates-of-the-caribbean-troubleshooting-tips-issues#post-4934956

During multidrain in a multiball, a ball gets lost in the subway and eventually pops out of the The Depths during ball search
https://pinside.com/pinball/forum/topic/jjpirates-of-the-caribbean-troubleshooting-tips-issues/page/3#post-4941279

Ball sticking under chest
https://pinside.com/pinball/forum/topic/jjpirates-of-the-caribbean-troubleshooting-tips-issues/page/3#post-4942244

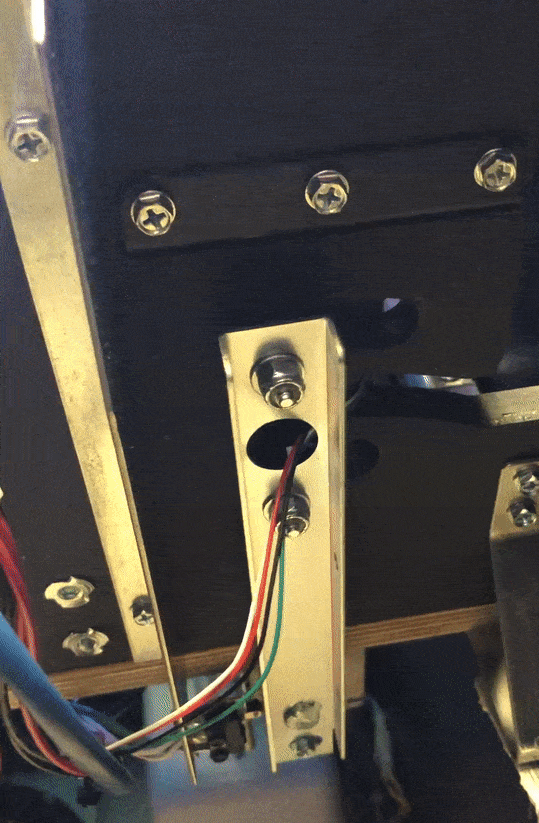
Balls getting stuck in wiring hole under the Black Pearl
https://pinside.com/pinball/forum/topic/jjpirates-of-the-caribbean-troubleshooting-tips-issues/page/3#post-4942267

Both barrels spinning the same direction bugs you. Make them spin opposite directions
https://pinside.com/pinball/forum/topic/jjpirates-of-the-caribbean-troubleshooting-tips-issues/page/6#post-4954781

What size is the rubber ring at [location]
https://pinside.com/pinball/forum/topic/jjpirates-of-the-caribbean-troubleshooting-tips-issues/page/8#post-4958386

Rubber in the star map / chapter select area at top of playfield is worn through
https://pinside.com/pinball/forum/topic/jjpirates-of-the-caribbean-troubleshooting-tips-issues/page/17#post-4985183

#2 4 years ago

PROBLEM:Where the heck does the Map2 piece that comes with the jjPotC Cliffies go?

SOLUTION:When installing the cliffies, the MAP protector is a two-piece set. One protects most of the surface area around the hole and targets, and the other protects the back of the hole.

The map2 piece goes on the backside of the map hole to protect the back of the hole from ball hits. The goal is to try to keep the map 1 piece as flat as possible and then not torque too much pressure on it, so I put down map 1 (after wiping the area with the activator so the 3M adhesive for the front edge would stick well):

map1 (resized).jpgmap1 (resized).jpg

...then put the map2 piece on top of that at the backside of the hole:

map2 (resized).jpgmap2 (resized).jpg

...then put the ball guide on the right on top of that stack. Then I put in the post and screw to hold the deflector, paying attention not to tighten overly tight and also to orient the deflector to similar orientation to when I took it off.

map3 (resized).jpgmap3 (resized).jpg

#3 4 years ago

Installed the map Cliffys last night and it went very well. Make sure the entire map Cliffy is flat against the wood once installed (use included alcohol swab to clear area first), the map 2 Cliffy goes on top followed by the angle bracket and then the ball guide bracket.

Check out the video below from Buffalo Pinball for how to remove the ship.

https://www.twitch.tv/videos/405272384

#4 4 years ago

PROBLEM:You're having problems putting your playfield back down that last 3/4"

SOLUTION:You may have forgotten to remove the last piece of shipping foam that's screwed to the back of the cabinet. From the manual:
potc-shipping-blocks (resized).jpgpotc-shipping-blocks (resized).jpg

#5 4 years ago

PROBLEM: The shooter plunge is inconsistent. Sometimes it can barely get the ball onto the playfield.

SOLUTION: Likely your playfield is hanging too low and the auto launch bracket has dropped very slightly into the path of the shooter rod, robbing it of energy, causing weak plunges. You can test for this by watching the window that lets you see the shooter tip and spring on the shooter rod.

The auto launch bracket is visible through this window on the top, running over the shooter rod. Do a full plunge and see if the auto launch bracket moves - it should not move at all. If it moves, even every few plunges but not all of them, then this is your problem and there are two ways to address it.

auto-launch bracket (resized).jpgauto-launch bracket (resized).jpg

METHOD ONE: Shim the hooks where they connect to the playfield with a thin piece (1-2mm is plenty) of metal, plastic, or dense foam so it raises the playfield very slightly and in turn clears the path of the shooter rod again.

The yellow area is where you want to put the shim - it goes UNDER the hook ON EACH SIDE (to keep the playfield level), then the hook is put in place on top of it.

hook-shim-zone (resized).jpghook-shim-zone (resized).jpg

METHOD TWO: Bend the hooks slightly down where the connect to the playfield using a robo-grip pliers or something like that. Don't go crazy, a small bend is all you need.

If you do the bend method instead of shimming, bend the top part of the hook down A LITTLE (1-2 mm):
hook1 (resized).jpghook1 (resized).jpg

Then bend the end of the hook very slightly outward so it will go into the slot in the receiver easily
hook2 (resized).jpghook2 (resized).jpg

#6 4 years ago

PROBLEM: You see an error message when you go into the system menu like this:
error message (resized).pngerror message (resized).png
(or your ship isn't registering "miss" hits or bullseye hits, or both)

SOLUTION: The EASY solution is to manually move the ship and hit the target using your hand. The software will report a problem if a switch is not activated within a certain number of balls, so it may just be that you haven't had a ball in the cannon in a while. Moving it manually will clear the error as long as the switches work.

If that's not it, one or both switches need to be adjusted. The switch for error 48 is BEHIND the backboard at the bottom, and activated with a lever attached to the ship. The bullseye (destroy) switch is inside the ship, but the wires run out through the back.
dauntless-switch (resized).jpgdauntless-switch (resized).jpg

Switch 48 is always ON and "activates" when the bar attached to the ship moves away allowing the switch to be released and in the "OFF" position (the reverse of what you would expect. First, examine the switch and tug carefully on the wires to make sure you don't have a broken wire.

If the wires are okay, go into switch test mode and make sure the ship moves freely, and that the switch activates when you move the ship by hand. If it doesn't watch the switch carefully to see if it opens enough to register, if not, loosen the switch and adjust the position or bend the leaf.

Dauntless Switch.gifDauntless Switch.gif

(Note the switch opening and closing with the movement of the arm attached to the ship out front)

lhammer610 added this possible solution, too:

I found that I kept getting switch errors, even though I could move the ship and activate the switch. What I found out to be the issue was that:

* The ship had to move too far to activate (turn off) the switch. The switch should activate when the ship is moved ~1/3 to 1/4 of the total movement. If the switch does not activate until most of the way to the left, a ball hit may not move the switch far enough.

* Do not bend the switch with a switch adjustment tool.

* To adjust the switch, loosen the two small bolts holding the switch to the bracket. The upper hole is a slot that allows the switch to be moved in and out (see picture). This is more easily accessed by lifting the playfield up against the backbox.

adjustment-sml (resized).jpgadjustment-sml (resized).jpg
#7 4 years ago

PROBLEM: Chest seems to reject shots that it should have captured.
SOLUTION: There are two possibilities. The forks may be loose, or the forks may be bent, directing the ball into the sides of the chest entrance and bouncing back.

FIX A
Check the forks first - remove the fork mech (the one that raises and lowers the forks) from under the playfield (5 screws.). Tighten the two screws for the fork which are likely loose. This is a common problem. Recommend loctite (blue) for a more permanent fix.

FIX B
If tightening the forks doesn't work, if you have a phone that will do slow-mo, record in that mode and have someone take the shots to the chest. Watch what the ball is doing. If it's not coming toward the chest opening in the center, take the fork mechanism off the bottom again and bend the fork tines (one or both, depending on what's needed) the direction that will guide the ball to the center of the opening in back. ADJUST A LITTLE AT A TIME AND ADJUST THE WHOLE FORK TINE, NOT JUST THE TIPS.

Note in this gif that the fork tines you can see through the opening are pointed to the left, and the ball is being thrown to the left side of the opening, then bouncing to the right and dropping back out. The fix here was to straighten the tines so it threw the ball towards the center of the opening.
chest_reject.gifchest_reject.gif

#8 4 years ago

Oh man! These are fantastic detailed posts! Really glad you took the initiative and put in all this work.

Thank you PinMonk and @zaphx! And everyone else that has helped bring/correct these issues along this long road.

#9 4 years ago

PROBLEM: Balls getting stuck at the top of the Black Pearl ramp.
SOLUTION: Ensure the game is horizontally (left to right) level, measured at the playfield. Next, locate the screw to the right of the ramp which compresses a rubber crush washer. Tighten this screw clockwise until setting balls on the top of the ramp always makes them roll away right. Do not over-tighten or the screw can break in the post! If this fails to resolve the problem, remove the rubber entirely. If this still fails to resolve the problem, put a clear cabinet bumper under the Pearl ramp to lift the left side a bit. You want the ball to roll off to the right easily no matter how gently it is placed on top of the ramp. This is a very common issue and easily fixed.

#10 4 years ago

PROBLEM: The Black Pearl rocking motion sometimes halts (especially during the cannon shot) or otherwise seems to struggle in the calibration test.

SOLUTION: Put the playfield in the first service position, such that you can observe the motion of the arm. Run the ship calibration test. If the pin that controls the rocking of the Pearl contacts the top or bottom of the slot, loosen the two screws on the control arm and correct the height travel is unimpeded in both directions. This took a bit for me to find, but after correcting it the calibration was able to run all the way down to 4, and the ship rocking was much more playable.

#11 4 years ago

PROBLEM: The metal rails in the shooter lane are malformed, causing bad plunges

SOLUTION: Take pictures of the shooter lane before removal, noting the angle of attack into the right orbit. Remove the shooter lane. It has 3 connection points, one hex screw near the top, the “stack” which holds the right strobe, and a small black screw near the bottom. With the wireform removed, gently bend the bottom two forks such that they are slightly down and slightly apart. The goal here is to make them hug the shooter lane when reinserted. When reassembling, take care not to strip the black screw. I was advised to put the screw in and gently turn counterclockwise until it rises up, to ensure it hit the threads correctly on reinsertion. This fixed the problems with the shooter completely.

#12 4 years ago

PROBLEM: Switch (any switch) isn't registering.

SOLUTION: Activate/deactivate the switch while in switch test mode on the system menu and see if the switch works at all. If not, remove the switch and carefully examine the small plastic trigger at the end of the switch arm to see if it's stuck in the down (or up) position. If it's stuck, try to work it free. If you can get it moving, likely it will stay functional. Sometimes they come with a little extra plastic from the factory that prevents proper operation.

#13 4 years ago

PROBLEM: Game reports stuck MAP targets

SOLUTION: There are two possibilities.

FIX A
Targets under the ship may be mounted too close together, causing them to hang up on each other. Each has two screws holding it to the playfield. Loosening the screws (don't remove) under the playfield for the targets and re-set them slightly further apart.

FIX B
If the targets don't look too close together, the leaves for the switch may be too close together making the machine think the target is continuously being hit. Put the game in switch test mode and press each the M, then the A, then the P targets to see if any don't register. If you find one not registering, slightly PULL that target toward you and see if that causes the switch to register. If it DOES, power off and remove that switch from under the playfield and adjust the two leaves of the switch further apart so they're close but not touching. Re-assemble and test the switch by pressing it in switch mode.

#14 4 years ago

PROBLEM: Game reports stuck GOLD targets

SOLUTION: The L target may be getting caught under the wiring harness on the Pearl ramp. Loosen the target and press the harness up and out of the way, then reinstall. The Pearl ramp adjustment to stop the ball from sticking on the ramp also may help.

#15 4 years ago

PROBLEM: Chapter Select or Left Orbit posts fail to raise up

SOLUTION: Locate the post mechanism(s) under the playfield. Adjust the position with the screw and lock into place with the hex nut. Consider blue loctite to prevent recurrence.

#16 4 years ago

Let's add the loose flippers for the Black Pearl as well.

#17 4 years ago
Quoted from wesman:

Oh man! These are fantastic detailed posts! Really glad you took the initiative and put in all this work.
Thank you vireland!

A lot of these were written by @zaphx so credit should be given. https://pinside.com/pinball/forum/topic/jjp-pirates-of-the-caribbean-official-owners-and-fan-club/page/81#post-4843189

#18 4 years ago

Let's see how successful this ends up being.

I think the natural transition will be a slow one over the next several weeks/months, but hopefully successful in the end. We'll probably have to keep re-directing people over here.

The post that has this link in it (in the other thread) should be a key post.

#19 4 years ago
Quoted from joseph5185:

Let's see how successful this ends up being.
I think the natural transition will be a slow one over the next several weeks/months, but hopefully successful in the end. We'll probably have to keep re-directing people over here.
The post that has this link in it (in the other thread) should be a key post.

I can do that for whatever it helps

#20 4 years ago

Thank you for compiling this!

#21 4 years ago

This thread is already on fire.

That didn't take long...

#22 4 years ago

Duly noted and edited! (I've properly flogged the person posting on my behalf with an oversized mackerel!) It's amazing how much effort zaphX put into that spreadsheet! He spend months compiling issues relentlessly!

We've got some really solid techs in this thread! Reminds me of the many awesome helpful folks in the Houdini thread also!

(Damn these mackerel bruises are purple already! Oops, I meant my EX employee's mackerel bruises!)

#23 4 years ago

Yes. A lot of them are from the list he compiled. I invited him to post the info he had compiled and I'd link it, but he's burned out on PotC tech, so he said I could do it for him, which is fine. I just want to get all the info in one place and add pictures and video where possible.

#24 4 years ago

Curious - are there known build date ranges that are prone to more issues, or newer build dates that point to factory fixes for things. I am looking at a POTC new in box that was built 2/13/19 - is that any indication of QC?

#25 4 years ago
Quoted from MiamiRedSkin:

Curious - are there known build date ranges that are prone to more issues, or newer build dates that point to factory fixes for things. I am looking at a POTC new in box that was built 2/13/19 - is that any indication of QC?

It feels like they're rushing these out the door to get to Wonka with minimal QA (at least not the usual level of JJP QA I've known in the past), so I don't think the date helps much. The one we got was 2/11/19 and it had a bunch of issues to correct out of the box. Nothing hard, just a bunch of niggly things that would have been obvious if it had been played.

#26 4 years ago
Quoted from joseph5185:

Let's add the loose flippers for the Black Pearl as well.

I'll get there. It may take a week or so to get everything in, and maybe even longer if I take some illustrative pics or video to add to specific ones.

#27 4 years ago
Quoted from MiamiRedSkin:

Curious - are there known build date ranges that are prone to more issues, or newer build dates that point to factory fixes for things. I am looking at a POTC new in box that was built 2/13/19 - is that any indication of QC?

I have one of the December builds and can happily say that I have only experienced the loose fork ramp issue. It took less than 5 minutes to fix...just tighten two screws. All other frustrations have been due to my own screw ups while installing mods.

#28 4 years ago
Quoted from PinMonk:

Yes. A lot of them are from the list he compiled. I invited him to post the info he had compiled and I'd link it, but he's burned out on PotC tech, so he said I could do it for him, which is fine. I just want to get all the info in one place and add pictures and video where possible.

I'm only on a couple weeks of firsthand stuff here, so I can imagine he'd be pretty drained in this area. He was working on those for months it seemed.

You've been doing an excellent job yourself all along as well! I know that other user had some great map and tortuga Cliffy installation too!

Quoted from PinMonk:

It feels like they're rushing these out the door to get to Wonka with minimal QA (at least not the usual level of JJP QA I've known in the past), so I don't think the date helps much. The one we got was 2/11/19 and it had a bunch of issues to correct out of the box. Nothing hard, just a bunch of niggly things that would have been obvious if it had been played.

Mine was 1/21/19, and so far hook alignment issues and sagging monitor. Not bad, but not anything that should ideally exist for a new owner.

#29 4 years ago
Quoted from MiamiRedSkin:

Curious - are there known build date ranges that are prone to more issues, or newer build dates that point to factory fixes for things. I am looking at a POTC new in box that was built 2/13/19 - is that any indication of QC?

2/4/19 build here and thankfully no major issues. Even took the ship mini playfield off and back on to install the map hole Cliffys, still no issues.

#30 4 years ago
Quoted from PanzerFreak:

Installed the map Cliffys last night and it went very well. Make sure the entire map Cliffy is flat against the wood once installed (use included alcohol swab to clear area first), the map 2 Cliffy goes on top followed by the angle bracket and then the ball guide bracket.
Check out the video below from Buffalo Pinball for how to remove the ship.
https://www.twitch.tv/videos/405272384

First off, kudos to PinMonk for the great thread, this is sure to be a great resource for all JJPOTC owners.

I noticed PanzerFreak linked to Tuna's stream of taking the ship off, which is great (thank you!). Since VODs on Twitch disappear after a few weeks, I trimmed it up and posted it to YouTube to archive it and make it easier to get right into the good stuff. Here's the link:

#31 4 years ago

Oct build for me. Issues,
Broken wire under BP/ Fixed
Auto plunger irregular/ still not fixed
Apron lcd went out/ Fixed in a few days, new lcd from JJP, Big props given to @kingpingames
Ground braid covering leg bolt hole/ fixed in seconds
Minor adjustment to chest release mech/ little bend of release metal
Subway to depths catching/ fixed
Leaf switch right/s chapter select needed adjusted after 100 games or so/ fixed
That is all I can think of. Great game, glad it was my first and only NIB!!!!

#32 4 years ago
Quoted from KevInBuffalo:

First off, kudos to vireland for the great thread, this is sure to be a great resource for all JJPOTC owners.
I noticed panzerfreak linked to Tuna's stream of taking the ship off, which is great (thank you!). Since VODs on Twitch disappear after a few weeks, I trimmed it up and posted it to YouTube to archive it and make it easier to get right into the good stuff. Here's the link:

Adjusted the ship removal link to this direct-link post instead. Thanks.

#33 4 years ago
Quoted from heni1977:

Auto plunger irregular/ still not fixed

Yeah, I'm struggling with this too. Things I have tried:

- Checking the alignment of the whole mech (seems fine)
- Checking the tightness of the coil in the mech
- Adding a washer so the autoplunger "forks" are consistent and toeing up the ball solidly

It still ends up failing fairly frequently.

#34 4 years ago

PROBLEM: Black Pearl reporting stuck open switches

SOLUTION: Remove the Black Pearl and look for broken wires underneath. In one case, the green/brown wire at the Bonus target was broken off resulting in switches 9, 10 and 12 failing (because the switch wires are daisy-chained, one wire broken upstream can break everything after it on the chain). Resoldering broken wires corrects the problem.

#35 4 years ago

PROBLEM: Tortuga saucer sending the ball SDTM

SOLUTION: Most likely the ball deflector/guide at the back of the Tortuga saucer is loose or mis-aligned. Remove Tortuga Tom and loosen the pop bumper to gain access to the two phillips screws for the deflector that's slightly under the pop bumper skirt. Aim the guard a bit to the left. Test and ensure the scoop fires into the middle of the left flipper. Consider blue loctite to make the fix permanent.
Here's how you get the pop bumper apart to gain access to the two screws:

This is the deflector that you may need to tighten and/or adjust the direction it's pointing:
01- deflector location (resized).jpg01- deflector location (resized).jpg
These are the screws you need to tighten once the deflector is where you want it:
02 - Tortuga Screw locations (resized).jpg02 - Tortuga Screw locations (resized).jpg

There's a single #1 phillips screw each at the front and back of the barrel you need to remove:
03-rear screw (resized).jpg03-rear screw (resized).jpg
04 - front screw (resized).jpg04 - front screw (resized).jpg

Once the barrel is off, you see a mounting plate, but the hex set screw that holds it on is hidden underneath it. Feel for it and use a hex wrench to loosen it, then slide the mounting plate up and off:
05 - plate removal (resized).jpg05 - plate removal (resized).jpg

This is a better look at the set screw once the plate is off:
06 - under plate (resized).jpg06 - under plate (resized).jpg

There are now two motor screws to remove. READ THE NEXT STEP BEFORE DOING THIS ONE:
07 - motor screws (resized).jpg07 - motor screws (resized).jpg

Under each screw holding the motor on, there's a nylon spacer. Be careful to hold the spacer as you lift the screw out so you don't lose the spacer in the machine:
08 - spacers (resized).jpg08 - spacers (resized).jpg

Lift the motor up a bit and set it to the side, which will expose the screws for the pop bumper. LOOSEN, DO NOT REMOVE THEM. Once loose, you can raise the skirt in the front where the two screws are for the deflector and tighten/adjust as-needed:
09 - bumper screws (resized).jpg09 - bumper screws (resized).jpg

Reverse the process to put it all back together.

#36 4 years ago

PROBLEM: Spotlights flickering and/or going out.
SOLUTION: You may find that twisting or manipulating the spot brings it back. Avoid twisting it, as this will make the situation worse. Instead pull the bulb directly out. The diffuser cap may separate from the bulb housing, which is easily fixed with super glue.

Once the bulb housing is out, note the two wires folded up onto the base of the bulb. Smooth these out and make sure they are mostly straight and covering both sides of the edge. Reinstall, gluing the diffuser on if it separated.

Pinsider yelobird suggests this drop-in replacement bulb upgrade: https://www.cometpinball.com/product-p/opmax12v.htm

You can also avoid having to glue the spotlight bulbs in place to make sure they never fall out by doing this:
https://pinside.com/pinball/forum/topic/fixing-led-bulbs-flashers-that-fall-out-of-spotlights#post-4402506

#37 4 years ago
Quoted from Crile1:

I have one of the December builds and can happily say that I have only experienced the loose fork ramp issue. It took less than 5 minutes to fix...just tighten two screws. All other frustrations have been due to my own screw ups while installing mods.

I also have a December build (12/27) and honestly...it's really solid. Just a couple things here and there, but nothing "major" at all.

I will note that it's a CE...not that it should matter.

#38 4 years ago
Quoted from PinMonk:

PROBLEM: Tortuga saucer sending the ball SDTM
SOLUTION: Most likely the ball deflector/guide at the back of the Tortuga saucer is loose or mis-aligned. Remove Tortuga Tom and loosen the pop bumper to gain access to the two phillips screws for the deflector that's slightly under the pop bumper skirt. Aim the guard a bit to the left. Test and ensure the scoop fires into the middle of the left flipper. Consider blue loctite to make the fix permanent.
[quoted image]

The one I played on site was doing this! No wonder!
Now it makes sense. It's not "supposed" to.

Haha

#39 4 years ago
Quoted from zaphX:

Yeah, I'm struggling with this too

I can't remember who, but they had used zip ties on the coil, hoping to take the play out of it and that helped a little. But is still doing it! Unless someone else comes up with a fix, I will have to tear it apart and really get a good look at it when I have the time.
I will see if I can squeeze a e clip in one side and see if that helps.

#40 4 years ago
Quoted from zaphX:

Yeah, I'm struggling with this too. Things I have tried:
- Checking the alignment of the whole mech (seems fine)
- Checking the tightness of the coil in the mech
- Adding a washer so the autoplunger "forks" are consistent and toeing up the ball solidly
It still ends up failing fairly frequently.

When you say "failing" does that mean can't get it around the top of the playfield or can't get over the hump onto the playfield?

Have you slo-mo recorded the auto-launches to see if it reveals something robbing the energy from the launch?

#41 4 years ago
Quoted from PinMonk:

When you say "failing" does that mean can't get it around the top of the playfield or can't get over the hump onto the playfield?
Have you slo-mo recorded the auto-launches to see if it reveals something robbing the energy from the launch?

I don't suspect a Titan plunger could help in any way other than durability. Maybe it actually "feels" better?
lol

#42 4 years ago
Quoted from joseph5185:

I don't suspect a Titan plunger could help in any way other than durability. Maybe it actually "feels" better?
lol

The auto-launch doesn't use a plunger, it's the two forks that are activated by the coil.

#43 4 years ago
Quoted from PinMonk:

The auto-launch doesn't use a plunger, it's the two forks that are activated by the coil.

Right. I knew that. (I really did.)

Okay then. Replace the forks? Maybe?

#44 4 years ago
Quoted from joseph5185:

Right. I knew that. (I really did.)
Okay then. Replace the forks? Maybe?

Probably just need to adjust the position.

https://pinside.com/pinball/forum/topic/jjp-pirates-of-the-caribbean-official-owners-and-fan-club/page/58#post-4785754

#45 4 years ago

Maybe. But on my shooter wireform there was a clear point of contact robbing energy from the ball. I could feel the ball hitting one of the flat support wireforms hard. And another one very slightly. Knock on wood but that was 100 percent of my shooter issues.

#46 4 years ago
Quoted from BC_Gambit:

Maybe. But on my shooter wireform there was a clear point of contact robbing energy from the ball. I could feel the ball hitting one of the flat support wireforms hard. And another one very slightly. Knock on wood but that was 100 percent of my shooter issues.

Yep also another possibility.

#47 4 years ago

PROBLEM: Screw on top of the post from the sling under the Black Pearl ramp is pushing into the ramp, deforming it with a dent. You can see it in this picture, just below the "P" in "Pearl," tearing the ramp sticker a little and pushing up deforming the ramp with a bump.

ramp-screw (resized).jpgramp-screw (resized).jpg

SOLUTION: The post in question really should have been a metal mini-post from the factory to allow proper clearance for the ramp above and still allow tension for the slingshot below. As it is now, you can back off the two #1 philips screws at the entrance to the ramp to release some of the tension on this screw, but not too much because you want the ramp to still be solidly connected to the playfield.

If you're feeling ambitious, you can try swapping in a mini-post instead.

Added over 5 years ago:

EDIT: Messing with the bottom screw that is denting the ramp causes other problems because that is literally the only thing giving support to that side of the ramp. It's basically a terrible design with no left-side support. I'd leave it alone and deal with the sticker tearing and bump where the screw is pressing in.

#48 4 years ago
Quoted from PinMonk:

PROBLEM: Screw on top of the post from the sling under the Black Pearl ramp is pushing into the ramp, deforming it with a dent. You can see it in this picture, just below the "P" in "Pearl," tearing the ramp sticker a little and pushing up deforming the ramp with a bump.
[quoted image]
SOLUTION: The post in question really should have been a metal mini-post from the factory to allow proper clearance for the ramp above and still allow tension for the slingshot below. As it is now, you can back off the two #1 philips screws at the entrance to the ramp to release some of the tension on this screw, but not too much because you want the ramp to still be solidly connected to the playfield.
If you're feeling ambitious, you can try swapping in a mini-post instead.

Has anybody done the mini post fix? I am not sure how well the metal bit that the screw goes through would then be connected to the playfield? Maybe I am picturing the wrong replacement part.

Does anybody have a link to the mini post they used? Is it a wood screw or a threaded base?

This was a great heads up, I was not aware of this screw being an issue.

#49 4 years ago
Quoted from BC_Gambit:

Has anybody done the mini post fix? I am not sure how well the metal bit that the screw goes through would then be connected to the playfield? Maybe I am picturing the wrong replacement part.
Does anybody have a link to the mini post they used? Is it a wood screw or a threaded base?
This was a great heads up, I was not aware of this screw being an issue.

I will probably try it, but I haven't removed that post yet to know if the existing plastic post/screw combo is going into a t-nut (machine threaded) or right into the wood (wood screw). The only thing that's dicey is that will make that small metal cover only connected on one end, so it will have to be very tight so it doesn't move. It's a bonus that it's not plastic, but even with it being metal, it can still swing around from hits and vibration. So that's a problem to solve. But I think a mini-post is the answer, I just have to figure out the details.

#50 4 years ago
Quoted from PinMonk:

I will probably try it, but I haven't removed that post yet to know if the existing plastic post/screw combo is going into a t-nut (machine threaded) or right into the wood (wood screw). The only thing that's dicey is that will make that small metal cover only connected on one end, so it will have to be very tight so it doesn't move. It's a bonus that it's not plastic, but even with it being metal, it can still swing around from hits and vibration. So that's a problem to solve. But I think a mini-post is the answer, I just have to figure out the details.

Hmm... looking at the pick again I am thinking grinding the screw (or using a lower profile or smaller diameter head screw) would the way to go. If there is only the one post supporting that bracket, you may be trading a possible ramp dimple with a ramp hammer from the metal hammering the ramp from ball hits...

Promoted items from the Pinside Marketplace
$ 99.95
Cabinet - Shooter Rods
Hookedonpinball.com
Shooter rods
From: $ 12.00
Flipper Parts
Precision Pinball prod.
Flipper parts
From: $ 7.50
Playfield - Protection
Pin Monk
Protection
$ 35.00
Playfield - Protection
Pinball Mod Co.
Protection
There are 3,536 posts in this topic. You are on page 1 of 71.

Reply

Wanna join the discussion? Please sign in to reply to this topic.

Hey there! Welcome to Pinside!

Donate to Pinside

Great to see you're enjoying Pinside! Did you know Pinside is able to run without any 3rd-party banners or ads, thanks to the support from our visitors? Please consider a donation to Pinside and get anext to your username to show for it! Or better yet, subscribe to Pinside+!


This page was printed from https://pinside.com/pinball/forum/topic/jjpirates-of-the-caribbean-troubleshooting-tips-issues and we tried optimising it for printing. Some page elements may have been deliberately hidden.

Scan the QR code on the left to jump to the URL this document was printed from.