(Topic ID: 68869)

IJ Williams "You Cheat, Dr. Jones!" Club

By RDReynolds

10 years ago


Topic Heartbeat

Topic Stats

  • 11,674 posts
  • 669 Pinsiders participating
  • Latest reply 39 minutes ago by Phoerber
  • Topic is favorited by 355 Pinsiders

You

Linked Games

Topic Gallery

View topic image gallery

ij2 (resized).jpg
ij1 (resized).jpg
IMG_1048 (resized).jpeg
IMG_1671 (resized).jpeg
IMG_0831 (resized).jpeg
IMG_0787 (resized).jpeg
DSCN3498 (resized).JPG
DSCN3497 (resized).JPG
IMG_2559 (resized).jpeg
IMG_3082 (resized).jpeg
IMG_3053 (resized).jpeg
IMG_3052 (resized).jpeg
20240331_185053 (resized).jpg
20240331_185034 (resized).jpg
20240331_184519 (resized).jpg
20240331_184510 (resized).jpg
There are 11,674 posts in this topic. You are on page 147 of 234.
#7301 3 years ago

Hello,

I'm looking for those insert decals.
Lost treasure and the clear one.

Only need those 2 not the whole set.
If somebody could help me with this.
Wille pay of course for those 2 decals and shipment to Belgium.

Do not have the tools nor the skills to make them myselfes.

Thanks

DSC_2989 (resized).JPGDSC_2989 (resized).JPG
#7302 3 years ago
C246BA4C-AC37-478B-BD7F-4C4051A76215 (resized).jpegC246BA4C-AC37-478B-BD7F-4C4051A76215 (resized).jpeg
#7303 3 years ago
Quoted from schwarz:

[quoted image]

This is 100% accurate? I thought I remember reading somewhere that the manual had incorrect information?

#7304 3 years ago
Quoted from CashMoney:

This is 100% accurate? I thought I remember reading somewhere that the manual had incorrect information?

I just replaced mine off that list but I usually buy extras so maybe the totals are off.

#7305 3 years ago
Quoted from CashMoney:

This is 100% accurate? I thought I remember reading somewhere that the manual had incorrect information?

E should be 4" other than that its pretty close.

There are a couple small ring errors too.

17 of the 5/16" rubbers and add a couple 3/16 rubbers.

Also in a couple areas 3/8" fits better than the 7/16"

I always build the kit myself out of my bulk rubber supply.
So if something doesnt fit right I just get a rubber that does.

check here its pretty up to date except E is wrong:

https://www.flippers.com/rings/ij.htm

#7306 3 years ago
Quoted from pinballinreno:

E should be 4" other than that its pretty close.
There are a couple small ring errors too.
17 of the 5/16" rubbers and add a couple 3/16 rubbers.
Also in a couple areas 3/8" fits better than the 7/16"
I always build the kit myself out of my bulk rubber supply.
So if something doesnt fit right I just get a rubber that does.
check here its pretty up to date except E is wrong:
https://www.flippers.com/rings/ij.htm

This is perfect, thank you!

#7307 3 years ago

Does anyone happen to have one of the replacement trough opto boards with the rubber grommets that you might consider selling, or would you know where I can get one? If so, please do send me a PM. Thanks.

#7308 3 years ago
Quoted from TimBoch:

Joined the club today. I have been looking for some time and finally found one I felt good in buying. Still a bit sad to have to sell my one of a kind Tee'd Off with a custom color DMD to make room, but I think I can live with this line up.
[quoted image]

This has to be one of the best 6 pin collections I have ever seen

#7309 3 years ago

In my head, Brasso will shine these wireforms right up, but want to ask the forum before I ruin it with something too harsh...

Safe to use?

5718363B-B4A8-4B81-A7A4-BB0AB311F5BC (resized).jpeg5718363B-B4A8-4B81-A7A4-BB0AB311F5BC (resized).jpeg
#7310 3 years ago
Quoted from radial_head:

In my head, Brasso will shine these wireforms right up, but want to ask the forum before I ruin it with something too harsh...
Safe to use?
[quoted image]

I use nev r dull, its non abrasive and works well.

Its just thin plating, go easy on them.

#7311 3 years ago
Quoted from pinballinreno:

I use nev r dull, its non abrasive and works well.

Its just thin plating, go easy on them

Followed this suggestion from #pinballinreno and they came out nice and shiney

#7312 3 years ago
Quoted from pinballinreno:

I use nev r dull, its non abrasive and works well.

Do you also apply with fine steel wool, or?

I'm going to try going lightly with the fine steel wool and the brasso on the captive ball wire form since that's the least visible and gets the least amount of intense wear and report back.

#7313 3 years ago

Seems to me, any 0000 of steel wool would be abrasive.

If it were me: I'd flip the rail over and test bottom (unseen) side for best results.

#7314 3 years ago

Nev R Dull is a fiber based material that you can clean the wire forms with ... I wouldn't use anything to scratch the surface

#7315 3 years ago
Quoted from Kerry_Richard:

Seems to me, any 0000 of steel wool would be abrasive.
If it were me: I'd flip the rail over and test bottom (unseen) side for best results.

So would you recommend just polishing with a rag?

#7316 3 years ago
2ABA2B60-478C-4FFA-9ED0-42591E3EF8A1 (resized).jpeg2ABA2B60-478C-4FFA-9ED0-42591E3EF8A1 (resized).jpeg47713908-E6D6-4015-AC98-21D81DBB5F2D (resized).jpeg47713908-E6D6-4015-AC98-21D81DBB5F2D (resized).jpeg595A10A4-DED7-4BE2-95FA-A6AFF84C65C9 (resized).jpeg595A10A4-DED7-4BE2-95FA-A6AFF84C65C9 (resized).jpegB5A0CF5A-5A69-4A18-B041-E0A607F42380 (resized).jpegB5A0CF5A-5A69-4A18-B041-E0A607F42380 (resized).jpegC399103B-F3BC-426C-81FA-4534EB5F804F (resized).jpegC399103B-F3BC-426C-81FA-4534EB5F804F (resized).jpegFD57D037-50A4-4C60-B4E7-3B18B7E8D4AA (resized).jpegFD57D037-50A4-4C60-B4E7-3B18B7E8D4AA (resized).jpeg
#7317 3 years ago

#7318 3 years ago
Quoted from PiperPinball:

[quoted image][quoted image][quoted image][quoted image][quoted image][quoted image]

Wow. Love the mods and the wood-like accents. Really fits the theme.

Well done!

#7319 3 years ago
Quoted from Toine79:

Hello,
I'm looking for those insert decals.
Lost treasure and the clear one.
Only need those 2 not the whole set.
If somebody could help me with this.
Wille pay of course for those 2 decals and shipment to Belgium.
Do not have the tools nor the skills to make them myselfes.
Thanks
[quoted image]

I hope you find them. I had the Lost Treasure insert flake off also and I ended up painting it in, couldn't find the single decal.

#7320 3 years ago

Well there is a lot going on in that machine.

#7321 3 years ago
Quoted from PiperPinball:

[quoted image][quoted image][quoted image][quoted image][quoted image][quoted image]

That's the best looking modded IJ PF I've ever seen - congratulations on an awesome job! Love the changed wireform through the cliff, but the idol with Indy getting ready to do the swap is amazing. I also really like how Indy's biplane is way smaller than the fighter, it's shows perspective and looks like the fighter is swooping in from high - the shot off tail fin of the biplane and the smoke trail is brilliant! The PF is packed with mods and tastefully done - I'm in awe!!

#7322 3 years ago
Quoted from PiperPinball:

[quoted image][quoted image][quoted image][quoted image][quoted image][quoted image]

I like the look of the bi plane

#7323 3 years ago
Quoted from Kerry_Richard:

If it were me: I'd flip the rail over and test bottom (unseen) side for best results.

Wise words. Brasso took the coat clean off. Glad I did it on the underside of the captive ball wireworm.

Quoted from transprtr4u:

Nev R Dull is a fiber based material that you can clean the wire forms with ... I wouldn't use anything to scratch the surface

Strangely enough, this took quite a bit off as well. Definitely less than the Brasso and Steel Wool, but on areas where the plating was already coming off a little, it took more off. On areas where there was no flaking of the plating, it did fine.

Live and ya learn!

#7324 3 years ago
Quoted from Toine79:

Hello,
I'm looking for those insert decals.
Lost treasure and the clear one.
Only need those 2 not the whole set.
If somebody could help me with this.
Wille pay of course for those 2 decals and shipment to Belgium.
Do not have the tools nor the skills to make them myselfes.
Thanks
[quoted image]

I don't know about the clear one. I think that'd be a pretty stock Williams part, no? It's not game specific, after all. Never seen them sold individually, though. I also note that the pop bumper mylar usually covers this area as well - did they come up when the mylar was removed?

As for the Lost Treasure decal, it just so happens I have a spare. Shame I didn't know about this before I shipped your target decals! PM me if you're interested in the single decal, though.

#7325 3 years ago
Quoted from radial_head:

Wise words. Brasso took the coat clean off. Glad I did it on the underside of the captive ball wireworm.

Strangely enough, this took quite a bit off as well. Definitely less than the Brasso and Steel Wool, but on areas where the plating was already coming off a little, it took more off. On areas where there was no flaking of the plating, it did fine.
Live and ya learn!

If the brass plating has turned to tarnish and completely oxidized,

Removing the tarnish, removes the fully oxidized plating.

Like i said, its very thin.

But, it can be replated any time at a local plating company.

#7326 3 years ago

Sigh, gotta love Saturday evening and I find issues with IJ. Looking for some guidance...I am seeing that the Start button is somehow being triggered during the gameplay (no I am not accidentally pushing it) adding 2p, 3p, and 4p game modes at seemingly random times. I only notice it right after a mode completes...perhaps it has to do with the trough? No errors on startup, and I literally did nothing new today to service the machine, so I am at a loss.

It's not the microswitch as the game doesn't start for no reason, only added credits are happening after a game is starting. On page 2-46 of the manual I see the start button there, should I follow the wire to the points horizontally, vertically or both to see if there is loose wire?

#7327 3 years ago
Quoted from orlandu81:

Sigh, gotta love Saturday evening and I find issues with IJ. Looking for some guidance...I am seeing that the Start button is somehow being triggered during the gameplay (no I am not accidentally pushing it) adding 2p, 3p, and 4p game modes. No errors on startup, and I literally did nothing new today to service the machine, so I am at a loss.
I guess I can try to swap the microswitch but it is fairly new, replaced in the last month or so, so I'm thinking its not that easy of an issue. On page 2-46 of the manual I see the start button there, should I follow the wire to the points horizontally, vertically or both to see if there is loose wire?

I had something similar happen in the past. It wasn't a problem with the switch - it was a short elsewhere on that circuit. Pull the glass off, start a game, and hit playfield switches until it adds another player. (Or you could just use the switch edge test, like a normal human.)

It's just like those multi-switch triggering problems that happen when your contacts get bashed together on the lower right switch under the POA, above the mode hole.

#7328 3 years ago
Quoted from AaronZOOM:

I had something similar happen in the past. It wasn't a problem with the switch - it was a short elsewhere on that circuit. Pull the glass off, start a game, and hit playfield switches until it adds another player. (Or you could just use the switch edge test, like a normal human.)
It's just like those multi-switch triggering problems that happen when your contacts get bashed together on the lower right switch under the POA, above the mode hole.

Found it. The switch above "Special" is triggering it. I'll lift up the playfield and inspect it, thank you!

#7329 3 years ago
Quoted from AaronZOOM:

I had something similar happen in the past. It wasn't a problem with the switch - it was a short elsewhere on that circuit. Pull the glass off, start a game, and hit playfield switches until it adds another player.
You know, just like those multi-switch triggering problems that happen when your contacts get bashed together on the lower right switch under the POA, above the mode hole.

Had this same problem. Was a short, broken connection under the POA next to the mode hole. Ball must have hit it. However, we made a metal bracket cover to prevent future air balls hitting it.

#7330 3 years ago
Quoted from orlandu81:

Found it. The switch above "Special" is triggering it. I'll lift up the playfield and inspect it, thank you!

Make sure you take an extra close look at that POA switch. This is an ancient IJ legend passed down through generations.
https://pinside.com/pinball/forum/topic/automatically-adding-new-players-while-playing#post-2279595-parent

#7331 3 years ago
Quoted from PiperPinball:

Had this same problem. Was a short, broken connection under the POA next to the mode hole. Ball must have hit it. However, we made a metal bracket cover to prevent future air balls hitting it.

Quoted from AaronZOOM:

Make sure you take an extra close look at that POA switch. This is an ancient IJ legend passed down through generations.
https://pinside.com/pinball/forum/topic/automatically-adding-new-players-while-playing#post-2279595-parent

You were both right, it is that dam switch under the POA. Second time I've had issues, last time it was a different side effect. I have the Cliffy (Ricochet's original design) I just haven't gotten around to installing it yet. Maybe I'll stop procrastinating now...or wait until the 3rd time I have issues with it to finally act

#7332 3 years ago
Quoted from AaronZOOM:

I don't know about the clear one. I think that'd be a pretty stock Williams part, no? It's not game specific, after all. Never seen them sold individually, though. I also note that the pop bumper mylar usually covers this area as well - did they come up when the mylar was removed?
As for the Lost Treasure decal, it just so happens I have a spare. Shame I didn't know about this before I shipped your target decals! PM me if you're interested in the single decal, though.

Thanks but ordered already the whole sheet with decals. Have no experience with this so any tips arr welcome.

I will do it like this: sanding the insert as smooth as possible, shoot 1 clear shot to make inserts shine, stick the decal and shoot again clear to seal the decal.
Sand if necessary to level it with playfield.

Correct me if I'm wrong.
Thanks

#7333 3 years ago

Hi, I’ve noticed recently that my ball does not eject/drop always the same from the mode hole. About 20% of the time, it drops left to the top (sometimes right in top) of the left sling (and at one point bounced up and over to a right out lane drain.

I recently changed rubbers (including posts) to Titans. I haven’t removed my POA yet (waiting for the new mode hole deflector, would rather do it once that twice!), so the post rubber left of the mode hole was not changed. I wonder if the new grippier and bouncier post rubber on the right is sending it off to the left as it drops out? Or does this happen on other machines?

#7334 3 years ago
Quoted from RobbyIRL5:

Hi, I’ve noticed recently that my ball does not eject/drop always the same from the mode hole. About 20% of the time, it drops left to the top (sometimes right in top) of the left sling (and at one point bounced up and over to a right out lane drain.
I recently changed rubbers (including posts) to Titans. I haven’t removed my POA yet (waiting for the new mode hole deflector, would rather do it once that twice!), so the post rubber left of the mode hole was not changed. I wonder if the new grippier and bouncier post rubber on the right is sending it off to the left as it drops out? Or does this happen on other machines?

I would start by adjusting the kicker that knocks the ball out of the hole. You have to go under machine to adjust this. It needs to be centered perfectly and over time it will stray to one side or the other

#7335 3 years ago

When rebuilding, I can’t figure out where this piece goes. Not the mode scoop.... but just can’t seem to figure out where.

81C20076-0045-48ED-9565-9A864879CB07 (resized).jpeg81C20076-0045-48ED-9565-9A864879CB07 (resized).jpeg
#7336 3 years ago
Quoted from radial_head:

When rebuilding, I can’t figure out where this piece goes. Not the mode scoop.... but just can’t seem to figure out where.

Behind the entrance to the subway ... by the drop targets to load idol

#7337 3 years ago

Maybe here as well.

B82ED906-0CB0-41B6-BD09-187442D51958 (resized).jpegB82ED906-0CB0-41B6-BD09-187442D51958 (resized).jpeg
#7338 3 years ago
Quoted from schwarz:

Maybe here as well.
[quoted image]

Wow! That’s is. What a pain. Thanks!

#7339 3 years ago

Working on some bamboo leg covers!

C7823CE6-BBF0-44A3-9463-FDAF471E9DA7 (resized).jpegC7823CE6-BBF0-44A3-9463-FDAF471E9DA7 (resized).jpeg
#7340 3 years ago

Anybody else had trouble with the cliffy protector making the scoop shot reject a lot more? Before my teardown, it would reject probably 40% of the time, now it rejects almost 80% of the time after installing.

Just ordered a set of EvilMcBooty’s (what a name) IJ Scoop Lock Kit, and desperately waiting for Jim’s conical lock helper, but curious if anybody else experienced this or give me some pointers on how I might have installed mine wrong.

#7341 3 years ago
Quoted from radial_head:

Anybody else had trouble with the cliffy protector making the scoop shot reject a lot more? Before my teardown, it would reject probably 40% of the time, now it rejects almost 80% of the time after installing.
Just ordered a set of EvilMcBooty’s (what a name) IJ Scoop Lock Kit, and desperately waiting for Jim’s conical lock helper, but curious if anybody else experienced this or give me some pointers on how I might have installed mine wrong.

Given you've done a teardown, not everything will be identically aligned as before. Cliffys or any saucer protector can cause issues however the IJ start mode hole is notorious for rejects so it could be possibly associated with the teardown and not so much the cliffy. The only true way of determining if it's the cliffy is testing it now with it on and with it off (not changing anything else).

#7342 3 years ago
Quoted from radial_head:

Anybody else had trouble with the cliffy protector making the scoop shot reject a lot more? Before my teardown, it would reject probably 40% of the time, now it rejects almost 80% of the time after installing.
Just ordered a set of EvilMcBooty’s (what a name) IJ Scoop Lock Kit, and desperately waiting for Jim’s conical lock helper, but curious if anybody else experienced this or give me some pointers on how I might have installed mine wrong.

I’m in the exact same boat. After installing the cliffy...it’s a 85% reject rate

#7343 3 years ago
Quoted from Manny65:

The only true way of determining if it's the cliffy is testing it now with it on and with it off (not changing anything else).

I’m absolutely not trying to rip on Cliffy, just trying to see if anybody has the same issue. Cliff, like plenty of the big names in the hobby, has done far too much for the hobby for anybody to be mad at him. Here’s my theory:

After 27 years of play, the scoop itself (the metal piece that Jim is properly redesigning) and the scoop hole have worn down. There is significant wear on the scoop hole and the scoop deflector has inevitably bent up slightly over time. In theory, if the scoop deflector had been designed perfectly, the scoop wouldn’t have worn down after rejection after rejection, adding the cliffy wouldnt have made a difference.

However, the scoop hole and deflector have worn down equally after nearly 30 years and correcting only one of them has made the reject rate far worse.

#7344 3 years ago

When I first installed my mode hole Cliffy, my stick rate actually went UP. Not much, but it was noticable.

That mode hole is a harsh mistress - even the tiniest change can completely alter the performance. I fought with it for years before just removing the deflector plate altogether. That works fine, but like others here I'm eager to put ricochet's upgrade into action.

#7345 3 years ago
Quoted from AaronZOOM:

When I first installed my mode hole Cliffy, my stick rate actually went UP. Not much, but it was noticable.

This was my exact experience with the Cliffy as well.

While waiting for the "Antidote", I (and a few others) have had solid interim success with a pad stuck right underneath the plastic in front of the mode start hole.

#7346 3 years ago
Quoted from orlandu81:

This was my exact experience with the Cliffy as well.
While waiting for the "Antidote", I (and a few others) have had solid interim success with a pad stuck right underneath the plastic in front of the mode start hole.

Cool. Can you provide a pic of this or explain a bit more what you mean? I too am poisoned, and am patiently awaiting for a richochet of the antidote.

Side note...if Indy wouldn't have obtained/drank the antidote, we would have never had to have the displeasure of meeting the annoying short round... just saying.

#7347 3 years ago
Quoted from JDelzer:

Cool. Can you provide a pic of this or explain a bit more what you mean? I too am poisoned, and am patiently awaiting for a richochet of the antidote.
Side note...if Indy wouldn't have obtained/drank the antidote, we would have never had to have the displeasure of meeting the annoying short round... just saying.

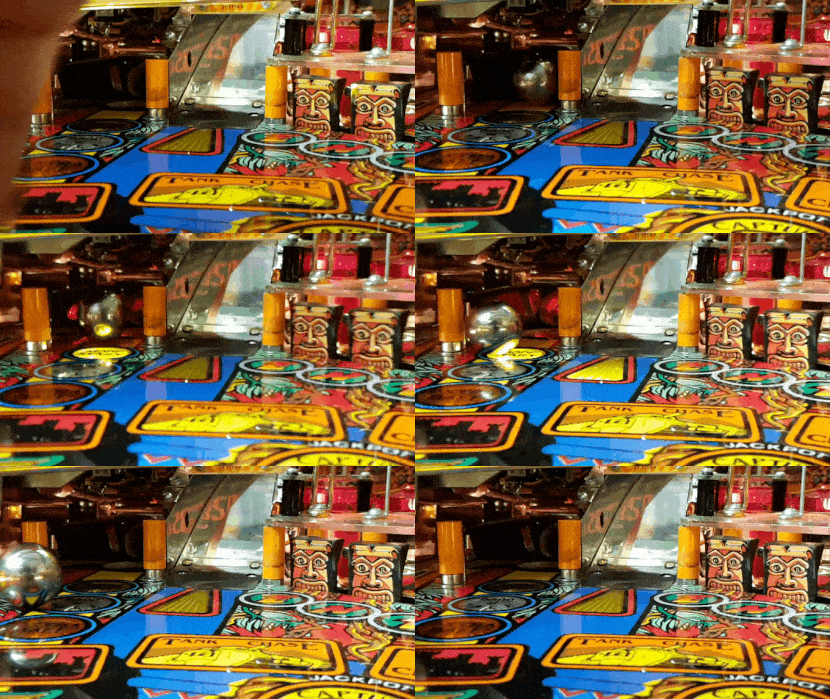
Here is mine, you will need to find the right spot on your machine as they are all different. I drilled out the holes on the deflector and shifted it back a few millimeters and lifted it with some thin washers. I then adhere the pad towards the front under the plastic. I get 90%+ success with this fix, but the pad does fall off over time. I was lucky this past time, as the pad is perfectly positioned that it hasn’t fallen off after more than 500 games, and is still on there tight.

2B68EFED-3E48-4FDA-B860-456240B4FDD2 (resized).jpeg2B68EFED-3E48-4FDA-B860-456240B4FDD2 (resized).jpegA0861691-3DD2-40C0-BDBD-682439C52A1C (resized).jpegA0861691-3DD2-40C0-BDBD-682439C52A1C (resized).jpeg

#7348 3 years ago
Quoted from orlandu81:

Here is mine, you will need to find the right spot on your machine as they are all different. I drilled out the holes on the deflector and shifted it back a few millimeters and lifted it with some thin washers. I then adhere the pad towards the front under the plastic. I get 90%+ success with this fix, but the pad does fall off over time. I was lucky this past time, as the pad is perfectly positioned that it hasn’t fallen off after more than 500 games, and is still on there tight.
[quoted image][quoted image]

Here is mine, factory setup, and Cliffy (the carbon style, not the metal).
Special features:
-able to maximize the success rate around 10% (we can name it "sucks as rate"
-built in mini pf microswitch destroyer

So the new mod by Ricochet is a must have, not the Color DMD

20201128_221622.gif20201128_221622.gif
#7349 3 years ago
Quoted from Davi:

Here is mine, factory setup, and Cliffy (the carbon style, not the metal).
Special features:
-able to maximize the success rate around 10% (we can name it "sucks as rate"
-built in mini pf microswitch destroyer
So the new mod by Ricochet is a must have, not the Color DMD [quoted image]

Not debating that at all, I'm on the list and was a beta tester. The Antidote is a must...

...the color DMD too...

#7350 3 years ago

U6 check sum error.

Anyone know what this is?

Promoted items from Pinside Marketplace and Pinside Shops!
12,000 (OBO)
Machine - For Sale
Wilmington, DE
From: $ 55.00
Gameroom - Decorations
Pinball Photos LLC
 
$ 75.00
Playfield - Toys/Add-ons
PFX Pinball Mods
 
$ 0.00
Lighting - Backbox
Creekside Hideaway, LLC
 
$ 79.99
Cabinet - Armor And Blades
PinGraffix Pinside Shop
 
$ 1,059.00
Flipper Parts
Mircoplayfields
 
$ 20.00
Playfield - Toys/Add-ons
2step’s shop
 
$ 70.00
Cabinet - Toppers
Creekside Hideaway, LLC
 
$ 1,159.00
Flipper Parts
Mircoplayfields
 
14,000 (OBO)
$ 35.00
Cabinet - Other
Rocket City Pinball
 
11,250 (Firm)
Machine - For Sale
Trumansburg, NY
$ 29.00
12,500 (OBO)
From: $ 33.00
Gameroom - Decorations
Rocket City Pinball
 
From: $ 55.00
Gameroom - Decorations
Pinball Photos LLC
 
$ 69.99
Playfield - Toys/Add-ons
Lighted Pinball Mods
 
€ 160.00
Playfield - Toys/Add-ons
Pino Pinball Mods Shop
 
€ 50.00
Playfield - Toys/Add-ons
Pino Pinball Mods Shop
 
From: $ 55.00
Gameroom - Decorations
Pinball Photos LLC
 
$ 49.99
Playfield - Toys/Add-ons
Lighted Pinball Mods
 
From: $ 9.99
Eproms
Matt's Basement Arcade
 
$ 85.00
$ 1,319.00
Flipper Parts
Mircoplayfields
 
$ 59.95
Playfield - Toys/Add-ons
pinballmod
 
From: $ 20.00
Various Novelties
Pinball Photos LLC
 
$ 59.95
Playfield - Toys/Add-ons
pinballmod
 
$ 18.00
Playfield - Protection
Volcano Pinball
 
Hey modders!
Your shop name here
There are 11,674 posts in this topic. You are on page 147 of 234.

Reply

Wanna join the discussion? Please sign in to reply to this topic.

Hey there! Welcome to Pinside!

Donate to Pinside

Great to see you're enjoying Pinside! Did you know Pinside is able to run without any 3rd-party banners or ads, thanks to the support from our visitors? Please consider a donation to Pinside and get anext to your username to show for it! Or better yet, subscribe to Pinside+!


This page was printed from https://pinside.com/pinball/forum/topic/ij-williams-you-cheat-dr-jones-club/page/147?hl=radial_head and we tried optimising it for printing. Some page elements may have been deliberately hidden.

Scan the QR code on the left to jump to the URL this document was printed from.