(Topic ID: 52301)

Gottlieb Golden Arrow spinner adjustment

By JONESDS

10 years ago


Topic Heartbeat

Topic Stats

  • 32 posts
  • 8 Pinsiders participating
  • Latest reply 10 years ago by Pafasa
  • Topic is favorited by 3 Pinsiders

You

Linked Games

Topic Gallery

View topic image gallery

fierce.warrior.jpg
image.jpg
image.jpg
image.jpg
spinr.jpg
1.jpg
Spinner.GIF
image.jpg
image.jpg
#1 10 years ago

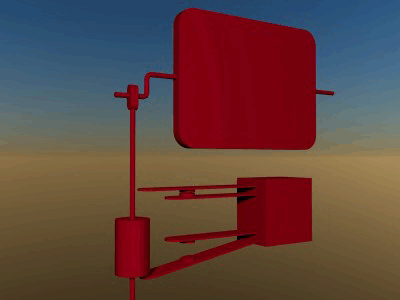
Probably should have adjusted the game to 100% before shopping it, now I'm not sure how to adjust the spinner switches on this game. This is my first EM with two switches on the spinner, are both supposed to be adjusted open, closed or a mixture? Attached a pic of the two switches and weight to actuate switches as well as schematic that I'm not sure how to interpret with the spinner in the rest position.

image.jpgimage.jpg image.jpgimage.jpg

#2 10 years ago

According to your Schematic when your target is in the resting position both switches should be Normally Open (NO) then both Normally Closed (NC) upon actuating, going back and forth while spinning open/close.

Ken

#3 10 years ago

That looks like a clever setup to get two pulses from one revolution.

#4 10 years ago

Maybe, I'm not seeing it. With the switches laid out like they are (long blade top of first switch, long blade bottom of second switch), I don't think they both can be open at the same time. Which has me thinking that it's one open, one closed in the resting state. But if one is closed in the resting state, does keep the score motor from completing it's reset on game start?

#5 10 years ago

Looking again at your picture versus the Schematic. Sometimes a Schematic is not as clear as one would hope.

In the picture it appears the Switch closet to the Playfield should be "NO" and the bottom switch "NC" and hopefully that works for you.

I recently had an issue with a Williams Stardust that had an error on the Schematic that told me I should have a "NO" switch instead of a "NC". What was more frustrating was that it had a "NO" switch that looked factory and the right gates just would not work correctly. I ended up building a new "NC" switch after testing the circuit both ways and determining it should have been "NC" to begin with.

Moral of the story: Don't always trust the Schematics, use your common sense too.

Ken

#6 10 years ago

Actually i read the schematic as

On the left spinner target switch there is a make break switch where one is closed and one is open
which is the same as in the picture.

The right spinner has the same setup

I would vote the schematic is correct.

--Jeff

#7 10 years ago

I also see the schematic as one open and one closed but it (the schematic) is not very clear how this system works. Heres my take, I think there should be a period of time where they are both open. The closed state should not overlap between the two switches or the machine will never see a change in state. I think at rest they should both be open and then as the spinner rotates it will alternate closing each switch with a moment of time between each closure where both switches will be open.

Take this as my opinion only given that I have never seen this setup. I just see it working this way in my mind.

So I guess I am saying that the schematic is not clear enough to adjust switches by.

Dane

#8 10 years ago

I should clarify....by asking a question of the OP.

With the spinner at rest, does the weight sit at the bottom of its range of up/down motion, or at the top, or in the middle? My post above was assuming the the weight sits in the middle of its range of up/down motion when the spinner is at rest.

If I am wrong on the position of the weight, the only thing that changes is the state of the switches when the spinner is at rest.

#9 10 years ago

When I purchased the game, it was disassembled in a storage unit. It had a busted seam on the cabinet so I never assembled it prior to shopping it. Shopping it, I just stripped everything off the playfield and then reassembled. I now find myself in the position that I'm not sure of the correct way to adjust this dual switch setup.... both closed at rest, top open bottom closed at rest, top closed bottom opened at rest, etc. The picture just shows the weight in the middle of the two for perspective, I should have worded my original post better.

#10 10 years ago

Check the wire colors to correspond to the switches as shown on the schematic. It looks to me like a normally open closest to the playfield, normally closed below. Two things we need to know. Is the pic taken with the arm at rest position? Does the arm raise when actuated, or lower with one half revolution of the spinner? Once we know that, it should be obvious.

#11 10 years ago

I think this

Quoted from Pafasa:

, I think there should be a period of time where they are both open.

Quoted from SteveFury:

That looks like a clever setup to get two pulses from one revolution.

if they are both open no points are scored.
If one or the other close on rotation points get scored. TO me it loks liek the same colored wired cause the dots all merge together for these 2
Therefore you couldnt have a closed switch at rest or you would be locking your pts coil.

2 pulses per spin sounds correct and would work nicely.

Manually spin and see ...... we can get an positive answer

--Jeff

#12 10 years ago

I whipped up a quick animation. It pauses when both switches are closed. The setup provides two pulses for each revolution. Sorry the model's all red I didn't have time to assign textures.

Spinner.GIFSpinner.GIF

#13 10 years ago

Steve,
very cool
can you render a still for when the plunger is at rest.

--Jeff

#14 10 years ago

Here it is:

1.jpg1.jpg

#15 10 years ago

OK i got it.

Steves animation made me think..

so if the NO or the NC switches are open no pts are scored because the switch is inline. only when the both switches are closed and the plunger is travelling open do you score pts.

this makes sense with the schematic. I would call this a make break switch as much a

make -- make make - break switch

That means the gap size between the long switches should be exactly the size of the plunger.

When the playfield is at rest the plunger weighs down the lower switch to open it

What a PITA way to engineer that

--Jeff

#16 10 years ago

MrKegFlex, will you post a pic of the switch wiring for us please? The way the switch is wired will make a big difference here. At least for my understanding.

#17 10 years ago

I guess you could consider it sorta similar to a 3 position toggle switch where the center position is "ON". The spinner crank is in the 9 o'clock and 3 o'clock position for it to be on. spinr.jpgspinr.jpg

#18 10 years ago
Quoted from SteveFury:

I guess you could consider it sorta similar to a 3 position toggle switch where the center position is "ON". The spinner crank is in the 9 o'clock and 3 o'clock position for it to be on.

THIS! ^^^^

#19 10 years ago
Quoted from SteveFury:

I whipped up a quick animation.

I'm getting dizzy.

#20 10 years ago

Sorry for the delay in providing schematic wire colors and switch wiring. In the switch wiring pic, the front blade tab (long blade on top switch) is connected to the bottom blade tab (long blade on bottom switch), the bottom blade tab is not visible.

image.jpgimage.jpg image.jpgimage.jpg

#21 10 years ago

That certainly supports Steve's animation sequence......case closed?

#22 10 years ago

Yes, I believe so. I finally found the switch that was causing the score motor to never stop on game start, set the spinners to the adjustment mentioned above and played a few games. After playing a few games, I *think* I see why they did it that way. The plastic spinners spin decently for the most part, not as well as the old ones, but I did have a spinner stop upside down a couple times. I wonder if it was designed that way for that problem?

#23 10 years ago

Few more adjustments and I'll be putting the glass back on and sliding it into the lineup... Just need to figure out what to pull from the lineup to make room for it. Thanks for the help!

image.jpgimage.jpg

#24 10 years ago

Nice looking table!

#25 10 years ago

Well, guess I was off this time.

Looks like SteveFury gets the cookie once again!

Great looking game.

Now have fun!

Ken

#26 10 years ago

Congrats! I have this game in my sights around here. Wish me luck!

If you subscribe to the pinball ninja blog, look through his archives and find his repair on this game. There is a modification that he does to the spinners to get better action out of them. It's pretty cool and looks easy!

#27 10 years ago
Quoted from Pafasa:

Congrats! I have this game in my sights around here. Wish me luck!
If you subscribe to the pinball ninja blog, look through his archives and find his repair on this game. There is a modification that he does to the spinners to get better action out of them. It's pretty cool and looks easy!

Good luck! No experience on this game, seems intriguing at the moment.... Hope it turns into a keeper with it being so sharp looking.

Thanks for the heads up on the ninja mod, I'll check it out.

#28 10 years ago

Thanks! & You're Welcome! & Thanks......this tread renewed my drive to go after the Golden Arrow near me. If I end up with it, I'll be sure to post about it on Pinside.

As you play it, It would be nice to read your thoughts on it. I am very intrigued by the 10k shot and the 6 inch bell.

#29 10 years ago

The spinner mod-drill the lower end of the plastic spinner target and insert lead weight (or other heavy metal). Gives it a bit more momentum. You can disguise the fix with a bit of white paint or caulking. Ninja has so many weapons in his arsenal! Always thought Golden Arrow was a great looking art package some of Gordon Morrison's fine work of the classic 70's Gottliebs.

fierce.warrior.jpgfierce.warrior.jpg

#30 10 years ago

The interesting part is that PBR shows it has the spinner in stock... if you mess up, seems you can get NOS/repro replacements. Seems worth trying...

#31 10 years ago

That is one good looking game! Have fun with it.

3 weeks later
#32 10 years ago
Quoted from Pafasa:

Thanks! & You're Welcome! & Thanks......this tread renewed my drive to go after the Golden Arrow near me. If I end up with it, I'll be sure to post about it on Pinside.

Got it! Posted about it!

http://pinside.com/pinball/forum/topic/em-show-us-your-em-pinball-machines/page/10#post-963538

As I clean it up, I'll post before and after pics it a new thread.

Promoted items from Pinside Marketplace and Pinside Shops!
$ 15.00
Lighting
Space Coast Pinball
 
From: $ 4.99
Cabinet - Decals
The Pinball Scientist
 
$ 12.00
Great pinball charity
Pinball Edu

Reply

Wanna join the discussion? Please sign in to reply to this topic.

Hey there! Welcome to Pinside!

Donate to Pinside

Great to see you're enjoying Pinside! Did you know Pinside is able to run without any 3rd-party banners or ads, thanks to the support from our visitors? Please consider a donation to Pinside and get anext to your username to show for it! Or better yet, subscribe to Pinside+!


This page was printed from https://pinside.com/pinball/forum/topic/gottlieb-golden-arrow-spinner-adjustment and we tried optimising it for printing. Some page elements may have been deliberately hidden.

Scan the QR code on the left to jump to the URL this document was printed from.