(Topic ID: 78179)

Getaway Club ~ Dispatch, run a make on license plate KINGPIN

By MrSanRamon

10 years ago


Topic Heartbeat

Topic Stats

  • 13,815 posts
  • 564 Pinsiders participating
  • Latest reply 59 minutes ago by golfergordy
  • Topic is favorited by 297 Pinsiders

You

Linked Games

Topic poll

“Which S/W Version do you use?”

  • L1 22 votes
    6%
  • L2 179 votes
    51%
  • L3 11 votes
    3%
  • L5 120 votes
    34%
  • P7 9 votes
    3%
  • C-C 7 votes
    2%

(Multiple choice - 348 votes by 346 Pinsiders)

Topic Gallery

View topic image gallery

shooter repair4 (resized).jpg
shooter repair3 (resized).jpg
Shooter repair2a (resized).png
Shooter repair1 (resized).jpg
Disappearing post fix4 (resized).jpeg
Disappearing post fix3 (resized).jpeg
Disappearing post fix2 (resized).jpeg
Disappearing post fix1 (resized).jpeg
HSIIclear (resized).jpg
pasted_image (resized).png
Shooter rod (resized).jpg
DSC06633 (resized).JPG
ezgif.com-video-to-gif-converter.gif
PXL_20240408_220306294 (resized).jpg
PXL_20240408_220311370 (resized).jpg

You're currently viewing posts by Pinsider AlexRogan84.
Click here to go back to viewing the entire thread.

#10826 3 years ago

Well... I got my Holy Grail pin on Wednesday. A really nice Getaway. Soooo many memories of playing this as a kid. Love this game.

I bought it from fellow Pinside member here PinballJAH (Jim). He took really good care of it and really, really went out of his way to make sure I was taken care of too. Wrapped it all up super well so that when I got to his place to pick it up, it was ready to go. The machine has a PIN2DMD colour display, Flipper Fidelity speakers up top, pretty much perfect backglass, tons of little cool decals in places around the playfield, good quality bright LED's everywhere, a toy car up on the side along with a Donut Heaven mod.

The game plays as it should. A couple little things I'm working on. The right slingshot plunger had the little plastic linkage break off, so a new one of those will go in. I'll freshen up all three flippers with the standard rebuild kit as well.

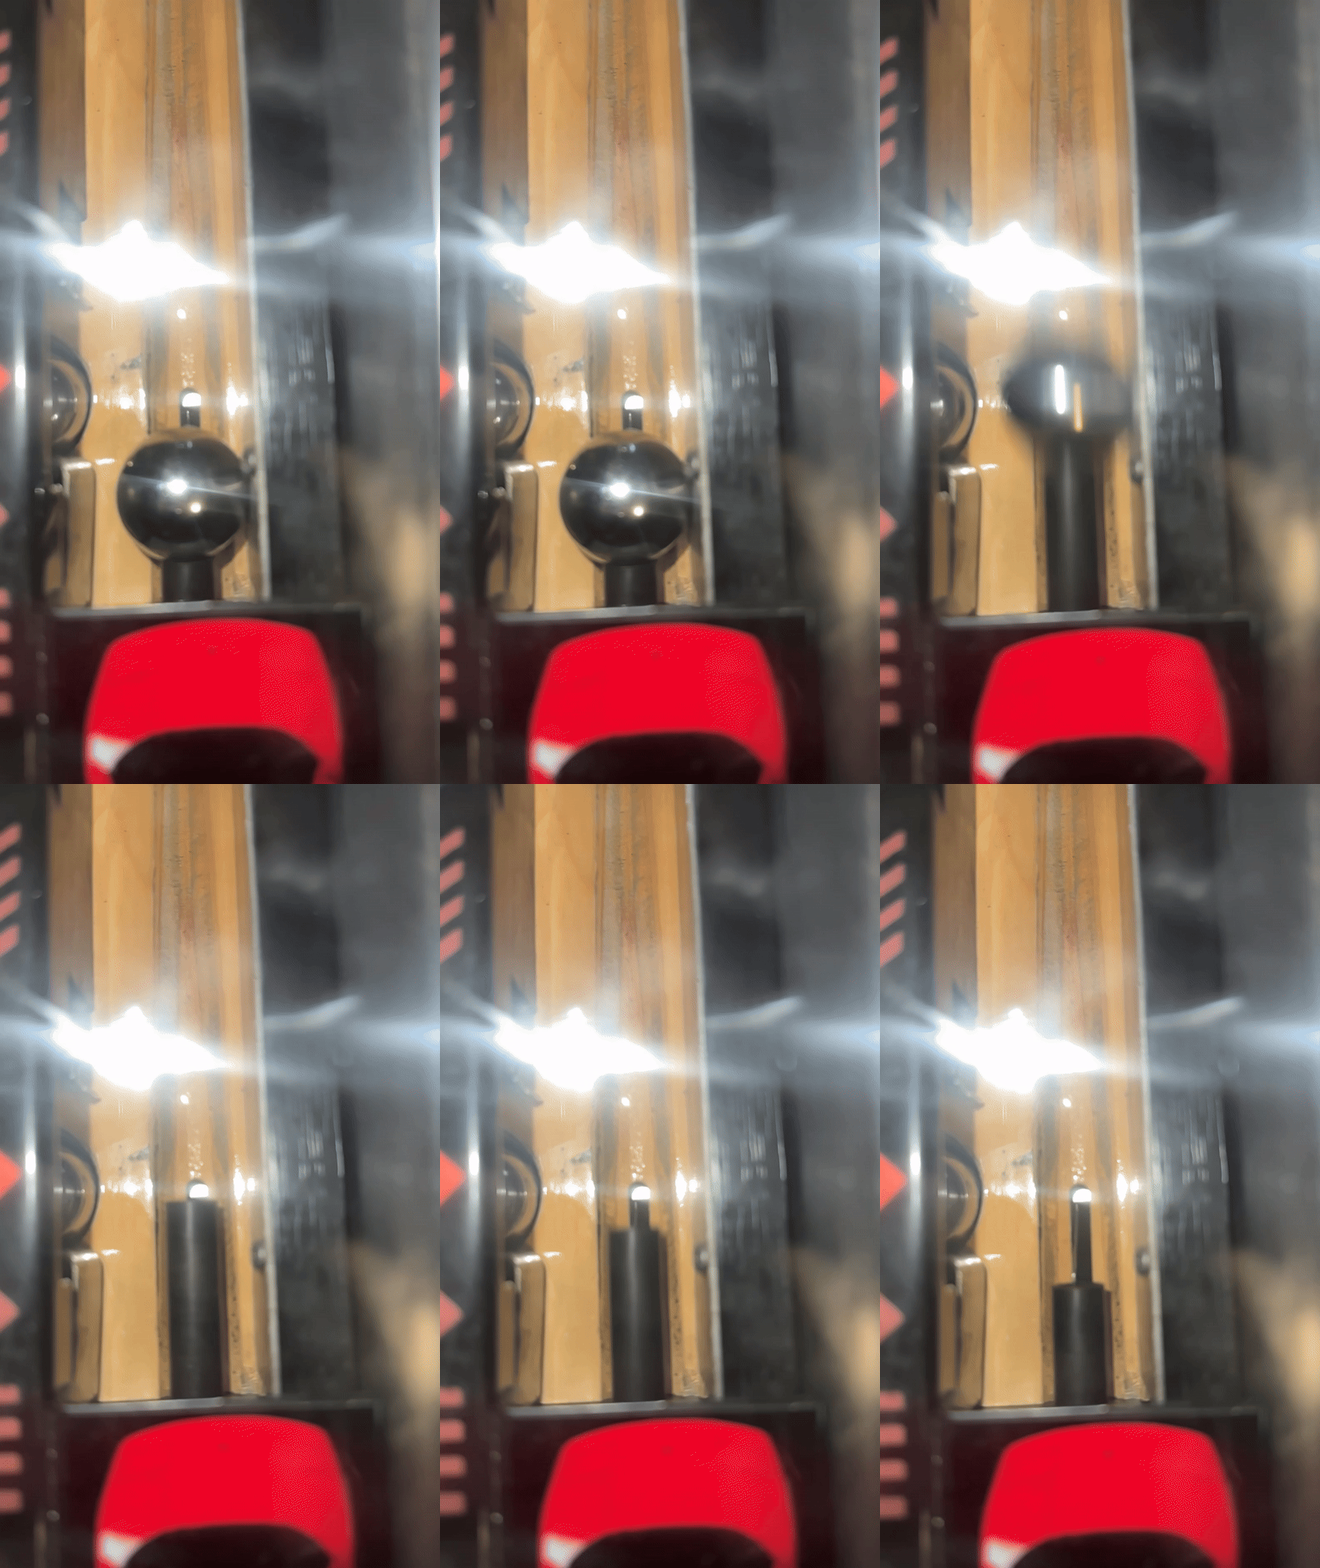
There is one issue I wanted to ask the group though. A portion of the shifter assembly needs attention. It was working ok, and still does (electrically), but the little plastic/rubber shift boot (shoulder) thingy that slides over the shaft of the shifter and is what the shaft pivots on has one side crumbled away. I took some pics after I got it apart.

You can see how this part, which isn't hard plastic, but isn't soft rubber either (almost like the material they make hockey pucks out of?... hey, I'm Canadian, where do you expect my comparisons to come from??? lol). The little round extensions on each side are meant to exactly fit in the corresponding holes on the sides of the metal bracket, and then once it's all tightened back together, when you pull up or push down on the shifter handle, the opposite end of the shaft clicks the upper or lower switch.

It won't do this if it can't pivot. The DMD said Shifter Error initially, as I think when it starts up, if one of those switches is closed, it knows something is wrong.

So, two questions:

- Does anyone offer replacements for this little part?

- Has anyone MacGyver'ed a solution of their own to fix what is there without replacing everything?

I am thinking it could be any number of ideas that basically just allow it to pivot again. That collar thing just slides on, and I could drill a small hole through the broken side so that a washer or bolt or portion of a coil sleeve maybe could go in it's place. Just wondering what you all think?

IMG_2376 (resized).JPGIMG_2376 (resized).JPGIMG_2389 (resized).JPGIMG_2389 (resized).JPGIMG_2390 (resized).JPGIMG_2390 (resized).JPGIMG_2391 (resized).JPGIMG_2391 (resized).JPGIMG_2392 (resized).JPGIMG_2392 (resized).JPG
#10831 3 years ago
Quoted from pinballjah:

Glad you are enjoying the game. I have never seen a shifter error before. You definitely have a knack for pinballs, having already taken this assembly apart. Most if not all of the decals came from Mr_Tantrum, if you want to add anymore. He has a lot to choose from including an updated stop light and a real mountain mod. Sorry to see this game go from my collection.

Thanks Jim. Might be that 13 years of experience taking apart the DeLorean. Pinballs are a joy to work on compared to some of the old car stuff, lying on cold concrete out in the garage with a 3,000 pound oily car a few inches over your head. I can sit comfortably at my dining room table and take apart Getaway shifter assemblies all day long!!! haha

2 weeks later
#10863 3 years ago

Can someone humor me as to the part number for the little rubber bulb "condoms" like the two on the supercharger ramp entrance? Nothing comes up in a search on the Marco parts page for bulb condom. Go figure!? lol I'd like to replace the yellow one as it's missing on my machine.

29 (resized).jpg29 (resized).jpg
#10865 3 years ago
Quoted from Mr_Tantrum:

Get rid of them and just put in colored LEDs (they originally were used to change the light color). I've gone white domes previously, but now I have clear faceted domed ones and like them best (red and amber).
https://www.cometpinball.com/products/faceted-bulbs
[quoted image]

I did find them ironically. Lamp covers they go by. I found about 20 of them rolling around in the bottom of my Lethal Weapon 3 when I first got it.

Hadn't realized that's how they made the colour differences originally. Guess I never thought about it. On the Party Zone, there is an all red effect with one of the GI strings. For multiball and the "Big Bang" jackpot... would that red effect been also done by these rubber bulb covers back in the day? I am meaning to replace all those GI lights with LEDs and wondered which ones should be which colour. Might end up finding more of these rubber covers once I go in there.

2 weeks later
#10867 3 years ago

I'm troubleshooting an intermittent beacon light and need some help. The light bulb itself always comes on, but the motor making the disc spin doesn't always come to life. Inevitably, if I reach up and tap firmly to the side of the light on top of the backbox, it starts rotating. Kind of seems to me like it's caught on something.

I've taken it off and looked and it doesn't seem to be catching on anything obvious. There's decent clearance all the way around. No obvious loose wires or connectors inside the cabinet going to the boards up top either.

I see on the Marco website that you can buy a replacement, heavy duty upgraded motor. Here: https://www.marcospecialties.com/pinball-parts/14-7971

You can see though how it says it might not be your motor and to check these other things. The one that caught my eye is where it says the "o-ring belt may be too tight."

What are they talking about with this? Is there a belt inside the motor? I have not taken my motor apart. Anyone have pics of the inside of a motor or can tell me what this o-ring belt reference means?

Thanks.

#10869 3 years ago
Quoted from GRUMPY:

F-14 has 3 beacons with 2 o-rings use as belts. If the o-rings are too small the motor isn't strong enough to turn the reflectors. On your game there is no o-rings, the reflector is mounted directly to the motor shaft. So either the motor is dieing or the grease inside the housing is dried up and isn't lubricating the gears any more. I have taken this type of motor/gearbox apart and cleaned out the old grease and replaced it with new grease.

Awesome. Thank you very much. Good explanation. And simple too. I'll definitely open up the motor I have and see what the condition of the grease is. Cheers.

#10878 3 years ago

I've been working on my flippers a little bit. I have done the flipper rebuild kits on all three. I still feel like the lower right flipper is a bit weak, especially as it gets right out to the tip of the flipper. I think it might be an adjustment of some kind needed on the EOS switches, but not really sure. I also think there's too much slop in the bushing on the right side, but I don't know how or what to adjust that out. These were new bushings too with the rebuild kits.

The flipper buttons are also a little suspect. I have new ones coming, but the ones in there don't have much of a spring out resistance, and I like feeling that on the buttons. This is usually from the internal spring in the button or from the tip of the button plunger resting on the top of the leaf spring metal tab. The thing is though, with the Getaway, it seems like there isn't enough room on that right flipper leaf switch to move things around or in and out because the stacked base of the switch is right snug up with the bracket on the shifter.

You guys have this scenario on your machines too? Where the leaf switch is wedged in there under that angled top bracket part of the shifter mechanism? This is I guess necessary because the right switch has the dual acting blades for the top flipper. I think that's what is going on there anyway.

Here's a pic of what I mean. Early pic when I got the game. A few things have changed, but that geometry is still the same for the switch base and the shifter bracket.

IMG_2357 (resized).JPGIMG_2357 (resized).JPG
2 weeks later
#10894 3 years ago
Quoted from tiltmonster:

lol, to me it's luck... just run through the EB when it appears, if you can. I'm usually trying to make it to the end of the timer for the points.

I had a way of getting this EB to pop-up fairly consistently once upon a time. I used to do it by hugging one side or the other. Like go to the left and keep pressing the left button while you're there. It seemed like that was daring the logic to throw the EB sign up on the far side. And it often would. You would need to dart over and get it (by driving through it, as mentioned). I only ever did this in the lowest gear... meaning, I never changed gears and so the car moved much slower. If you get to the end of the race, you're only looking at about 12 mil, but if you get the extra ball along with that, it's well worth it.

#10896 3 years ago
Quoted from transprtr4u:

Going to try this ...
Thanks to all for the replies
HNY

I tried it right after I posted that and it didn't work. It might need a longer video mode drive time than the default as it felt like it used to come towards the end of the run. Can't remember what the default is, like 14 seconds or something. It might need to go out to 20. I'll try it a few more times and see if I can get it to happen.

Otherwise, I bet I have played 300 games in the one month I've had my Getaway and I don't recall seeing the EB in video mode a single time. Might also be related to the EB percentage it's set to in settings or it could possibly be related to which version of the code the game is running. My machine is on L2.

1 week later
#10921 3 years ago

The shifter looks complete also. Nothing obvious missing in that photo.

1 week later
#10951 3 years ago
Quoted from THJM:

This pic is taken from around page 133 or so. The metal L-shaped piece to the right of the supercharger (the one with the caution sticker put on), is this a standard part? I don't have it on my machine.
Thanks.[quoted image]

Quoted from EStroh:

Yes, standard part. Is meant to keep the ball from leaving the playfield. Same thing with the one over the hairpin turn on the left side.
Odds are though, the ball will never hop out of the superchager and hit this piece. I wouldn't sweat it if it's in a home use environment.

You can still buy this bracket, part number 01-10904: https://www.marcospecialties.com/control/keywordsearch?SEARCH_STRING=01-10904

It is mentioned under service bulletin 43 included on pages 16 and 17 of this 38 page PDF file: http://howtopinball.com/files/pinball/paperwork/williams/service-bulletins/williams-service-bulletin-book-1992-fall.pdf

(Originally found on the PinWiki page for Williams here: https://www.pinwiki.com/wiki/index.php?title=Williams_WPC#Service_Bulletins)

You can get that and many more Getaway decals for this bracket and others from Mr. Tantrum, Pinside member:

https://pinside.com/pinball/forum/topic/getaway-club-dispatch-run-a-make-on-license-plate-kingpin/page/129#post-3868238

http://thezumwaltfamily.com/pinball/

#10960 3 years ago

My Red Light Mania bulb on the ramp entrance sign will come on dimly anytime the 2nd gear light on the playfield below it is on. Anyone else have this happen on their machine?

I haven't measured the voltage, but I think it is a lot less than full as it is pretty dim compared to when it is on for real. It's consistent though, anytime you're in 2nd gear, that red light mania bulb also lights up dimly.

This happens at the beginning of every game as you're going through the gears and you can also see it when you change gears to start the video mode. Wasn't sure if I've got some kind of wiring crossover going on underneath that I need to figure out?

#10966 3 years ago
Quoted from sparksterz:

Do you have LEDs? Sounds like ghosting

Quoted from curban:

Is this with an LED? Are you using non-ghosting LEDs?
When I first started collecting, I didn’t know what ghosting was. I drove myself crazy looking for bad diodes. In the end, non-ghosting bulbs usually did the trick.
...although in my T2 the diode in the skull was wired incorrectly and causing all kinds of lighting problems.

It sounds like this is what it must be. My game does have LED's, and I thought I had bought the non-ghosting ones, but it's entirely possible I didn't really know what I was choosing when I got them. Or it could be that a couple odd bulbs here and there got into my swap out pile.

This ghosting concept is basically where an LED will light up with just a small amount of power getting to it? And then the non-ghosting bulbs don't change the power coming to the socket, but simply don't come on unless a certain minimum power level is reached? Is that about how it is?

#10985 3 years ago
Quoted from THJM:

Question now on replacement rubbers.
I plan to go with all Titan silicone replacement rubbers unless you can recommend better ones out there. I also plan to do things fairly faithfully to the original flyers/promotional video. In the promo video all the rubbers appear to be white, except for red on all three flippers. The posts are all black except for the larger yellow post to the left of the supercharger entrance. Interestingly, there are some differences I noticed in the flyer pics. The flyer shows black rubber on the main flippers and both red and black on the upper flipper depending on what picture you look at. It also shows a red post to the right of the supercharger which I think I like better than black as the yellow/red post combination would match the yellow/red of the supercharger lights (which are oddly reversed in the flyer).
For the "white" Titan rubbers do people generally prefer to go translucent or stick with white?
Also for the flipper rings Titan has the option of "Standard" or "Low Bounce Standard", what do people generally prefer there? And is that for all three flippers?
Finally is there accurate rubber list somewhere or should I just rely on the manual?
Thanks in advance.

I ordered white rubber rings with my kit and it annoyingly continues to leave white smudges on the balls. So much so that the ball starts to play like it's got English on it like on a pool table. Terribly irritating and I think it's happening on account of the rubber quality in that kit. I take the balls out every few days and clean them off and reinstall and it's not my favorite thing at the moment!!

I actually thought perhaps that yellow post would have been meant for the one directly under the traffic light. My kit came with 8 black posts and 1 yellow and there are only 8 spots so I think the idea was you could use the yellow if you wanted to or go with all black instead.

I noticed that inconsistency on the flipper colours depending on which flyer photo you are looking at too.

I would also agree with the comment about the manual not necessarily being correct for rubber quantities and types. They flat out miss locations on their little diagram. My game came to me with the rubber ring placement all wrong as many of the locations up top by the pop bumpers are doubled up and for whatever reason, mine had only a single ring on each location. I also think there is some variation in the way you can do the posts and rings right at the bottom edge of the left pop bumper and this can have a big impact on how easy or hard it is for you to shoot the ball around that loop and then up the lock ramp.

I would look over as many of the playfield shopped out images as you can and see what you might like to do on your own game. Or if you click on images in this thread, you can page through tons of different pictures and see plenty of them that will show you such variations.

1 week later
#11044 3 years ago
Quoted from stumblor:

Hi team. Searching for a getaway shooter gauge (the bracket that sits to the right of the apron) if anyone happens to have a spare sitting about?
Massive respect and pinball karma points (and cash) waiting.

Are you talking about this?

https://www.marcospecialties.com/pinball-parts/01-10136

2 weeks later
#11068 3 years ago
Quoted from McDoom:

Hi everyone!!
I’ve wanted this game for a very long time and now I possibly have the chance to own one however, I’m going to have to make the decision based off pictures only.
What are some issues to look out for and what questions should I ask the seller.
Thanks

If the seller can provide pictures, they can provide video too.

Ask for two videos: one of gameplay and another of the game running through all the test modes. Easy to video record the game getting powered on, showing the code versions and whether there are any errors. Then go into utilities menu and do the lamp, flashers and coil tests. Something else you can ask for is for the seller to show you the supercharger test times. This is also in the utilities menu and requires the glass off to do. It will give you some reassurance that the supercharger is working correctly. It's the biggest challenge on a Getaway keeping working. Most everything else is pretty standard pinball machine components.

Other than that, pictures should show the backbox circuit boards clearly as well as various angles of underneath the playfield and inside the cabinet. Post the pics here if you want help, or send them directly for review if you're worried about someone else coming along and buying it out from under you.

#11074 3 years ago
Quoted from Paseb:

hi guys, i would like to rebuild my lower flippers, i bought the rebuild kit but i assumed its a good time to put new coils at the same time?
is anyone happen to have the part number for the coil?
do i need something else at the same time or the rebuild kit is normally complete?
thx for the help.

Post a pic up of what yours look like underneath and we can see if anything else is amiss. The machines can get some MacGyver'ed fixes over the years. Like said above, the coils for the lower flippers are a little different than the upper right one. The lower ones are the same physical size, just slightly more powerful to get to those long ramp shots.

The kits "should" have what you need, but don't always come that way. Games can have some variation on how the springs were used or attached. And you might want to replace the bushing that the flipper stem goes through. Generally if they got worn down you'll feel some slop in the movement and they won't work quite as well as they should.

Adjust the EOS switches while you're doing flipper work too. That's kind of a common rule of thumb on any flippers to adjust those last before finishing.

#11076 3 years ago
Quoted from Paseb:

are the springs coming with the rebuild kit
my guy told me he fixed the spring on one of the flipper
thx for the precious help guys

It may depend on who you got your rebuild kit from. They aren't all the same I've noticed. I think most every kit has the springs, but some come with bushings for example and some do not. New coil stops and sleeves are key plus the linkages. Springs as well especially if they've gotten stretched loose over time.

Mine look like this underneath:

IMG_2925 (resized).JPGIMG_2925 (resized).JPG
3 weeks later
#11189 3 years ago

For anyone struggling to make that long shot up the ramp using the right lower flipper and left orbit, in addition to flipper bat alignment and coil strength/condition, keep in mind that the diverter coil and associated wiring for the supercharger magnets is bunched right at that corner and is hard to see when things are back together. You might have a portion of that wiring hanging down just enough to impede the ball a little bit. You can see it reasonably well if you remove the glass, keep the playfield down in its normal position, and with your head down as low as you can get it right above the flippers, peer through that orbit with a flashlight. It might be obvious what's slowing the ball down. That shot is not all that hard nor relying on a perfect shot to get to make that ramp if things are set-up well. If you can't hit it reliably, it's probably not your pinballing ability, it's probably something about the way the machine is set-up.

#11201 3 years ago
Quoted from Tinnhound:

Hey guys, I bought a new CPR plastic set a few years ago and installed it on my Getaway. Here is a picture comparing the new plastics to the old ones. The originals had a nice bright orange border pinstripe, but on the new set, the pinstripe looks like light faded pink. Does anyone make a better plastic set? With more accurate colours? Or has anyone bought a set from CPR lately and had better success? I just bought a second Getaway, and I want to install a new plastic set, but don’t want the washed out pink border. Thanks for all help!
[quoted image]

Quoted from Kobaja:

Same here and many others report the same. Unfortunately I dont know who makes better... :/

Quoted from transprtr4u:

Just got a newly made set a little bit ago , the orange still no as vibrant as the original

I bought a set recently from Absolute Pinball in Saskatchewan and the orange pinstripe is good. It doesn't look pink at all to me.

IMG_3047 (resized).JPGIMG_3047 (resized).JPG
#11207 3 years ago

My F105 fuse is blowing. And so coils 1 to 8 aren’t working. This includes the divertor arm, ramp up/down, both slingshots and locker coil. If I replace the fuse and turn the game on, it gives me two errors. Check divertor and check ramp up/down. I don’t know which thing is causing which. If the fuse is blown, none of those features work, but if one of those features has a short somehow, it would perhaps show as having failed and blow the fuse?

Is there a methodical way to test for shorts on that fuse and the solenoids 1-8 it powers? I can open things up for a visual inspection of either the divertor coil or ramp coil or both but wanted to see if there was a way to narrow things down across all of those 8 coils first on fuse F105?

Thanks.

#11218 3 years ago
Quoted from Seth1977:

They fall instantly. Not slow but normal. Gets stuck up at full flip.
Out of curiosity. I used the blue pin coil from Marco. This is a pic of the right flipper, I think it is hooked up correctly but can some post a pic of there coils with wires. Thank you
[quoted image][quoted image]

Generally speaking, you don't put the lug end of the coil next to the coil stop. It is meant to be turned around and facing the other way. The coil should have a little nub that then sits perfectly in that small cut-out portion of the bracket. This is what keeps it from rotating or moving excessively.

I just replaced my left flipper coil with a new one. Pics from the other day.

I can't see super well which wires are terminated on which lug for your right flipper coil. The ORANGE-GREEN looks to be correct, but confirm the middle lug has the BLUE-VIOLET and the third lug has the BLUE-YELLOW wire.

IMG_3352 (resized).JPGIMG_3352 (resized).JPG
#11223 3 years ago
Quoted from TheOnlyest:

The flanged end of the sleeve should always be at the coil-stop end, regardless of the orientation of the coil.
If the sleeves are in backward, they will crush and bind the plunger when you secure the coil. If you find that the sleeves are in backward, you'll need to replace them again.

Thank you for this. I'm not sure my own games have this orientation at every coil. I may not have known to check for this when replacing sleeves.

A new question though for anyone out there in Getaway land or similar... my balls have gotten magnetized.

It became crystal clear to me when the balls wouldn't come down out of the lock area to start multiball. I shut the game off and had a look with the glass off and playfield up on horizontal working height and sure enough the balls were not only sticking to each other a little, but the lead ball was sticking to the end of the plunger on that locker coil.

Is there a solution for this? On Getaway at least? The Supercharger is a key feature of the game and the magnets are necessary to make it go. But can we load special balls that are less prone to getting magnetized? Is that even a thing? How can you tell looking at balls on the workbench to tell which ones are which? Or is there something going on with my game that should be dialed down some to help lessen this magnetizing effect? Thanks!

#11225 3 years ago
Quoted from sparksterz:

Are you using standard carbon steel balls and not mirror finished ones? I've been using standard ones in my Getaway and never had an issue close to what you're describing. I've seen warnings on a lot of the super high polished ones that warn of issues with magnetization. As for how to tell on a bench...well...not sure. Maybe if you have a microscope you can put it under there and look for how deep the pits are?

Not sure how they would have been labelled when new, but they are pretty shiny. I replaced the balls in the game when I got it and maybe that wasn't a good idea. I still have the old balls that came with it and I'll see about putting those back in. They weren't banged up or pitted or rusted or anything like that. I just thought new and shiny/spiffy/fancy would be better. Apparently not for the balls though, lol.

Do most of the main parts vendors sell balls that are non-shiny or dull? Is that how I should be shopping for them? Just on the Getaway that is. My other games I don't think have the same issue.

#11228 3 years ago

I would be interested in seeing if there are potential ball magnetizing differences between shooting a ball into the Supercharger and shooting two balls into the Supercharger so they’re looping around together. I do this quite a bit in multiball when relighting the jackpot, 10 loops at a time. If you shoot the first ball in and then the second right after it at the same time you have the third ball in the kickout hole while it plays the “he went in the tunnel” animation, you can have those two balls going around the Supercharger I would estimate at least 30 times before they divert out. That’s the most strenuous test I can think of to put it through while in normal gameplay mode.

#11234 3 years ago
Quoted from Mr_Tantrum:

I've never had any magnetization issues with chrome steel in Getaway, and I've had plenty of double and triple ball supercharger events. However, I helped a friend buy a World Cup Soccer recently and we were having weird issues. Turns out that the pin magnetized the balls on the first use with it's magnasave and magnetic ball lock mech. Repeated test with new balls, and again in the first game they had issues (where sticking together and not launching in the ball trough). Bought some carbon steel balls for that game, and they work perfectly. I think the difference of travelling through a magnetic field in Getaway verses actually being captured by an electromagnet in WCS made a significant impact on magnetizing the balls.'
If you want to do a simple test, take the balls out, place them on a flat surface, then slowly move one ball towards another. If their is an attraction (even a small one), then you should replace them. Similarly, if you stick two balls together and pull the leading ball and the ball behind it travels with it, then that confirms they are magnetized.

Thanks for the explanation. I tested the balls like you suggested and they are definitely magnetized. They can pull each other like a little train. In fact, one of the balls I got to pick up a small washer. So I'll definitely be getting some plain old fashioned carbon steel balls in the near future for my Getaway.

There were times when I was playing and the balls acted like they had "English" on them. And I mean like a pool ball or cue ball does when you hit it with your cue a little off centre. I have been seeing a little bit of smudging on the balls ever since I put in new white rubber rings. I got thinking that somehow one or more of those new rubbers was getting hit hard enough to smear the ball a little and that's what was showing up on them. Although since it's continued to happen long after I would have thought the rubber surface would have cleaned itself off, it got me wondering if there is some little dob of cleaner or wax that I can't find and every so often a ball goes into it and gets a little on it. Between the smudges and the magnetizing, the ball can do some crazy things at times. Sure has made it fast and unpredictable.

Anyone think of a spot or two on the game where they've had cleaner or wax hide and smudge up the balls because you didn't realize it was there? I've looked all over and can't find anything obvious.

#11236 3 years ago

Just to clarify, it is the metallic properties that lead to balls getting magnetized and not how shiny they are, right? Like carbon steel, even when super shiny, won't get magnetized? Yet the chrome ones are more prone to getting magnetized? Just trying to understand how it happens to help me figure out what I need to do or change on the game if it isn't just my ball choice.

#11239 3 years ago

Right on, thanks. I just found and read through a good thread on balls and magnetism from a few years ago. User BlackKnight wrote most of the technical and it explained a lot. Will definitely get some carbon steel balls for my Getaway.

#11244 3 years ago

Something else I've noticed on my Getaway... it feels like there is a lot less power on the upper flipper when you hit it the second time going for loops. Like if I flip at the ball to shoot it up into the ramp, it goes really quite firmly and can even slam into the locker area. Not the same feeling at all when I am flipping for loops. For whatever reason, the second time I go to hit the ball on the way by, it feels weaker. Almost like it would be the equivalent of the hold power and not the full power.

Any idea how or what could be affecting that on the upper flipper? EOS switch positioning perhaps? Bad connection or component on the Fliptronics board? Does the upper flipper even have that two mode power for hit and hold like the lower flippers do? You obviously can't cradle a ball with the upper flipper.

Like I said, it's a feel thing so more difficult to measure or describe accurately. But you know it's a different amount of force on that second time around just by playing it.

#11257 3 years ago
Quoted from golfergordy:

I recently picked up a Getaway HSII, and some days the game keeps shutting down momentarily and then resets right back up - this usually occurs during multi-ball, but also sometimes when 1st starting up the game. Other days the game plays just fine. I know that there's a logically organized procedure for checking components out on pinwiki.com for this problem, but I'm wondering if anyone who has had this problem solved it, and what was done to correct this problem. I've checked the line voltage and it's always between 119.8 - 120.4 VAC, on a 15 A circuit with nothing else connected to the circuit, which I think should be fine. Any comments would be greatly appreciated.

Quoted from Kobaja:

Sounds like unstable 5V.

I believe that is what this product is for:

https://pinside.com/pinball/market/shops/1014-pinsound/04622-no-more-reset

#11259 3 years ago

Anyone know if this anti-mag ball trough shim will fit in the Getaway? It's not listed under product compatibility.

https://www.marcospecialties.com/pinball-parts/03-16809

#11281 3 years ago

Cleaned, waxed or shiny new balls make a big difference in the supercharger times too.

1 week later
#11284 3 years ago

Nice to see the forum back up and running

Got thinking about something else to check or adjust for those having difficulty making the long ramp shot using the lower right flipper and passing around that left orbit.

Check to see that your rest position for that lower right flipper isn't too high up. Reason being, if the flipper is too "strong" to the right, which it will be if set that way, you will need to let the ball travel a little farther down the flipper bat before hitting it to try and get the angle you need for that left orbit. And when you need to wait that extra bit, the power won't be there the same way it will be if you have the flipper adjusted lower.

Use the alignment dots underneath the end of each lower flipper bat and try and centre the tip right over that dot. Tighten it up well underneath and then play some games. I think you'll notice the difference.

#11292 3 years ago

Just a little problem resolved post...

I was intermittently having a second ball jump out into the shooter lane before the first one was launched. Then it would launch both of them, and you could play with both of them, but the game got pretty confused if you drained one and kept playing the other. The flippers and features still worked usually, but the music stopped.

It happened a lot on ball three, but sometimes on earlier balls too. I thought maybe it was a grounding issue or static electricity build-up even on me or the game. I couldn't find a lot of consistency until I started to realize it only ever happened when three balls were in the trough to start (i.e. no balls were locked).

I then read something on either here or one of the Facebook groups about checking out the trough switches. Sure enough, the trough switch for the 3rd ball (well, the one farthest away from the shooter lane) was occasionally sticking. I got looking underneath with the playfield pulled up and out and the apron cover removed. While slowly and quietly moving either a ball or my finger across the top of the switch, I noticed it would at times get over to the side and be touching the side of the groove it was sticking out through. And every so often it wouldn't go back up all the way to release the little plunger in the switch itself.

So I took it off the game and gently bent the wire portion at the spot that it looked like it had gotten bent out of shape slightly to begin with. And good to go. Haven't had it stick again and there hasn't been a second ball get shot out into the shooter lane since.

It seems like when that switch is still down, the game is being told all the balls are still in the trough, so tries to move one of them along. When it did this, either that switch freed itself up from the coil movement or it now got the signal from the second trough switch that it was open and figured the ball had made it there. Either way, it fixed the issue by adjusting that switch.

#11298 3 years ago
Quoted from transprtr4u:

After a complete tear down and cleaning my game showed the same error. After running a ball through the supercharger the error cleared.
However my game did start .... So must be an other issue that you are having

For the supercharger opto errors, you can check the connections on the accelerator board which is mounted under the playfield at the back. Agreed on those errors at times resetting themselves once you shoot a ball through the supercharger. I got the set of errors while having a U20 blowing issue thanks to my divertor arm coil lugs shorting against something under the ramp. I fixed the orientation and positioning of the divertor arm coil and it has been good ever since.

At one point while I was not quite in the clear, I had fuse 105 blow, which powers coils 1-8. This is both left and right slings, the divertor arm, locker coil and a couple others. Before I knew that fuse was blown, I tried to start a new game and all it did was make the sound of the engine trying to turn over. But it wouldn't start. On a side note, I thought that was pretty cool hearing the engine trying to start while the game has a blown fuse. You could have a fuse blown. Agreed also on the opto errors potentially being a different issue.

1 month later
#11368 2 years ago

This is on my Getaway but it could be on any game...

I have the flipper button protectors and they’ve developed a sticky feel to them. Not on the back, I mean where your fingers rest that aren’t on the button.

It feels tacky almost like finger grease or oil or lotion. It’s distracting enough I want to clean them up or remove them. Any suggestions? Cleaning them somehow? I don’t know what it is that’s on them or coming out of them or if it’s just my imagination. I would rather have it feel a little more rough as these feel sticky and rubbery. Smooth yes but sticky smooth if you know what I mean?

1 week later
#11385 2 years ago

Here's another picture of the ball launcher assembly. I had my apron off putting in a Cliffy protector. I also replaced the armature recently and the tip on the replacement is black. Same one as the link just shared (A-15709). I don't believe there is an A-15673. Where did you find that reference?

IMG_3709 (resized).JPGIMG_3709 (resized).JPG
#11387 2 years ago
Quoted from BasementFacts:

In the manual. I'll go ahead and try 15709. Thanks guys!
[quoted image]

Weird. I have a different image in my manual for that kicker assembly.

Kicker assembly in manual page 2-27 (resized).JPGKicker assembly in manual page 2-27 (resized).JPG
1 week later
#11392 2 years ago

The adjustment is to lower the rest position of the flipper. Look at the alignment dot underneath the tip of the flipper for reference.

It will still only just get over to the right flipper. And you’ll need to “one time” it with that right flipper to go back up the ramp. It won’t dribble far enough to cradle it first. Sometimes it will come over just right and you flip precisely when it lands and other times you pause momentarily before flipping. It is very particular and specific to each time the ball comes down the return. It won’t be the exact same time after time. Similar but you have to make a very quick judgement. If you get the hang of it, you can net 100 million in that 20 second supercharger round.

1 week later
#11421 2 years ago
Quoted from golfergordy:

Malenko - I agree with all you said. Where did you get the decal on the top of the bracket that covers on top of the kicker mechanism?
Probably 20-30 games have now been played on my game since I improvised a fix for my kicker's sporadic performance which had the kickback plunger (and incorrect coil sleeve) installed in the kicker mechanism, and it now works perfectly every time. I think I'll leave everything installed the way it is right now. Soon I'll replace the coil sleeve with the same incorrect one that's in there right now, but I'll also get the correct sleeve and see how it works with my incorrect plunger.
Also, thanks to sparksterz for replying with his serial #. sparksterz serial # doesn't look close to my #. I can't figure out how the serial # sequence works, other than the initial numbers (50004) seem to be the model # used by Williams for the Getaway game. I also checked on the Internet Pinball Serial Number Database site and knowing that 13K + units were manufactured, all of the serial numbers submitted don't seem to follow the same numbering sequence pattern. I have previously read somewhere that pb mfg. companies don't always use a serial numbering sequence that makes sense to a casual observer, but it probably makes sense to the mfg. company. Also, regarding sparksterz pics of his kicker, it looks like the tip of the plunger sticks out a bit beyond the metal bracket that holds the mechanism in place, similarly to the pics submitted by others commenting on this topic, so those pics probably show the correct plunger.

I replaced my shooter lane (kicker) armature recently too. My original was the white tip and the replacement was the black tip. It was working fine before, but since I have been chasing some mystery source of smudges or smears getting on the balls from time to time, I thought it might have been the culprit.

You can see the new black tipped replacement in the photo. Beside it is the kickback armature (plunger). It is quite a bit narrower at the end. I also put in a new disappear post for the spot where the balls lock as mine was a little rough on the end and I noticed it was holding some magnetism.

I have the same decal on the shooter coil cover. It came with my game though when I bought it. I did put in a Cliffy protector on that eject spot and you can see the tip of the plunger and the cover in the same pic.

IMG_3655 (resized).JPGIMG_3655 (resized).JPGIMG_3711 (resized).JPGIMG_3711 (resized).JPGIMG_3712 (resized).JPGIMG_3712 (resized).JPG
1 week later
#11428 2 years ago
Quoted from Blenderhead:

Hi group,
I recently got my Getaway back after loaning it to a cousin for a few months. When I got it back, I noticed several files were no longer playing from my Pinsound card. Soon afterwards, I also had an error pop up... "shifter error". I went into single switch test and the up/down switches are working. Also, now whenever either flipper is pressed, it launches the ball. Does anyone here have an idea what may be causing these issues?

I won’t comment on the pin sound thing, but those other two are simple…

The shifter error will be because the game was played for at least 100 balls or 30 games and pressing shift down was never used. Meaning, your cousin always went with shift up.

If you play a game and go shift down, it will resolve the error.

Having said that, using the flipper buttons to launch the ball is an option in the adjustments menu. I don’t recall which number but it’s there. You can put it back to using the shifter and not the flippers and you’ll be good on both of those issues.

#11431 2 years ago
Quoted from Gingerbloke:

HI Guys - I have a strange issue - sound. I am getting sound at the speakers but almost inaudible - I need to put my ear to the speaker to hear it...
So sound card is working, Rom is OK, ribbon calbe OK like i say, the sound is coming out, in a whisper... - any ideas what it could be? re-seated all connectors...

Check the ribbon cables again. For condition but also to see that they are clipped in correctly and no pins are sticking out the side or pushed over.

What volume setting is the game on? What happens when you press up or down on the volume buttons? Do you see the volume bars change on the DMD when you do this?

1 week later
#11436 2 years ago

I turned my Getaway on earlier today and it showed a message saying the factory settings had been restored.

I didn't knowingly do this and wondered what might have caused this?

I turn the games off when I'm not using them. Getaway might have been off for 1-2 days max. I have it plugged into the same power bar as a Funhouse I just got. I have turned off the power bar several times recently as I have been working on things with the Funhouse. My batteries are still fine and the game kept the date and time settings, which to me is the weird part. It went back to the factory set-up, like losing the free play for example, but it didn't lose the date or time.

Any idea what might have caused this or things I should check to see if there is something else going on?

#11447 2 years ago
Quoted from Seth1977:

check your batteries, that was an issue I was having, changed them out and problem solved

Quoted from tiltmonster:

Yup. that's the 1st place I'd look. Change them more than you think you need to when the machine is on...

Giving it the benefit of the doubt, I changed the batteries today, but I don't think that was it.

And here's why... when I turned the game on and saw the factory settings restored message, it hadn't erased the time and date. Or the high scores. All of that was still in there.

I took the batteries out today and tested them with a battery tester. They showed fine, but I put fresh ones in anyway. Now, I did this with the game still plugged in, but not turned on. After replacing the batteries and turning it back on, not only did I go back to the factory settings again, but it gave me the bookkeeping audits erased message as well. And this time all the high scores were gone.

So... what do you think is going on here? First off, is that the recommended way to change batteries in order to normally keep your settings? (keep the game power plugged in but not turned on?) And what or why would the game factory reset itself but the time and date and other things weren't reset?

Curious behavior....

#11450 2 years ago
Quoted from GRUMPY:

You need to have the game turned on to keep your settings when replacing the batteries.

Good to know, thanks. Best be watching where your fingers go and not electrocute yourself while you're doing that then...

#11451 2 years ago
Quoted from Deltron:

I had the same problem. I fixed mine by replacing the short ribbon cable between the mpu and driver board

I'll check mine, thanks. I replaced all the ribbon cables soon after I got it. Proactively. Sometimes that backfires...

1 week later
#11468 2 years ago
Quoted from Nick_C:

Just purchased a beautiful High speed 2 in excellent condition. When I start a game, the super charger light does not flash but the redline mania light flashes. I believe the yellow super charger light is supposed to flash at the start of a game. Even if the reline mania light is flashing, it doesn't necessarily mean that the ball will enter the supercharger.
Any help advice greatly appreciated as always.
ROM version L-2

They might just have gotten installed backwards. Left is right and right is left. Normally left side is supercharger yellow and right side is redline mania red.

Take a couple pictures of the backside showing the wiring colours.

EDIT: actually, on second thought, go into test mode and do the single lamp test and see what comes on for each of those.

1 week later
#11499 2 years ago
Quoted from Scott8806:

Yes I couldn't believe it when I saw it everyone says I have a machine I bought new and it's never moved but this one really took me by surprise now to put new rubbers leds color dmd and I need to get with u to put some of your cool mods on here

Holy cow! That's one crazy nice and new looking machine. Time capsule almost. And the reds are still red on the cabinet and the edges of the cabinet like under the lockdown bar aren't worn at all. Gorgeous. Nice find.

1 month later
#11537 2 years ago
Quoted from JerodP:

Mr_Tantrum decals installed tonight. The playfield looks so much more finished now. I feel like this is how the pin should’ve shipped from the factory.
[quoted image][quoted image][quoted image][quoted image][quoted image]

Nicely done. Looks good. And I noticed one thing on your game that piqued my interest...

The way the star post or rings are arranged on the leftside of the left pop bumper. And specifically near the opening to the loop shot.

Mine has always been arranged differently. Not sure what is right or what is wrong or even if there is a right or wrong. Lots of variety here. What I do know is that when I removed the star post from where it was, which was impeding somewhat the shot to the loop area, it made the shot much easier to hit. And I intend to leave it out for now, but my question is actually for what to do with the screw hole(s) that were under that star post?

There are actually two small screw holes. Not sure why. The second, smaller one wasn't used, but was covered by the star post. The top edge around those screw holes is a little frayed and I would like to do something with that to ensure it doesn't get pulled on or peeled more than it is with the ball going over it or near it.

Any suggestions? I was thinking of placing a small, custom sized piece of Mylar directly over it and just sealing it down flat that way. Any other ideas?

IMG_5282 (resized).JPGIMG_5282 (resized).JPGIMG_5283 (resized).JPGIMG_5283 (resized).JPGIMG_5284 (resized).JPGIMG_5284 (resized).JPGIMG_5287 (resized).JPGIMG_5287 (resized).JPG
#11539 2 years ago
Quoted from Kobaja:

Return the atarpost. Even tho it doesn't look like it, it is there by design. The loop was too easy without it, so it was added afterwards officially.

I don't mind that actually. Glad to hear it was put in by Williams going back to the early days. I put up a 964 million point game with that star post in... I don't think I'm someone that needs the game to be any easier Thanks.

#11544 2 years ago

Well, I’m gonna see how brilliant of a Getaway player I really am. I just put the post back where it was. Then moved the right outlane post all the way out. That’s the only one I see on the game that is adjustable. I then put the settings all to extra hard and lowered the tilt warnings down to one. Let’s see how hard really hard really is…

#11545 2 years ago

I made all the changes. Widening out the right outlane makes the biggest difference by far. And the kickback not relighting as easily as it used to is a close second. Totally different game set up this way.

1 week later
#11560 2 years ago
Quoted from pineal:

i joined the club about 2 weeks ago
when 3rd ball gets locked it says suspect ran red light but only one ball gets released
after drain the second ball search releases another ball
switch test shows all 3 work manually and with a ball, also fine when another ball or 2 is present
im running L5
what next? is this a known bug?

Not a known bug to my knowledge.

I would be looking closer at the "disappear post" and coil that drives it. Maybe that coil is trying to release the balls for you but is stuck or impeded somehow?

1 week later
#11583 2 years ago
Quoted from Hapidance:

EStroh
I’m pretty sure everything is plugged in ok. There is a bit of a humm. It stops when I pull the ribbon cable.
The heat sink circled is very hot
Is that normal ?[quoted image][quoted image]

On the DMD, what side is the red line on for the ribbon cable? In that last photo, it is on the left. It should follow down and also be on the left in the connection on the back of the display.

1 week later
#11610 2 years ago

Just a quick thank you to those that mentioned putting in an LED in the beacon light on top to replace the high watt incandescent that was in there.

My rotating assembly would occasionally stick and you had to tap the top of the back box to get it to go. Not every time, but maybe once every ten times or so. The bulb always came on but the rotating portion only worked most of the time.

It hasn't stuck a single time since putting in an LED bulb. And as a bonus I had some of those large size LED's leftover from doing an LED swap on my taillights on the car. So free and easy. Can't beat that!!

3 weeks later
#11649 2 years ago
Quoted from PinJim:

thanks, admittedly I didn’t search all of the pages….

Don't worry, you shouldn't be expected to. Search functionality isn't good once threads get so many pages to them. Yet dedicated threads per issue isn't the norm here it seems.

That post is factory, or at least soon after the first few machines got out there. Made that loop too easy without it. Lots of variation on post placement as well as how the rubber rings are in on the game. It makes it your own though so do as you wish. There's no originality police coming to your door anytime soon.

3 weeks later
#11673 2 years ago
Quoted from Pinash:

My ball launch plunger is VERY close to the right flipper button. I think when a ball launches, the large weight on the back of the plunger taps the flipper switch (causing a slight activation of the flipper). I'm going to replace the flipper switch with one that hasn't been so mangled, hoping it will sit closer to the cab wall. Any other ideas?

Can you post a picture of that area looking down to give us a better idea of how close things are to one another?

#11686 2 years ago

You can put the yellow rubber post under the traffic light... so that it's all yellow.

#11700 2 years ago
Quoted from golfergordy:

LEFT FLIPPER MOMENTARILY STICKING IN THE UP POSITION BEFORE RETURNING TO THE REST POSITION PROBLEM SOLVED:
Today I removed the coil plunger stop and checked it for magnetism - not magnetized.
Also checked the end of the plunger for mushrooming - not mushroomed.
Then noticed (what I think was) excess free play in the plastic coil plunger link on the side of the plunger opposite from the stop. I'm just about ready to place my parts order which includes every similar link in the game, so that issue will be solved in a week or so when I receive the parts.
Even though I replaced the coil sleeve about 2-months ago, I decided to install a new one. When I got the new sleeve in, I noticed that the stop bracket wouldn't fit snuggly against the coil end piece (where the soldering lugs are). It appeared that the new sleeve stuck out about 1/8" further than it should beyond the end of the coil preventing the stop bracket from snuggly fitting against the end piece, and therefore the bracket mounting holes wouldn't line up perfectly with the threaded mounting screw holes. I removed the new sleeve and compared it with the one I just removed and they were identical, so I figured that two months ago when I installed the previous sleeve I probably forced the coil over a bit so that the stop bracket could be screwed in, which probably slightly misaligned the coil with the plunger - the flipper worked ok (until a week or so ago) so I never gave it another thought. Anyway, I sawed off about 1/8" of the new coil sleeve, installed it so that the end bracket now fits snuggly as it should, screwed in the bracket, and played a few games with the now perfectly working left flipper.
Thanks to all who were following this issue and offering suggestions.

Which direction are you pushing the sleeve into the coil from? Flanged end should be up against the coil stop. Soldering lugs on the coil should (normally) be on the end opposite to the coil stop.

2 weeks later
#11728 2 years ago
Quoted from Mr_Tantrum:

I sell a 3D print version, but probably cost prohibitive to ship to you.

Costs aside for shipping one to Germany, your 3D printed product saved the day for me when I needed it. My game had that same kind of wear on the "shoulders" of the mount and it too would slip out of the bracket and render it unuseable.

The one you made for me worked perfectly from the moment it went in and has since for all of the gazillion games I've played on my Getaway. Thank you very much for that, super(charger) appreciated!

IMG_2391 (resized).JPGIMG_2391 (resized).JPGIMG_2587 (resized).JPGIMG_2587 (resized).JPGIMG_2590 (resized).JPGIMG_2590 (resized).JPG
1 week later
#11757 2 years ago
Quoted from ckcsm:

My cabinet definitely had lots of fade in the reds, also the normal bumps and bruises as you would expect for a machine of this vintage.
I sanded and painted the cabinet in a satin black automotive finish with a hardner added to thoroughly cure the finish and installed the new decals. It was a lot of work but I'm happy with the end result. I also painted the front door and backbox hinges a black metallic.[quoted image]

Looks really sharp. What decals did you go with? Link to where you bought them?

#11782 2 years ago

https://pinside.com/pinball/forum/topic/getaway-check-f114-amp-f115-error-troubleshooting

You can read up on troubleshooting the F114 and F115 fuse error here. Lots of good advice and approaches to figuring out where exactly the problem is.

Mine ultimately was related to the coil for the supercharger diverter arm being in backwards and shorting out to another component next to it.

#11803 2 years ago
Quoted from Buellxb12r:

Recently started having issues with my shifter. When playing a game, sometimes the shifter does not change gears when it's supposed to. I have to flip it up and down several times for it to change gears. Other times it works properly like it always did before.
When performing the switch tests for up and down it registers every single time like it's supposed to. I've had L-5 rom in this machine for several years and it's always worked correctly. Haven't changed anything at all on the machine.
It seems to only occur during gameplay and at random times. It switches gears properly in video mode as well.
Any help is appreciated.

Time to remove it and have a closer look. I would bet on it being the plastic shoulder mount piece that has one or both sides worn down or broken off. You can buy a 3D printed replacement from one of the Pinside members here if so.

IMG_2389 (resized).JPGIMG_2389 (resized).JPGIMG_2391 (resized).JPGIMG_2391 (resized).JPGIMG_2587 (resized).JPGIMG_2587 (resized).JPGIMG_2589 (resized).JPGIMG_2589 (resized).JPG
#11805 2 years ago
Quoted from Buellxb12r:

Thank you for the advice. I can take it apart and give it a look. But why would it register properly every single time in switch test mode if that was the issue?

I don’t know. That’s why I suggested you take it apart and look. Intermittent is just that. Intermittent.

2 weeks later
#11864 2 years ago
Quoted from Spacemanratso09:

Have the new screw in post already in with a star post but gonna look at lighting it up thank you
There is no end it seems to putting cool shit on this game

Personally I think there is an end point to adding things. I don’t like playing games where visibility of the ball is reduced or blocked. The mountain mod is one of those things. I like to be able to see the ball going around that back right corner to judge how quickly it’s coming out. Too many extras on the game is just clutter in my opinion. But then that’s all the discussion really is. An opinion.

1 month later
#11950 2 years ago

I like keeping GI bulbs on the playfield white too. Same goes for in the backbox. I think they come out looking a little off when you go with the blue or purple trying to match the plastics or artwork. I think I did red behind the words GETAWAY in the backbox, but that's about it.

I usually go with cool white with the frosted dome for my bulbs. I've even gone back to white underneath some coloured inserts after realizing the insert colour comes through cleaner with a white bulb than trying to match yellow or orange or whatever. I saw this difference most significantly on my Lethal Weapon 3 pin.

Side note, Party Zone has a multiball/Big Bang jackpot feature where all the GI goes red. They originally did this by having some of those GI bulbs dedicated to this red mode and put those rubber bulb condoms on them. I have red frosted dome LEDs in all those spots now.

And on the subject of toys or others mods and add-ons, I don't like having my view blocked or impeded. That goes for the mountain mod in Getaway, but also as simple as playing games with plastic return ramps that are cloudy with age and have GI bulbs out. Found this on a Creature from the Black Lagoon onsite and it was pretty much unplayable because you couldn't see where the ball was half the time. This isn't DE Tommy with the flipper covers, lol.

oh... and photos turn out terrible with the playfield glass in place for the most part.

IMG_6387 (resized).JPGIMG_6387 (resized).JPGIMG_6389 (resized).JPGIMG_6389 (resized).JPGIMG_6394 (resized).JPGIMG_6394 (resized).JPGIMG_6397 (resized).JPGIMG_6397 (resized).JPGIMG_6406 (resized).JPGIMG_6406 (resized).JPG
#11956 2 years ago
Quoted from transprtr4u:

Im aware ... point was if the game was manufactured with the mountain, would you remove it ?
I personally like it and managed to get 1 of the prototypes.. think it actually looks great and doesn't impede the game...

Don't know. Can't think of a time I played a machine that had the mountain so no idea if it would block the view. Who knows, maybe if it had come with the game originally, I wouldn't have enjoyed it as much. Not sure, don't really care at this point.

#11958 2 years ago

Good to know, thanks. I'll have to find a game with the mountain mod installed and give it a whirl.

#11968 2 years ago
Quoted from golfergordy:

transprtr4u,
I thought the same thing you mentioned was possible, as the only way for the game to recognize a problem with a part like a microswitch. If the switch isn't activated for an entire game or 2, it probably comes up as an error the next time the game is booted up. Do you have any opinion regarding my question 1) ?

Switches show up as being in error if they haven't been triggered in either 30 games or 100 balls played. It is always keeping track while you play. It figures that if you haven't hit every switch in that many games or balls, then something must be wrong.

This happens on the shifter on Getaway, or at least it does for me. I pretty much never shift down on the lever when I play. Not to launch balls and not to shift down during video mode. So if I don't shift down once in a while just because, it will give me the credit dot. Shifting down just once eliminates the error dot as it sees the switch is working again (i.e. being used again).

I'm not certain about those rollover switches and exactly what the function of each one is, but I thought it had to do with the game knowing which direction your ball is travelling. Meaning, lower then upper versus upper then lower. And I still think it is tied to the ramp operation. Maybe it's somewhat redundant and unnecessary to have both or issues happen so infrequently you haven't noticed yet. Perhaps in multiball it's needed more? Or it also activates the freeways? Keep playing and see what you notice.

#11984 2 years ago

If you’re still having trouble figuring out the F114 & F115 fuse blowing issue, quite a bit of helpful troubleshooting was written here:

https://pinside.com/pinball/forum/topic/getaway-check-f114-amp-f115-error-troubleshooting#post-6049831

#11989 2 years ago
Quoted from Kobaja:

measure if it is shorting out somewhere. could have been rubbing against something and worn down the insulation.

That left side return trail coming off the supercharger has a switch that's mounted next to the ramp entrance sign. The wires seem to get pulled pretty tight and it's bare metal on the edge of the pathway it's next too. Check those wires for insulation damage too.

2 weeks later
#12023 2 years ago

Every so often my Getaway resets itself to factory settings (i.e. when I power it on it gives me the factory settings restored message). It did it tonight and the only thing I did was move it out of the way a little while I worked on the game beside it.

What I am wondering is what might be in the backbox among the connections and circuit boards that could cause this? A loose wire or connector or cable? Power supply or batteries issue? Something susceptible to physical movement of the cabinet?

Tonight when I went back into the settings after getting this message, it hadn't lost the time setting nor the high scores. The only thing that was back to defaults was it wasn't on free play anymore and my minimum volume override selection was back to default. That's it, so not everything, just some basic settings.

Any ideas?

Game was powered off most of the day but still plugged into the power bar. No power surges or anything else noticed in the house today.

#12025 2 years ago
Quoted from TheOnlyest:

ok, first off, when you turn the power off, it cuts power to all the game circuits, so having it plugged in, unplugged, surge protector or not, is irrelevant.
The batteries are there to hold the RAM settings, and the strangest part of your description is, that you get a settings default message, but the settings actually didn't default?? That being the case, it really seems that your RAM chip has errors. The fact that you moved the game across the floor a bit has to be coincidence, that contributing to problem defies all logic and nature in general. You can try to do a full RAM-clear first, or just replace the RAM. If you replace the RAM, use NVRAM, then the batteries can be eliminated from the equation too.

Thanks.

The reason I mentioned the game being off versus on is just because I was describing the circumstances I found it in. I leave my games off at the power switch underneath the cabinet when I'm not using them. I turn them on when I'm playing but otherwise they are off.

And I got the factory settings restored issue to occur again today. Same, only settings and pricing adjustments affected.

So when looking in the manual, it talks about what voltage is necessary on the RAM chip. It says you can check voltage at pins 26 and 28 and you should get 5+ volts when the game is on and at least 4 volts when it is off.

Can someone confirm which pins these are on the RAM chip? I think the number is starting at 1 to the left of the half circle mark and continues down counter clockwise to 14 and then 15 on the other side and up to 28. So 26 would be the 3rd last pin and 28 the last. And are these two pins where I should measure the voltage across? Or is that meant to read 26 or 28 against a known ground point? Wasn't sure if 26 or 28 was the ground on this chip or not?

#12033 2 years ago
Quoted from golfergordy:

I've been having the same kind of problem: A few months ago all the high scores disappeared (except for the highest score). Then more recently, some of the game conditions changed (reset). I've been working on solving other problems, so haven't looked into this issue yet.

I had my batteries moved off board soon after I got it and the off board battery holder isn't very good quality. They don't maintain full contact with the batteries all the time. This is why I was losing my game settings.

3 weeks later
#12111 1 year ago
Quoted from Hapidance:

I just discovered I can shoot the ball by using the flippers.
How did I not know this?

There is a similar setting in the menu for shifting gears with the flippers instead of using the shifter as well. Not sure how that works exactly in video mode though come to think of it...

1 month later
#12166 1 year ago

Bulb # Description Bulb type Colour
24-8768 Freeway 1 555 Yellow
24-8768 Freeway 2 555 Yellow
24-8768 Freeway 3 555 Yellow
24-8768 Freeway 4 555 Yellow
24-8768 Freeway 5 555 Yellow
24-8768 Speed (x2) 555 Red
24-8768 Left freeway 555 Yellow
24-8768 Lock (x2) 555 Green
24-6549 2X 44 Green
24-8768 4X 555 Green
24-8768 Hold bonus 555 Yellow
24-8768 6X 555 Green
24-6549 8X 44 Green
24-8768 Getaway 555 Red
24-8768 Speed millions 555 Yellow
24-6549 Super jackpot 44 White
24-8768 Top red 555 Red
24-8768 Top yellow 555 Yellow
24-8768 Top green 555 Green
24-8768 Right freeway 555 Yellow
24-8768 Special (x2) 555 Red
24-8768 Video mode 555 Red
24-8768 Random lamp 555 Yellow
24-8768 Extra ball 555 Orange
24-6549 Tach 1 44 White
24-8768 Tach 2 555 White
24-8768 Tach 3 555 White
24-8768 Tach 4 555 White
24-8768 Tach 5 555 White
24-8768 Bottom red 555 Red
24-8768 Bottom yellow 555 Yellow
24-8768 Bottom green 555 Green
24-6549 Shoot again 44 Orange
24-8768 Kickback 555 Yellow
24-8768 Tach 11 555 Yellow
24-8768 Tach 12 555 Red
24-8768 Tach 13 555 Red
24-8768 Tach 14 555 Red
24-6549 Tach 15 44 Red
24-6549 Shift 44 Orange
24-8768 Right return lane 555 White
24-8768 Left return lane 555 White
24-8768 Six bank bottom (x2) 555 Yellow
24-8768 Six bank middle (x2) 555 Yellow
24-8768 Six bank top (x2) 555 Yellow
24-8768 Supercharger 555 Yellow
24-8768 Red line mania 555 Red
24-6549 Start button 44
24-8768 4th gear 555 Red
24-8768 5th gear 555 Red
24-8768 Stop light red 555 Red
24-8768 Stop light yellow 555 Yellow
24-8768 Stop light green 555 Green
24-8768 1st gear 555 Red
24-8768 2nd gear 555 Red
24-8768 3rd gear 555 Red
24-8768 Tach 9 555 White
24-8768 Tach 10 555 Yellow
24-8768 Middle red 555 Red
24-8768 Middle yellow 555 Yellow
24-8768 Middle green 555 Green
24-8768 Tach 6 555 White
24-8768 Tach 7 555 White
24-8768 Tach 8 555 White

GI string 1 24-6549 Playfield 44
GI string 2 24-6549 Playfield 44
GI string 3 24-8768 Insert 555
GI string 4 24-8768 Insert 555
GI string 5 24-8768 Insert 555

Backbox 555 White
Coin door Should be orange not red 44 Red

Flashers
24-8704 Right bank flasher 89
24-8802 Supercharger flasher 906
24-8802 Insert flasher 906
24-8704 Left slingshot flasher 89
24-8802 Insert flasher 906
24-8802 Free ride flasher 906
24-8704 Left ramp flasher 89
24-8802 Left ramp flasher 906
24-8802 Insert flasher 906
24-8704 Left bank flasher 89
24-8704 Flipper flasher 89
24-8802 Flipper flasher 906
24-8802 Insert flasher 906
24-8704 Right slingshot flasher 89
24-8802 Insert flasher 906

#12172 1 year ago
Quoted from JakeFAttie:

Thanks guys for all the bulb advice! I've ordered a bunch of different types and am looking forward to trying them all out! I really prefer the warm yellow and soft lighting of the older pinball machines, but I'm curious, is there a general consensus that the original lighting on The Getaway is too dark for nighttime play? I see a lot of comments about trying to lighten the playfield and mine is very inconsistent right now, with areas that feel to bright because of LEDs and then corners and loops that are very dark and shadowy. My first concern is mellowing all my flashers and the over-bright bumper LEDs, but then after that I'll be trying to even out and perhaps brighten the playfield a little?

Hey, you also had asked about the pop bumper lights...

Those are just LED discs that should pull out without anything needing to be changed or modified before putting a regular bulb back in the receptacle.

I think the ones you have are these: https://www.marcospecialties.com/pinball-parts/05-PBR555-B

Wedge or bayonet ends, and colours you can choose too. There are also different styles that will sit in the middle of the pop bumper body, plus some that have as many lights underneath the surface as on top and you can use those with clear pop bumper bodies.

I have these on my Getaway and don't mind them. Most all of the mods on my game came to me like that. I'm with you though on that I do like games to be as original as possible without getting too jazzed up. I like to see when I'm playing though so every bulb in every game I own is LED. Personal preference but hey, that's how I like em

#12186 1 year ago

Saturday night. A good night for pinball. Finally rolled the scoreboard on my Getaway!!

4A0BC99A-832B-425C-877E-5826A24F5730 (resized).jpeg4A0BC99A-832B-425C-877E-5826A24F5730 (resized).jpeg
2 months later
#12327 1 year ago

Could someone with a PIN2DMD in their Getaway post a short video of what their attract mode screens look like? I put a colour display in my game recently with the newest colorization files that I could find but it does a couple of unusual things. The most obvious one is that while on the "Free Play Press Start" screen, the lower half flashes between saying Press Start and some full width residual grab from some other screen. Just wondering if that is "normal" or a problem with the display? The display came to me in a World Cup Soccer game and was having issues with not always powering on, so I had swapped it over to the Getaway to see if maybe it was the game or power board and not the display. Thanks.

#12331 1 year ago
Quoted from Da-Shaker:

Cool, thx. I was hoping to get a head start. I’ll start reviewing the forum.

First thing to do when you get the game is run the supercharger test. Basically it will give you a number representing the speed the ball goes around the loop. Smaller number equals faster. Not everyone has the same definition of what is fast or what is slow. The number gives you specifics. Then go from there.

2 weeks later
#12401 1 year ago
Quoted from Da-Shaker:

This machine has to be the funnest machine to mod. The shifter came in and looks great. The set screws will ensure the knob won’t move. The knob does have a little weight to it. Hopefully that won’t be a problem. I had know idea you could shift down in this game.
[quoted image]

That down shift switch can be an occasional source of credit dot too. If you tend to never use it, after enough time (~30 games or ~100 balls) where the game doesn't see the switch made at least once, it will throw up the error code. Use it just once and the error will reset itself and go away.

#12404 1 year ago
Quoted from Mancave:

Just to be different, play video mode in 1st gear

Most people new to the game or that haven't played it in so long to remember seem to do that anyway. SHIFT GEARS!!!!! lol

#12416 1 year ago

I took some pictures of my game last night running the GI strings one at a time. Not sure how much help this will be as it is tough to see which bulb is on with the plastics covering them.

The order I tried to do them in was All Lamps (1st four pics), then the first GI string test (next six pics), then the second GI string test (next three pics), then the fourth GI string test (next four pics). After those, I did the three backbox GI string tests and finally the all illumination test.

IMG_8689 (resized).JPGIMG_8689 (resized).JPGIMG_8690 (resized).JPGIMG_8690 (resized).JPGIMG_8691 (resized).JPGIMG_8691 (resized).JPGIMG_8692 (resized).JPGIMG_8692 (resized).JPGIMG_8693 (resized).JPGIMG_8693 (resized).JPGIMG_8694 (resized).JPGIMG_8694 (resized).JPGIMG_8695 (resized).JPGIMG_8695 (resized).JPGIMG_8696 (resized).JPGIMG_8696 (resized).JPGIMG_8697 (resized).JPGIMG_8697 (resized).JPGIMG_8698 (resized).JPGIMG_8698 (resized).JPGIMG_8699 (resized).JPGIMG_8699 (resized).JPGIMG_8700 (resized).JPGIMG_8700 (resized).JPGIMG_8701 (resized).JPGIMG_8701 (resized).JPGIMG_8702 (resized).JPGIMG_8702 (resized).JPGIMG_8703 (resized).JPGIMG_8703 (resized).JPGIMG_8704 (resized).JPGIMG_8704 (resized).JPGIMG_8705 (resized).JPGIMG_8705 (resized).JPGIMG_8707 (resized).JPGIMG_8707 (resized).JPGIMG_8709 (resized).JPGIMG_8709 (resized).JPGIMG_8710 (resized).JPGIMG_8710 (resized).JPGIMG_8711 (resized).JPGIMG_8711 (resized).JPGIMG_8712 (resized).JPGIMG_8712 (resized).JPG
#12422 1 year ago
Quoted from hawk370:

Hi guys, Hoping I can get some help and direction here. My supercharger stopped working and I'm trying to find the cause. All the optos register in switch test but none of the magnets work at all. I pulled the Accelerator board and tested the transistors, and they all test good as far as I can tell. I feel like those are not likely to all fail at the same time anyway, right? I also Checked fuse F106 and that is good. any idea what to check next?

In case that isn't a typo, the magnets are on fuse F103 not F106, so check F103 to make sure it is still good. Does your rotating light on top work still? That is on the same fuse.

You can also double check that the supercharger didn't get turned off in the settings menu. It can be disabled there via the diverter being disabled. That's adjustment 15 on the features section. Make sure it isn't disabled.

#12441 1 year ago
Quoted from Da-Shaker:

Thanks for the play field suggestions. I have a little time and will think it over a little bit.
Additionally, I’m doing a flipper rebuild. Is there a stronger flipper coil people are using?

Go with what was meant to be in there. Blue label FL-11629 for both lower flippers and red label FL-11630 for upper right.

#12447 1 year ago

I don't often go for direct shots at those middle red-yellow-green targets. Too unpredictable where the ball goes afterwards, air balls or otherwise. First time through the gears, a shot up the ramp or into the mountain saucer will spot you a target. That's the strategy for getting multiball the first time. After that, I'll purposely miss hit a shot with the upper flipper at the loop and intentionally catch the lower bank of targets that will careen into the middle bank. The top bank becomes a little more luck by throwing it into the pop bumpers and waiting for it to hit the one you need.

1 month later
#12473 1 year ago
IMG_8697 (resized).JPGIMG_8697 (resized).JPG
1 month later
#12555 1 year ago

Here's another if you need it.

IMG_3169 (resized).JPGIMG_3169 (resized).JPG
2 weeks later
#12601 1 year ago
Quoted from Cobradvs:

My manual only lists 5 bulbs for GI (2 #44s and 3 #555s). That seems like not very many. Am I missing something?

Quoted from Mr_Tantrum:

- I'm all cool/natural white in my Getaway GI, and it really makes the art pop more and seems brighter overall. Not exactly sure what you are referring to about the 5 bulbs for GI, but that is wrong.

I think the 5 bulbs for GI (2 for #44s and 3 for #555s) is a reference to the number of GI strings and not an individual bulb count. I don't recall how many bulbs are on each string. It's usually somewhere between 5 and 10.

I made a pretty lengthy bulb list complete with colours and bulb type when I did my Getaway. Looking at it now I'm not so sure I still understand my own notes, lol. I was originally of the mindset to colour match inserts and backbox bulbs, but have since changed my mind. I like how it looks with just cool white frosted domes everywhere. I believe I kept a few of the bulbs in the backbox as red, where the flashing lights are behind the artwork.

That being said, the parts list calls for:

Quantity 52 round base #44s Williams part number 24-6549
Quantity 98 wedge base #555s Williams part number 24-8768

Quantity 11 round base #89s Williams part number 24-8704 (flashers, larger base)
Quantity 10 round base #906s Williams part number 24-8802 (flashers, smaller base)

Quantity 1 round base #1156s Williams part number 24-8826 (this is the mini-bulb for the rotating beacon light on top of the backbox. https://www.marcospecialties.com/pinball-parts/04-1156 Be sure to use this exact bulb or your motor will tend to stick as it can't get over the start-up current of an over-sized bulb AND the rotating part. If you have to give the top of your game a love tap to get it going, it's sticking because it has the wrong bulb in it).

#12606 1 year ago
Quoted from tiltmonster:

Nice video, well done

Wow, no kidding. Great job. And no commercials!!

1 week later
#12640 1 year ago
Quoted from humanoid:

He has: it's called L-5C. I have it on my HS2.
"Changes
The premature multiball (re)start bug - fixed.
With tournament play unselected: Multiball may be removed from Burn rubber awards (with adjustment A.2 13).
Secret mania is scrapped.
Why it rocks
Correct light locks, lock balls, start multiball, jackpot and super jackpots logic.
Secret mania messes up the traffic lights progress and potentially have more hazardous side effects.
Note
With tournament play selected: Multiball is still the fifth Burn rubber award (when no extra balls selected)."
Since it's based on L-5, there's no 'RUN THE RED LIGHT' display, however I consider what it does add to be worth it. It was made before the PPS-sanctioned updates, so it's a little tricky to find, but I can send it to you.

Remind me why the "run the red light" text got removed/changed?

#12646 1 year ago

Decided my Getaway deserved some love... and a cleaning. Went with red for the rubber rings and post sleeves. I also had a new plastics set that I hadn't fully installed, so put those in too. Replaced some of the foam padding behind the stand-up targets too. The middle set of traffic light ones I find are prone to producing airballs when that foam has worn down or isn't there. It was pretty filthy back in the corners. She's playing quick now!!

IMG_9506 (resized).JPGIMG_9506 (resized).JPGIMG_9528 (resized).JPGIMG_9528 (resized).JPGIMG_9532 (resized).JPGIMG_9532 (resized).JPGIMG_9535 (resized).JPGIMG_9535 (resized).JPGIMG_9540 (resized).JPGIMG_9540 (resized).JPGIMG_9549 (resized).JPGIMG_9549 (resized).JPGIMG_9552 (resized).JPGIMG_9552 (resized).JPGIMG_9554 (resized).JPGIMG_9554 (resized).JPGIMG_9557 (resized).JPGIMG_9557 (resized).JPG
#12648 1 year ago
Quoted from Cobradvs:

Looks nice! Funny, I get air balls from the middle light targets on occasion. Never considered the foam to be the potential issue. I'll look into replacing those.

I'd love to hear whether it helped or not on your own game. I happened upon the idea with my Theatre of Magic actually. A couple of similar stand-up targets on either side of the ramp entrance. And the ball would often go bonkers if you hit them just so. I put a new piece of foam padding back there and it helped a lot. I think if anything it helps to keep the ball in contact with the playfield and not at a slight angle up as it hits a target. Once it hits and rebounds back, that slight angle grows and catches air. That's my theory anyway, lol.

#12651 1 year ago
Quoted from Cobradvs:

Yeah I'll give it a try. What foam did you use?

I used these: https://www.marcospecialties.com/pinball-parts/23-6534-9

One piece of advice is to make sure the metal surface you're sticking these to is good and clean. The adhesive on the back of these is not super strong and if there are bits of the previous foam piece still on there, the new piece will fall right off.

Oddly enough I find your thumb to be the best thing to clean the surface with. You can pull that target down through the playfield without needing to unrivet or desolder anything. Just undo the two screws holding the bracket to the playfield. Once you have good access to it, I just rubbed the old adhesive with my thumb on the surface until it all comes off. It will roll together like any other glue would and then just pick it off. No need to antiseptically clean the surface. Just get the old adhesive off and you're good.

#12653 1 year ago
Quoted from Zukram:

Has anyone replaced the motor for the beacon light, and maybe know a source for an original spec'd motor. Mine does not function and looking for a replacement..

Does the light work?

#12663 1 year ago
Quoted from rvermeire:

only solenoid 12 'plunger' and ..... enable 1,2,3 whatever that might be...
Is this little board only controlling the plunger ?

Enable 1, 2, 3 are the three magnets in the supercharger. Does the supercharger work? You can do the supercharger test with the glass off and you feeding a ball into it by hand to find out.

2 weeks later
#12703 1 year ago

Looking for some ideas on figuring out an intermittent issue I'm having.

I did a topside tear down of my Getaway recently. Rubber rings and post sleeves, a few new plastics and overall cleaning. It is all back together and working well, except now my ball launching will sometimes clunk into the redlight target of the leftside bank of 3.

And it isn't every time. Most ball one games starting don't do it, but then it often does later in that game either on a second ball or after you've locked some. It basically will come out of the shooter lane and instead of going around the loop, it will hit right into that red target. Which is quite a bit off from making the loop. It isn't just grazing that post sleeve beside the red target, it's a full ball width or more lower.

And since it isn't all the time, it's got me stumped on what is causing it?

If my shooter coil was underpowered some of the time I could see it doing this perhaps. Not sure why it would do it fine some of the time and clunk other times?

I got thinking perhaps my shooter lane exit flap was sticking or hanging up and causing the ball to veer off course. It seems to move freely when you try it with your finger though. That also might explain the intermittent aspect if a locked ball getting released by the disappear post moving was rattling the flap. When a ball gets released from the locking area, you can see the flap jump slightly. It has always done that though. It also doesn't appear to be catching either of the post sleeves beside the flap on it's way out.

Playfield and / or cabinet alignment is a possibility too. Yet wouldn't explain why it doesn't happen all the time. I didn't adjust the leg heights when I was doing my work on the game, but I for sure had the playfield up and down many times and it's position or alignment could have changed slightly.

Cleaning the game made it faster too, yet that's another thing that doesn't make sense when it doesn't happen everytime.

Magnetized balls? I don't think that's an issue or why it would do this.

Could there be an issue with the power supply or boards that would cause varying power to coils mid-game like this? I swear the game has done some weird things since putting it back together, like it gets confused as to which mode it is in. Hard to explain and not sure it isn't just my imagination. Like it gave me two consecutive multiball awards for Burn Rubber shots, which is very unusual. I'm running L-2 for code.

#12708 1 year ago
Quoted from retroware99:

Have you taken a very careful look at the wires that are soldered to the shooter lane solenoid? If one is hanging on by a thread it might explain the problem you are having.

Thank you for the suggestion. I did look closely after you said that and found that while the coil wires looked ok, it did not have the correct coil sleeve. Meaning, no flange and I think it was moving around a little. Intermittently and affecting launcher power. I have the correct sleeve with the flange and I’ll put that in and see how it goes.

#12710 1 year ago
Quoted from golfergordy:

When I first obtained my Getaway pb the ball plunging into the pf was erratic, but not quite as bad as yours is. The problem turned out to be that the wrong coil was installed, the coil had sideways free play (wiggle), and the plunger had too much free play. I kept the wrong coil but took action to eliminate the coil wiggle and I shortened the length of the plunger travel, replaced the coil sleeve, and it's been perfect now for the last 1-3/4 yrs.

Thanks. I see in the manual the coil is listed as A-14789. I'll have to double-check mine. I know it isn't new as the paper wrap label is pretty worn looking.

The Marco image for the assembly shows the lugs on the coil in the middle of the assembly, whereas mine or oriented out at the end (the end closest to the plunger tip and the ball). How is yours oriented?

#12713 1 year ago
Quoted from tiltmonster:

If it were me I'd look into the shooter assembly, coil A-14789, Coil sleeve 03-7067-3, spring 10-128 and the shooter rod (bell armature A-15709). I'd check the armature and coil sleeve first, these can wear and throw everything out of whack . Also, check the alignment of the mounting bracket, it could be loose and moving around or just off kilter...
Manual page 2 -27

Thanks. I believe you are right that something is physically off kilter. I'm going to focus on exactly where the ball sits waiting to be struck and how the tip of the armature makes contact. Since the end of the armature is cupped, if it doesn't exactly meet the centre of the ball each time, I think it would result in the inconsistent ball launching I am seeing.

I did want to mention this issue though too:

Quoted from rvermeire:

The switch is working fine in switch edge test when i move it by hand.
For some kind of reason the coil is continuing to shoot up at game start. In solenoid test it's going up and down as it should.

When I reversed my launcher coil so that the lugs were in the middle of the assembly and not out at the end, I realized they were in contact with the top of the leaf switch for the flipper button on that side of the cabinet. Important to note that you won't see these in contact with each other when the playfield is up, only when it is down, so you'll need to look through the coin door while the playfield is down in it's regular position.

When I started the first game after reversing the launcher coil, it must have blown the F102 fuse because that's when the launcher wouldn't fire. But something else starting happening at that exact moment... the ramp starting trying to move even though it was already in the correct position.

So somehow this shorting of the launcher coil lug to the tip of the right flipper button switch was causing havoc with the ramp up/down.

I went through the diagnostics, checking solenoids and switches and all was fine except the launcher wouldn't fire. I replaced the F102 fuse with a new 3A slow blow and everything came back to life. No transistors damaged on the power driver board, nothing wrong with the small high power board underneath the apron, nothing other than fuse 102. And the ramp is fine and not doing that same glitchy thing that was described previously here.

Just wanted to share in case anyone else is having this ramp movement going on and might not realize their launcher coil lugs are touching their flipper button switch tips.

#12715 1 year ago
Quoted from tiltmonster:

Yes, if the armature does not strike the center of the ball it can cause spin on the ball making it act differently when exiting the shooter lane. If this is random maybe the armature plastic is broken or loose and moving around, I suppose the same is true if the entire mounting bracket is out of alignment or loose. I only say this because it happened when I noticed the spin on the ball but everything seemed fine until I tore it the assembly apart. Additionally my coil sleeve was warn out.
Sometimes it's the little things that throws everything out of whack. Hopefully it's an easy fix for you as well because chasing down these annoying issues can be like running around in circles. Good luck

I think I have a new theory. I thought it was only one of the three balls doing this misaligned launch. Like one specific ball that might have been scuffed or worn or magnetized or something. So I put new balls in and now I've noticed some other pattern. It does the mislaunch each and every time there is a ball locked. Doesn't do it when there are no balls launched. So I think somehow when the ball is locked, it's pushing back on something physically to impede the ball path. Need to look closer at this. Stay tuned...

#12727 1 year ago

Check to see that the lugs of the ball launcher coil are not touching the ends of the flipper button switch on the right side when the playfield is down. Look through the open coin door to see. I replicated the odd ramp up / down behavior by doing this inadvertently the other day.

2 weeks later
#12748 1 year ago
Quoted from Charger500:

I haven’t posted in a long time. But I’m back, and hope to visit more often. I got the highest score on Getaway since I got it 6 years ago. I’m running L-5 Chip I believe. I only had one extra ball. The big run came in the Supercharger 4 th gear mode. I was able too keep hitting the supercharger, like twenty or thirty times, by making a “ski pass” from the left in lane to the right flipper.
[quoted image]

Wow, impressive. I got over 1 billion once and thought that was pretty good. 3 billion? Yikes.

Hitting the supercharger in 4th gear mode 20 or 30 times... may I ask how long your timer is on that mode? Mine seems way too short to hit it more than about 6-7 times. I have gotten to 35 million on the last shot up just as the timer runs out, but that's about it.

3 weeks later
#12774 1 year ago

Would anyone happen to have a Getaway gameplay video to share that shows a PIN2DMD with "redrum" (Sascha)'s colorization files in it?

#12787 1 year ago
Quoted from slippifishi:

[edit] Thought I knew of a newer version of Malenko's project, but sorry I was wrong!

No worries. Was just trying to see how the colorization looks on a PIN2DMD with the files currently available. I bought another display recently and intended on putting it into my Party Zone. Screens look really nice but they are out of sync with the sounds/voices unfortunately. I put it into Getaway briefly and decided it looked awful. Wound up putting it into my World Cup Soccer and am blown away at how incredible it looks. I have a colour display in WCS and Theatre of Magic and they both look amazing. Mg PZ and HS2 will stay orange as I think they look better that way.

Awesome seeing those three Getaways in a row like that with the different mods and lighting choices. Cool! Thanks for sharing.

2 weeks later
#12915 1 year ago
Quoted from 7oxford:

Does anyone have any shop out photos for removing and installing the topper. Long story short, I removed the lamp, motor and cover about 2 years ago and now I’m trying to figure out how to re-install. The manual is not helpful.
[quoted image]

IMG_2412 (resized).JPGIMG_2412 (resized).JPGIMG_2876 (resized).JPGIMG_2876 (resized).JPGIMG_3781 (resized).JPGIMG_3781 (resized).JPGIMG_3785 (resized).JPGIMG_3785 (resized).JPG
2 weeks later
#12970 11 months ago
Quoted from Acronymicon:

seeing as its on topic currently I have to ask:
I am restoring a Getaway to sell. New playfield, couple mods, refurbed redecaled repainted cab and resilkscreened warning on the backbox, powder coated, every mech rebuilt all high wear components replaced, hardware tumbled, harnesses all ultrasonically cleaned. Lots of other smaller things, nvram, recapped sound board, pin 2 dmd, etc.
Trying to get it as close to right off the assembly line as possible.
Anyone willing to suggest a fair price range would be appreciated.

If that was in Ontario right now, it would list for $7,500 CAD and you might get someone to buy it from you for $7,200 CAD.

#12979 11 months ago
Quoted from Mr_Tantrum:

Well, I'm back in the PIN2DMD club. Ordinally, I had a PIN2DMD in my Getaway several years ago when I started the colorization project for it. Long story short, for various reasons I abandoned the project and others carried the torch forward doing a fantastic job. When I had my DE JP it came with a ColorDMD when I bought it, but I thought the PIN2DMD colorization was significantly better on that game so I swapped displays. Unfortunately, the PIN2DMD went with JP when I sold it while the ColorDMD stayed with my Getaway.
Anyway, I couldn't be happier having a PIN2DMD back in my Getaway. Overall, I just think the colorization is better/more appealing to me. At this time, the only thing not colored is the map sequence given what a challenge it is using the PIN2DMD software, but I think the rest of the animations are enough to overcompensate for it.
Pics of DMD are always a little difficult (especially when you are the one playing the game and taking the pictures), but here are a few samples.
[quoted image][quoted image][quoted image][quoted image][quoted image][quoted image][quoted image][quoted image][quoted image][quoted image][quoted image][quoted image]

Are the colorization files you are using available for purchase? I've bought a couple game files, like for Theatre of Magic, and the authors often code files for your exact PIN2DMD display number and charge $25 USD or thereabouts. Don't see that avaulable for Getaway, so why I'm asking. Thanks.

#12990 11 months ago

I am looking for a replacement part for my Getaway. It's called the "ball guide, center wall" with part number 01-10613. It is part of the ramp, at the top, on the inside edge of the loop that brings the ball back down to the left flipper. It has four metal tabs, two on each side, welded to the stainless guide and these screw into the base of the ramp at the top. I don't see it listed for sale, or even for reference, on Marco.

If you have one from a game you parted out or something along those lines, I'd be interested in buying it from you. Or trading for other parts or plastics. Thanks.

#12993 11 months ago

You're right, a picture is better. Ignore my hand showing the opto... old photo. It's what I highlighted in green. The manual calls it out separately, so I believe it was meant to be a unique part and loose. It's held on with the four tabs. Needless to say, not all four of my tabs are still in attendance.

HS2 ball guide center wall (resized).jpgHS2 ball guide center wall (resized).jpg
#12995 11 months ago
Quoted from jrcmlc:

Do you have the part removed so I could see what's damaged? I'd this is a lost part I might be able to have it made.

It's back in the game at the moment. One of the tabs is broken off and gone and a second tab has got a crack and will likely break off soon too. The metal loop seems to put a fair bit of tension on the tabs to keep it tight like that. Sort of acts like a spring. The tab that broke is on the right side, the same side that the divertor arm is. And I think the divertor arm bangs into it each and every time it opens/closes, so has been jostling that ball guide and those tabs for the past 30 years. I don't know how to make such things, but would absolutely be interested in working with you if you do. It's really just a single piece of stainless steel, bent to form the loop with the four tabs welded on the bottom edge.

#12997 11 months ago
Quoted from jrcmlc:

If I had a unit in good shape I could have it made no question, but I'm not going to remove mine to have it copied so that might be our pinch point on this. Lol

I don't blame you, lol. Let me see what I can do to get the dimensions for you. I should be able to use CAD software better than I actually can, so might have to go old school and use pencil and paper

#13005 11 months ago

Thanks for taking the time to post pics of yours. Glad you did that because I realized one more tab that's broken off. The one on the top. It's actually still connected to the underside of that plastic. So that one at the leading edge on the right side is broken at the bottom and the top. And the second one back on the right side is the one with the crack developing in it. So maybe too far gone to try and fix or weld back together. Will keep an eye on it though. Yea, odd that Marco has the whole ramp assembly but not that lane guide. I may contact them to double check that is correct. I would buy the whole thing for $40 if that's the deal.

What I may do in the meantime is see if I can find a suitably sized L bracket that I can slip under the lane guide for that front right tab and use the screw from underneath to hold the L bracket in place and have the L portion sticking up to hold the guide back. It seems like the guide is recessed back slightly so it shouldn't catch a ball on the way by, nor affect the opening of the divertor arm to allow the ball into the supercharger. We shall see.

1 week later
#13035 11 months ago
Quoted from data_eastside:

I'm having an issue with the Getaway I recently picked up- the plunger will not consistently make it all the way around the loop. I took it all apart, replaced the coil sleeve, re-soldered the coil connection and made sure everything was as tight as possible and the plunger was hitting the ball straight. It's still not making it around the loop most of the time. It seems like sometimes the coil just fires weaker than other times. And it will work for a few times and then go back to not making it all the way around. Anybody have any suggestions? The next thing I was going to do was replace the A-14879 coil[quoted image]

A couple things to check:

Playfield incline is what? 6.5 degrees? What is the bubble level showing?

Playfield level side to side?

Take a picture to share of the loop entrance to show where your posts and rubber rings are. Also show the shooter lane flap exit in a second photo.

#13044 11 months ago

That sounds like one of the optos is being triggered erroneously and if the game gets confused and thinks the ball is somewhere it isn't, it starts the sound effects until the ball triggers some other switch and it realizes where it is.

If you could take a video with sound of it doing it we could confirm for you. I assume it is the first opto going up the supercharger ramp. Kind of like on other games that have a wire gate for the ball entering a ramp and the game does a little sound effect or sets off the flashers signifying you hit the ramp.

Inspect the optos on the ramp entrance. You could take the glass off and start a game and grab the ball with your hand so it isn't triggering anything else, and then pass your finger or the tip of a pen or something past that ramp opto and see what happens. My guess is you'll duplicate your sound effects. If that's the case, see if anything looks misaligned on that opto, either side. It may just be the connections for the opto boards and you need to reflow the solder there.

2 months later
#13116 9 months ago

It's pretty straightforward. Take some pics before you start and make note of how things are positioned relative to the flipper button switch beside it and also which end is "gear up" and which end is "gear down."

IMG_2389 (resized).JPGIMG_2389 (resized).JPG
1 month later
#13169 8 months ago
Quoted from Gorgar666:

I’m parting out a Getaway. Message me!

Hey, I can’t add pics to PM’s, so I’ll add it here.

This is the part I am looking for. This centre ball guide is the loop piece on the inside curve of the metal ramp. It is a separate piece held in with screws and nuts. This is what I am after if you have one.

IMG_1566 (resized).pngIMG_1566 (resized).png
2 weeks later
#13217 7 months ago

Continuing the kickback performance improvement suggestions, if you are past looking at the coil or plunger being weak and the ball not finding it’s way into the hideout saucer every time, you can ensure the game is levelled correctly side to side and also the incline front to back is good too. Lastly, and I’ve seen this on the shooter side on the right recently, confirm your balls aren’t magnetized because if they are, it can throw the ball off line and not make the loop. I know that’s not what you asked specifically, but game levelling and balls getting magnetized are significant concerns on any Getaway.

#13230 7 months ago

Can anyone tell me what the part number is for the small, metal, tubular spacer that sits under the flipper return ball guide on the leftside? There are two of them at the tip of the ball return guide (the top, the skinny end) and each has a skinny screw through them to keep the ball guide tight to the playfield. I noticed one of mine is missing and would like to get a replacement. Can't find them anywhere in the manual or online. Thanks!

#13235 7 months ago
Quoted from jrcmlc:

Nice pull from the archives

Wow, ya, thanks. That is going way back. Much appreciated. Looks like I’m not the only one to ever go looking.

#13254 7 months ago
Quoted from pinballjah:

Getaway II banner turned out great. This game was deserving of a pinball banner! Probably should have put a couple cop cars in front of the donut store
[quoted image]

Jim… you need me to take that off your hands for use with your old Getaway?? Or did you get another??

1 week later
#13286 6 months ago

The manual calls for an 1156 base bulb. My beacon light "stuck" all the time when I first got the game. Had to tap on the top of the backbox to get it to start spinning. And then I went ahead and replaced a ton of components trying to figure it out. It wasn't anything other than the wrong bulb taking too much of the "start-up current". An LED will do the trick and so too will getting the "mini" 1156 like this: https://www.marcospecialties.com/pinball-parts/04-1156

After I put the correct bulb in, it hasn't gotten stuck again. It used to do it almost every game and afterwards it has probably turned on over 1,000 times without getting stuck once.

2 weeks later
#13374 6 months ago

https://pinballmedics.ca/product/williams-metal-lane-guide-spacer/

I was waiting to get a couple of these in my hands and compare before sharing the link. I just installed one of them in my Getaway and they are indistinguishable from the originals.

3 weeks later
#13389 5 months ago
Quoted from 7oxford:

In my getaway the up/down post releases all the locked balls instead of one at a time. Can anybody advise me of a fix or adjustment I can make for this?

Quoted from jrcmlc:

Is it supposed to release them one at a time?

Yes, supposed to be one at a time.

From my experience with my own Getaway, it means your balls have gotten magnetized.

Take them out of the game and put them on a clean sheet of paper, flat on a table. Move one of them towards the other with your fingers and see if they pull the other balls. My bet is they will be. Time for new ones, preferably the ones that AREN'T advertised as super shiny as those are the ones with extra chrome in them and this is what you DON'T want.

#13391 5 months ago
Quoted from Kobaja:

Please elaborate why this is so.
Anyway - just for fun. In case those balls in fact are magnetized - throw them into the coals during your next BBQ. 500-800°C will demagnetize them. Also likely change color, but that's is why I say 2Just for fun"

No idea. More ferrous content. Less ferrous content. Seems the commonality with places selling balls is that they say the trade-off with the shiny balls is that they are more likely to get magnetized. And the connection is attributed to the extra chrome. Any more explanation than that and I'll have to dig out the materials science textbook, lol.

#13394 5 months ago
Quoted from 7oxford:

Can you please clarify “they”? Are you talking about the micro switches, rail or post?
I will check out with new balls. I presume the supercharger could magnetise the balls over time.
Thanks for the responses.

They means the alignment of the "disappear post" tip coming up to the centre of the ball and wire form. That wire form, when you loosen up the places where it is screwed down, will let you shift it a little left or a little right. Too much to one side and the top of that disappear post might not stop the ball completely.

Yes, the magnets in the supercharger will magnetize the pinballs over time. So will the big magnets in many other games, like Theatre of Magic or World Cup Soccer. Just one of those things.

Oh, I actually had found the tip of my disappear post itself had gotten magnetized at one point. I replaced it. Probably didn't need to but there you go.

#13405 5 months ago
Quoted from Kobaja:

Please elaborate why this is so.
Anyway - just for fun. In case those balls in fact are magnetized - throw them into the coals during your next BBQ. 500-800°C will demagnetize them. Also likely change color, but that's is why I say 2Just for fun"

lol, and yet this is what you contribute? Brutal. Have a nice day, troll.

#13410 5 months ago

All this talk of gameplay and multiballs and jackpots and I thought I better have a few games myself. Had my second highest score ever at 1.19 billion. Had the Superjackpot up to 175 million and choked at least a few times with legit chances to get it and never did, lol. Did realize that the relighting of the superjackpot by going back up the supercharger caps at 50 loops. The game keeps adding 10 loops each time you score a jackpot to get the next one, but it seems like it won't go higher than 50 loops. Crazy game.

Anyone cracking the highscores on my Getaway is going to need at least a billion to do it...

#13413 5 months ago
Quoted from jrcmlc:

I've seen some of your scores posted before... I am not there but I absolutely have a 1B game in me, I just haven't found it yet.... Out of the regular posters on this thread I think I'm third but only barely.... Just need to put it all together. Lol
What Rev are you on, L2 or l5?

Thanks. I won't say it's easy, but the game can certainly be taken advantage of and you can put up huge scores with the right approach.

I'm on L-2 with extra hard installed (so no memory on orbits or extra balls unclaimed and whatnot). Tilt bob is pretty normal and outlane posts are either regular or easy (of the 3 positions possible).

I need to get a better rig made up to video a recent game and show some of the strategy. I came up with a way to get through the video mode basically everytime with minimal effort and that's 23+ million each time. 4th gear award mode that is 5 million per shot can be used for close to 100 million if you get good at hitting the supercharger, then letting the ball ski off the left flipper to the right and one timing it back up the ramp. It keeps adding 5 million on subsequent shots and before the timer expires, I've had it to 35 or 40 million per shot.

My usual strategy with multiball is to focus on two balls going. I don't purposely let the 3rd ball drain, but going at it with two is better in my opinion. Basically, after the starting jackpot of 25 million, keep throwing both balls in the supercharger and getting 20 loops knocked off the requirement to light the superjackport and then when they both come down fast together, I try to hit the left flipper on the first one to throw it into the hideout saucer while keeping that left flipper up and so the second ball skis off to the right, which you then throw it back up the ramp or shoot the left orbit to claim the jackpot. There is absolutely an incredible rhythm to it that I just have never found in any other game. Plus you get to claim the helicopter bonus and take a second to catch your breath because now both balls are held while it does the superjackpot animation.

Some games you're on and some games you are not. You mostly have to "practice" on your specific Getaway to see where the shots are and make tiny adjustments so you can hit them reliably.

There are some "cheats" so to speak as well that people don't always realize. For example, you can light the lights to earn locks by hitting the supercharger ramp or saucer hole. Every one of those shots gives you one more of the green or yellow or red lights for lock. This only works the first time you get multiball and not afterwards. Afterwards, you have to hit the targets, which another piece of advice is to usually not aim for them directly. Do other stuff and get them with your miss hits. Most games are brutal when you go after targets directly (like Diner for example). Getting those targets from ramp shots is a great strategy in a league setting where there are often no extra balls available and you need to earn points quicker on what is normally a shorter game.

#13415 5 months ago
Quoted from Pinball-Obsessed:

Took me a few more days to get back to playing a game.
My Getaway releases one ball at a time and always has.
Also here’s that picture of my highest score I got the other day too!
[quoted image]

Nicely done!

Game looks great. I like seeing games in mostly original condition with only a few subtle, tasteful mods.

Are those art blades? Which ones did you get?

3 weeks later
#13439 4 months ago
Quoted from KenM:

I'm new to the getaway club and having an issue with the supercharger going a little slower that it should. The magnets and opto's all work in test and i've unplugged and plugged in the cabinet power supply and board connectors multiple times. I have found that the high voltage which is usually around 70v drops to around 59-60v (at the rottendog board test point) while the supercharger is going.
Any help on where to look first?
Thanks!

One man's slow is another man's fast. How slow is slow? Go into the test menu and start the supercharger test. Put a ball into the supercharger and see what the test times are. Report back

#13442 4 months ago
Quoted from KenM:

Haha it was around 150 or so. It made it around but not always fast enough to shoot out in to the wireform on the left once completed.

lol, gotcha. Ok, ya, that's pretty slow.

A couple easy things first that probably aren't the cause... new, slick and shiny ball plus clean the supercharger surfaces that the ball travels on. Make sure the game is level left and right and that the incline is about where it should be (6.5 degrees which is usually to see the edge of the level bubble at the first line).

You said the optos and magnets all test fine. I don't know what the chances of a magnet being plugged into the wrong connector so it's firing off the wrong opto is, but I suppose that could be checked to confirm.

The thing that I've seen have the biggest impact on the speeds or times is when the divertor arm is able to move too much when it's in that open position. Check to see how much play there is in the divertor arm. When the ball is racing around, if it hits into the divertor arm and the divertor arm moves back and forth slightly, it will rob the ball of much of it's energy and speed. You may need to lift up the supercharger and pull out the solenoid and divertor arm to inspect. The parts diagram will show how it is supposed to go together and where the washers need to be.

You can also double check how stable or secure the "centre ball guide" piece is. This is the metal piece on the inside turn of that ramp. Up at the top, it's what the ball follows around when leaving the supercharger and coming back to the wireform and left flipper. That piece has metal tabs which allow it to screw into the metal ramp itself. If the metal tabs are broken off it can move and if it moves, it will mean the backside of the divertor arm won't be resting securely against it, instead it will be able to move, which you don't want because it slows the ball down.

#13447 4 months ago
Quoted from SilverUnicorn:

It’s here!!! Works well. Needs LED’s and a cleaning but super happy! [quoted image][quoted image][quoted image]

Welcome to the club! Great game for sure!

Lots to do and play and enjoy. When you get to it, download the manuals and documentation, among them this service bulletin PDF from PinWiki: https://www.pinwiki.com/wiki/images/b/b6/Williams-service-bulletin-book-1992-fall.pdf

It mentions three different ball hang-up brackets that don't look to be installed on your game (the two at the back anyway, I can't see well enough the third one near the shooter lane exit).

Available for sale at Marco or elsewhere:

https://www.marcospecialties.com/control/keywordsearch?SEARCH_STRING=01-10903

https://www.marcospecialties.com/pinball-parts/01-10904

One of the members here that posts often makes some nice decals for these brackets as well if you're interested in prettying up the game at some point.

IMG_9542 (resized).JPGIMG_9542 (resized).JPGIMG_9545 (resized).JPGIMG_9545 (resized).JPG
#13449 4 months ago
Quoted from Mr_Tantrum:

I see it has a few of my custom decals on it.
If/when you get to the point and you want to add some mods, shoot me a PM for a list of everything available.

Yea, those were on it when I got it a couple years ago. I think the previous owner, PinballJAH, got those from you. You made me up a replacement, 3D printed mount piece for my gear shifter/launcher as mine had broken. I like the do not enter symbol on the ball launcher exit flap. Definitely the most clever and the most subtle

#13455 4 months ago

Look underneath at the flipper assembly. See where the linkage “elbow” meets a rubber stopper? Not the coil stop end, the other end. The flatter that piece of rubber, the longer the travel of the flipper. So the thicker the rubber, the smaller the degree of travel is. If you put a new rubber stopper in there, then readjust the flipper alignment, you notice the up position of the flipper won’t be so high. And that’ll let you ski the ball over

#13461 4 months ago

The EOS switch won't be the problem. It doesn't affect how far up the flipper goes, only which power keeps it there.

I recently had my wireform return off to do something under my slingshot plastic and when I put things back together, noticed the ball would not ski over quite as well as it did before. The reason being that my slight adjustment to the wireform position, had the ball losing some momentum as it falls into the inlane and then down to the flipper. Might have been catching on the ball guide edge or maybe the side of the slingshot rubber. Either way, how smoothly that ball comes down and how much speed it gathers right off the bat will also affect whether or not you can ski the ball over to the right flipper to throw it back up the supercharger ramp.

#13475 4 months ago

Does anyone know of a how-to guide for adjusting the two brass screws on the lockdown receiver assembly to get the lockdown bar to stay snug and not move or shift if you put some weight on it with your palms?

#13478 4 months ago
Quoted from harig:

the more you turn in (clockwise) the 2 brass screws, the more snug the lockbar will stay. There is a limit though-at some point you might not be able to move the receiver lever anymore

Thanks. Most of my games the lockdown bar stays exactly where you put it. On my NBA Fastbreak though, it wants to "fall off" so to speak. And I mean at the ends of the rails on the sides and at the front of the cabinet, when you get it locked into position, after a little bit of time and gameplay and having your weight on the bar, it kind of pivots down slightly, like it doesn't have anything solid to rest on underneath. Does that make sense?

I try and get it to lock into position higher up, like the two main metal tabs that protrude from the bottom of the lockbar can be inserted into the receiver a little forward or a little back. And it doesn't seem to want to stay. It's just frustrating because when you're playing and then suddenly the lockbar moves a little, it feels unsettling. I don't know, maybe something is bent under there. I had similar trouble on both Theatre of Magic and World Cup Soccer but not at all with Getaway, Funhouse, Diner or Party Zone. Maybe the cabinets changed slightly from early 90s to mid-90s.

1 week later
#13516 4 months ago
Quoted from Mr_Tantrum:

Haven't seen that "SUPERCHARGER" loop cover before, did you design that?

I like the way that looks too. Like an extension of the supercharger / turbocharger / intake or whatever.

Is that piece available for purchase? Or more details / photos on what it looks like uninstalled?

#13518 4 months ago
Quoted from DystopicPinball:

please check on www.dystopicpinball.com

Nice! How much would you charge for one of those shipped to North America?

#13531 3 months ago

For the beacon on top, does the light come on at all? Check the bulb. It needs to be the “mini” bulb version of that base style. Too large and it robs the rotating part enough of the start up current to get it going.

#13533 3 months ago
Quoted from jrcmlc:

There was some strain on a cable or a loose wire in a connector, I have the topper working 100% after re-pushing down the wires into the connectors and have it even working through the shaker now. The display and flippers are still intermittently fucked, though. LOL

Down to the flippers and DMD. That’s good because now you can chase one thing at a time as those two things aren’t likely related.

Flippers: go underneath and move the linkage on each flipper with your fingers. What happens? Easy, smooth movement or is there resistance or sticking? Have a look at the ends of the flipper buttons and leaf switches. Anything odd there?

Does the upper left flipper work or is it sluggish like the bottom ones? Does it work and not work in sync with bottom right or is it doing something different? Might help you narrow down the trouble comparing upper right and lower right. Fuses for the flippers are new? If not, replace them.

#13547 3 months ago

Definitely not poking fun here at you or your specific game… but man are there ever some varying definitions of 100% here in the pinball community.

My personal fave is when a game gets advertised as being 100% converted to LED bulbs. And then you get the game home, start going through it and end up with a big bag full of dusty incandescents you replaced. Weird… always wonder what portion of the 0% part of that equation those bulbs fell under. lol

Irritating for sure. Game is coming along nice though. Hope any of those day one unmet expectations are in the rearview mirror soon enough.

#13554 3 months ago
Quoted from jrcmlc:

Alright who wants this mezel key-start mod that I removed from my getaway? It's all complete minus the "nut" or whatever goes on the back of it, I'm guessing the stock start button nut or something from HD or lowes would fit fine, mine was zip tied in place and was pretty secure. Light strip, wires with correct connectors to attach to where your start button used to be, etc all here. $20 shipped conus
[quoted image][quoted image][quoted image]

Shipped to Canada? PM me and I can give you my address and postal code if you’re able to get a quote or approximate cost.

#13557 3 months ago
Quoted from jrcmlc:

Turned on my new lemon getaway and have a shifter check switch error credit dot cluster. at 130am last night it was fine, today at 11am, hosed. Good times. good times.

Shift down instead of shift up to launch the ball. Might just not have seen that switch used in the past 30 games or so.

#13559 3 months ago

Not to disagree, but it actually SHOULD do that. And I mean, any switch you have not activated in 30 games or about 100 balls is supposed to throw up the credit dot. Every game does that, not just the Getaway.

1 week later
#13613 3 months ago
Quoted from Top_Fuel_Friday:

Having some issues with a super weak Plunger Kicker Coil on my getaway, it won't launch the ball out of the shooter lane to start the game in solenoid test or game play. Some videos below and diagnostics I've already done.
Before My restoration the coil did launch the ball, but it would just barely make it to the top of the board to fall down into the pop bumpers instead of shooting around the loop at the top (it never shot around that loop in my ownership).
Could this be a computer board issue, not firing the transistor long enough, bing a blip rather than a fire? Chris Hibler went through the power board and found no issues. Game has a rotten dog computer board and power board.
- Fuses all good
- Voltage at the HC Driver board and coil pass (74v)
- Coil Ohms test at 2.8
- Good path to ground from HC Driver board
- Transistors on the Power and HC Driver board are good, replaced the HC Driver one just as a check and same performance.
- Jumping either the transistor on the Power or the HC Driver board results in a successful launch of the ball
- Coil, Sleeve, Plunger, wiring from HC Driver board to Coil all new parts from Marco and test good
- Mechanically the plunger moves with very little friction in the coil
Starting a game:
Jumping the power board transistor resulting in a good shoot:
Voltage test results from HC Current board
[quoted image]
Shooter Coil assembly
[quoted image]

Your coil sleeve is moving in that first video. Flange end is probably broken off of it. Take the coil out and inspect and replace the sleeve with a new one.

1 week later
#13646 3 months ago

What's the difference in the backbox light bulbs on those two games? The one on the left looks a lot more crisp.

#13649 3 months ago
Quoted from jrcmlc:

The left is 2smd comet that I installed and the right is comet also I think, but maybe 1smd.

All white bulbs? Cool white? Natural / yellow white? The one on the left looks colder (likely whiter bulbs than the one on the right).

#13675 3 months ago
Quoted from data_eastside:

Here's a pic that shows the LEDs a bit better. I reseated the ribbon cables and nothing on the DMD still. Since it's not booting wouldn't that more likely indicate an issue other than the ribbon cables ?
[quoted image]

You need to be able to post a full resolution photo so people can zoom in and try and see something amiss cuasing your problems. Both photos you shared got scaled down either by your phone or forum settings. Upload the full rez photo please.

1 month later
#13690 58 days ago
Quoted from Luke_Nukem:

Go into the menus, scroll through the settings using volume up and down and enter, find "game adjustments", there will be a setting about volume override... Set it to yes.
Boom!, Done.

I learned something along these lines on System 11 games, specifically on my Diner. They have no "min volume override" setting, yet the volume control knob (pot) won't turn it down completely. You can turn it all the way down and it'll still be heard. You can fake out the circuit though by installing a wire to short circuit the connections on the pot. Use alligator clips and a jumper wire to experiment if you like. It changes the resistance through that circuit and in effect lets you mute the game.

2 weeks later
#13704 38 days ago

Ferrari vs Lambo... any worse/different than the BTTF artwork not having Michael J Fox on it?

4 weeks later
#13797 10 days ago

I don't have one handy to offer, but I think it would be beneficial if someone showed how the shooter coil, plunger and coil sleeve go together... like an explodaview image. I don't recall off hand if this coil sleeve is supposed to have a flange on the end of it, nor which way it is supposed to face. The wrong coil sleeve or one that is broken can cause the launcher power to be inconsistent.

Promoted items from Pinside Marketplace and Pinside Shops!
From: $ 159.95
Cabinet - Sound/Speakers
PinSound
 
$ 30.00
Playfield - Toys/Add-ons
G-Money Mods
 
$ 9.95
Eproms
Pinballrom
 
$ 9.95
Eproms
Pinballrom
 
$ 15.00
Playfield - Decals
Metal-Mods
 
$ 70.00
Playfield - Toys/Add-ons
RobTune
 
From: $ 100.00
Playfield - Toys/Add-ons
G-Money Mods
 
5,650 (OBO)
Machine - For Sale
Fontana, CA
$ 35.00
Playfield - Toys/Add-ons
G-Money Mods
 
$ 16.50
Lighting - Led
Lermods
 
4,550
Machine - For Sale
Melbourne, ON
$ 20.00
Wanted
Machine - Wanted
Fort Lauderdale, FL
$ 65.00
Playfield - Toys/Add-ons
G-Money Mods
 
4,800 (OBO)
Machine - For Sale
Evansville, IN
From: $ 15.00
Cabinet - Other
NO GOUGE PINBALL™
 
From: $ 3.50
Playfield - Other
Rocket City Pinball
 
$ 69.00
Gameroom - Decorations
Pinball Pimp
 
$ 20.00
Cabinet - Decals
Pinball Haus
 
$ 19.00
Electronics
NO GOUGE PINBALL™
 
$ 109.99
Lighting - Led
Lighted Pinball Mods
 
$ 17.99
Eproms
Matt's Basement Arcade
 
$ 19.00
Boards
Tilted Pinball
 
$ 85.00
Cabinet - Other
Pinball Haus
 
$ 15.00
Playfield - Plastics
Pinball Haus
 
$ 22.50
Playfield - Decals
Pinball Haus
 
$ 225.00
Lighting - Interactive
Professor Pinball
 
Hey modders!
Your shop name here

You're currently viewing posts by Pinsider AlexRogan84.
Click here to go back to viewing the entire thread.

Reply

Wanna join the discussion? Please sign in to reply to this topic.

Hey there! Welcome to Pinside!

Donate to Pinside

Great to see you're enjoying Pinside! Did you know Pinside is able to run without any 3rd-party banners or ads, thanks to the support from our visitors? Please consider a donation to Pinside and get anext to your username to show for it! Or better yet, subscribe to Pinside+!


This page was printed from https://pinside.com/pinball/forum/topic/getaway-club-dispatch-run-a-make-on-license-plate-kingpin?tu=AlexRogan84 and we tried optimising it for printing. Some page elements may have been deliberately hidden.

Scan the QR code on the left to jump to the URL this document was printed from.