(Topic ID: 78179)

Getaway Club ~ Dispatch, run a make on license plate KINGPIN

By MrSanRamon

10 years ago


Topic Heartbeat

Topic Stats

  • 13,819 posts
  • 564 Pinsiders participating
  • Latest reply 3 hours ago by golfergordy
  • Topic is favorited by 297 Pinsiders

You

Linked Games

Topic poll

“Which S/W Version do you use?”

  • L1 22 votes
    6%
  • L2 179 votes
    51%
  • L3 11 votes
    3%
  • L5 120 votes
    34%
  • P7 9 votes
    3%
  • C-C 7 votes
    2%

(Multiple choice - 348 votes by 346 Pinsiders)

Topic Gallery

View topic image gallery

shooter repair4 (resized).jpg
shooter repair3 (resized).jpg
Shooter repair2a (resized).png
Shooter repair1 (resized).jpg
Disappearing post fix4 (resized).jpeg
Disappearing post fix3 (resized).jpeg
Disappearing post fix2 (resized).jpeg
Disappearing post fix1 (resized).jpeg
HSIIclear (resized).jpg
pasted_image (resized).png
Shooter rod (resized).jpg
DSC06633 (resized).JPG
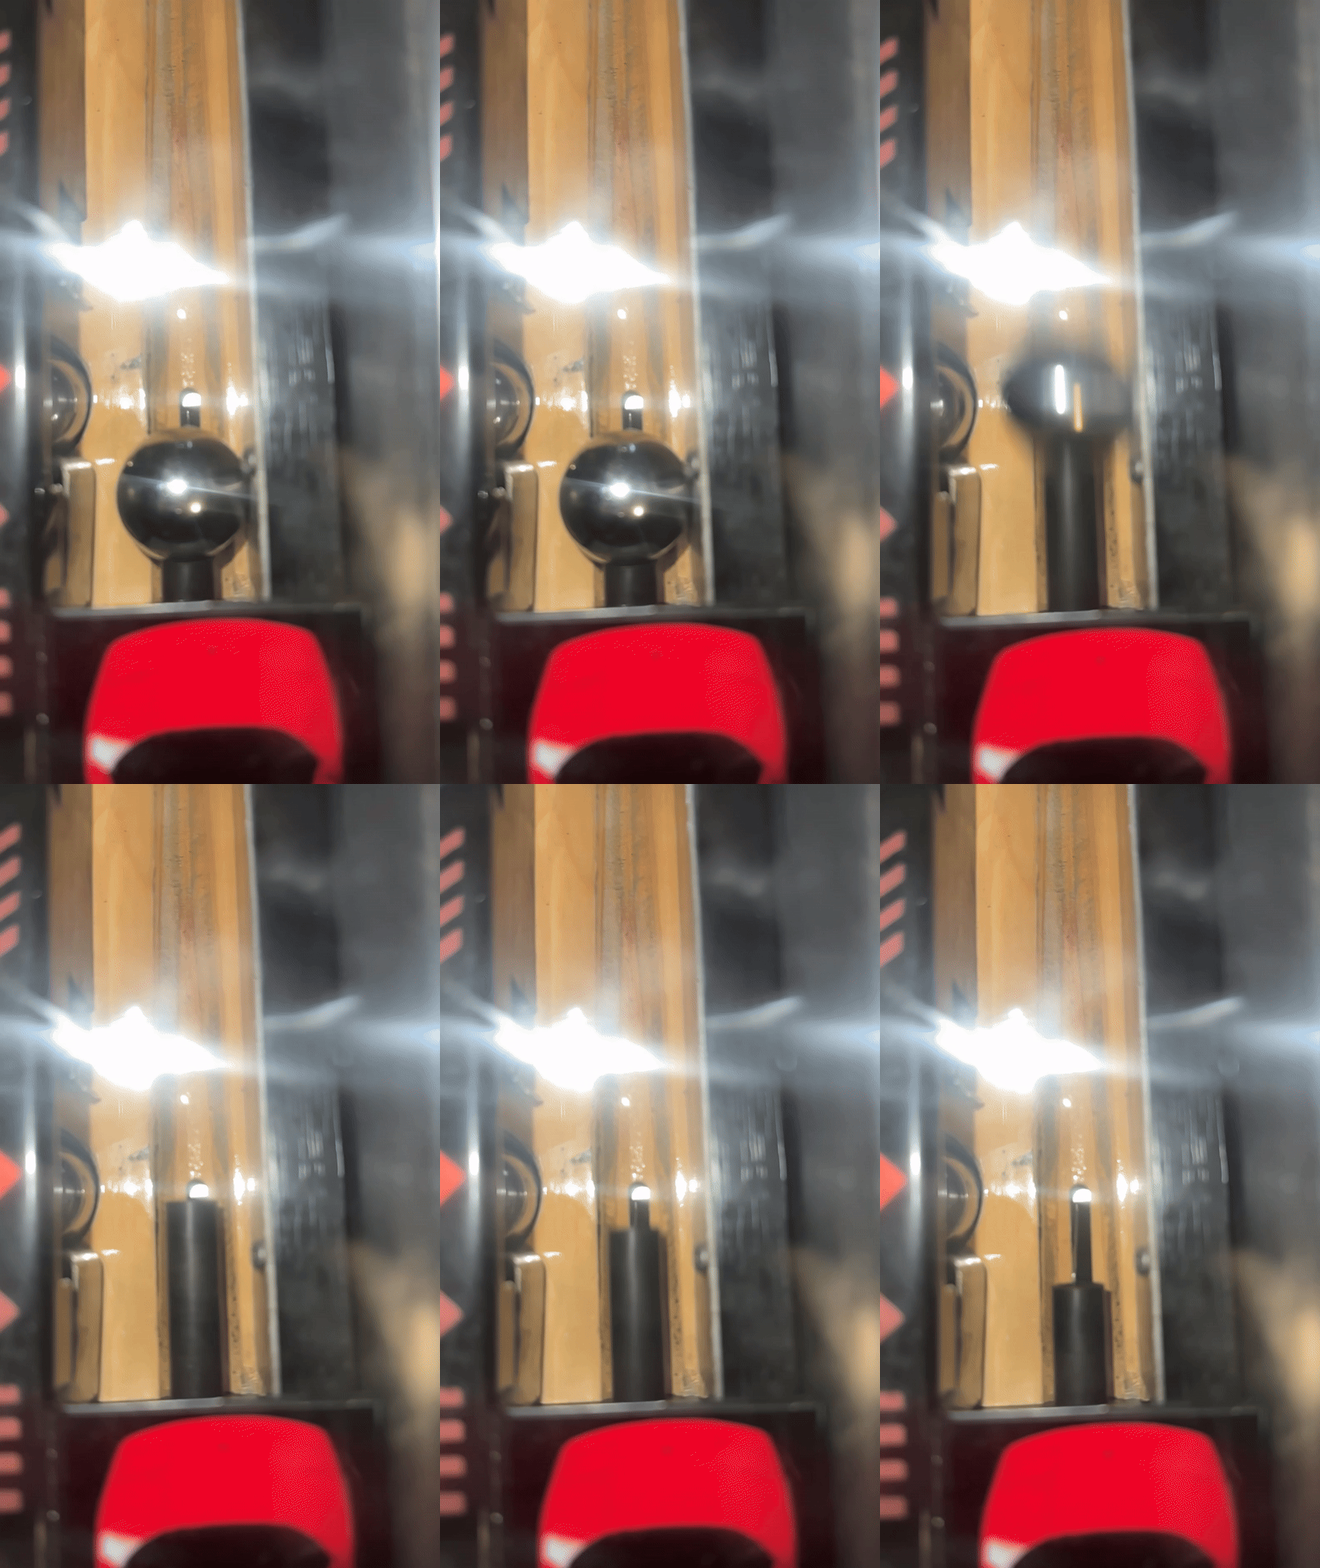
ezgif.com-video-to-gif-converter.gif
PXL_20240408_220306294 (resized).jpg
PXL_20240408_220311370 (resized).jpg
There are 13,819 posts in this topic. You are on page 198 of 277.
#9851 4 years ago
Quoted from Mr_Tantrum:

No, you will need the new version. As of a week or so ago, all of my orchestrations on the PinSound community site are now in the new format. Just re-download and install.

Thanks, I think I realized what I did. There are two files available when you click the download button and I picked the wrong file.

#9852 4 years ago
Quoted from Sleepy:

Thanks, I think I realized what I did. There are two files available when you click the download button and I picked the wrong file.

This is the only one like that. I’m trying to get them to clean up for me.

#9853 4 years ago

To anyone who has built a pinduino supercharger DIY kit have you found the need to trim the LED strip? I get some of them lighting, but not all in the length. The voltage at the end of the strip seems to be more than adequate with 4.81v being read.

Also, any tips for placing that LED strip inside the ring?

#9854 4 years ago
Quoted from sparksterz:

To anyone who has built a pinduino supercharger DIY kit have you found the need to trim the LED strip? I get some of them lighting, but not all in the length. The voltage at the end of the strip seems to be more than adequate with 4.81v being read.
Also, any tips for placing that LED strip inside the ring?

Yes, you trim it to length. I didnt have any issues with the entire strip lighting. For placing it inside, I put it flush with the top of the trough, and verified clearance with a ball. It was a very easy install.

#9855 4 years ago
Quoted from robertmee:

Yes, you trim it to length. I didnt have any issues with the entire strip lighting. For placing it inside, I put it flush with the top of the trough, and verified clearance with a ball. It was a very easy install.

Ditto. The LED strip should have cut lines on it, if I recall. I assume you purchased the LED strip with the adhesive backing? If not, you are going to need to use some double-sided tape (Scotch permanent will work well). Also, be sure to clean the inside top of the SC loop with alcohol before applying strip to ensure maximum adhesion.

When you say you got part of if lighting, how did you do that? If you actually ran it live with the Getaway program, the program only defines the first X number of LEDs (I don't remember exactly how many, and not where I can check it). This may explain why not all of the SMDs are illuminating on the uncut length.

#9856 4 years ago

I have it running right now by having the kit fully assembled and installed in my machine. I thought I had broken something, but in assembling an entire duplicate kit I get the same behavior which leads me to believe that my run of LEDs is just longer than the software works with. I haven't actually measured it out to see where the LEDs that are lit would line themselves on the inner track yet, I'll probably be doing that next and routing the wires.

#9857 4 years ago
Quoted from sparksterz:

I have it running right now by having the kit fully assembled and installed in my machine. I thought I had broken something, but in assembling an entire duplicate kit I get the same behavior which leads me to believe that my run of LEDs is just longer than the software works with. I haven't actually measured it out to see where the LEDs that are lit would line themselves on the inner track yet, I'll probably be doing that next and routing the wires.

The software will work with any # of lights (well, there is probably some limit). However, in my Pinduino Getaway program, I define the specific number of LEDs as 47 (must be the case that you define the number for the various running effects, etc. to work properly). My question would be if you cut where the lights stop working, would that leave you with 47? Also, is that the correct length to apply around the SC loop since it was for me and others?

#9858 4 years ago

Ah, yeah I just counted and my strip is definitely more than 47. That would explain it. Thanks!

#9859 4 years ago

Wow, feeling dumb right now...if I had just sized out the outside loop of the super charger with the LED strip in the first place it should have been obvious the amount of lit LEDs.

I did get it installed, I had to raise my strip just a hair above flush, but man is this a cool mod! Wish I did it years ago. No time like the present though!

#9860 4 years ago

The DIY kit is definitely the best bang for buck mod to this game.

#9861 4 years ago
Quoted from sparksterz:

Wow, feeling dumb right now...if I had just sized out the outside loop of the super charger with the LED strip in the first place it should have been obvious the amount of lit LEDs.
I did get it installed, I had to raise my strip just a hair above flush, but man is this a cool mod! Wish I did it years ago. No time like the present though!

Awesome, and glad you like it! Are you using my program or the default one?

#9862 4 years ago
Quoted from Mr_Tantrum:

Awesome, and glad you like it! Are you using my program or the default one?

I'm currently using your program. Only thing I wish I could change is to remove the idle animation from the video mode, by I'm guessing there's no way to read the signal for that.

#9863 4 years ago
Quoted from sparksterz:

I'm currently using your program. Only thing I wish I could change is to remove the idle animation from the video mode, by I'm guessing there's no way to read the signal for that.

Yeah, all of the events are triggered off of flashers. Would takes some additional hardware/connectivity development by Pinduino to anything beyond that.

#9864 4 years ago

So here is the recent addition to my Getaway: The CPR backglass. It not yet installed due to the old trimming being to tight for the 4mm glass. I will need to purchase the 3/16 " version and see how to make that work.

The colors are brilliant and the mirror looks very nice.

One drawback is the position of the image on the glass. It sits very low, so where the bottom will be covered by the trimming, the top will show a gap. Being completely honest - if it was not international shipping I would likely have it exchanged for this reason. But then again - I'm a perfectionist.

IMG_0211 (resized).JPEGIMG_0211 (resized).JPEG
#9865 4 years ago
Quoted from Kobaja:

So here is the recent addition to my Getaway: The CPR backglass. It not yet installed due to the old trimming being to tight for the 4mm glass. I will need to purchase the 3/16 " version and see how to make that work.
The colors are brilliant and the mirror looks very nice.
One drawback is the position of the image on the glass. It sits very low, so where the bottom will be covered by the trimming, the top will show a gap. Being completely honest - if it was not international shipping I would likely have it exchanged for this reason. But then again - I'm a perfectionist.[quoted image]

I bought the mirrored one a year to 2 years ago, cant remember it's been so long. This was before they changed the printing process and I really like it a lot. The colors are awesome but it's their version of the BG...

I bought the budget EATPM BG and it's really good too but I wish I had gotten the mirrored one when they had it available. Still a great upgrade, enjoy!

EDIT: you can see a bit of the light bleed on the Elvira because it's not 100% centered but it's still beautiful!

Backglass 2 (resized).jpgBackglass 2 (resized).jpgBackglass old vs new 2 (resized).jpgBackglass old vs new 2 (resized).jpg
#9866 4 years ago

I'm happy to present the Getaway Mountain Mod 2.0, now available for order on demand. Personally, I've never been a fan of the original mountain mod, as it just seemed too bulky and it kind of eats up the back right part of the playfield. Several months ago mjenison posted about a mountain he was working on, and I really liked his design and approach. He was nice enough to allow me to provide my input on the design as he progressed, and as a result we've decided to partner together to offer this mod.

This mod includes the following:
- Custom designed 3D printed mountain
- Internal lighting (LED strip with wiring and connectors to link into GI)
- Custom designed 3D mountain clear plastic to replace OEM version (cutout to allow for better view of mountain)

OPTIONAL: Spotlight with LED bulb and wiring with connectors to link into GI

Pricing is as follows:
- Mountain with internal lighting and custom clear plastic for supercharger loop = $100 (includes US shipping - outside US on a per quote basis)
- Spotlight with LED bulb and wiring: Add $10 to your order.

As always, PM me if you have any questions or would like to order. This and all my other Getaway mods can be found here: http://thezumwaltfamily.com/getawaypinball

Tunnel with Internal Lighting
IMG_2773.JPGIMG_2773.JPGIMG_2781.JPGIMG_2781.JPGIMG_2782.JPGIMG_2782.JPGIMG_2778.JPGIMG_2778.JPG

Custom Plastic
IMG_2775.JPGIMG_2775.JPG

With Spotlight
IMG_2777.JPGIMG_2777.JPGIMG_2779.JPGIMG_2779.JPG

Without Spotlight
IMG_2776.JPGIMG_2776.JPGIMG_2780.JPGIMG_2780.JPG

#9867 4 years ago

Wow, I'm really surprised by the responses I've received for the mountain mod. Just to let everyone know, I'm making them in the order I receive, so please be patient. I have lighting on order, and I'm researching how much it would be to have the plastics professionally produced. If cost prohibitive, then I will just make them by hand like I do all of my others. As a FYI, each mountain takes 24 hours just to print, then I have to paint the snow on top which is 3-4 coats but dries fast.

Also, I forgot to mention that the mountain I show is a darker brown than what the final versions will be. All I had at the time was a dark green filament, so I spray painted the mountain with whatever color brown I already had. The ones produced for sale will actually be more of a milk chocolate brown that is a much closer match to all of the brown on the plastics in the game. If you've ordered from me, and prefer the really dark brown (eventually, when I get a chance I'm actually going to replace mine with the new color), please let me know and I'm happy to paint your that color. I've attached a pic showing my first production mountain to give everyone a sense of the mountain color.

IMG_2793.JPGIMG_2793.JPG
#9868 4 years ago

First mountain just finished printing. Four more to go to finish out this first batch of orders.

IMG_2794.JPGIMG_2794.JPG
#9869 4 years ago
Quoted from Mr_Tantrum:

First mountain just finished printing. Four more to go to finish out this first batch of orders.[quoted image]

That does look like a mound of chocolate....yummy

#9870 4 years ago

Im putting that on wonka

#9871 4 years ago

I have some news for those of you who have purchased the new mountain mod 2.0. Honestly, one thing I was dreading was hand making all of the plastics that I decided to include with the mountains. I even ordered the material, but when I got it I realized I ordered the wrong thickness. So, I sent it back and that got me thinking about having the plastics professionally made (I've already handled the design work). Anyway, I have a fair quote from one place already, but today I also discovered a local company about 20 minutes from me that does this kind of work all the time. I should have their quote tomorrow so that I can make a decision who to go with. While it will definitely be a little more in cost (probably about $5 extra per order than I expected), I'm happy to absorb that. You will receive a professionally cut plastic, and I get to save hours of time working while sweating in a hot garage and getting plastic dust all over the place.

The lighting and wiring for this first batch of orders should be here by this weekend, so I think if things go as planned then I'm looking at mid-late next week for shipping out the entire first batch. After I finish these, I have some other orders to fulfill since these are consuming all of my print time, but after things clear up I'll be ready for some one-offs for those of you who may still be on the fence waiting to see how they look in everyone's games.

Just rolled #3 off the printer & starting #4. FYI, for those who thought I might be exaggerating, look at the print time remaining on the printer's LCD screen for this model that I just started.
IMG_2807.JPGIMG_2807.JPG

#9872 4 years ago

So I've posted a few times over the last couple of years about ideas of how to fix my coin door holes. People shared some ideas, but nothing offered was something I wanted to undertake. As a result, I've gone on with life being bugged by it every time I play the game or even walk by the machine. I don't know why it didn't hit me sooner, but I tonight I figured why not make a decal to cover that area? . . . so I did. Not sure if this is a unique problem to me, but if anyone else is interested in the decal I will sell it for $10 shipped to US (pm me if interested).
IMG_2811.JPGIMG_2811.JPGIMG_2812.JPGIMG_2812.JPGIMG_2815.JPGIMG_2815.JPGIMG_2814.JPGIMG_2814.JPG

#9873 4 years ago
Quoted from Mr_Tantrum:

So I've posted a few times over the last couple of years about ideas of how to fix my coin door holes. People shared some ideas, but nothing offered was something I wanted to undertake. As a result, I've gone on with life being bugged by it every time I play the game or even walk by the machine. I don't know why it didn't hit me sooner, but I tonight I figured why not make a decal to cover that area? . . . so I did. Not sure if this is a unique problem to me, but if anyone else is interested in the decal I will sell it for $10 shipped to US (pm me if interested).
[quoted image][quoted image][quoted image][quoted image]

I have the exact same problem. More pinball money

#9874 4 years ago

Thought I would give a brief update to all of you mountaineers (i.e. those who have ordered the Getaway mountain that mjenison and I are offering). Anyway, the initial batch is up to 8 and I've literally spent the last 8 days doing nothing on my printer but generating mountains. I'm on my second spool of brown filament, but thus far every print has come out perfect.

I've also been struggling for an entire week to get a couple of quotes on making the custom plastic for me that I'm including with the mod. I finally received all of the info today that I needed to make a decision, but it was already after 5:00 when I contacted the supplier with my intent to move forward. Hopefully, I'll get a confirmation tomorrow and an idea of what the timeline will be. Once I know, then I will let the group know as this will be the deciding factor for when I'll be able to ship out mountains to everyone who is in this initial batch.

Finally, I have all of the lighting ordered, but for some reason the post office is taking there sweet time. Package should have been here last Friday, but it's been sitting in some postal warehouse here in town instead of making its way to my house. This has happened before, and I'm confident I will receive the lighting before the plastics make it too me, so we'll be okay there.

To everyone else who has ordered 3D items besides mountains, you are next in queue and I should be able to get started on your stuff sometime on Wednesday. I'll make everything as quickly as I can, but realistically I'm probably looking at early next week before I'm able to ship all of the current orders.

#9875 4 years ago
Quoted from Mr_Tantrum:

the custom plastic for me that I'm including with the mod

was tere a photo of that somewhere? did i miss it?

#9876 4 years ago
Quoted from Kobaja:

was tere a photo of that somewhere? did i miss it?

View the pics here: https://pinside.com/pinball/forum/topic/getaway-club-dispatch-run-a-make-on-license-plate-kingpin/page/198#post-5226898

It replaces the original mountain plastic with the graphic on it.

#9877 4 years ago
Quoted from Mr_Tantrum:

It replaces the original mountain plastic with the graphic on it.

Ahh... The clear one. OK, that makes sense.
I was thinking about the one the mountain sits on. Because there I have a problem. I'm using pinbits' protector plastics which are adding thickness. This results in the nuts barely biting into the threading on the posts. Considering needing to put the mountain on top of that will surely not let the nuts bite anymore. For me this is why I am hesitant to buy the mod - it would mean I need to remove the protector plastics.

#9878 4 years ago

BTW I just posted a review with photos of the CPR full mirrored backglass for "High Speed 2: The Getaway". Enjoy the read

https://pinside.com/pinball/forum/topic/review-cpr-backglass-for-high-speed-2-the-getaway

#9879 4 years ago
Quoted from Kobaja:

Ahh... The clear one. OK, that makes sense.
I was thinking about the one the mountain sits on. Because there I have a problem. I'm using pinbits' protector plastics which are adding thickness. This results in the nuts barely biting into the threading on the posts. Considering needing to put the mountain on top of that will surely not let the nuts bite anymore. For me this is why I am hesitant to buy the mod - it would mean I need to remove the protector plastics.

Yes, I’m betting you would have to replace the two posts with ones that had longer threads.

#9880 4 years ago

Thought I would show off my new addition to the lineup. I arranged them with the taller in the middle for symmetry, but the first thing my son said was that it looked like a traffic light - red, yellow, green. Even how my pins are arranged is an homage to my beloved first Getaway.
IMG_7981.jpgIMG_7981.jpg

I also think it is kind of funny in that I don't have a single manual plunger - probably one of the most iconic things about pinball. I have a gear shift, a gun trigger, and a push button. Oh well, one of these days.

#9881 4 years ago

Congrats on number 3! No 4 is not too far off.

#9882 4 years ago
Quoted from pinballjah:

Congrats on number 3! No 4 is not too far off.

Well, I think #4 would be a replacement for the wife (not something I want to do), as she pretty much told me point blank that 3 is all we have room for.

#9883 4 years ago
Quoted from Mr_Tantrum:

be a replacement for the wife

as long as your wife has two buttons to push, a nice backbox and decent shaker, i don't think an upgrade is necessary. lol. sorry - i couldn't resist...

#9884 4 years ago
Quoted from Mr_Tantrum:

Well, I think #4 would be a replacement for the wife (not something I want to do), as she pretty much told me point blank that 3 is all we have room for.

3 is a good number, I've come to that conclusion for myself only, sure I could probably squeeze 5 into my space but I'm happy with 3. I can swap out one for another if I choose, like I did with my PZ for TS. At this point I'm pretty happy with the pins that I have, maybe would consider changing out my Getaway for a GB, maybe... only thing that could change that is if I find a crazy deal on a project pin, as that is a part I really enjoy, bringing back a beater to it's former glory. Enjoy!

#9885 4 years ago
Quoted from tiltmonster:

3 is a good number, I've come to that conclusion for myself only, sure I could probably squeeze 5 into my space but I'm happy with 3. I can swap out one for another if I choose, like I did with my PZ for TS. At this point I'm pretty happy with the pins that I have, maybe would consider changing out my Getaway for a GB, maybe... only thing that could change that is if I find a crazy deal on a project pin, as that is a part I really enjoy, bringing back a beater to it's former glory. Enjoy!

That’s what I thought until I got number 4 and now up to 8.

#9886 4 years ago
Quoted from Mr_Tantrum:

Well, I think #4 would be a replacement for the wife (not something I want to do), as she pretty much told me point blank that 3 is all we have room for.

Looks like there is some room just to the right....

#9887 4 years ago
Quoted from pinballjah:

That’s what I thought until I got number 4 and now up to 8.

I know famous last words but deals aren't what they were when I started so getting something that needs some tlc for a good price is getting harder to find. I don't need a NIB because I like working on the machines, that's part of the hobby for me, so I'm ok finding a pin that has been routed but that has nothing to do with the space I've dedicated to my line up.

#9888 4 years ago
Quoted from okgrak:

Looks like there is some room just to the right....

I wish, but that would completely block the entrance to the door. I might not mind being captive in there, but I could see other issues arising.

#9889 4 years ago

I have a mountain update for all current orders. I just received alert that the plastics have been made and are on their way to me. In the end I chose CPR for both price and reputation. Tracking shows they will arrive on 10/15, so if everything is on time I'll be shipping all current orders mid-next week. I also received all of the lighting today, so that just leaves me with painting the snow peaks and applying a satin clearcoat. I'll get that done by the end of this weekend. FYI, I did purchase a few extra plastics (5 of them), so I'll have a few for any follow-up orders from those of you who may be on the fence or waiting to see what others think before you decide.

#9890 4 years ago

I thought that I’ve asked this before but can’t seem to find it, so I apologize if redundant.

I have an intermittent issue where the left flipper drops at times, but continues to work almost immediately when I repress the flipper button. In other words, I might be cradling the ball and the flipper will just go limp, but I can repress the button and it works (sometimes it takes a few presses). Other times I might press the left button during play and the flipper won’t fire immediately.

Is this most likely just a leaf switch adjustment? Something I’ve been slow to address, but now that I’ve had friends over a couple of times to play, it is kind of embarrassing.

#9891 4 years ago

Need Help !!! I picked up a Getaway and the the game had a fire in upper cabinet
It was swapped out but no beacon, I found the entire assembly but I don’t know size of hole to drill or location
Any help greatly appreciated

#9892 4 years ago
Quoted from Mr_Tantrum:

I thought that I’ve asked this before but can’t seem to find it, so I apologize if redundant.
I have an intermittent issue where the left flipper drops at times, but continues to work almost immediately when I repress the flipper button. In other words, I might be cradling the ball and the flipper will just go limp, but I can repress the button and it works (sometimes it takes a few presses). Other times I might press the left button during play and the flipper won’t fire immediately.
Is this most likely just a leaf switch adjustment? Something I’ve been slow to address, but now that I’ve had friends over a couple of times to play, it is kind of embarrassing.

I would clean the contacts of the leaf switch and make sure the is no pitting on the contacts to make sure there is a solid connection. You can use a multimeter set to continuity and test depressing the flipper button to see if it is indeed a leaf switch issue.

#9893 4 years ago

Need help on a repair issue. The display was not working correctly, all the pixels would eventually light, but the images and numbers were sporadic. Then the other day, the display was working correctly, I could go thorough the test menu and see what i was doing, but later in the day, the screen starting losing pixels again. I figured that the display kind of works, must be the display board, so I ordered a rottendog DMD089 board. It finally came in today, i put it in and nothing, machine will not turn on. I double checked wires, connectors, etc. The -125VDC test point on the RD board measured -147 V, which is way more then +/- 5% that i would think would be tolerable. I removed the RD board and put the old one back in and now the machine is fine, well it works, still have sporadic display, but it plays. With the old board, all the voltages are fairly close.

Is there anything special to installing a DMD089 board? Do i need to adjust some trim pots for voltage adjustments? I thought it was slap it in and off you go type of thing. I have no clue on which way to proceed.

#9894 4 years ago
Quoted from Mr_Tantrum:

I have an intermittent issue where the left flipper drops at times, but continues to work almost immediately when I repress the flipper button. In other words, I might be cradling the ball and the flipper will just go limp, but I can repress the button and it works (sometimes it takes a few presses). Other times I might press the left button during play and the flipper won’t fire immediately.
Is this most likely just a leaf switch adjustment? Something I’ve been slow to address, but now that I’ve had friends over a couple of times to play, it is kind of embarrassing.

There is a thread about similar symptoms where the gold plated cabinet flipper switch has been replaced by tungsten heavy duty switches. I have something similar on my right hand switches , which I had replaced because they were damaged when I bought the machine. I am about to(when I have finished moving house!) replace the switch with the low voltage switch.

#9895 4 years ago

Sometimes the wood in between the leaf contacts can fall apart causing an issue or as mentioned before, they aren't making proper contact, it's a good starting point...

#9896 4 years ago
Quoted from jtmirolli:

Need help on a repair issue. The display was not working correctly, all the pixels would eventually light, but the images and numbers were sporadic. Then the other day, the display was working correctly, I could go thorough the test menu and see what i was doing, but later in the day, the screen starting losing pixels again. I figured that the display kind of works, must be the display board, so I ordered a rottendog DMD089 board. It finally came in today, i put it in and nothing, machine will not turn on. I double checked wires, connectors, etc. The -125VDC test point on the RD board measured -147 V, which is way more then +/- 5% that i would think would be tolerable. I removed the RD board and put the old one back in and now the machine is fine, well it works, still have sporadic display, but it plays. With the old board, all the voltages are fairly close.
Is there anything special to installing a DMD089 board? Do i need to adjust some trim pots for voltage adjustments? I thought it was slap it in and off you go type of thing. I have no clue on which way to proceed.

Sometimes display issues are as simple as reconnecting the ribbon cable or replacing the ribbon cable, I have very little experience with RD boards

#9897 4 years ago
Quoted from tiltmonster:

Sometimes display issues are as simple as reconnecting the ribbon cable or replacing the ribbon cable, I have very little experience with RD boards

Think I might have found the problem on the new RD board. For you technical people, the 100VAC on J605 feeds a bridge rectifier that then runs through a LM337 voltage regulator for the -125 volts, then thru another LM337 for the -115. I'm getting low voltage out of the first regulator so everything down the line is going to be low also. I'm also getting different voltage readings from the test point on the board and the J604 plug, so it is losing voltage somewhere along the line.

Maybe someone has run across this one in the past...

#9898 4 years ago
Quoted from whitey:

Need Help !!! I picked up a Getaway and the the game had a fire in upper cabinet
It was swapped out but no beacon, I found the entire assembly but I don’t know size of hole to drill or location
Any help greatly appreciated

I tried to look for you, but I cannot tell what size the hole needs to be as it is covered by the motor assemply. Looks like you'll just need to get the assembly and figure out from that. However, there is a large recess in the top of the backbox that is just large enough for the beacon cover to fit down into. Then a couple of metal tabs are used to secure it in place.

IMG_2862 (resized).JPGIMG_2862 (resized).JPGIMG_2863 (resized).JPGIMG_2863 (resized).JPG
#9899 4 years ago
Quoted from tiltmonster:

Sometimes the wood in between the leaf contacts can fall apart causing an issue or as mentioned before, they aren't making proper contact, it's a good starting point...

Took a look, and everything is beautiful (I've done a complete rebuild within the last year or so). However, one of my wire bundles soldered to one of the leaf switch leads was a little loose. A quick re-soldier, and a game to test, and I did not experience the issue. Hopefully then resolved the issue and nothing more serious that randomly rears itself.

#9900 4 years ago
Quoted from KJS:

The piece goes over the opto on the ramp

Yo, sorry man can you post a picture ? I have look at all the opto on the Ramp and it does not seem to fit. Its doing my head in

Promoted items from Pinside Marketplace and Pinside Shops!
$ 19.00
Electronics
NO GOUGE PINBALL™
 
$ 9.95
Eproms
Pinballrom
 
$ 225.00
Lighting - Interactive
Professor Pinball
 
$ 40.00
Wanted
Machine - Wanted
Fort Lauderdale, FL
From: $ 209.00
$ 30.00
Playfield - Toys/Add-ons
G-Money Mods
 
From: $ 3.50
Playfield - Other
Rocket City Pinball
 
$ 35.00
Cabinet - Other
Rocket City Pinball
 
4,025 (OBO)
Machine - For Sale
San Diego, CA
$ 19.00
Boards
Tilted Pinball
 
$ 69.00
Gameroom - Decorations
Pinball Pimp
 
$ 65.00
Playfield - Toys/Add-ons
G-Money Mods
 
$ 10.00
Playfield - Plastics
Pinball Haus
 
$ 9.95
Eproms
Pinballrom
 
$ 329.99
Lighting - Other
Lighted Pinball Mods
 
$ 109.99
Lighting - Led
Lighted Pinball Mods
 
From: $ 100.00
Playfield - Toys/Add-ons
G-Money Mods
 
$ 17.99
Eproms
Matt's Basement Arcade
 
$ 20.00
$ 70.00
Playfield - Toys/Add-ons
RobTune
 
$ 22.50
Playfield - Decals
Pinball Haus
 
5,000
Machine - For Sale
Mesa, AZ
$ 20.00
Playfield - Plastics
G-Money Mods
 
$ 85.00
Cabinet - Other
Pinball Haus
 
$ 75.00
Playfield - Toys/Add-ons
G-Money Mods
 
Trade
Great pinball charity
Pinball Edu
There are 13,819 posts in this topic. You are on page 198 of 277.

Reply

Wanna join the discussion? Please sign in to reply to this topic.

Hey there! Welcome to Pinside!

Donate to Pinside

Great to see you're enjoying Pinside! Did you know Pinside is able to run without any 3rd-party banners or ads, thanks to the support from our visitors? Please consider a donation to Pinside and get anext to your username to show for it! Or better yet, subscribe to Pinside+!


This page was printed from https://pinside.com/pinball/forum/topic/getaway-club-dispatch-run-a-make-on-license-plate-kingpin/page/198?hl=ajnin and we tried optimising it for printing. Some page elements may have been deliberately hidden.

Scan the QR code on the left to jump to the URL this document was printed from.