(Topic ID: 78179)

Getaway Club ~ Dispatch, run a make on license plate KINGPIN

By MrSanRamon

10 years ago


Topic Heartbeat

Topic Stats

  • 13,819 posts
  • 564 Pinsiders participating
  • Latest reply 5 days ago by golfergordy
  • Topic is favorited by 297 Pinsiders

You

Linked Games

Topic poll

“Which S/W Version do you use?”

  • L1 22 votes
    6%
  • L2 179 votes
    51%
  • L3 11 votes
    3%
  • L5 120 votes
    34%
  • P7 9 votes
    3%
  • C-C 7 votes
    2%

(Multiple choice - 348 votes by 346 Pinsiders)

Topic Gallery

View topic image gallery

shooter repair4 (resized).jpg
shooter repair3 (resized).jpg
Shooter repair2a (resized).png
Shooter repair1 (resized).jpg
Disappearing post fix4 (resized).jpeg
Disappearing post fix3 (resized).jpeg
Disappearing post fix2 (resized).jpeg
Disappearing post fix1 (resized).jpeg
HSIIclear (resized).jpg
pasted_image (resized).png
Shooter rod (resized).jpg
DSC06633 (resized).JPG
ezgif.com-video-to-gif-converter.gif
PXL_20240408_220306294 (resized).jpg
PXL_20240408_220311370 (resized).jpg
There are 13,819 posts in this topic. You are on page 166 of 277.
#8251 5 years ago
Quoted from Mancave:

This is essentially the same method as polishing your stainless ball guides/anything stainless to a mirror finish (very close to mirror anyway) only difference being that the grit level is much lower down the scale. So if they have ball trails (most older ones will have) you would start at about 80 -100 (i use wet and dry paper and sand wet, cleaning as you go) to level out then gradually work your way up through the levels of grit to about 2000 or 2500 and then polish up with a calico wheel and a compound followed by a buffing wheel to finish with. The higher grit number you go to the better the finish after using the calico wheel and compound. Great guide flynnibus TY!!. Thought it would be timely to add this info also for those that may consider polishing their ball guides. I haven't got any photos at the moment to show the end result BUT i must say they come up very nice and makes a huge difference to the overall look.

Yup... but as you say, the grits are far less. I usually do emery paper if I have deep ball wear to clean out... and finish at about 600 grit if I want the grained stainless look. Going 600, 800, up to 1000 or 1500 should give you a really glossy look. But with the heavy grits, it's really important to sand in STRAIGHT lines... else you'll be fighting your own work a lot more.

But honestly I'm not a fan of the mirror finished guides for two reasons. 1) I prefer the factory gained look 2) Ball wear comes back within days or weeks of play... 3) the polished stuff shows fingerprints, etc more

I just sand out heavy ball wear if needed, move up to 320... maybe 600... and just use green polish on the tight cotton wheel on the buffer wheel. This gives me a polish level that is great, but requires very little effort.. so having it ruined with play, isn't a big deal.

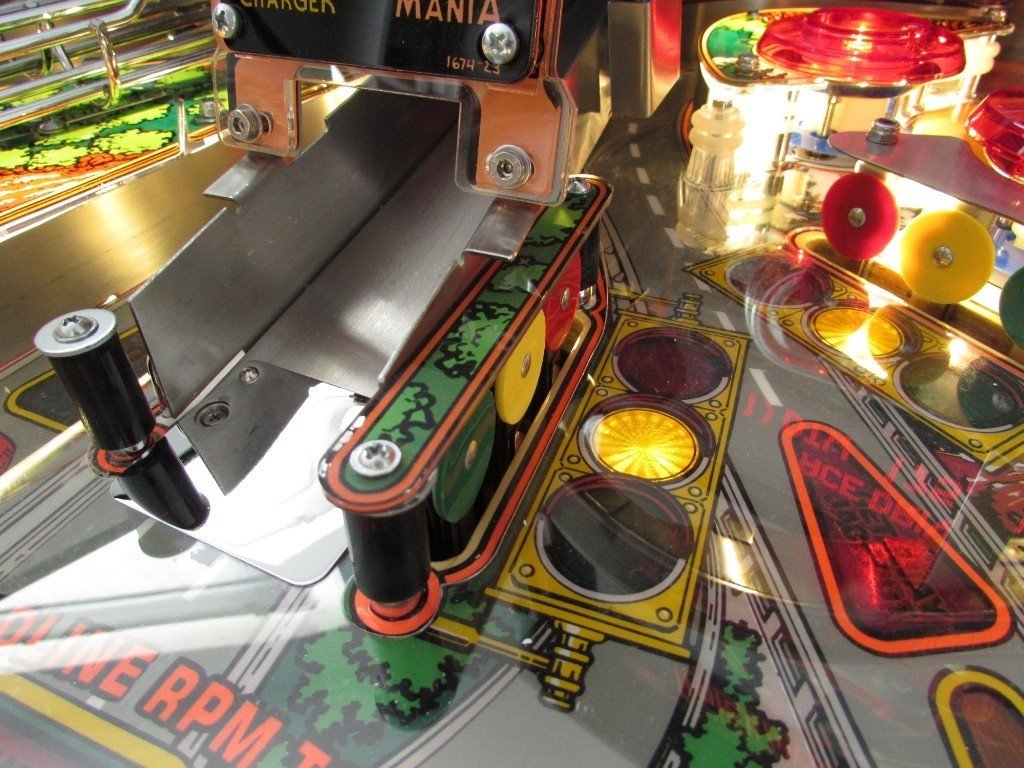
Like this guide... I don't think I even sanded this one.. just used the buffer wheel.

Image uploaded from iOS (3) (resized).jpgImage uploaded from iOS (3) (resized).jpg
Image uploaded from iOS (2) (resized).jpgImage uploaded from iOS (2) (resized).jpg

I've shied away from sanding on ramps/etc because it's so hard to get a uniform finish into the corners, etc.

#8252 5 years ago
Quoted from flynnibus:

I considered 'frosting' the inside of mine to make the beacon itself less visible.

How would you do this, glass beading?

#8253 5 years ago
Quoted from GRUMPY:

How would you do this, glass beading?

just sand with a high grit... like 1000 or 1500

#8254 5 years ago

Anyone know what this plastic is in the CPR set? I assume it's for some of the extras they had included... but no idea how it would be used

unknown (resized).jpgunknown (resized).jpg

#8255 5 years ago
Quoted from flynnibus:

Anyone know what this plastic is in the CPR set

It's for the 'feet' of that plastic assembly above the super charger ramp entrance. The one that had the two Lanka for refline mania and super charger

#8256 5 years ago
Quoted from Kobaja:

It's for the 'feet' of that plastic assembly above the super charger ramp entrance. The one that had the two Lanka for refline mania and super charger

Ok, the ramp sign... but no idea how it would be used?

#8259 5 years ago

When the ball drains and the screen says bonus, the trough try’s to kick a ball. Not the eject butnone of the ones under he apron. It will make the sound of the bonus again and try to kick another ball under the trough. No switch errors.. is it likely an adj or bad switch

#8260 5 years ago

Maybe getting a bounce back? Is the wire gate intact?

#8261 5 years ago

I haven't removed the apron.. and I didn't think of that will check
thanks

#8262 5 years ago

Shows off my custom ramp target bank plastic - I love it!

Surprised you didn't create the custom plastic for the center bank (to each his own, but I think it looks better than the original silver metal piece).

#8263 5 years ago

Does anyway know if there has been a real way to fix endless multiball. I got it for the first time, at first thought it was a midnight madness type thing. I found an old thread on it but it didn’t seem like there was definite fix?

#8264 5 years ago

Does it happen a lot to you? I think I’ve only had it happen once... and I just power cycled. It hurt to throw away a decent game but thems the breaks.

#8265 5 years ago

It has only happened once. But haven’t had the game too long. I figured if there was a way to eliminate it I wanted to do so and avoid any other problems

#8266 5 years ago
Quoted from Mr_Tantrum:

Surprised you didn't create the custom plastic for the center bank (to each his own, but I think it looks better than the original silver metal piece).

The center target one I have laying here, but it is too thick to allow enough threading to stick out for the nut to catch on to. I even have a custom made thinner metal plate, but even with that there's no way.

#8267 5 years ago
Quoted from Kobaja:

The center target one I have laying here, but it is too thick to allow enough threading to stick out for the nut to catch on to. I even have a custom made thinner metal plate, but even with that there's no way.

Then someone has substituted the wrong post. The correct post has a longer threaded top... like 3/8 or more tall. Its taller than the normal threaded too post... and afaik... Not currently available.

I had the metal plate and plastic and tons of thread above the nut

#8268 5 years ago
Quoted from Kobaja:

The center target one I have laying here, but it is too thick to allow enough threading to stick out for the nut to catch on to. I even have a custom made thinner metal plate, but even with that there's no way.

Quoted from flynnibus:

Then someone has substituted the wrong post. The correct post has a longer threaded top... like 3/8 or more tall. Its taller than the normal threaded too post... and afaik... Not currently available.
I had the metal plate and plastic and tons of thread above the nut

You definitely have the wrong post. This should not be a issue at all (at lease wasn't for me nor the several others for whom I made these plates for).

#8269 5 years ago
Quoted from Mr_Tantrum:

You definitely have the wrong post.

Does someone have part number of the correct post? I'd love to complete my baby properly.

#8270 5 years ago
Quoted from Kobaja:

Does someone have part number of the correct post? I'd love to complete my baby properly.

Oddly enough, now that I've researched I remember that I had to replace my post. Read around these posts:
https://pinside.com/pinball/forum/topic/getaway-club-dispatch-run-a-make-on-license-plate-kingpin/page/67#post-3407620
https://pinside.com/pinball/forum/topic/getaway-club-dispatch-run-a-make-on-license-plate-kingpin/page/115#post-3698997

The post doesn't exist anymore, but TheOnlyest led me to an alternative.

#8271 5 years ago

My DMD went from not working intermittently to not working at all.

Looks like a color DMD just got moved up to the top of the priority list.

#8272 5 years ago
Quoted from Pinless:

My DMD went from not working intermittently to not working at all.
Looks like a color DMD just got moved up to the top of the priority list.

Have you made sure it is the dmd and not the power supply to the dmd or bad ribbon cable?

#8273 5 years ago
Quoted from chubtoad13:

Have you made sure it is the dmd and not the power supply to the dmd or bad ribbon cable?

I think it may be the driver(?) board (top right in the back box). It looks pretty toasty near the bottom.

I haven’t tested the ribbon cables, I’m not quite sure how to go about doing that.

1603637E-ED6F-4043-A0D4-3E27825F42D7 (resized).jpeg1603637E-ED6F-4043-A0D4-3E27825F42D7 (resized).jpeg3C5AC5EC-EC8B-4006-AEF5-2CE60A25B649 (resized).jpeg3C5AC5EC-EC8B-4006-AEF5-2CE60A25B649 (resized).jpeg
#8274 5 years ago
Quoted from Pinless:

I think it may be the driver(?) board (top right in the back box). It looks pretty toasty near the bottom.
I haven’t tested the ribbon cables, I’m not quite sure how to go about doing that.[quoted image][quoted image]

Yeah, that DMD Driver board looks like it may need some work, you could try to repair it or replace it but the ColorDMD does not use the power from this board. If it were me, I'd still repair or replace it before I dropped $400 on a new ColorDMD.

#8275 5 years ago
Quoted from Pinless:

It looks pretty toasty near the bottom.

https://www.pinballlife.com/index.php?p=product&id=2828

This is a nice fix if the board is to far gone.

#8276 5 years ago

I’ve never seen this option, thanks for the link.

#8277 5 years ago

It’s not much more to just replace the whole board. Although I guess that’s a nice solution in a pinch.

#8278 5 years ago
Quoted from gunstarhero:

It’s not much more to just replace the whole board. Although I guess that’s a nice solution in a pinch.

Agreed. If you don't know what's wrong with your board, or don't know how to repair it, then it's probably best to send it out for repair or buy as new one; why take a chance and spend the money if you're unsure.

#8279 5 years ago

I got the xpin replacement. Seems like a major upgrade to me. Less flickering with my led based DMD than the original.

#8280 5 years ago

I''m posting this to help other owners who may be experiencing the same problem. My Getaway has been driving me crazy. I've had it a few months and I love it, but....it been one thing after another. The latest problem was the divertor operating slowly so that if the pinball travelled fast, the divertor gate would operate when the ball passed thus missing the supercharger. I tried everything. I readjusted the divertor shaft thinking that would solve the problem. I changed the divertor coil. I changed two transistors, Q82 and Q56. I even ordered a new gate even though my old one appears fine. Finally tonight my brother suggested a very simple solution...put a screw in the plastic behind the divertor thereby limiting the space it had to cover to open the supercharger. Problem fixed...

Maurizio

IMG_20180813_001305 (resized).jpgIMG_20180813_001305 (resized).jpg
#8281 5 years ago

Wow something that simple but I still wonder what the problem is.

#8282 5 years ago

Ok... I'm here to join the club.
I picked up a Getaway a few days ago... Super dirty but ok playfield... Faded cabinet... It is almost white on one side... What should be red.

I've got one question...
What are these two connectors for... Marked in the attached picture?
I traced one of them back to j110 but I can't figure out what they are good for?

And another question.... On startup the game says "Shifter error".... But the shifter works fine!? (Switch test)
What could be the reason? Any hints?Defective diodes on the switches?

pixlr_20180813202018174 (resized).jpgpixlr_20180813202018174 (resized).jpg
#8283 5 years ago

I got a shifter error to go away by doing a factory reset in the settings menu. Only time I ever saw it was after I transported the game to my house when I first bought it.

#8284 5 years ago

Thanks for the hint.... But....
I already did a factory reset...did not help

#8285 5 years ago
Quoted from OlliG:

Ok... I'm here to join the club.
I picked up a Getaway a few days ago... Super dirty but ok playfield... Faded cabinet... It is almost white on one side... What should be red.
I've got one question...
What are these two connectors for... Marked in the attached picture?
I traced one of them back to j110 but I can't figure out what they are good for?
And another question.... On startup the game says "Shifter error".... But the shifter works fine!? (Switch test)
What could be the reason? Any hints?Defective diodes on the switches?[quoted image]

Those connectors are not used, there were some games that used them but not this one.

I had a shifter error, I think it cleared when I did a switch test or a solenoid test for the shifter, mine worked too but it was annoying.

Welcome!

EDIT: Clarification, those connectors are for flipper switches but not used on the Getaway

#8286 5 years ago
Quoted from maur:

I''m posting this to help other owners who may be experiencing the same problem. My Getaway has been driving me crazy. I've had it a few months and I love it, but....it been one thing after another. The latest problem was the divertor operating slowly so that if the pinball travelled fast, the divertor gate would operate when the ball passed thus missing the supercharger. I tried everything. I readjusted the divertor shaft thinking that would solve the problem. I changed the divertor coil. I changed two transistors, Q82 and Q56. I even ordered a new gate even though my old one appears fine. Finally tonight my brother suggested a very simple solution...put a screw in the plastic behind the divertor thereby limiting the space it had to cover to open the supercharger. Problem fixed...
Maurizio[quoted image]

I'm not sure what's going on there and it's difficult to tell what you did because of the glare on the glass but there is a set screw that holds the diverter in place, it's a real MF'er to get to and to work on but I had to make an adjustment to mine a while back. I'll be honest, it took a very long time to get it set to the right spot and I probably should have switched out the coil, sleeve and spring at that time because that's an annoying part of the game to repair.

#8287 5 years ago

You're right Tiltmonster there is a set screw that holds the divertor but it was really difficult to adjust to the right position. When I took everything apart I found that there was alot of slack in the shaft and entire assembly was wonky. I tried to order it put I was told it was not available. Here is a better picture of the solution I found. It reduces the distance the divertor has to travel to engage the supercharger. In case someone else is having the same problem

Maurizio

IMG_20180813_223403 (resized).jpgIMG_20180813_223403 (resized).jpg
#8288 5 years ago
Quoted from OlliG:

Thanks for the hint.... But....
I already did a factory reset...did not help

Shifter error is rather normal. Those errors are displayed when a switch isn't used for a while. Since any user will typically use only one direction of the shifter, the other switch will be unused and cause the error

#8289 5 years ago

More Getaway trouble... started a game this morning and the Supercharger wasn’t working. Diverter works in test but all opto switches on the Supercharger are dead. Reseated all the connectors on the Supercharger board under the PF and restarted and now getting a check fuses 114 and 115 error. Huh. Fuses test good. Game still boots and plays a game and Supercharger still doesn’t work. Tried disconnecting the Supercharger and rebooting again and no change, check 114 and 115, game will still start and play.

Game has a new cpu board and a recently serviced driver board. Seems like all the usual LEDs are lit.

Any ideas?

Little update: had a broken wire at J212 causing switch 24 always closed to be open, that seems to have fixed the check 114 and 115 message. Supercharger still not working, also noticed the left bank of white targets 86 - 88 are also non responsive.

Another update: That J212 connector is a wreck, gonna replace it totally and see if that solves any issues.

#8290 5 years ago
Quoted from Kobaja:

Shifter error is rather normal. Those errors are displayed when a switch isn't used for a while. Since any user will typically use only one direction of the shifter, the other switch will be unused and cause the error

Good call, I think that simple trick is the answer +1

#8291 5 years ago

Okay more weirdness:

Managed to piece J212 back together. That seemed to solve the switch 24 issue. Started chasing the issue with all the supercharger optos and the l bank targets. As I was going through a switch test I heard a boop and all the optos came on. Started testing them and they work. Started testing the l bank and one triggers as opto 1 and the optos all go out again. A couple seconds later they come back on. Mash the l bank for awhile and try to recreate the error and nothing. Okay well, that’s odd.

Start a game to test the supercharger with a ball... and no sound at all. No music, no effects, and no test tones when you exit the game.

Tested fuses on the sound board, reseated all connectors and ribbon cables, no change.

What in the world is going on here? This is a game that was working fine until yesterday?!?

#8292 5 years ago
Quoted from gunstarhero:

Tested fuses on the sound board, reseated all connectors and ribbon cables, no change.

What in the world is going on here? This is a game that was working fine until yesterday?!?

Could still be a ribbon cable issue perhaps?? Going off what you've mentioned so far it sure seems erratic and not something specific like a fuse, etc.
I'm not 100% positive but i think JD has the same set of ribbon cables? swapping the set from another working machine would at least rule the cables out i guess.

#8293 5 years ago
Quoted from Mancave:

Could still be a ribbon cable issue perhaps?? Going off what you've mentioned so far it sure seems erratic and not something specific like a fuse, etc.
I'm not 100% positive but i think JD has the same set of ribbon cables? swapping the set from another working machine would at least rule the cables out i guess.

Hmm, good thinking. I just flip flopped the board into my CFTBL and it worked so it's probably not the board.

#8294 5 years ago

For the Supercharger; have you checked the accelerator board under the playfield to be sure all pins and connectors are good?

I suppose the sound issue could be related to the ribbon cable...

#8295 5 years ago
Quoted from tiltmonster:

For the Supercharger; have you checked the accelerator board under the playfield to be sure all pins and connectors are good?
I suppose the sound issue could be related to the ribbon cable...

Supercharger is (currently) working. I've checked the boards underneath and reflowed all connections. I think the issue is somewhere on the green-grey line, maybe a bad diode or a flaky solder...

As for the sound, swapped in a known good ribbon cable, and swapped the possibly bad one into another game and no change. The "bad" one works and the "good" one doesn't change anything.

Can anyone tell me how to test for power at the sound board?

#8296 5 years ago
Quoted from maur:

You're right Tiltmonster there is a set screw that holds the divertor but it was really difficult to adjust to the right position. When I took everything apart I found that there was alot of slack in the shaft and entire assembly was wonky. I tried to order it put I was told it was not available. Here is a better picture of the solution I found. It reduces the distance the divertor has to travel to engage the supercharger. In case someone else is having the same problem
Maurizio
[quoted image]

If there is slop, its almost always where the divertor is attached to the shaft. Those rivets get stretched out or fail all together. You can rebuild it even with pop-rivots you can get from the hardware store... vs needing the more fancy crush rivot types.

#8297 5 years ago

Just a quick question... How do I change the lamp inside the start button?
I removed the Microswitch....
And then?

#8298 5 years ago

I just did this last night. I pulled the switch out, then with a pair of pliers, grabbed the bigger side of the socket and aggressively pulled it out. I tried with my fingers, but a no go!

#8299 5 years ago

Not sure if I understand it correctly....You pulled on the bigger side of the Microswitch mounting brackets?

#8300 5 years ago

Yes, correct... I pulled on the bigger side of the mounting bracket.

Promoted items from Pinside Marketplace and Pinside Shops!
$ 329.99
Lighting - Other
Lighted Pinball Mods
 
$ 69.00
Gameroom - Decorations
Pinball Pimp
 
$ 17.99
Eproms
Matt's Basement Arcade
 
5,650 (OBO)
Machine - For Sale
Fontana, CA
$ 219.00
Gameroom - Decorations
Lit Frames
 
$ 9.95
Eproms
Pinballrom
 
$ 95.00
Cabinet - Sound/Speakers
Pinball Mod Co.
 
$ 19.00
Electronics
NO GOUGE PINBALL™
 
5,000
Machine - For Sale
Mesa, AZ
$ 85.00
Cabinet - Other
Pinball Haus
 
Wanted
Machine - Wanted
Fort Lauderdale, FL
$ 70.00
Playfield - Toys/Add-ons
RobTune
 
$ 75.00
Playfield - Toys/Add-ons
G-Money Mods
 
$ 109.99
Lighting - Led
Lighted Pinball Mods
 
From: $ 100.00
Playfield - Toys/Add-ons
G-Money Mods
 
$ 30.00
Playfield - Toys/Add-ons
G-Money Mods
 
$ 22.50
Playfield - Decals
Pinball Haus
 
$ 9.95
Eproms
Pinballrom
 
$ 10.00
Playfield - Plastics
Pinball Haus
 
$ 35.00
Cabinet - Other
Rocket City Pinball
 
$ 19.00
Boards
Tilted Pinball
 
4,550
Machine - For Sale
Melbourne, ON
$ 28.99
Lighting - Interactive
Lee's Parts
 
$ 20.00
$ 65.00
Playfield - Toys/Add-ons
G-Money Mods
 
There are 13,819 posts in this topic. You are on page 166 of 277.

Reply

Wanna join the discussion? Please sign in to reply to this topic.

Hey there! Welcome to Pinside!

Donate to Pinside

Great to see you're enjoying Pinside! Did you know Pinside is able to run without any 3rd-party banners or ads, thanks to the support from our visitors? Please consider a donation to Pinside and get anext to your username to show for it! Or better yet, subscribe to Pinside+!


This page was printed from https://pinside.com/pinball/forum/topic/getaway-club-dispatch-run-a-make-on-license-plate-kingpin/page/166?hl=pinless and we tried optimising it for printing. Some page elements may have been deliberately hidden.

Scan the QR code on the left to jump to the URL this document was printed from.