(Topic ID: 78179)

Getaway Club ~ Dispatch, run a make on license plate KINGPIN

By MrSanRamon

10 years ago


Topic Heartbeat

Topic Stats

  • 13,806 posts
  • 564 Pinsiders participating
  • Latest reply 5 days ago by golfergordy
  • Topic is favorited by 296 Pinsiders

You

Linked Games

Topic poll

“Which S/W Version do you use?”

  • L1 22 votes
    6%
  • L2 179 votes
    51%
  • L3 11 votes
    3%
  • L5 120 votes
    34%
  • P7 9 votes
    3%
  • C-C 7 votes
    2%

(Multiple choice - 348 votes by 346 Pinsiders)

Topic Gallery

View topic image gallery

shooter repair4 (resized).jpg
shooter repair3 (resized).jpg
Shooter repair2a (resized).png
Shooter repair1 (resized).jpg
Disappearing post fix4 (resized).jpeg
Disappearing post fix3 (resized).jpeg
Disappearing post fix2 (resized).jpeg
Disappearing post fix1 (resized).jpeg
HSIIclear (resized).jpg
pasted_image (resized).png
Shooter rod (resized).jpg
DSC06633 (resized).JPG
ezgif.com-video-to-gif-converter.gif
PXL_20240408_220306294 (resized).jpg
PXL_20240408_220311370 (resized).jpg
There are 13,806 posts in this topic. You are on page 136 of 277.
#6751 6 years ago
Quoted from enkiktd:

This was a really rough reimport, we basically had to rewire most of the machine. We have had to replace a lot of hacked/wrong parts, so this is not a surprise. We've ordered new ones for both sides.

Wow sorry to hear that, reimports can be a problem. I got lucky with my Jack Bot, it just needs all new leaf switches and a good cleaning.

#6752 6 years ago

These are just some of the things we've had to repair, including a "custom" coin door that involved someone using a saw on the cabinet to extend the hole downward. Power was spliced into everywhere and I'm pretty sure there was some burning at some point, the high current board was toasty.

IMG_6071 (resized).JPGIMG_6071 (resized).JPG

IMG_6456 (resized).JPGIMG_6456 (resized).JPG

IMG_6098 (resized).JPGIMG_6098 (resized).JPG

IMG_6465 (resized).JPGIMG_6465 (resized).JPG

#6753 6 years ago
Quoted from enkiktd:

These are just some of the things we've had to repair, including a "custom" coin door that involved someone using a saw on the cabinet to extend the hole downward. Power was spliced into everywhere and I'm pretty sure there was some burning at some point, the high current board was toasty.

Oh man. I had a funky coin door like that on the LAH I had. Some of these reimports are REALLY butchered. I hope you got yours cheap. Are you going to put a stock cd back in it? A lot of wood work then and new decals but doable.

#6754 6 years ago

This is where we are at now, new coin door but we need to replace the wood and re-decal. It was a fun project, expensive after all the parts but we learned a lot from it.

Luckily DMD was good and playfield was pretty good, but we feel we could tackle almost anything now. Lol

IMG_7659 (resized).JPGIMG_7659 (resized).JPG

#6755 6 years ago

Looks good but ya got a ways to go yet. Have fun.

#6756 6 years ago
Quoted from enkiktd:

This is where we are at now, new coin door but we need to replace the wood and re-decal. It was a fun project, expensive after all the parts but we learned a lot from it.
Luckily DMD was good and playfield was pretty good, but we feel we could tackle almost anything now. Lol

I know you've been working on this for a long time and tackling all sorts of advanced issues. Great job getting to this point, and something you should be very proud of.

#6757 6 years ago

Hey guys, working on this game right now. The insert decals from classic arcades look great until you have light behind them. The light bleeds through the blacks too much (in my opinion). Anyone have waterslide decals made for this game yet?

20170920_205633 (resized).jpg20170920_205633 (resized).jpg

#6758 6 years ago

That sucks. Not enough ink saturation. Where did you get them? Classic Arcades?

#6759 6 years ago
Quoted from SUPERBEE:

That sucks. Not enough ink saturation. Where did you get them? Classic Arcades?

Yup.

#6760 6 years ago

Maybe shoot classic arcades a few photos and see if they have better ones.

#6761 6 years ago

So I'm totally new at posting on this site and new in the world of pinball. I bought a HSII about a month ago and have been going through cleaning and fixing flippers, kickback, supercharger, etc. I'm getting an eject hole error 77. The coil works, but the game does not recognize the ball being in the eject hole, so no animations, video mode, extra ball, etc. the ball there until the game cycles through the solenoids and kicks it out. Thoughts on where I should start to get this fixed? What should it look like? The switches appear oos from Marco, Mr Pinball.
Also, the ball will occasionally get stuck just past the down ramp. The ramp seems to be high enough. Is that just a leveling issue?
TIA

#6762 6 years ago
Quoted from Bones82:

So I'm totally new at posting on this site and new in the world of pinball. I bought a HSII about a month ago and have been going through cleaning and fixing flippers, kickback, supercharger, etc. I'm getting an eject hole error 77. The coil works, but the game does not recognize the ball being in the eject hole, so no animations, video mode, extra ball, etc. the ball there until the game cycles through the solenoids and kicks it out. Thoughts on where I should start to get this fixed? What should it look like? The switches appear oos from Marco, Mr Pinball.
Also, the ball will occasionally get stuck just past the down ramp. The ramp seems to be high enough. Is that just a leveling issue?
TIA

Is your swith end sticking up and through the outhole? If not, the ball will sit there because it is not pushing the swith down and the co
il will not fire.

#6763 6 years ago

Check the outhole switch as Tiltmonster says. More thn likely the switch just needs to be adjusted. If that doesnt work, post back here.

Quoted from Bones82:

Also, the ball will occasionally get stuck just past the down ramp. The ramp seems to be high enough. Is that just a leveling issue?

Does the ball pass cleaning under the ramp without touching it at all ? You probably just need to adjust the ramp mech. There are lots of good posts here on how to do it. Just search "adjusting HSII ramp" and something should come up.

#6764 6 years ago
Quoted from SUPERBEE:

Check the outhole switch as Tiltmonster says. More thn likely the switch just needs to be adjusted. If that doesnt work, post back here.

Does the ball pass cleaning under the ramp without touching it at all ? You probably just need to adjust the ramp mech. There are lots of good posts here on how to do it. Just search "adjusting HSII ramp" and something should come up.

The ball sitting in the outhole without it ejecting with eventually cause an error because that coil has not fired in game play for too long, it's a WPC thing... now that I'm back home here's what it should look like.

As for the ball getting stuck under the ramp flap, that could also be a switch error... the ball, when it travels back under the ramp in the opposite direction of the ball launch, should roll over a switch causing the ramp to lift back up so it does not get stuck underneath, if that switch is bad or not working it could get stuck ( a common issue). I'd check that switch directly under the ramp, not sure what switch # but I can look it up if needed.

Cliffy Outhole (resized).jpgCliffy Outhole (resized).jpg

#6765 6 years ago

Thanks for the picture and for all the suggestions. They really helped. With switch testing, it worked, and it was high enough, but I found out the kicker attached to the coil was too high so the ball couldn't reach the switch. Under the play field I found it disconnected forward so that it would still fire. Once I got it reattached it all works fine.

Re: the other issue, it's only when the ball isn't hit hard enough to make it all the way around the loop. Switch is working. I'll work on adjusting the height.

I don't want to keep posting issues, but want to make sure I'm not doing something stupid. I ran a solenoid test and the mars lamp wants to turn, but can't initiate. One in ten might go okay. If you nudge it, it will rotate fine. I think unrelated, but at the same time the opto switch to my supercharger now only intermittently works. Switch testing also only has if intermittently working. There's lots of posts on opto switches here, but do you suspect it to be a loose wire or cold solder? Am I burning out the mars lamp if it isn't able to rotate? (It worked a week ago)

#6766 6 years ago
Quoted from Bones82:

I don't want to keep posting issues, but want to make sure I'm not doing something stupid.

That's probably one of the biggest reasons we start these clubs is that we ask questions BEFORE we do something stupid. So ask away before you blow up or start your game on fire. I just wish I knew more so I could help.

#6767 6 years ago
Quoted from Bones82:

I ran a solenoid test and the mars lamp wants to turn, but can't initiate.

This is normal in test as it is only briefly pulsed on in test.

#6768 6 years ago

Hey guys,

I've been taking some slow motion video of various pinball mechanisms on my Getaway. Might be interesting to those of you who want to know more about how the Getaway playfield parts work! Check out the thread here: https://pinside.com/pinball/forum/topic/slow-motion-pinball-footage#post-3985590

#6769 6 years ago
Quoted from Bones82:

Thanks for the picture and for all the suggestions. They really helped. With switch testing, it worked, and it was high enough, but I found out the kicker attached to the coil was too high so the ball couldn't reach the switch. Under the play field I found it disconnected forward so that it would still fire. Once I got it reattached it all works fine.
Re: the other issue, it's only when the ball isn't hit hard enough to make it all the way around the loop. Switch is working. I'll work on adjusting the height.
I don't want to keep posting issues, but want to make sure I'm not doing something stupid. I ran a solenoid test and the mars lamp wants to turn, but can't initiate. One in ten might go okay. If you nudge it, it will rotate fine. I think unrelated, but at the same time the opto switch to my supercharger now only intermittently works. Switch testing also only has if intermittently working. There's lots of posts on opto switches here, but do you suspect it to be a loose wire or cold solder? Am I burning out the mars lamp if it isn't able to rotate? (It worked a week ago)
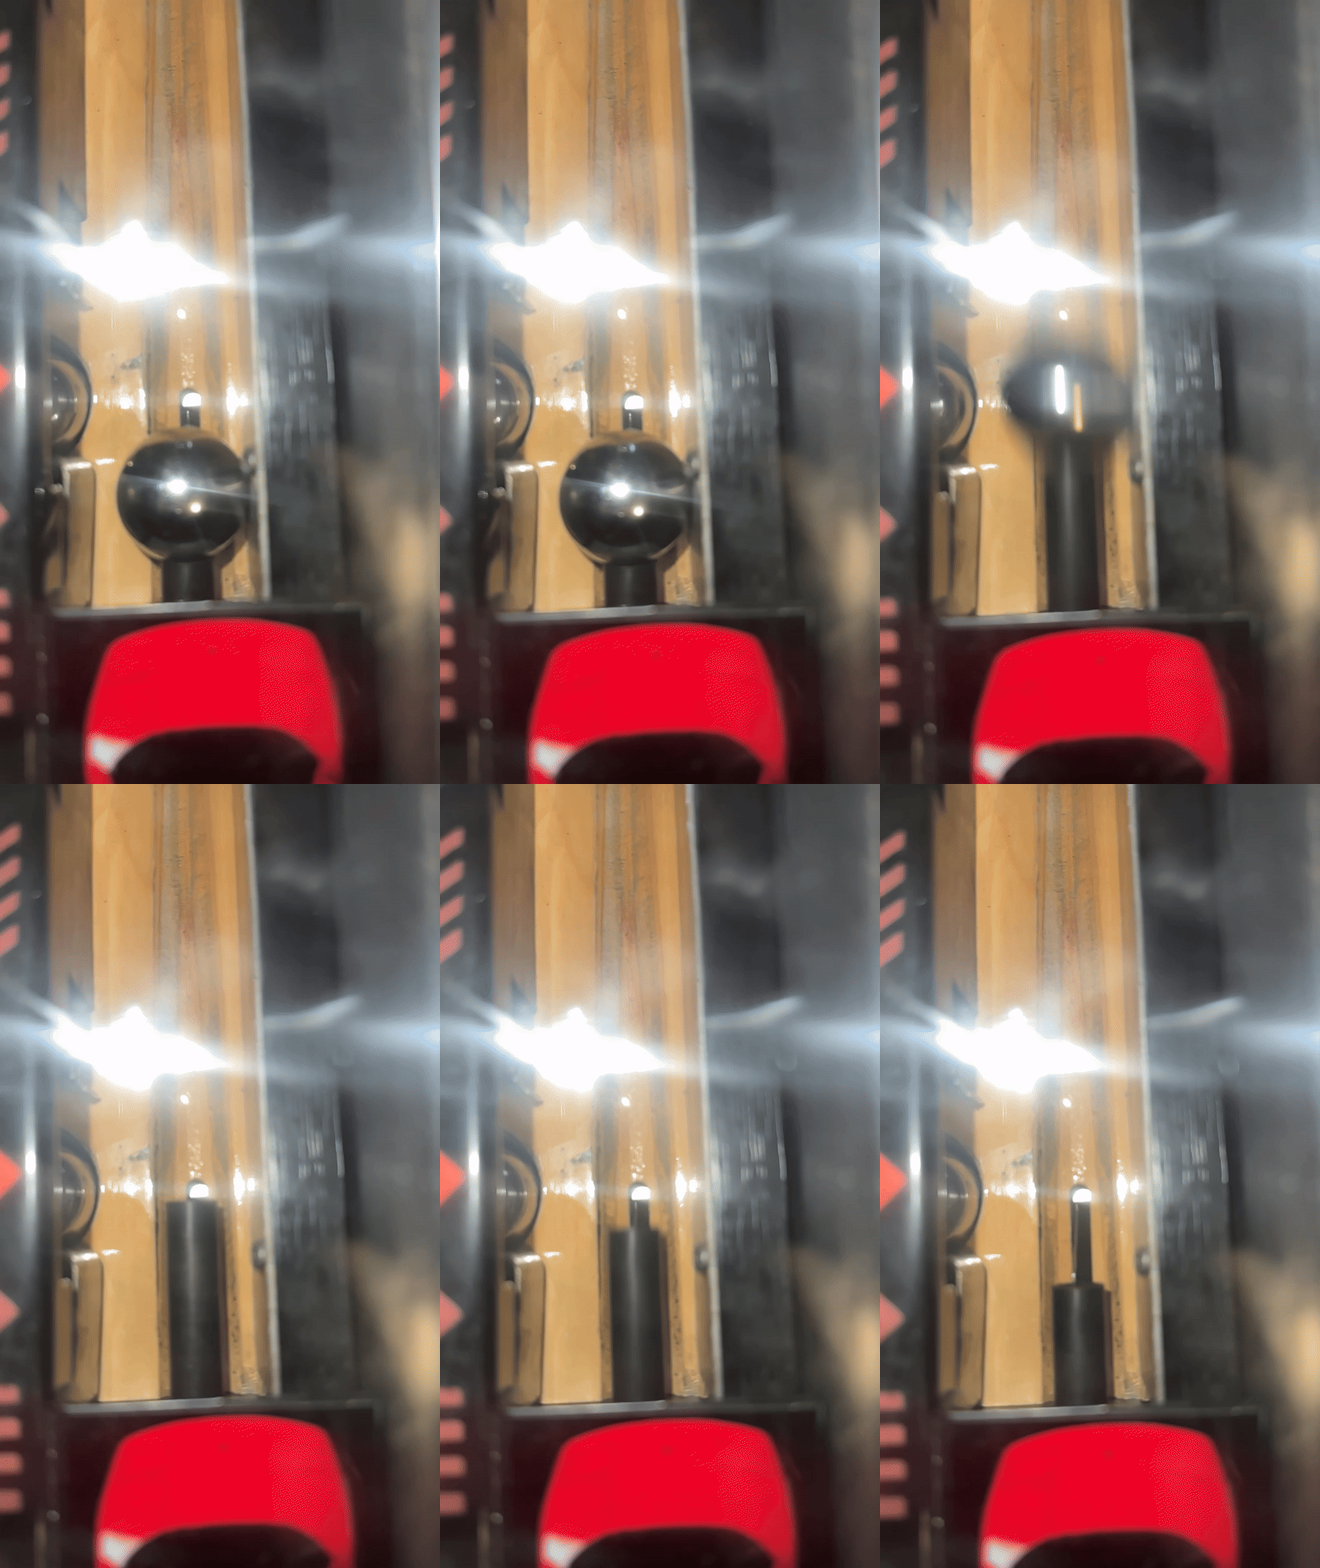
Unrelated-

This could be a solder issue or an opto issue, resolder, if that does not work replace it, it's fairly easy to fix.

Mars lamp is a simple motor with a gear that rotates the lamp, make sure your set screw is tight. Start with that...

Quoted from MustangPaul:

That's probably one of the biggest reasons we start these clubs is that we ask questions BEFORE we do something stupid. So ask away before you blow up or start your game on fire. I just wish I knew more so I could help.

Exactly, post any issue anytime, there are lots of active members with a ton of knowledge who are happy to help.

And BTW; Welcome!

#6770 6 years ago
Quoted from Bones82:

So I'm totally new at posting on this site and new in the world of pinball. I bought a HSII about a month ago and have been going through cleaning and fixing flippers, kickback, supercharger, etc. I'm getting an eject hole error 77. The coil works, but the game does not recognize the ball being in the eject hole, so no animations, video mode, extra ball, etc. the ball there until the game cycles through the solenoids and kicks it out. Thoughts on where I should start to get this fixed? What should it look like? The switches appear oos from Marco, Mr Pinball.
Also, the ball will occasionally get stuck just past the down ramp. The ramp seems to be high enough. Is that just a leveling issue?
TIA

Welcome to the club! Always exciting when new HS2 owners come aboard. This thread is great for all sorts of things: repairs, mods, off-topic, whatever. By all means don't be bashful. Also, do learn to use the search tools for the thread as there is a ton of great historical info posted here.

#6771 6 years ago

Thanks everyone for your advice. Re: the mars lamp, it stopped turning once I replaced the burnt out bulb. I used the 1156 brake light from an auto store. Once installed, there's not enough juice to light the light and turn the motor. I tested with both the new light in or out. Do you think an LED light would work? (It's a 2-pack for $20 at the auto store so thought I'd ask before I buy) or, is there a different light you all use?

#6772 6 years ago
Quoted from Bones82:

Thanks everyone for your advice. Re: the mars lamp, it stopped turning once I replaced the burnt out bulb. I used the 1156 brake light from an auto store. Once installed, there's not enough juice to light the light and turn the motor. I tested with both the new light in or out. Do you think an LED light would work? (It's a 2-pack for $20 at the auto store so thought I'd ask before I buy) or, is there a different light you all use?

I'm not sure what bulb you used but I have an LED 1156 12V in mine and it's no issue. I'm not sure why the bulb would cause the motor to fail unless something came loose when you installed the bulb.

In the test mode do you hear the motor trying to turn?

If Yes; Did you make sure the set screw is tight? see page 2 - 25 in your manual or

https://www.arcade-museum.com/manuals-pinball/G/Getaway_HSII_OPS.pdf

If No; your motor could be bad or the gear worn down or frozen.

Should also look at:

The 4 wires on that molex clip connecting to the motor, 2 for the motor power and 2 for the bulb, make sure all wires and pins are good.

#6773 6 years ago

Motor tries to turn. I had a video but can't upload. It tries to turn, and is loud. Sometimes it works. Searching through the forum, I found something from a few years ago about rebuilding the motor, with a similar issue from Steve1515. I'm going to check to see if the light socket is shorting out also. Looks like I have a weekend project! (Or may be in the market for a new motor)

#6774 6 years ago

Using LED automotive bulb in mine and works perfectly. You may very well have another issue.

#6775 6 years ago
Quoted from Bones82:

I'm going to check to see if the light socket is shorting out also. Looks like I have a weekend project! (Or may be in the market for a new motor)

You need to remove the resistor board from the backbox and check the solder joints for cracks and reflow as needed.

#6776 6 years ago
Quoted from GRUMPY:

You need to remove the resistor board from the backbox and check the solder joints for cracks and reflow as needed.

When you mention resistor board, on this case it's the same as the triac driver board, correct?

#6777 6 years ago

Where can I get a kick ass 1156 led light for the Mars lamp? Seems neither comet nor cointaker sell them. I want a muti smd that will burn the eyes out when it's lit . Also, does anyone know if F14 uses the same bulbs as the Getaway?

#6778 6 years ago
Quoted from Bones82:

on this case it's the same as the triac driver board, correct?

No, two separate boards.

#6779 6 years ago
Quoted from SUPERBEE:

I want a muti smd that will burn the eyes out when it's lit . Also, does anyone know if F14 uses the same bulbs as the Getaway?

Add a bridge rectifier to this and run standard #89 leds.
Look at nerdygrrl write up on converting F-14 to leds.

#6780 6 years ago
Quoted from Bones82:

When you mention resistor board, on this case it's the same as the triac driver board, correct?

Quoted from GRUMPY:

No, two separate boards.

That top board in between the motor & Triac...

inside backbox 2 (resized).jpginside backbox 2 (resized).jpg

#6781 6 years ago
Quoted from SUPERBEE:

Where can I get a kick ass 1156 led light for the Mars lamp? Seems neither comet nor cointaker sell them. I want a muti smd that will burn the eyes out when it's lit . Also, does anyone know if F14 uses the same bulbs as the Getaway?

I have and extra from buying a pair for mine. I'll take a picture when I get home.

#6782 6 years ago
Quoted from Kawydud:

I have and extra from buying a pair for mine. I'll take a picture when I get home

Awesome thanks

#6783 6 years ago
Quoted from GRUMPY:

Add a bridge rectifier to this and run standard #89 leds.
Look at nerdygrrl write up on converting F-14 to leds.

Thanks Grumpy, I'm going to look into this.

#6784 6 years ago
Quoted from SUPERBEE:

Thanks Grumpy, I'm going to look into this.

This way you can use a red led instead of a white led. Also #89 led cost 1.89 not 10.00.

#6785 6 years ago
Quoted from Kawydud:

I have and extra from buying a pair for mine. I'll take a picture when I get home.

Was the LED 1156 much brighter? I didn't buy one -Amazon has several- because i figured they mostly end up in tail lights on cars so probably can't be all that bright?

#6786 6 years ago
Quoted from pkrobin:

Was the LED 1156 much brighter? I didn't buy one -Amazon has several- because i figured they mostly end up in tail lights on cars so probably can't be all that bright?

To me the regular incandescent bulb puts out a better light pattern because my LED is like 20 little lights and not as dramatic. Is it brighter, yes; is it better I'm not so sure... perhaps if there was a bulb cover over it, like with the frosted LED's, I'd like it more. I'm leaving it in for now but not sure if I'll keep it that way (it would be the only bulb I did swap out).

Edit: I don't think these photo help but the top is the incandescent bulb

Mars Lamp (resized).jpgMars Lamp (resized).jpg
Mars Lamp LED (resized).jpgMars Lamp LED (resized).jpg

#6787 6 years ago

This is the Mars bulb I got. In warm white; bright as hell. Gets your attention
https://www.superbrightleds.com/moreinfo/tail-brake-turn/1156-led-bulb-w-stock-cover-36-smd-led-tower-ba15s-retrofit-car/1686/#notab
Same bulls I have in my electric converted lamp post outside.

#6788 6 years ago

Hey guys, I finally got my project Get Away completed! This was a complete restoration and I also got almost every mods out there for it. Thanks again to Mr_Tantrum for some of his custom stickers and Pin sound contribution. This was one crazy project! Even managed to get an invisiglass for it.

Here's the list of the work that was done on it:
-Full cabinet high quality decal set
-Custom side blade graphics
-Custom target decals
-AnyPin NVram
-BriteButtons Illuminated flipper buttons
-BriteCaps EVO Bumper caps
-Metal cabinet protectors
-Mezelmods backboard lighting kit
-Mezelmods through lightning kit
-Mezelmods donut heaven
-Mezelmods flasher toppers
-Mezelmods LED start key
-Mezelmods illuminated cop car
-Noflix pinball cards illuminated
-Titan clear rubber kit
-Pinsound kit with speakers and subwoofer
-Pinsound headphone cabinet kit
-Lighted pinball colored LED speaker ultimate
-Supercharger ramp lights interactive
-ColorDMD replacement LCD display
-Cointaker premium non-ghosting LED kit
-Vivak playfield protector
-Vivak plastic protectors -Invisiglass

IMG_8541 (resized).JPGIMG_8541 (resized).JPG

IMG_8542 (resized).JPGIMG_8542 (resized).JPG

IMG_8545 (resized).JPGIMG_8545 (resized).JPG

IMG_8547 (resized).JPGIMG_8547 (resized).JPG

IMG_8548 (resized).JPGIMG_8548 (resized).JPG

IMG_8549 (resized).JPGIMG_8549 (resized).JPG

#6789 6 years ago
Quoted from psychopat:

Hey guys, I finally got my project Get Away completed!

Very nice!!!

I am working on something similar and am wondering where you got those instruction cards and if you maybe have them as a printable file?

Also, do you have more nformation on the pinsound soundfiles you used and how they have been incorporated?

#6790 6 years ago
Quoted from psychopat:

Hey guys, I finally got my project Get Away completed! This was a complete restoration and I also got almost every mods out there for it. Thanks again to Mr_Tantrum for some of his custom stickers and Pin sound contribution. This was one crazy project! Even managed to get an invisiglass for it.
» YouTube video
Here's the list of the work that was done on it:
-Full cabinet high quality decal set
-Custom side blade graphics
-Custom target decals
-AnyPin NVram
-BriteButtons Illuminated flipper buttons
-BriteCaps EVO Bumper caps
-Metal cabinet protectors
-Mezelmods backboard lighting kit
-Mezelmods through lightning kit
-Mezelmods donut heaven
-Mezelmods flasher toppers
-Mezelmods LED start key
-Mezelmods illuminated cop car
-Noflix pinball cards illuminated
-Titan clear rubber kit
-Pinsound kit with speakers and subwoofer
-Pinsound headphone cabinet kit
-Lighted pinball colored LED speaker ultimate
-Supercharger ramp lights interactive
-ColorDMD replacement LCD display
-Cointaker premium non-ghosting LED kit
-Vivak playfield protector
-Vivak plastic protectors -Invisiglass

That is one sweet Getaway! Fantastic job, and your hard work will payoff as this is a very fun pin to play. Can't get over how shiny your play field is - wax on, wax off!

Glad I talked you into the Pinsound and I hope you agree how much it adds to the overall experience - your vid rocks!. May I suggest one other thing? You should consider illuminating the gauges on the sling plastics and the drive 65 plastic. You can easily do this with post LEDs from Comet. Search through this thread as others and I have posted details to see if you like it - here is one of my posts and a pic below to give you an idea of what it looks like: https://pinside.com/pinball/forum/topic/getaway-club-dispatch-run-a-make-on-license-plate-kingpin/page/77#post-3437950

I see Noflix in your list, I'm going to have to track those down. Where did you buy you them and how did you wire them? Also, did you print your cards on regular paper or something special? Can we get a close up of your flipper button protectors, and where did you buy them? Also, the more I see those speaker panels, the more I think I'm going to have to get one.

PS: Also saw your No Parking sign back by the mountain - nice touch.

pic.jpgpic.jpg

#6791 6 years ago
Quoted from psychopat:

Hey guys, I finally got my project Get Away completed! This was a complete restoration and I also got almost every mods out there for it. Thanks again to Mr_Tantrum for some of his custom stickers and Pin sound contribution. This was one crazy project! Even managed to get an invisiglass for it.
» YouTube video
Here's the list of the work that was done on it:
-Full cabinet high quality decal set
-Custom side blade graphics
-Custom target decals
-AnyPin NVram
-BriteButtons Illuminated flipper buttons
-BriteCaps EVO Bumper caps
-Metal cabinet protectors
-Mezelmods backboard lighting kit
-Mezelmods through lightning kit
-Mezelmods donut heaven
-Mezelmods flasher toppers
-Mezelmods LED start key
-Mezelmods illuminated cop car
-Noflix pinball cards illuminated
-Titan clear rubber kit
-Pinsound kit with speakers and subwoofer
-Pinsound headphone cabinet kit
-Lighted pinball colored LED speaker ultimate
-Supercharger ramp lights interactive
-ColorDMD replacement LCD display
-Cointaker premium non-ghosting LED kit
-Vivak playfield protector
-Vivak plastic protectors -Invisiglass

Super nice, congrats. But you forgot a mod, my Leg Light-Ups.

#6792 6 years ago

I just went and watched some of the videos of your restoration. Awesome that everything was documented like that, and great work. Only issue I have is that I don't understand Fench. Still very informative, and looking forward to watching more.

#6793 6 years ago
Quoted from Kobaja:

Very nice!!!
I am working on something similar and am wondering where you got those instruction cards and if you maybe have them as a printable file?

I found the cards on this thread, I think they are available on Pinball Rebel: Getaway High Speed II by Greg Peck
http://www.pinballrebel.com/game/pins/instruction/

Here is the high res print PDF I made for them https://www.dropbox.com/s/xbptv6gwgxtn2m4/getaway_cards.pdf?dl=0

The pinsound files were made by Mr_Tantrum. I used the GetawayHS2_ZZTopVocals_CustomCallouts_MrTantrum.zip
I wanted to stay closer to the original since I love ZZ top and I feel it's a real highlight of the game. The pinsound and speaker upgrade make such a huge difference, I can feel the bass while playing

#6794 6 years ago
Quoted from Mr_Tantrum:

That is one sweet Getaway! Fantastic job, and your hard work will payoff as this is a very fun pin to play. Can't get over how shiny your play field is - wax on, wax off!
Glad I talked you into the Pinsound and I hope you agree how much it adds to the overall experience - your vid rocks!. May I suggest one other thing? You should consider illuminating the gauges on the sling plastics and the drive 65 plastic. You can easily do this with post LEDs from Comet. Search through this thread as others and I have posted details to see if you like it - here is one of my posts and a pic below to give you an idea of what it looks like: https://pinside.com/pinball/forum/topic/getaway-club-dispatch-run-a-make-on-license-plate-kingpin/page/77#post-3437950
I see Noflix in your list, I'm going to have to track those down. Where did you buy you them and how did you wire them? Also, did you print your cards on regular paper or something special? Can we get a close up of your flipper button protectors, and where did you buy them? Also, the more I see those speaker panels, the more I think I'm going to have to get one.
PS: Also saw your No Parking sign back by the mountain - nice touch.

Thanks! The shiny playfield is mostly due to the playfield protector. It was the first time I used those and they are simply fantastic. They do require a lot of work but if you are doing a tear down, its a no brainer to use those and have your playfield last forever. They come from germany I believe: https://playfield-protectors.com/Home/Details/ikCCpCvfdE-CVzDgaE0mkQ?categoryid=22&category=Playfield%20Protectors&name=The%20Getaway%3A%20High%20Speed%20II%20%7C%201992

Good idea about the illumination on the gauges, I will look into those thanks!

The illuminated Noflix card were from Pinball Center http://www.pinball.center/en/shop/pinball-modding/illuminated-pinball-cards/164/noflix-pinball-card-bally-/-williams-red-illuminated

I thought the material was red but it was lighting up white, unfortunately they make red light which is still nice but it makes everything on the mini translite instruction cards reddish. They must have white ones available somewhere.

I used the same material that I use for arcade marquees and backglass, it's a 12 mil translite material. It let's the light pass through and look very cool.
20883171_10154953367187684_1053008003_o (resized).jpg20883171_10154953367187684_1053008003_o (resized).jpg

My friend André that worked on the restoration gave me the flipper button protectors. I think he picked it at Pinfest and he also hooked me up with the invisiglass, those are very hard to get here. However I bought some of those button protectors at the same place I get the playfield protector for my T2 restoration and they look identical. https://playfield-protectors.com/Home/Details/pLJd8UEQ-Emy5QyXGc3NbQ?catgoryid=25&name=Button Protector - halfcircle (WPC - 1993)

The speaker panel mod is nice but requires a good amount of work. Their kit is also very artisanal... meaning it's all hand made, the instruction were not great (website in construction too) and requires still a bit of touch up to make it perfect. I liked it for the getaway since it lights up all the gauges, for my T2 project I only got the speaker light it instead.

#6795 6 years ago
Quoted from Mr_Tantrum:

I just went and watched some of the videos of your restoration. Awesome that everything was documented like that, and great work. Only issue I have is that I don't understand Fench. Still very informative, and looking forward to watching more.

Thanks! most of the credit goes to my friend André. On my side I took care of everything artwork related including printing/laminating, planning the mods, getting the parts etc and he did most of the installs. He does that full time for a living since many years and is very good at it. Some of the mods were quite advanced like taking everything off the playfield and I'm not at that level yet haha

This was quite a project, almost 2 months of work total. I will probably never get back what I put in if I ever sell it, but for me this machine is really a keeper and will look awesome at my home arcade.

The next project is a T2 and I have to say, there's probably even more parts going on it. Everything will be documented as well.

#6796 6 years ago
Quoted from psychopat:

I found the cards on this thread, I think they are available on Pinball Rebel: Getaway High Speed II by Greg Peck
http://www.pinballrebel.com/game/pins/instruction/
Here is the high res print PDF I made for them https://www.dropbox.com/s/xbptv6gwgxtn2m4/getaway_cards.pdf?dl=0
The pinsound files were made by Mr_Tantrum. I used the GetawayHS2_ZZTopVocals_CustomCallouts_MrTantrum.zip
I wanted to stay closer to the original since I love ZZ top and I feel it's a real highlight of the game. The pinsound and speaker upgrade make such a huge difference, I can feel the bass while playing

In case you were not aware, you can have multiple PinSound orchestrations on your USB drive and easily switch between them. See my guide on PinSound here on Pinsite for details. I keep 4 on my stick and switch based on mood - keeps the game fresh: zztop, techno with zztop, U2, and mixed artist driving theme music ("I Can't Drive 55" is main track).

#6797 6 years ago
Quoted from Mr_Tantrum:

In case you were not aware, you can have multiple PinSound orchestrations on your USB drive and easily switch between them. See my guide on PinSound here on Pinsite for details. I keep 4 on my stick and switch based on mood - keeps the game fresh: zztop, techno with zztop, U2, and mixed artist driving theme music ("I Can't Drive 55" is main track).

I didnt know that! will look into it. I thought you had to wait an hour each time in order to update the sound files.

#6798 6 years ago
Quoted from psychopat:

I didnt know that! will look into it. I thought you had to wait an hour each time in order to update the sound files.

No, just search for Mr_Tantrum's Guide to Pinsound, and I outline how to do everything. You can download all my mixes from PinSound Community, and build the USB drive content in your PC. Then it is plug and play without having to wait on Pinsiund card to extract orchestration.

Almost forgot, I also keep the original soundtrack on the drive too. Fun for showing others the difference.

#6799 6 years ago

So I thought I fixed the ball eject assembly but what I'm finding is the spring plate keeps becoming disconnected from the eject cam assembly, pushing the tip of the eject assembly higher so the ball can't hit the switch. The pin connecting the two is fairly loose. I didn't see any hairpin to keep it attached. I tried to attach pictures that shows the pin. The eject cam attaches on the opposite side. Thoughts?

IMG_1461 (resized).JPGIMG_1461 (resized).JPG

#6800 6 years ago

Here is another picture showing the pin on the right and eject cam on left. You can see the hole slightly in the cam on the left that it goes into, but it keeps coming apart. I can't see a way to tighten the pin and nothing seems broken.

Thanks for your help

IMG_1465 (resized).JPGIMG_1465 (resized).JPG

Promoted items from Pinside Marketplace and Pinside Shops!
$ 19.00
Electronics
NO GOUGE PINBALL™
 
$ 9.95
Eproms
Pinballrom
 
$ 225.00
Lighting - Interactive
Professor Pinball
 
$ 40.00
Wanted
Machine - Wanted
Louisville, KY
From: $ 209.00
$ 30.00
Playfield - Toys/Add-ons
G-Money Mods
 
From: $ 3.50
Playfield - Other
Rocket City Pinball
 
$ 35.00
Cabinet - Other
Rocket City Pinball
 
5,000
Machine - For Sale
Mesa, AZ
$ 19.00
Boards
Tilted Pinball
 
$ 69.00
Gameroom - Decorations
Pinball Pimp
 
$ 65.00
Playfield - Toys/Add-ons
G-Money Mods
 
$ 10.00
Playfield - Plastics
Pinball Haus
 
$ 9.95
Eproms
Pinballrom
 
$ 329.99
Lighting - Other
Lighted Pinball Mods
 
$ 109.99
Lighting - Led
Lighted Pinball Mods
 
From: $ 100.00
Playfield - Toys/Add-ons
G-Money Mods
 
$ 17.99
Eproms
Matt's Basement Arcade
 
$ 20.00
$ 70.00
Playfield - Toys/Add-ons
RobTune
 
$ 22.50
Playfield - Decals
Pinball Haus
 
5,000 (Firm)
Machine - For Sale
Gilroy, CA
$ 20.00
Playfield - Plastics
G-Money Mods
 
$ 85.00
Cabinet - Other
Pinball Haus
 
$ 75.00
Playfield - Toys/Add-ons
G-Money Mods
 
6,300 (OBO)
Machine - For Sale
Newtown, CT
There are 13,806 posts in this topic. You are on page 136 of 277.

Reply

Wanna join the discussion? Please sign in to reply to this topic.

Hey there! Welcome to Pinside!

Donate to Pinside

Great to see you're enjoying Pinside! Did you know Pinside is able to run without any 3rd-party banners or ads, thanks to the support from our visitors? Please consider a donation to Pinside and get anext to your username to show for it! Or better yet, subscribe to Pinside+!


This page was printed from https://pinside.com/pinball/forum/topic/getaway-club-dispatch-run-a-make-on-license-plate-kingpin/page/136?hl=bones82 and we tried optimising it for printing. Some page elements may have been deliberately hidden.

Scan the QR code on the left to jump to the URL this document was printed from.