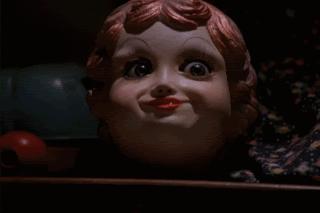
(Topic ID: 64458)

Funhouse!? Club... (Fans welcome)

By mof

10 years ago


Topic Heartbeat

Topic Stats

  • 5,074 posts
  • 462 Pinsiders participating
  • Latest reply 8 hours ago by Coyote
  • Topic is favorited by 209 Pinsiders

You

Linked Games

Topic Gallery

View topic image gallery

20240416_132929 (resized).jpg
pasted_image (resized).jpeg
20240406_204204 (resized).jpg
A-13962 (resized).jpg
fh-2-topper-2_560x560 (resized).jpg
IMG_9534.gif
IMG_7018 (resized).jpeg
FunhouseBluePaintMix2 (resized).jpg
20240331_104306 (resized).jpg
20240329_172816 (resized).jpg
20240329_155815 (resized).jpg
DSCN7358 (resized).JPG
IMG_2472.gif
IMG_0823 (resized).jpeg
IMG_1603 (resized).jpeg
IMG_1604 (resized).jpeg
There are 5,074 posts in this topic. You are on page 63 of 102.
#3101 2 years ago
Quoted from killerrobots:

Well I sort of did. I got a set for the cabinet not realizing they didn't include the heads. I can't seem to find them separate so I just decided to paint. I already did one side but this side has more sanding so I just wanted to double check a couple of details. Here is the left side finished.[quoted image]

You painted that?? It looks fantastic!

#3102 2 years ago
Quoted from yzfguy:

You painted that?? It looks fantastic!

+1 !! Wow, great job! Looks incredible.

#3103 2 years ago
Quoted from yzfguy:

You painted that?? It looks fantastic!

Hey thanks, I appreciate that but I will tell you that it is not actually that hard to do. It is just very time consuming, that one side probably took me 10 hours.

If there is enough existing art left then it is basically these steps:

1. Pick a color (say red)
2. Lay down clear mask (frisket)
3. Use X-acto to cut out all areas with that color
4. Peel off mask
5. Spray a layer of primer (to cover an old paint)
6. Use airbrush to spray color (for Funhouse it is pretty easy to match colors because they are primary)
7. Peel off masking
8. Repeat for next color

It doesn't really take any artistic ability just patience, anyone could do it.

I will take some pics doing the red balloons so you can see the process.

#3104 2 years ago

Here’s the left side (mine needs some of your blue paint…)

0BB8CAC9-A344-4276-83A7-ADFE23E84108 (resized).jpeg0BB8CAC9-A344-4276-83A7-ADFE23E84108 (resized).jpeg
#3105 2 years ago
Quoted from killerrobots:

Could I trouble someone to take a nice picture of the right side graphic on the head of the machine? I am currently painting mine and could use it for reference.[quoted image]

Lots of pictures here:
http://christopherhutchins.com/gallery/

#3106 2 years ago
Quoted from bajm:

Here’s the left side (mine needs some of your blue paint…)
[quoted image]

Perfect, thanks.

#3107 2 years ago
Quoted from killerrobots:

Well I sort of did. I got a set for the cabinet not realizing they didn't include the heads. I can't seem to find them separate so I just decided to paint. I already did one side but this side has more sanding so I just wanted to double check a couple of details. Here is the left side finished.[quoted image]

Incredible touch up work!

#3108 2 years ago
Quoted from killerrobots:

Hey thanks, I appreciate that but I will tell you that it is not actually that hard to do. It is just very time consuming, that one side probably took me 10 hours.
If there is enough existing art left then it is basically these steps:
1. Pick a color (say red)
2. Lay down clear mask (frisket)
3. Use X-acto to cut out all areas with that color
4. Peel off mask
5. Spray a layer of primer (to cover an old paint)
6. Use airbrush to spray color (for Funhouse it is pretty easy to match colors because they are primary)
7. Peel off masking
8. Repeat for next color
It doesn't really take any artistic ability just patience, anyone could do it.
I will take some pics doing the red balloons so you can see the process.

Amazing to see what can be done with a little time and effort!

#3109 2 years ago

Thanks again. If anyone every wants to do it here are the basic steps:

1. Frisket

0821210910 (resized).jpg0821210910 (resized).jpg

0821210910b (resized).jpg0821210910b (resized).jpg

0821210914_HDR (resized).jpg0821210914_HDR (resized).jpg

2. Cut out with X-acto

0821210924 (resized).jpg0821210924 (resized).jpg

3. Mask for overspray

0821210941 (resized).jpg0821210941 (resized).jpg

4. Primer

0821210947 (resized).jpg0821210947 (resized).jpg

5. Color

0821211034 (resized).jpg0821211034 (resized).jpg

6. Black Accent

0821211036 (resized).jpg0821211036 (resized).jpg

7. Peel off Masking

0821211037_HDR (resized).jpg0821211037_HDR (resized).jpg

8. Final Product

0821211044 (resized).jpg0821211044 (resized).jpg

Inevitably there is always a lot of touch up but it really isn't too challenging.

#3110 2 years ago
Quoted from pinballinreno:

I would just get decals...

For anyone going the decals route, where is the best place to get them from? Is there some variety in the quality of the decals for sale out there?

#3111 2 years ago
Quoted from AlexRogan84:

For anyone going the decals route, where is the best place to get them from? Is there some variety in the quality of the decals for sale out there?

Phoenix arcade possibly. He has a great setup for printing.

#3112 2 years ago
Quoted from pinballinreno:

Phoenix arcade possibly. He has a great setup for printing.

Would these ones be good to get?

https://www.ministryofpinball.com/en/funhouse-cabinet-decals.html

#3114 2 years ago

A different choice is the thick high gloss stuff from RAD-CALS (Mirco):

http://www.pinballsales.com/shop/pc/viewPrd.asp?idproduct=336&idcategory=43

#3115 2 years ago
Quoted from AlexRogan84:

For anyone going the decals route, where is the best place to get them from? Is there some variety in the quality of the decals for sale out there?

I got mine from the "The Game Room Guys" but the link is not working anymore (weird?) so I can't recommend that one. Also odd, they came in a box labeled "Marco". In any case they look okay.

One question my wife and I debated. When I got my machine the side art had no red at all on the side but the decal does. She thinks they changed it but I think it just faded over time. Did the original fade that much?

0729211558 (resized).jpg0729211558 (resized).jpg
#3116 2 years ago

Yes, they fade that much. Never changed by the factory.

#3117 2 years ago
Quoted from killerrobots:

I got mine from the "The Game Room Guys" but the link is not working anymore (weird?) so I can't recommend that one. Also odd, they came in a box labeled "Marco". In any case they look okay.
One question my wife and I debated. When I got my machine the side art had no red at all on the side but the decal does. She thinks they changed it but I think it just faded over time. Did the original fade that much?[quoted image]

I think it DID fade and you never saw it as the original was supposed to lok. The RED inks they used were not very sun tolerant. Here is a good picture of what the artwork looked like when new:
ebay.com link: itm

#3118 2 years ago

My reds are also pretty much gone. Although my right side of Funhouse faded worse than the left side. The reds on my Getaway are now pink at best too. You can see how much it faded over the years when you look at the red still underneath where the leg attaches.

Now, in terms of applying these decals, is there a quick and easy way (i.e. lazy) as well as a long and involved way? And I mean in prep work. I can see how the hinges for the backbox would need to come off as well as the side rails to do the sides of the cabinet. But I was wondering about how much sanding or removal of the old stenciling/images would need to be done? Can you just apply the new ones right over the old? Or is that going to look horrific?

IMG_3371 (resized).JPGIMG_3371 (resized).JPGIMG_4386 (resized).JPGIMG_4386 (resized).JPGIMG_4389 (resized).JPGIMG_4389 (resized).JPG
#3119 2 years ago
Quoted from AlexRogan84:

My reds are also pretty much gone. Although my right side of Funhouse faded worse than the left side. The reds on my Getaway are now pink at best too. You can see how much it faded over the years when you look at the red still underneath where the leg attaches.
Now, in terms of applying these decals, is there a quick and easy way (i.e. lazy) as well as a long and involved way? And I mean in prep work. I can see how the hinges for the backbox would need to come off as well as the side rails to do the sides of the cabinet. But I was wondering about how much sanding or removal of the old stenciling/images would need to be done? Can you just apply the new ones right over the old? Or is that going to look horrific?
[quoted image][quoted image][quoted image]

This is my first decal install but my understanding is that if you can feel a dinge you can see it through the decal. I sanded and bonded two times. I also painted the edges to match.

0818212018_HDR (resized).jpg0818212018_HDR (resized).jpg
#3120 2 years ago
Quoted from killerrobots:

This is my first decal install but my understanding is that if you can feel a dinge you can see it through the decal. I sanded and bonded two times. I also painted the edges to match. [quoted image]

Often the old artwork shows thru.

Its should all be removed or painted and primered over.

#3121 2 years ago

Okay, thanks. I will paint it.

#3122 2 years ago
Quoted from AlexRogan84:

My reds are also pretty much gone. Although my right side of Funhouse faded worse than the left side. The reds on my Getaway are now pink at best too. You can see how much it faded over the years when you look at the red still underneath where the leg attaches.
Now, in terms of applying these decals, is there a quick and easy way (i.e. lazy) as well as a long and involved way? And I mean in prep work. I can see how the hinges for the backbox would need to come off as well as the side rails to do the sides of the cabinet. But I was wondering about how much sanding or removal of the old stenciling/images would need to be done? Can you just apply the new ones right over the old? Or is that going to look horrific?
[quoted image][quoted image][quoted image]

Operators back in the day would just stick new decals on the cabinet with little or no surface prep.

Often to swap out a broken cabinet.

You could clearly see the old artwork thru the new decal.

But these games were usually in a line up and tbe side art was never seen.

Yes it looks horrific and often wrinkly.

#3123 2 years ago
Quoted from pinballinreno:

Operators back in the day would just stick new decals on the cabinet with little or no surface prep.

I do not know of ANY operator that gave a rats arse about the cabinet condition, honestly. 75~% of the time the game was in a line with other games, and the cabinet was rarely seen, and in those cases where the cabinet was seen, decals weren't worth their cost - even if they WERE available.

At least, for pinball.

Now, when you got a 'kit' for an arcade, those came with decals, and yeah, we put those on. No sense having a SF2 cabinet with MK3 in it. And in those cases, yeah - the decals were just slapped over the others.

#3124 2 years ago
Quoted from Coyote:

I do not know of ANY operator that gave a rats arse about the cabinet condition, honestly.
//<![CDATA[
window.__mirage2 = {petok:"16ead3f9fb9868b680fa0b8a652994778363f992-1629685070-1800"};
//]]>

75~% of the time the game was in a line with other games, and the cabinet was rarely seen, and in those cases where the cabinet was seen, decals weren't worth their cost - even if they WERE available.
At least, for pinball.
Now, when you got a 'kit' for an arcade, those came with decals, and yeah, we put those on. No sense having a SF2 cabinet with MK3 in it. And in those cases, yeah - the decals were just slapped over the others.

I absolutely agree with this.

Game downtine equals negative cash pure and simple.

In my area they just rattle can them black. Problem solved.

#3125 2 years ago

It is funny I just got back from league and half the time I am thinking...well that lamp is out, those rubbers need to be replaced, that has a credit dot...

At home I try and make sure everything it working perfectly but that is just not how it is commercially.

#3126 2 years ago
Quoted from pinballinreno:

In my area they just rattle can them black. Problem solved

Just had a pinbot dropped off in my shop today missing 1/3 of the front art....

16297686580044884660137647587237 (resized).jpg16297686580044884660137647587237 (resized).jpg

#3127 2 years ago

Just finished painting the head and installed the decals. Head took awhile but came out good. Decals were easy. I thought I might need a second person but I didn't have any problem doing them myself. I would say decals is do-able for just about anyone. However getting the machine stripped and level is quite a lot of work.

0823211931_HDR (resized).jpg0823211931_HDR (resized).jpg0823212018a_HDR (resized).jpg0823212018a_HDR (resized).jpg
#3128 2 years ago
Quoted from killerrobots:

Just finished painting the head and installed the decals. Head took awhile but came out good. Decals were easy. I thought I might need a second person but I didn't have any problem doing them myself. I would say decals is do-able for just about anyone. However getting the machine stripped and level is quite a lot of work.[quoted image][quoted image]

Looks pretty good!

#3129 2 years ago

Yeah now I get to start on the playfield...

Also here is a question I struggle with. When you are restoring things the hardest part for me is when to stop. I see all these high end restores but a lot of it will never been seen. I have these old stickers that I had to remove to paint everything. Part of me thinks I should reprint them and stick them back on but it that just wasting time? I mean, who will ever know?

0813211707 (resized).jpg0813211707 (resized).jpg
#3130 2 years ago
Quoted from killerrobots:

Yeah now I get to start on the playfield...
Also here is a question I struggle with. When you are restoring things the hardest part for me is when to stop. I see all these high end restores but a lot of it will never been seen. I have these old stickers that I had to remove to paint everything. Part of me thinks I should reprint them and stick them back on but it that just wasting time? I mean, who will ever know?[quoted image]

You will

#3131 2 years ago

Get out of my head...

#3132 2 years ago
Quoted from killerrobots:

Get out of my head..

Lololololol

#3133 2 years ago
Quoted from killerrobots:

Yeah now I get to start on the playfield...
Also here is a question I struggle with. When you are restoring things the hardest part for me is when to stop. I see all these high end restores but a lot of it will never been seen. I have these old stickers that I had to remove to paint everything. Part of me thinks I should reprint them and stick them back on but it that just wasting time? I mean, who will ever know?[quoted image]

Order a shop out sticker set from treasure cove as well as apron decals for when you paint or powdercoat the apron.

Depends on how deep into the restore you want to go.

Everything old or dingy looks like crap when put onto a fresh cabinet and playfield.

Contact pinsider athens95

#3134 2 years ago

Perfect, I will reach out to him. Thanks.

#3135 2 years ago

Anyone know of or have a high resolution picture of an unpopulated playfield. I can't seem to find a good one. I just want it for reference as I am repainting mine.

#3136 2 years ago

Nevermind, I found one on a Virtual Pinball site.

#3137 2 years ago

So, I have a neighbor who has a Funhouse. She reached out to me about replacing her display. I sent her a link to one that I found on Marco's site. She ordered it and just sent me this message....

"I bought the digital display but it doesn’t look like the old one. My machine looks like it has 2 boards one smaller on top of the other and 3 ribbon cords instead of the one on the new one. Could it possibly be an updated display and would still work?"

The ad said it was for a Funhouse. Thanks in advance for any help!

#3138 2 years ago
Quoted from PismoArcade:

So, I have a neighbor who has a Funhouse. She reached out to me about replacing her display. I sent her a link to one that I found on Marco's site. She ordered it and just sent me this message....
"I bought the digital display but it doesn’t look like the old one. My machine looks like it has 2 boards one smaller on top of the other and 3 ribbon cords instead of the one on the new one. Could it possibly be an updated display and would still work?"
The ad said it was for a Funhouse. Thanks in advance for any help!

Are you talking about a pinscore display?

Its way different than the original
and hooks up differently.

No high voltage connection.

But they work very well.

#3139 2 years ago
Quoted from pinballinreno:

Are you tslking about a pinscore display?
Its way different than the original
and hooks up differently.
No high voltage connection.
But they work very well.

Yes..it's a Pinscore.

So does she just not hook up the high voltage connector?

#3140 2 years ago
Quoted from PismoArcade:

Yes..it's a Pinscore.
So does she just not hook up the high voltage connector?

Correct.

I know the directions are weak.

But basically follow them.

One ribbon and a low voltage connection.

Ribbon should go to the "display" labeled fitting on tje CPU board.

The red edge wire always goes to pin #1. Take note of this

Reuse the old standoffs from the old display. They might be stiff and hard to get into the 4 holes but they will fit.

If you break off a squeeze tip or 2 its ok.

#3141 2 years ago
Quoted from pinballinreno:

Correct.
I know the directions are weak.
But basically follow them.
One ribbon and a low voltage connection.
Ribbon should go to the "display" labeled fitting on tje CPU board.
The red edge wire always goes to pin #1. Take note of this
Reuse the old standoffs from the old display. They might be stiff and hard to get into the 4 holes but they will fit.
If you break off a squeeze tip or 2 its ok.

Thank you!!!!!

#3142 2 years ago
Quoted from PismoArcade:

So, I have a neighbor who has a Funhouse. She reached out to me about replacing her display. I sent her a link to one that I found on Marco's site. She ordered it and just sent me this message....
"I bought the digital display but it doesn’t look like the old one. My machine looks like it has 2 boards one smaller on top of the other and 3 ribbon cords instead of the one on the new one. Could it possibly be an updated display and would still work?"
The ad said it was for a Funhouse. Thanks in advance for any help!

My game has pinscore. Do you want me to post some pics for you?

#3143 2 years ago
Quoted from Santis:

My game has pinscore. Do you want me to post some pics for you?

I would love it. Thank you so much!

#3144 2 years ago

Just got my armor back from powdercoat and I think the red looks great with the new decals. Got it from a local shop for $150 which seemed pretty reasonable to me.

0831211411_HDR (resized).jpg0831211411_HDR (resized).jpg
#3145 2 years ago
Quoted from killerrobots:

Just got my armor back from powdercoat and I think the red looks great with the new decals. Got it from a local shop for $150 which seemed pretty reasonable to me.
[quoted image]

That looks pretty good. Is it matched to the red bslloons?

There is another funhouse in red, posted in the powercoated games thread.

They replaced the plastic backglass lift channel with a metal one and powdercoated it as well.

I thought it was a great detail that looked more finished.

But really the black ones look fine.

#3146 2 years ago

The red is pretty close to my eye to the red balloon. I debated doing some additional parts such as the coin door, shooter rod housing but I thought it might be a little too much. I didn't consider the back glass support but that might have been a nice touch.

#3147 2 years ago

Dont forget to remove some paint from the ground braid...

#3148 2 years ago
Quoted from cosmokramer:

Dont forget to remove some paint from the ground braid...

Yes!

But if it ohms out during ground test due to the inside touching the bolt, you should be ok.

I had to scrape off a tiny nick on my DW restore on one side only.

I ALWAYS test ground integrity once the cab is fully assembled.

Rails, hinges, door, legs, back panel and all metal in the head.

Power box, transformer...

All parts of the braid, everything metal!

It only takes 3 mins to do but might save a life.

#3149 2 years ago
Quoted from killerrobots:

The red is pretty close to my eye to the red balloon. I debated doing some additional parts such as the coin door, shooter rod housing but I thought it might be a little too much. I didn't consider the back glass support but that might have been a nice touch.

I saw it, and thought so too.

#3150 2 years ago

Thanks for the advice. I removed everything else but that part of the braid was already painted at the factory. I will make sure I have a good ground.

Promoted items from Pinside Marketplace and Pinside Shops!
$ 95.00
Cabinet - Sound/Speakers
Pinball Mod Co.
 
$ 170.00
Displays
Digipinball Shop
 
$ 27.95
Eproms
Pinballrom
 
$ 59.99
Playfield - Toys/Add-ons
Lighted Pinball Mods
 
$ 15.95
Playfield - Toys/Add-ons
ULEKstore
 
$ 17.95
Playfield - Toys/Add-ons
ULEKstore
 
$ 54.99
Cabinet - Shooter Rods
Lighted Pinball Mods
 
$ 10.00
Playfield - Toys/Add-ons
UpKick Pinball
 
$ 25.99
Lighting - Led
Lee's Parts
 
From: $ 9.99
Eproms
Matt's Basement Arcade
 
$ 9.95
Eproms
Pinballrom
 
$ 79.99
Cabinet - Armor And Blades
PinGraffix Pinside Shop
 
$ 45.99
Lighting - Interactive
Lee's Parts
 
7,700
Machine - For Sale
Norwalk, OH
$ 1,059.00
Pinball Machine
Mircoplayfields
 
$ 14.95
Playfield - Toys/Add-ons
ULEKstore
 
$ 225.00
Lighting - Interactive
Professor Pinball
 
Wanted
Machine - Wanted
Bethel Park, PA
5,500 (OBO)
Machine - For Sale
San Martin, CA
$ 29.95
$ 44.99
Cabinet - Shooter Rods
Pinball Shark
 
13,000 (Firm)
Machine - For Sale
Phoenix, AZ
$ 25.99
Lighting - Led
Lee's Parts
 
$ 399.00
Cabinet - Decals
Mircoplayfields
 
$ 26.99
Lighting - Interactive
Lee's Parts
 
$ 22.50
$ 69.99
Playfield - Toys/Add-ons
Lighted Pinball Mods
 
There are 5,074 posts in this topic. You are on page 63 of 102.

Reply

Wanna join the discussion? Please sign in to reply to this topic.

Hey there! Welcome to Pinside!

Donate to Pinside

Great to see you're enjoying Pinside! Did you know Pinside is able to run without any 3rd-party banners or ads, thanks to the support from our visitors? Please consider a donation to Pinside and get anext to your username to show for it! Or better yet, subscribe to Pinside+!


This page was printed from https://pinside.com/pinball/forum/topic/funhouse-club/page/63?hl=killerrobots and we tried optimising it for printing. Some page elements may have been deliberately hidden.

Scan the QR code on the left to jump to the URL this document was printed from.