(Topic ID: 105502)

Fixing inserts with lot of art (BOP)

By TheRingMaster

9 years ago


Topic Stats

  • 5 posts
  • 4 Pinsiders participating
  • Latest reply 9 years ago by lyonsden
  • No one calls this topic a favorite

You

Linked Games

No games have been linked to this topic.

    Topic Gallery

    View topic image gallery

    bop600dpi.gif
    296856-i.jpg
    296855-i.jpg
    #1 9 years ago

    Hi everyone!

    So, i am doing a restoration of my BOP and now I am starting with the playfield. I have read vid1900s guide to it and some other sources and it will be interesting to try it.

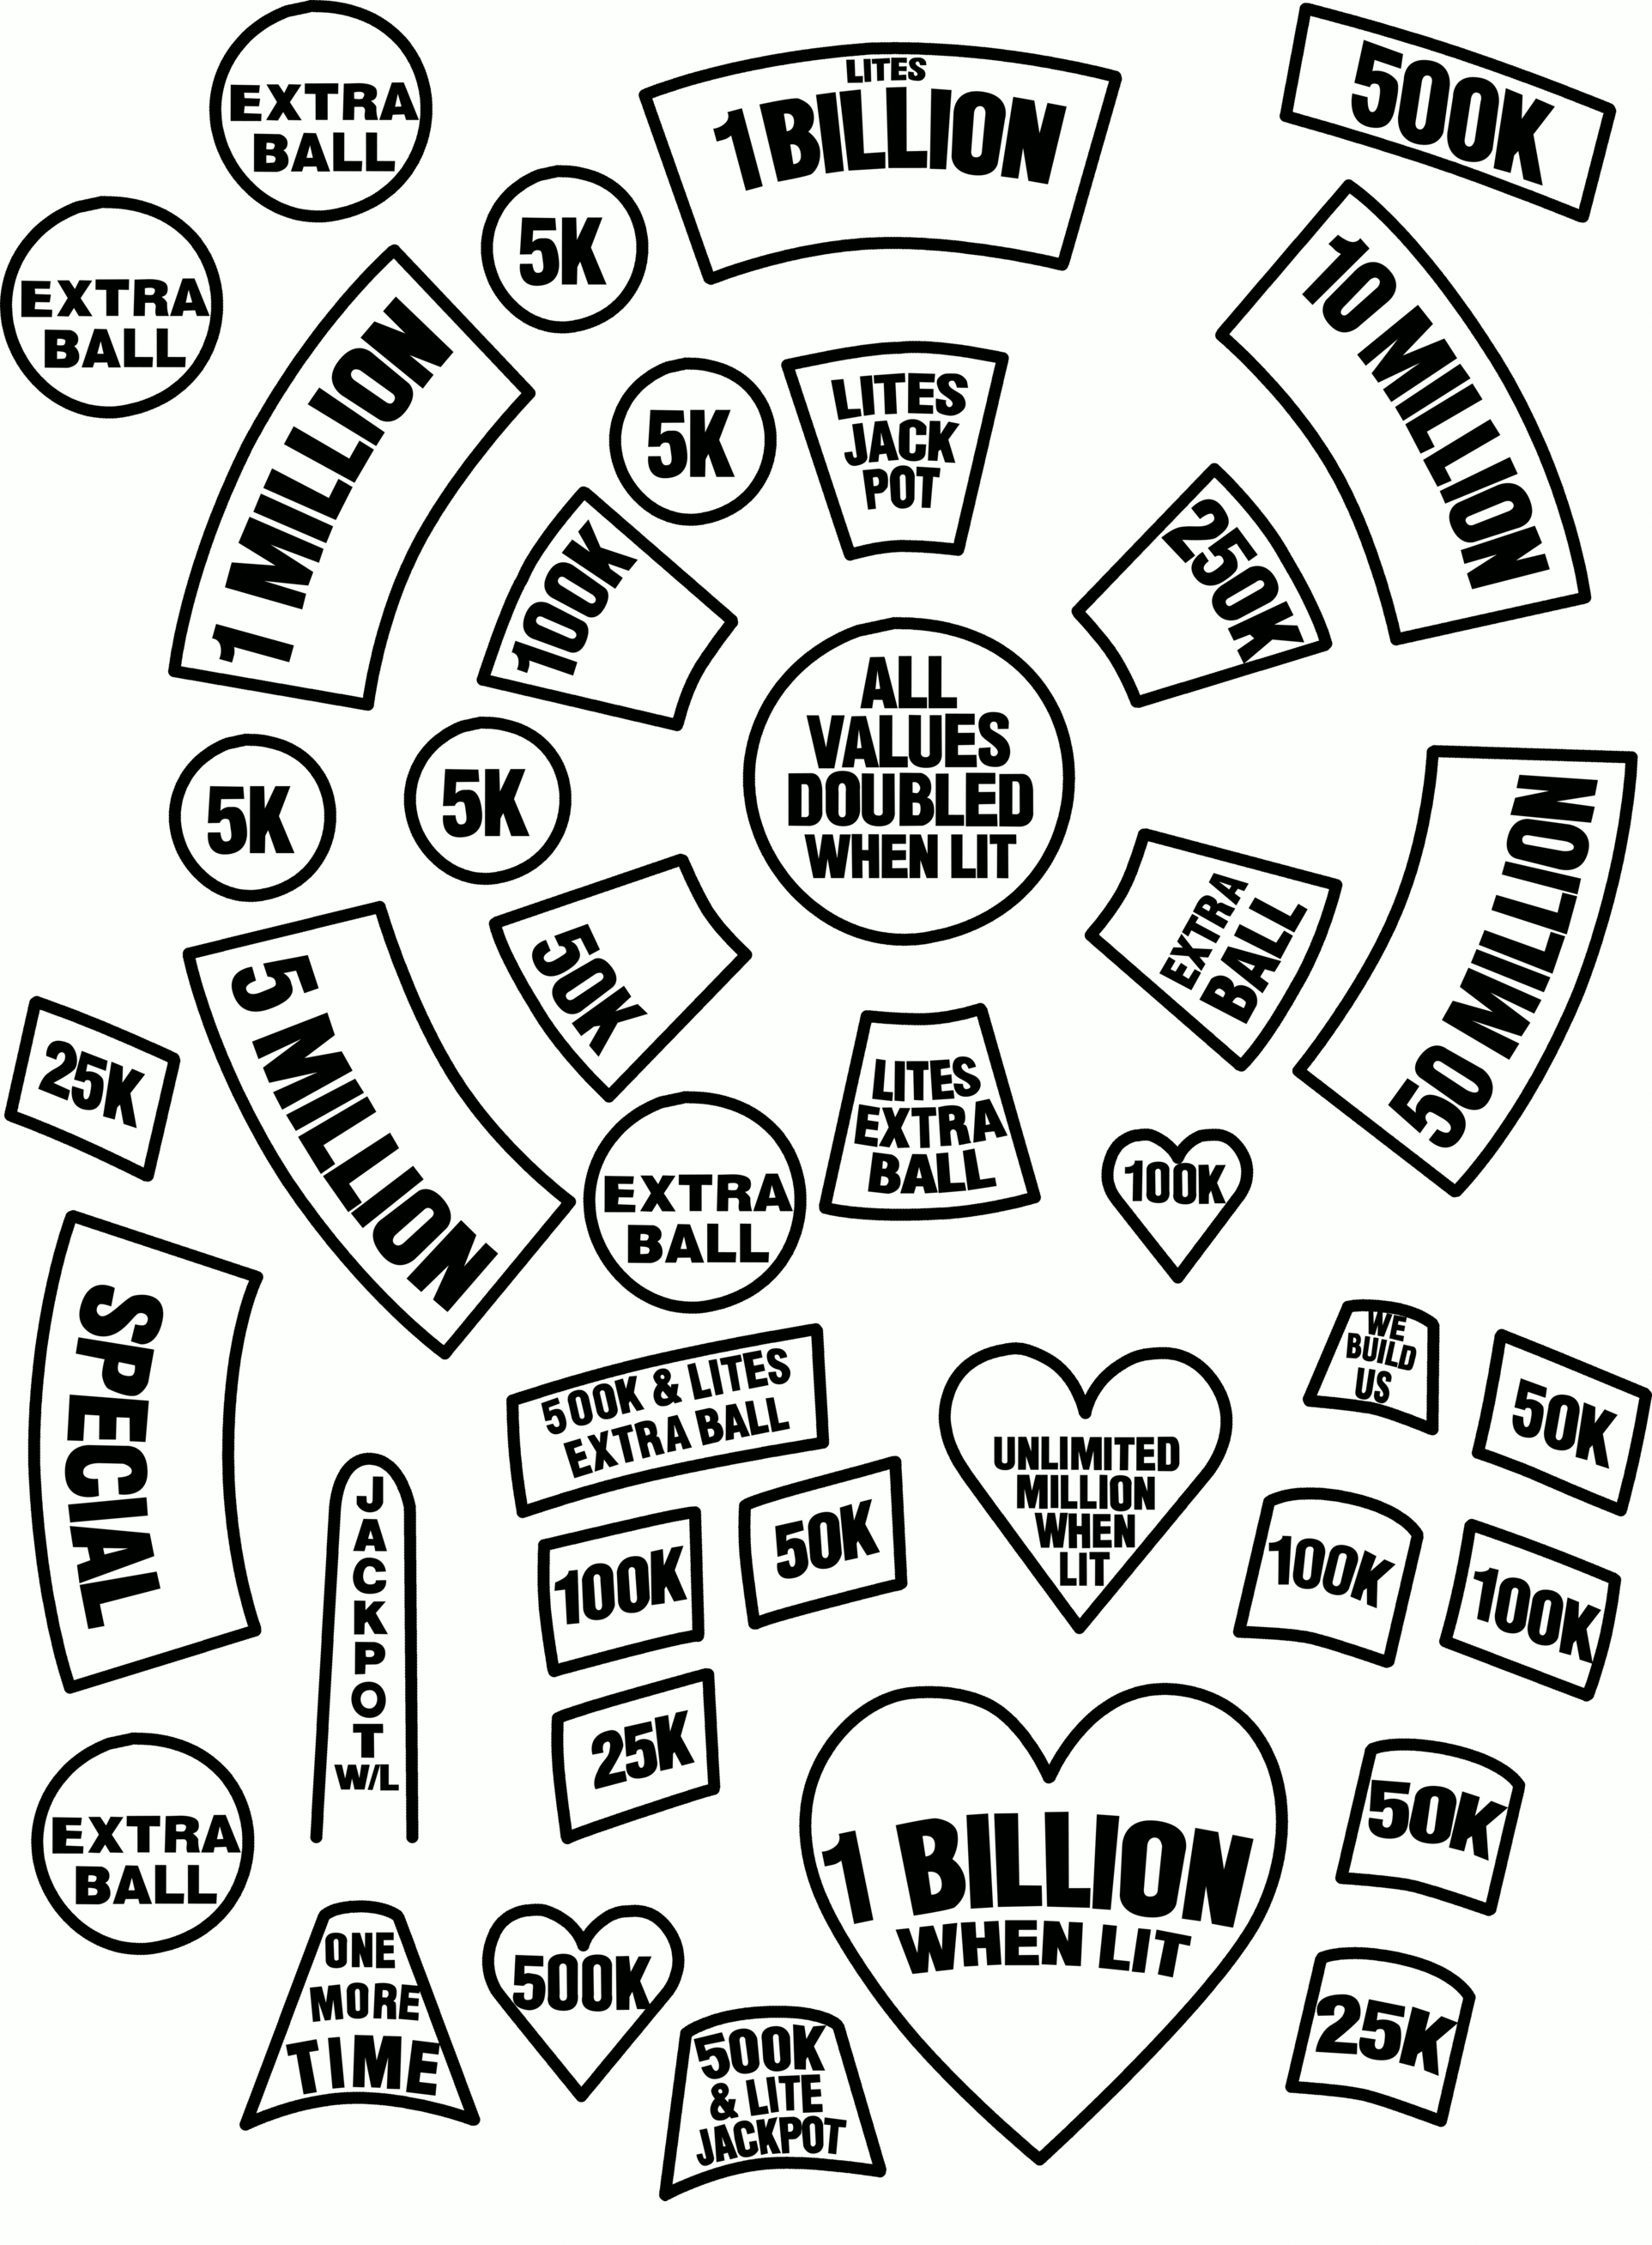
    Anyway, the question I have is how to tackle the inserts on this particular machine. I know about making water slide decals for the black text on "common" inserts but here i face a lot of inserts that have been printed on. Here are some examples:

    296855-i.jpg296855-i.jpg

    296856-i.jpg296856-i.jpg

    As you can see its not only the black text on them but also some art that is printed on the surface of the inserts. I would obviously like to fix these before clear coating the PF.

    The ways of doing this would be to either make a decal with the black text AND the art. But i feel it would be a pita to match the color from the scan, through the computer and out on the printer...
    The other way would be to just airbrush it back, which would be hard too but at least feels a tiny bit easier...

    Are there any other choices here and does anyone have any experience of doing this that they would like to share.. and also how would I prep the inserts before airbrushing them if I go that way? Sand them off a bit and clean them with alcohol and then go?

    / Andy

    #2 9 years ago

    Looks like this topic posted twice. So just testing if this shows up in both.

    #3 9 years ago

    I deleted the duplicate...you are all set now with just this one...

    Pete

    #4 9 years ago

    I don't see what the difference is between a number 10 and the art outline of the space shuttle. Its not half tone, its not color, its just black lines. Scan it, reproduce, apply.... repeat. For the one o two tiny spots that have red on the shuttle just paint over the top and clear the whole thing. Paint will do better if you clear first then sand gently paint and clear again (you need more than 1 coat anyhow).

    If you plan on replacing inserts (they look cracked) then your GOOD if you can do first part- cause the decal cares not if its going over a new insert

    If you cannot scan and are going to keep inserts, you can cover with a transparent stencil material and cut out the stencil you require by going over the outlines and fixing the missing parts.... a bit of a pain but completely do able with a little patience.

    If you cannot scan and your putting in new inserts, you need to rethink cause by hand is going to suck unless your an actual real life artist with experience in line drawings like this-

    Bottom line- GET someone to scan this for you. Someone somewhere has this machine and a scanner- its 30 mins work for them... and valuable to you beyond measure comparatively.

    #5 9 years ago

    I found this file for BOP decals a while ago. Can't remember who to credit for it, but here it is in case it is useful to you.

    bop600dpi.gifbop600dpi.gif

    Reply

    Wanna join the discussion? Please sign in to reply to this topic.

    Hey there! Welcome to Pinside!

    Donate to Pinside

    Great to see you're enjoying Pinside! Did you know Pinside is able to run without any 3rd-party banners or ads, thanks to the support from our visitors? Please consider a donation to Pinside and get anext to your username to show for it! Or better yet, subscribe to Pinside+!


    This page was printed from https://pinside.com/pinball/forum/topic/fixing-inserts-with-lot-of-art-bop and we tried optimising it for printing. Some page elements may have been deliberately hidden.

    Scan the QR code on the left to jump to the URL this document was printed from.