(Topic ID: 40984)

Dredd Owners Thread. Members Only!

By Anim8ormatt

11 years ago


Topic Heartbeat

Topic Stats

  • 4,876 posts
  • 545 Pinsiders participating
  • Latest reply 1 hour ago by jetmechinnc
  • Topic is favorited by 238 Pinsiders

You

Linked Games

Topic Gallery

View topic image gallery

IMG_9588 (resized).jpeg
IMG_9587 (resized).jpeg
03-8936-GLD_750x248 (resized).jpg
03-8936_750x255 (resized).jpg
Screenshot_20240330-203539_Gallery.jpg
IMG_1236.jpeg
IMG_9543 (resized).jpeg
IMG_9541 (resized).jpeg
IMG_9540 (resized).jpeg
IMG_9542 (resized).jpeg
IMG_9546 (resized).jpeg
IMG_9545 (resized).jpeg
IMG_9539 (resized).jpeg
IMG_9538 (resized).jpeg
20240330_122726 (resized).jpg
20240330_122733 (resized).jpg

You're currently viewing posts by Pinsider davi.
Click here to go back to viewing the entire thread.

#3080 4 years ago
Quoted from Calfdemon:

Still looking for the lower 2 ball guides by the flippers... Any ideas?
On a side note, I posted a request to consider reproducing the JD ramps which are next to impossible to find. He says he will consider it when he is less busy. So if others jump on this one, we may finally be able to get some brand new ramps made! Anyone potentially wanting some new ramps may want to voice their wishes here: https://pinside.com/pinball/forum/topic/freeplay40-ramps/page/64#post-5005597

Please post pics. I may have surplus metal parts.

#3085 4 years ago
Quoted from Calfdemon:

I am not at home right now, but going through my older photos, it is these 2 guides that separate the inlanes from the outlanes and edge up to the flippers...[quoted image][quoted image]

This?

IMG-08ddaa647d2302dd71ec5979b5d9be81-V (resized).jpgIMG-08ddaa647d2302dd71ec5979b5d9be81-V (resized).jpgIMG-631bdf35f22d25de8513e3d23f8bffe6-V (resized).jpgIMG-631bdf35f22d25de8513e3d23f8bffe6-V (resized).jpg
#3096 4 years ago

New member here, looking for help. Can someone please send me some good high resolution pictures about bottom side of populated playfield? I would like to restore a JD, however the bottom side of playfield is almost empty... Please contact me in PM.

Thanks in advance!

#3099 4 years ago
Quoted from Davi:

New member here, looking for help. Can someone please send me some good high resolution pictures about bottom side of populated playfield? I would like to restore a JD, however the bottom side of playfield is almost empty... Please contact me in PM.
Thanks in advance!

Many thanks for quick help!
trumpy
mbwalker

2 weeks later
#3114 4 years ago
Quoted from Baron_VonLoppnow:

Hi Davi - I too am looking for the outlane divider that you show in your pic in post #3085 - left side only. I just noticed that one of the tiny brackets that feature the screw hole is not there, causing the ball to bounce a little as it comes into the flipper. Would be easiest to replace it rather than rig something up or try to weld something. Feel free to reply to me privately if you have something you can still sell.

I have a spare, however it's not original, welded. Seems it is a common design issue, like the ball guide at sniper tower.

20190525_190939 (resized).jpg20190525_190939 (resized).jpg
#3116 4 years ago

Is there a demand about plastic sets? I am not talking about the known low quality inkjet version, but a screen printed, high quality full set, including colored, grey and clear plastics. If everything goes well, I may have some sets in the near future.

2 months later
#3190 4 years ago
Quoted from KenM:

Does anyone feel like measuring the height of the topper? I'm tired of searching. I have a short basement ceiling and hope it'll fit.
Thanks!

8 inch.

1 month later
3 weeks later
#3256 4 years ago
Quoted from PinRob:

Same thing I experienced. And then the decals lifting up after awhile

Printed version is possible. If the demand is real, I will consider to create a printed plastic.
Do we really need the hole at the top?

#3259 4 years ago
Quoted from PinRob:

Hole not needed. Like to see some more pictures of yours

My restoration is in progress, and the original plastic is broken, decal is faded.
Options:
Print on clear plastic, then curve it
3D print, tricolor translucent version, without decal

20191020_124110 (resized).jpg20191020_124110 (resized).jpg20191020_124315 (resized).jpg20191020_124315 (resized).jpg
#3273 4 years ago
Quoted from C_Presley:

I’ve tried to find that washer in the manual to get a size, if you place a ball under that nut that holds the wire form is there enough space between the two for the ball to fall down? I’m assuming this issue is why that washer exist. I’ll take a few fender washer and see what I can do. Thanks for the pics and help!

Size of washer:
Diameter: 44 mm
Cut distance from center: 12 mm

1 week later
#3307 4 years ago

Here is how the 5 bank works:

JD_5bank (resized).JPGJD_5bank (resized).JPG
#3311 4 years ago
Quoted from EvanDickson:

Holy cow, did you build that cad model just for this thread?

It's not my merit.
When I was in a hunt for a drop target, I found this cad drawing.

#3321 4 years ago

Glue won't eliminate the root cause. This is a design flaw: as you can see, there is a deformation on the metal protector (next to target). This metal takes over all the force to the plastic ramp. That's why so many broken Air Raid ramp out there.
I am also looking for suggestions, how to protect the ramp.

#3322 4 years ago
Quoted from ragefactory:

Do you know where i can find the 3D of the plastic crane + metal arm + magnet?
Working on a mod to replace all, here the concept.
Thanks
[quoted image]

I have no info about other drawing.

#3344 4 years ago
Quoted from Thor-NL:

Going through a parts-bin I found some JD parts.
But have two questions, the lamp-boards, is this a complete set?
About the pursuit-assy's, is there a right and left version? or do these come from two JD's and are they both for one side?
Thanks[quoted image][quoted image]

Board set looks complete.
Pursuit assy set:

20191018_160258 (resized).jpg20191018_160258 (resized).jpg
1 week later
#3374 4 years ago
Quoted from TicTacSeth:

Anyone know what size the screws are that hold on the opto switches on the stacked wire forms (that connect to the ramps) in the upper right?

Total 8 screws for 4 optos; plus 4 spacers.
Part numbers:
4004-01005-08 ms 4-40x1/2 p-ph
01-11681 spacer-ramp opto

20191123_203423 (resized).jpg20191123_203423 (resized).jpg
#3379 4 years ago
Quoted from TicTacSeth:

Awesome, thanks! I was in it last night and saw I was missing one of those spacers. It also looks like the black side of the optos barely creep over the wireform rail, is it supposed to clear it better than that or is this normal?

As I remember, here you can find pictures about stacked wireform (too):

https://pinside.com/pinball/forum/topic/judge-dredd-teardown-pics-400

1 week later
#3382 4 years ago
Quoted from MagicPockets:

Real life got in the way so only just getting back to solving this. Is there an openly available parts list/tear down for the machine? I'm mindful of asking lots of n00b questions and prefer to avoid that if possible.
From the advice so far, I need the following parts -
https://www.marcospecialties.com/pinball-parts/A-6306-2
https://www.marcospecialties.com/pinball-parts/03-8561
https://www.marcospecialties.com/pinball-parts/4106-01152-06
But the comment above about the pin has me wondering if that's the correct plunger and/or if I need a different part? Happy to order whatever parts needed if somebody can either confirm or point me to a schematic/manual. This is really not my forte so thanks again for all the help.
[For context as been a few weeks - the plunger in the Sniper Tower (which is plastic in mine) has come free and appears to be broken where a pin clips to or runs through the plunger]

https://www.ipdb.org/files/1322/Bally_1993_Judge_Dredd_Manual.pdf

#3387 4 years ago
Quoted from o-din:

Is it just the motor? I was wondering where to get those myself. I know the gearbox with motor is super expensive but available at Marco.
PBresource rebuilds them so they may have just the motor. Another option is if it is the same motor as the crane uses which I have not checked, that assembly is only $89 at Marco.

The crane motor is different - unfortunately.

#3390 4 years ago
Quoted from o-din:

They are hard to order from anyway.
I searched as best I could. Best bet is to contact PBresource. They rebuild these things. If they don't have it, might try to post a wanted to buy ad for a used one. It's gotta be out there somewhere.
http://www.pbresource.com/motor.html
Otherwise, it's bite the bullet time.
https://www.marcospecialties.com/pinball-parts/14-7985

$379 for a pinball gearbox/motor? I know it's an upgraded one, and a problematic part, but... $379?

#3392 4 years ago
Quoted from o-din:

Lucky to have it available at all. A few years ago there were none.
Again check with PB resource. When no parts were available to the public, they were to whoever is doing the rebuilds for them. That is the best advice I can give.

Yes, at least it's available, and brand new. Has anybody tried these?

2 weeks later
#3414 4 years ago
Quoted from ragefactory:

Hi, since my PURSUIT pastics was broken and cannot find a new one, i made a replica.
If someone interested i made it availbale in my shop.
thanks.[quoted image][quoted image][quoted image]

Nice colors - but the rounded cutout is too big (your original is not a good reference). How can your screw to the bracket?
See attached NOS pic.

JD pursuit (resized).jpgJD pursuit (resized).jpgJD pursuit assy (resized).pngJD pursuit assy (resized).png
#3416 4 years ago
Quoted from ragefactory:

Hi, the original "small" hole is fragile: a strong ball hit can crack the plastic around (that's the reason mine original reached the status you see in the photo).
If you put 2 washers, the area that absorbs the impact is greater, so no risk to crack the plastic around the hole.

Then you need 2 huge washers. How is this look like as installed?

#3418 4 years ago
Quoted from grantopia:

I'm hoping someone can help me track down a part. I've had a few balls get lodged under the plastic on the left side of the subway entrance. It looks like there should be a little wire "gate"/rail to keep the ball out of there...there are two holes in the playfield for it. There is one on the right side of the entrance...anyone have a size, part number, etc on this? Hopefully the pictures illustrate what I'm talking about...[quoted image][quoted image]

I guess this is.
Repro is in progress (not by me) for a guy in EU, PM me if you need one.

20191025_203949 (resized).jpg20191025_203949 (resized).jpgIMG_1008 (resized).JPGIMG_1008 (resized).JPG
#3420 4 years ago
Quoted from grantopia:

Sorry, it's actually the wireform that's under the plastic. It looks like there is one on each side of the scoop entrance to keep the ball from getting under that plastic.

I see. You need a simple gate. Distance between hole centers: 32 mm.

20191225_193800 (resized).jpg20191225_193800 (resized).jpgDSC_2550 (resized).JPGDSC_2550 (resized).JPG
1 week later
#3422 4 years ago
Quoted from wizard_mode:

Hi all, I am running the deadworld mod and trying to adjust the crane lifter wheel but I found it to have a blown out set screw. I would like to buy a new lifter cam wheel but see that pinbits and pinballspareparts are both sold out. Anyone know of a boutique part maker who is making these? Or, is anyone aware of a 3d cad file I could use to 3d print a few of these? Please PM if anyone has a lead. Thx

I can help, PM sent.

#3425 4 years ago
Quoted from Davi:

I can help, PM sent.

Printed the 1st sample based on original dimensions. I've increased the fill at the bottom, looks good at first sight. The question mark is the set screw installation.

20200102_231113 (resized).jpg20200102_231113 (resized).jpg20200102_232303 (resized).jpg20200102_232303 (resized).jpg20200102_232343 (resized).jpg20200102_232343 (resized).jpg
12
#3427 4 years ago
Quoted from wizard_mode:

Davi install a helicoil for the set screw. Looks awesome. I replied to your PM!

Here is the 2nd version. No need to suffer from helicoil, no need to glue anything. Only a simple 8-32 slim hex nut and the original grub screw are required.

20200103_234149 (resized).jpg20200103_234149 (resized).jpg20200103_233422 (resized).jpg20200103_233422 (resized).jpg20200103_233832 (resized).jpg20200103_233832 (resized).jpg8-32 slim hex nut (resized).JPG8-32 slim hex nut (resized).JPG
3 weeks later
#3473 4 years ago
Quoted from o-din:

Right. I figured it out. Don't know what else to say.[quoted image]

That's the hardware version of:

ADJUSTMENTS -> STANDARD ADJ. -> MIN. VOL. OVERRIDE
Set to "YES".

#3476 4 years ago
Quoted from Shredso:

What happened with this project? Will it be for sale or are you sharing the file? I just got my 3d printer back online, this would be a great one to test out the setup.

Waiting for test results.

1 month later
#3555 4 years ago
Quoted from robotron911:

Really nice job. I have the metal crane mod from the guy in the UK. I think it is excellent. This may be an even better execution of a crane mod. I guess the question is the plastic durable enough, particularly from any random air ball strikes that could happen over time.

Thank you. I have no experience about airballs in Judge Dredd. I think the chance of airball at the upper right corner, at the height of the crane is very low, "protected" by ramps and the deadworld.

#3559 4 years ago
Quoted from TractorDoc:

There should be a new thread in the near future to provide details. I'm sure a link will be posted here in the Dredd Thread.
I'm still trying to provide the designer/creator a few minor bits of info to make sure production cranes are bug free.
A few more pics to highlight some of the detail under the truss.[quoted image][quoted image]

Here is the separated thread about my crane mod:
https://pinside.com/pinball/forum/topic/judge-dredd-active-3d-crane-modification

#3562 4 years ago

Thanks guys for the intense interest

f0236b1f735021faf840cf6b2f3e8c7d2204c785.giff0236b1f735021faf840cf6b2f3e8c7d2204c785.gif
2 weeks later
#3607 4 years ago
Quoted from durgee7:

Hey Guys,
Do you guys recognize this ground? I can try finding it in the Pinside Shopout pics.
Any info on these items is greatly appreciated!
[quoted image]

Easy.

JD_cab (resized).JPGJD_cab (resized).JPG
2 months later
#3690 3 years ago
Quoted from legendpin:

No I think the shop is closed right now and everything is out of stock.

No... Out of stock means really out of stock, not related to shop status.
In stock example:
https://www.ministryofpinball.com/en/catalog/product/view/id/7673/s/89-flasher-4-x-led-yellow/category/909/

3 weeks later
#3710 3 years ago
Quoted from luckymoey:

And if you take the plastic off of the crane, there will be a switch where the magnet grabs the ball. The switch interferes with the Davi crane mod. You can remove it since it's not essential to game play. Believe it just reduces magnet voltage once the ball is grabbed.

The crane mod for proto/sample games is almost done, hopefully I can reveal first pictures in few days.

#3718 3 years ago
Quoted from Davi:

The crane mod for proto/sample games is almost done, hopefully I can reveal first pictures in few days.

Update:
1st crane version for prototype/sample games is done.

Thanks for luckymoey for measurements!

Modifications have been made in the gripper and also in the cylinder part to create space for microswitch and actuator.
I am going to send this for test.

20200705_153100 (resized).jpg20200705_153100 (resized).jpg20200705_153126 (resized).jpg20200705_153126 (resized).jpg20200705_145354 (resized).jpg20200705_145354 (resized).jpg20200705_145548 (resized).jpg20200705_145548 (resized).jpg
3 months later
#3797 3 years ago
Quoted from BeeGeeMtl:

Hey everyone! I was looking to powder-coat the JUDGE DREDD legs, what color would you guys suggest? Also, if you know of any online pictures of other JDs that have power-coat already, I've love to check them out since I'm more of a "visual" guy. Thanks!

https://pinside.com/pinball/forum/topic/powder-coating-services-offered?tq=Dredd&tu=

1 week later
#3812 3 years ago

I am looking for review/opinion about upgraded planet motor/gearbox. Is this worth the money?

https://www.marcospecialties.com/pinball-parts/14-7985

JD planet (resized).JPGJD planet (resized).JPG
1 week later
#3827 3 years ago

Seems this joke is not well known, needs an explanation:
https://pinside.com/pinball/forum/topic/judge-dredd-is-a-1400-game-folks

1 week later
#3830 3 years ago
Quoted from AntennaMan:

Would someone tell me what the posts on each side of the Subway Entrance are? Model/part#. The ones that hold the double rubbers on each side and the wire form and plastic above the entrance. Both of mine snapped in half.

Manual, page 2-33.

Screenshot_20201109-022808_Drive (resized).jpgScreenshot_20201109-022808_Drive (resized).jpg
#3832 3 years ago
Quoted from Langless28:

New to the group. Super excited. I have a demo man so same era but does this opto board for my left flipper look correct? In use to the black plastic photo interrupters. Issue is this metal one is extremely stiff compared to my right flipper.
[quoted image]

Welcome to the JD club. Opto board type looks OK (but optos are damaged).
You can remove one copper blade for lighter button feeling.
Screenshot_20201109-095840_Drive (resized).jpgScreenshot_20201109-095840_Drive (resized).jpg

#3837 3 years ago

What is the best source for good quality and correct color cabinet decals? Looking for original color scheme.

2 weeks later
12
#3846 3 years ago

During my JD restoration I realized that the deadworld gearbox is open. I learned that at some point Bally changed to open version as part of cost cut.
I think open gearbox is not a good idea: no dust protection, and risk of fallen screws, washers while the playfield is lifted.
I created a perfect fit plug. Now my gearbox is closed. I am going to upload the stl file to Thingiverse soon.
(In the opened pic, originally there are 2 shafts and the screws to the motor.)

20201124_134510 (resized).jpg20201124_134510 (resized).jpg20201124_134523 (resized).jpg20201124_134523 (resized).jpg

#3847 3 years ago
Quoted from fosaisu:

Other than patching the L7 rom to support the Deadworld mod, anyone have thoughts on glitch fixes or scoring/balance tweaks that’d be nice to see? If we put a good list together maybe we could pique soren’s interest and jump the line a bit.

Nobody? It's time to improve the L7 ROM, unless this version is flawless.
I would help, but I don't really know this pin, I am in the middle of restoration as 1st step (purchased as a strongly incomplete pin), and I have no memories about JD from mid '90's arcade times.

Calling @JediPimp:

https://pinside.com/pinball/forum/topic/dredd-owners-thread-members-only/page/53#post-4334098

#3849 3 years ago

What's the purpose of the extra ball guide next to flippers in prototype games?

2e42414188b9a9fe9b998b56729818ce6654f86e (resized).jpg2e42414188b9a9fe9b998b56729818ce6654f86e (resized).jpg
1 week later
#3858 3 years ago
Quoted from durgee7:

Here's another video after restarting (powering on) the machine without pushing start. Maybe I need to check the fuses.

Played the video with 0.25x speed. Seems the switch is activated by the plunger.

#3860 3 years ago
Quoted from durgee7:

Hey Guys! I just got another Dredd and decided to clean the playfield and replace balls before playing. The machine has decided to continuously fire the Left Launch Coil after pressing start. I turned the game off and powered up again, but that same coil continues to actuate. Any ideas on where I should start? The rollover micro switch is not getting activated by accident. I did notice a few loose wires (one of which looks to be from the side of the supergame switch). The red-green wire has a terminal that probably needs to connect somewhere. Maybe that's causing this issue?
Any help is greatly appreciated...even photos showing locations for the loose wires in my pics.
Thanks!
[quoted image][quoted image]

The green wire goes to the the door switch (smaller one with 2 terminals).

#3862 3 years ago
Quoted from durgee7:

Ok, I attached the green-red wire to the coin door switch and soldered that loose yellow-orange wire to the supergame microswitch (that still doesn't seem to light or work). This video is afterward. Notice how at the end I get a ball to load after pressing start a second time. Unfortunately, I kept getting another ball loaded, and it didn't end until all balls were in the shooter lane. I restarted and pressed start twice to speed up the process but no ball would load in the shooter lane, but game thought I launched a ball after pressing launch.
Full disclosure: The person who sold this to me said they had issues with the ball trough and had to fix it prior to sending me a video. I'll never learn my lesson of buying pins without actually playing them. I have a feeling my homework is only beginning for ball trough issues.
Thanks again for all your help. I'm wondering if new ball trough boards are needed.
[quoted image][quoted image]

Check the switches and the ball trough in the service menu.

#3864 3 years ago
Quoted from durgee7:

Yeah, I tried that well before and it tells me to open coin door to enter menu. This game is something else. My previous Dredd was easy to enter diagnostics. This machine is suspicious in that no credit dots appear ( too good to be true). The battery area on the cpu was altered with trace repair wires...not sure if that's involved.

This machine seemed worked well on Wednesday with no ball trough issues. I didn't check diagnostics until today, and now diagnostics are not even pulling up.
I removed one of the trough boards (great lakes) and there have been wires extended using shrink tube. Maybe the wires are kinked and not allowing a good connection to the board.
I am able to play a game with 2 balls (no joke). When a 3rd ball is added, the trough automatically kicks it into the shooter lane, and I end up with 2 in the lane. Same occurs for every ball I add in excess of 2.
[quoted image][quoted image][quoted image]

The coin door switch seems bypassed, the game thinks the door is closed?

#3877 3 years ago

Lack of response about code fixes... I ended up a compilation based on Pinside rating comments, JD club comments, and comments from soren thread.
If you think Judge Dredd update would be good by soren, please visit his thread, and upvote my post and/or add your post. Thanks.

https://pinside.com/pinball/forum/topic/official-williams-and-bally-software-upgrades/page/8#post-6018904

#3881 3 years ago
Quoted from ibis:

So has anyone ever found a replacement motor for the planet mech? Not talking about the gear box, just the motor itself. It appears to be removable. If not, Steve Young offers a repair service for it, has anyone ever used it before? Cost, time frame, etc? Thanks in advance!

What's wrong with the motor?

#3888 3 years ago
Quoted from ibis:

Its got an open winding according to my meter.

The motor for Deadworld is not available (14-7985). However, you can use the crane motor (14-7989).
Differences:
Mounting plate: you can move it from bad deadworld motor to new crane motor (2 screws).
Speed: the crane motor is ~15% faster according to my measurements. Buy a 12V DC PWM speed controller ($5), then you can reduce the speed.
The crane motor itself is available in few webshop. As an option, the motor/gearbox assy is $89 at Marco.

3 months later
#3973 3 years ago
Quoted from SantaEatsCheese:

Question for the group. I am trying to figure out how the target bank reset mechanism works, the one that knocks the drop targets down. The one that lifts works fine, but at the start of Safecracker it goes nuts. The solenoid works and is firing, but it does not knock down the targets. It has not worked since I acquired this "100% working and solid" machine... Figures.
Am I missing a part or is there an adjustment I am missing?
In any case, thanks!
[quoted image]

Looks like the wire is missing.

#3974 3 years ago
Quoted from Davi:

Looks like the wire is missing.[quoted image]

c47e4ee1ca01e538e212a1be840e8f8727b3108e (resized).jpgc47e4ee1ca01e538e212a1be840e8f8727b3108e (resized).jpg

#3976 3 years ago
Quoted from BobLangelius:

Nice 3D drawing, If i do say so myself

Yes it is, someone spent few hours on this.

#3982 3 years ago
Quoted from SantaEatsCheese:

Of course... does anyone happen to know where I can find this part? I can't find a parts number for it or even the item in my manual. Thanks!

It's not listed in the manual.

20210325_140128 (resized).jpg20210325_140128 (resized).jpg20210325_140140 (resized).jpg20210325_140140 (resized).jpg20210325_140206 (resized).jpg20210325_140206 (resized).jpg20210325_140229 (resized).jpg20210325_140229 (resized).jpg20210325_140241 (resized).jpg20210325_140241 (resized).jpg20210325_140257 (resized).jpg20210325_140257 (resized).jpg
#3986 3 years ago
Quoted from SantaEatsCheese:

Thank you for the assist!
Can you tell me how big the square in red is so that I get the scale correct?
[quoted image]

20x20 mm.

#3988 3 years ago
Quoted from BobLangelius:

[quoted image]
The PDF should print out at 1 to 1

Cool. Are you the author of drop target assy CAD drawing?

#3989 3 years ago

It's 10x10 mm. Grid is 1 mm.

#3991 3 years ago

Nice job. Why did you created this?

2 months later
#4045 2 years ago
Quoted from flipkidflip:

This is the vertical upkicker assembly for the Sniper Tower, which has broken somehow. From the digging I’ve done, the conclusion I’ve reached is that the longer cylindrical part was part of the plunger assembly and has broken from the the lower metal part of the plunger.
I believe I need to replace the plunger with this: https://www.marcospecialties.com/pinball-parts/02-4668
Can anyone confirm?
Thank you![quoted image]

Yes - 02-4668 is the correct part, it's also listed in the manual.

2 months later
#4081 2 years ago
Quoted from Jmckune:

Just picked up this game. Mine came without a topper and I’m going to be ordering soon. My only question is, what type of hardware do I need to connect the eagle to the bracket and the bracket to the backbox? Thanks

Eagle to the bracket:
4106-01115-12 (4) sheet metal screw #6 x 3/4 pl-hwh
4700-00023-00 (4) washer .203 x .625 x .059

Bracket to the backbox:
4700-00033-00 (3) washer .265 x .750 x .067
4320-01123-24B (3) carriage bolt 1/4-20 x 1-1/2 inch
4420-01141-00 (3) flange nut 1/4-20

3 weeks later
#4124 2 years ago
Quoted from Kneissl:

Dredd has a custom piece for the left? switch

Yes, standard opto set doesn't fit.
The blade and the bracket are custom.
https://pinside.com/pinball/forum/topic/judge-dredd-flipper-opto-assembly-left-hand

#4130 2 years ago
Quoted from Calfdemon:

Could I ask a favor please...
Can someone take pictures and measurements of the parts needed under the shooter lane plastics please? The shooter lane plastics on each side are elevated (for an apparent reason I found out) and I need to know what parts / sizes are used to mount those plastics that high off of the rails underneath. I mounted mine low when it was rebuilt and do not have the riser parts anymore. And just to dissuade anyone from lowering their plastics, apparently on the launches (more on the right), they happen so quickly (multiball) and with enough power that some of the balls catch the end of the plastic and will rip them right out of the wood rails. This is obviously why they raised them originally. They look a lot better low, but no bueno...
Thanks in advance for the help!
EDIT: And it has been a while since my JD was torn down. Are both sides elevated or just the right side? I know for a fact that the right side was, I just cant remember if the left side was done to match? Anyway, again, any help is appreciated.

Few pictures...
https://pinside.com/pinball/forum/topic/dredd-owners-thread-members-only/page/79#post-6165889

#4131 2 years ago
Quoted from Calfdemon:

Could I ask a favor please...
Can someone take pictures and measurements of the parts needed under the shooter lane plastics please? The shooter lane plastics on each side are elevated (for an apparent reason I found out) and I need to know what parts / sizes are used to mount those plastics that high off of the rails underneath. I mounted mine low when it was rebuilt and do not have the riser parts anymore. And just to dissuade anyone from lowering their plastics, apparently on the launches (more on the right), they happen so quickly (multiball) and with enough power that some of the balls catch the end of the plastic and will rip them right out of the wood rails. This is obviously why they raised them originally. They look a lot better low, but no bueno...
Thanks in advance for the help!
EDIT: And it has been a while since my JD was torn down. Are both sides elevated or just the right side? I know for a fact that the right side was, I just cant remember if the left side was done to match? Anyway, again, any help is appreciated.

Few more...

DSC_2357 (resized).JPGDSC_2357 (resized).JPGDSC_2414 (resized).JPGDSC_2414 (resized).JPGDSC_2419 (resized).JPGDSC_2419 (resized).JPGDSC_2427 (resized).JPGDSC_2427 (resized).JPG
#4132 2 years ago
Quoted from Calfdemon:

Could I ask a favor please...
Can someone take pictures and measurements of the parts needed under the shooter lane plastics please? The shooter lane plastics on each side are elevated (for an apparent reason I found out) and I need to know what parts / sizes are used to mount those plastics that high off of the rails underneath. I mounted mine low when it was rebuilt and do not have the riser parts anymore. And just to dissuade anyone from lowering their plastics, apparently on the launches (more on the right), they happen so quickly (multiball) and with enough power that some of the balls catch the end of the plastic and will rip them right out of the wood rails. This is obviously why they raised them originally. They look a lot better low, but no bueno...
Thanks in advance for the help!
EDIT: And it has been a while since my JD was torn down. Are both sides elevated or just the right side? I know for a fact that the right side was, I just cant remember if the left side was done to match? Anyway, again, any help is appreciated.

The spacer:
https://www.marcospecialties.com/control/keywordsearch?SEARCH_STRING=03-8371

1 week later
#4143 2 years ago
Quoted from denzo:

Dear JD owners,
I have the L1AT rom, the ring, replaced both of them. Guess what happened? Nothing changed.
Oh, no, after the second virtual lock the third ball "locked" virtually too... Great.
//<![CDATA[
window.__mirage2 = {petok:"490bd55705ad5e0660d6f8d571aa97e946ca52aa-1631953612-1800"};
//]]>

I have checked the diverter and the left ramp optos, they are working fine! Except in the test the left ramp optos switch 67 says "not used". But it is working.
So, now I have the DW mod, but unusable...
I have read something about the switch 67/32 problem, but everywhere said that the DW mod is working fine without any further modifications.
Btw I have a normal production game (left ramp opto is halfway up on the ramp, no gunner just crosshairs on the snipertower).

http://www.iobium.com/judge_dredd_locking_ring_mod.htm

https://pinside.com/pinball/forum/topic/dredd-owners-thread-members-only?tq=Switch+32&tu=

https://pinside.com/pinball/forum/topic/dredd-owners-thread-members-only?tq=Switch+67&tu=

#4152 2 years ago
Quoted from ReallifePin:

I am final done shopping this beast out. It was filthy when I got it but I'm happy with how it turned out. I have one molex connector to add and then I'm ready to play some games and really get everything fine tuned.
[quoted image]

Very nice!

#4164 2 years ago
Quoted from Mancave:

Yeah i saw that too but nothing has come out of it as yet.

I really hope Judge Dredd is potential title for him. In his thread we listed many "to be improved" points.

2 months later
#4215 2 years ago
Quoted from bartron:

I changed the smaller Deadworld ring to translucent blue, it makes a noticeable difference.
[quoted image]

Without the ring system, it looks empty, and the rotation is almost invisible.

IMG_7374 - Version 2 (resized).jpgIMG_7374 - Version 2 (resized).jpg
1 week later
#4232 2 years ago
Quoted from FieldDog1:

Hi all just joined the club, put in a pinsound and added the TNA soundtrack and it’s awesome! Glad to be part of the team!

Welcome! 4 times welcome

2 weeks later
#4259 2 years ago
Quoted from pacman11:

Alright bought a new coin door and the plug doesn’t fit is there an adapter for this? The orginal plug is larger see pictures below.
[quoted image][quoted image][quoted image]

You have 2 options:

Destructive, but cleaner look:
Purchase a 13 pin IDC (0.156), cut the new plug (0.100), then press the new wires to the IDC (0.156) according to the manual.
https://www.marcospecialties.com/pinball-parts/5792-10817-13

Non-destructive:
Purchase a 13 pin IDC (0.156), a 13 pin IDC (0.100), and a 13 pin Z connector (0.100). Create an adapter like this:
Coin door (resized).jpgCoin door (resized).jpg

It's a lot more work, and unnecessary extra connections.

2 weeks later
#4278 2 years ago
Quoted from OldTor:

Hi, has anyone got any advice for getting this nylon locking nut off? When i turn it the post spins, I can't see the bolt under under the playfield or get long nose pliers under the plastic to stop it.[quoted image]

Remove 1 or 2 red targets (it's just 2 screws), then you will have an access.

3 weeks later
#4297 2 years ago
Quoted from PinballSTAR:

Did Judge Dredd ship from factory with Gold legs or Chrome ? I see Chrome in most promotional items but see very many games with Gold legs with chrome siderails / lockdown.
I know World Cup Soccer had Chrome and Gold (legs only) mix from factory - curious if Dredd was the same or just something that caught on in the aftermarket.

Factory setup is brass plated.
01-2263-2-BR

#4299 2 years ago
Quoted from PinballSTAR:

TY - the only thing that threw me off was the flyer shows chrome... interesting they switched before production.

The flyer shows brass, a kind of light brass.
Compared to lockdown bar, you can see a minor difference.

4 months later
#4366 1 year ago
Quoted from ReadyPO:

The Soren thread has a key post (#2) that shows the updated ROMs, Post #1 lists authorized dealers. Dredd has not been done yet (as of July 4th, 2022).
Soren Updates:
CFTBL
Junk Yard
Road Show
Mousin Around
Theatre of Magic
Radical
Demolition Man
Keep an eye on that thread, it will be updated with any new ROMs.
https://pinside.com/pinball/forum/topic/official-williams-and-bally-software-upgrades

L1-D is available:
https://pinside.com/pinball/forum/topic/official-williams-and-bally-software-upgrades/page/11#post-6293784
Contact Meldenhut

2 months later
#4468 1 year ago
Quoted from Days:

The motor of the underworld doesn't work, i think is because of one of the cogs, i saw that there is new motor selling in the USA, but i can't find any in europe and the shipping price from USA + Vat would be a bit expensive.
there is someone making it or selling it on Europe, or making just the cogs? or the cogs of other motors can work , like the motor for world cup 94?
Thank you for your help

Is the motor itself works? Any damage on motor gear?

#4470 1 year ago
Quoted from Days:

it's the motor gears, the motor turns but one of the gear doest turn because of wear off with time/use i imagine.
But if needed i buy a new motor, wanted to see if i could repair first.

The planet assembly contains a lot of parts. Motor is just one item, it's listed as #1 on assembly drawing.
Do you mean the motor is OK, but something in the gearbox is wrong? (The gearbox is not listed in the manual.)
Remove the motor, and check the gears.
If the motor is OK, the gearbox has an issue.
You have 2 options:
1. Rebuild the assy in the USA
2. Buy a new gearbox

Screenshot_20220918_214513 (resized).jpgScreenshot_20220918_214513 (resized).jpg
#4472 1 year ago
Quoted from Days:

yes, it's one of those "wheels /cogs " near the numer 6 and 20.
hooo we can buy just the gear box? would be nice there is a name or a reference for it? it's the same as for world cup 94?

This gearbox is unique, it's designed for Judge Dredd.

1 month later
#4478 1 year ago

I have 2 surplus crane from the last run:
https://pinside.com/pinball/forum/topic/judge-dredd-active-3d-crane-modification/page/3#post-7218845

292a22a8546f7437c9b119fef5dd8ef8e214a827 (resized).jpg292a22a8546f7437c9b119fef5dd8ef8e214a827 (resized).jpg
1 month later
#4504 1 year ago
Quoted from jetmechinnc:

I just got this cool pin in my house and I’m doing a nice restoration with new decals, powder coat etc etc. However the big ramp is cracked out on the right side and has been “fixed” using a pencil and some tape lol. Normal searches from Marco and other sites show no stock, is there a pinsider making reproduction ramps for this cool wide body pin?

The chance is low.
https://pinside.com/pinball/forum/topic/freeplay40-ramps/page/97#post-7241628

#4506 1 year ago
Quoted from Robotworkshop:

There is also rampomatic. He makes different sets of ramps and does good work.

Here is the summary of JD ramps:

Original tools are at Larry and pin-pimp:

Larry:
Main ramp (left ramp)
Black Out ramp
https://pinside.com/pinball/forum/topic/freeplay40-ramps/page/84#post-5912645

pin-pimp:
Air Raid ramp
Stake Out ramp
Subway 1 (2 parts)
Subway 2
https://pinside.com/pinball/forum/topic/freeplay40-ramps/page/83#post-5910766

JodyG (Rampomatic) was also in the discussion. He needs a good donor ramp.
https://pinside.com/pinball/forum/topic/freeplay40-ramps/page/82#post-5788299

2 months later
#4594 1 year ago
Quoted from PBlank:

So I ran into an issue with the “Extra Ball” button lamp not working. The button works fine, just the lamp is out. Tried other bulbs, nothing. Even switched out the bulb holder, nothing. I traced the 2 lamp yellow and red wires back to the 5 DIODE SW LMP & SPCR ASSY board and I don’t see any burn spots so I’m not sure what’s goin on. Any thoughts?
Thanks
[quoted image][quoted image]

Check the red/grey at the other connector, J2.
Red looks loose.

Screenshot_20230304_091009_Chrome (resized).jpgScreenshot_20230304_091009_Chrome (resized).jpg
2 months later
#4623 11 months ago
Quoted from Langless28:

I know the dead world motor info is pretty scarce. I recently had the motor completely seize up enough to bend one of the gear teeth. The two small idler gears on the outside of the motor are supposed to free spin but I had to use a small press to get them off.
30+ year old grease finally collected enough debris and dried out to cause too much friction between all the various shafts etc.
I had to completely tear apart everything, clean, fix the tooth and rebuild.
I am dumping all the photos so hopefully it will help someone else one day.
[quoted image][quoted image][quoted image][quoted image][quoted image][quoted image][quoted image][quoted image][quoted image][quoted image][quoted image][quoted image][quoted image][quoted image][quoted image][quoted image][quoted image][quoted image][quoted image][quoted image][quoted image][quoted image][quoted image][quoted image][quoted image][quoted image][quoted image][quoted image][quoted image][quoted image][quoted image][quoted image][quoted image][quoted image][quoted image]

Good stuff. Do you have a 3D printer?
I created a custom plug for the gearbox.

Pinside_forum_5984531_1 (resized).jpgPinside_forum_5984531_1 (resized).jpg
3 months later
#4675 8 months ago
Quoted from nhman:

I’m looking for this metal wire form piece that sits just above the subway and prevents the ball from getting stuck under the dead world ring. Anyone have one or know the part number? What a fun game to play, New dredd owner…how do I join this group?
[quoted image]

I have one (maybe 2).

#4677 8 months ago
Quoted from nhman:

Cool, part number is 12 7127. See pic. Is this the part you have?
[quoted image]

Yes, this part.

20230825_143403 (resized).jpg20230825_143403 (resized).jpg
1 month later
#4706 6 months ago
Quoted from qbass187:

Hey guys,
Going through my parts hoarde and I found a few Judge Dredd parts and pieces I forgot I had.
Davi Lighted crane mod $125 shipped
[quoted image][quoted image][quoted image][quoted image][quoted image]

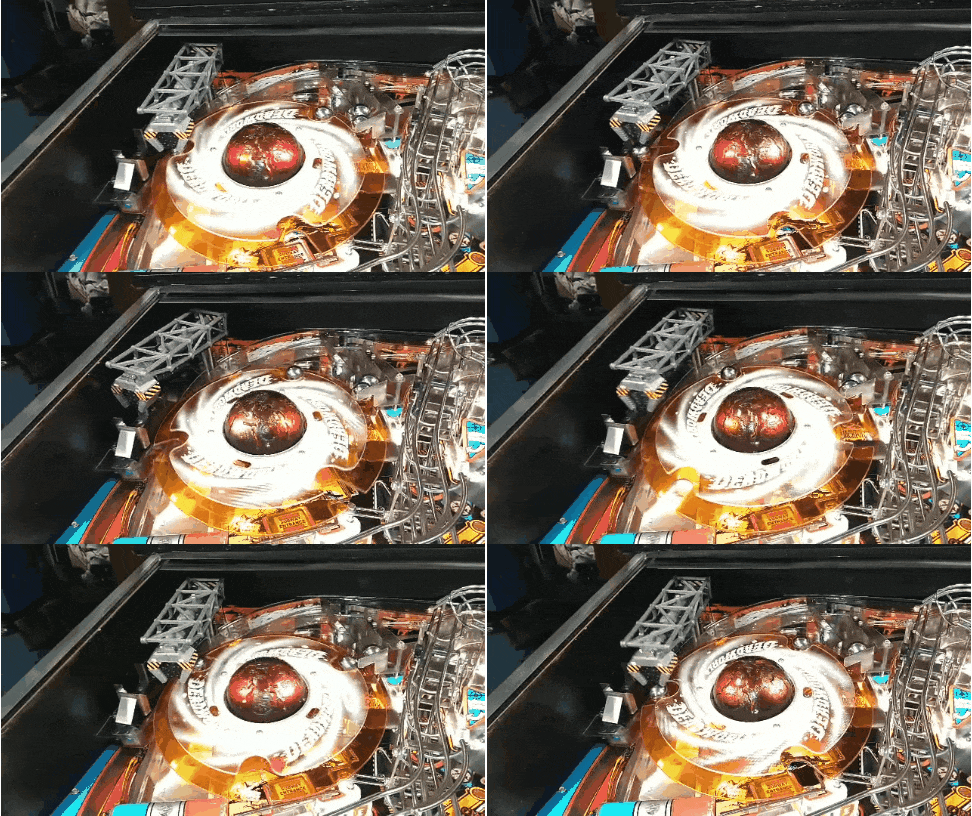
This is how the crane look like in action.

Pinside_forum_5548597_0 (1) (resized).jpgPinside_forum_5548597_0 (1) (resized).jpgPinside_forum_5548597_1 (1) (resized).jpgPinside_forum_5548597_1 (1) (resized).jpg
1 month later
#4740 5 months ago
Quoted from Shaker:

Message Davi directly. He's still making them, and you might be just in time for his next batch.
I have one on order.
https://pinside.com/pinball/community/pinsiders/davi
- Mark

Your information is 100% correct
The batch is ready.

20231119_180439 (resized).jpg20231119_180439 (resized).jpg20231119_180559 (resized).jpg20231119_180559 (resized).jpg
#4742 5 months ago
Quoted from fsumassey:

what exactly is this mod?
I just joined the club yesterday!
Picked up my machine and gonna set it up today!

https://pinside.com/pinball/forum/topic/judge-dredd-active-3d-crane-modification

3 months later
#4807 59 days ago
Quoted from Rahxephon1:

I'm putting together the Judge Dredd I got dissasembled and I'm not sure im missing something in the zone where the wireform connect with the ramps.
Should something be in those two screwholes? And is there a vertical hex post between the plastic ramps?
Thank you in advance for your help.
[quoted image][quoted image]

Hopefully this helps.

20240225_190028 (resized).jpg20240225_190028 (resized).jpg20240225_190043 (resized).jpg20240225_190043 (resized).jpgDSC_0022 (resized).JPGDSC_0022 (resized).JPGDSC_0050 (resized).JPGDSC_0050 (resized).JPGDSC_0056 (resized).JPGDSC_0056 (resized).JPG
2 weeks later
#4820 40 days ago
Quoted from Freeplay40:

It's Time to start shipping some Dredds!
I will begin notifying those on my list later today. If you know you are on my list and no longer interested, please let me know. I still have a lot of ramps to make, but I have a good deal already to ship. What people order will help me adjust production to fit the needs.
Regardless of where you are on my list, if you want to let me know what you want, I would appreciate that a lot, again so I can adjust production.
The first thing I noticed when removing the ramps from my own game is that they were very fragile. I immediately made the decision to make all of the Dredd pieces out of my thicker (.150") plastic for greater strength and durability. I think the most fragile was the big ramp. When I removed it I had to be careful to support it as I thought it would just break in my hands! In addition to making them out of thicker plastic, I also corrected some items and where I could, I left more plastic for strength, particularly at mounting points. Although I ended up destroying my own ramps in the molding process, they were in very good shape for making the molds. The only actual breakage I had was at the big ramp right side exit. The mounting tab had broken off and this is one point where I left more plastic for strength. All in all I am very pleased with the results of all of the pieces.
One other thing I noted that I would like everyone to check when assembling the pieces. On the Big ramp at the center Exit (to Dead World) the two brackets at the exit I found to be a little tight with respect to how they fit, specifically the top edges where they meet the underside of the top edge of the ramp. I checked the fit against the original ramp and it is was also tight. Once the pieces are riveted to the ramp, I feel they will put additional stress on the top edge of the ramp. So, I will be shaving my own bracket tops down about 1/16".
The ramps are being offered without decals and without any metal beyond the entrance flaps. There are I think 16 pieces in total that the whole set that need to be riveted to the new ramp. If I were to provide these 16 pieces, I suspect the cost overall would increase $150-$175, so I promote reusing your existing metal.
All pieces are pre-drilled for the metal that must be transferred. Odin noted that on the prototype Big ramp, one of the optic sensors was mounted down near the entrance to the ramp vs at the upper left corner. I am reproducing the ramp as if that sensor is in the upper left corner. If you have a Prototype Big ramp that has this optic sensor down near the entrance and want to preserve it, let me know and I will send you a Big ramp without the pre-drilling at the upper left corner. You would need to position your sensor on the ramp then mark and drill the mounting holes for the bracket and the two 1/4" holes in the side of the ramp.
I am also not providing decals and I was easily able to remove my own. They cleaned up beautifully and I will reuse them. As soon as I take a break from ramp making, I will assemble my own set of ramps and post pics. If you want a new set of NOS Dredd Decals, there are some available to purchase at Pinball Inc. Note that as I write this they only have 12 left in stock.
https://www.pinballinc.com/index.php?route=product/product&path=120&product_id=292
Prices:
Big ramp $235
Stakeout ramp $125 (Includes ball containment piece at the top of the ramp)
Air Raid ramp $65
Black Out Ramp $130
Functional Subway $65
2 Piece Dead World Subway $115 (This is a non functional subway.
There is a full set discount of $35
For those interested, JodyG here on Pinside (aka rampomatic.com) has hand held rivet kits for sale.
Also check out his tutorials for both riveting and reusing decals!
Sun came out today so took outside photos.
[quoted image][quoted image][quoted image][quoted image][quoted image][quoted image][quoted image]

Looks great!
One remark about reusing existing metals: 4 ramps contains 2 metal guards/each ramp. The access to the lower rivet is very limited. With standard tools like Pintonka, it's impossible to reach. A flat and narrow surface is required to provide support to the rivet head.

1 week later
#4829 33 days ago
Quoted from Shaker:

Who do we beg, bribe or threaten to get the playfield plastics reproduced?

I will ask next week my contact. Maybe he has few screen printed sets available.
https://pinside.com/pinball/forum/topic/hep-this-week-9-17-18/page/186#post-6297123

1 month later
#4875 23 hours ago
Quoted from jetmechinnc:

I have just a quick question about the toppers. The Dredd I just finished restoring has a heavy plaster topper (maybe 15-20lbs). Is this the original one or one that someone made years ago? I think this Dredd was in storage for years and was a reimport from Italy (assuming that since th coin door says 500 lire instead of quarters). [quoted image][quoted image]

This is how the original look like with the metal bracket.
https://pinside.com/pinball/forum/topic/dredd-owners-thread-members-only/page/74#post-5627801

Promoted items from Pinside Marketplace and Pinside Shops!
5,000
Machine - For Sale
New Castle, CO
$ 165.00
Playfield - Toys/Add-ons
DevilsMuse Arcade
 
$ 29.00
Cabinet - Other
Filament Printing
 
$ 30.00
Playfield - Other
YouBentMyWookie
 
$ 35.00
Cabinet - Other
Rocket City Pinball
 
From: $ 19.99
Eproms
Matt's Basement Arcade
 
$ 65.00
Cabinet - (Alt) Translites
Pinball Haus
 
$ 19.95
Playfield - Toys/Add-ons
ULEKstore
 
$ 329.99
Lighting - Other
Lighted Pinball Mods
 
$ 99.99
Playfield - Toys/Add-ons
Lighted Pinball Mods
 
$ 69.99
Playfield - Toys/Add-ons
Lighted Pinball Mods
 
$ 9.95
Eproms
Pinballrom
 
$ 3.00
Tools
Nezzy's Pinball Prints
 
$ 17.99
Eproms
Matt's Basement Arcade
 
$ 9.95
Eproms
Pinballrom
 
$ 29.50
Playfield - Plastics
Pinball Haus
 
$ 85.00
Trade
Machine - For Trade
Pasadena, TX
5,300 (OBO)
Machine - For Sale
Minneapolis, MN
4,000 (Firm)
Machine - For Sale
Richardson, TX
From: $ 20.99
Playfield - Plastics
Gameroom Mods
 
$ 72.95
Eproms
Pinballrom
 
$ 1.00
Pinball Machine
Pinball Alley
 
From: $ 99.99
Cabinet - Other
Lighted Pinball Mods
 
$ 14.00
Cabinet - Toppers
Twisted Tokens
 
Great pinball charity
Pinball Edu

You're currently viewing posts by Pinsider davi.
Click here to go back to viewing the entire thread.

Reply

Wanna join the discussion? Please sign in to reply to this topic.

Hey there! Welcome to Pinside!

Donate to Pinside

Great to see you're enjoying Pinside! Did you know Pinside is able to run without any 3rd-party banners or ads, thanks to the support from our visitors? Please consider a donation to Pinside and get anext to your username to show for it! Or better yet, subscribe to Pinside+!


This page was printed from https://pinside.com/pinball/forum/topic/dredd-owners-thread-members-only?tu=davi and we tried optimising it for printing. Some page elements may have been deliberately hidden.

Scan the QR code on the left to jump to the URL this document was printed from.