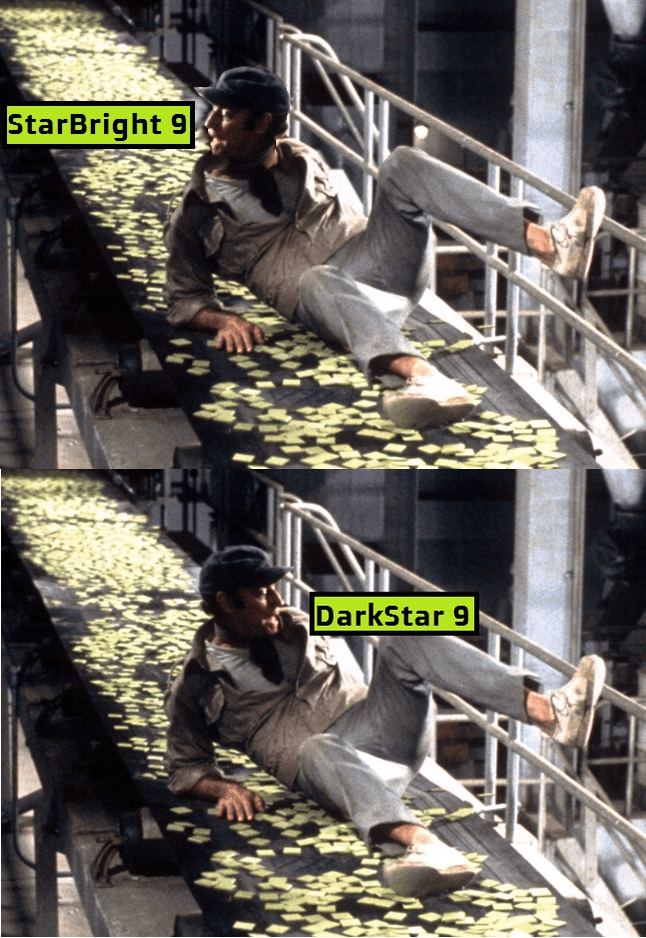
(Topic ID: 291434)

DIY - Stranger Things - DarkStar 9/StarBright 9 - Screen Upgrade

By Medisinyl

3 years ago


Topic Heartbeat

Topic Stats

  • 250 posts
  • 67 Pinsiders participating
  • Latest reply 71 days ago by Dahawk007
  • Topic is favorited by 83 Pinsiders

You

Linked Games

Topic Gallery

View topic image gallery

IMG_1445 (resized).jpeg
IMG_1444 (resized).jpeg
All installed (resized).jpg
Full Kit (resized).jpg
20231228_211839 (resized).jpg
20231228_212032 (resized).jpg
IMG_1274 (resized).jpeg
IMG_1276 (resized).jpeg
IMG_1275 (resized).jpeg
IMG_1277 (resized).jpeg
screenshot.5997 (resized).jpg
screenshot.5996 (resized).jpg
IMG_1921 (resized).jpeg
IMG_1920 (resized).jpeg
IMG_1917 (resized).jpeg
IMG_1918 (resized).jpeg

You're currently viewing posts by Pinsider medisinyl.
Click here to go back to viewing the entire thread.

11
#1 3 years ago

EDIT: Now StarBright 9 has replaced DarkStar 9--identical material under a different name.

Since my post in the main Stranger Things thread, I've received many PMs and inquiries. Seemed easiest to keep one response in a separate thread.

The video clips below give some idea of what this material looks like. While the installed video came out darker than reality for much of it (phone would auto-adjust and I was using one hand to flip), it still gives a good idea of the huge difference it makes.

I purchased the screen material here, and would recommend having 5 sample sheets (it's possible this will prove to be difficult): https://shop.elitescreens.com/store/p127/Sample_Screen_Material.html

This is the adhesive sheeting I used (I also ordered the more expensive 3M sheets, but found this cheaper option to be the easiest to work with): https://www.amazon.com/gp/product/B00JN9FDN8/ref=ppx_yo_dt_b_asin_title_o05_s00

To achieve the results seen in the installed video, I also have 1-3 layers of cardstock in all of the large arrow inserts and some of the smaller inserts closer to the screen. Also, the back half of my right flasher is blocked with a piece of black vinyl, the lighting is dimmed in the game through settings, and I made partial cones to go over the sling LEDs (still some room to better darken this area from the screen, which perhaps I'll do later). I also pulled the LED near the shooter lane exit and it was one of the worst offenders.

Can download the parts and see instructions for the billboard and bulb cones here: https://www.thingiverse.com/thing:4825295

-----------------------

You'll have to figure out which direction is appropriate (they're not guaranteed to be one way or the other on the sheet as I received them both ways).

When turned the proper way, the image will be perfectly viewable at all 180 degrees from the bottom to the top, but standing further than at the corner of the game left to right will start to show the ambient light rejecting feature this material has. So no matter how tall or short you are, the game will look stellar from player perspective.

When the material is received with the proper direction being the slimmest, you'll likely need to carefully remove the adhesive to get enough height for the main screen panel (the front can be rolled off, but the back may need some help with contact cleaner--alcohol will ruin the material, and goo gone was messy).

Before cuts are made to the screen material, cut enough double sided tape sheet to cover an entire sample. After pulling the one side, with it on a flat surface, line up the screen materials and carefully apply it flat (I held the other end taught and something like a credit card to slowly push the material down into place to avoid air bubbles).

For the main panel: I placed the material over the factory white panels. It was best to cut the bottom, left, and right sides to proper size beforehand. All sides could be done that way, but I chose to use an exacto knife at the top. I used a sliding cutter for most straight cuts..similar to this: https://www.amazon.com/Firbon-Scrapbooking-Automatic-Safeguard-Cardstock/dp/B075NYWF5P/ref=sr_1_2

For the drops: I removed the drop asssembly from underneath and removed the old decals (cleaned any remaining adhesive with 91% alcohol). With one flat side at the lower end, and the rest cut oversized, apply the material one target at a time, cutting around the edge with an exacto knife to be a perfect fit--this is larger and better looking than the smaller factory size. I found the most accurate cut to be achieved when holding the blade angled in a bit toward the material side, and holding some pressure against the target.

Ramps: These may be tricky for some. I used card stock and progressively made many cuts until I got a nearly perfect shape of the ramp decals. It's best to remove the factory pieces, but I left them in. I cut the created template in half and placed them on top of the screen material, taping them all to a large piece of glass (any hard surface will do). IMPORTANT--the screen material MUST be cut in the proper direction--templates should be laid straight up and down, not at an angle--otherwise the result will be darker and likely different between both halves).

With that arrangement for the ramp pieces, I cut around the template with an exacto knife. Test the cut before pulling the backing for installation.

Spinner: I did the same as above, but used the decal replacement that came with the game as a template (I only applied to the side facing the player when it's at rest).

Stand up targets: Apply directly over the factory piece (this keeps the rivet from interfering). Can cut to the size of the supplied replacements.

Billboard: If using my 3D file, cut to fit (I used cardstock here as well after painting and clearing).

-------

Perhaps this will help some. Please feel free to let me know what I'm forgetting or what I could make clearer.

Sorry for the blurry billboard photos (didn't pull the glass, and would lose my ball before I could get a good shot )
20210406_234259 (resized).jpg20210406_234259 (resized).jpg20210407_001500 (resized).jpg20210407_001500 (resized).jpg20210411_220620 (resized).jpg20210411_220620 (resized).jpg20210411_221022 (resized).jpg20210411_221022 (resized).jpg20210411_221500 (resized).jpg20210411_221500 (resized).jpg

#7 3 years ago
Quoted from PinballConspiracy:

Curious what it all looks like with the game/projector powered off.

Here's a couple pics (glass on).

My stand up targets have been on the longest and have taken a beating. All other surfaces look like they'll hold up well (bunch of games with the ramps installed and they're still flawless, and the drops look great too [some scuffing in the pics, but no effect on projection quality yet--shall see how they hold up]).

Fortunately the high wear areas are tiny and not too difficult to replace when the time comes (I have plenty extra on hand for repairs). I'm still content with the trade-off for the result, and don't foresee ever having to replace the ramps or middle board (my factory left and right boards were damaged, so perhaps one day I'll see wear on those--so far so good).

Quoted from BowlingJim:

How big was the sample? I just want to do the 3 main screen panels.

You'll need 2-3 sheets for the main board (partially depends on if they send them oriented "portrait" or "landscape" and if mistakes are made).
20210412_124051 (resized).jpg20210412_124051 (resized).jpg20210412_124104 (resized).jpg20210412_124104 (resized).jpg

#9 3 years ago
Quoted from joetechbob:

Could you laminate the high wear areas with mylar without hurting reflective performance? Or maybe too specular?

I wondered how that may work. A clear/glossy piece would likely be an issue for the projection, but perhaps a protective layer with a more matte finish would work.

I don't have such material on hand, but perhaps I can find something to experiment with.

#11 3 years ago
Quoted from haveaniceswim:

I see the scuffs on the drops in the picture. On the factory white screen material, Novus 1 does a good job of restoring the drops to a clean white. Do the scuffs on the Darkstar 9 material not come off when cleaned? Or is the material actually being damaged (as opposed to soiled) by the balls?
Thanks for all your efforts to improve the game!

I'll pull the glass later tonight when I get home and see how it goes (I have yet to clean the stand ups, so they have some weeks on them, but I expect it's damage that won't clean off).

#14 3 years ago
Quoted from PinballConspiracy:

Also, I think you already posted a pic of it but how does this mod do during the upside down mode? Thanks

It's in the first video. It works very well--can finally see everything (never even noticed all the pink mountain like scenery with lightning on the drops before).

As noted in the post, the material won't help on the ramp sides due to the extreme angles.

#16 3 years ago
Quoted from Munsters:

You make the video’s in dark, do you have an video also in daylight? If not, is this also better in (day)light? And... also better them blackdiamond?

The 27 second mark of the installed video shows a moment with bright lights on (can pause here to see it). The same amount of light would have left the projection nearly invisible on the factory material.

While I haven't tried Black Diamond, it has been reported by others that it doesn't work on the ramps--Darkstar 9 does.

Regardless, I couldn't imagine a better image than what I'm getting with this material (especially with such good viewing angles, which sounds like a miss on Black Diamond), but if anyone has a way to get me some Black Diamond material, I would do a comparison (I had asked before with no luck, but did try a ton of different materials before landing on this one).

I could make another video with full bright lights if desired.

#18 3 years ago
Quoted from MrMikeman:

Sucks I can’t get the samples shipped to Canada. I tried.

Darn. Unfortunate to hear, but thank you for letting others know.

I'm hoping many will get to experience the game this way.

1 week later
#23 2 years ago
Quoted from Palmer:

I ordered my samples the day this thread was created and just got them today. I opened up my game just to see the difference between the stock white and Darkstar 9. gotta say this material is amazing. The only drag is you can't use it on the ramps. But the main wall ramp area, the drops, the scoreboards all look 10 times better.

Works great on the ramps as shown in my clips. Are you sure you had it turned the proper direction to test?

The material must be almost exactly the right orientation, and it works just as well as those main surfaces (just not on the more extreme sides of the ramps).

#27 2 years ago
Quoted from PinballConspiracy:

Is there a good online 3d printing service anyone would recommend? Not seeing anywhere to get it done locally..
Got main panels done with the Darkstar 9 and so far so good..air bubbles plague me, and my exacto skills arent great but chugging along with the smaller stuff..Also, I now know what you are saying with results being darker, my panels are "darker" bc thats what the dimensions of the D9 samples kinda dictated..was worried would be too dark but it is acceptable and is looking good on camera etc..will probly go darker with the ramps and smaller stuff also to keep it unison unless testing proves too dark to see those lil demidogs trotting across the targets lol

EDIT: [From our PMs, it was realized that the material in the quote was installed incorrectly--it only works properly when the silvery appearance is arranged up and down--the darker orientation isn't a personal preference option--it doesn't work]

-------

Not sure I understand what you mean by "darker," and there shouldn't be any "too dark" with this material unless oriented improperly.

The effect will only work properly in one direction--any deviation will result in a dark/muddy image that I wouldn't consider an improvement (worse the further the deviation, up to 90 degrees).

Bubbles should be easy to avoid if you perfectly pre-cut the 3 sides mentioned in the post, then carefully apply from bottom to top (cutting any excess at the top, which will be very little if the samples were oriented in the way that proper viewing is a "landscape" rather than "portrait" [I received samples in both orientations, so it can't be assumed]--it's harder to use in the landscape orientation due to the height not working without careful cleaning of the adhesive to gain full height). For me, cutting straight lines was easiest with the sliding tool (similar to what was linked).

The demodogs and such are MUCH easier to see with the D9 material, but you'll want to put at least one piece of fitted cardstock in the inserts below and turn the lights down in the game a bit (otherwise they'll show that nearby light too much IMO).

As noted, the material will suffer noticeable damage on the stand up targets, but my drop targets still look perfect when playing (despite being able to see some light marking when the game is off, I can't detect it when projecting, even knowing they're there). I'll likely periodically replace the stand up material--it would be hard to go back to stock after seeing them this way.

1 week later
#32 2 years ago
Quoted from killborn:

Got mine installed last night and I love it. I only did the big screen, both ramps and the drops and I was able to do that with 3 sheets and some to spare.
Just to add some side notes:
You have to remove the old material from the drops otherwise the "4 bank drop trip" doesn't work properly.
Should also remove the old material from the ramps because otherwise the new screen will sit up above the ramp entrance plate. The height difference seemed pretty significant to me and worthy of removal.
Since I have an LE, I'm not sure where the reflection of the backglass shows up on regular glass, but with HD glass it shows up right over the big screen. Luckily there is a setting that turns down the backglass light during play and I turned it down to 25% and it made a huge difference.
Patience is key here, especially when removing the glue and paper from the DS9 sample and also when applying the adhesive to the sample so as to not get bubbles, we're talking TK lock level patience
Thanks Medisinyl for doing all the leg work!
[quoted image]

Glad to see others getting to experience the game with this material . Patience is indeed the key. It's not a hard job...just a tedious one to do properly. As noted, I also suggest removing the original ramp and drop decals, but you'll want to keep the original stand up decals if covering those (some may not want to deal with high wear of the stand ups with this material though).

Other lighting changes will be what's necessary to get the result I've shown.

A simple test, would be to place a couple layers of cardstock over all of the main 7 arrow inserts during attract mode, then pull them away to see how much of a difference it makes.

Even once a few layers of cardstock are cut and inserted into each insert from underneath (and all lights dimmed in settings), the sling lights (and light at the end of the shooter lane) still significantly pollute the projection quality. Putting your hands over the slings during attract and removing them will give some idea of how much those bulb cones I made can help in those areas.

#36 2 years ago
Quoted from PanzerFreak:

Nice mod, video quality looks much better. I recently installed a grey projector screen in my home theater and the black levels are much better versus a white screen. Looks like the same concept here. The grey areas will also produce better black levels versus a white screen while lights are on in the room.

I also tried some grey theater screen material from multiple brands, but the results were mediocre.

The Darkstar 9 manages to pull off a magic trick with great black levels, far superior contrast, and good color accuracy (the other grey materials would suffer with color accuracy and brightness, and still not get the same black levels). In full screen form, it does cost significantly more than their standard Cinegray though (~30x).

#43 2 years ago
Quoted from ToucanF16:

Ok, I was gone from the thread a couple weeks. Is a precut kit being sold yet?

Quoted from jeffro01:

I'm with you on that one... I'd rather just buy a pre-cut kit from the OP and not have to deal with my shaky, should never operate an knife, hand...
Jeff

As noted, I have no intention to produce a kit, but I'd be glad to see someone else pick up where I left off to create a peel and stick solution.

Just hoped my findings and 3D files could help some while I continue to put my time into other mod development and production.

2 weeks later
#47 2 years ago
Quoted from ToucanF16:

Did the guy making the precut kits go dark?

Looks like he posted an update. Hopefully he can confirm that the material he is offering is the real Black Diamond material by Screen Innovations (I had subtly prompted a clarification with my post in his thread as it doesn't look like real BD to me in his video clips, but it wasn't addressed).

10 months later
#49 2 years ago
Quoted from Gotfrogs:

Is the Darkstar 9 material samples still available? I did not see it as a choice in the drop down menu linked to in the first post.

This was recently brought to my attention, and at that time, the Starbright 9 had an SKU of Darkstar 9, so I thought it could just be a name change, though it appears they've since fixed the SKU to match.

I'll look into it more tomorrow to see if I can find information that would suggest they're the same or point to another viable option.

I could order another sample or two to compare or experiment with.

I had sent a D9 sample to Rocco that was offering the "black diamond", and he was able to confirm better performance with the D9, but unable to source it there (EDIT: update from him on the next page).

#51 2 years ago
Quoted from Travahontas:

They have Darkstar UST (Ultra Short Throw) and UST 2 materials... wonder how similar they are.

I noticed some new offerings, which is what I was considering experimenting with if specs check out and sound promising, though it's hard for me to imagine something better than what I see with the Darkstar 9.

IIRC the D9 has a 180* viewing angle top to bottom, so anyone tall or short would see a great picture from player perspective.

I'd hope to see similar specs elsewhere, though currently on the phone, which is harder to research with.

EDIT: As a side note, the material has held up beyond my expectations. Every point that gets dirty from ball contact has been able to wipe clean to a perfect surface underneath.

Also currently working on a mod set for Stranger Things. Not sure on a reveal estimate, but at least a couple months out.

#53 2 years ago
Quoted from Rocco:

Hello, everyone,
I tested the Darkstar material from Medisinyl. It worked very well, except for the plastic ramp on the right. Unfortunately there is no way to buy the Darkstar in Germany or Europe. I would love to continue testing with it, but I would need 2-3 pieces of the material in DinA3.
I could then do a laser test etc. with it.
If anyone can obtain larger samples, I would be very grateful if you could contact me.
Many greetings,
Benjamin

Indeed, while the Darkstar 9 material works great on the bottom of the ramps, it doesn't work on the sides unfortunately.

Your prep work to make this easier for others is stellar, so I'd love to see you be able to find a way to make this practical to offer up.

Will update once I know more about the product switch.

#54 2 years ago

I've just ordered a sample of the StarBright 9. Sounds like it could just be DarkStar 9 with a new name, but we shall see.

Looking at other available options, I don't see anything else that has promising specs for this application. The Darkstar UST is for high lumens, which isn't the case here, and CLR screens would make it so you'd have to be looking from the lockdown bar for a good image.

And as I likely mentioned, you unfortunately can't cheap out with the lower end dark screens--terrible image quality.

1 week later
#58 2 years ago

Well, I got the "StarBright 9" sample.

Safe to say I don't need to do any tests to compare it to DS9

Unfortunately still the small sample size as before.

20220412_195910 (resized).jpg20220412_195910 (resized).jpgWebp.net-gifmaker (2).gifWebp.net-gifmaker (2).gif
#60 2 years ago
Quoted from VisitorQ:

Just placed my order for 5 sheets as instructed, will report back on how mine are label once I receive them.
The only thing I was wondering is once I placed my order was if I should have order any extra sheets in case of future wear or repair?

As shipping is "free," no harm in waiting to see where your 5 sheets get you to decide on having extra. Probably not a bad idea to have some on hand, but after nearly a year of home use, all of my surfaces are still in great shape.

Still get dirty from play, but have wiped clean each time.

Just snapped this pic of the standups after cleaning, which get dirty the quickest (same pieces I installed last year).

20220412_223222 (resized).jpg20220412_223222 (resized).jpg
#62 2 years ago
Quoted from VisitorQ:

Looks like they are holding up well and yeah, as long as the material is available with the free shipping it can be ordered at any time.
Question. I see on your game on the right ramp the word "jackpot" is centered correctly but on mine, it display incorrectly like the picture I have attached even cutting of the letter "T". That is not a picture of my game but the issue is exactly the same. It seems like everything else on all the other projector screens display correctly but the right ramp. Is there any adjustment for this or how did you get yours to look the way it does?
[quoted image]

After the projector heats up (at least 5 minutes [better to wait longer to be safe]), adjustments can be made in the settings, which individually can set most parameters. Settings made before the projector heats up, will show issues once it does heat up--a game freshly turned on should look a bit blurry, and clear up after being on awhile.

IIRC, the templates that come up for calibrating may not be 100% perfect to where you want the letters on the right ramp to show up, so it may take a couple attempts, remembering the reality of positioning vs the template.

#65 2 years ago
Quoted from VisitorQ:

Well I got my order and it was labeled correctly, hope it is the same as DarkStar9.
[quoted image]

That's frustrating.

Hard for me to tell from your photo as the DS9 material has many appearances depending on angle/light. Description has similarities, but ceiling light rejecting isn't mentioned on DS9. I noticed it before ordering, but receiving DS9 pushed aside the concern.

When properly oriented, it shouldn't change tone when looking from a low angle or above (but will if looking from the side). If it appears wrong in one orientation, try turning 90*.

EDIT: I've sent an email to Elite. Will update once I hear back.

gggggg (resized).jpggggggg (resized).jpg

#67 2 years ago

Seems we're all good.

nhyth (resized).jpgnhyth (resized).jpg
#70 2 years ago
Quoted from Gotfrogs:

I am confused. They do not have the same name. Is StarBright 9 the same material as DS9?

Based on my question, I can only assume that's what he meant, and as he says they have the same properties, that seems to make it clear.

#73 2 years ago
Quoted from Rocco:

Is it possible for you guys to order a big Screen of StarBright9 / DarkStar9 in the US?

Yes, but the cheapest option is ~$1500/1600+ for a 106" screen in the US (not sure what the final cost with international shipping would be)

Pricey, but if you had a serious interest list, you could make it worthwhile, and I expect you could charge more than your other kit with this material.

This is a daunting DIY for those that don't have the patience/time or confidence.

Your method would also produce one piece ramps, which is a nice perk compared to DIY with samples.

#76 1 year ago
Quoted from VisitorQ:

Plans to test out StarBright 9 tomorrow at the very least on the main screen. A few questions...
So from what I understand the material is directional. It can be on the card that it comes attached to upside down in portrait or landscape, correct? Is it clear when testing or how will I know I have it in the right direction?
On the main screen I will install the new material over the old however on the ramps I will remove the old material?
Is it possible to remove the stickers on the ramps and then use them as a template to cut the new ones or do they rip apart when you remove them?
Any final tips or suggestions? I did order the double sided tape recommend and I do have a cutting board.

While I did receive a sample that was a different landscape/portrait orientation, top-to-bottom should be the top and bottom of the sample (compared to the card text). I expect the other was an anomaly.

But you can test outside the game by holding the sheet and rotating it so that you look at it nearly flat--if it remains silvery, that will be the top-to-bottom, and if it goes black, that is side-to-side. Best to also check both orientations when projecting to make it more obvious if there's any question.

As this was done a year ago, my freshest memory of the details would have been in the initial DIY.

Presuming the current samples are the same size and using the same adhesive, you'll have to carefully remove it (as noted in the DIY) to be able to get a large enough piece for the main screens, but with multiple sheets, there's room for trial-and-error, as a failed attempt sheet can still be used on the other surfaces with next to nothing lost (or even have enough done correctly to use for one of the panels).

And again, to get the theater-like look my game has, the lighting aspects must be addressed, but it will still be a night and day difference without (though certain inserts are an issue IMO without addressing them as they reflect more off the new projector surface in a distracting way [all can be neutralized]).

If you start light hunting after install, you may be surprised how much difference a seemingly irrelevant light source can make when directed toward the screen.

#78 1 year ago

The adhesive (attaching the sample to the cardstock), without damaging the material...unless the sample got slightly taller after the name change (not expecting that). Just repeating what should be in the original write up.

#80 1 year ago
Quoted from VisitorQ:

Remove what?
In you write-up for the main screen it says... "For the main panel: I placed the material over the factory white panels."
I think you said for the ramps you removed the white material. My question was can you remove the white material on the ramps and then use them as a template to cut the new material? I was sure if they came off in one piece or not.

I didn't remove my original ramp decals, but it's recommended.

The write up mentions I created a template with cardstock that I progressively cut into the correct shape.

#83 1 year ago
Quoted from VisitorQ:

I tackled some of this project yesterday and have a few tips in doing so...
When you apply the two sided tape to the back of the screen material I recommend doing the whole the whole screen and then cutting everything to size afterwards. Do not cut small pieces and then apply the tape to the back, just do it all in one shot, then cut it to size. Also when you apply the double sided tape start with the top and apply it just slightly over the card description card, then slowly apply it over the screen rubbing it back and forth with your figure in order to avoid air bubbles. I flipped it upside down as you can see in the second picture pushing my figure back and forth slowly applying it to the back of the screen. If you take your time and do it like this you should avoid any visual air bubbles as seen in the last picture.[quoted image][quoted image][quoted image][quoted image]

Correct. This is how I did mine as well, but after separating the sample from the cardstock (at least for the main screen), if there's not enough height below the cardstock.

Hard for me to tell if your samples are slightly taller (EDIT: they are taller)

I believe I used a straight edge of some kind when rolling the adhesive onto the screen to avoid bubbles. My first attempt was also fairly poor in that regard

#85 1 year ago
Quoted from VisitorQ:

The screen material that I got was tall enough to cover the main screen, I did not have to remove the card board description card in order to gain a bigger piece of material. ***DO NOT use rubbing alcohol on the back of the screen material, it will start to remove the back black coating.
One sheet is not big enough to do the main screen, you will need two. The picture I am posting is one whole sheet and this after cutting it down height wise, not length wise. I apply the sheet over the right side and the main screen over top the stock screen, then I took a razor blade and slice it down the center to separate it. I am not sure if this is the best way of doing it because when I did do the left side, it came out a bit cleaner on the edges when using a cutting board... Which BTW, I HIGHLY recommend using a cutting board as talked about in the original post. I was lucky enough to have one and honestly can't imagine tackling this without one.
[quoted image]

That's excellent news

And yeah, the DIY does note to not use alcohol, but electronic contact cleaner (not necessary if everyone gets these taller samples)

#89 1 year ago
Quoted from VisitorQ:

Random thoughts so far...
This is 100% and upgrade over stock. I highly recommend doing at least the center screen and this can be down with two screen samples.
I do not feel you have to adjust any light settings of the game to achieve more than satisfactory results. Although directing lights, pulling lights and dimming lights may achieve greater results I don't feel it is necessary. My opinion may change on this once I do some of the other targets etc...
I think it goes with out saying, although I haven't seen DarkStar 9 StarBright9 is either the same or yields similar results.

Thank you for the photos and additional information.

Good to see more of these getting installed into games.

Though while it's a night and day difference with the screen alone, believe it or not, there's another night and day difference to be had beyond it with the light hunting if motivated.

#91 1 year ago
Quoted from VisitorQ:

I guess it's all about how far you want to take it.
I did 3D print the light cones and the billboard. Are you attaching the billboard to the ramp with the same double sided tape?

As noted, the light cones aren't entirely plug and play for all spots (some need cutting), and if you have light bleed from the bulb type at the base, some black paint could help on that side.

I used mounting tape for the billboard (3M, about 1mm thick [15lb?]). Same material I used for the stand up targets, figuring they'd take a beating and it would help protect them, but it may not be necessary as the material has held up beyond expectations.

Those 3D parts were quickly made when I was in the heart of developing the America's Most Haunted set, so time was at a premium for me, and they weren't as perfectly developed. Intended for those that didn't mind adapting them a bit.

I recently updated my billboard as the original measurement led to some curve/flex (and I also painted it to match the purple LE armor [and glows with the UV]).

When doing it the second time around, I added some black foam to the right peg so that it now mounts more straight and flat (also required adding more layers of the mounting tape to the left peg). A fair improvement over the red one that I had in there.

#93 1 year ago
Quoted from VisitorQ:

The billboard seemed ok when I looked at it but I only looked at it for a second. I was just wondering how you mounted it but sorta figured for the most part how it was done. If you want to post the newer revision I will print one of them too, otherwise I will just either use or not use the other.
I know the biggest pain in the ass with doing this project is going to be the ramps and other than the main screen, they could use the most improvement in the game. Sadly it looks like the material is not going to be long enough and the ramps are going to have to be laid down in two sections. ugh.

I didn't make a new 3D file, I just modified the mounting length with foam to adapt it (had an extra on hand from when I originally made it, and was motivated to make it better with the new mod set I'm in the midst of creating for Stranger Things).

Ramps indeed require more patience, and careful planning to make sure both pieces (on each side) are cut right so that they both project with the exact same appearance (took me two tries at it).

A shame we can't get ramp length samples.

Those lower ramps are very much worth doing though...hard to see anything on them at all without the new screen.

Placing a piece on the ramps to see the difference should help give the drive to make them work.

#95 1 year ago
Quoted from VisitorQ:

Gotcha.
Agree on the ramp samples and I'm sure they make a big difference, just seems like it is going to be a pain in the ass is all. Did you split the decals evenly or how did you go about it?

I believe I used as much as possible for the bottom piece, then the remainder for the top.

Can't see the seam during gameplay in a dim room, and of course the center of the left side is a bit obscured by the ramp, so the compromise of splitting them isn't a big deal.

Just took this pic of my right ramp. Any color anomalies are the flash/reflections--still flawless after a year (funny enough, the factory white sides have damage that doesn't clean off).

20220424_204805 (resized).jpg20220424_204805 (resized).jpg
#98 1 year ago
Quoted from Rocco:

Today I spoke to the European distributor of Elite Screens and talked about why the material is not available in Europe.
I also explained to him what I wanted to do with the canvas.
He's now asking the producer if it's possible so that I can get the StarBright 9 / DarStar 9 material in a special size if the edition is right.

That's awesome news

Hopefully it all goes well.

#100 1 year ago
Quoted from Rocco:

This was the answer, no change in EU to work wit Darkstar9.;(
Hello Mr.......,
we would like to thank you again for your inquiry.
Unfortunately, the factory is not able to produce in this size and due to the shortage of raw materials, priority is given
supplies the US market with products of this type of screens.
For this reason, we unfortunately have to inform you that we cannot support you with your project.
We wish you all the best and much success.

Darn :/

2 weeks later
#114 1 year ago
Quoted from Ashram56:

Just looking to order some sample material to install on my machine. Just curious however, would you have made a digital version of your ramp templates (and maybe others) ? I have a small laser CNC (Snapmaker A250), and I'd hope I would be able to laser cut the material for best result.
Regards

Rocco had been trying to get larger samples to do that in full size for the ramps and other pieces, but wasn't able to get them in Germany.

From what he posted, it sounded like there may be some chance the screen company would help that happen for someone in the US if asked directly.

I'd love to see someone with the ability and time make it happen for the community.

1 month later
#122 1 year ago
Quoted from Gotfrogs:

I “upgraded” the three panels of the screen today. I removed the stock screen material, applied the adhesive sheets to the Darkstar material and then used the old decals as a pattern for cutting out the new ones. Unfortunately I am not please with my installation. The contrast and color on the new screen look great but I ended up with two issues.
1) I have a few bubbles that I was unable to work out. They look terrible with the game off but when the projector is on they are not as visible.
2) There is a slight gap in the middle and right panel. I don’t think this was there before because it really bugs me now!
I might start over as I only used 1.5 out of may 5 DarkStar sheets but I need to make some type of modification to my process if I have a chance at getting better results.
[quoted image][quoted image][quoted image]

It does take some finesse, and the bubbles are most likely to occur when applying the adhesive (rather than laying the assembled materials onto the screen area).

One option to close any gaps would be to cut a slightly larger piece for the wing portions to accommodate any difference.

Unlikely this process could change the spacing of the panels, but perhaps the greater contrast would exacerbate the appearance of an existing gap.

#124 1 year ago
Quoted from Gotfrogs:

I agree that applying the adhesive was the toughest part. I noticed that taking the clear backing off of the adhesive as opposed to the paper backing worked much better for keeping the adhesive flat. I tried it the other way and the adhesive all bunched up on me. Before applying the screen tp the machine, I even tried cutting some of the adhesive bubbles on the back with a razor. I think this helped but not completely.
As for the gap, I may have created it when I pulled off the old decal? I took my time but did have to pull relatively hard. I think I will at least redo the right panel and try and reduce the gap by having the decal overhang the metal a tad.
Thanks for the help.

I didn't find any need to remove the original decals for the main screen, so I didn't get to experience what that may require. I have however seen some routed games with torn up originals that would merit removing.

Looks a bit like some of the metal is exposed to the left of your right panel, which is perhaps at least part of the gap.

For the standup targets, it's best to keep the original decals in place and put the new material over it (for a properly smooth surface).

I would recommend removing the original lower ramp and drop target decals though if those are being done.

#126 1 year ago
Quoted from Mank:

What are people using to stick the material, particularly to the targets?
I have 2 targets that the original projector material has fallen off . Any idea how to stick them back on? I imagine this adhesive will come in handy too when upgrading the projector material. Is it 3M double sided tape or is there a spray on or paint on adhesive to get the material back on the stand up targets?

The adhesive sheeting that worked for me is highlighted in the first post as an Amazon link (just under the embedded videos).

If you still have your original extras bag with the game, you should have spare factory target decals.

3 weeks later
#136 1 year ago
Quoted from VisitorQ:

Traded my Stranger Things but before I did I had sourced and committed to a new OEM projector for it. My intention was not to sell this but to keep it as a back up in case mine would ever fail cause let's be honest, a premium or LE without a working projector you would be better off with a Pro (no offense to Pro owner .
So... If anyone is interested in a brand new, never used, factory OEM projector directly from Stern... Here is your chance. I was planning on listing this on eBay to be fair but wanted to give you guys a crack at it.
If you are interested Private Message me an offer and high bid will take it by the end of day tomorrow or the week, it just depends on how many people are still actively interested. I figure private messages would be best because I don't want to clutter up the thread with my sale.
Good Luck
The fine print...
Opening Bid Starts at $500
Bids are in the amount of $10
Acceptable payment: PayPal or Venmo (Winning bid pays fees or sends Friends/ Family)
Shipping is fee with tracking via USPS, any additional insurance or services are extra.
[quoted image][quoted image][quoted image][quoted image][quoted image][quoted image]

I'll bid $550.

EDIT: Seeing now this may not be allowed here, but the offer stands if it works out.

3 months later
#150 1 year ago
Quoted from jonnyqtrek:

...so may I ask clarification on what the recommended approach to removing the adhesive is? Is goo gone pretty much the default method since alcohol is ruinous? Or is there another recommended option?

Sounded like the newer sheets may have been tall enough to avoid having to do that, but this product (CRC QD Electronic Cleaner) is safe to use to remove the adhesive (and has also been the best I've used to clean the material when dirty):

https://www.amazon.com/CRC-05103-Electronic-Cleaner-11/dp/B000BXOGNI/ref=asc_df_B000BXOGNI/

Walmart tends to have it, and perhaps cheapest there.

Not all contact cleaners would be safe to use.

3 weeks later
#154 1 year ago
Quoted from jonnyqtrek:

Hmm...am I correct in concluding that I should not have applied star Bright 9 to the two standup targets under the Demogorgon? ("M" and "O") because of the angle?

I didn't add any there, and believe that was the conclusion.

2 months later
#174 1 year ago
Quoted from mattosborn:

There are alternatives to StarBright. I used the "High Contrast" material from Silver Ticket Products. Not sure how it compares to StarBright, but it looks pretty damn good to me. It doesn't have any orientation issues either. Their sample pack, which is a bunch of 8"x11" sheets of their different offerings (12 different materials?) costs only $4.20. One sheet of HC material was enough to do the main screen panels, drop targets, and standups.

FWIW, I tested the Cinegray products shown in this video that compares the Silver Ticket HC screen (video claims the Cinegray is superior), and while better than the stock white, they're muddy (darks gained, with brights lost, and worse colors) in comparison to the StarBright screen (night and day difference between them).

Perhaps their ALR screen would be worth experimenting with, but I haven't tried that one (the material gnjax posted also looks promising if it works on the ramps).

7 months later
#182 6 months ago
Quoted from PinPickle:

I'm going to give this another shot. My previous screen mod was subpar.
Does anyone have a 3 printer that can sell the billboard and light diffusers? I would be interested in purchasing.

I may have updated the billboard file for my game (bit better fitting) and never updated the public file. Will check within the next couple days.

#184 6 months ago
Quoted from cooked71:

So 5 sample sheets is enough? Or best to get a couple more in case.

Bit detached from a perfect memory of it, so I'd be inclined to believe the 5 noted when fresh in mind should be about right, but if wary about needing an extra practice piece, or want extra on hand just in case...

#192 6 months ago
Quoted from cooked71:

I'm not really familiar with the original paper setup on the ramps. Is the OG stuff under the ramps and we're putting the new stuff on top of the ramp?
If so, how is it holding up after all this time?

Best to take the old material off, and I did for some parts, but I did put mine on top of the old ramp material (would have taken it off if I did it again).

After ~1000+ plays, mine looks like this:

Nearly flawless where the ball touches. The bottom area of the drops does get scuffed as shown, but not noticed during gameplay. Small, but noticeable blemish on the standup to the right of the left ramp.

Has held up far beyond expectation.

Pinside_forum_7791537_0 (resized).jpgPinside_forum_7791537_0 (resized).jpg

3 months later
#241 85 days ago
Quoted from mattosborn:

I thought StarBright/DarkStar9 didn't work on the ramps due to the angle....

The fact it works great on the lower ramps is the reason this DIY exists--materials others found before did not (only doesn't work on the vertical sides).

Promoted items from Pinside Marketplace and Pinside Shops!
8,099 (OBO)
Machine - For Sale
Evansville, IN
$ 22.95
Playfield - Protection
ULEKstore
 
$ 74.99
Playfield - Toys/Add-ons
Lermods
 
$ 15.00
Playfield - Other
Pin Monk
 
$ 10.00
From: $ 55.00
Playfield - Decals
PinEffects
 
From: $ 25.00
Cabinet - Armor And Blades
arcade-cabinets.com
 
From: $ 130.00
Lighting - Backbox
Myth Pinball Parts Shop
 
$ 14.95
Playfield - Toys/Add-ons
ULEKstore
 
$ 9,499.00
Pinball Machine
Classic Game Rooms
 
$ 30.00
Playfield - Other
YouBentMyWookie
 
$ 29.99
Playfield - Decals
Cento Creations
 
$ 25.00
Cabinet - Sound/Speakers
PinEffects
 
$ 8.95
Playfield - Toys/Add-ons
ULEKstore
 
13,500
Machine - For Sale
Covington, GA
From: $ 30.00
$ 189.00
Cabinet - Toppers
Slipstream Mod Shop
 
$ 27.95
Playfield - Toys/Add-ons
ULEKstore
 
$ 40.00
Playfield - Protection
arcade-cabinets.com
 
8,995 (OBO)
Machine - For Sale
Linn Creek, MO
$ 95.00
Playfield - Toys/Add-ons
Slipstream Mod Shop
 
From: $ 40.00
Playfield - Plastics
Gameroom Mods
 
From: $ 30.00
Cabinet - Other
Rocket City Pinball
 
$ 38.00
Playfield - Toys/Add-ons
Slipstream Mod Shop
 
Great pinball charity
Pinball Edu

You're currently viewing posts by Pinsider medisinyl.
Click here to go back to viewing the entire thread.

Reply

Wanna join the discussion? Please sign in to reply to this topic.

Hey there! Welcome to Pinside!

Donate to Pinside

Great to see you're enjoying Pinside! Did you know Pinside is able to run without any 3rd-party banners or ads, thanks to the support from our visitors? Please consider a donation to Pinside and get anext to your username to show for it! Or better yet, subscribe to Pinside+!


This page was printed from https://pinside.com/pinball/forum/topic/diy-stranger-things-prem-le-darkstar-9-screen-details?tu=medisinyl and we tried optimising it for printing. Some page elements may have been deliberately hidden.

Scan the QR code on the left to jump to the URL this document was printed from.