(Topic ID: 177822)

DIY Batsignal Mod Tutorial for Batman66

By docquest

7 years ago


Topic Heartbeat

Topic Stats

  • 61 posts
  • 22 Pinsiders participating
  • Latest reply 2 years ago by insx
  • Topic is favorited by 36 Pinsiders

You

Linked Games

Topic Gallery

View topic image gallery

IMG_20210712_185748 (resized).jpg
IMG_20210712_185824 (resized).jpg
IMG_20210712_180313 (resized).jpg
IMG_20210712_175813 (resized).jpg
IMG_20210712_175138 (resized).jpg
Image from iOS (2) (resized).jpg
Image from iOS (1) (resized).jpg
IMG_5812 copy (resized).jpg
IMG_5811 copy (resized).jpg
IMG_5809 copy (resized).jpg
washer and screw (resized).jpg
screw compare (resized).jpg
ur plastic2 (resized).jpg
instructions (resized).jpg
z_connector (resized).jpg
trifurcon_156 (resized).jpg
There are 61 posts in this topic. You are on page 1 of 2.
18
#1 7 years ago

I've been a lifelong Batman66 fan, I know the show inside and out, backwards and forwards and this is a grail theme for me. As I patiently wait for my Stern Batman66 to arrive I've been looking at acquiring possible mods and maybe making a few myself.

This thread will document how I made my own Batman66 style Batsignal mod for the Stern Batman66 game. I hope other Bat-fans find it useful to make to their own. If you are technically challenged and think its is over your head (its not really) you can PM me and I can make one for you for $40 plus $3 shipping within continental US. However I'd encourage you to go ahead and try doing it on your own using my steps below as a guide. If anyone sees a way to further improve the mod please chime in with recommendations to make it even better.

One of the first mods I wanted for my game was the same mini Batsignal that is included on the SLE machines. Stern is using an off the shelf product made by Running Press books. Running Press makes a whole bunch of these "mini kits" that contain some type of trinket or toy and little book that comes with it. I've seen ones based n Dr Who (mini dalek), Star Trek (mini enterprise), Games of Thrones (mini sword), Harry Potter (mini wand), Walking Dead (mini zombie), etc.

Their Batsignal toy lights up via an on/off switch on the bottom (battery is included). The included mini book cover a very broad overview of the Batman comic character. It appears to be geared towards kids.

01_original_box (resized).jpg01_original_box (resized).jpg
02_original_contents (resized).jpg02_original_contents (resized).jpg
02b_original_signal (resized).jpg02b_original_signal (resized).jpg

#2 7 years ago

Stern installs this Batsignal on their Batman66 SLE on the plastic in the upper right corner. The battery has been removed and it is controlled by the game code. Here's a pic of it mounted on the SLE on top of the plastic in the upper right hand corner of the game.

sle_mounted (resized).jpgsle_mounted (resized).jpg

#3 7 years ago

The Batsignal is labeled as lamp #132 in the manual and its connector originates from node board 8c via connector CN5. Its still unclear when the signal will be activated during he game. Right now in the very beta 0.59 code, SLE users have stated it only comes on during the attract mode. It is assumed it will come on during other times when the code is more mature.

bat_signal_wiring (resized).jpgbat_signal_wiring (resized).jpg

batsignal lamp (resized).JPGbatsignal lamp (resized).JPG

signal_connector_location (resized).jpgsignal_connector_location (resized).jpg

#4 7 years ago

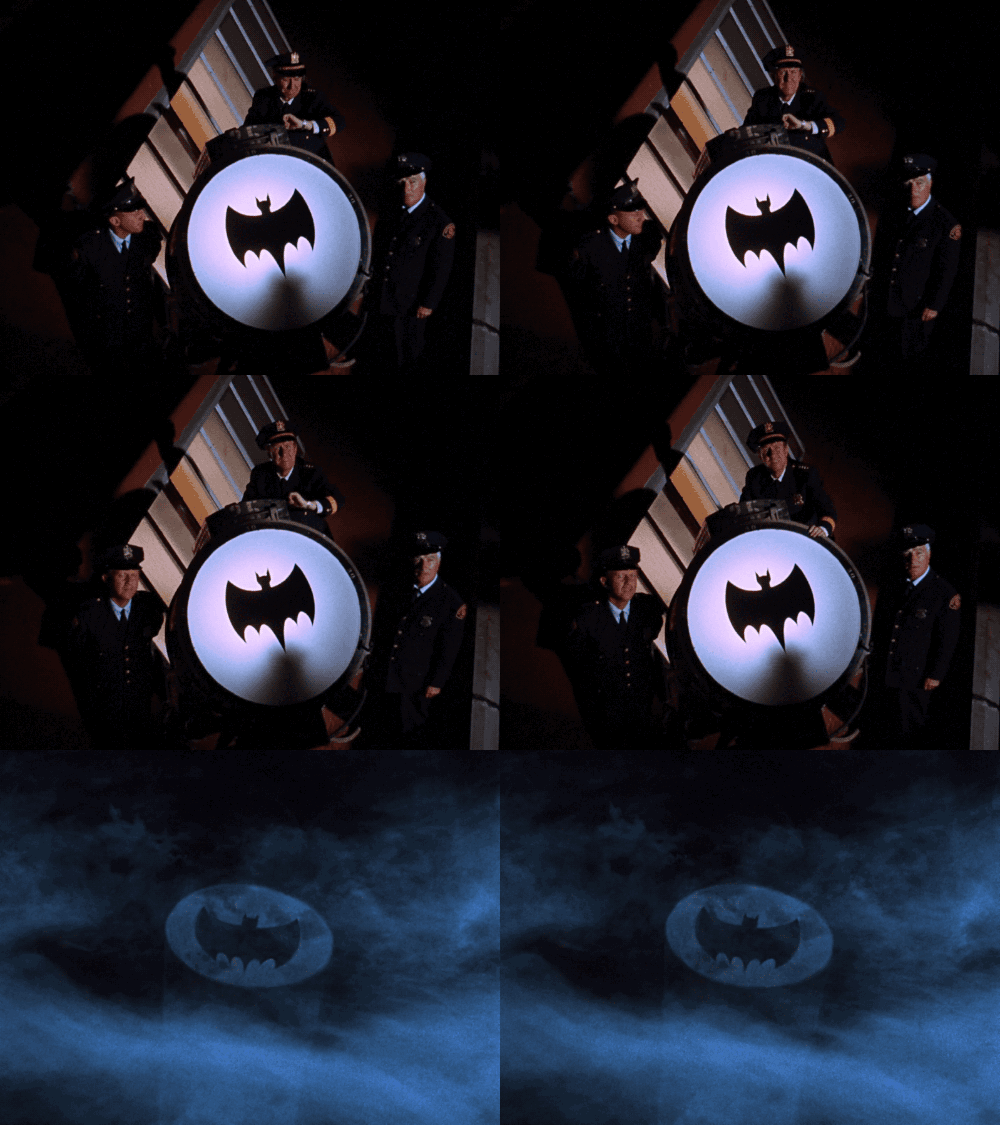
Although this mod is a perfect size for the game I have one big issue with it. It doesn't look anything like the Batsignal from the TV show. This toy is more of a generic comic style Batsignal.

There have been many iterations of the Batsignal in various comic and film version of Batman. However this game is specicially celebrating the Batman 1966 TV show so I want a Batsignal that looks more like the one from the show.

giphy-5.gifgiphy-5.gif
giphy-6.gifgiphy-6.gif

giphy.gifgiphy.gif

giphy (2).gifgiphy (2).gif

giphy (1).gifgiphy (1).gif

#5 7 years ago

If you look at the games art package there are quite few images of the classic Batsignal and the Batsignal logo in the game. I think the premium has the most with over a dozen images of the classic Batsignal logo on it. In all cases its the style used from the TV show not the style in the current Batsignal toy.

signal_collection (resized).jpgsignal_collection (resized).jpg

#6 7 years ago

I want my Batsignal to look moire like the TV version so it fits in better with the game art package.

batsignal.gifbatsignal.gif

giphy-2.gifgiphy-2.gif

#7 7 years ago

So here's what I did to make it look more like the TV version.

I used the same Running Press signal Stern did but I gave it a paint job, changed the lens on it, replaced the cool white LED with a brighter warm white LED, and will add the right connector to allow it to be triggered by the game like it is on the SLE.

Here' the finished result.

23_finished_signals_on2b.jpg23_finished_signals_on2b.jpg

#8 7 years ago

Yeah I got one of these for a friend and his Spider-Man. It's a cheap Chinese made projector and you can change the film inside it for whatever: https://www.amazon.com/Welcome-light-Projector-Shadow-Light/dp/B009SI2ZEO

#9 7 years ago

So here a list of parts you'll need and common places to get them:

Wire 2 different colors - Radio Shack, hobby store
white paint - Michaels, hobby lobby, hardware store
black paint - Michaels, hobby lobby, hardware store
warm white LED - Radio Shack, hobby store, Ebay
100 ohm current limiting resistor - Radio Shack
heat shrink tubing - Radio Shack, hobby store
double stick foam - Michaels, hobby lobby, hardware store
super glue - anywhere
alligator clips or Stern style 2 pin connector (exact part number TBD)

The Batsignal itself can be found multiple places. The Amazon price seems to fluctuate a quite a bit. I saw it as low as $6 at one point, right now its just under $9.

https://www.amazon.com/Batman-Signal-Mega-Mini-Kits/dp/0762445262/ref=sr_1_1

I've also seen it at my local Barnes and Noble book store. If its there, its usually by the front registers on a rotating turnstile with all the other Running Press mini book kits. If you go to the link below there is an option to check your local store to see if they have it in stock or not. If you buy it here is $9.95.

http://www.barnesandnoble.com/w/home-gift-batman-bat-signal-mini-kit/24508821?ean=9780762445264

For hooking up to your game, there are two approaches you can take. You could connect to the existing game controlled lighting connector so its triggered whenever the game tells it to turn on. Its been verified that the connector on the SLE machines is also present on the LE and premium machines. Alternatively you can connect to an existing insert or flasher in the game via some alligator clips. Whenever the LED or flasher you connect to goes off it would also have your Batsignal mode go on or off. I don't have my game yet so I'm sure of the exact connector to use. Once I get my game in I'll verify the exact style connector needed as well as the pinout and update this thread.

#10 7 years ago

First you will need to open up the Batsignal. First apply a little pressure to spread the two side arms holding the Batsignal to remove the signal from the base. Then on the back there is a battery door that need to be removed. First remove the small Phillips head screw, then turn the door counterclockwise to unlock it and remove the door. You'll see the 3 volt battery behind the door, remove that you won't need it anymore.

03_original_back_door_locked (resized).jpg03_original_back_door_locked (resized).jpg

04_original_back_door_unlocked (resized).jpg04_original_back_door_unlocked (resized).jpg

05_original_battery (resized).jpg05_original_battery (resized).jpg

#11 7 years ago

Now you have access to the seam between the two halves of the Batsignal. I choose to split the seam here in the back because it it gets a little messed up it will be hidden when you put the battery door back on. This is probably the trickiest part of the whole mod because if you are not careful you could break the plastic in areas you don't want to break it. I use a sharp utility knife with a razor blade to start cutting right along the seam line. As I work the razor blade into the seam I carefully try to pry the two halves apart. Be patient and take your time and it should eventually split apart. I've done 3 of these so far and some seem to use more glue than others. Two of them split pretty easily and one was real stubborn that took a lot more TLC.

Once it's split you can inspect the seam and use an exact knife to clean up the seam of old glue or broken plastic so that when it's reassembled it goes back together with a nice tight fit along the seam.

06_original_seam (resized).jpg06_original_seam (resized).jpg

07_original_split (resized).jpg07_original_split (resized).jpg

#12 7 years ago

You can now remove the lens, you can throw that away as you won't need it any more. Take out the cone shaped inner part and remove the existing LED, wiring and switch.

07b_original_lens (resized).jpg07b_original_lens (resized).jpg

08_original_wiring (resized).jpg08_original_wiring (resized).jpg

09_original_led (resized).jpg09_original_led (resized).jpg

#13 7 years ago

Next off is the paint job. Painting this is a bit of a pain because there are a lot of nooks and crannies on the signal. Its also very cold here now in the northeast so its too cold to paint in the garage so I need to do it in the basement which ends up smelling the place up. But I really like how it looks in black so it was worth it to me.

I used a semi gloss black testors paint designed for plastic models and it came out pretty nice. Some of the edges and corners have a hint of the original silver showing through with adds a nice weathered look to it.

The two signal halves and the base got entirely painted. The inner cone piece was painted black on the outside but on the inside I painted it white. I thought the original silver color on inner cone didn't look as nice as white. The white also reflects more light to make the signal look brighter.

#14 7 years ago

While waiting for the paint to dry you can start working on the lighting. I decided to replace the original LED with a warm white one that;s also a little brighter then the LED the toy comes with. I like the warmer looking white as opposed to the cool white it comes with. You can re-use the existing LED if you like. The LED that comes with the toy is meant to run on 3 volts from the battery.

10_leds (resized).jpg10_leds (resized).jpg

#15 7 years ago

Stern Spike games use 5 volts for their controlled lighting so if you use the original LED you should add a current limiting resistor. The LED I'm using is designed for 3.0 -3.4 volts with a max current of 28 millamps so it also needs a current limiting resistor. To calculate the approximate resistance to use you can go to www.ledcal.com to figure it out. In my case I assumed 3.2 volt drop across the LED and a target current of 20 milliamps. The calculator said 90 ohms was ideal but 100 ohms is a much more common size and I had it so I used that and it works fine. 100 ohms should work fine with the original LED as well. I don't know the max current limit of the original LED but we know its designed for 3 volts, 20 milliamps is very typical for LED current draw. You definitely need to have a current limiting resistor. If you don't you run the risk of burning out the LED. Here's a nice primer on why you need a current limiting resistor.

https://www.sparkfun.com/tutorials/219

11_led_calc (resized).jpg11_led_calc (resized).jpg

#16 7 years ago

Here's how I wired the LED. The longer leg on the LED is the positive side. I soldered one end of the resistor to this side and then soldered a red wire to the other end of the resistor. I then soldered a black wire to the shorter length lg on the LED. there not a lot of room in the toy so I shortened the legs before soldering the resistor and wires to it.

Once soldered I also put a little bit of shrink tubing over my solder joints. The shrink tubing will prevent two sides of the led from shorting out against one another. If you solder the wire really close to the LED and route the wire carefully you could get away without using the shrink tubing but I had some already and used it. I ran the wire out of the toy via the cutout areas that used to contain the on/off switch, its just the right size for the wires to fit through.

12_led_wired (resized).jpg12_led_wired (resized).jpg

13_cable_routing_inside (resized).jpg13_cable_routing_inside (resized).jpg

#17 7 years ago

The biggest discrepancies with the original toy are the orange colored lens and the incorrect bat logo. I have access to a PVC card printer so I made an image of the appropriate sized logo and printed it on a slightly tinted 30 mil PVC card. The original diameter of the lens is 0.9515" so I put a circle of that diameter in my logo image. So if you cut just inside this circle of the printed image you'll have a perfect diameter to fit in the toy.

Be aware that you need to orient the logo properly when you put it back in the signal. You don;t want to glue everything back together and find out your logo is rotated upside down.

I attached the logo image for people to print on their own. You could print it on clear transparency material then attach it to a clear piece of circular plastic that is 0.95" in diameter. If someone wants to build their own mod and can't print the lens themselves, PM me and I can print it for you.

14_lens_size (resized).jpg14_lens_size (resized).jpg

15_lens_card (resized).jpg15_lens_card (resized).jpg

#18 7 years ago

Here is the image I made for the logo. If you print it at 300 dpi it should print at the right size, i.e. circle is 0.95".

14b_bat_signal_logo.jpg14b_bat_signal_logo.jpg

#19 7 years ago

Now you can start re-assembling everything. First make sure the wire is routed securely and nothing is pinched when the two halves are put together. I run the wire through the bottom where the on/off switch used to be located. I then orient the lens in the groove to the proper orientation. I put a tiny dab of glue in the groove to keep the lens from rotating once its re-assembled. I put glue around the whole seam and then put the two halves together.

You should clamp the two halves together while the glue dries. If you don't have a clamp you could use rubber bands. The two support arms of the base could also be used like a poor mans clamp since they squeeze the two halves together.

16_lens_in.jpg16_lens_in.jpg
17_cable_out_bottom.jpg17_cable_out_bottom.jpg

#20 7 years ago

If you want to control the signal via an existing insert or flasher you can add the alligator clip to the wires. You could use these radio shack clips, 270-1545. I like them because they have the rubber protective boot over the clips. I remove the rubber boot to solder the wire through the hole then reinsert the rubber boot.

18_alligator_clips (resized).jpg18_alligator_clips (resized).jpg

19_alligator_solder (resized).jpg19_alligator_solder (resized).jpg

20_finished_alligator_clips (resized).jpg20_finished_alligator_clips (resized).jpg

#21 7 years ago

Once I have my machine I'll verify the type, and pinout of the right connector to have the mode be controlled by the game code like it is on the SLE. Based on these pics I think its a 2 pin locking 0.156" molex and a male/male coupler added.

signal_unconnected (resized).jpgsignal_unconnected (resized).jpg

#22 7 years ago

The final step is to add a little bit of double sided adhesive foam pads tot he bottom. You are now ready to stick it on the upper right side plastic (or anywhere you like).

21_foam_tape (resized).jpg21_foam_tape (resized).jpg

#23 7 years ago

Here's how the finished mod looks with the light on and off. I made an unpainted one was well to see how it looks. I think I still like the black one better.

If anyone has suggestions to improve it please posts your ideas.

I made 4 of these so far so if anyone wants to buy one of these I'd sell one for $40.

22_finished_signals_off (resized).jpg22_finished_signals_off (resized).jpg

23_finished_signals_on2 (resized).jpg23_finished_signals_on2 (resized).jpg

#24 7 years ago

Following this. Great post. I'd like to buy a black one.

#25 7 years ago

Nice job man.

#28 7 years ago

Outstanding work! You've got great attention to detail.

#29 7 years ago

interested in a black weathered version!

#30 7 years ago

Great work!

PM sent. Would love a black one, but ok with either.

I'm not capable of doing something this cool ...

#31 7 years ago

PM sent!

Awesome job! Like to get a black one from you.

#32 7 years ago

Nicely done and great tutorial!

#33 7 years ago

Excellent work. Thank you for taking the time to create, document, and share this.

#34 7 years ago

You did such a great job, i almost want one
for my Ghostbusters!

#35 7 years ago

Fantastic!

#36 7 years ago

Pm sent....great job!!!...black for me please...

#37 7 years ago

PM sent holly great idea batman!!!!

#38 7 years ago

Thanks for all the kind words. Response was greater than I expected so I'll be busy busting up Batsignals, ripping out their guts, and rebuilding them over the next few days.

I was glad to hear from several pinsiders who are gonna try and tackle the mod themselves which is very cool too. If you do it yourself please post pics of your finished creation installed in your machine. I'd love to see what other creative ideas people come up with.

Once my LE gets here I will verify the connector I have fits and my pinout is correct and then I'll will start shipping them out. If you prefer the flexibility of just using the alligator clips to piggyback off of an existing insert or flasher I have a couple of those Batsignal versions ready to go right now.

#39 7 years ago

any chance you can do a BDK version?

#40 7 years ago

I also forgot to mention that there is cool prop builder out there who made a very nice replica of the TV Batsignal. Unfortunately I think the scale is a bit big to use as a playfield mod. His smallest version (1:12 scale) is still over 6" tall. But if you are getting a Premium and looking for a nice sized topper this could do the trick.

Here's his website:
http://tmmello1965.wixsite.com/fanmade/bat-signal

mello_signal (resized).JPGmello_signal (resized).JPG

#41 7 years ago

Hmmm....... buy this mod now and get the Batman LE later?

Missed out on an LE that was priced right this weekend.

#42 7 years ago

I got my LE today and it does have the playfield connector for the playfield Batsignal toy.

So far with the 0.65 code that connector triggers the Batsignal to flash during attract mode. Also when you start a game the GI goes dark and the backbox Batsignal and the Batsignal toy are both lit before you plunge the ball. Sort of like Commissioner Gordon is calling Batman to action by lighting the signal. Of course you could alternatively hook up the toy Batsignal to any flasher or insert light in the game and trigger it that way instead. Here's it is on my game off and on.

20170113_153249 (resized).jpg20170113_153249 (resized).jpg

20170113_152452 (resized).jpg20170113_152452 (resized).jpg

#43 7 years ago

Here's the update on how connect to the Stern provided connector to control and power your mod. To reach the Stern connector you wires should be about 3 feet long. The Stern connector is a 2 pin female 0.156" Molex connector with a locking ramp. To interface with it you need to buy these 3 parts from pinball life or other favorite hardware supplier:

2 pin female 0.156" Molex connector with ramp $0.11
http://www.pinballlife.com/index.php?p=product&id=3440
molex_2_pin (resized).jpgmolex_2_pin (resized).jpg

Trifurcon 0.156" terminal $0.10
http://www.pinballlife.com/index.php?p=product&id=496
trifurcon_156 (resized).jpgtrifurcon_156 (resized).jpg

2 pin male to male Z connector $0.60
http://www.pinballlife.com/index.php?p=product&id=2095
z_connector (resized).jpgz_connector (resized).jpg

If you really wanted to save a few pennies you could just solder the LED leads to the male to male Z connector and not use female connector at all. I prefer to use all 3 parts for a cleaner looking mod install.

#44 7 years ago

The +5v for the LED will go to pin 1 of the 2 pin female connector and pin 2 is the LED ground. On the pinball life 2 pin female connector there is a faint "1" molded into the plastic indicating which is pin 1. I made my wires red and orange so that way its to make sure the Stern red goes to the mod's red and the stern red/orange goes to the mod's orange. The Z connector is designed to go onto the female Molex connector one way only. However if you really "manhandle" it enough you could put it on backwards. Just keep the wire colors lined up and you should be good.

Here's a summary of how to install it once you have your wiring connector made.

instructions (resized).jpginstructions (resized).jpg

#45 7 years ago

You need to be careful where the signal is mounted on the plastic. The back of the signal sticks out a little farther than the base. You want to make sure that when you lift and slide the playfield you have clearance to not hit or scrape anything. This is the mounting location Stern uses for the Batsignal on their SLE. You could mount it anywhere you want but you'd need to make sure your wiring was long enough to go where you want it to.

This was my first spike game and I noticed a lot of the insert LED's and flashers are the mini board style. If you make your own mod with the alligator clips it would be hard to hook on to those since the contacts for the LED are so small. If you want to hook to one of those instead of using the Stern connector you might need to solder some jumper wires to the LED board.

1 week later
#46 7 years ago

A fellow pinsider with an SLE let me know that Stern uses a screw to mount their batsignal to the game. Lo and behold I checked my LE and there is a hole in the plastic for mounting. I can only assume the premium has it as well.

So you have 2 mounting options. You can use double stick foam tape or you can screw it in. The advantage of the foam tape if you have more flexibility as to where you mount it to the plastic (you can try and move it over a bit so Cheif O'Hara and commissioner Gordon are a little more visible). If you screw it using the pre-exisitng hole your location if fixed. This pic shows where the pre-exisiting hole is on the plastic.

ur plastic2 (resized).jpgur plastic2 (resized).jpg

#47 7 years ago

If you want to screw it in you need to remove the existing screw on the bottom of the batsignal. It is a 1/4" long course threaded. I'm guessing a #4 size. It has a washer built in to it. I tried replacing it with a #4 3/4" long metal pan head screw with a #6 washer (they didn't have #4 washers at Lowes) and it seems to fit well. At first I thought 3/4" was too long but it seems fine. This approach might need a dab of glue or lockite as the threads are coarse. A similar coarse screw is used to secure the batmobile to the spinner and some have had their come loose.


screw compare (resized).jpgscrew compare (resized).jpg
washer and screw (resized).jpgwasher and screw (resized).jpg

#48 7 years ago
Quoted from msj2222:

any chance you can do a BDK version?

I have bought one of these to fit into my BTDK. I'm going to have a relay make it flash in conjunction with the Bat Signal flasher in the back panel.

#49 7 years ago
Quoted from stoptap:

I have bought one of these to fit into my BTDK. I'm going to have a relay make it flash in conjunction with the Bat Signal flasher in the back panel.

If you put an led flasher in the signal that was the same voltage as the exisitng flasher in your back panel tham no relay needed?

#50 7 years ago
Quoted from docquest:

If you put an led flasher in the signal that was the same voltage as the exisitng flasher in your back panel tham no relay needed?

nope.

keep in mind.
flasher in spike are 5 volts.
before that they are 12 volts.

Promoted items from Pinside Marketplace and Pinside Shops!
From: $ 99.99
Cabinet - Other
Lighted Pinball Mods
 
From: $ 99.99
Cabinet - Other
Lighted Pinball Mods
 
$ 24.75
Flipper Parts
Precision Pinball prod.
 
10,950 (OBO)
Machine - For Sale
Houston, TX
From: $ 30.00
Cabinet - Toppers
+CY Universal
 
$ 25.00
Playfield - Protection
ScottyMods
 
From: $ 15.00
Playfield - Other
YouBentMyWookie
 
$ 11.95
Playfield - Toys/Add-ons
ULEKstore
 
$ 5.00
Playfield - Decals
UpKick Pinball
 
$ 130.00
Cabinet - Toppers
Docquest Pinball Mods
 
From: $ 30.00
Cabinet - Other
Rocket City Pinball
 
10,500
Machine - For Sale
Springfield, MO
$ 135.00
Cabinet - Toppers
Sparky Pinball
 
$ 259.99
Cabinet - Toppers
Lighted Pinball Mods
 
11,500
Machine - For Sale
Haddonfield, NJ
$ 30.50
Playfield - Toys/Add-ons
The MOD Couple
 
$ 25.25
Playfield - Toys/Add-ons
The MOD Couple
 
$ 28.00
Playfield - Toys/Add-ons
ULEKstore
 
$ 25.95
Cabinet - Shooter Rods
The MOD Couple
 
From: $ 99.99
Cabinet - Other
Lighted Pinball Mods
 
$ 29.25
Playfield - Toys/Add-ons
The MOD Couple
 
$ 50.00
Playfield - Protection
Duke Pinball
 
$ 8.99
Cabinet - Other
Inscribed Solutions
 
Wanted
Machine - Wanted
Altoona, PA
Great pinball charity
Pinball Edu
There are 61 posts in this topic. You are on page 1 of 2.

Reply

Wanna join the discussion? Please sign in to reply to this topic.

Hey there! Welcome to Pinside!

Donate to Pinside

Great to see you're enjoying Pinside! Did you know Pinside is able to run without any 3rd-party banners or ads, thanks to the support from our visitors? Please consider a donation to Pinside and get anext to your username to show for it! Or better yet, subscribe to Pinside+!


This page was printed from https://pinside.com/pinball/forum/topic/diy-batsignal-mod-tutorial-for-batman66/page/1 and we tried optimising it for printing. Some page elements may have been deliberately hidden.

Scan the QR code on the left to jump to the URL this document was printed from.