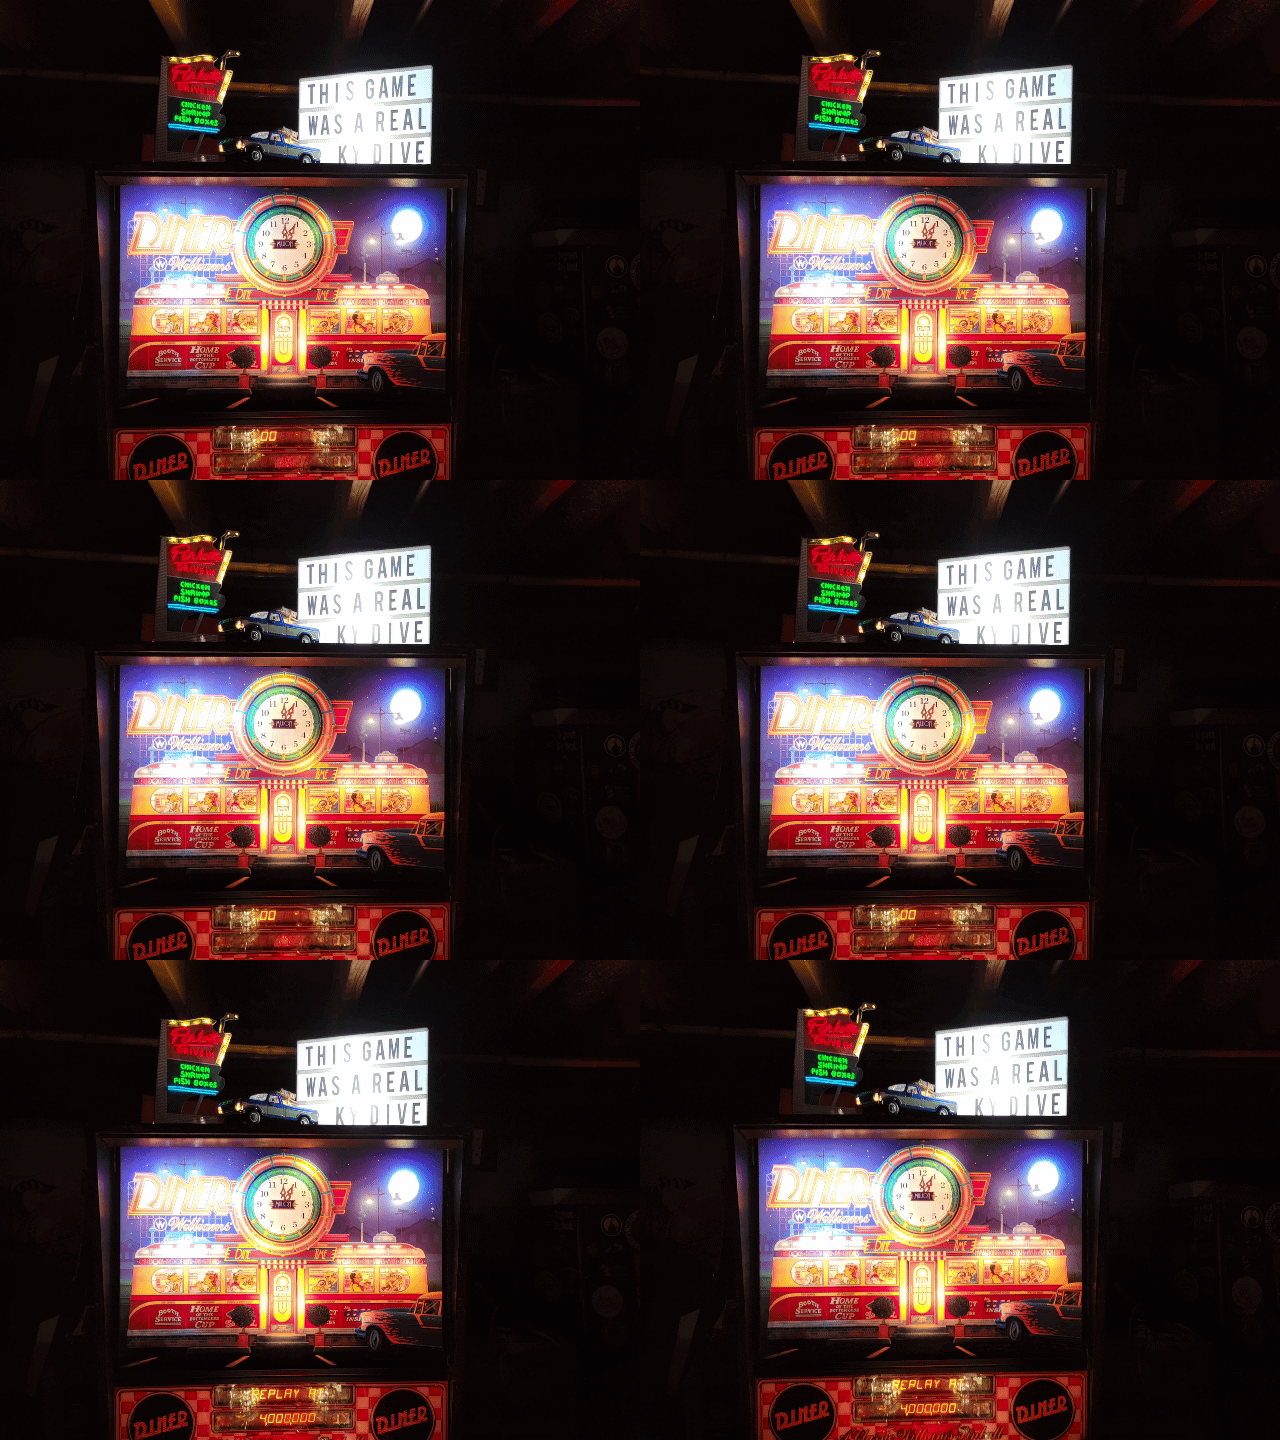
(Topic ID: 50275)

Diner Owners Club...Can I Take Your Order ?

By Pinballgeek

10 years ago


Topic Heartbeat

Topic Stats

  • 2,027 posts
  • 230 Pinsiders participating
  • Latest reply 4 months ago by Sonic
  • Topic is favorited by 83 Pinsiders

You

Linked Games

Topic Gallery

View topic image gallery

468C8358-514E-474B-A4FA-6B6A48BF4BB2 (resized).jpeg
PXL_20230818_015224729 (resized).jpg
PXL_20230818_015217741 (resized).jpg
PXL_20230818_015252906 (resized).jpg
PXL_20230818_014723841 (resized).jpg
PXL_20230818_014721016 (resized).jpg
PXL_20230818_014827026 (resized).jpg
PXL_20230818_014807488 (resized).jpg
PXL_20230818_015311263 (resized).jpg
PXL_20230818_015303822 (resized).jpg
01_s11_ssd3.jpg
00_s11_ssd3.jpg
CA32A5DE-C882-43F7-A308-499962824623 (resized).jpeg
7169687A-9648-4094-8846-EE493B1739D9 (resized).jpeg
8767A2EA-C9E9-4E11-B57D-E6906F386A32 (resized).jpeg
A421D1B0-5878-42D8-98BD-4F680FEC5B6B (resized).jpeg
There are 2,027 posts in this topic. You are on page 39 of 41.
#1901 1 year ago
Quoted from goingincirclez:

Thanks for the feedback everyone. I was leaning toward leaving them out, but wasn't sure if that was going a step too far. And you're right, I guess most new games don't have the bars either, does anyone know when that happened? As for the pins, I agree that as long as the flippers are "meant" to be set straight with the feed lanes, they aren't necessary. But if the designer's intent is a lower/drooped alignment I can see where they would be handy. Diner, I think, should be straight.
~~~~~~~
On another topic, I'll share a pic from my restore thread with some ideas for what they may be worth. I got the new cup from mike200mph and it looks great! And while applying the stickers my daughter noticed and confirmed my own thoughts, which is that the stripe as usually seen (including our own original) is almost always upside down. Because on the handle, the red stripe is on top... so that's how she put the stripe on the cup, to match. I think it looks better this way but as admitted above, I have a bit of OCD about silly stuff.
The other mod I did was to the cup bracket: I used a Dremel cut-off wheel and chopped/rounded the corners to match the bottom of the cup. No more unsightly large pointy metal blocking the upper lanes. The spoon plate is still just as rigid, so no worries there: the original square bracket shape was for ease of manufacture; the reduction of supporting surface in that area is not enough to impair function.
[quoted image]

I think there are two ways to approach restorations... make it look and play absolutely identical to the way it came from the factory... OR... make it look and play fantastically, just like it came from the factory, except make improvements or corrections to mistakes made in the design or manufacturing. Either is fine in my opinion, but you can't have both. And for those OCD reasons you've already mentioned.

That cup sticker for example I would put on in the same orientation as it came from the factory. That's just me. It's not an impediment to play like it could be for example if having it the other way around blocked your view of something behind it.

We have new, replacement and improved technology cup spin switches now. Others installing these have commented that they want the switches to register every spin of the ball around the cup and not just every other rotation, like the original switches and code do for us. If the game was meant to take every other rotation into account for scoring, that's how I'd rather see my game play.

Some of the inside painting of the game cabinets was pretty sloppy looking. Funhouse for example has the nice, bright blue paint, and yet it is all over the map inside the cabinet and looks awful. Authentic, but awful. If I was going to repaint a cabinet, I would do everything consistent on all surfaces, but that might not match the purists view.

There are just as many examples in old car restorations. Guys that are adamant about originality will actually reglue brand new weather striping inside the hood to look sloppy and careless because that's how the factory did it. That makes no sense to me, but there you go. Different strokes for different folks.

Personally, I focus more on making sure the game plays as perfect as I can get it to. So not having a lot of toys and other mods blocking your view is important to me. That's boring to some, but ok, to each his own.

#1902 1 year ago

Looking for CPR Silkscreened playfield silver or gold. Let me know if somebody have something for sale.

#1903 1 year ago
Quoted from vbobrusev:

Looking for CPR Silkscreened playfield silver or gold. Let me know if somebody have something for sale.

I thought CPR had them back in stock? I saw a notice a week or two ago.

Edit: Sorry, I later realized you are looking for the silk-screened version

#1904 1 year ago

Thanks tstone. Guard will no doubt be needed.

Off2war....get me shipping details "down under" and I will drop yours to you.

20230120_183440 (resized).jpg20230120_183440 (resized).jpg
3 weeks later
#1905 1 year ago

The resistor for my left ramp flashers is dead, a cable tie was resting on it, which melted. So I can't see the value of the resistor.

Could anyone let me know the value of this one, it's R11 on the interconnect board.
20230212_210748~2 (resized).jpg20230212_210748~2 (resized).jpg

#1906 1 year ago

The spring steel hinge on my left ramp entrance broke, and probably had been broken since I got the game because it had a section of mylar over it holding the two pieces together, and I didn’t put it there. So I took the parts off, traced a new piece on spring steel, and made a new one.

Putting it all back together it isn’t dropping. I also replaced the “pin crank stud” that the ramp rides on because the old one was almost worn through.

Problem is, not it’s not dropping on its own. I made sure the path for the stud is smooth and the ramp flap isn’t touching anything, so it’s not stuck open.

The spring on the coil that raises the ramp seems very weak, like I wouldn’t expect it to be doing much of anything to help push the mech back to the lowered position. If I press the release latch from the top, the ramp flap just sits there.

The stud is also not stuck in the slot of the side wall it pokes through, I already messed with that a little.

DCC6A067-CF82-4B20-A6B1-604393FE1685 (resized).jpegDCC6A067-CF82-4B20-A6B1-604393FE1685 (resized).jpeg
#1907 1 year ago
Quoted from DaveTheTrain:

The resistor for my left ramp flashers is dead, a cable tie was resting on it, which melted. So I can't see the value of the resistor.
Could anyone let me know the value of this one, it's R11 on the interconnect board.
[quoted image]

4 ohms, same values as R9

#1908 1 year ago
Quoted from DaveTheTrain:

The resistor for my left ramp flashers is dead, a cable tie was resting on it, which melted. So I can't see the value of the resistor.
Could anyone let me know the value of this one, it's R11 on the interconnect board.

Are you sure it's dead?

#1909 1 year ago
Quoted from tstone:

Are you sure it's dead?

It has zero continuity, no buzz. The rest do. So I assumed so.
The transistor for the left flashers is probing, but that continuity stops at that resistor.

#1910 1 year ago

Thought I would share my completed resto, which I customized in honor of a departed local establishment. I utlimately decided to make my own side blades by continuing the checker pattern from the back... not terribly original but it looks better than I thought. The bric-a-brack decor on the blades is separatelly applied. If anyone is interested in these blades (plain checkers) let me know. I designed them as rectangular trim-to-fit, so they can be tailored to whatever random alignment nuance your back panel/decal has in the cabinet. Yes, it's a bit OCD that way but it pays off!

20230218_122338 (resized).jpg20230218_122338 (resized).jpg

I liked some of the mods available for sale elsewhere, but my 15yo daughter and I had more fun bouncing ideas based on what's out there and coming up with our own usage. So we decorated the playfield with erasers and other bits that fit eerily well! Did you know erasers feel just like rubber posts, ha!

The other big bit is the custom topper I made, which fits the theme but ties into the history of this particular one:

Pinside_forum_7391750_2 (resized).jpgPinside_forum_7391750_2 (resized).jpg

Pinside_forum_7389111_2.gifPinside_forum_7389111_2.gif

Anyway, apologies if some of you already saw my other dedicated threads on these topics but I figured I would share the ideas with the club thread.

And now I do have a question: with regards to "spins" on new replacement cups, is there a consensus that these might be slower than before, or hacks to dialing it in? I've read several pages back and I've checked my ramp alignment, entry flap, switch, flipper configs, etc. Everything about this game plays perfect and snappy but the cup spins seem a little slower than they were before I tore it apart.

I *did* notice while working on it that the cup has a lot of literal static: incidental dirt and other bits cling to it, which is odd. So I might try to clean it again and rewax it. And a friend suggested that being fresh plastic, it might be a bit softer than the old one which hardened over decades (literally that's part of why they turn yellow) so sure, the friction of softer material could be a little slower but that almost seems like a stretch.

But other than that I've also noticed that the switch only seems to register every other hit at times. I'll have the glass off and I can hear it make a nice click but not score until the next go-round. It's 100% reliable in test though. Is this a rom or game progression quirk?

#1911 1 year ago
Quoted from goingincirclez:

But other than that I've also noticed that the switch only seems to register every other hit at times. I'll have the glass off and I can hear it make a nice click but not score until the next go-round. It's 100% reliable in test though. Is this a rom or game progression quirk?

I had that happening on my game also, even after installing a new switch.

So, I upgraded to an MRS switch. Its an easy simple install, but it didn't fix this issue (if it even is an issue?).

I just thought that the switch doesn't register if the ball goes too fast.

However it rewards every other spin on the MRS switches too, so that is not the case.

I now think that its software limiting the reward depending on the multiplier (this doesnt seem likely), or my MRS switch is slow?

Others, please chime in.

#1912 1 year ago
Quoted from goingincirclez:

And now I do have a question: with regards to "spins" on new replacement cups, is there a consensus that these might be slower than before, or hacks to dialing it in?

You are correct, the cast resin cups are softer than the "old hardened" acrylic ones by a tiny bit.

They will harden up over time, I think. Resin always gets harder over a long period of time (years).

Softer material makes the ball move more slowly.

Waxing it will help, but it will wear off and have to be reapplied when you wax the playfield.

For static, apply an anti-static liquid like the stuff we used to put on vinyl records to keep them clean and static free:

https://www.amazon.com/Audio-Technica-AT634a-Record-Care-Solution/dp/B07JLXZ58W

Or any of the anti-static liquids for plastic or acrylic.

#1913 1 year ago
Quoted from goingincirclez:

And now I do have a question: with regards to "spins" on new replacement cups, is there a consensus that these might be slower than before, or hacks to dialing it in? I've read several pages back and I've checked my ramp alignment, entry flap, switch, flipper configs, etc. Everything about this game plays perfect and snappy but the cup spins seem a little slower than they were before I tore it apart.

somewhere further up in this thread someone suggested to change the flipper angle (tips closer to the apron). This worked well on my game - the 2.7 million cupshot became possible (but never easy) again.

#1914 1 year ago
Quoted from branlon8:

somewhere further up in this thread someone suggested to change the flipper angle (tips closer to the apron). This worked well on my game - the 2.7 million cupshot became possible (but never easy) again.

Yep did the same thing and helped a lot.

#1915 1 year ago
Quoted from branlon8:

somewhere further up in this thread someone suggested to change the flipper angle (tips closer to the apron). This worked well on my game - the 2.7 million cupshot became possible (but never easy) again.

Quoted from Sethman:

Yep did the same thing and helped a lot.

Would you guys mind to share a nice direct-overhead photo of your flipper alignment?

I actually had the same idea and adjusted some already. I'd initially aligned them dead-level with the return guides. I later dropped each maybe about 1mm or so. I'm hesitant to go much lower because the Today's Special scoop already seems too easy too hit too often and frankly gets a little disruptive (Missed the ramp? STOP AND GO FOR YOU!). But I can see where lower could direct a meatier part of the flipper toward the cup ramp so maybe it's a tradeoff I haven't found...?

I will admit, I've backhanded the left ramp a couple times accidentally but I don't remember that happening before, so maybe the flippers *are* too high even though they look and play right. (But bankhandable shots are among my favorites... argh, tradeoffs!)

#1916 1 year ago

this corner of the room is not very light, but I think you can get an idea of the angles.

5A69D2D7-D668-449B-B61A-110CDBC3364E (resized).jpeg5A69D2D7-D668-449B-B61A-110CDBC3364E (resized).jpeg
#1917 1 year ago

My Diner flippers are aligned to the alignment holes:
diner flippers (resized).jpgdiner flippers (resized).jpg

Use an allen wrench or a toothpick between the rubber and the bat and stick it in the hole for correct positioning.

IMO the game plays pretty good at this setting.

#1918 1 year ago

Has anyone done an alternative colour for your rubber rings and post sleeves and like how it turned out? Pics to share? I am thinking of either red or orange if I don't just use white again. The game looks good with just white as far as I'm concerned. Yellow post sleeves with those white rings too.

#1919 1 year ago

https://www.marcospecialties.com/pinball-parts/01-8726-L-1

Anyone know what the proper type and size and quantity of screws are for the playfield support brackets? I noticed mine don't have as many screws in it as it seems like it should and peering through the holes, it looks like maybe the ends are going into T-nuts or something else threaded (i.e. not wood screws). Just wondering what size thread and length the screws needed are.

#1920 1 year ago

branlon8 and pinballinreno thank you for those photos! Yes, your flippers were a bit lower than mine. I've adjusted mine to match (near as I can tell: my CPR pf didn't have holes for the alignment pins nor did I install the bars, so I used the pf art as a reference)... and the ramp shots seem more inclined toward more spins now. And still "backhandable' as the occasional fluke. Still get an occasional dribbler so I guess that's the nature of the beast, but better is better so I'll take it. Thanks again.

#1921 1 year ago
Quoted from AlexRogan84:

https://www.marcospecialties.com/pinball-parts/01-8726-L-1
Anyone know what the proper type and size and quantity of screws are for the playfield support brackets? I noticed mine don't have as many screws in it as it seems like it should and peering through the holes, it looks like maybe the ends are going into T-nuts or something else threaded (i.e. not wood screws). Just wondering what size thread and length the screws needed are.

All screws are 1/2" long. The 2 phillips are 8-32 and go into T-nuts.
The other 4 are #8 course-thread, hex-head wood screws.

Image1 (resized).pngImage1 (resized).png

#1922 1 year ago
Quoted from pinballinreno:

I had that happening on my game also, even after installing a new switch.
So, I upgraded to an MRS switch. Its an easy simple install, but it didn't fix this issue (if it even is an issue?).
I just thought that the switch doesn't register if the ball goes too fast.
However it rewards every other spin on the MRS switches too, so that is not the case.
I now think that its software limiting the reward depending on the multiplier (this doesnt seem likely), or my MRS switch is slow?
Others, please chime in.

It is every other hit. It isnt a fluke.

1 week later
#1923 1 year ago

Anybody need a new left side ramp for their Diner? I have a repro that has never been out of it's plastic packaging. PM me for a great deal.

Add now in the Marketplace.

1 week later
#1925 1 year ago

Hi Larry
I repro'd the cup, I showed you at the York show in Pa 2 yrs ago.
Still have Plenty if Anyone Needs
Thanks Mike

20211231_132956 (resized).jpg20211231_132956 (resized).jpgScreenshot_20211231-132908_Gallery (resized).jpgScreenshot_20211231-132908_Gallery (resized).jpgScreenshot_20211231-132933_Gallery (resized).jpgScreenshot_20211231-132933_Gallery (resized).jpg
#1926 1 year ago
Quoted from lrosent345:

3Anyone making the coffee cup?

Did you guys find the molds?

Injection molding might lower the cost down to the original $65 price.

I say do it!

#1927 1 year ago

I'm having a frustrating issue, hoping you experts can help!

When I boot up, I get a test report.

It says to check switch, right sub playfield 2, #16.

I have used the manual to identify this switch, it's in the "special" hole, it has white/grey and green/red wires.

The switch looks OK to me, seems to test OK. It isn't jammed or anything, seems to open and close correctly with the wire.

I'm not sure why I'm getting the error.

Also, the special hole seems to work fine during gameplay.

I hate getting that test report and credit dot.

Can someone tell me what I should do next?

thanks!

#1928 1 year ago
Quoted from tstone:

I'm having a frustrating issue, hoping you experts can help!
When I boot up, I get a test report.
It says to check switch, right sub playfield 2, #16.
I have used the manual to identify this switch, it's in the "special" hole, it has white/grey and green/red wires.
The switch looks OK to me, seems to test OK. It isn't jammed or anything, seems to open and close correctly with the wire.
I'm not sure why I'm getting the error.
Also, the special hole seems to work fine during gameplay.
I hate getting that test report and credit dot.
Can someone tell me what I should do next?
thanks!

When you say "seems to test OK"....are you using the menu or a meter to test the switch to make sure it is registering correctly? or are you just saying it moves like it should? Trust me, they will look and feel fine, but have broken internals. If you put the game into the switch test mode, is it registering correctly?

#1929 1 year ago
Quoted from Manimal:

When you say "seems to test OK"....are you using the menu or a meter to test the switch to make sure it is registering correctly? or are you just saying it moves like it should? Trust me, they will look and feel fine, but have broken internals. If you put the game into the switch test mode, is it registering correctly?

When I disconnect the wire and test with my meter, I get open with the button not pressed and closed with it pressed.

I can't actually figure out how to do a single switch test in this game, even after looking at the manual.

Could someone explain how to do the test? I agree that would be best. My machine has 3 buttons that aren't labeled, the center one can have an "up" or "down" position. I think the left one is "advance".

I could also compare it to the one right next to it, right sub playfield 1.

thanks,

#1930 1 year ago

OK, I figured out how to test single switches.

The test seems to work properly.

In switch test mode, when I activate the switch, it displays right sub playfield 2.

When I activate the switch right next to it (for which there is no error), I get right sub playfield 1, as expected.

These are the expected results...and also note...when the game boots up, the switch is "off", so somehow it is identifying an issue when the switch is not activated.

I'm confused...it seems like it's working both in switch test and in game play...why do I get the error?

#1931 1 year ago

Have you ever hit the switch during game play? I know some machines will register a switch error if it hasn't been hit in several gamed. The logic assumes the switch is bad.

#1932 1 year ago

Also, make sure you are testing the switch with an actual pinball. Many times the wire gets bent and you can activate the switch by hand, but a ball will miss the mark.

#1933 1 year ago
Quoted from Manimal:

Have you ever hit the switch during game play? I know some machines will register a switch error if it hasn't been hit in several gamed. The logic assumes the switch is bad.

Yeah, I hit it almost every game. It gets hit every time a ball goes in the special hole.

Quoted from Manimal:

Also, make sure you are testing the switch with an actual pinball. Many times the wire gets bent and you can activate the switch by hand, but a ball will miss the mark.

I did try it with a pinball...but again, since the switch is "open" when the machine is powered on, I would think the machine thinks it's "closed/activated" to register an error, but I don't see this during the test.

#1934 1 year ago
Quoted from tstone:

Yeah, I hit it almost every game. It gets hit every time a ball goes in the special hole.

I did try it with a pinball...but again, since the switch is "open" when the machine is powered on, I would think the machine thinks it's "closed/activated" to register an error, but I don't see this during the test.

If you hit it every game and the ball ejects without going into a ball search, then the switch is fine. No idea why it would be saying it is not.

#1935 1 year ago

Just picked up a Diner and want to redo the cabinet. The artwork looks simple enough that one could almost do it as a stencil. Anyone ever try this/know where you can get a stencil? Otherwise, I was leaning towards doing Radcals as that looks to be the easiest route.

1 week later
#1936 1 year ago
Quoted from mike200mph:

Hi Larry
I repro'd the cup, I showed you at the York show in Pa 2 yrs ago.
Still have Plenty if Anyone Needs
Thanks Mike
[quoted image][quoted image][quoted image]

I'm tearing down my Diner and cleaning it up, replacing the rubber rings and post sleeves and a few other odds and ends.

I'm curious what the best method is for removing the cup from the backboard? I have it all out now and got it removed without breaking anything, but it was a real struggle trying to wiggle the cup out while it has the plastic saucer base still attached along with the metal L bracket. I took it out last, after all the ramps and plastics were also out as well as the EAT lane guides as I found you needed to tip the cup down and then slide it out and those lane guides seem to be in the way to do this. I've also since removed the backboard as my flasher wiring needed some attention.

Mike... for your repo cup, could you please message me what the cost would be for one cup plus shipping to Guelph, Ontario, Canada? I can give you my full address privately if you need that to confirm the shipping costs. Just let me know. Thanks!

IMG_0167 (resized).JPGIMG_0167 (resized).JPGIMG_0250 (resized).JPGIMG_0250 (resized).JPGIMG_0257 (resized).JPGIMG_0257 (resized).JPG
#1937 1 year ago

Not sure what the "best" method is, but I had to do about the same as you described. It's not something that's very intuitive or easy. But it's also one of those "should never have do do this again" things so... never really studied or wrote the process down, haha.

#1938 1 year ago

Doing the playfield swap on this way a breeze.... but that cup. That effing cup.

#1939 1 year ago

Hello everyone!

The tl;dr of this post is that I'm looking for anyone who might be willing to share their progress photos of a complete playfield swap? Or just lots of detailed pics of top and bottom?

Long story:

In 2006 my dad and I went in together and bought a Diner machine that someone else had started as a project. The playfield was mostly already stripped and only had some rails and such on it. Nothing else. Everything was in the coinbox and boxes. The playfield was pretty worn and so I stripped the rest of it and we sent it out to have it refurbished. More than a year later, we hadn't heard anything from the repair place, so we had them return it. It really hadn't been touched. But as time had moved on, so had I. I was moving out of state for a job and didn't have time to get anything more done with it. I ended up finding a wife where I moved to, and well, never got back home.

So in the ensuing years, my parents retired, my dad sold off his other machines and moved to AZ. He still has the Diner though, but nothing has been done and it's been sitting in his shed there for almost a decade. When CPR announced a while back that they were making Diner playfields, I told him about it, but he seemed to balk at the price. Then they sold out.

Well, I just happened to check back on their site a month or so ago and found that the playfields were back in stock. So I bought one. And the plastics. And backglass... I'm going to surprise my dad for his 70th birthday next month and show up with all of it and everything else to hopefully get the machine into some sort of order. If nothing, it will hopefully have a nice looking playfield.

I've read pretty much completely through this thread and have already bought the new Diner cup from mike200mph and the MRS from @sonic. Both of the products look amazing.

I'm planning on purchasing basically all new playfield posts and mechanicals to some degree (pops). I haven't seen what's left of this machine in years, so going in very blind. I've only got a few pics from when I pulled the playfield, and it doesn't really help me much, as it's all been moved at least 4 times and once across the country. I do remember things like the one lift ramp being crap and possibly a broken plastic ramp. Gonna probalby just buy all new from Planetary.

So if anyone has a photo gallery that they could link to or such, that would be much appreciated. I've attached some of the pics I have of it from when it was purchased, and my new CPR playfield.

DSC01748 (Medium) (resized).JPGDSC01748 (Medium) (resized).JPGDSC01749 (Medium) (resized).JPGDSC01749 (Medium) (resized).JPGDSC01750 (Medium) (resized).JPGDSC01750 (Medium) (resized).JPGDSCN0044 (Medium) (resized).JPGDSCN0044 (Medium) (resized).JPGIMG_20230328_142819 (Medium) (resized).jpgIMG_20230328_142819 (Medium) (resized).jpg
#1940 1 year ago

I have my topside off and on my dining room table right now. Underside remained intact. I have a parts order coming today or tomorrow with star posts and rubber rings and flashers and when it arrives I’ll put it back together. If you want any pictures of anything from what you see, just ask as now is the time.

101C5F39-0571-490D-AD1F-EC39ED06AFCA (resized).jpeg101C5F39-0571-490D-AD1F-EC39ED06AFCA (resized).jpeg11A0BC16-F077-44D0-A18B-835784F740A8 (resized).jpeg11A0BC16-F077-44D0-A18B-835784F740A8 (resized).jpeg19222406-F99C-45B2-87A9-659E772CB68A (resized).jpeg19222406-F99C-45B2-87A9-659E772CB68A (resized).jpeg1A2F3098-14E5-4D59-BBCC-C8DF4F5D3445 (resized).jpeg1A2F3098-14E5-4D59-BBCC-C8DF4F5D3445 (resized).jpeg61FE81C5-9144-4A82-ACA6-677938BB602E (resized).jpeg61FE81C5-9144-4A82-ACA6-677938BB602E (resized).jpegCF343C27-04CE-4334-8C47-11C36FB0ABB1 (resized).jpegCF343C27-04CE-4334-8C47-11C36FB0ABB1 (resized).jpeg
#1941 1 year ago

Those are terrific thanks!

Can you get any of the wire harness routing and such on the bottom?

#1942 1 year ago
Quoted from Austin_Pinbarge:

Those are terrific thanks!
Can you get any of the wire harness routing and such on the bottom?

You’re welcome and no problem. I’ll upload them when I get back on my computer as I have good ones saved there to share. Not many on my cell.

#1943 1 year ago
Quoted from AlexRogan84:

You’re welcome and no problem. I’ll upload them when I get back on my computer as I have good ones saved there to share. Not many on my cell.

No worries. Not in a hurry yet. Will be working on this starting 5/5. I think I might try and do like a live rebuild thread or something. I've only got like 4 days there.

#1944 1 year ago
Quoted from Austin_Pinbarge:

Hello everyone!
The tl;dr of this post is that I'm looking for anyone who might be willing to share their progress photos of a complete playfield swap? Or just lots of detailed pics of top and bottom?
Long story:
In 2006 my dad and I went in together and bought a Diner machine that someone else had started as a project. The playfield was mostly already stripped and only had some rails and such on it. Nothing else. Everything was in the coinbox and boxes. The playfield was pretty worn and so I stripped the rest of it and we sent it out to have it refurbished. More than a year later, we hadn't heard anything from the repair place, so we had them return it. It really hadn't been touched. But as time had moved on, so had I. I was moving out of state for a job and didn't have time to get anything more done with it. I ended up finding a wife where I moved to, and well, never got back home.
So in the ensuing years, my parents retired, my dad sold off his other machines and moved to AZ. He still has the Diner though, but nothing has been done and it's been sitting in his shed there for almost a decade. When CPR announced a while back that they were making Diner playfields, I told him about it, but he seemed to balk at the price. Then they sold out.
Well, I just happened to check back on their site a month or so ago and found that the playfields were back in stock. So I bought one. And the plastics. And backglass... I'm going to surprise my dad for his 70th birthday next month and show up with all of it and everything else to hopefully get the machine into some sort of order. If nothing, it will hopefully have a nice looking playfield.
I've read pretty much completely through this thread and have already bought the new Diner cup from mike200mph and the MRS from Sonic. Both of the products look amazing.
I'm planning on purchasing basically all new playfield posts and mechanicals to some degree (pops). I haven't seen what's left of this machine in years, so going in very blind. I've only got a few pics from when I pulled the playfield, and it doesn't really help me much, as it's all been moved at least 4 times and once across the country. I do remember things like the one lift ramp being crap and possibly a broken plastic ramp. Gonna probalby just buy all new from Planetary.
So if anyone has a photo gallery that they could link to or such, that would be much appreciated. I've attached some of the pics I have of it from when it was purchased, and my new CPR playfield.
[quoted image][quoted image][quoted image][quoted image][quoted image]

Start a restoration thread of your own for this project.

People will post all of their pictures there or links to their albums.

Otherwise this thread will become unusable.

This way you will be able to focus on "only" things pertaining to your project.

#1945 1 year ago

I replaced the saucer on the top left after having an intermittent history of the ball not always activating the switch. (Tried new switch and bending the switch arm over the last year but it always comes back)

I noticed the ball doesn't always sit squarely in the saucer, so isn't depressing the switch. The reason seemed to be the two teeth on the side of the saucer were worn down to nothing.
1a8841d94442fdd069afa50060769ec66635d563~2 (resized).jpg1a8841d94442fdd069afa50060769ec66635d563~2 (resized).jpg

So I popped a new one in and when the ball lands it always works... But key word is when.
Now the ball doesn't always land in the saucer from a plunge and sometimes seems to bounce off the deflector. I think the teeth added less clearance and room for the ball to drop downwards and settle.

I checked a diner on location and the teeth are worn away on that one too.

Can anyone confirm the saucer is supposed to have the teeth?

Ours has a playfield protector so I imagine that adds a bit of height. I was thinking I could try lowering the saucer by a few mm with some washers to see if that helps.

#1946 1 year ago
Quoted from DaveTheTrain:

I replaced the saucer on the top left after having an intermittent history of the ball not always activating the switch. (Tried new switch and bending the switch arm over the last year but it always comes back)
I noticed the ball doesn't always sit squarely in the saucer, so isn't depressing the switch. The reason seemed to be the two teeth on the side of the saucer were worn down to nothing.
[quoted image]
So I popped a new one in and when the ball lands it always works... But key word is when.
Now the ball doesn't always land in the saucer from a plunge and sometimes seems to bounce off the deflector. I think the teeth added less clearance and room for the ball to drop downwards and settle.
I checked a diner on location and the teeth are worn away on that one too.
Can anyone confirm the saucer is supposed to have the teeth?
Ours has a playfield protector so I imagine that adds a bit of height. I was thinking I could try lowering the saucer by a few mm with some washers to see if that helps.

Yes, they have teeth. Part number is in the manual, and I don't know as I ever saw one made without the teeth. Are you sure you have it turned the correct direction?

#1947 1 year ago
Quoted from DaveTheTrain:

I replaced the saucer on the top left after having an intermittent history of the ball not always activating the switch. When the ball lands it always works... But key word is when. Now the ball doesn't always land in the saucer from a plunge and sometimes seems to bounce off the deflector. I think the teeth added less clearance and room for the ball to drop downwards and settle.
I checked a diner on location and the teeth are worn away on that one too.
Can anyone confirm the saucer is supposed to have the teeth?

That plunge-saucer was 100% reliable on my Diner both before and after I rebuilt it. Funny enough tho, in the before-state, one of its teeth was also worn/broken like yours. Didn't seem to be causing an issue but I replaced it with a new part anyway during the resto process (because if the second tooth broke, would I then have a problem?)

Does your deflector have the rubber pad on it? WMS games are notorious for saucer rejects when the rubber pads are missing. My WW and Space Station scoops were troublesome at times until I replaced their worn/missing original rubber deflector pads. They make a world of difference.

#1948 1 year ago
Quoted from goingincirclez:

That plunge-saucer was 100% reliable on my Diner both before and after I rebuilt it. Funny enough tho, in the before-state, one of its teeth was also worn/broken like yours. Didn't seem to be causing an issue but I replaced it with a new part anyway during the resto process (because if the second tooth broke, would I then have a problem?)
Does your deflector have the rubber pad on it? WMS games are notorious for saucer rejects when the rubber pads are missing. My WW and Space Station scoops were troublesome at times until I replaced their worn/missing original rubber deflector pads. They make a world of difference.

No pad, and according to pics and the part number it isn't supposed to have one. If there's evidence on the contrary I'd like to see it as maybe it would solve my issue.

If I put a rubber on it it would make the gap even smaller and I'm convinced it would make it worse.

Rather than washers I cut some cardboard to fit around the saucer and space it by a few mm and it's been fine, just sometimes the switch doesn't activate like before but it's rare.

1 month later
#1949 11 months ago

Looking for new diner cup, let me know if you have it for sale.

1 month later
#1950 9 months ago

Well I guess now is as good a time as any to learn how to do board work. I just blew Q33. I was pulling the coin bin and touched two wires in the coin door. you live and you learn. Turn the machine off for even minor jobs.

Any tips and tricks the community has for board work would be much appreciated!

What tools and parts do I need and where is the best place to get them? Does anybody have good YouTube links for board work tutorials? Anything else I should know before I tackle this?

Thank you!

Q33 blown (resized).jpgQ33 blown (resized).jpgQ33 blown angle (resized).jpgQ33 blown angle (resized).jpg
Promoted items from Pinside Marketplace and Pinside Shops!
$ 11.95
Playfield - Toys/Add-ons
ULEKstore
 
$ 12.50
Lighting - Led
RoyGBev Pinball
 
$ 79.99
Cabinet - Armor And Blades
PinGraffix Pinside Shop
 
$ 5.00
Playfield - Protection
UpKick Pinball
 
$ 29.99
Playfield - Toys/Add-ons
Daddio's 3D Printed Mods
 
$ 3.00
Tools
Nezzy's Pinball Prints
 
Wanted
Machine - Wanted
Fort Lauderdale, FL
$ 15.00
Playfield - Decals
Metal-Mods
 
$ 18.95
Eproms
Pinballrom
 
$ 19.99
Eproms
Matt's Basement Arcade
 
$ 29.99
Eproms
Matt's Basement Arcade
 
$ 10.00
Playfield - Toys/Add-ons
UpKick Pinball
 
$ 1.00
Pinball Machine
Pinball Alley
 
$ 15.00
Cabinet - Sound/Speakers
Gweem's Mods
 
$ 95.00
Cabinet - Sound/Speakers
Pinball Mod Co.
 
$ 54.99
Cabinet - Shooter Rods
Lighted Pinball Mods
 
$ 27.95
Eproms
Pinballrom
 
There are 2,027 posts in this topic. You are on page 39 of 41.

Reply

Wanna join the discussion? Please sign in to reply to this topic.

Hey there! Welcome to Pinside!

Donate to Pinside

Great to see you're enjoying Pinside! Did you know Pinside is able to run without any 3rd-party banners or ads, thanks to the support from our visitors? Please consider a donation to Pinside and get anext to your username to show for it! Or better yet, subscribe to Pinside+!


This page was printed from https://pinside.com/pinball/forum/topic/diner-clubowners-and-previous-owners-welcome/page/39 and we tried optimising it for printing. Some page elements may have been deliberately hidden.

Scan the QR code on the left to jump to the URL this document was printed from.