(Topic ID: 268931)

DE Jurassic Park refurb for my army son

By gdonovan

3 years ago


Topic Heartbeat

Topic Stats

  • 74 posts
  • 9 Pinsiders participating
  • Latest reply 2 years ago by gdonovan
  • Topic is favorited by 4 Pinsiders

You

Linked Games

Topic Gallery

View topic image gallery

sb38.pdf (PDF preview)
20200614_114038 (resized).jpg
20200612_122347 (resized).jpg
20200607_175654(0) (resized).jpg
20200607_182055 (resized).jpg
20200607_175745 (resized).jpg
20200604_181213 (resized).jpg
20200604_181231 (resized).jpg
20200604_181156 (resized).jpg
external (resized).jpeg
4dbabee4-3674-4bee-82cd-db1a7953a466_1.b2168f502bd4997445b47ff1d07ac690 (resized).jpeg
20200604_084519 (resized).jpg
20200603_194012 (resized).jpg
20200603_172214 (resized).jpg
20200603_172600 (resized).jpg
20200603_172749 (resized).jpg
There are 74 posts in this topic. You are on page 1 of 2.
#1 3 years ago

My son who joined the army this year loves dinosaurs, still does to this day. So I told him I'd get a dinosaur themed pin and being Data East fans would have to be the original Jurassic Park. Now myself.. I'm not fond of the title, the two I played felt clunky to me which after 7 different DE pins was a shocker as I generally love how DE's shoot.

So after hunting around for several weeks if not months, I finally dragged one home and the adventure truly begins. Was sold as a working, routed unit with a few quirks.. and in all fairness to the seller who struck me as a little bit of a pin novice, this is strictly true and I hold no ill will against the seller as to what I was going to find later. I would have purchased it regardless and he even kicked back a few bucks so we are square after some mischief came to light.

I have heard stories about pins re-imported back to the states from Europe.. sometimes they have very.. interesting.. repairs to keep them in service. and it in this case I can assure you its true. There was a great deal of mischief going on under the hood! Stick with me as we whip this old girl back into shape and even do a few mods for my boy so he has a surprise when he gets back home..

20200516_104052 (resized).jpg20200516_104052 (resized).jpg20200516_150012 (resized).jpg20200516_150012 (resized).jpg
#2 3 years ago

On initial inspection and play..

The good: Cabinet solid and in fairly good condition, translite excellent, playfield, very, very good with some minor lifting of mylar here and there and some minor paint chipping. Unit had cliffies on the scoops and most of the bulbs swapped over to comet LED's. DMD was sharp and worked perfect, sound was crisp and frankly the best sounding DE I have owned to date.

The bad: One GI string was out (DE, no surprise there and disclosed) one pop pumper seemed sluggish, the T-Rex side to side motor was grinding (also disclosed) no topper (but lamp sockets there and all work, might do something about an alternate topper) and four or five plastics were broken.

My wife loves the pin, the first time the T-Rex grabbed the ball she started laughing like hell.

Follow along as we go for a deeper dive..

aeafe355e87df6fa02a9f5dcc3eb6c4415c05fe7 (resized).jpegaeafe355e87df6fa02a9f5dcc3eb6c4415c05fe7 (resized).jpeg
#3 3 years ago

So after 15 minutes of play the fun started when the machine abruptly shut down leaving nothing but GI lamps on. It was time to dive in..The F1 fuse on the power supply board had popped (9 volt A/C) and I lifted the hood and pulled up the schematics..

Digging deep unpleasantness abounded!

The PPB had heavy damage to several traces (not all shown in picture) which look to have been "repaired" with a hot butter knife wielded by Michael J. Fox! Four pins were totally bypassed all together and the lines directly attached to the fuse pads! zounds!

Investigating the 9 volt a/c line, the problem was traced down to the flipper board which had a truly unique remote mounted transistor! Fresh out of correct part number? Slap this bad boy in there and press on!

After isolating the flipper issue, one coil and some flashers decided to lock on. TIP-122 #46 went south and took the top right out hole coil and one LED flasher with it. Luckily I have a handful of slightly more burly TIP-102 in stock along with spare coils but look what I found on the back of the mpu! Messy.

The back of the playfield a horror show, wire nuts! This is not going to do. At this point I started going over the playfield point by point repairing some broken wires at switch locations, a diode that was not hooked up correct on a lamp socket causing others in the line to strobe and looking at the one sluggish popper... which had heavy duty EM style contacts on the spoon, outstanding! My parts list was growing by leaps and bounds.

Undeterred I pressed on.

20200516_145852 (resized).jpg20200516_145852 (resized).jpg20200516_184650 (resized).jpg20200516_184650 (resized).jpg20200516_194644 (resized).jpg20200516_194644 (resized).jpg20200517_160143 (resized).jpg20200517_160143 (resized).jpg20200516_143429 (resized).jpg20200516_143429 (resized).jpg
#4 3 years ago

The first picture is not my JP, alas I did not take one for posterity but the second is after an hour or two of inspection of wiring and connectors and re-routing of the harness so it fit correctly. If possible, the wiring routing was actually worse than the first picture portrays.

I still have some work to do on left side but a considerable improvement. Once I repair the wiring for the GI circuit (proper connector and heavy duty pins in stock) I'll finish up there.

The original PPB board is good for the scrap bin, its cooked beyond hope. Almost ordered a new Rottendog PPB unit but grabbed a very clean DE BTTF unit off Ebay that needs a new bridge but otherwise pristine. I'll have to populate a few transistor locations but that is not a problem.

a068ceaf400fe0ae027feb519e4336b6d3953d4c (resized).jpga068ceaf400fe0ae027feb519e4336b6d3953d4c (resized).jpg20200517_130933 (resized).jpg20200517_130933 (resized).jpg

#5 3 years ago

Other issues off the top of my head.. Knocker? Non-functional, on the to-do list.

Ramp diverter? Also non-functional but in this case due to an excessively strong spring. Digging through my stash rustled up another spring with less tension and it works perfect now.

Smart Missile button dead, broken wire on diode, fixed.

Right rear flasher dome melded down, on order.

Flipper rubber stops wiped out, on order.

Slingshot plastics on order.

50 pack of 8-32 x 3/8 screws for all the circuit boards, I swear at least half in not more are missing.

#6 3 years ago

Jeep is on the way!

jeep (resized).jpgjeep (resized).jpg
#7 3 years ago

Add recapping the 5V section of the power supply to your list

#8 3 years ago

Two x two words
Tims gate!
Chads code!

Folowing

#9 3 years ago
Quoted from jorro:

Two x two words
Tims gate!
Chads code!
Folowing

Refresh of the power supply, new cap and bridge for PPB and Chad's code update is on the to-do list. Want to get everything sorted out before potentially introducing other issues. NVRAM also on the menu, one of my favorite pin mods which is a snap on Data East.

#10 3 years ago

Unexpected day off so made the most of it..

1. Repaired knocker, wiring.

2. Worked on the playfield wiring, routing and tie wraps.

3. Reflowed & straightened some bent board pins, replaced a TIP-36C, replaced a broken fuse clip.

4. Turned on the T-Rex left to right motor. I don't think there is anything wrong with the motor and gearbox. If you remove the motor and have it just hanging with no load and run the manual tests the motor is sort of jerky. If you put a voltmeter on it the voltages are all over the board between 4-6 volts. I'm going to have to look into this further, very odd.

5. Replace a bunch of incandescent flashers with Comet LED 8SMD

6. Found a few GI bulbs were still incandescent, replaced them too.

7. Temporarily got the dead backbox GI string functioning again by jumping off the other backbox string next to it, arranged LED lighting to my tastes behind translite.

8. Fixed prop rod mount.

9. Fixed sticking stand up target switches.

10. Adjusted upper flipper.

#11 3 years ago

(Also posted in Jurassic Park club)

Interesting T-Rex issue I thought I'd post here and get some feedback, doing a board search turned up nothing or I'm using the wrong search terms.

The T-Rex on my newly acquired Jurassic Park is very slow and jerky moving left to right. One direction is slightly faster than the other for some reason. The problem looks to be MPU related as I will cover below.

1) The motor and gearbox looks new.

2) Removing the motor from the gearbox and running it in diagnostic mode the motor is noticeably jerky in operation.

3) Checking the voltage at the motor shows it swinging from 3-6 volts DC.

4) The voltage for the L/R motor comes from the shaker motor board, fuse F1. The fuse is fine, the fuse holder fine and the diode is fine.

5) Grounding the controlling TIP-122 at the MPU causes T-Rex to slew about like a hot rod. Smooth and snappy.

So at this point I have determined that the MPU is improperly grounding the circuit, or so it seems.

6) Hooking up a logic probe, the TIP-122 (Connector CN12/Q24) the signal is neither high nor low when actuated. Its almost like the MPU can't make up its mind or is trying to pulse the motor which I have never heard of on a pin.

7) I replace driver Q24 and the pre-driver and check the resistor and sim bank (ok), still does it.

8 ) I socket and replace the 7408 upstream of Q24, still does it.

9) For haaass I replace the 6821 PIA upstream of that. It was already socketed so a snap and I have spares. Still does it.

MPU code is 5.01 I think, I may burn ChadH code to a chip tomorrow and try it out. Anyone else run into this?

I watched this video on youtube, it sounds crunchy but moves quickly like when I ground the Q24 transistor.

#12 3 years ago

More parts on order- new relay for the L/R T-Rex voltage reversal pcb (sticks) several 7408 I.C. (going to change out all four in case some odd difference between the brands, 2 already changed out) Need to reroute and replace the led wiring for system green/yellow lamps (crushed by drop target ball hits)

PPB came in today, looks mint! More parts in tomorrow...

#13 3 years ago

More witchcraft!

Had a chat with a board member who clued me in to a possible issue about voltages and decided to follow up on it. So I came home, fired up the machine and went to move T-Rex left to right... and nothing. The MPU was grounding the pin but had like a single volt at the shaker board. What the hell? Pulled F1 and F2 fuses on the power board and F2 was bad.

Replaced the fuse and now T-Rex is moving at a reasonable clip. Ok.. then...

Now I start a game.. and the flippers will lock in the up position when actuated for the first time and cause the machine to reboot after a second or two. WTH!

Removing the F2 fuse... and the flippers work normal with no reboot. How is that even possible? The 9 volt AC is needed to hold the flipper up, I'm not sure how that is happening with only one leg.

#14 3 years ago

Oh and I tossed in a Rottendog power board that is new and tested in my LW3.. and it won't boot at all. This thing has issues.

#15 3 years ago

Some progress before bed, and some carnage.

1) The F2 fuse; turns out the bridge on the power board went south. Replaced bridge and set aside for a moment.

2) Toned out the harness and found some connections near the transformer were in tough shape, fixed those and the machine is running with the RD power board.

3) The flipper board is unhappy with life, I think I'm just going to replace it. The TIP-36C I replaced is now no good as is the pre-driver, which looks like it has been replaced before along with a few other parts. No idea what is going on here but I think its best if moved into the future repair shelf until I have more time.

4) I did a video of T-Rex moving about, will post in the morning if I get up early enough.

Gary

#16 3 years ago

Well tonight was a much better experience.

1) Replaced the three socketed 7408's, everything seems to work.

2) Adjusted right side VUK, switch bent in on position, replaced missing coil bracket screw

3) Replaced top right outhole coil.

4) Pulled control room green & yellow lamp post and wiring, replaced crushed wiring and re-routed in such a way it can't get crushed again. Took a rat tail file and made a groove behind the control room scoop so the wire is nowhere near the target bank.

5) Replaced melted flasher dome, top right. Replaced bulb with LED.

6) Found four more incandescent bulbs hiding on the playfield, replaced.

7) Replaced the slingshot plastics with new ones.. which I can't say I'm pleased with the quality. Notable banding in the print and very faded looking. If I knew this is what they looked like I'd consider just getting a set from CPR. Not a good quality product from a major vendor, looks like done on an inkjet printer frankly.

20200522_193623 (resized).jpg20200522_193623 (resized).jpg20200522_193722 (resized).jpg20200522_193722 (resized).jpg20200522_193810 (resized).jpg20200522_193810 (resized).jpg20200522_193919 (resized).jpg20200522_193919 (resized).jpg
#17 3 years ago

Don't go CPR for plastics. The blue is WAY off and they never addressed it. Dropped your package in the mail today

#18 3 years ago

Backside of the old board, front of new board after I pulled off the two TIP36C, cap and bridge.

New board after new cap, new bridge and fully populated to JA spec with new TIP36C and all pins reflowed.

Tested perfect.

20200523_085422 (resized).jpg20200523_085422 (resized).jpg20200523_063659 (resized).jpg20200523_063659 (resized).jpg20200523_070630 (resized).jpg20200523_070630 (resized).jpg

#19 3 years ago

Now to fix this trainwreck

20200523_073035 (resized).jpg20200523_073035 (resized).jpg
#20 3 years ago

Both 9 pin GI related connectors at the power supply board and PPB replaced with Trifurcon contacts and new connector housings. GI strings all operational and should be for a long time.

20200523_091200 (resized).jpg20200523_091200 (resized).jpg

#21 3 years ago

Chasing my tail again I bet.

The factory manual appears to be incorrect. In the third picture it states T REX BIDIRECTIONAL 9VDC which isn't exactly true or at best misleading because looking at the circuit there is no way the motor will ever see 9 volts.

1) Two 9 volt ac lines flow out of the transformer along with a common for them, these are pins 10-11-12 at the power supply board. Two hots will get you 18 volts AC or if you use just one and the common 9 volts AC.

2) At the shaker motor board you see these two hots reappear, Gray and Gray-Green each with 9 volts AC from pins 10 and 11. For the shaker motor these two hots go through a PAIR of diodes and provide DC voltage for the shaker. Note since there is two hots the output will be twice as high compared to if you used just one hot.

3) Note the last diode (D1) on the shaker board is the feed for the L/R motor, it is a single 9VAC hot. 9 volts AC going in isn't going to get you 9 volts DC going out. And this is going to be half waved rectified voltage which is going to be pretty choppy.

4) The voltage leaves the shaker board and goes to a relay board. The purpose is to flip the voltage and ground going to the L/R motor to change direction. When the MPU signals the TIP-102 at location Q27 to ground, T-Rex will rotate in one direction. When the MPU signals Q24 & Q27 the voltage is flipped at the relay and T-Rex goes the other direction.

Can anyone see any error in this analysis? I am thinking about installing a cap to smooth out the power going to the L/R relay.

Edit: Marco's website indicates the motor is indeed 5 volts.

JP_transformer (resized).jpgJP_transformer (resized).jpgJP_shaker (resized).jpgJP_shaker (resized).jpgtrex_motor (resized).jpgtrex_motor (resized).jpg

#22 3 years ago

Wrapped up my day double checking the wiring to the flipper board, ohming out the coils and replacing the coil diodes on general principle.

The two main flippers check out at 4.8 to 5.0 ohms, with the factory spec calling for 3.8 ohms.

The upper right flipper which had no wrapper came in at 6 ohms and suppose to be 13.8 ohms. I suspect it was replaced with a lower flipper coil at one time and will leave alone for the moment.

I reinstalled the original power supply board and voltage looks good.

T-Rex comes out tomorrow for some refurbishment.

#23 3 years ago

Pulled T-rex mech, replaced missing fasteners and mounted the Jeep at the right rear location. May illuminate in future.

20200524_123332 (resized).jpg20200524_123332 (resized).jpg
#24 3 years ago

Your making some great progress
Your son will be so happy with this pin!

#25 3 years ago
Quoted from jorro:

Your making some great progress
Your son will be so happy with this pin!

Thank you, I'd like to think I'm "over the hump" and finally making progress.

By next weekend it should be done God willing, more parts here this Wednesday.

#26 3 years ago

Plugging along today..

Took apart lower plastics and flippers to get broken machine screws out, installed new tee nuts.

Replaced saucer plastic at T-rex

Went over the PF harness CLOSE. Lots of new tie-wraps, found broken connection on slingshot. Eyeballed every single diode and socket to make sure not rubbing, bent, broken.

Tuned up right side VUK.

Welded broken spot welds on VUK wire form.

Working on filling worn area around scoop so Cliffy fits correct.

20200525_200557 (resized).jpg20200525_200557 (resized).jpg
#27 3 years ago

How did you mount the Jeep?

#28 3 years ago
Quoted from peteyhugs:

How did you mount the Jeep?

Line up the left front tire with the nut holding the flasher dome on, the tire will just be in front of the nut. If you have it right, you will be able to just get a nut driver on it for future maintenance without removing the Jeep and the right side tires will be riding the lane guide.

One screw where the rear axle is, one in the left front tire to keep Jeep from moving/spinning.

Got the inlane plastics done and adjusted the ramp switch as it was not registering. Only thing to for now is wait for parts to show up Tuesday-Wednesday-Thursday. Correct up/down motor, relay for L/R board, domes for topper lamps, RD flipper board, backglass lift trim, one pop bumper switch and 27C512 Eproms to burn ChadH code.

#29 3 years ago

Local hobby shop open!

20200526_120936 (resized).jpg20200526_120936 (resized).jpg
#30 3 years ago

Things starting to get better.. Parts!

Flipper board, L/R relay, backglass lift trim, popper switch assembly and NVRAM are done.

Now to attach some further decoration..

20200526_161110 (resized).jpg20200526_161110 (resized).jpg20200526_161116 (resized).jpg20200526_161116 (resized).jpg20200526_163210 (resized).jpg20200526_163210 (resized).jpg20200526_165037 (resized).jpg20200526_165037 (resized).jpg

#31 3 years ago

My wife says the strangest thing she has ever seen my do was stick wire up a dinosaurs butt.

20200526_210125 (resized).jpg20200526_210125 (resized).jpg20200526_210120 (resized).jpg20200526_210120 (resized).jpg

#32 3 years ago

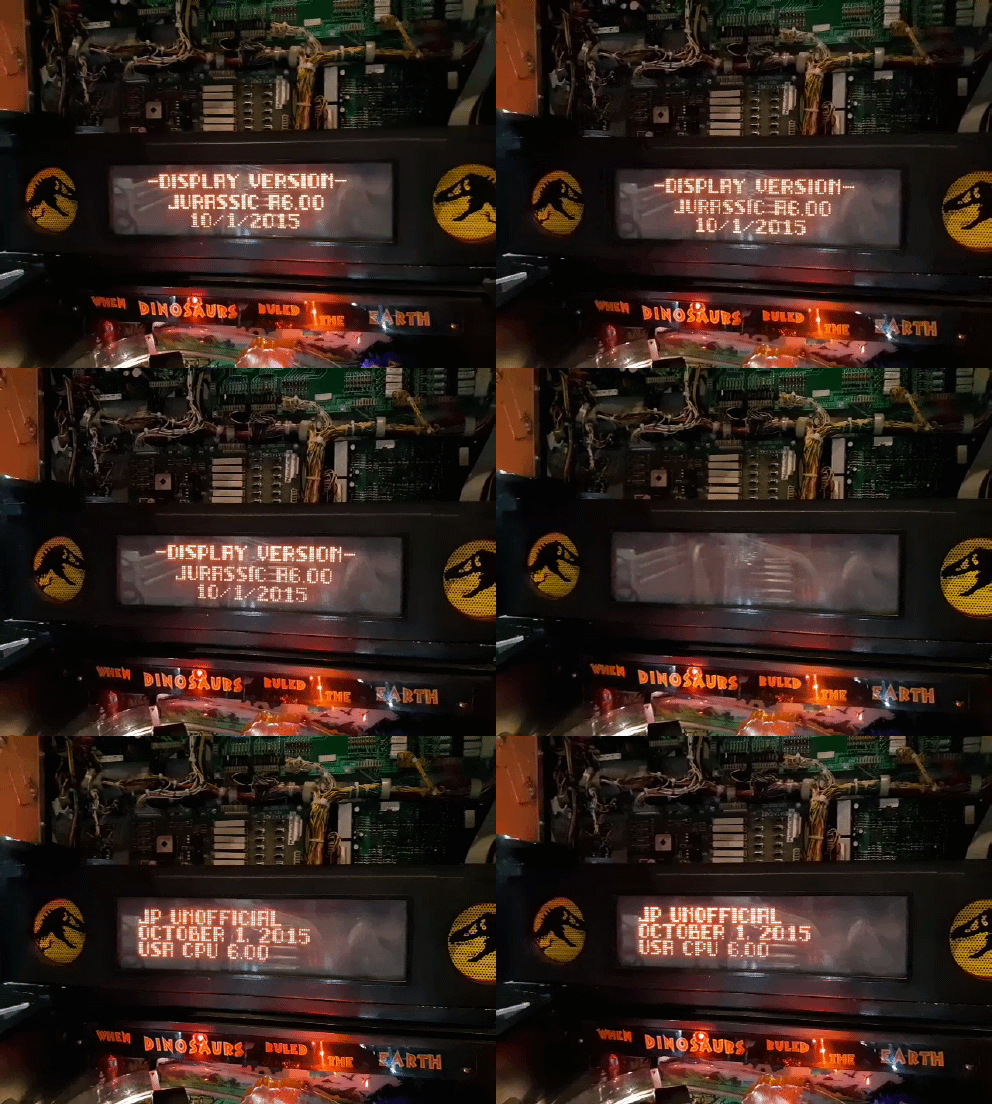
ChadH 6.0 has been installed.

20200528_073718_1.gif20200528_073718_1.gif
#33 3 years ago

Box from Marco in so it was time to get to work... before heading into work last night but that is another story.

1) Decided I could save the PPB for a spare test board.

The board looks like a mess but it does work proper, traces are all wrecked for the GI and the header pin through holes are all blown out. So I attached leads to all the fuse holders, made a pass through hole in the PCB and attached a 9 pin GI connector with a "Z" connector. While the board was on the bench changed out the capacitor and reflowed pins, the ground pins were all cracked.

Now I have a spare test PPB to go along with my other DE spares.

2) Installed domes on top of backbox for topper lamps, still unsure what I'm doing for topper.

3) Replaced up/down motor with correct one for T-Rex and cleaned up last of playfield wiring. More below..
20200529_155659 (resized).jpg20200529_155659 (resized).jpg20200530_041322 (resized).jpg20200530_041322 (resized).jpg

#34 3 years ago

The T-Rex.. ALMOST works perfect. I figured out while watching my wife play why the mech is slower one direction than the other. The plate the upper mech is attached too is not in proper alignment. When going to the left the front glide assembly will dig into the lower plate towards the end of travel. I'll take it apart again one more time to see if I can find the problem. Either the motor casing is not square or something is bent and I'll have to straighten it out.

To-Do list- Align T-Rex, pull wiring in a bit more from rear of playfield, clean and wax, change out some elastics, tweak the left Cliffy, install last tree, cabinet and minor playfield touch up, fix plates for legs, vacuum cabinet, swap out some LED's when Comet order arrives.

20200529_183957_1.gif20200529_183957_1.gif
#35 3 years ago

So after work today I pulled the T-Rex and the mounting plate is tweaked on one side. I carefully tweaked it back, shimmed up the motor shaft and base so the upper assembly can't slip down in the future.

Noticed the upper T-Rex plastic was spread out a bit, glued that. When re-installing, noticed a playfield stud intruding into the flange area and fixed that too.

Made a hinge cover for the T-Rex from a bit of synthetic leather.

Tweaked the wiring so not so close to the back of the playfield.

Moved a playfield figure about so not so close too the upper flipper.

Adjusted "Egg" switch, it was too sensitive and being triggered by the boat out-hole and poppers time to time.

Popped in the last tree next to the amber and ramp.

Played a few games with my wife, very well behaved game at this point.

I'm cautiously optimistic.
20200530_170910 (resized).jpg20200530_170910 (resized).jpg20200530_191010 (resized).jpg20200530_191010 (resized).jpg20200530_193504 (resized).jpg20200530_193504 (resized).jpg

#36 3 years ago
Quoted from gdonovan:

To-Do list- Align T-Rex, pull wiring in a bit more from rear of playfield, clean and wax, change out some elastics, tweak the left Cliffy, install last tree, cabinet and minor playfield touch up, fix plates for legs, vacuum cabinet, swap out some LED's when Comet order arrives.[quoted image]

Tweaked the left Cliffy, installed lamp for T-Rex outhole, touched up PF and cab, replaced a busted sling spring, fixed some Mylar, tree installed, vacuumed cabinet.

All I have left is to fix some leg/bolt plates, print out some score cards, a good PF cleaning and wax and a few elastics.

#37 3 years ago
Quoted from gdonovan:

Well tonight was a much better experience.
1) Replaced the three socketed 7408's, everything seems to work.
2) Adjusted right side VUK, switch bent in on position, replaced missing coil bracket screw
3) Replaced top right outhole coil.
4) Pulled control room green & yellow lamp post and wiring, replaced crushed wiring and re-routed in such a way it can't get crushed again. Took a rat tail file and made a groove behind the control room scoop so the wire is nowhere near the target bank.
5) Replaced melted flasher dome, top right. Replaced bulb with LED.
6) Found four more incandescent bulbs hiding on the playfield, replaced.
7) Replaced the slingshot plastics with new ones.. which I can't say I'm pleased with the quality. Notable banding in the print and very faded looking. If I knew this is what they looked like I'd consider just getting a set from CPR. Not a good quality product from a major vendor, looks like done on an inkjet printer frankly.[quoted image][quoted image][quoted image][quoted image]

Put those sling protectors under plastics

#38 3 years ago
Quoted from Hayfarmer:

Put those sling protectors under plastics

Ya beat me to it.

#39 3 years ago

Looking really good. I have a 4yo that loves anything dinosaur also, It will make the perfect excuse to grab a JP one of these days.

#40 3 years ago

I read that someone mentioned the cpr plastics are not a good match. Is there a better set to go with ?

#41 3 years ago
Quoted from wolffcub:

I read that someone mentioned the cpr plastics are not a good match. Is there a better set to go with ?

Not that I'm aware of.

I swear I'm going to dive deeper into making my own, all the aftermarket stuff leaves much to be desired.

#42 3 years ago
Quoted from gdonovan:

Not that I'm aware of.
I swear I'm going to dive deeper into making my own, all the aftermarket stuff leaves much to be desired.

The after market ones are too dark blue
Think this is on purpose so you need to swap the entire set

#43 3 years ago

Is it that bad ? The plastics on mine are bad.

#44 3 years ago
Quoted from gdonovan:

All I have left is to fix some leg/bolt plates, print out some score cards, a good PF cleaning and wax and a few elastics.

Leg/bolt plates fixed, cleaned and adjusted the top right flipper switch after the flipper stopped working, changed out a few elastics with a few more to go.. Getting there! The VUK switch is fussy, I'm going to change it out tomorrow. Also found a chafed wire when investigating the upper flipper issue, heat shrinked it and added a piece of foam to keep it from happening again.

#45 3 years ago
Quoted from wolffcub:

Is it that bad ? The plastics on mine are bad.

Look them up in the
JP club topic
In the picture gallery page 8 are some examples of color diffrences.
Ie
https://pinside.com/pinball/forum/topic/jurassic-park-club/page/63#post-3671598

#47 3 years ago
Quoted from gdonovan:

Leg/bolt plates fixed, cleaned and adjusted the top right flipper switch after the flipper stopped working, changed out a few elastics with a few more to go.. Getting there! The VUK switch is fussy, I'm going to change it out tomorrow. Also found a chafed wire when investigating the upper flipper issue, heat shrinked it and added a piece of foam to keep it from happening again.

Huh, might not be the VUK switch after all. I was running a few minutes ahead this morning and stopped to look at the switch and the diode popped right off. I'll solder it on after work and see if it checks out.

Score cards are printed out, waiting from LEDs from Comet.. almost there. I am going to light the dinosaur banner on the back of the playfield, 20 inch led strip with a dimmer coming in. Already have a spot in the lineup picked out and my son will be home in July for leave if all works out.

Oh, and I'm going to repaint the inside of the cabinet adjacent the playfield once all the heavy work is done. Was thinking about pinblades but way over budget at this point.

Have $50 alone in just fasteners.. let that sink in... there was $50 in missing/broken/wrong fastener hardware no larger than 10-32 between the backbox, cabinet and playfield and that doesn't count what was pulled from my existing stash.

#48 3 years ago

Much better.

Soldered VUK switch diode, seemed fine but will keep eye on it.

20200602_184736 (resized).jpg20200602_184736 (resized).jpg20200602_184846 (resized).jpg20200602_184846 (resized).jpg
#49 3 years ago

Comet package in! Mounted 20 inch led strip with dimmer on aluminum angle behind banner. Installed the rest of playfield lamps and reinstalled playfield. The jeep has a dim green led in the interior so it has an odd glow with the door open.

20200603_165744 (resized).jpg20200603_165744 (resized).jpg20200603_172511 (resized).jpg20200603_172511 (resized).jpg20200603_172600 (resized).jpg20200603_172600 (resized).jpg20200603_172749 (resized).jpg20200603_172749 (resized).jpg20200603_172214 (resized).jpg20200603_172214 (resized).jpg
#50 3 years ago

T-rex gets some choppers

20200603_194012 (resized).jpg20200603_194012 (resized).jpg
Promoted items from Pinside Marketplace and Pinside Shops!
$ 1.25
Lighting - Led
Mitchell Lighting
 
4,500 (Firm)
Machine - For Sale
Ronkonkoma, NY
From: $ 20.00
Lighting - Led
Mitchell Lighting
 
$ 12,999.00
Pinball Machine
Classic Game Rooms
 
$ 27.95
Eproms
Pinballrom
 
$ 10.00
Playfield - Other
Loop Combo Pinball
 
$ 89.99
Cabinet - Decals
Maine Home Recreation
 
$ 29.95
Playfield - Toys/Add-ons
ULEKstore
 
Trade
Machine - For Trade
Mariposa, CA
$ 29.95
Playfield - Toys/Add-ons
ULEKstore
 
Trade
Machine - For Trade
Needville, TX
$ 29.95
Playfield - Toys/Add-ons
ULEKstore
 
$ 45.00
Playfield - Toys/Add-ons
G-Money Mods
 
From: $ 12.00
Cabinet - Decals
arcade-cabinets.com
 
$ 18.95
Eproms
Pinballrom
 
$ 49.99
Playfield - Toys/Add-ons
FlipMods
 
$ 10.00
Playfield - Protection
UpKick Pinball
 
$ 65.00
Playfield - Toys/Add-ons
G-Money Mods
 
From: $ 9.99
Eproms
Matt's Basement Arcade
 
From: $ 75.00
Playfield - Protection
UpKick Pinball
 
$ 130.00
Gameroom - Decorations
Dijohn
 
$ 50.00
Playfield - Protection
Duke Pinball
 
From: $ 33.00
Gameroom - Decorations
Rocket City Pinball
 
$ 65.00
Playfield - Toys/Add-ons
G-Money Mods
 
4,400
Machine - For Sale
Livermore, CA
$ 18.95
Playfield - Toys/Add-ons
ULEKstore
 
$ 18.95
From: $ 9,499.00
Pinball Machine
Paradise Distribution
 
$ 250.00
Playfield - Other
Avid Creations Wireforms
 
There are 74 posts in this topic. You are on page 1 of 2.

Reply

Wanna join the discussion? Please sign in to reply to this topic.

Hey there! Welcome to Pinside!

Donate to Pinside

Great to see you're enjoying Pinside! Did you know Pinside is able to run without any 3rd-party banners or ads, thanks to the support from our visitors? Please consider a donation to Pinside and get anext to your username to show for it! Or better yet, subscribe to Pinside+!


This page was printed from https://pinside.com/pinball/forum/topic/de-jurassic-park-refurb-for-my-army-son/page/1 and we tried optimising it for printing. Some page elements may have been deliberately hidden.

Scan the QR code on the left to jump to the URL this document was printed from.