My question is, when did the Force doze off?
(Topic ID: 72482)
 Star Wars
Data East, 1992
Star Wars
Data East, 1992Quoted from PoMC:My question is, when did the Force doze off?
![]()
Quoted from joelleoj:Newbie question here: How do you lift the playing field up? Does it just lift up or is there a locking mechanism? Any precautions I need to take?
No silly questions in this hobby bud.
Step 1: open the coin door.
Step 2: Look for the lock bar handle. Most are in the top right side of the coin door opening. Some are right in the centre.
Step 3: Hold the handle open while you pull the lock down bar at the bottom of your playfield glass off. Should pull straight up. Might be sticky if someone spilled some suds on it over the years.
Step 4: Slide the playfield glass out of the bottom opening. (be careful not to torque it... having it smash isn't cool. Having it smash while still in the machine would be a miserable experience I haven't experienced yet.) Once out set it somewhere safe.
Step 4.5: Can't believe I forgot this and added it in at the end... REMOVE ALL THE BALLS before lifting your playfield. ALWAYS.
Step 5: (Some variables here.) Most games, you can lift the front of the playfield up by grabbing it from the Apron. Apron is the plastic or metal cover at the bottom of the playfield covering the drain mechanisms. Grab it in the centre where the ball drains. Lift it up. (Here's the variable). Some machines are on a rotating hinge. Playfield is fairly solidly attached to the machine. Others... including the machine in this forum discussion, a Data East Star Wars have pins on the side of the playfield that are simply resting on a wooden edge on the inside of the cabinet. Make sure you bring it up straight or it might slide off the edge and fall inside the cabinet. Good chance you break plastics or more if that happens. Some games have a prop up bar on one side to prop your playfield up just like a car hood. Depending who you talk to... MOST people say not to use them as it can warp your playfield. I just carefully slide the upright playfield ahead enough that I can lean it up against the header.
That should about do it. Anything I missed guys?
Yes you did, this is very important. Do NOT set the glass on edge on a cement or hard surface floor with out putting some sort of padding down first. Just a slight tap setting it down on these surfaces can shatter it and the thermal difference can shatter it also. I like to use the rubber faced gloves when handling the glass so it doesn't slip, the edges can be sharp and I don't get finger prints on the inside of the glass (which always show up after you put it back in, then you have to take it back out and clean it).
Can someone find that video a Pinsider posted about the guy standing on the glass and then taking other sheets and tapping on the edge to showing it shatter, I can't find it. Everyone new to the hobby should see it. ![]()
Thanks for the info!
I've owned this game for 15 years but have been petrified to do any work on it for fear of hurting something. Now that a few lights have burnt out and other miscellaneous odd problems, I've been researching LEDs and reading to see how easy it actually is!
I knew how to get the glass off (a hard lesson when I first bought the game and couldn't figure out how to get the balls in it!) but I figured the playing field had to be lifted entirely out to change the bulbs underneath. Then I saw a video of another machine and figured there had to be an easier way.
I bought some Novus #1 yesterday and got the playing field fairly cleaned and discovered some broken and cracked plastics and some other issues I hadn't noticed before.
Once I get all my game problems "in order", I'll post them and get the invaluable information from you guys again! Odowda, markmon, and GoodtobeDad helped me with my sound problem yesterday and made my 7 year old daughter VERY happy! Thanks again guys!
Quoted from joelleoj:Thanks for the info!
I've owned this game for 15 years but have been petrified to do any work on it for fear of hurting something. Now that a few lights have burnt out and other miscellaneous odd problems, I've been researching LEDs and reading to see how easy it actually is!
I knew how to get the glass off (a hard lesson when I first bought the game and couldn't figure out how to get the balls in it!) but I figured the playing field had to be lifted entirely out to change the bulbs underneath. Then I saw a video of another machine and figured there had to be an easier way.
I bought some Novus #1 yesterday and got the playing field fairly cleaned and discovered some broken and cracked plastics and some other issues I hadn't noticed before.
Once I get all my game problems "in order", I'll post them and get the invaluable information from you guys again! Odowda, markmon, and GoodtobeDad helped me with my sound problem yesterday and made my 7 year old daughter VERY happy! Thanks again guys!
You really need to get over this fear. No matter what your skill level is you're probably going to do more damage to the game by not doing regular maintenance. Pinside is a great place to find people wanting to help so don't be afraid to ask. Half the fun of this hobby is working on these machines. ![]()
Quoted from Ed209:You really need to get over this fear. No matter what your skill level is you're probably going to do more damage to the game by not doing regular maintenance. Pinside is a great place to ask for help so don't be afraid to ask. Half the fun of this hobby is working on these machines.
I second this! Everyone is a rookie at one point. I know I was terrified the first time I lifted a PF and saw all the wires and mechanisms underneath...but once you learn what they all do, and how to fix and diagnose, it becomes fun! Expecially when you are modding the machine! Put in a full led kit, you won't be disappointed! It changes the look of the machine 100%!
Again, thanks for all the insight and tips! I jumped in and opened up my machine to clean it further and to check out what needs work. You all were all right...it wasn't as intimidating once it was all opened and I could actually see what the parts do. I actually "fixed" my Obi-Wan Trough switch that was underneath by the VUK by locating it and flipping it a few times with my finger. I'm not sure if it was bent or just stuck, but now it works!
Some additional questions and/or guidance for advice:
ROM Upgrade
What do I need to upgrade my ROM? Marco Specialties has the following and I'm not sure which I need:
#EPROM2422 - STAR WARS (DATA EAST) EPROM ROM0 A1.05
#EPROM2939 - STAR WARS (DATA EAST) EPROM C5 GAME 1.04
#EPROM2421 - STAR WARS (DATA EAST) EPROM C5 GAME 1.03
I'm assuming I need the Game 1.04 but want to make sure before I order it that I don't need the others. I saw the Sound ROMs that are installed in my machine, so I know I don't need those.
How simple are these to pop in? I've read a couple scary posts that people have bent pins.
Translite
My translite has "bubbles" where the image is pulling away from the glass, almost as if it's a vinyl window sticker on the back side of the glass and is bubbling. If I push on the back, it doesn't really eliminate the bubbles. What's the best way to fix this? Or should I just leave it alone and not risk cracking, scratching, or whatever?
Bulbs - Backlite and Playing Field LED Conversion
I'm confused with the bulbs.
Example: The Lamp Bulb Part Number listing in the Owner's Manual on page 43 list the lights 1-8 (the S-T-A-R W-A-R-S lights) as 3 (#89 bulbs), but mine are all #555s in these sockets. Others on my machine are this way too (listed as #89s but are #555s). I'm in the process of buying LEDs to convert and I want to make sure I don't fry anything putting the wrong bulbs in.
On their conversion kit description, Marco states "You must remove the ground wire to lamp sockets of #89 and #906 style flash bulbs for the LED's to operate correctly." Is this necessary if I buy LEDs that are specifically #89 or #906 replacements? What happens if I don't pull the ground wire? Will they not work correctly or fry the bulb? Do I just yank the ground wire and leave it or do I have to terminate it somewhere? Yes, I'm a complete idiot when it comes to wiring and electric...the extent of my knowledge is "I flip the light switch and the light turns on"!
What LED bulbs do people recommend in the back light and playing field to show it off the best? I'm going to put frosted bulbs where they are actually visible, but what is recommended? 1, 3, or 4 LED?
The bulbs that are underneath...should I stick with whites or put the color that the item actually is (i.e. Red bulb for the red displays)? And again, what work best underneath? 1, 3, 4 LEDs etc?
I've seen where people have put a green behind Yoda on the back light. Not sure if I like that or not...I'm thinking more of all white to broadcast the picture better.
R2-D2
My R2-D2 motor and all the gears attached are turning but the long rod that actually spins the dome isn't being turned. Recommendations? It's not that big of a deal, but while I've got it open if it's a quick washer replacement, I'll do it.
Cleaning
I used Novus #1 and it got most of the dirt off of the playing field. I see recommendations for Novus #2 is being used. Should I hit my playing field with a coat of #2? Does that provide a protection coat or clean it deeper?
The "exposed" wood where the ball launches is dirty. Not sure I can explain it without a picture...It's actually where the notch above the ball launcher is. It looks like the wood isn't smooth and dirt is in the "grain cut". What is the best way to clean this?
Is it just me but does cleaning the field actually make the ball go faster?!? Now when I hit the ramp, I'm getting some jump and air balls that I wasn't getting lately and some pretty fast drains right off the bat (another reason I'm looking forward to the upgraded ROM for the Ball Save feature!). I wouldn't have though cleaning it would speed the ball up that much, but now I'm convinced!
Quoted from joelleoj:My translite has "bubbles" where the image is pulling away from the glass, almost as if it's a vinyl window sticker on the back side of the glass and is bubbling. If I push on the back, it doesn't really eliminate the bubbles. What's the best way to fix this? Or should I just leave it alone and not risk cracking, scratching, or whatever?
Your translight IS like a vinyl window sticker, it's just a piece of thin flexible plastic printed on one side. A backglass is just that, a piece of glass that has been printed on the back of the glass. The 4 black plastic strips on your translight is what holds the plastic film on to the glass. You just pull them off slowly and the translight or tl for short will come off. The bubbling is normal unless of course the lights in the backbox or bb for short are too close to the tl and have started to expand the plastic tl because of the heat.
I made drop target decals. Get them here.
https://pinside.com/pinball/forum/topic/desw-data-east-star-wars-drop-target-decals-free-download-
Quoted from Tekman:I made drop target decals. Get them here.
https://pinside.com/pinball/forum/topic/desw-data-east-star-wars-drop-target-decals-free-download-
Thanks for doing that for our members. That's why I started this club, so we could help each other better our games. ![]()
Quoted from joelleoj:What do I need to upgrade my ROM? Marco Specialties has the following and I'm not sure which I need:
#EPROM2422 - Star Wars (DATA EAST) EPROM ROM0 A1.05
#EPROM2939 - Star Wars (DATA EAST) EPROM C5 GAME 1.04
#EPROM2421 - Star Wars (DATA EAST) EPROM C5 GAME 1.03
Buy them from pinsider ChadH directly in my opinion. ChadH developed them, he should get the $ from the sale of them.
Quoted from Curbfeeler:Buy them from pinsider ChadH directly in my opinion. ChadH developed them, he should get the $ from the sale of them.
What he said.
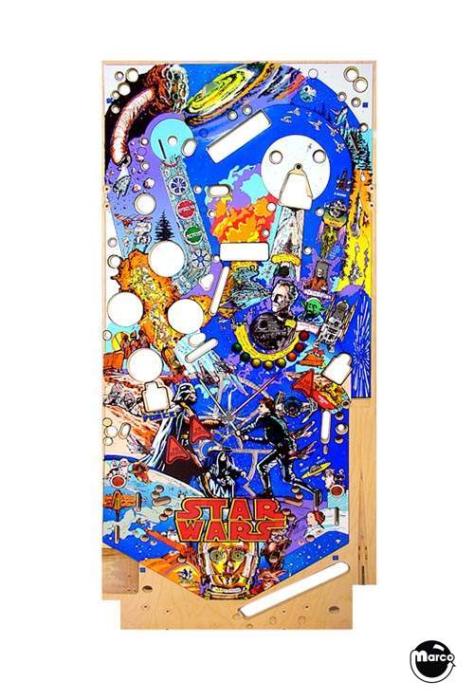
I noticed something after stripping down my DESW pf to clean - there's this cool "jump to light speed" graphic under the metal launch ramp that you can't see when it's all assembled! Does anyone think it'd be possible to make a transparent plastic version of the ramp, maybe even put some light there too?
You can see the graphic half way up and on the right here, I'm sure some of you will have seen it from your own work on the pf. http://www.marcospecialties.com//images/products/830-5121-00/large.jpg
Quick tech question. I recently got a few smd 3 and 7 led light strips that i added to my machine using the included alligator clips to clip onto existing GI. After installing a few last night, my F1 fuse blew. I thought maybe they were touching somewhere to short it out but couldn't find any. So i unplugged the ones I had under the death star. New fuse and it worked.
today I decided to try again. I currently have all of these connected using the alligator clips. I have 2 purple 7 smd strips at bottom of pf by the ball drain on the apron so it lights up yhe flippers. I have one 7 blue and one 3 purple around the r2d2. I have a 3 red and 3 blue around the pop bumpers. I have a 7 purple under the ramp, a green 3 behind the ramp plastic with jackpot..empire..etc, and finally a purple 7 around the upper right corner of pf illuminating that back area. I also had installed awhile back 4 spot lights. So simple question, do I have to many lights hooked up??!! I tried spreading out where I connected all the alligator clips. Tried using a different GI for each one. Any help would be great as now the entire back of the PF is lights out. Game still plays fine though. Is the F1 fuse located on the power supply? Would it be worth it to invest in a new one if available? I hear people talk about the new ones but have not done any research on them at all as to where to get, how easy to install...etc. so any help would be great!!
edit: looked at my manual at quick fuse guide, and the F1 fuse that is blowing is on my PPB board...just fyi!
Quoted from vader1979:Quick tech question. I recently got a few smd 3 and 7 led light strips that i added to my machine using the included alligator clips to clip onto existing GI. After installing a few last night, my F1 fuse blew. I thought maybe they were touching somewhere to short it out but couldn't find any. So i unplugged the ones I had under the death star. New fuse and it worked.
today I decided to try again. I currently have all of these connected using the alligator clips. I have 2 purple 7 smd strips at bottom of pf by the ball drain on the apron so it lights up yhe flippers. I have one 7 blue and one 3 purple around the r2d2. I have a 3 red and 3 blue around the pop bumpers. I have a 7 purple under the ramp, a green 3 behind the ramp plastic with jackpot..empire..etc, and finally a purple 7 around the upper right corner of pf illuminating that back area. I also had installed awhile back 4 spot lights. So simple question, do I have to many lights hooked up??!! I tried spreading out where I connected all the alligator clips. Tried using a different GI for each one. Any help would be great as now the entire back of the PF is lights out. Game still plays fine though. Is the F1 fuse located on the power supply? Would it be worth it to invest in a new one if available? I hear people talk about the new ones but have not done any research on them at all as to where to get, how easy to install...etc. so any help would be great!!
edit: looked at my manual at quick fuse guide, and the F1 fuse that is blowing is on my PPB board...just fyi!
and don't forget you have 4 pop ring lights on the game too so I think you may have reached the limit for that fuse. But I'm no pin tech. On my EATPM half the gi is on one fuse and the other half is on another and I ran into the same problem as you. When I put to many lights on one side I blew the fuse so I switched over to the other side. Don't know if that would work with SW though.
Quoted from MustangPaul:and don't forget you have 4 pop ring lights on the game too so I think you may have reached the limit for that fuse. But I'm no pin tech. On my EATPM half the gi is on one fuse and the other half is on another and I ran into the same problem as you. When I put to many lights on one side I blew the fuse so I switched over to the other side. Don't know if that would work with SW though.
Yes i figured out my own problem. I do have too many running on one fuse. I disconnected three of the smd strips and got correct size fuses today. The GI came back on! So I hooked up one at a time to see what would happen. I have all but one connected back up. So i think it was just one too many! Also while I was having to change the F1 fuse I noticed on my PPB board that one of the fuse "clips" for F1 was extremely loose. If i have to change any more fuses i am afraid that the clip will break off. So i went online and found a rottendog PPB replacement on bay area amusements. I heard that they are very good replacement boards to put in there as they fixed a few of the original flaws of the board and also added 3 safety fuses. They must be popular because Ii only found the one available board on that site. Every other site i looked at were out of stock. And after i got that board, I went bsck into the site and saw that they were out of stock, so I got lucky and snagged the last one. Anyone else have info on those rottendog boards? Are they as good as I hear? Curious...
Good ya got it fixed, but you had the wrong value fuses in it. ![]() I thought that was the first thing you checked.
I thought that was the first thing you checked. ![]() No idea about the RD boards though.
No idea about the RD boards though.
I got them printed at a Fedex Print shop for about $4. They do it on a Lami-label. It's a type of laminated sticker.
Quoted from pinballshark:Here's some alternative target decals I made and some additional yellow target stickers. IMO, the original drop target stickers blended in too much with the playfield art. I never get tired of picking off storm troopers.
DESW-targets.pdf 385 KB
VERY nice job, I'm sure some can use.
Coming soon. DESW Dark Side Edition! I've been working on this for a while and I'm finally almost finished. The goal was to add as much black as possible for a custom "Dark Side" theme. This is where I'm at so far.
cab-black.jpg
cab2.jpg
cab1.jpg
pf1.jpg
cabback1.jpg
lowerpf1.jpg
rebuiltpops.jpg
top1.jpg
top3.jpg
top2.jpgQuoted from Tekman:Coming soon. DESW Dark Side Edition! I've been working on this for a while and I'm finally almost finished. The goal was to add as much black as possible for a custom "Dark Side" theme. This is where I'm at so far.
cab-black.jpg 71 KB
cab2.jpg 71 KB
cab1.jpg 80 KB
pf1.jpg 117 KB
cabback1.jpg 79 KB
lowerpf1.jpg 126 KB
rebuiltpops.jpg 125 KB
top1.jpg 138 KB
top3.jpg 306 KB
top2.jpg 328 KB
Damn Tekman that has got to be the nicest DESW on the planet. ![]()
Quoted from Hyderyoda:OK OK I have a ??? when i go in the death star it only works 1/2 the time any idea ? what I need to look at . Has this ever happen to anyone else?
Have you checked the drop target switch?
Quoted from Bok013:Where can i get a set of backbox decals for SW? I don't need a full cab set. They don't have to be perfect either. Please let me know. Thanks.
That's gonna be hard to find. Wish I could help.
Quoted from Bok013:Where can i get a set of backbox decals for SW? I don't need a full cab set. They don't have to be perfect either. Please let me know. Thanks.
I thought I saw these for sale somewhere. I know I saw a full set of decals for sale. Maybe if you find the site you could ask for just the backbox decals? I think it was from pinballcenter.eu?
Quoted from Hyderyoda:OK OK I have a ??? when i go in the death star it only works 1/2 the time any idea ? what I need to look at . Has this ever happen to anyone else?
yup...Check The Target switch inside the death star. If it works half the time the pin might be bent, or the microswitch might be failing. Either way, check it out!
Quoted from Bok013:Where can i get a set of backbox decals for SW? I don't need a full cab set. They don't have to be perfect either. Please let me know. Thanks.
Darin
So anyone order anything today for their sw pin? I ordered some red led pop bumper rings and a couple green ones to try Paul's idea about putting them in the death star. We shall see! Also finally ordered a set of side mirrors. I'm nervous about the fit, but I am super excited as this was my final mod to purchase! I really hope it makes the game pop!
Quoted from vader1979:So anyone order anything today for their sw pin? I ordered some red led pop bumper rings and a couple green ones to try Paul's idea about putting them in the death star. We shall see! Also finally ordered a set of side mirrors. I'm nervous about the fit, but I am super excited as this was my final mod to purchase! I really hope it makes the game pop!
The only thing I ordered were 2 red/red pop rings for the Death Star mod I want to try. If your worried, I would be too about the mirror fit, sand the sides of the pf as much as you can. You'll have a nice mess but every little bit of clearance would help and you have time before the mirrors arrive. Keep us posted with the mods OK.
Quoted from vader1979:So now that the new Star Wars trailer is out, does that mean that all of our DE Star Wars pins just doubled in price?
That would be nice for us owners but I don't think so. ![]()
Quoted from vader1979:So now that the new Star Wars trailer is out, does that mean that all of our DE Star Wars pins just doubled in price?
Yes. Mine is for sale. I'll take $7500. Players condition. ![]()
Quoted from Tekman:I finished my DESW Dark Side restoration! More pics to add to the previous ones in this thread.
cabrightcloseup.jpg 121 KB
rightheadcloseup.jpg 84 KB
cabfront.jpg 105 KB
cabinside1.jpg 109 KB
cabinside2.jpg 117 KB
cabinside3.jpg 90 KB
cabinside4.jpg 117 KB
darksideapron.jpg 130 KB
That is soooo much better then new I can't believe it. A masterpiece for sure. ![]()
Quoted from MustangPaul:That is soooo much better then new I can't believe it. A masterpiece for sure.
Thanks!
Wanna join the discussion? Please sign in to reply to this topic.

Great to see you're enjoying Pinside! Did you know Pinside is able to run without any 3rd-party banners or ads, thanks to the support from our visitors? Please consider a donation to Pinside and get anext to your username to show for it! Or better yet, subscribe to Pinside+!

This page was printed from https://pinside.com/pinball/forum/topic/data-east-star-wars-clubmembers-fans-welcome/page/14 and we tried optimising it for printing. Some page elements may have been deliberately hidden.
Scan the QR code on the left to jump to the URL this document was printed from.
 Saint Paul, MN
 Swift Current, SK
 Surbiton